Thank you for choosing Zepter AqueenaEvo
Thank you for choosing the Zepter AqueenaEvo water purifying system. We appreciate your trust in Zepter International, a global leader in health and lifestyle solutions.
Your AqueenaEvo is designed to consistently deliver clean, healthy, and delicious water for you and your family, providing a reliable source of pure water in your home.
This guide will help you maximize the benefits of your AqueenaEvo. Please review these instructions carefully to understand its operation and maintenance procedures.
To ensure that your warranty remains valid, adhere to all guidelines outlined in this manual. For additional information or assistance, please contact your Zepter sales representative.
For AqueenaEvo installation, maintenance, or filter replacement services, please contact your authorized Zepter Service Technician or Zepter Service Center.
contact details are conveniently found on your Warranty Card.
1. AqueenaEvo technology
AqueenaEvo WT-600 is a superior 7-stage advanced filtration with under sink tankless RO (Reverse Osmosis) system. PAC (Polypropylene Activated Carbon Filter) removes 99% of large particles, residual chlorine, colour, and odors, while the RO (Reverse Osmosis) filter eliminates many harmful chemicals (PFAS, pharmaceuticals), heavy metals (lead, arsenic, uranium), TDS (nitrates, nitrites), chloride, fluoride, microplastics, and many other toxic chemicals, including ethylene glycol, vinyl chloride, and acrylic acid, along with bacteria, viruses, and odors.
2. AqueenaEvo Operating Parameters
Model AqueenaEvo WT-600
Maximum Flow Rate 2270 liters per day. Dependent on feedwater type, operating pressure and water temperature.
Rated Voltage Input DC 24V, 85W
Feed Water Type Municipal Potable/Tap water or Well water meeting the government drinking water standards.
Feed Water Pressure 15-60 PSI
Note: Install a pressure regulator if the feed water pressure exceeds this. Feed Water Temperature 5-38°C (41-100°F)
Water Hardness (Optional) To achieve the best results, utilize feedwater that has a hardness level under 10 grains per gallon and is free of iron.
3. AqueenaEvo Overview
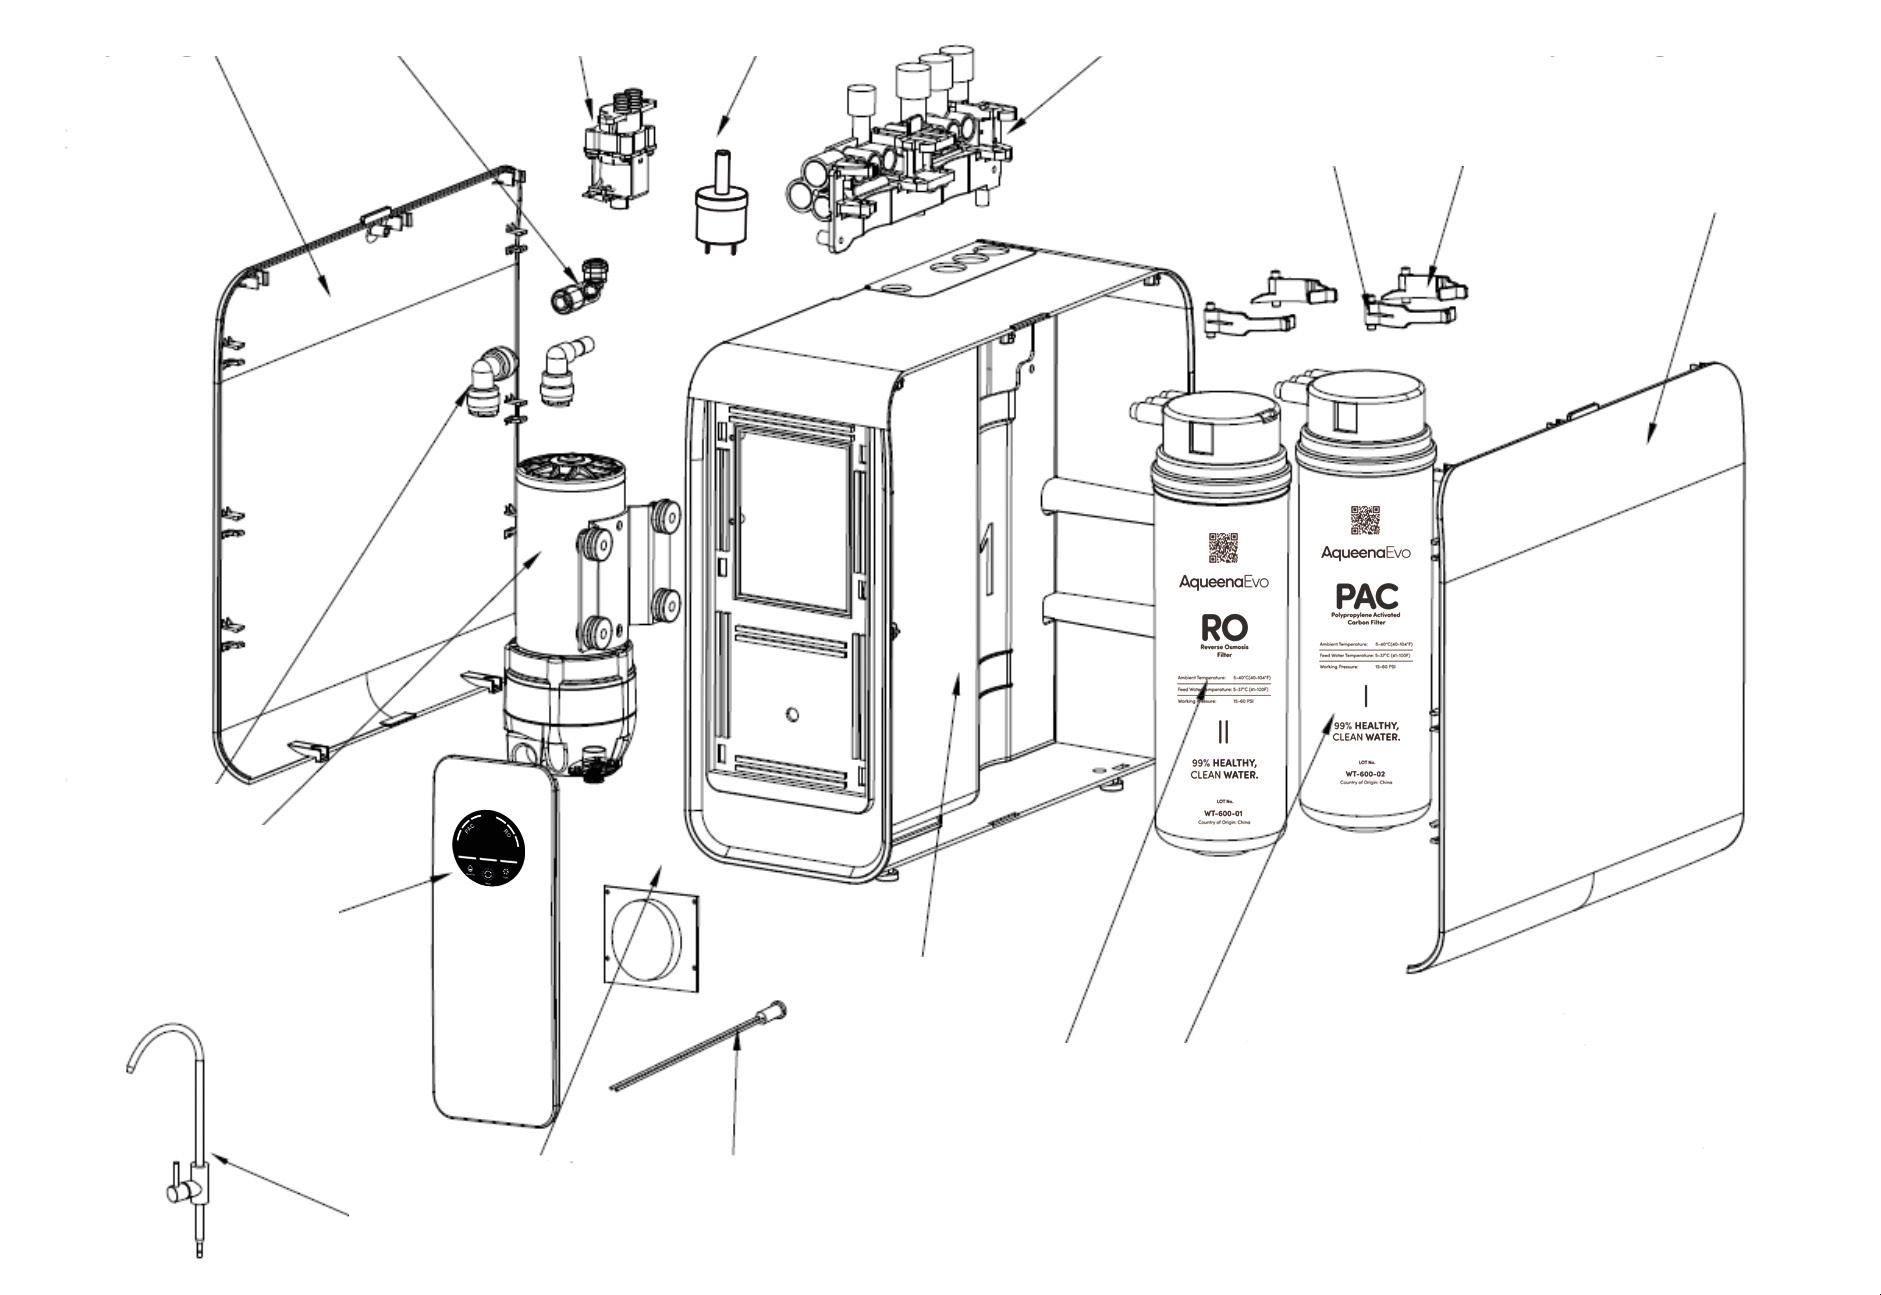
4. Contents of the box
Before starting the installation, carefully unpack your AqueenaEvo WT-600 device. Lay out all included parts to familiarize yourself with the components and verify that nothing is missing. Checking all parts in advance will help ensure a smooth and efficient installation process. Package Contents List:
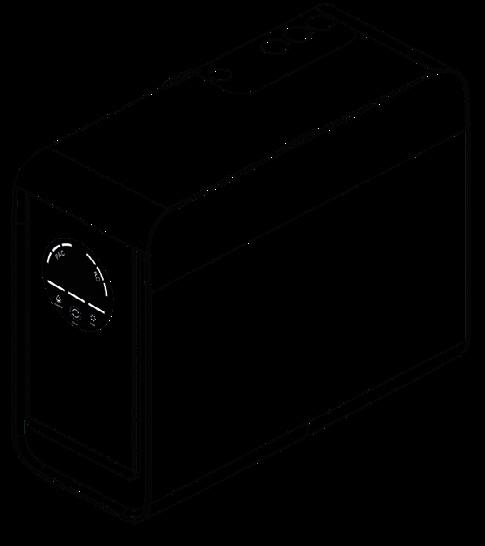
A Main body
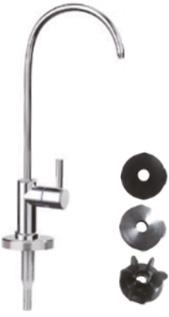
B Faucet
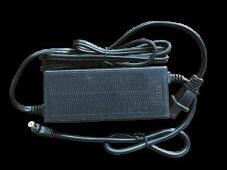
C Power adapter AC/DC
Input: 200-240V 50-60Hz 2.5A MAX
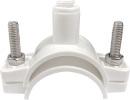
D Drain saddle 1/4” quick fitting
E Tubing 3/8" PE (White, 2 m)
F Tubing 3/8"PE (Blue, 2 m)
G Tubing 1/4"PE (Red, 1.5 m)
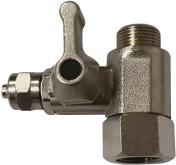
H Feedwater valve G3/8"x 3/8" tube (feedwater adaptor)
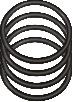
M Spare parts kit
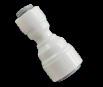
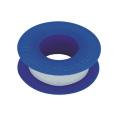
M1 G3/8" x 1/2” female converter fitting
M2 G3/8” x 1/2” male converter fitting M3 3/8"Card pin (x3)




5. Safety Information
The AqueenaEvo WT-600 has been designed with safety in mind; however, anyone handling or installing the system should be aware of potential risks.
Before installation and operation, carefully review all safety guidelines outlined in this manual. The safety precautions and this instruction manual are part of the appliance.
Read them thoroughly before using your new appliance for the first time, and keep them in a safe place for future reference.
• Use the appliance only as described in these instructions.
• The manufacturer is not liable for damages resulting from use contrary to the intended purpose.
• If you transfer the appliance to another person, include this manual.
• Ensure the mains voltage stated on the rating label corresponds to your local electricity supply.
• After removing the packaging, check that the water filtration unit is intact and carefully inspect the device body and accessories.
• The appliance must only be used for its intended function. The manufacturer cannot be held responsible for damage caused by improper or unreasonable use.
WARNING! This appliance is not intended for use by persons (including children) with reduced physical, sensory or mental capabilities, or lack of experience and knowledge, unless they have been given supervision or instruction concerning use of the appliance by a person responsible for their safety.
WARNING! Children must not operate unsupervised; Keep the cord out of reach.
WARNING! Children shall not play with the appliance.
WARNING! Keep small parts away from children.
WARNING! Keep packaging material away from children.
WARNING! Cleaning and user maintenance must not be performed by children.
WARNING! Always put the main appliance on a flat, dry and clean surface.
WARNING! Misuse of the appliance can cause injury!
WARNING!! Risk of electric shock: Do not operate with a damaged cord or plug.
WARNING!! Do not place the cord on a sharp edge.
WARNING! Always connect to a grounded outlet.
WARNING! Disconnect from mains before cleaning or moving.
WARNING! Do not change filters with wet hands.
WARNING! Do not use extension cords unless approved by a competent authority.
WARNING! Indoor home use only.
WARNING! Keep away from heat sources such stoves, ovens, radiators.
WARNING! Do not immerse the appliance, cord, or plug in water.
WARNING! Do not modify or repair the appliance yourself.
WARNING! Use only original replacement filters and parts.
WARNING! Do not use with microbiologically unsafe water unless adequately disinfected.
WARNING! Ensure inlet water pressure is within specified range 15 - 60 psi.
WARNING! Connect only to cold-water supply within recommended temperature range.
WARNING! Disconnect from mains before replacing filters or performing maintenance.
WARNING! Clean exterior with a damp cloth; avoid abrasive cleaners.
WARNING! Regularly check for leaks; disconnect immediately if leakage occurs.
WARNING! If smoke, unusual sounds, or odors occur, disconnect immediately and contact Zepter service.
WARNING! Do not use the appliance after it has fallen or been damaged, contact Zepter service.
At the end of its service life, do not dispose of the appliance and the filters as ordinary waste. Hand it over to qualified personnel for proper disposal and recycling where possible. This helps to protect the environment
6. Installation Guide
Before starting the installation, please read this manual thoroughly to ensure proper setup and safe operation. Pay close attention to all safety guidelines and follow each step carefully.
Installation must comply with state and local laws and regulations. Please verify and adhere to all local plumbing codes before proceeding.
Required Tools:
To install the AqueenaEvo WT-600 Water Purification System, you will need basic hand tools, including:
• Electric drill with drill bits up to 12.5mm (0.5 inch)
• Adjustable wrench
• Tube cutters or a sharp knife
• Crosshead screwdriver
Ensuring you have the right tools and follow the proper installation procedure will help guarantee optimal system performance and longevity.
Typical Installation
The illustration below provides an example of a standard under-sink installation, requiring no additional accessories.
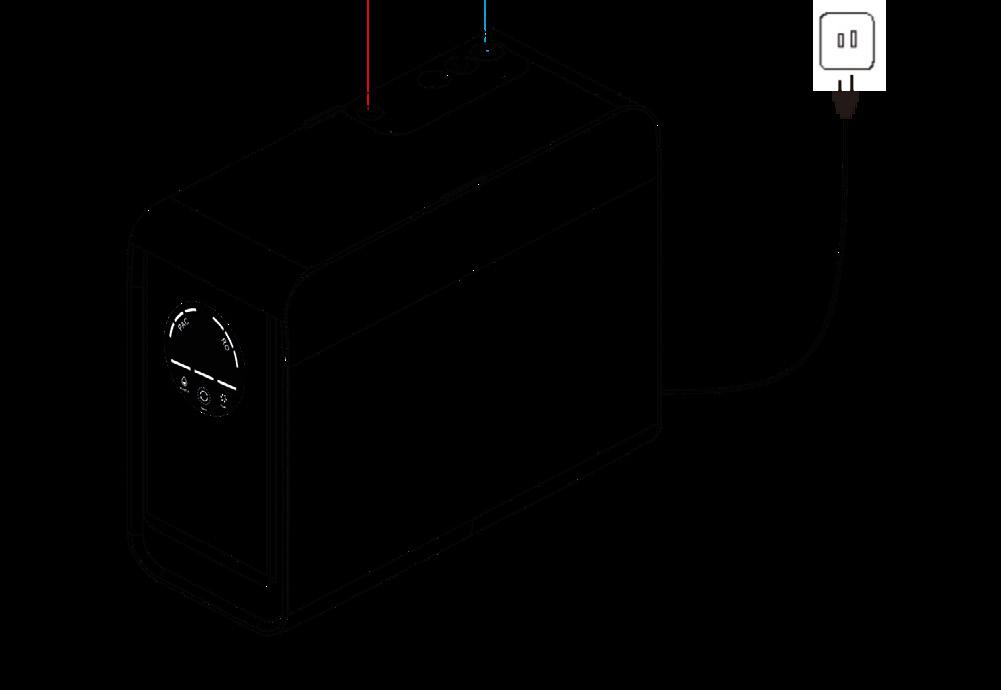
Note: Please check if the sealing ring is installed, or it may cause water leaking. If the cold-water valve outlet is 1/2”,it can be connected via the following two fittings.
Install the feed water adaptor valve
Warning: Make sure you have turned the water supply off before starting any plumbing work.
If the cold-water valve outlet is 3/8”, it can be directly connected by following the steps.
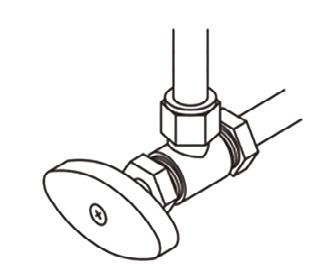
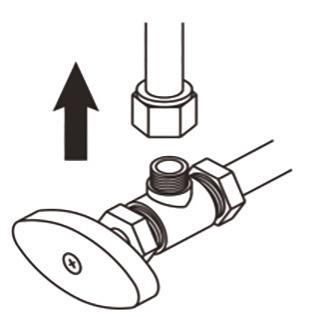
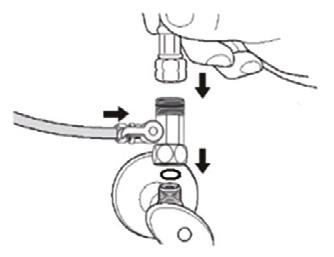
Locate Shut off valve
Remove the original connection from between the faucet and the cold-water shut-off valve under the sink.
Connect the cold-water supply and feed water adapter valve.
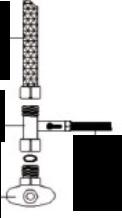


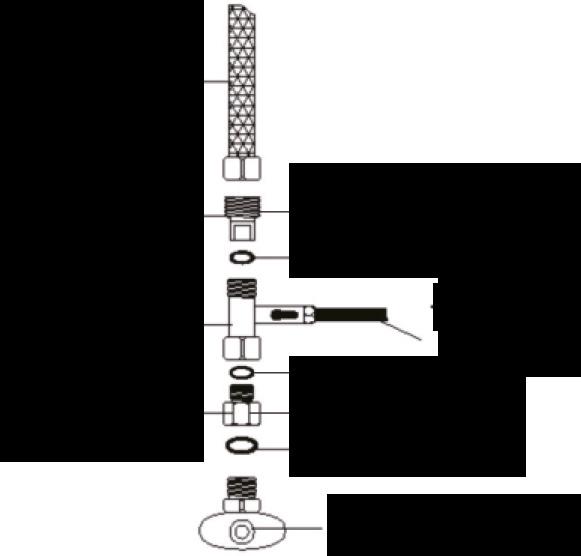
Step 2
Installing the Faucet
Warning: For optimal placement, install the faucet on the sink surround, preferably using an existing mounting hole.
If a suitable hole is available, remove the cover and ensure you have clear access both above and below the sink.
If a suitable hole is available, remove the cover and ensure you have clear access both above and below the sink.
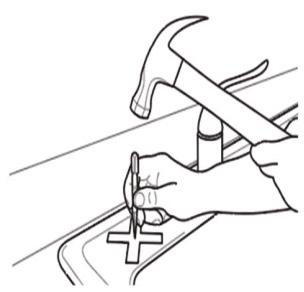
If no pre-existing holes are available, you will need to drill a new hole. the maximum thickness of the sink for this installation is 3 cm (1.2 inches). For granite, tile, or concrete countertops, professional assistance may be required to prevent damage.
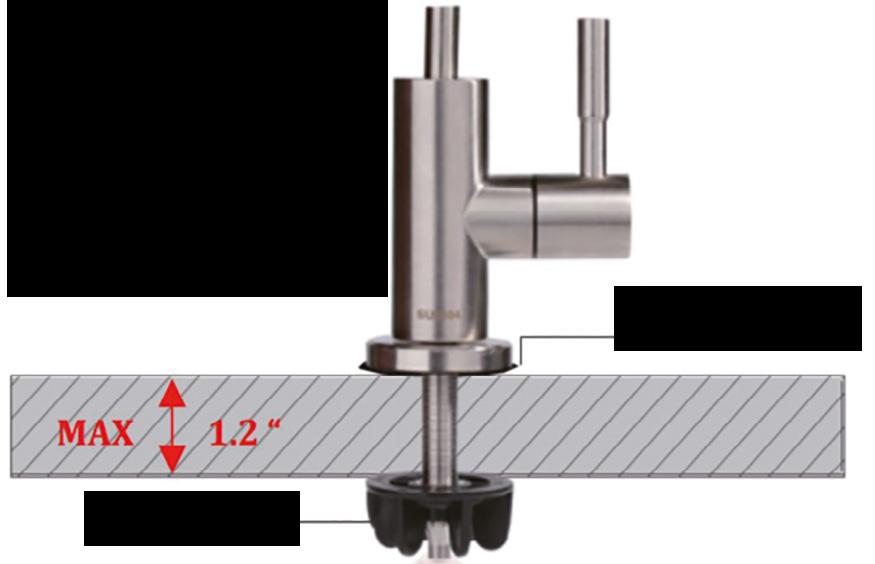
To drill the hole:
• Mark the drilling spot using a hammer and center punch.
• Start with a pilot hole, then gradually increase the drill size up to 1.2 cm (0.5 inch).
• Insert the faucet through the hole with the top gasket in place.
• Secure it firmly using the locknut.
• Ensure the faucet is stable and properly sealed to prevent leaks.
Step 3
Installing the Drain Saddle
When installing AqueenaEvo WT-600 under a sink, ensure the drain is connected to a straight piece of pipe before the water trap (either the ‘P’ trap or ‘U’ bend), as shown in the diagram below.
Drill 0.65 cm (0.25 inch) hole on the drainpipe with an electric drill.
Only install saddle valve on straight pipe above ant water traps!
Never mount drain saddle on bends of below the water trap!
Remove the backing and stick the saddle valve seal on the pipeline through the holes.
Faucert Assembly (outlet)
Top gasket Locknut
Step 4.2 - How to insert the tube into a quick-connect.
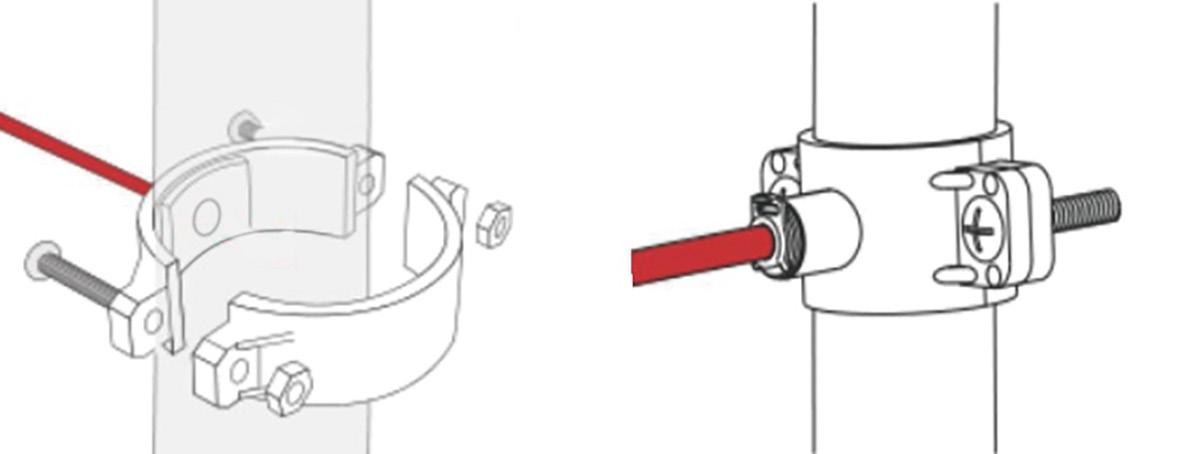
Assemble the drain saddle valve according to the provided diagram.
Tighten the bolts evenly using a crosshead screwdriver to ensure the clamp fits snugly around the pipe.
Do not overtighten.
Once secure, insert the 0.6 cm (0.25 inch) PE tube into the saddle valve’s Quick Connect (QC) fitting.
Step 4
Assemble the Components
AqueenaEvo WT-600 water purification system uses quick-connect (QC) fittings, making the installation simple and easy.
Step 4.1 - How to release the tube (or plug) from a quick-connect.
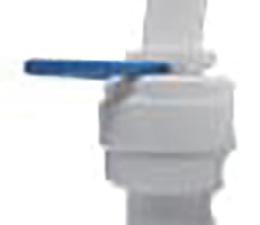
Remove the locking C-clip by sliding it out from under the quickconnect fitting collet.
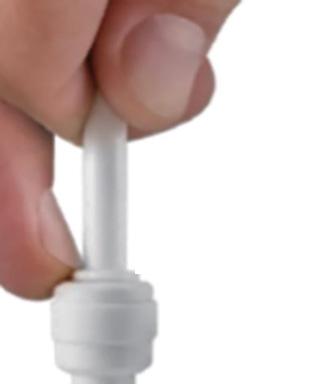
Make sure the tube has a clean square cut with no bur present. Push the collet down onto the fitting (closing the gap between the collet and fitting) and hold.
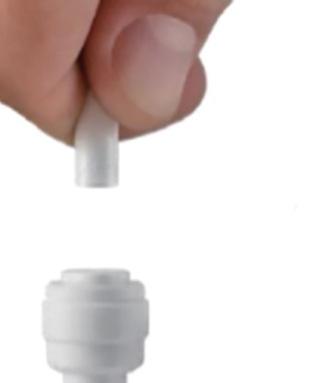
While holding the collet down, gently pull the tube (or plug) in the opposite direction at the same time to release.
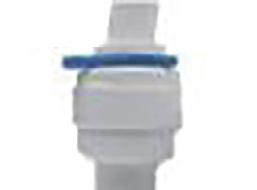
Replace the locking C-clip to secure the QC fitting.
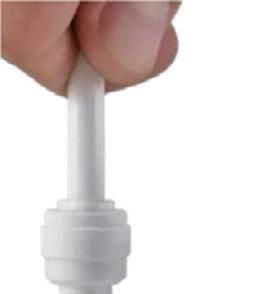
Push the tube firmly into the QC fitting, ensuring it is positioned correctly (you will feel the tube ‘jump’ into position as you push it into the fitting). The 1/4” tube is secure once it has traveled 1. 5 cm (0.6 inch) into the fitting. The 3/8” tube is secure once it has traveled 1.9 cm (0.7 inch) into the fitting.
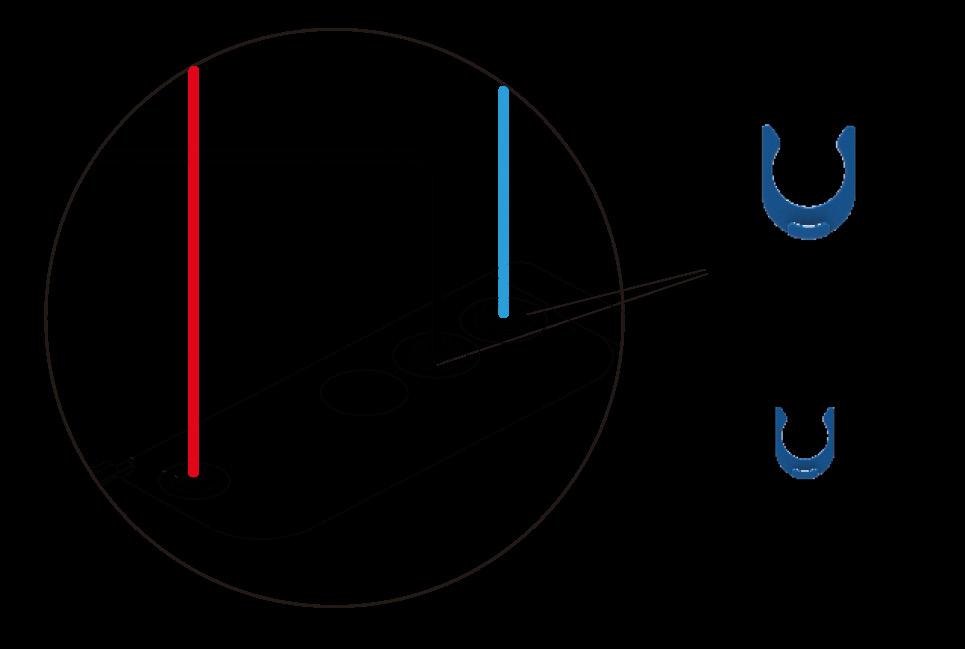
To prevent water leakage, ensure that the Card Pin is installed in the correct location when connecting the tubing.
Step 5
Connect Tubing
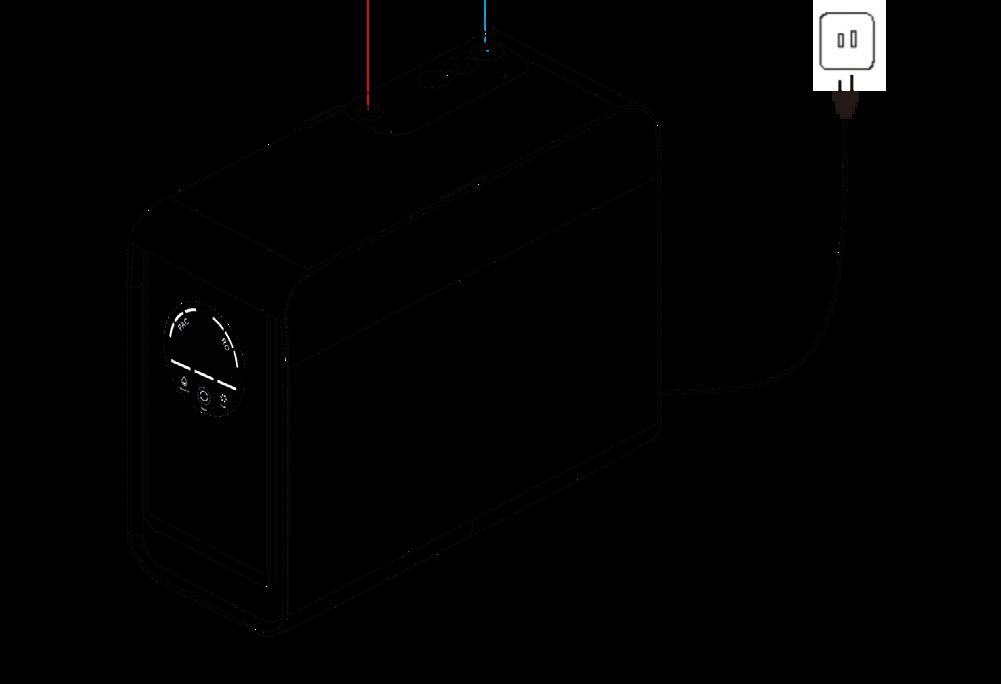
Follow the instructions below to connect AqueenaEvo WT-600:
A. Inlet water.
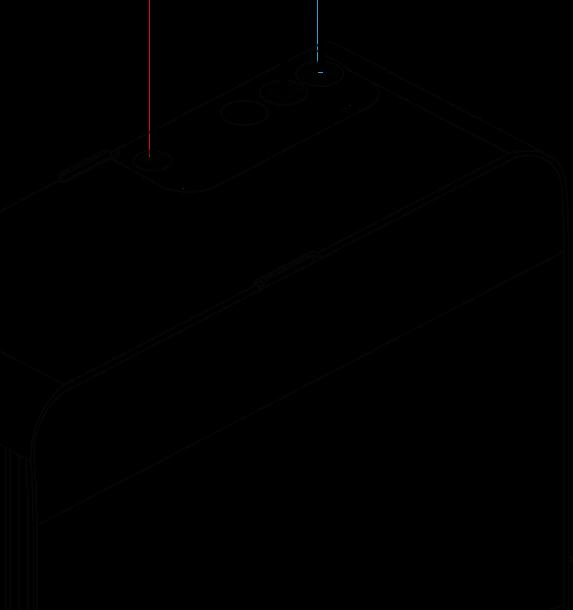
Use 3/8” white tube to connect the Inlet water port and the Feedwater Valve. (refer to white tube connect)
B. Waste water.
Use 1/4”red tube to connect the waste water port and the Drain Saddle. (refer to white tube connect)
C. Outlet water.
Refer to blue tube connect. Use3/8” blue tube to connect the outlet water port and the Gooseneck Faucet.
Step 6
System Flushing (Startup and Filter Replacement)
Turn on the Feedwater valve and gooseneck faucet, then plug in the system and allow it to run for 20 minutes. This will rinse all fittings and the new filters.
Check for any signs of leaks during this time.
Warning: Ensure that the power socket under the sink is turned on and confirm that the system is correctly plugged into the power outlet.
After the flushing process, the system is ready for use. Simply turn on the faucet and enjoy clean, filtered water.
Note: You may hear some noise while the system is running. This is normal, and the noise will subside once the faucet is turned off.
Congratulations! You have completed the installation!
8. Maintenance and filter replacement
Control Panel
The AqueenaEvo WT-600 control panel has one push-button and two indicators to operate the system and to display the service life of filters.
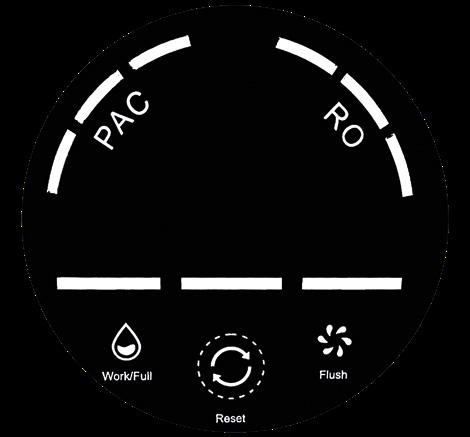
Warning Indicators
• PAC filter Indicator - Indicates when the user needs to replace the PAC Filter. After plugging in the power, the indicator light remains on and will flash when the filter lifespan expires.
• RO filter Indicator - Indicates when the user needs to replace the RO Filter. After plugging in the power, the indicator light stays on and will flash when the filter lifespan expires.
• Reset Button - Used to reset the filter cartridge, please refer to Replacing Filter Cartridges
Part of the manual for details. (After plugging in the power, the indicator light remains on)
• Safety Protection - All indicator lights will flash, and the system will stop filtering water. Reset the system by reconnecting the power.
Filter capacity depends on water consumption and water quality. On average, one set of filters can purify approximately 4000L of water.
Filter Cartridge Replacement Instructions
Before installing a new filter, ensure that the alignment markings on both the filter and the locking latch are properly matched. To replace the filter cartridge safely, please follow these steps:
1. Turn off the feedwater valve to stop the water supply.
2. Turn on the faucet to release any built-up water pressure inside the system.
3. Switch off the power supply to ensure a safe replacement process.
Once these steps are completed, you may proceed with installing the new filter.
Step 1
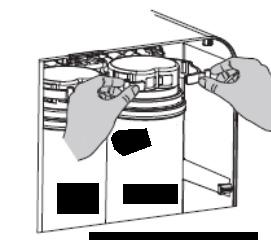
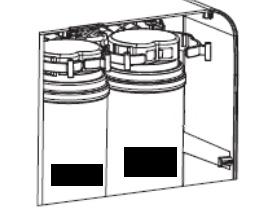
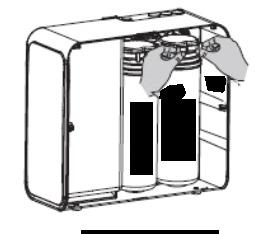
• As shown in the diagram, press the locking latches on both sides simultaneously with both hands and pull them outward with force to pry open the clasps.
• The filter cartridge will then popout automatically.
Step
2
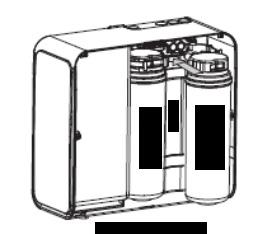
• Remove the old Filter cartridge and discard it.
• Match the corresponding label on the new Filter cartridge (ensure it aligns with the label on the housing) and align it with the water inlet/outlet ports.
• Press the new Filter cartridge firmly into place.
Tips:
1. Avoid using excessive force to prevent breaking the clasps.
2. Before replacing the Filter, verify that the label on the Filter cartridge matches the label on the clasp to ensure compatibility.
3. Replace the PAC Filter cartridge First, followed by the RO Filter cartridge, in this order for easier and faster installation.
4. After installation, ensure the clasps are fully seated into their slots and that the Filter cartridge is firmly secured.
Resetting Filter Cartridges
Please follow the following steps to reset the filter indicator light,
3.1 Hold the Reset button down for 3 seconds; you will hear 1 beep.
3.2 Select the filter cartridge you want to reset.
After 1-beep, the PAC Filter indicator light will flash. Move to step 3 to complete PAC Filter reset, if you want to reset the RO filter, please just press the Reset button once to select the RO Filter, then the “RO” indicator light will flash.
3.3 Hold the Reset button down for at least 3 seconds to complete the reset process.
You will hear 1 beep, and the selected filter indicator light will change from flashing to steady, and the system will return to regular operation. If there is no operation within 10 seconds, during each stage of the filter reset process, the System will automatically exit the setting state, and then flush the system, refer to Step 6: System Flushing (Startup and Filter Replacement)
Note: the above steps can only reset one selected filter cartridge at a time, and they cannot reset two filter cartridges at the same time.
9.
Troubleshooting
Q: The system does not power on after plugging it in.
A: Ensure that power is available under the sink, as this issue often occurs when the power supply is switched off. Check the connection between the power plug and the outlet to ensure it is securely plugged in. To test if the issue is with the system itself, try plugging it into a different power outlet.
Q: There is no water output from the faucet.
A1: The water supply is off – Turn on the feedwater adapter or water supply valve.
A2: Incorrect filter installation – Reinstall the filter, ensuring each cartridge is placed correctly.
A3: A tubing is crimped – Inspect all tubing and straighten any kinks.
A4: If the system continuously dispenses water for over an hour, it enters safety protection mode, causing all indicator lights to flash and the filtration to stop. Reset the system by unplugging and reconnecting the power.
A5: Incorrect inlet and outlet tube connections – Verify that the inlet water tube is properly connected to the system’s inlet and the outlet tube to the system’s outlet, following the manual instructions.
Q: The water flow at the faucet is low.
A1: A tubing is crimped or leaking – Check that all tubing is properly installed and secure.
A2: Low water temperature – The system operates best within a temperature range of (5–37°C).
A3: Low water pressure – Ensure the incoming water pressure is between 15–60 psi.
Note: due to the difference in feed water quality and water amount consumption, the above is an estimate only.
A4: The filter cartridge is clogged – If using well water, ensure it passes through a pre-filtration system to prevent large particles from clogging the filter and reducing its lifespan.
Q: Why does black water come out during flushing?
A: This is normal. The black water is caused by residual carbon powder on the filter material. Flush the system for 5 minutes, after which the water will be safe for use.
Q: The filtered water tastes like tap water.
A1: Incorrect tubing installation – Ensure the drain tubing is not connected to the faucet.
A2: The filter is expired – Replace the PAC filter or RO filter cartridge.
Q: All indicator lights are flashing.
A1: The system has dispensed water continuously for over an hour and has entered safety protection mode. To reset, unplug and reconnect the power.
Q: Wastewater continues to flow even after turning off the faucet.
A1: The solenoid valve may be damaged. Please contact quality@zepter.com for assistance.
Q: The filtered water has an unusual taste or odor.
A1: The PAC filter has reached its adsorption capacity – Replace the PAC filter
A2: Incorrect pipeline connection – Verify that all connections follow the manual instructions.
A3: The system has not been used for an extended period – Replace all filter cartridges and flush the system.
Q: The system makes significant noise during operation.
A: Poor water quality may cause premature filter blockage. Replace the PAC and RO filters and check the quality of the incoming water. Note: Some noise during filtration is normal.
10. Disposal Information
In accordance with art. 13 of Legislative Decree no. 151 dated 25 July 2005, the implementation of European Directives 2002/95/EC, 2002/96/EC and 2003/108/EC on the reduced use of hazardous substances in electrical and electronic equipment, and their disposal, the barred bin symbol means that used electrical and electronic products should not be mixed with general household waste. For proper treatment, recovery and recycling, please take this product to designated collection points at the end of its useful life. Properly disposing of this product will help conserve valuable resources and prevent potential negative effects on human health and the environment, which could otherwise result from improper waste handling.
11. Warranty card and Statement
All our appliances have undergone strict inspection tests and are guaranteed against manufacturing defects. The 2 Year Warranty is valid from the date of purchase, as indicated on the invoice issued by the retailer upon delivery of the appliance. The manufacturer undertakes to repair or replace, free of charge, any parts that are found to have a manufacturing defect within the warranty period. Defects that are not clearly attributable to either the material or the manufacturing will be examined at one of our Zepter Service Centers or at our headquarters and charged according to the outcome.
The warranty is only valid if:
1. The machine is found to have material or production defects.
2. No signs of breakage by the customer or of original pieces having been fitted by an unauthorized person have been found.
3. Original accessories have been used.
4. The machine has not been overloaded or caused to crash.
5. The device has been maintained in line with the manufacturer’s recommendations.
6. All filters and membranes have been changed regularly, and the recommended filter replacement period has not been exceeded.
The Warranty does not apply to:
1. Components subject to wear and tear.
2. Damage caused by transport, incorrect use, negligence or faulty installation, as per the warnings set out in the product catalogue.
3. Consumables (including filters and membranes which must be replaced periodically).
This warranty does not affect the consumer’s statutory rights under applicable national legislation or their legal entitlements against the retailer as defined in the sales or purchase agreement. In the absence of applicable national legislation, this Warranty will constitute the consumer’s sole and exclusive legal recourse. In this case, the manufacturer will not be liable for any accidental or consequential damage arising from the breach of any express or implied guarantee of this product. The manufacturer’s liability will be limited to and will not exceed the product purchase price paid by the consumer. This Warranty does not cover damage to the product resulting from mistreatment or misuse of the product, inappropriate packaging, accidents, or maintenance and repair operations carried out by unauthorized service centers. The manufacturer reserves the right to withdraw its Warranty if the label containing the product serial number has been removed or rendered illegible after purchase.
23 CH-8832 Wollerau, Switzerland E-mail: quality@zepter.com
address: Zepter International Poland Sp. z o.o. ul. Domaniewska 37 PL-02-672 Warsaw, Poland