Benson Ins t allat i o n Guide
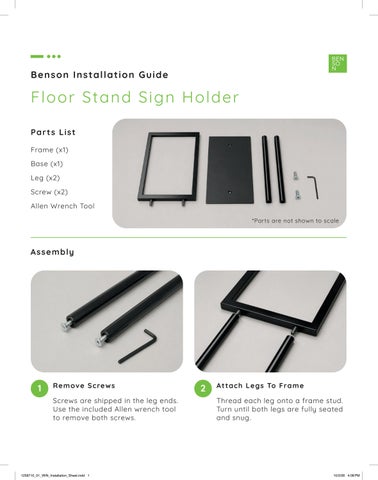
F lo o r S ta n d S i gn Ho lde r Part s Li s t Frame (x1) Base (x1) Leg (x2) Screw (x2) Allen Wrench Tool *Parts are not shown to scale
As s em bly
1
Remove Sc rews Screws are shipped in the leg ends. Use the included Allen wrench tool to remove both screws.
1258710_01_WIN_Installation_Sheet.indd 1
2
Attach Legs To Frame Thread each leg onto a frame stud. Turn until both legs are fully seated and snug.
10/2/26 4:08 PM
Screws are shipped in the leg ends. Use the included Allen wrench tool to remove both screws.
Po s ition T h e Ba se
3
Thread each leg onto a frame stud. Turn until both legs are fully seated and snug.
4
Align the base with the legs. The beveled recesses must face down, toward the floor.
Secure The Base Insert screws from underneath and tighten. Each screw head should sit fully inside its bevel.
Impo rtant The beveled side of the base must face the floor, this allows the screws to sit flush with the underside of the base.
Fin al Chec k •
Both legs are fully threaded into the frame.
•
Both base screws are tightened securely.
•
Screw heads are fully seated inside the recesses.
•
Stand upright and insert sign.
If the sign holder feels loose, recheck all four connections before use.
your benson.com
1258710_01_WIN_Installation_Sheet.indd 2
10/2/26 4:08 PM