2 minute read
MAKE A TERRARIUM
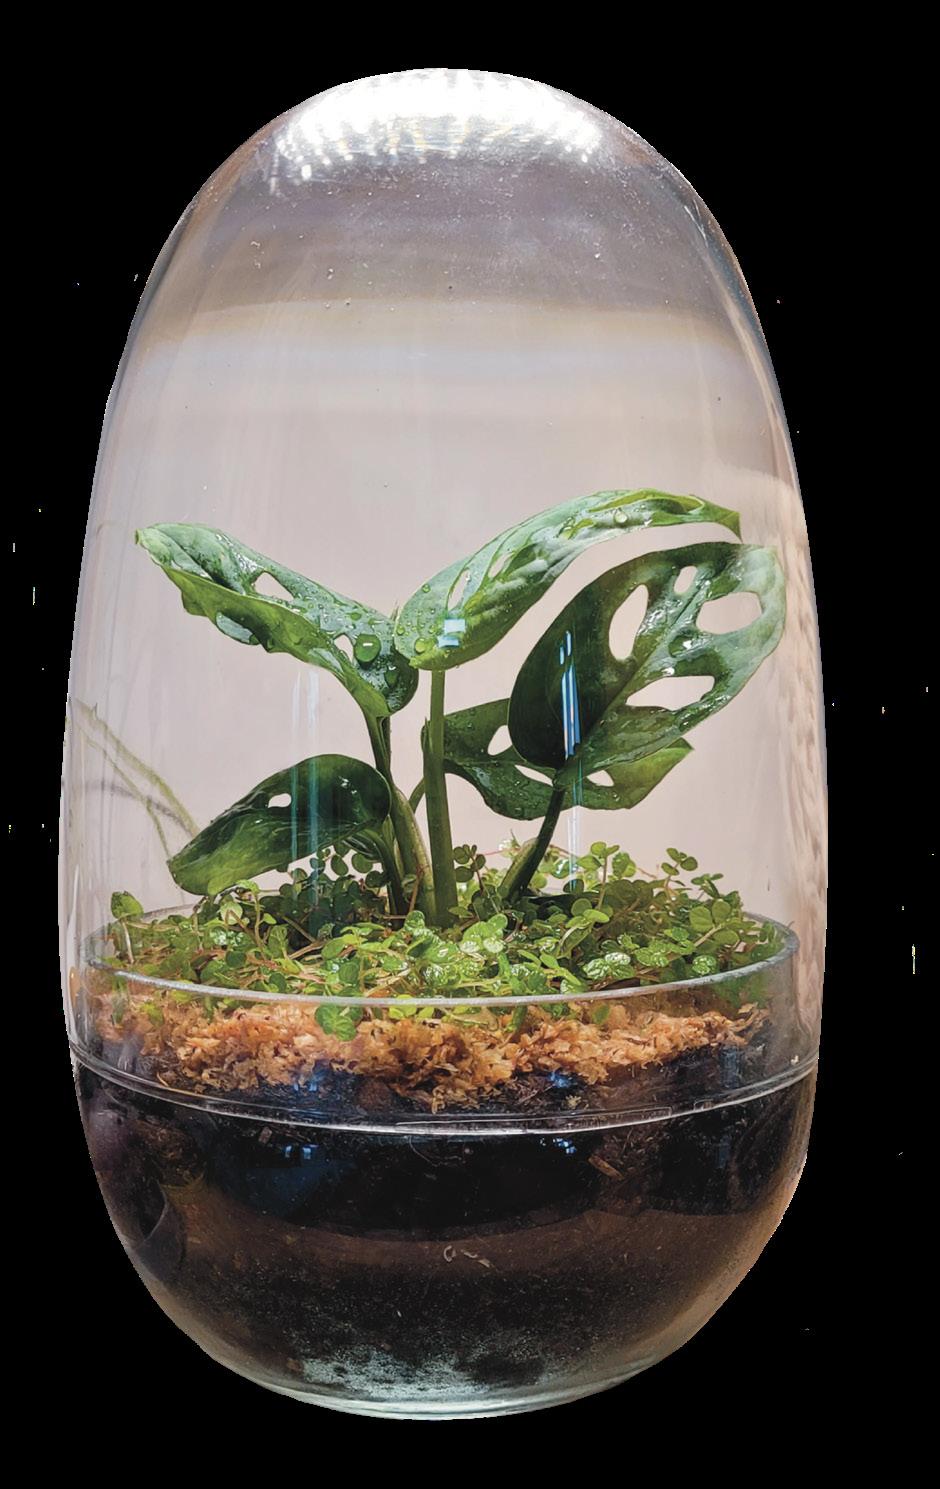
Terrariums are cute little worlds contained within beautiful glass vessels. They range in size from tiny bottles filled with moss, to massive, repurposed fish tanks full of vining plants and other fantastic greenery.
They’re easy to look after, look gorgeous on shelves, and make amazing gift ideas. However, their retail prices can sometimes be a bit off-putting.
Advertisement
Luckily enough, terrariums are easy and inexpensive to make at home. There’s probably an old sauce jar somewhere that could use new life anyway!

What You Need To Make A Terrarium
• A glass vessel - This could be anything from a candle jar to a cereal container, as long as it’s clean and the opening is wide enough to fit plants through. I recommend browsing the glassware section of your local op-shop.
• Small pebbles or gravel - These will go at the base of your terrarium. They’ll act as a drainage layer so your plants don’t get wet feet.
• Activated charcoal - Also called horticultural charcoal, this can be found at your local gardening store. It will help keep your terrarium fresh and stop bacterial growth.
• Potting soil - We want fresh soil to make your plants happy. Generally I would avoid mixes with lots of fertilizer, as we don’t want the plants to outgrow the vessel too quickly.
• Plants - Select smaller plants for your terrarium, they will eventually grow to fill out your vessel. Plants that like humid environments will do well in closed terrariums. See the next pages for plants I recommend.
• Decorative stones (optional) - While not essential, some nice pebbles or other decorative items – like clay mushrooms – can help make your terrarium look like a tiny world.
• Gardening tools - A small trowel or old spoon for adding gravel and soil to your vessel, a pair of long tweezers, forceps, or chopsticks for placing plants inside, and a spray


Making Your Terrarium
Step 1: Fill the bottom with small pebbles. Take your glass vessel and fill the bottom with small pebbles, completely covering the base. Aim to make this layer at least 2 cm, but the depth can vary depending on the height of your vessel.
Step 2: Add a layer of activated charcoal. Cover your pebbles with a thin layer of activated charcoal. This layer should contain just enough to cover the pebbles – a little goes a long way.

Step 3: Add potting soil. Add your layer of soil. This should be just enough for your plants to be able to root, while leaving enough space for their leaves to grow without touching the lid. I would recommend about 3–5 cm. Adjust accordingly depending on the size of your jar and plants.
Step 4: Add your plants. Picture how you want your plants to sit. If you have a feature plant, start by planting that one first and work down to smaller ones.
• Make a small hole where you want the plant to be.

• Remove plant from its nursery pot
• Massage roots to remove excess soil and trim longer roots.
• Place in hole and cover roots with soil.
• Repeat for all plants.
• Trimming roots before planting will restrict plant growth, which is great for making sure they don’t outgrow your terrarium too quickly.
Step 5: Add some decoration (optional). You can decorate your terrarium in any way you’d like. This could be pretty stones or even tiny garden gnomes. You could also leave the terrarium as it is, and let the plants speak for themselves.
Step 6: Water your terrarium. Use a spray bottle to spray water into your terrarium. Only a few sprays should be necessary – just enough to make the soil look darker, but not super soaked.
Step 7: Close it up and finish. Place the lid on your terrarium and admire your beautiful handiwork! You may choose to leave your terrarium open, just note that open terrariums require watering more often. The condensation that forms inside a closed terrarium allows the soil to last longer between waters.


