


The key objectives of this lesson are for children to:
• Write the capital and lowercase form of the letter ‘a’.
• Recognize the capital and lowercase form of the letter ‘a’ alone and within words.
• Understand the difference between the capital and lowercase form of the letter ‘a’.
• Learn vocabulary associated with the letter ‘a’.
• Identify words and objects that start with, or contain, the letter ‘a’ in real-life scenarios.
• Develop a basic understanding of punctuation, specifically, the use and identification of capital and lowercase letters in different parts of a word.
• Listen to and identify words starting with the letter ‘a’.
• Practice pencil control and grip.




• The purpose of this activity is for children to practice writing both the capital and lowercase form of the letter ‘a’.
• Starting with the capital ‘A’, describe the components of the letter and its shape. For example, it is a letter formed by two diagonal lines that meet at a point, it looks like an open triangle with a line halfway through it etc. Invite students to contribute to the description, identifying any key features they think are interesting or important, or any shapes/objects they think are familiar to the letter.
• After that, demonstrate how to form the letter by tracing the shape on a flashcard and then in the air in front of the class. Invite students to join you in practicing the tracing motion in the air and allow them to become familiar with forming this shape. Students can practice together as a class and then independently. They can first practice in the air and then trace the shape in their books.

• Ensure that you specify that letters are always formed from top to bottom. Take notice of the way students trace the letter and correct any mistakes.
• When they finish, use other objects or tools to provide a creative multi-sensory approach to learning letters. For example, using block or magnet letters, invite students to physically feel the shape of the letter ‘A’. Using clay or Play-Doh allow students to create the shape themselves or using a small amount of dish soap on a plain tray, grant students the opportunity to practice forming the letter by tracing it in the soap.
• These activities help learners process letters through multiple senses and allow them to use visual and gross motor kinesthetic techniques to learn the alphabet.
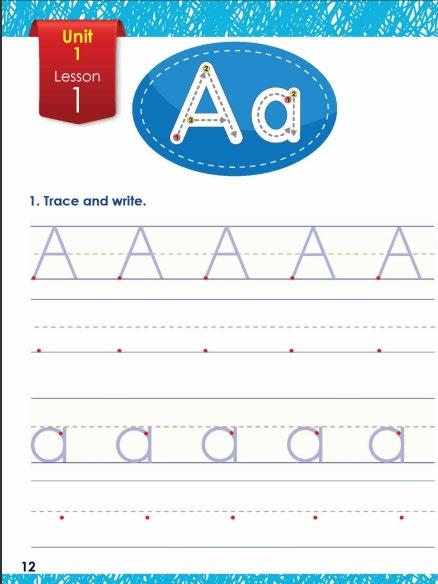
• Once complete, ask students to open page 12 of their activity book and trace the capital form of the letter ‘A’ with their fingers first. Afterwards, allow them to use a pencil to write the letter in the notebook.
• Repeat the above steps for the lowercase form of the letter ‘a’.
Note: It may be helpful to remind students of the proper way to grip a pencil before this activity.




• This exercise can be completed in conjunction with Activity 1 from Pupil’s Book 1 for further practice.
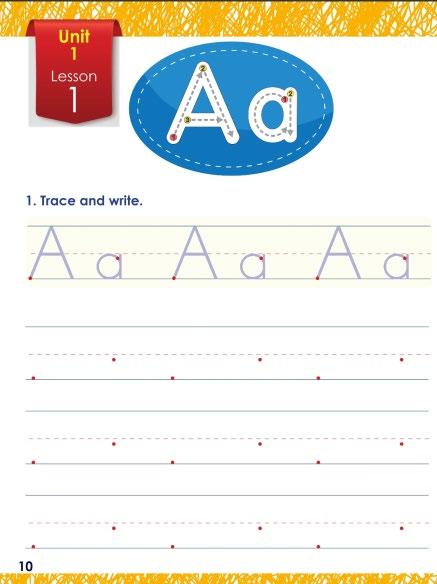
• Before writing directly in the book, invite students to refamiliarize themselves with the shape of the letter ‘A’ and ‘a’ with you. Ask them to describe the letter to you in class then trace the letter in the air together and independently.
• They can also sensorily review the exact shape of the letter using block letters, magnet letters, clay, or the dish soap method described above.
• Afterwards, invite them to turn to page 10 of Activity Book 1. First, instruct them to trace the letters with their fingers, then once they feel confident, allow them to use a pencil to trace and write the letters in the space provided.
• Ensure you teach capital ‘A’ and lowercase ‘a’ separately.


• Using two bowls and some flashcards, perform this activity in class as a group before instructing learners to complete Activity 2 in their workbook.
• First, using the flashcards, re-identify the capital and lowercase forms of the letter ‘a’. Start a class discussion and invite students to describe the shape of the two letters and their differences.
• Then, using an example, demonstrate how to sort the capital and lowercase letters into separate bowls alone.
• Once the demonstration is over and the students have a clear understanding of the task, invite them to sort the letters into bowls together as a class. This can be done in multiple ways. The teacher can hold up each flashcard and students can shout out which bowl they think it belongs in. Additionally, instead of shouting, students can remain standing and walk to one side of the room to indicate one bowl, and the other side to indicate the other. Learners can also walk to the table and take turns putting the letters in the bowls themselves to develop their confidence and independence.
• Rather than completing this as a class, you can also split students into pairs or groups, allowing them to sort the letters independently. This may be more beneficial in building learners’ confidence and independence, as well as granting them more individual time to spend on the activity. If doing so, be sure to walk around the class and provide feedback to each group.
• After these activities are completed, invite students to complete the activity individually in their books. Instruct them to carefully draw lines from each apple to a bowl.
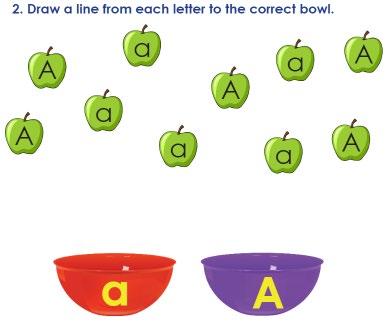

This activity is flashcardsupported



• This activity encourages students to find examples of both forms of the letter ‘a’ in real life.
• Use flashcards or Presentation Plus to provide students with examples of words containing both forms of the letter ‘a’. As a group, allow learners to identify where they can see the letter on the board or in the flashcards, working together with the teacher.
• Once complete, encourage students to participate in a scavenger hunt around the classroom to see if they can spot any examples of the letters ‘a’ and ‘A’. This activity can be timed, and a sticker can be awarded to the student who finds the most examples to encourage participation.
• Once complete, invite students to complete the activity in their workbook. Instruct them to circle all the examples they can find and walk around the classroom, providing feedback and advice to students who may need it.

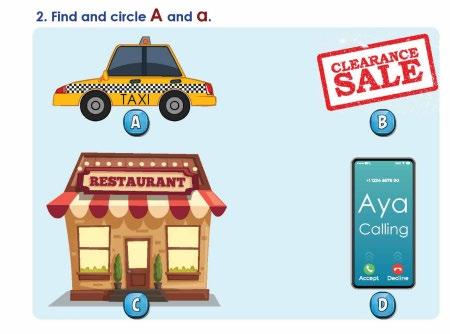
• Encourage students to keep an eye out for examples of the letters ‘A’ and ‘a’ when they go home. They can cut samples from a newspaper or take pictures of the learned letter in the surrounding community.

• When they have all their examples, ask them to create a poster that they can present to the class. This activity emphasizes research-based learning and presentation skills, building a focus on letter recognition outside of the classroom. It also encourages creativity, and expanding knowledge learned in class to the outside world. The posters can then be hung on the classroom wall.
• Note: For the presentation, students can present in their native language as long as they can identify examples of ‘a’ and ‘A’.

• The purpose of this activity is to introduce learners to new vocabulary words that start with and contain the letter ‘a’ and give them practice tracing and identifying the letter in different words. Students should be confident in each vocabulary word by the end of the lesson.
• Using the flashcards found in this guide, identify the word for students, explain what it means, demonstrate how to pronounce it, and identify where the letter ‘a’ is located in each one.
• After that, invite students to repeat the word with you and call on individual learners or the class as a whole to identify where they can see the letter ‘a’. Do so as many times as needed until learners are confident in identifying the position of ‘a’.
• It is also helpful to use the word in multiple contexts and different sentences. Engage with students by asking them where they would normally see an ‘apple’, ‘ant’, or ‘alligator’, and how seeing those things would make them feel. Asking questions and engaging students in this way helps ground new vocabulary in real-life scenarios, assisting with learners’ understanding and memory.
• Once the class activities are complete, encourage students to complete this activity in their workbook. Instruct them to do so step by step, first saying the word out loud, then identifying where the ‘a’ is, and finally tracing the shape of the letters, first with their finger, then with a pencil.

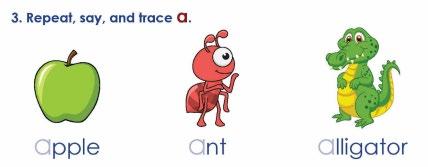
This activity is flashcardsupported


• This activity can be completed alongside Activity 3 from Pupil’s Book 1 to help learners practice finding the letter ‘a’ in new words and in different parts of the word.
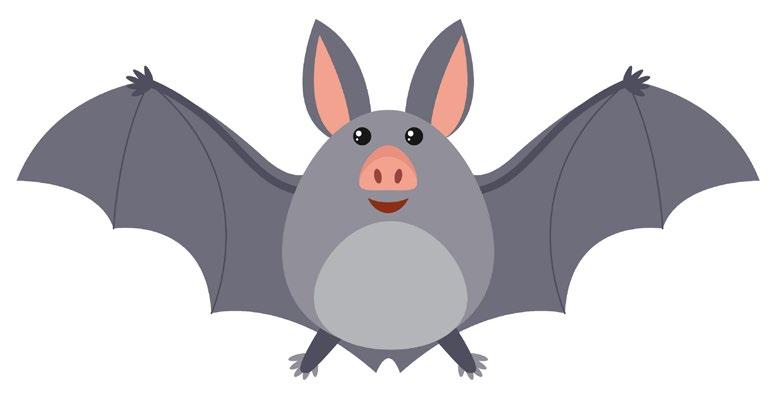
• As aforementioned, use the flashcards from this guide to introduce the words to students. First, define and pronounce it yourself, then ask students to repeat after you. Engage the class with contextual questions about the word, for example, “would you be happy to find a bat in your kitchen?” This reinforces learners’ understanding of the meaning of the words and what context they can be used in. Be sure to ask them to help you find where the letter ‘a’ can be found in each word. You can also split students into groups or pairs, giving each group flashcards to practice identifying the letter’s position independently.
• Engage students in finding the letter ‘a’ by sounding out the words, alone and then with the class, and asking them to clap when they hear the letter ‘a’. This encourages them to learn about the letter position auditorily as well as visually.
• Once complete, ask students to practice this activity in their workbook. Make sure to pay close attention to which letters the students circle and correct any mistakes they may make.
• Additionally, make sure to re-establish the difference between capital and lowercase ‘a’ and their position in a word.

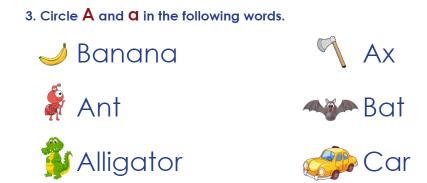
This activity is flashcardsupported


• This activity encourages visual recognition of written words and the association of meaning to those words.
• To begin, using the flashcards from this guide, identify each picture and each word for the students and encourage them to repeat after you.
• After the meaning of each flashcard (picture and word) is established separately, test students on their recognition and memory by showing them a flashcard and asking them to say what each one represents without your help.
• Once this is complete, demonstrate the association between matching flashcards, showing learners how to link each picture with each word. Students can then be split into pairs or small groups. Provide each group with a set of flashcards and encourage them to try and match the relevant pictures and words together. Walk around the classroom and encourage students, providing hints and help when necessary.
• This activity can also be done as a class using Presentation Plus.
• Once students feel confident in their matching skills, encourage them to complete this activity in their workbooks independently.

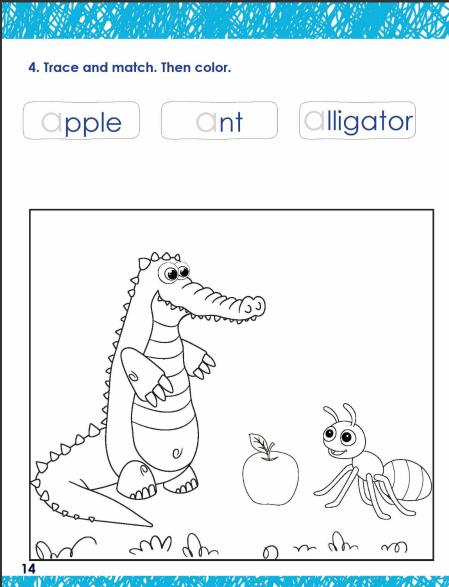
This activity is flashcardsupported


• Activity Book 1 contains a reader focused on identifying a specific letter (A) in the new vocabulary words learned earlier. This page encourages students to verbally identify words that start with the letter ‘A’ and practice writing both forms of the letter. The goal is for students to memorize the sentence and the words by the end of the class.
• Using the flashcards from this guide, repeat the sentence “A is for …” for each word in the reader (apple, ant, alligator). When doing so, ask students to repeat after you and emphasize the letter 'a' in each word while consistently using the same sentence structure: "A is for ...".
• Next, you can ask students to finish the sentence for you. For example, point to the relevant picture and ask students to complete the sentence “A is for …”.
• Afterwards, the class can be split into pairs to complete the activity more independently. One student can point to the picture and the other can ‘read’ the sentence and name the object. This will provide more individual practice time, boosting students' confidence. Engage the class by asking them to think of other words they know that start with the letter ‘a’, using the same sentence structure, i.e. “A is for …”. This allows them to expand what they have learned in the class to their existing knowledge.
• You can also read aloud from stories and ask learners to clap when they hear a word starting with ‘a’. When they clap, stop reading and ask them to identify which word they heard using the structure “A is for …”.
• Once completed, ask students to read each sentence from Activity 4. Encourage them to use the pictures for assistance and fill in the missing letters when they are ready.
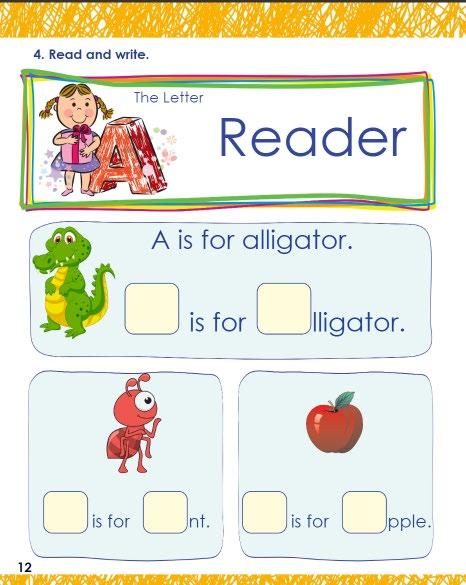

Note: It is pedagogically advised that students of this age range learn these terms and sentences by listening to human voices rather than computerized voices so that they can learn the inflections in tone and recognize how the same letter sounds in different words.
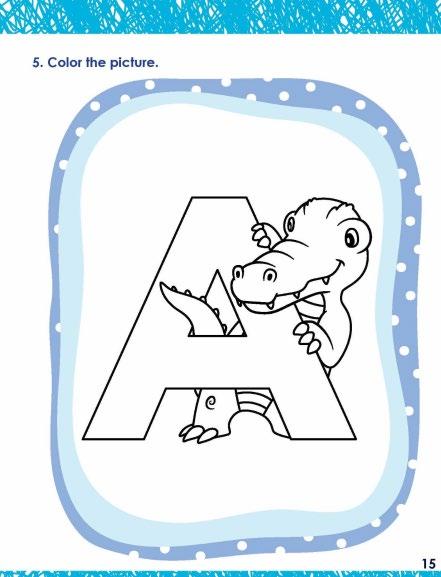
• This activity helps students improve their pencil or crayon control and fine motor skills.
• The teacher should move around the classroom, encouraging students to color within the borders of the letters and images.
• Once the students have finished, the teacher can invite some of them to recall the names of the letters and the images.

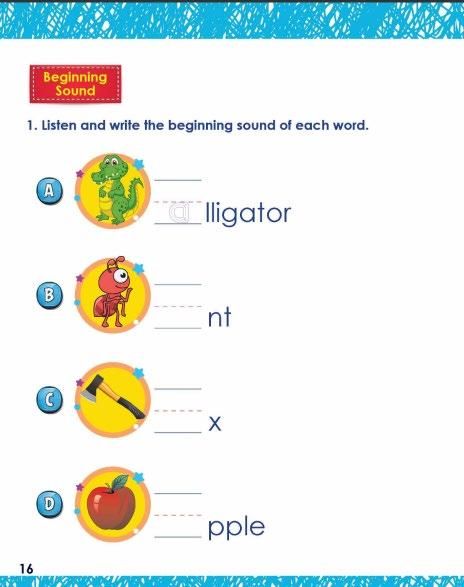
• The key objective of this activity is to develop listening skills and the ability to recognize the initial sounds of words. It is a good opportunity to learn new vocabulary items that begin with the same letter/sound of the lesson.
• The teacher may wish to use Presentation Plus to teach this lesson by following the following steps:
o Play the sound of the word several times. At each time, the teacher invites the students to repeat the word and focus on the word pronunciation, especially the beginning sound.
o Repeat the same process as a whole class activity first, then invite as many individual students as possible to ensure mastery over the words and letter sounds
o The teacher can then invite the students to complete the exercise on their books.

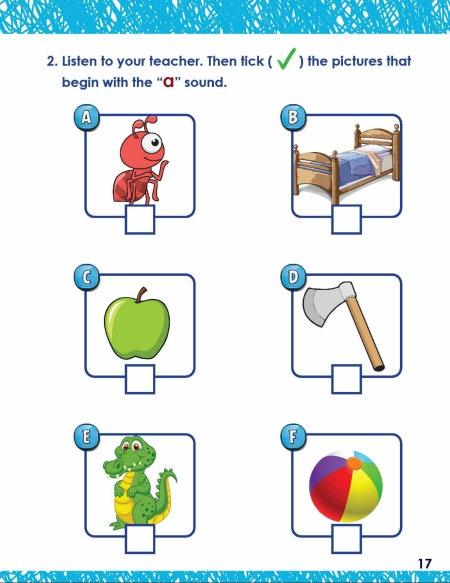
• The key objective of this activity is to develop listening skills and to distinguish the letter sounds from other sounds in this lesson. It also aims to help students recognize and recall words and their sounds visually. The teachers may wish to use Presentation PLUS to deliver this part of the lesson:
o Display the slide that shows the images. Then play the sound of each word/image several times.
o The teacher invites individual students to answer, and then to praise or correct according.
o When all the words and images are completed, the teacher may invite the students to complete the exercise on their books.
o More fun could be added to the exercise by inviting the students to work in pairs. One student points to an image, the other should say the name of the image and the beginning sound of the word.


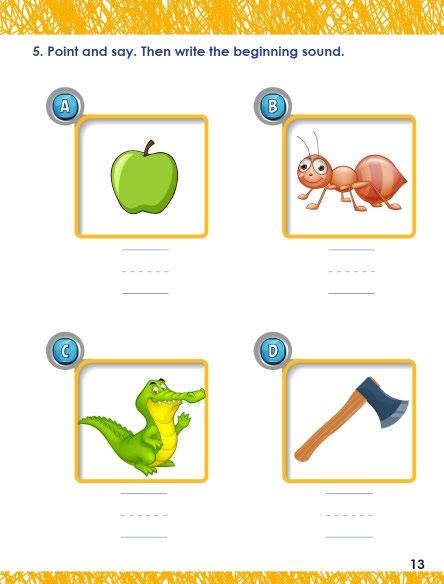
• The teacher explains the task to the students: They need to say a word and then write the beginning sound. You may wish to ask some students to say the words out loud. Then invite others to say the beginning sounds.
• Using Presentation PLUS would be helpful as you can invite individual students to come to the smart board. Say the word and then write the beginning sound.
• You can add more fun by inviting the students to work in pairs. One student to point to a word. The other is to say it and say the sound it begins with.

• The main objective of this activity is to enhance reading skills and help students become fluent readers in the future. It is essential to teach sight words as visual representations rather than prompting students to decode the words while reading.
• To achieve this, the teacher might consider presenting the sight word alongside a picture and prompting the students to repeat it several times. Afterward, the teacher can invite the students to identify the word among other words in a word-salad exercise using Presentation PLUS, and then again in their books.
• Next, the teacher asks the students to sit in groups, gives them flashcards related to this exercise, and asks them to reorder the letters to make words. Then, they write the missing letters to complete the words.
• Finally, the teacher uses Presentation PLUS to motivate the students to read the provided sentences in Exercise 3, which combines picture and word reading.
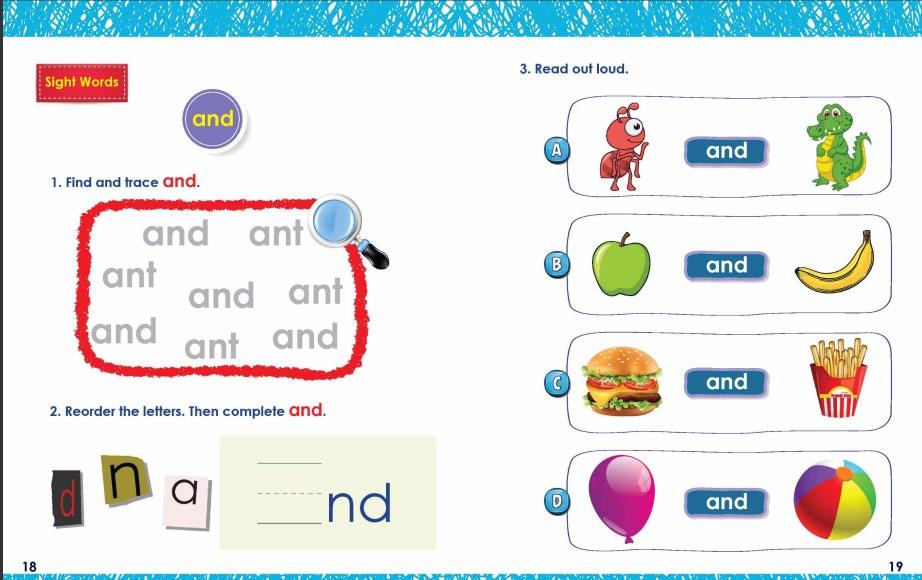

This activity is flashcardsupported


6,7 & 8 Activity Book 1
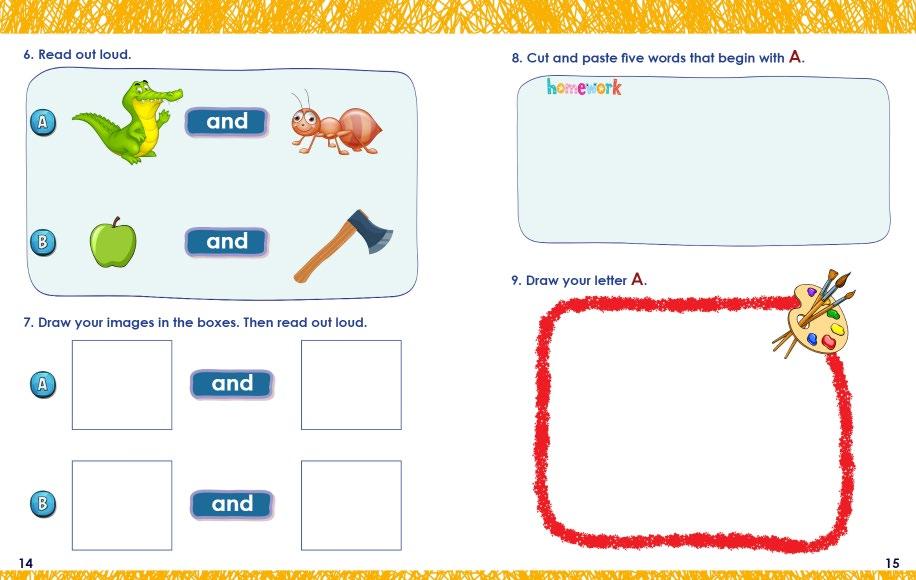
• This activity helps learners read simple sentences and phrases confidently using pictures and newly learned sight words.
• First, ask the students to identify the pictures in the exercise and name the beginning sounds of each picture. Then, have them read the simple sentences slowly.
• It would be best to ask as many students as possible to read to ensure fluency.
• You can then move to the next exercise which develops creativity, links learning to real life, and personalizes learning since each student might come up with a different drawing.
• However, the key objective is to encourage the student to use the newly learned sight word in context using their own words.
• Students can now complete homework at home, which opens their eyes to how they can apply what they learned in school to real-life situations.
• Art is vital for developing creativity and imagination, especially in helping children express themselves through artistic activities like drawing.



Use the Mobile App to review the lesson


















The key objectives of this lesson are for children to:
• Write the uppercase and lowercase forms of the letter ‘B’.
• Recognize the uppercase and lowercase forms of the letter ‘B’ alone and within words.
• Understand the difference between the uppercase and lowercase forms of the letter ‘B’.
• Understand that uppercase and lowercase ‘B’ represent the same letter.
• Learn vocabulary associated with the letter ‘B’, specifically ‘boy’, ‘book’, and ‘balloon’.
• Identify words and objects that start with, or contain, the letter ‘b’ in real-life scenarios.
• Listen to and identify words starting with the letter ‘b’.
• Practice reading, writing, and auditorily identifying the letter ‘b’.
• Revise writing and identifying the uppercase and lowercase form of the letter ‘A’.
• Practice pencil control and grip.
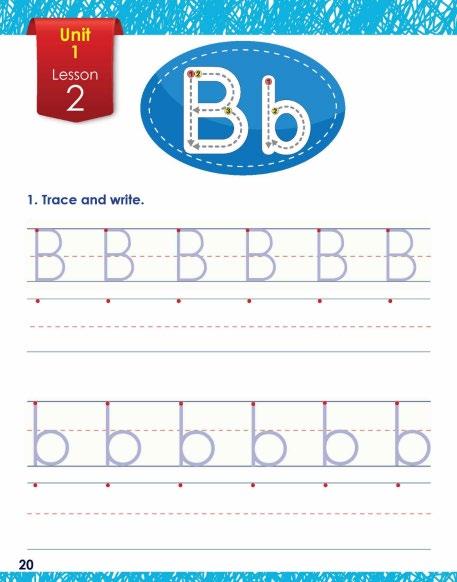
• The purpose of this activity is for children to practice writing both the uppercase and lowercase forms of the letter ‘B’.
• Starting with uppercase ‘B’, describe the components of the letter and its shape. Invite students to contribute to the description, identifying any key features they think are interesting or important, or any shapes/objects they think are familiar to the letter. For example, it looks like a pair of sunglasses on its side.
• After that, demonstrate how to form the letter by tracing its shape on an A4 flashcard. Using the diagram from the book, explain how to write the letter in three steps: by first forming a straight line from top to bottom, then forming a small semicircle that reaches halfway down the line, followed by a slightly larger semicircle that reaches the end of the line. Specify that letters are always formed from top to bottom.
• You can provide students with the opportunity to practice writing by taking them outside to the sandbox or garden, or by bringing a tray of sand into the classroom. Encourage them to trace the letter 'B' in the sand with their fingers as many times as they wish. This activity will help learners develop their gross motor skills and practice forming the letter before transitioning to writing with a pencil.
• Alternatively, provide students with a spool of thick string and instruct them to form the shape of the letter ‘B’ using the string. This activity can also be done in pairs, with two students working together to create a letter. This will increase students’ collaboration skills and allow them to have fun with friends while learning letters.
• This activity can also be completed interactively as a class using Presentation Plus. The teacher can first demonstrate how to
write ‘B’ on the board. Afterward, students can take turns writing the letter on the board themselves and receive feedback from the teacher.
• Once students understand the basic shape of the letter ‘B’ and how to form it, ask them to turn to page 20 of Pupil’s Book 1 and complete the activity. Instruct them to first trace the shape of the letter using their finger, then with their pencil, and once they feel comfortable, ask them to practice writing the letter in the space provided.
• This is a good time to walk around the classroom and check students’ work. Take notice of how they trace and write the letter and correct any mistakes.
• Once complete, repeat the above steps for the lowercase form of the letter ‘b’.
b hlfl d d f h

• This exercise can be completed after Activity 1 from Pupil’s Book 1 for further handwriting practice.
• Before writing in the book, ask the students to review the shapes of the letters 'B' and 'b'. Begin by having them describe each letter, and then demonstrate how to write them by tracing the letters in the air.
• Be sure to correct any mistakes you observe. Additionally, they can practice forming the shapes tactilely by tracing them in sand or soil. This can be done outside in the garden or playground, or inside using a tray of sand.
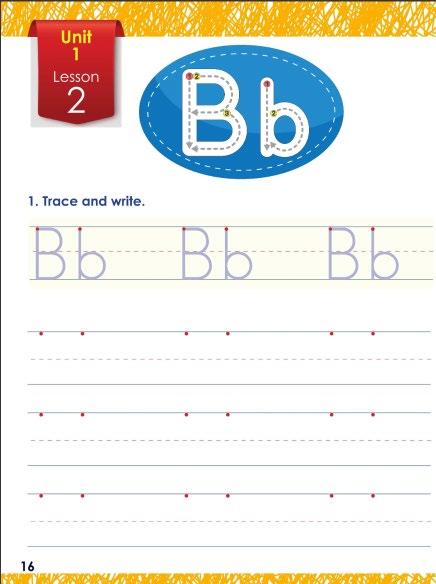
• Afterward, invite the students to turn to page 16 of Activity Book 1. First, instruct them to trace the letters with their fingers. Once they feel confident, allow them to use a pencil to trace and write the letters in the space provided.
• Please remind students to follow the writing pattern shown in the first line. Specifically, instead of writing all the uppercase letters first and then the lowercase letters, they should alternate between writing one uppercase letter and one lowercase letter, as indicated in the activity book. This approach will help them practice writing letters in the order they appear in words, with the uppercase letter first followed by the lowercase letter.


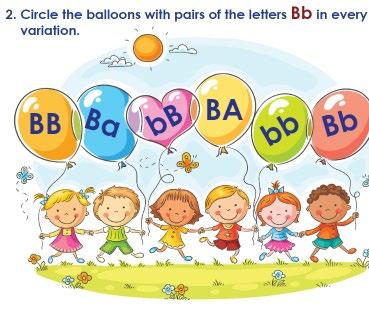
• This activity will assist students in matching letters and understanding that both uppercase and lowercase variants represent the same letter and sound. Furthermore, it will assist them in reviewing both the uppercase and lowercase forms of the letter 'A' that they learned in the previous lesson.
• Before writing in the Activity Book, play a game with the students to help them practice identifying matching letters.
• Using multicolored inflated balloons and a marker, write different combinations of an uppercase and lowercase ‘A’ and ‘B’ on each balloon (as depicted in exercise 2), such that each balloon has 2 letters on it. For example: AA, BB, AB, Ab, aB, aa, bb, Aa, Bb, etc.
• Once the balloons are ready, give each student a balloon and ask them to form a large circle. Then ask the students to throw all the balloons into the middle of the circle.
• When all the balloons are gathered in the center of the circle, instruct the students to find the balloons with matching letters. This matching is not case-sensitive, so combinations such as 'AA,' 'BB,' 'aa,' 'bb,' 'Aa,' and 'Bb' will all be considered correct.
• To encourage participation, you can reward the students who find matching balloons with stars or stickers.
• After the activity concludes, ask students to complete Activity 2 in their books individually. Instruct them to circle all the balloons containing matching letters.
• You can take this time to walk around the class and observe the students’ work, taking care to correct any mistakes if present.

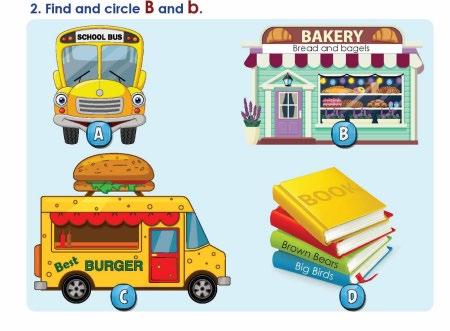
• This activity encourages students to find examples of both forms of the letter ‘B’ in real life.
• One or two days before this lesson, invite students to bring their favorite storybooks to class. Once in class, divide students into pairs or small groups and ask them to try and find as many examples of the letter ‘B’ in their books as they can. Afterward, invite each group or pair to the front of the class and ask them to present their findings to their peers.
• This activity supports learners’ ability to apply what they have learned in class to familiar experiences from their daily life and enhances their presentation skills and confidence.
• After each pair or group has presented what they have found, instruct students to complete this activity in their workbook by circling all examples of the letter ‘B’
• This activity can also be conducted interactively as a class using Presentation Plus. Begin by asking students to identify all instances of the letter ‘B’ they notice in the examples from the presentation. You can invite individual students to come to the board and circle the letters themselves. Once the class reaches a consensus, the presentation will reveal the correct answers by highlighting each letter one by one.


• At the end of this activity, ask students to bring two examples of the letter ‘B’, one uppercase and one lowercase, into class the next day. This can be within a book or magazine, or on a label from their favorite snack.

• Once students have brought their examples, invite them to present them in front of the class. Ask students to state where they found this example, why they chose it, where the letter ‘B’ is, and whether it is uppercase or lowercase.
• This exercise will grant learners the opportunity to actively search for examples of the letter ‘B’ when they are not in school and will also enhance their presentation skills and confidence.
• Once in class, if students have brought examples that can be kept in class, work together as a group to create a large collage with all the examples from each student. This can be then hung in the classroom for students to refer back to and feel a sense of pride. Invite students to decorate this collage however they would like.
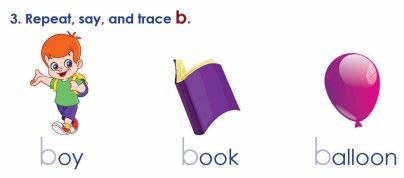
• The purpose of this activity is to introduce learners to new vocabulary words that start with the letter ‘b’ and give them practice tracing, writing, and identifying the letter within words. Students should be confident in each vocabulary term by the end of the lesson.
• Using Presentation Plus, identify each image displayed on the screen and explain its meaning. Additionally, point out the location of the letter 'B' in each image. After this, invite the students to repeat the word with you and encourage them to locate the letter 'B' on their own. You can also use the familiar sentence structure "B is for..." when discussing each image.
• Begin by demonstrating how to trace the letter on the whiteboard. Next, invite individual students to come to the board and trace the letters themselves. This creates a valuable opportunity to provide personalized feedback to each student as they practice.
• You can also use the flashcards from this guide to play a game with students. Hold up a random flashcard and ask students to tell you what each image represents. Then, ask them to reveal what letter each image starts with by tracing its shape in the air. Ask them to trace both the uppercase and lowercase form of the letter. When all students have traced a shape, let them know if they are correct by tracing the shape of the letter ‘B’ yourself and saying the letter name out loud.
• If further practice is needed, students can also trace the letter’s shape in sand or use a thick piece of string as described earlier.
• Once the class activities are complete, encourage students to complete this activity in their workbook. Instruct them to first say the word out loud, then identify where ‘B’ is, and finally trace the shape of the letters, first with their finger, then with a pencil.

This activity is flashcardsupported.
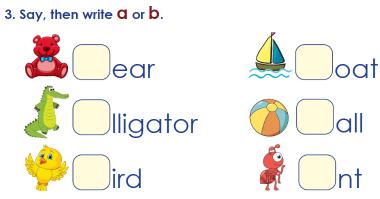
• This activity aims to help learners practice identifying the correct positions of the letters 'a' and 'b' in vocabulary words they are familiar with. It can be completed alongside Activity 5 from Pupil’s Book 1 for additional practice.
• As described earlier, you can first provide each student with two flashcards, one depicting the letter ‘A’, and one depicting the letter ‘B’. Next, present each image and incomplete word to the class, using a flashcard or projected image. Afterward, ask students to identify what the image is and then ask them to hold up the correct letter they think the displayed word starts with. Once the students have made their guesses, you can reveal the correct answer. This is a great way to test students on vocabulary terms they have learned in Lesson 2 and revise those learned in Lesson 1. You can also encourage students by providing stickers to those who answer the most questions correctly.
• As a supplement to this activity, you can also play a game to help students revise these vocabulary terms (and those from the Pupil’s Book) and the letter they start with. Draw or stick the letters ‘A’ and ‘B’ on two separate balls. Ask students to form a circle and then throw each ball to a random student. Once the student catches the ball, they are tasked with naming a word that starts with the letter they have caught using the phrase “A is for …” or “B is for…”. Encourage students to start the game using the words they have already learned, and then as the game progresses, add any other words they can think of. This is a great way to practice visual recognition of letters and linking letters to familiar vocabulary.
• Once these activities are complete, ask students to practice this activity individually in their workbook. Instruct them to first say each word out loud before filling in the missing letter. Make sure to pay close attention to how students form their letters and correct any mistakes you notice.

This activity is flashcardsupported.
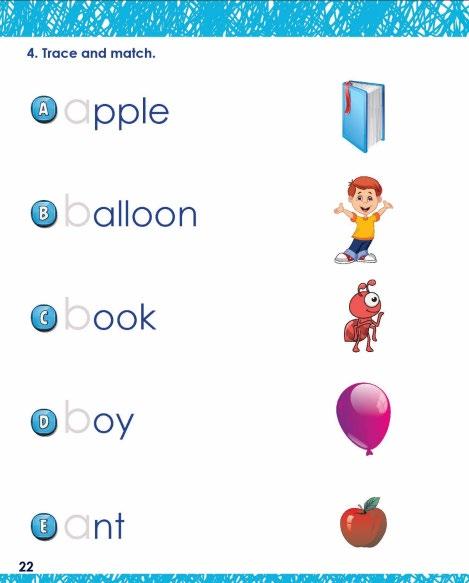
• This activity encourages sight recognition of familiar written words and the association of meaning to those words.
• To begin, using the flashcards from this guide, identify each picture and each word for the students, and encourage them to repeat after you. Next, demonstrate the association between matching flashcards by showing learners how to link each picture and word.
• Afterward, invite students to play a game with you. Place five boxes or bowls, each with an image of one vocabulary term, at the front of the class. Spread and/or hide a series of flashcards or post-it notes containing the written form of each word around the classroom and ask students to help you find them. Once a student finds a word, they should bring it to the front of the class and put the written word in the box/bowl that depicts the matching image.
• When the students put the flashcards in the bowl, ask them to say the word they found out loud. Stars and stickers can be awarded to students who find and place the highest number of correct words.
• You can also divide students into groups of four and give each group a set of flashcards that correspond to the words and images from this activity. Instruct students to match the relevant pictures with their corresponding words. As they work, walk around the classroom to offer encouragement and advice.
• This activity can also be completed as a class using Presentation Plus.
• Once students feel confident in their ability to match, encourage them to complete this activity in their workbook independently. Instruct them to identify each picture and word out loud before they match the relevant items.

This activity is flashcardsupported.

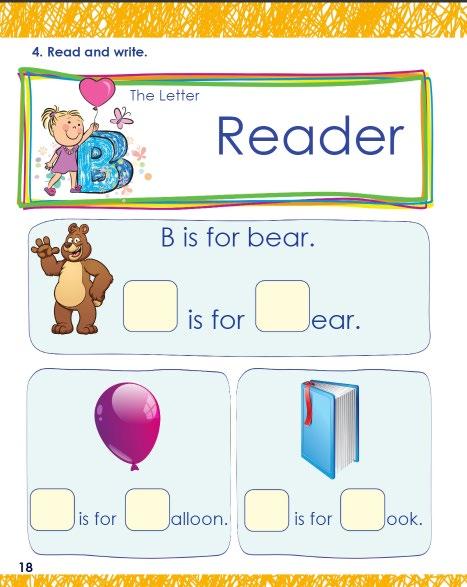
• On page 18 of Activity Book 1, there is a reading exercise focused on the letter "B" and its identification in the new vocabulary words learned earlier. This page encourages students to verbally identify words that begin with the letter "B" and practice writing both uppercase and lowercase forms of the letter. The goal is for students to memorize the sentence and the corresponding words by the end of the class.
• Using the flashcards from this guide, repeat the sentence “B is for …” for each word in the reader (bear, balloon, book). As you say each sentence, ask the students to repeat after you, making sure to emphasize the letter ‘B’ for each word. Consistently use the same sentence structure: “B is for …”.
• Next, you can ask students to finish the sentence for you. For example, point to the relevant picture and ask students to complete the sentence “B is for …”.
• Afterward, the class can be split into pairs to complete the activity more independently. One student can point to the picture and the other can ‘read’ the sentence and name the object. This will allow for more individual time to practice and will help build students’ confidence.
• Engage the class by asking them to think of other words they know that start with the letter ‘B’, using the same sentence structure, i.e., “B is for …”. This allows them to expand what they have learned in the class to what they already know.
• You can also read aloud from stories and ask learners to clap when they hear a word starting with ‘B’. When they clap, stop reading and ask them to identify which word they heard using the structure “B is for …”. Additionally, you can play “I Spy” with students by asking them to point to different objects around the classroom that start with the letter ‘B’.
• Once complete, ask students to read each sentence from Activity 4, using the pictures to help them, and then fill in the missing letters when they are ready.

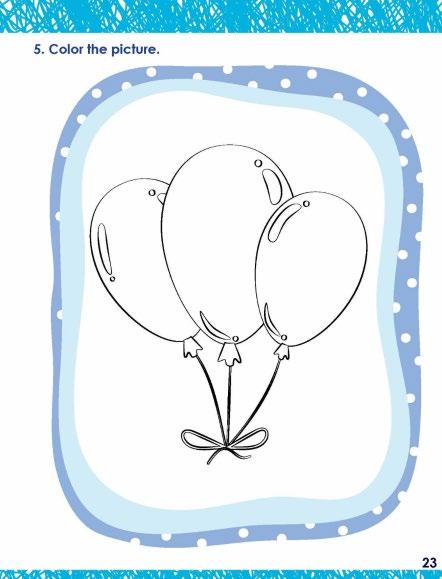
• This activity improves learners' control of the pencil or crayon and develops their fine motor skills.
• The teacher needs to walk around the class to encourage the students to color with the borders of the letter and the image.
• When they finish, the teacher may wish to invite some students to recall the letter name and image.


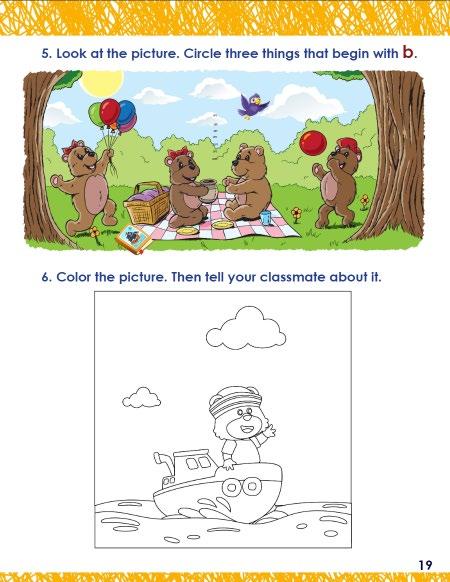
• This activity puts the students in real-life context to identify and name three things that begin with the letter B.
• The teacher can encourage students to describe what they see in the picture. While they may know the names of all the objects, they need to contextualize these objects from their own perspectives.
• Give the students five minutes to complete the task, then use Presentation PLUS and invite some students to come to the smart board to point and circle objects beginning with the “b”.
• Exercise 6 encourages students to develop a love for art while also focusing on improving their pencil control and fine motor skills. Since students are expected to color within the lines of the image, the teacher needs to walk around the classroom to ensure that this objective is being implemented accurately.
• This exercise is a good speaking activity. The teacher can invite some students to talk about the picture and use their imaginations to create a context of their own.

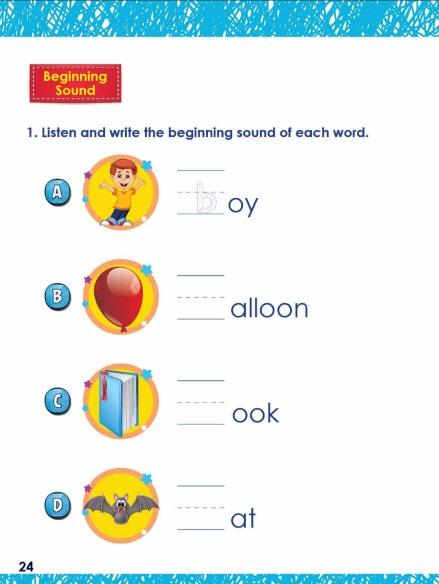
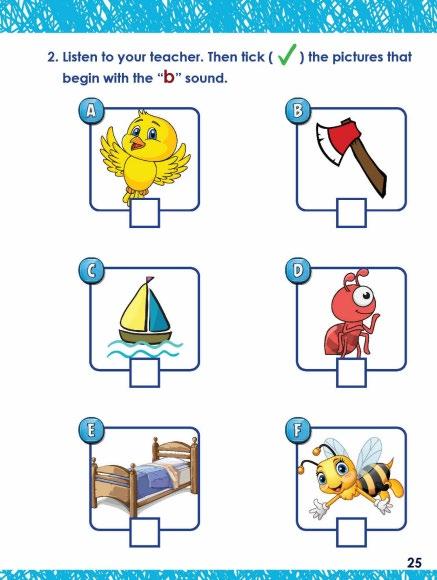
• This key objective of this activity is to develop listening skills and the ability to recognize the beginning sounds of words.
• It is a good opportunity to learn new vocabulary items that begin with the same letter/sound of the lesson.
• The teacher may wish to use Presentation Plus to teach this lesson by following the following steps:
o Play the sound of the word several times. At each time, the teacher invites the students to repeat the word and focus on the word pronunciation, especially the beginning sound.
o Repeat the same process as a whole class activity first, then invite as many individual students as possible to ensure mastery over the words and letter sounds.
o The teacher can then invite the students to complete the exercise on their books.

• This key objective of this activity is to develop listening skills and the ability to distinguish letter sounds from other sounds in this lesson.
• It also aims to help students recognize and recall words and their sounds visually.
• The teachers may wish to use Presentation PLUS to deliver this part of the lesson:
o Display the slide that shows the images. Then play the sound of each word/image several times.
o The teacher invites individual students to answer. Praising correct answers is very important.
o When all the words and images are completed, the teacher may invite the students to complete the exercise on their books.
o More fun could be added to the exercise by inviting the students to work in pairs. One student points to an image, the other should say the name of the image and the beginning sound of the word.

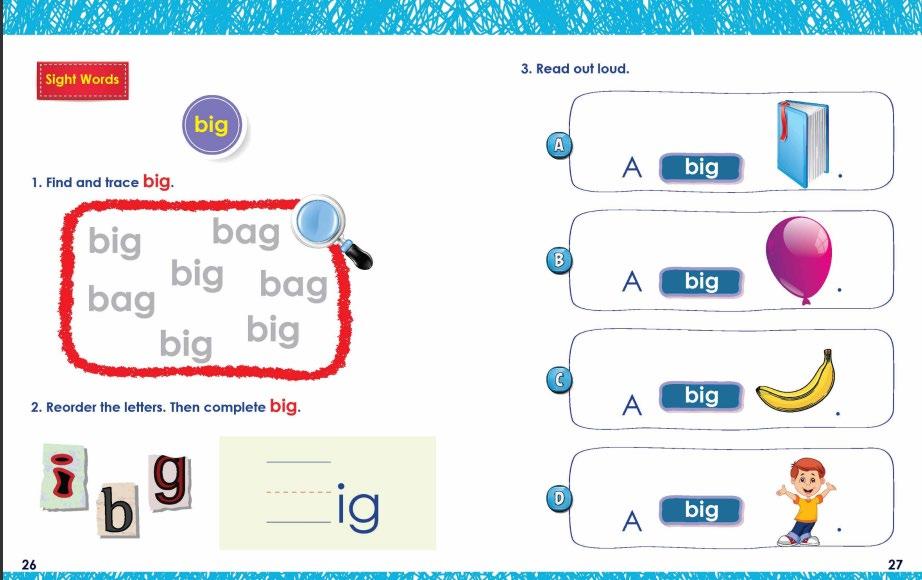
• The main objective of this activity is to enhance reading skills and help students become fluent readers in the future. It is essential to teach sight words as visual representations rather than prompting students to decode the words while reading.
• To achieve this, the teacher might consider presenting the sight word alongside a picture and prompting the students to repeat it several times. Afterward, the teacher can invite the students to identify the word among other words in a word-salad exercise using Presentation PLUS, and then again in their books.
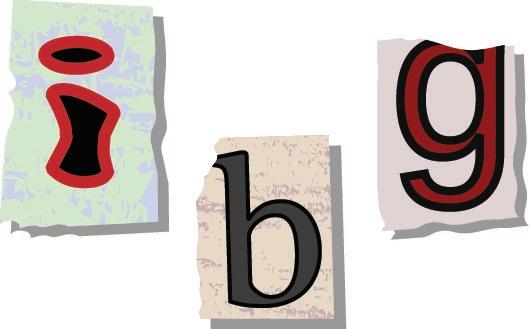
• Next, the teacher asks the students to sit in groups, gives them flashcards related to this exercise, and asks them to reorder the letters to make words. Then, they write the missing letters to complete the words.
• Finally, the teacher uses Presentation PLUS to motivate the students to read the provided sentences in Exercise 3, which combines picture and word reading.

This activity is flashcardsupported.


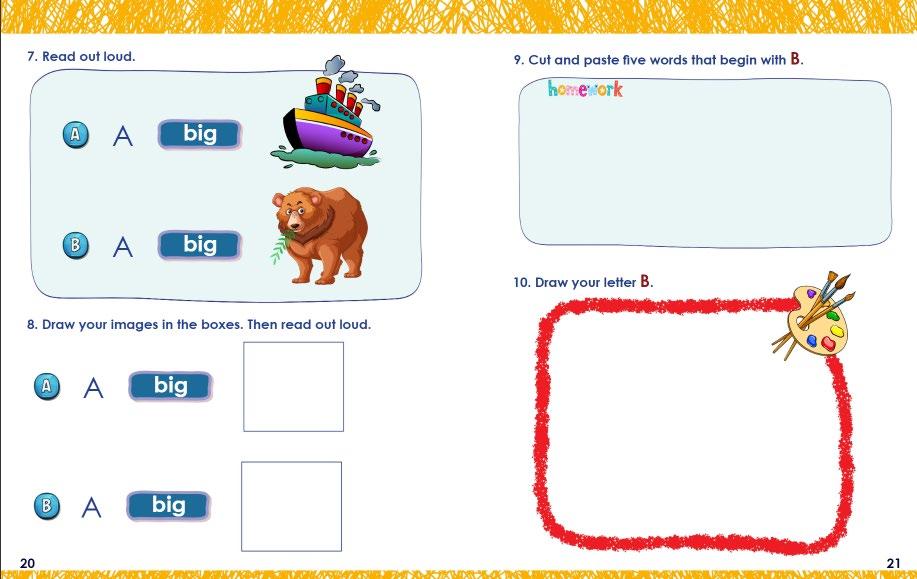
• This activity helps learners read simple sentences and phrases confidently using pictures and newly learned sight words.
• First, ask the students to identify the pictures in the exercise and name the beginning sounds of each picture. Then, have them read the simple sentences slowly.
• It would be best to ask as many students as possible to read to ensure fluency.
• You can then move to the next exercise which develops creativity, links learning to real life, and personalizes learning since each student might come up with a different drawing.
• However, the key objective is to encourage the student to use the newly learned sight word in context using their own words.
• Students can now complete homework at home, which opens their eyes to how they can apply what they learned in school to real-life situations.
• Art is vital for developing creativity and imagination, especially in helping children express themselves through artistic activities like drawing.



















The key objectives of this lesson are for children to:
• Write the uppercase and lowercase forms of the letter ‘C’.
• Recognize the uppercase and lowercase forms of the letter ‘C’ alone and within words.
• Understand that uppercase and lowercase ‘c’ represent the same letter.
• Learn vocabulary associated with the letter ‘C’, specifically ‘camel’, ‘cat’, and ‘car’.
• Identify words and objects that start with, or contain, the letter ‘C’ in real-life scenarios.
• Listen to and identify familiar and unfamiliar words starting with the letter ‘c’.
• Practice reading, writing, and auditorily identifying the letter ‘c’.
• Recognize shapes familiar to the letter ‘C’.
• Revise writing and identifying the uppercase and lowercase forms of the letters ‘A’ and ‘C’.
• Revise writing, and identifying objects that start with, the letters ‘A’, ‘B’, and ‘C’.
• Practice pencil control and grip.
• The purpose of this activity is for children to practice writing both the uppercase and lowercase forms of the letter ‘c’.
• Starting with uppercase ‘C’, describe the components of the letter and its shape. Invite students to contribute to the description, identifying any key features they think are interesting or important, or any shapes/objects they think are familiar to the letter. For example, it looks like a sideways smile or half of a circle
• After that, demonstrate how to form the letter by tracing its shape on an A4 flashcard, then in the air in front of the class. Invite students to join you in practicing the tracing motion in the air and allow them to become familiar with forming this shape. Specify that letters are always formed from top to bottom.
• Provide students with pipe cleaners and give them the task of bending the pipe cleaner to form the shape of the letter ‘C’. Encourage each student to repeat this activity as many times as necessary, using multiple pieces of pipe cleaner until they gain a strong understanding of the letter's shape. This exercise promotes a multisensory approach to learning letters. To make the activity even more engaging, allow students to decorate their letters with glitter, markers, stickers, or googly eyes.
• You can play a game with students by separating them into two or more groups. Encourage each group to create as many perfect letter ‘C’s as they can using pipe cleaners. The group with the highest number
of accurate letters can win a prize. This will increase students’ collaboration skills and allow them to have fun with friends while learning letters.
• To complete this activity interactively as a class, use Presentation Plus. The teacher should begin by demonstrating how to write the letter 'C' on the board. Once the demonstration is complete, students will take turns writing the letter on the board themselves, allowing them to receive individualized feedback from the teacher.
• Once students understand the basic shape of the letter ‘C’ and how to form it, ask them to turn to page 28 of Pupil’s Book 1 and complete the activity. Instruct them to first trace the shape of the letter using their finger, then with their pencil, and once they feel comfortable, ask them to practice writing the letter in the space provided.
• This is a great time to walk around the classroom and check students' work. Observe how they trace and write the letters and correct any mistakes.
• Once complete, repeat the above steps for the lowercase form of the letter ‘c’. Make sure to emphasize the difference between an uppercase and lowercase ‘c’, specifying that the lowercase letter is smaller.
Note: It may be helpful to remind students of the proper way to grip a pencil prior to this activity.

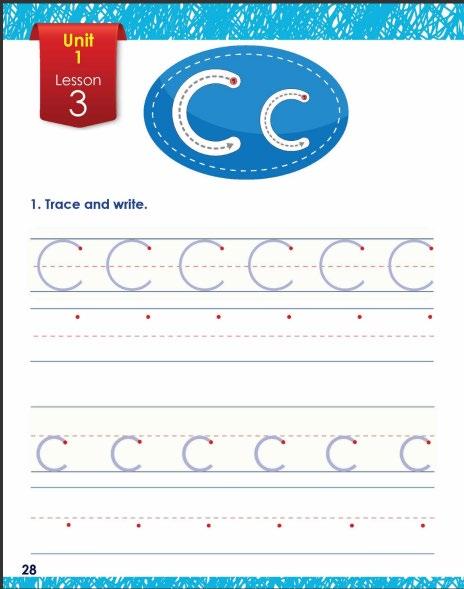

• This exercise can be completed after Activity 1 from Pupil’s Book 1 for further handwriting practice.
• Before writing directly in the book, invite students to refamiliarize themselves with the shape of the letter ‘C’ and ‘c’ by asking them to first describe the letter and then demonstrate how to write it by tracing it in the air. Be sure to correct any mistakes you notice. They can also use block letters or pipe cleaners to reaccustom themselves with the physical shape.
• Afterward, invite them to turn to page 16 of Activity Book 1. First, instruct them to trace the letters with their fingers, then once they feel confident, allow them to use a pencil to trace and write the letters in the space provided.
• Ensure you instruct students to follow the writing pattern demonstrated on the first line. In specific, rather than writing all the uppercase letters first and lowercase letters second, they should alternate writing one uppercase and one lowercase letter as indicated in the activity book. This will allow them to practice writing letters as they would appear in a word, with the uppercase letter first and the lowercase second.


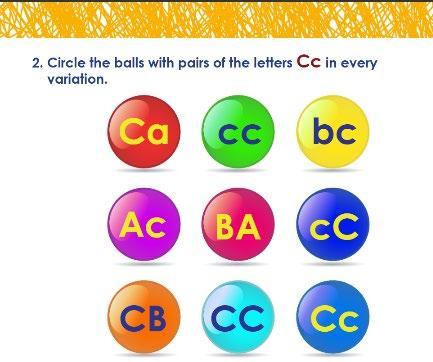
• This activity will help students match letters and understand that both uppercase and lowercase variants represent the same letter and sound. Additionally, it will help them revise both the uppercase and lowercase forms of the letters ‘a’ and ‘b’ that they learned in the previous lessons.
• Before writing in the Activity Book, play a game with the students to help them practice identifying matching letters.
• Using a marker and some cardboard boxes, write at least nine different combinations of an uppercase and lowercase ‘a’, ‘b’, and ‘c’ on each box (as depicted in exercise 2), such that each box has 2 letters on it. For example: Ca, cc, bc, Ab, AC, cC, cB, etc. Instead of using cardboard boxes, you can also use flat pieces of card or cardboard.
• Place these boxes in a circle around the room. Then one by one, or in small groups of two or three, give each student a ball or beanbag and ask them to throw the beanbag into the box (or onto the card) that depicts a pair of matching letters. This is not case sensitive, meaning cC is a correct answer alongside cc. You can encourage students by giving stars and stickers to those who throw their ball into the correct box.
• When the activity is over, invite students to individually complete Activity 2 in their book. Instruct students to circle all the balls they can see that contain matching letters.
• You can take this time to walk around the class and observe the students’ work, taking care to correct any mistakes if present.
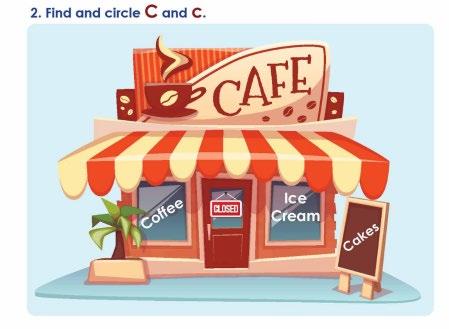
• This activity encourages students to find examples of both forms of the letter ‘C’ in real life.
• Take students on a scavenger hunt around the school to practice identifying the letter ‘C’ in the real world.
• Walk down the hallways and into the cafeteria and instruct students to pay close attention to the signs around them. Encourage learners to point out any examples of the letter ‘C’ they can find, whether it is the sign for the cafeteria, or from other students’ projects hanging on the walls. You can provide stickers to students every time they find a good example.
• It may also be helpful to encourage learners to keep an eye out for examples of the letters ‘A’ and ‘B’ as well, as to revise what they have learned in previous lessons.
• Once the scavenger hunt is complete and students have found as many examples as they can of both forms of the letter ‘C’ in school, complete this activity interactively in class using Presentation Plus.
• Using the examples from the Presentation PLUS, ask students to identify all the instances of the letter ‘C’ that they can see. You can also invite individual students to the board and ask them to circle the letters themselves. Once the class has reached an agreement, the presentation will display the correct answers by circling each letter one-by-one.

• At the end of this activity, ask students to bring two examples of the letter ‘C’, one uppercase and one lowercase, into class the next day. This can be within a book or magazine, or on a label from their favorite snack.
• Once students have brought their examples, invite them to present them in front of the class. Ask students to state where they found this example, why they chose it, where the letter ‘C’ is, and whether it is uppercase or lowercase.
• This exercise will grant learners the opportunity to actively search for examples of the letter ‘C’ when they are not in school and will also enhance their presentation skills and confidence.
• Once in class, if students have brought examples that can be kept in class, work together as a group to create a large collage with all the examples from each student. This can be then hung in the classroom for students to refer back to and feel a sense of pride. Invite students to decorate this collage however they would like.
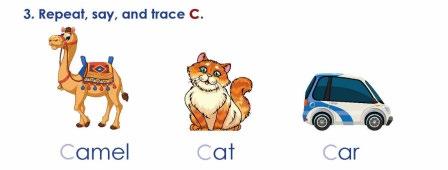
• The purpose of this activity is to introduce learners to new vocabulary words that start with the letter ‘C’ and give them practice tracing, writing, and identifying the letter ‘C’ within these words. Students should be confident in each vocabulary term by the end of the lesson.
• First, using the flashcards found in this guide, introduce the word to students, identify it, explain what it means, demonstrate how to pronounce it, and indicate where the letter ‘c’ is located in each one.
• After that, invite students to repeat the word with you and call on individual learners or the class as a whole to identify where they can see the letter ‘c’. Repeat the word and identify the letter as many times as needed until learners are confident in the vocabulary term and the position of ‘c’.
• It is also helpful to use the word in multiple contexts and different sentences. Engage with students by asking them where they would normally see a ‘camel, ‘cat, or ‘car, and what they like about those things This helps ground new vocabulary in real-life scenarios, assisting with learners’ understanding and memory.
• Next, play a game with students to practice these vocabulary terms. Using three balls or balloons, write or stick each vocabulary term on a ball. Then, ask students to form a circle and throw each ball randomly to a student. When the student catches the ball, they have to ‘read’ the word out loud and then trace the shape of the letter it starts with in the air. Play this game until each student has had the chance to practice each vocabulary word at least once.
• Afterward, complete this activity interactively as a class using Presentation Plus. Identify each image on the screen and where the letter ‘C’ is located. Then demonstrate how to trace and write the letter on the board and invite individual students to practice with you. This is a great opportunity to provide individualized feedback regarding their writing and letter formation.
• Once the class activities are complete, encourage students to complete this activity in their workbook. Instruct them to do so step by step, first saying the word out loud, then tracing the shape of the letters, first with their finger, then with a pencil.


• This activity helps learners practice identifying the correct position of letters (‘A’ and ‘C’) in vocabulary words they are familiar with, encourages sight recognition of words, and provides students with the opportunity to practice writing the letters ‘a’ and ‘c’.
• Before instructing students to complete this activity in their workbooks, you can split them into groups of 4-5 to play a game.
• Provide each group with two sets of flashcards, one set with the images ‘cat’, ‘camel’, and ‘car’, and the second set with the written form of these vocabulary terms. Task each group with matching the images to the words.
• When each group has matched the relevant flashcards, encourage them to practice writing the first two letters, ‘C’ and ‘A’. They can do so on a separate piece of lined paper, or even practice as a group on the same paper to make this activity more collaborative.
• Alternatively, you can complete this activity as a class. Give three students flashcards depicting the image of each vocabulary term and give the rest of the class the written form of the word (one word each). When every student has a flashcard, instruct them to find the other students that have matching vocabulary terms, whether in picture or written form. When each group has found each other, encourage them to practice writing on a separate piece of lined paper. They can also practice forming the letters ‘C’ and ‘A’ using pipe cleaners as aforementioned.
• Once these in-class activities are complete, encourage students to complete Activity 3 in their Activity Book. Instruct them to circle the correct word that matches the image, then write the missing letters in the space provided. Walk around the classroom and pay close attention to how students form their letters Correct any mistakes you notice.

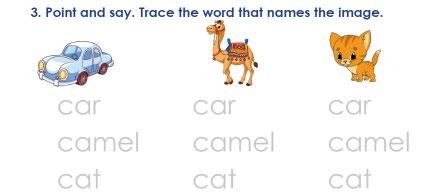
This activity is flashcardsupported


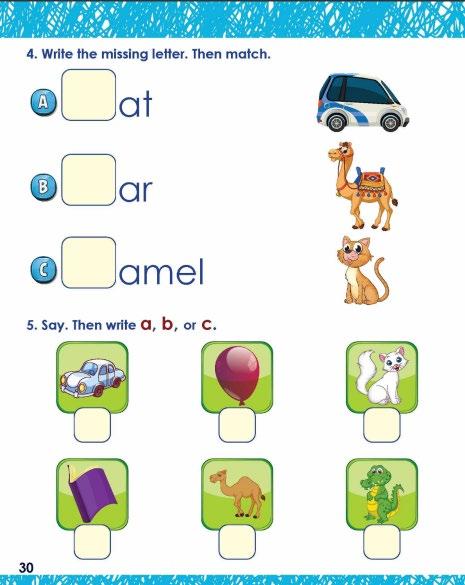
Activity 4:
• The teacher invites the students to name and loudly say the images of a car, a camel, and a cat. Ask as many students as possible would be beneficial for the students whose learning style is “social”.
• Then ask the students to work in pairs to work out the missing letters in every word.
• Once the words are complete, the teacher asks the students to match the word to the corresponding image.
• The use of Presentation PLUS would be very beneficial for those whose learning style is visual.
Activity 5:
• The teacher explains the task to the students: First, they need to say the words aloud. Then, they should write down the letters a, b, or c to indicate the letter with which each word begins. The use of Presentation PLUS would be very helpful for this activity.

This activity is flashcardsupported

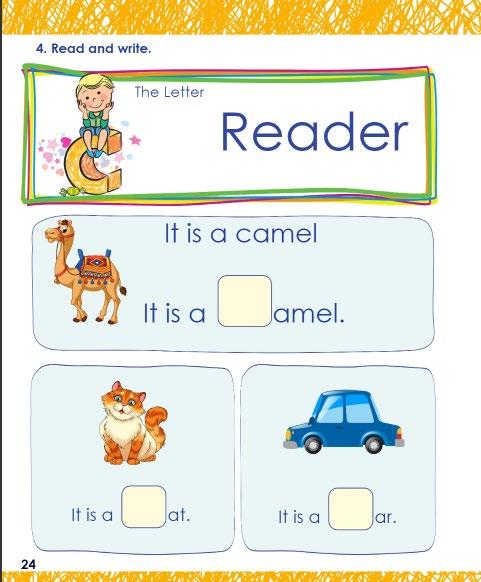
• Page 24 of Activity Book 1 features a reader that focuses on the letter 'C' and the identification of this letter in new vocabulary words learned earlier. This page encourages students to verbally identify words that begin with the letter 'C' and to practice writing both uppercase and lowercase forms of the letter. The goal is for students to memorize the sentence and the associated words by the end of the class.
• Encourage the students to repeat “It is a…"
• Next, you can ask students to finish the sentence for you. For example, point to the relevant picture and ask students to complete the sentence “It is a camel”
• Afterward, the class can be split into pairs to complete the activity more independently. One student can point to the picture and the other can ‘read’ the sentence and name the object. This will allow for more individual time to practice and will help build students’ confidence.
• Engage the class by asking them to think of other words they know that start with the letter ‘C’, using the same sentence structure, i.e., “It is a …”. This allows them to expand what they have learned in the class to what they already know.
• You can also read aloud from stories and ask learners to clap when they hear a word starting with ‘C’. When they clap, stop reading and ask them to identify which word they heard using the structure “It is a …”. Additionally, you can play “I Spy” with students by asking them to point to different objects around the classroom that start with the letter ‘C’.
• Once complete, ask students to read each sentence from Activity 4, using the pictures to help them, and then fill in the missing letters when they are ready.
• The use of Presentation PLUS would be very beneficial for those whose learning style is visual.

• This activity enhances learners' control over pencils or crayons and fine motor skills.
• The teacher needs to walk around the class to encourage the students to draw something that begins with “c”.
After finishing, the teacher might invite some students to present and discuss their drawings.
• The teacher explains the task to the students: they need to say the word and then write the beginning sound.
• You may wish to ask some students to say the words out loud. Then invite others to say the beginning sounds.
• Using Presentation PLUS would quite be helpful as you can invite individual students to come to the smart board. Say the word and then write the beginning sound.
• You can add more fun by inviting the students to work in pairs. One student to point to a word. The other is to say it and say the sound it begins with.

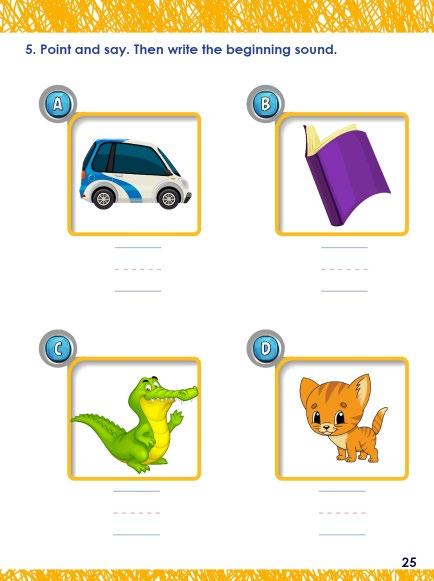
• This key objective of this activity is to develop the listening skill as well as the ability to recognize the beginning sound of words.
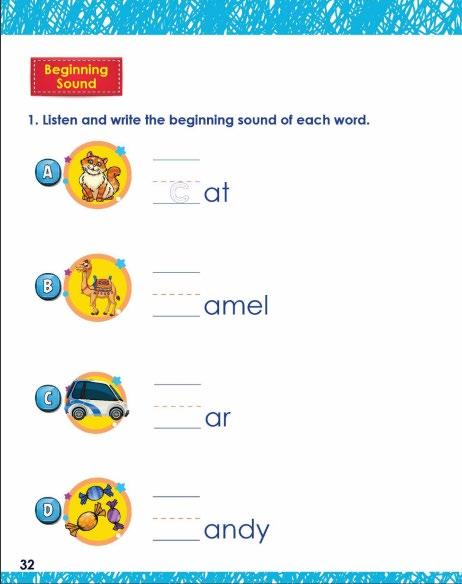
• The key objective of this activity is to develop listening skills and the ability to recognize the initial sounds of words. It is a good opportunity to learn new vocabulary items that begin with the same letter/sound of the lesson.
• The teacher may wish to use Presentation Plus to teach this lesson by following the following steps:
• It is a good opportunity to learn new vocabulary items that begin with the same letter/sound of the lesson.
• The teacher may wish to use Presentation Plus to teach this lesson by following the following steps:
o Play the sound of the word several times. At each time, the teacher invites the students to repeat the word and focus on the word pronunciation, especially the beginning sound.
o Repeat the same process as a whole class activity first, then invite as many individual students as possible to ensure mastery over the words and letter sounds.
o Play the sound of the word several times. At each time, the teacher invites the students to repeat the word and focus on the word pronunciation, especially the beginning sound.
o The teacher can then invite the students to complete the exercise on their books.
o Repeat the same process as a whole class activity first, then invite as many individual students as possible to ensure mastery over the words and letter sound.
o The teacher can then invite the students to complete the exercise on their books.

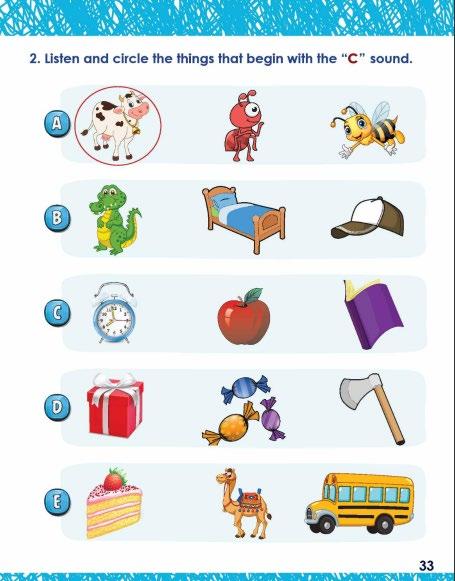
• The key objective of this activity is to develop listening skills and to distinguish the letter sounds from other sounds in this lesson. It also aims to help students recognize and recall words and their sounds visually. The teachers may wish to use Presentation PLUS to deliver this part of the lesson:
o Display the slide that shows the images. Then play the sound of each word/image several times.
o The teacher invites individual students to answer, and then to praise or correct according.
o When all the words and images are completed, the teacher may invite the students to complete the exercise on their books.
o More fun could be added to the exercise by inviting the students to work in pairs. One student points to an image, the other should say the name of the image and the beginning sound of the word.

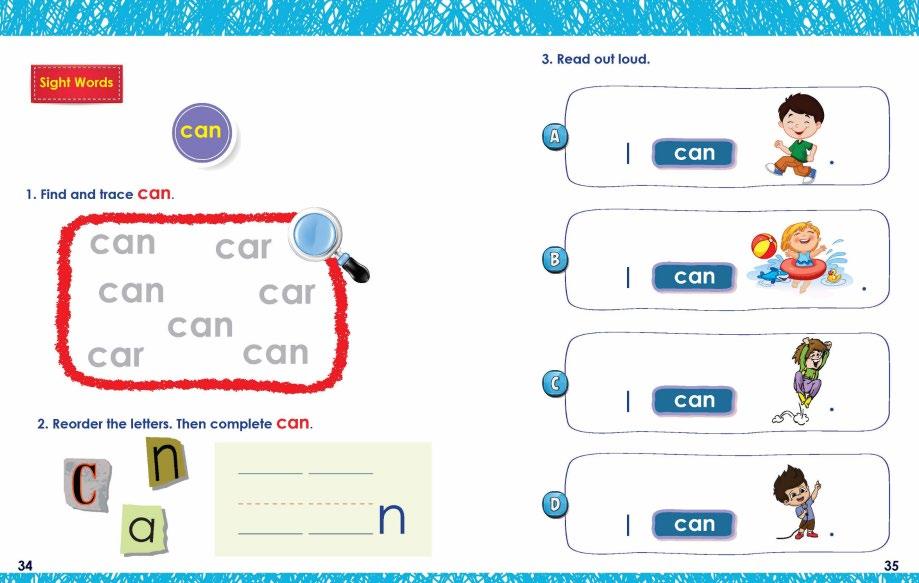
• The main objective of this activity is to enhance reading skills and help students become fluent readers in the future. It is essential to teach sight words as visual representations rather than prompting students to decode the words while reading.
• To achieve this, the teacher might consider presenting the sight word alongside a picture and prompting the students to repeat it several times. Afterward, the teacher can invite the students to identify the word among other words in a word-salad exercise using Presentation PLUS, and then again in their books.
• Next, the teacher asks the students to sit in groups, gives them flashcards related to this exercise, and asks them to reorder the letters to make words. Then, they write the missing letters to complete the words.
• Finally, the teacher uses Presentation PLUS to motivate the students to read the provided sentences in Exercise 3, which combines picture and word reading.



• This activity helps learners read simple sentences and phrases confidently using pictures and newly learned sight words.
• First, ask the students to identify the pictures in the exercise and name the beginning sounds of each picture. Then, have them read the simple sentences slowly.
• It would be best to ask as many students as possible to read to ensure fluency.
• You can then move to the next exercise which develops creativity, links learning to real life, and personalizes learning since each student might come up with a different drawing.
• However, the key objective is to encourage the student to use the newly learned sight word in context using their own words.
• Students can now complete homework at home, which opens their eyes to how they can apply what they learned in school to real-life situations.
• Art is vital for developing creativity and imagination, especially in helping children express themselves through artistic activities like drawing.

















The key objectives of this lesson are for children to:
• Write the uppercase and lowercase forms of the letter ‘D’.
• Recognize the uppercase and lowercase forms of the letter ‘D’ alone and within words.
• Understand that uppercase and lowercase ‘D’ represent the same letter.
• Learn vocabulary associated with the letter ‘D’, specifically ‘door’, ‘duck’, and ‘deer’.
• Identify words and objects that start with, or contain, the letter ‘D’ in real-life scenarios.
• Listen to and identify familiar and unfamiliar words starting with the sound ‘d’
• Review how to visually and auditorily identify words starting with the letter and sound ‘B’.
• Practice reading, writing, and auditorily identifying the letter and sound ‘D’
• Revise sight-reading and assigning meaning to vocabulary starting with the letter ‘D’.
• Revise writing, and identifying objects that start with, the letters ‘A’, ‘B’, and ‘D’.
• Practice pencil control and grip.
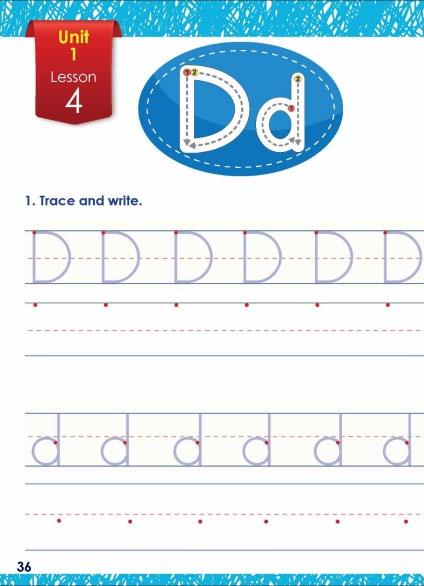
• The purpose of this activity is for children to practice writing both the uppercase and lowercase forms of the letter ‘D’
• Starting with uppercase ‘D’, describe the components of the letter and its shape. Invite students to contribute to the description, identifying any key features they think are interesting or important, or any shapes/objects they think are familiar to the letter.
• After that, demonstrate how to form the letter by tracing its shape on an A4 flashcard, then in the air in front of the class. Invite students to join you in practicing the tracing motion in the air and allow them to become familiar with forming this shape. Specify that letters are always formed from top to bottom and use the numbered diagram from this activity to guide students step by step.
• Next, you can provide students with the opportunity to practice by giving them PlayDoh. Task each student with shaping the PlayDoh to resemble the letter ‘D’. They can do so as many times as needed until they have a solid understanding of the letter’s shape. This particular exercise will help learners by encouraging a multisensory understanding of the shape of letters and granting them the opportunity to use their gross motor kinesthetic skills.
• Next, complete this activity interactively as a class by using Presentation Plus. The teacher should first demonstrate how to write ‘D’ on the board. Afterward, students can take turns writing the letter on the board themselves and receiving individualized feedback from the teacher.
• Once students understand the basic shape of the letter ‘D’ and how to form it, ask them to turn to page 36 of Pupil’s Book 1 and complete the activity. Instruct them to first trace the shape of the letter using their finger, then with their pencil, and once they feel comfortable, ask them to practice writing the letter in the space provided.
• This is a good time to walk around the classroom and check students’ work. Take notice of how they trace and write the letter and correct any mistakes.
• Once complete, repeat the above steps for the lowercase form of the letter ‘D’. Make sure to emphasize the difference between an uppercase and lowercase ‘D’. When describing its shape, ask students to contribute to the discussion by noting any differences they see between the two forms of the letter. Additionally, pay close attention to how students form the lowercase ‘D’, as it is common for early learners to confuse its shape with a lowercase ‘B’. If this happens, correct the student loudly and demonstrate the correct practice to the class as a whole.

• This exercise can be completed after Activity 1 from Pupil’s Book 1 for further handwriting practice.
• Before writing directly in the book, invite students to refamiliarize themselves with the shape of the letter ‘D’ and ‘d’ by asking them to first describe the letter and then demonstrate how to write it by tracing it in the air. Be sure to correct any mistakes you notice. They can also use Play-Doh to practice and reaccustom themselves with the physical shape.
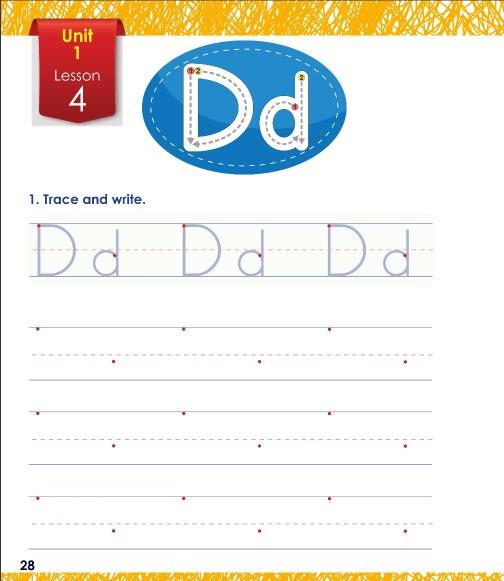
• Afterward, invite them to turn to page 28 of Activity Book 1. First, instruct them to trace the letters with their fingers, then once they feel confident, allow them to use a pencil to trace and write the letters in the space provided.
Note: It may be helpful to remind students of the proper way to grip a pencil prior to this activity.

• Ensure you instruct students to follow the writing pattern demonstrated on the first line. In specific, rather than writing all the uppercase letters first and lowercase letters second, they should alternate writing one uppercase and one lowercase letter as indicated in the activity book. This will allow them to practice writing letters as they would appear in a word or sentence, with the uppercase letter first and the lowercase second.

• This activity will help students match letters and understand that both uppercase and lowercase variants represent the same letter and sound. Additionally, it will help them revise different forms of the letters ‘A’, ‘B’, and ‘C’ that they learned in previous lessons. This is especially important because it is common for learners to confuse the lowercase forms of ‘B’ and ‘D’ with each other.
• Before writing in the Activity Book, play a game with the students to help them practice identifying matching letters.
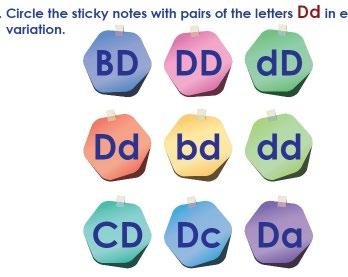
• Using a marker and some post-it notes or small pieces of card, write at least nine different combinations of an uppercase and lowercase ‘A’, ‘B’, ‘C’ and ‘D’ on each one (as depicted in Activity 2), such that each card/post-it note has two letters on it. For example, da, dd, db, AD, DD, cD, dD, etc.
• Mix the post-it notes or cards to create a pile in the center of the classroom. Next, instruct each student to find a card or post-it note that depicts a pair of matching letters (this is not case sensitive, meaning dD is a correct answer alongside dd and DD). Once the student has found a matching pair of letters, instruct them to keep the card with them and stand at the front of the classroom. You can encourage students by giving stars and stickers to those who find a correct card.
• This game presents a great opportunity for students to revise the uppercase and lowercase forms of ‘A’, ‘B’, and ‘C’ that they have previously learned as well, as this is the final lesson in Unit 1. You can expand the activity to include more combinations of letters and can ask students to find instances of matching letters with ‘A’, ‘B’, and ‘C’ as well.
• When the activity is over, invite students to individually complete Activity 2 in their book. Instruct students to color the circles that contain matching letters. This will inject some more fun into the activity and will allow learners to feel a sense of ownership over their work as they choose the colors they want to use.
• You can take this time to walk around the class and observe the students’ work, taking care to correct any mistakes if present. Ensure you pay attention to whether students are accidentally matching ‘B’ and ‘D’ as this is a common area for students to make mistakes.

• This activity encourages students to find examples of both forms of the letter ‘D’ in real life.
• Let students practice identifying the letter ‘D’ in the real world by taking them on a field trip around the classroom.
• Prior to this lesson, print or create posters to stick around the classroom that include examples of the letter ‘D’. You can create different stations for children to visit, each one representing a different instance where students may see the letter ‘D’ in real life. The first can include examples from the media, so newspapers and magazine headlines that include the letter ‘D’. Next, you can create a station with pictures of common signs students may see, for example, ‘Doctor’s Office’, ‘Drive-Thru’, ‘Dog Park’, etc. Another station may include labeled physical objects that start with the letter ‘D’, for example, a ‘dinosaur’ toy, a stuffed ‘dog’, some ‘dates’ or ‘donuts’, etc. This station can be broken down further into different categories, for example, food, animals, toys, etc.
• During class, give learners a chance to explore the classroom and find as many instances of the letter ‘D’ as they can. This can be in the form of a scavenger hunt where the examples are hidden, or a field trip and exploration where the objects are easily noticeable.
• Encourage learners to point out examples they can see and discuss them with their classmates. Urge them to ask questions and come up with their own examples of the letter ‘D’. For example, places they go with their parents or things they see in daily life.
• Once this exercise is complete and students have found as many examples as they can of both forms of the letter ‘D’, complete this activity interactively in class using Presentation Plus. Ask students to identify all the instances of the letter ‘D’ that they can see on the board. You can also invite individual students to circle the letters. Once the class has reached an agreement, the presentation will display the correct answers by circling each letter one-by-one.

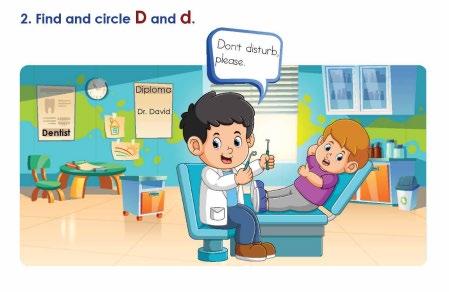
• At the end of this activity, ask students to bring two examples of the letter ‘D’, one uppercase and one lowercase, into class the next day. This can be within a book or magazine, or on a label from their favorite snack.
• Once students have brought their examples, invite them to present them in front of the class. Ask students to state where they found this example, why they chose it, where the letter ‘D’ is, and whether it is uppercase or lowercase.
• This exercise will grant learners the opportunity to actively search for examples of the letter ‘D’ when they are not in school and will also enhance their presentation skills and confidence.
• Once in class, if students have brought examples that can be kept in class, work together as a group to create a large collage with all the examples from each student. This can be then hung in the classroom for students to refer back to and feel a sense of pride. Invite students to decorate this collage however they would like.
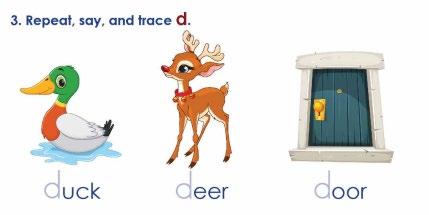
• The purpose of this activity is to introduce learners to new vocabulary words that start with the letter ‘D’ and give them the opportunity to practice tracing, writing, and identifying the letter ‘D’ within these words. Students should be confident in each vocabulary term by the end of the lesson.
• First, using the flashcards found in this guide, introduce the word to students, identify it, explain what it means, demonstrate how to pronounce it, and indicate where the letter ‘D’ is located in each one.
• After that, invite students to repeat the word with you and call on individual learners or the class as a whole to identify where they can see the letter ‘D’. Repeat the word and identify the letter as many times as needed until learners are confident in the vocabulary term and the position of ‘D’.
• It is also helpful to use the word in multiple contexts and different sentences. Engage with students by asking them where they would normally see a ‘duck’, ‘deer’, or ‘door’, and what they like about those things. This helps ground new vocabulary in real-life scenarios, assisting with learners’ understanding and memory.
• Next, play a game with students to practice these vocabulary terms. Stick images of each vocabulary term on the board; you can use the flashcards from this guide. Next, ask all the students to stand up. Then, randomly throw a ball or small beanbag to a student and ask them to catch it. When they catch the ball, it is their turn to choose a vocabulary term, say it out loud, and write an uppercase and lowercase ‘D’ underneath the corresponding image stuck to the board. Repeat this until each student has had a chance to practice identifying a vocabulary word and write the letter ‘D’ at least once. This is a great opportunity to provide individualized feedback regarding their writing and letter formation.
• Afterward, complete this activity interactively as a class using Presentation Plus. Identify each image on the screen and where the letter ‘D’ is located. Next, demonstrate how to trace and write the letter on the board, and invite individual students to practice writing with you.
• Once the class activities are complete, encourage students to complete this activity in their workbook. Instruct them to do so step by step, first saying the word out loud, then tracing the shape of the letters, first with their finger, then with a pencil.

This activity is flashcardsupported

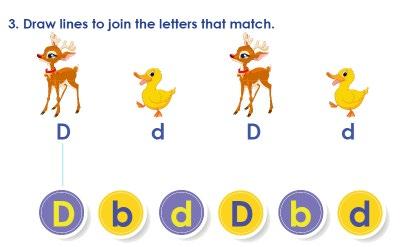
• This activity helps learners practice matching and recognizing uppercase and lowercase forms of the letter ‘D’. This is especially important as it is common for learners to confuse a lowercase ‘D’ with a lowercase ‘B’, and think they represent the same letter.
• Before completing this activity in the workbook, play a game with students to help them practice matching lowercase ‘D’s and uppercase ‘D’s.
• First, using the flashcards from this guide, ask learners to name the animals depicted in this activity (‘duck’ and ‘deer’) to revise the vocabulary terms learned in the previous activity.
• Next, using a marker and some post-it notes, write either an uppercase ‘D’, a lowercase ‘D’, or a lowercase ‘B’ on each post-it, such that each note has one letter. Create a minimum of 10 post-it notes and stick them in a random order on the wall or whiteboard. Then, ask learners to come to the wall and group the matching letters together by sticking them next to each other. In specific, all the lowercase ‘D’s should be grouped together, then all the uppercase ‘D’s, and then all the lowercase ‘B’s.
• This activity can also be completed by splitting learners into smaller groups of 4-5 students and giving each group their own set of post-it notes.
• Take this chance to observe the students’ work and take notice of instances where they may confuse ‘D’ and ‘B’. If this happens, correct them loudly such that the whole class hears and takes notice of the feedback.
• Once these in-class activities are complete, encourage students to complete Activity 3 in their Activity Book. Instruct them to draw lines to match the relevant letters and walk around the classroom to correct any mistakes you notice.

This activity is flashcardsupported
• This activity encourages sight recognition of newly learned, and familiar, vocabulary terms and the association of meaning to those words.
• Before instructing students to complete this activity in their workbooks, you can split them into groups of 4-5 to play a game.
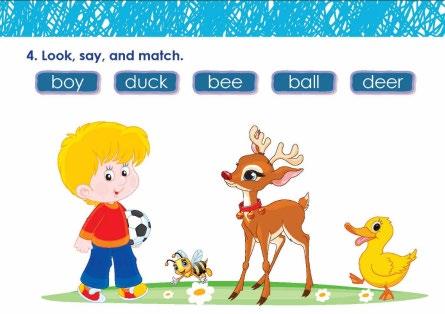
• Provide each group with two sets of flashcards, one set with the images ‘boy’, ‘bear’, ‘duck’, ‘bee’, and ‘deer’, and the second set with the written form of these vocabulary terms. Task each group with matching the images to the words. This is a great opportunity for learners to practice newly learned vocabulary terms as well as those learned in previous lessons.
• When each group has matched the relevant flashcards and had enough time to practice, play a game of Pictionary with the class as a whole. Using a whiteboard marker, draw a picture of one of the vocabulary words from this activity, and instruct learners to guess the word you are drawing as quickly as possible. When learners are guessing, they can shout their answer, or hold up a flashcard from their group work with the matching word. This will encourage them to practice ‘reading’ the word while guessing and will increase collaboration as students make their guesses as a group.
• Do this for all the terms from this activity, and if you have time, take this opportunity to do so with vocabulary from previous lessons. This is a great opportunity to revise Lessons 1, 2, and 3, in a fun and engaging manner.
• Next, use Presentation Plus to complete this activity interactively as a class. Then once complete, instruct them to do Activity 4 in their Pupil’s Books. Ask them to first say each word out loud, and then match the word to the image by drawing a line.

This activity is flashcardsupported

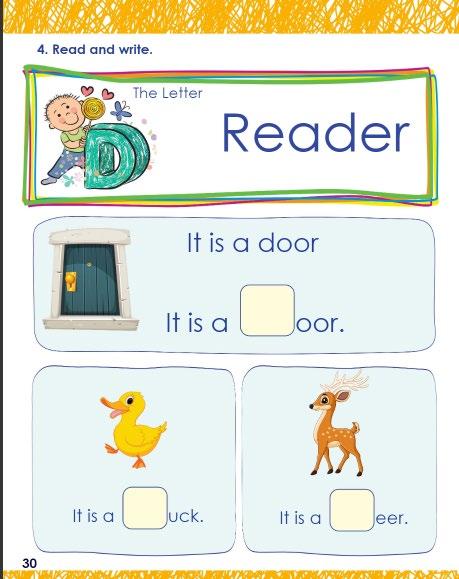
• Page 30 of Activity Book 1 features a reader focused on the letter 'D' and its identification in the new vocabulary words learned earlier. This page encourages students to verbally identify words that start with the letter ‘D’ and practice writing both forms of the letter. The goal is for students to memorize the sentence and the words by the end of the class.
• Using the Presentation PLUS, repeat the sentence “It is a door.”. When doing so ask students to repeat after you and make sure to emphasize the letter ‘D’ and the phrase “It is a…”
• Next, you can ask students to finish the sentence for you. For example, point to the relevant picture and ask students to complete the sentence “It is a …”.
• Afterward, the class can be split into pairs to complete the activity more independently. One student can point to the picture and the other can read the sentence and name the object.
• Engage the class by asking them to think of other words they know that start with the letter ‘D’, using the same sentence structure, i.e, “It is a …”. This allows them to expand what they have learned in the class to what they already know.
• You can also read aloud from stories and ask learners to clap when they hear a word starting with ‘D’. When they clap, stop reading and ask them to identify which word they heard using the structure “It is a…”. Additionally, you can play “I Spy” with students by asking them to point to different objects around the classroom that start with the letter ‘D’.
• Once complete, ask students to read each sentence from Activity 4, and then fill in the missing letters when they are ready.

• This activity reinforces learner’s ability to write the uppercase forms of ‘B’ and ‘D’ in relation to vocabulary terms they have already learned. It also reinforces their ability to auditorily identify these letters and assign meaning to the words they are found in.
• First, review the ‘b’ and ‘d’ sounds and provide examples different from those in this activity. Learners may find it hard to hear a difference between ‘b’ and ‘d’ so emphasize that the ‘b’ sound comes from the front of the mouth, specifically the lips, while the ‘d’ sound starts further back with the tongue touching the roof of the mouth. Repeat the sounds as many times as needed until students feel confident identifying each one. Be sure to exaggerate your mouth movement when pronouncing each letter so students can see the difference between the two sounds.
• Next, complete this activity interactively as a class using Presentation Plus. Go through each word one by one, reading and repeating the word as needed. You can also ask students to repeat the word after you, so they can familiarize themselves with pronouncing the different ‘b’ and ‘d’ sounds in context
• Next, ask students to tell you what letter they think each word starts with. To do so, before the lesson, give each student two flashcards, one depicting the letter ‘B’, and one the letter ‘D’. When students want to indicate which letter they think the word starts with, they can raise their corresponding flashcard.
• You can also invite individual learners to come up to the board and write the answer for each image, providing feedback as needed. Presentation Plus will reveal the correct answer afterward.
• After using Presentation Plus, play a game with the class. Give one student a flashcard depicting the letter ‘D’, and another a flashcard depicting the letter ‘B’. Then, distribute flashcards with images of the different objects from this activity to the remaining students. Task the class to group themselves by letter as they just did with Presentation Plus so that all learners holding flashcards with images starting with the letter ‘D’ are together, and the same for ‘B’.
• After this, the class can also play “I Spy” using objects around the classroom that start with ‘B’ and ‘D’ for further practice.
• Finally, instruct students to complete this activity in their workbook. Tell them to first say the word out loud before tracing ‘B’ or ‘D’ in the space provided.
• This is a great opportunity to walk around the classroom and check how students are forming their letters.

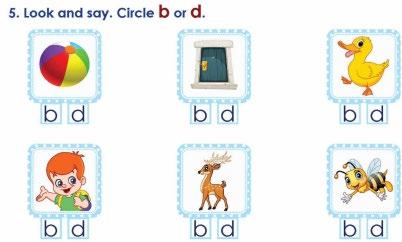

• This activity will grant students the opportunity to practice writing an uppercase ‘D’ and revise the vocabulary terms from this lesson. In addition, they will practice sight reading and assigning meaning to these words.
• First, you can split the class into groups of three students. Give each group two sets of flashcards found in this guide. One set contains the images of the vocabulary terms (‘door’, ‘duck’, ‘deer’), and the other contains the written form of these words. Task learners with matching the images to the correct words. Once all the flashcards are matched, ask them to practice writing the letter ‘D’ on a separate piece of paper.
• You can then play a game with the class as a whole. Stick the images of the vocabulary terms on the board and then, keeping students in their groups, provide each group with a set of flashcards containing the written form of each word. One by one, ask each group to come to the board and stick one word under its matching image, then write the letter ‘D’ next to it. One student can stick the flashcard on the board while another writes the letter. Do so until each group has stuck all their flashcards on the bo ard, and each student has practiced writing the letter at least once.
• Once complete, invite learners to turn to page 31 of their Activity Book. Instruct them to first identify which word matches the image above it, and then write the letter ‘D’ in the box provided. Take this opportunity to walk around the class and observe how students form their letters.

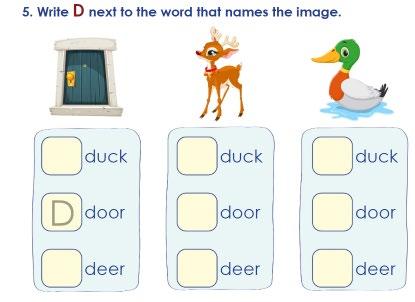
• This activity reinforces learners’ ability to have more control on the pencil or crayon as well as the fine motor skills.
• The teacher needs to walk around the class to encourage the students to something that begins with “d”.
• When they finish, the teacher may wish to invite some students to present and talk about their drawings.
• This activity builds on children’s creativity and love of coloring and helps learners focus on pencil/crayon control. It also adds fun to the lesson in a controlled manner.
• First, re-establish and demonstrate the correct way to grip a pencil.
• Next, give students explicit instructions to color inside the lines of the picture.
• Allow students to color individually but move around the classroom and correct students on their grip and whether they are staying within the lines. Make sure to speak loudly in an encouraging manner so all students can hear the correct practice.
• You can give reward stickers to students who color within the lines and to those who show creativity in their coloring tasks.

• The key objective of this activity is to develop listening skills and the ability to recognize the initial sounds of words. It is a good opportunity to learn new vocabulary items that begin with the same letter/sound of the lesson.
• The teacher may wish to use Presentation Plus to teach this lesson by following the following steps:
o Play the sound of the word several times. At each time, the teacher invites the students to repeat the word and focus on the word pronunciation, especially the beginning sound.
o Repeat the same process as a whole class activity first, then invite as many individual students as possible to ensure mastery over the words and letter sounds
o The teacher can then invite the students to complete the exercise on their books.

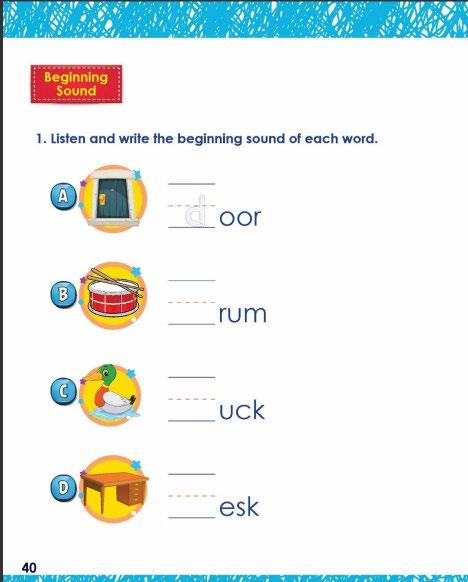
• The key objective of this activity is to develop the listening skill as well as the ability to distinguish the letter sound in this lesson among other sounds.
• It also aims at helping the students to recognize and recall the words and their sounds in a visual way.
• The teachers may wish to use Presentation PLUS to deliver this part of the lesson:
o Display the slide that show the images. Then play the sound of each word/image several times.
o The teacher invites individual students to answer, and then to praise or correct according.
o When all the words and images are completed, the teacher may invite the students to complete the exercise on their books.
o More fun could be added to the exercise by inviting the students to work in pairs. One students points to an image, the other should say the name of the image and the beginning sound of the word.
• The teacher invites the students to use their imaginations and knowledge to draw something that begins with “d’.
• You can invite selected students to talk about their drawing in front of the class, which will develop their presentational and leadership skills, as well as their speaking skills.

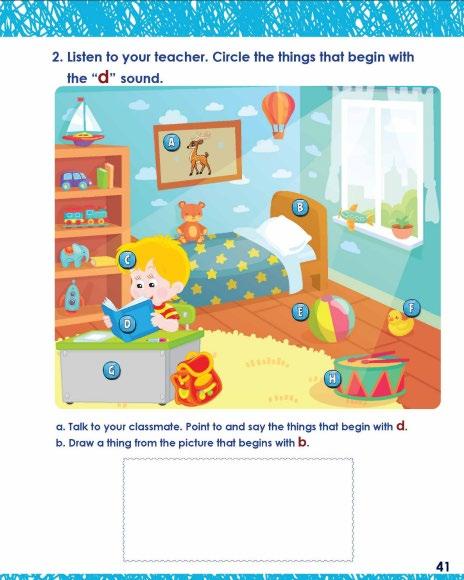
• The main objective of this activity is to enhance reading skills and help students become fluent readers in the future. It is essential to teach sight words as visual representations rather than prompting students to decode the words while reading.
• To achieve this, the teacher might consider presenting the sight word alongside a picture and prompting the students to repeat it several times. Afterward, the teacher can invite the students to identify the word among other words in a word-salad exercise using Presentation PLUS, and then again in their books.
• Next, the teacher asks the students to sit in groups, gives them flashcards related to this exercise, and asks them to reorder the letters to make words. Then, they write the missing letters to complete the words.
• Finally, the teacher uses Presentation PLUS to motivate the students to read the provided sentences in Exercise 3, which combines picture and word reading.

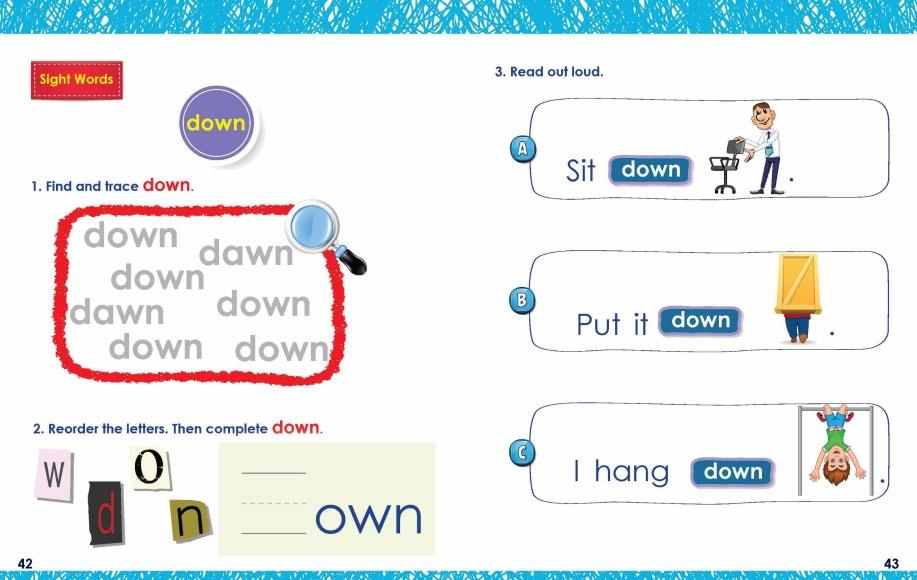

Activity 7: The primary objective of this activity is to enhance reading skills and prepare students to become fluent readers in the future.
• You may wish to invite some students to read the first sentence out loud. Then invite others to point to the image that represents the sentence. After that you may wish to invite the entire class to mimic the action of the sentence.
• Next, you can ask the students to match the sentences to the pictures correctly.
• More fun could be added to this exercise by asking the students to sit in pairs. One student to mimic an action. The other is to guess and say, “A bat can …”.
• Finally, you can encourage the students to use the same structure to make sentences of their own.
• You can then move to the next exercise which develops creativity, links learning to real life, and personalizes learning since each student might come up with a different drawing.
• However, the key objective is to encourage the student to use the newly learned sight word in context using their own words.
• Students can now complete homework at home, which opens their eyes to how they can apply what they learned in school to real-life situations.
• Art is vital for developing creativity and imagination, especially in helping children express themselves through artistic activities like drawing.

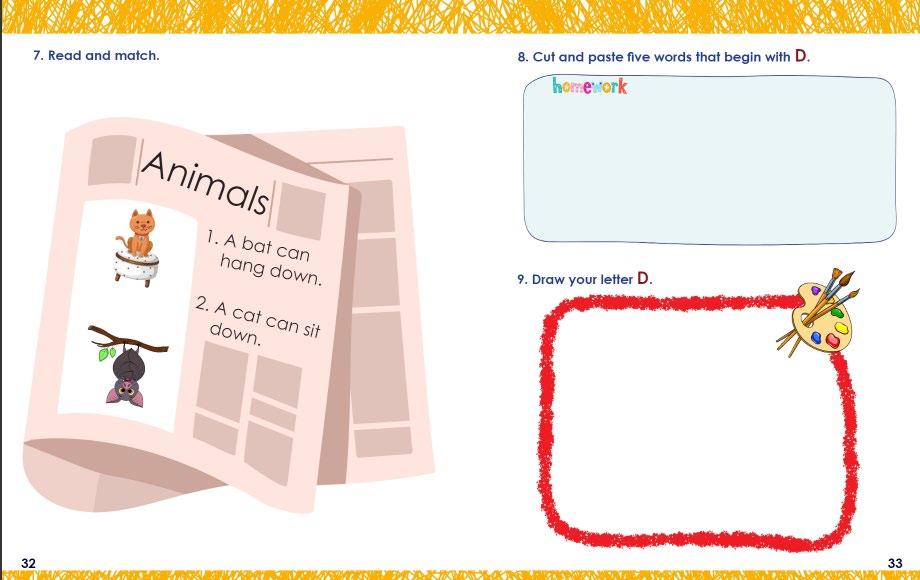







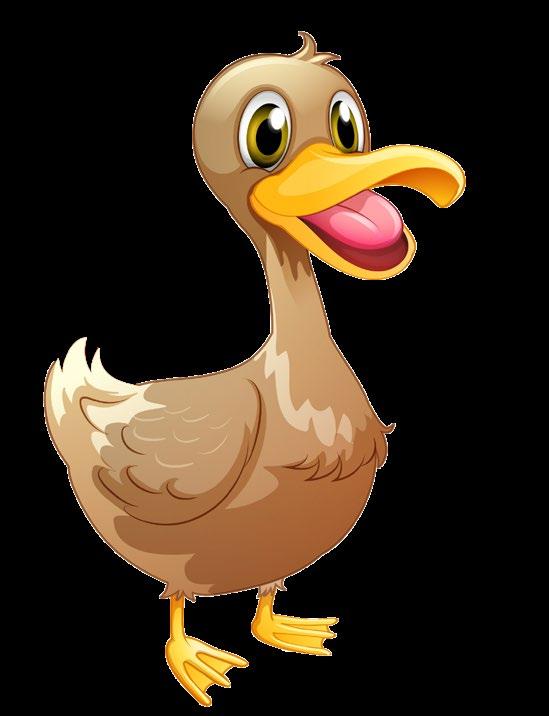



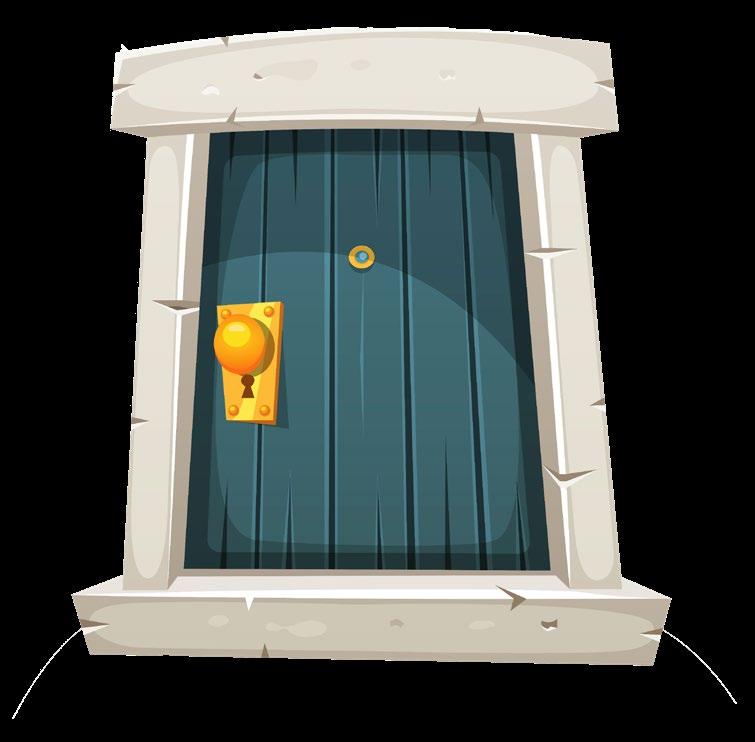









The key objectives of this lesson are for children to:
• Write the uppercase and lowercase forms of the letter ‘E’.
• Recognize the uppercase and lowercase forms of the letter ‘E’ alone and within words.
• Understand that uppercase and lowercase ‘E’ represent the same letter.
• Learn vocabulary associated with the letter ‘E’, specifically ‘ear’, ‘elephant’, and ‘egg’.
• Identify words and objects that start with, or contain, the letter ‘E’ in real-life scenarios.
• Listen to and identify familiar and unfamiliar words starting with the sound ‘e’
• Review how to visually and auditorily identify words starting with the letter and sound ‘A’ and ‘C’.
• Practice reading, writing, and auditorily identifying the letter and sound ‘E’
• Revise sight-reading and assigning meaning to vocabulary starting with the letter ‘E’.
• Revise writing and identifying objects that start with the letters ‘A’ and ‘C’.
• Practice pencil control and grip.
• The purpose of this activity is for children to practice writing both the uppercase and lowercase forms of the letter ‘E’.
• Starting with uppercase ‘E’, describe the components of the letter and its shape. Invite students to contribute to the description, identifying any key features they think are interesting or important, or any shapes/objects they think are familiar to the letter.
• After that, demonstrate how to form the letter by tracing its shape on an A4 flashcard, then in the air in front of the class. Invite students to join you in practicing the tracing motion in the air and allow them to become familiar with forming this shape. Specify that letters are always formed from top to bottom and use the numbered diagram from this activity to guide students step by step.
• Next, you can provide students with the opportunity to practice by giving them Popsicle Sticks or Craft Sticks. Task each student with creating the shape of the letter ‘E’ by using the popsicle sticks and sticking them together. They can do so multiple times until they have a solid understanding of the letter’s shape. They can also color and draw on their popsicle sticks to personalize their letters. This will encourage creativity and individuality and will let learners have fun in a multisensory way while developing an understanding of the shape of ‘E’.
• Next, complete this activity interactively as a class by using Presentation Plus. The teacher should first demonstrate how to write ‘E’ on the board. Afterward, students can take turns writing the letter on the board themselves and receiving individualized feedback from the teacher.
• Once students understand the basic shape of the letter ‘E’ and how to form it, ask them to turn to page 46 of Pupil’s Book 1 and complete the activity. Instruct them to first trace the shape of the letter using their finger, then trace with their pencil, and then once they feel comfortable, ask them to practice writing the letter in the space provided.
• This is a good time to walk around the classroom and check students’ work. Take notice of how they trace and write the letter and correct any mistakes.
• Once you have completed the previous steps, repeat them for the lowercase letter ‘e’. Because of the curved shape of the lowercase ‘e’, students can use a thick piece of wool or string to create the shape instead of using popsicle sticks.
Note: It may be helpful to remind students of the proper way to grip a pencil before this activity.

• This exercise can be completed after Activity 1 from Pupil’s Book 1 for further handwriting practice.
• Before writing directly in the book, invite students to refamiliarize themselves with the shape of the letter ‘E’ and ‘e’ by asking them to first describe the letter and then practice writing it by tracing its shape in the air. They can also use popsicle sticks and string as described above. Be sure to correct any mistakes you notice.
• Afterward, invite them to turn to page 34 of Activity Book 1. First, instruct them to trace the letters with their fingers, then once they feel confident, allow them to use a pencil to trace and write the letters in the space provided.
• Make sure to instruct students to follow the writing pattern shown on the first line. Specifically, instead of writing all the uppercase letters first and the lowercase letters second, they should alternate between writing one uppercase letter and one lowercase letter, as indicated in the activity book. This approach will help them practice writing letters in the order they appear in words or sentences, with the uppercase letter coming first and the lowercase letter second.

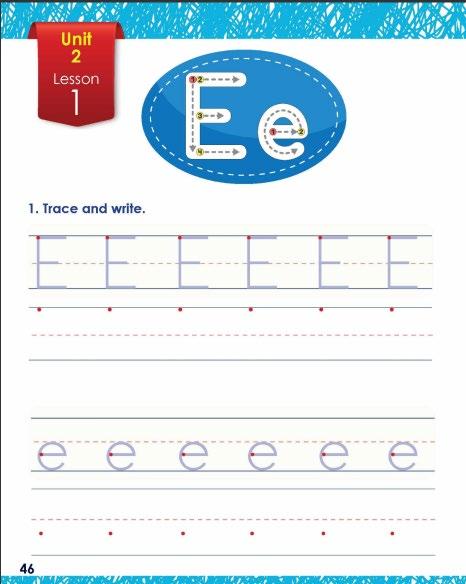

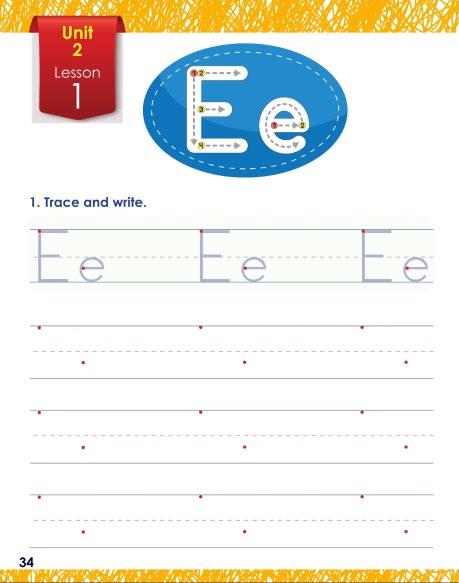


Exercise 2
• This activity will help students identify and recognize the letters E e in a fun way.
• The key objective is to recognize the eggs with the letters E e in every variation.
• Ask the class to sit in groups of four. Give each group a set of flashcards that show the eggs in the exercise.
• Explain to the students that they need to identify the eggs with the letters E e in every variation.
• Move around the class and discuss with the groups about their findings.
• Ask the groups how many eggs include E e in every variation (4 eggs).
• As some students to read the variations, i.e. eE, EE, Ee, and ee.
• You may also wish to ask some other students to read the other letters on the other eggs to enforce letter recognition of the previously learned letters.
Exercise 3
• The key objective of this activity is to help the students recognize the letters E e among other letters.
• Ask the students to sit in pairs and then to read the letters in Exercise 3 one by one. Once they come across either an uppercase E or a lowercase e, they shout bingo and color the letter.
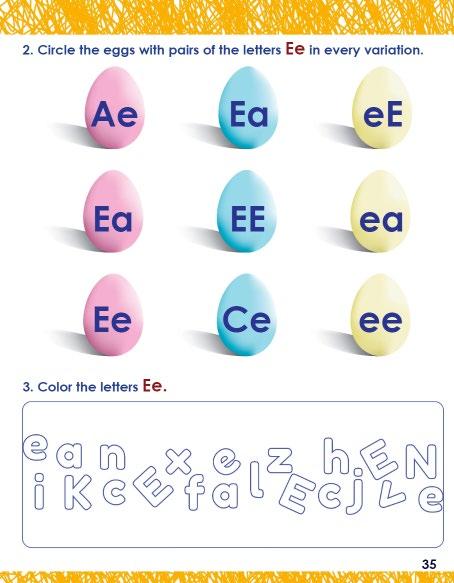

• This activity encourages students to find examples of both forms of the letter ‘E’ in real life.
• Following the theme of this activity, give students practice identifying the letter ‘E’ in the real world by taking them on a shopping trip around the classroom.
• Before this lesson, print pictures and labels of objects that start with or contain the letter ‘E’. In class, create different ‘shops’ that students can visit which include these examples.
• For example, create a fruit and vegetable shop (as in the activity) that contains apples, bell peppers, and strawberries. You can also create a clothing store and furniture store that displays jeans and shoes, or tables, beds, and closets, respectively.
• Print images of the items in each store and label each item so students can practice actively finding the letter ‘E’ in class.
• During class, give learners a chance to explore the classroom and go ‘shopping’. Task them with finding as many instances of the letter ‘E’ as they can. You can also give each student a ‘shopping list’ with the names of all the items in the classroom on it. When a student finds an item in the class that contains the letter ‘E’, they can highlight or circle it on their list.
• Encourage learners to point out examples they can see and discuss them with their classmates. Urge them to ask questions and come up with their own examples of the letter ‘E’ that may be missing. For example, furniture, clothes, or food that isn’t in the shops in class but should be.


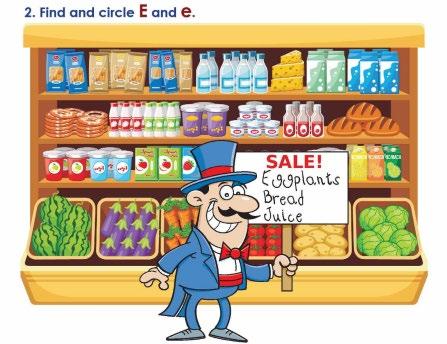
• Once this exercise is complete and students have found as many examples as they can of both forms of the letter ‘E’, complete this activity interactively in class using Presentation Plus. Ask students to identify all the instances of the letter ‘E’ that they can see on the board, as well as their positions at the beginning, middle, or end of a word. You can also invite individual students to circle the letters. Once the class has reached an agreement, the presentation will display the correct answers by circling each letter one by one.
• For further practice finding examples of the letter ‘E’ in real life – and following the theme of food from this activity – task students with finding a recipe, with the help of their parents, for a dish that starts with or contains the letter ‘E’.

• Ask them to bring this recipe to class the next day, specifically the name of the dish and its ingredients. They can even bring the food item to share with their peers.
• In class, each student can present the recipe to the class by describing the dish and its ingredients and identifying any instances of the letter ‘E’ that they have found.
• This will emphasize students’ research-based learning and presentation skills, building a focus on letter recognition outside of the classroom.
• After all the students have presented their recipes, you can collaborate with the class to create a poster that features all the recipes together. Note: For the presentation, students can present in their native language as long as they can identify examples of ‘E’ and ‘e’.
• The purpose of this activity is to introduce learners to new vocabulary words that start with the letter ‘E’ and give them the opportunity to practice tracing, writing, and identifying the letter ‘E’ within these words. Students should be confident in each vocabulary term by the end of the lesson.
• First, using the flashcards provided in this guide, introduce the word to students. Identify the word, explain what it means, demonstrate how to pronounce it, and then indicate where the letter ‘E’ is in each one.
• After that, invite students to repeat the word with you. You can also call on individual learners or the class as a whole to pinpoint where they can see the letter ‘E’. Repeat the word and identify the letter as many times as needed until learners are confident in the vocabulary term and the position of ‘E’.
• It is also helpful to use the word in multiple contexts and different sentences. Engage with students by asking them where they would normally see an ‘ear’, ‘elephant’, or ‘egg’, and what they like about those things. This helps ground new vocabulary in real-life scenarios and existing knowledge, assisting with learners’ understanding and memory.
• Next, complete this activity interactively as a class using Presentation Plus. First, ask for the students’ help with identifying each image on the screen. Repeat each word multiple times with the students, referencing both the image and the written form of the word so that they become comfortable sightreading. Next, ask them to point out where the letter ‘E’ is located. Finally, demonstrate how to write the letters on the board and invite individual students to practice writing with you. This is a great opportunity to provide individualized feedback regarding their writing and letter formation. Students can come up to the board in pairs, with one writing an uppercase ‘E’ and one writing a lowercase ‘E’. On their next turn, they can switch. Repeat this activity until each student has had a chance to practice writing both forms of ‘E’ at least once.
• After using Presentation Plus, play a game with the students to practice the newly learned vocabulary. As a class, task learners with creating a story using the three vocabulary words they just learned. You can also add an extra challenge for students to add as many words starting with ‘E’ in the story as they can. This is a great way for learners to practice using new vocabulary in context, and to generalize their learning to existing knowledge. You can also complete this activity by splitting the class into small groups. Each group can create their own story and present it to the rest of the class. The best story can get a prize.
• Once the class activities are complete, encourage students to complete this activity in their workbook. Instruct them to do so step by step, first saying the word out loud, then tracing the shape of the letters, first with their finger, then with a pencil.
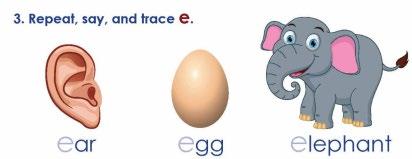


• This activity reinforces students’ ability to recognize words beginning with the sound ‘e’ and allows them to review how to recognize words beginning with the sound ‘a’. This is especially important as students can easily confuse the sounds of these two vowels.
• First, using Presentation Plus, go through the vocabulary terms on the board. Ask for the students’ help identifying each image and then ask them to repeat each word with you at least three times.
• Once the students are familiar with all the vocabulary terms, ask them to identify which sound each word starts with one by one. You can say the word out loud, and students can walk to one side of the classroom to indicate ‘a’ and the other side of the room to indicate ‘e’. This is a great way to redirect any restless energy into the learning activity.
• When the students have made their choice, you can invite one to come up to the board and write the answer.
• After using Presentation Plus, you can separate students into groups of 4-5 for further practice. Give each group two sets of flashcards, one containing the images of each word and one containing the letters ‘A’ and ‘E’. Task each group with sorting the flashcards so that all the words beginning with the letter and sound ‘a’ are in one group and all the words beginning with the letter and sound ‘e’ are in another.
• Once these activities are complete, instruct students to complete Activity 4 in their Pupil’s Book. Ask them to first say the words out loud and then circle the appropriate sound. Take this time to walk around the class and observe the students’ work, correcting any mistakes you may notice.

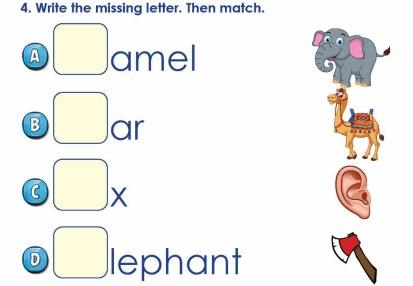
This activity is flashcardsupported

• Page 36 of Activity Book 1 contains a reader focused on a specific letter ‘e’ and identifying it in new vocabulary words learned earlier. This page encourages students to verbally identify words that start with the letter ‘e’ and practice writing the letter. Additionally, it begins students’ development in dealing with words in context by adding a description to familiar vocabulary.
• To start, go through the reader with students and read each sentence. Ask students to repeat after you and make sure to emphasize the letter ‘e’ for each vocabulary term. Ask students questions about each sentence to solidify their understanding of the new context being added, as compared to the readers from Unit 1. For example, “What size is the elephant” or “How many ears does it have?”
• Next, you can ask the students to say each sentence without you. For example, point to the relevant section of the reader and ask “Look! What is this?” or “What does this say?”. You can ask the class as a whole or point to individual learners who are more confident in their reading ability.
• Afterward, the class can be split into pairs to complete the activity more independently. One student can point to the picture and the other can ‘read’ the sentence. Then they can switch. This will allow for more individual time to practice and will help build students’ confidence.
• During this activity, you can encourage the class to continue thinking of context and description by asking them to think of other adjectives they can use to describe the images in this reader. For example, “The elephant has pink ears”. Instruct them to use full sentences when describing the images, using the vocabulary words they have learned.
• Once complete, ask students to do Activity 4 in their books. Ask them to read each sentence and then fill in the missing letters when they are ready.

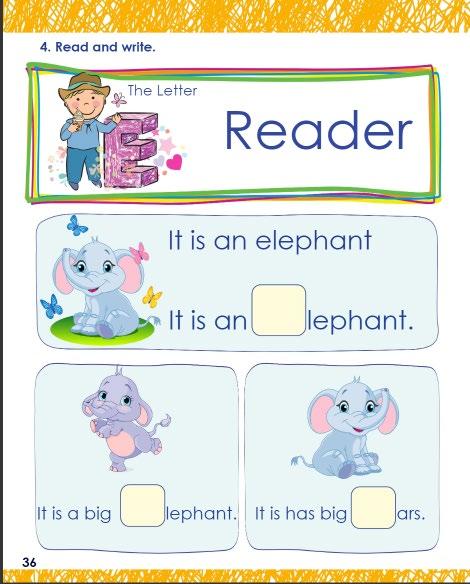
• The main goal of this activity is to review previously learned words, and their pronunciation, identify the initial letters, and recognize the starting sounds.
• Use Presentation PLUS to display the images one at a time. Then, ask the class to collectively say the name of each word out loud.
• Ask individual students to come to the smart board to say the word again, then circle the beginning sound of the word.
• Repeat the same tactic with the rest of the images in the exercise.
• Once all the images are completed. Ask the class to complete the task on their books individually.
• You can add fun to the activity by asking the students to sit in pairs. One student is to point to an image, the other is to say the word and it is beginning sound.
• Do that in turn until they finish all the images.

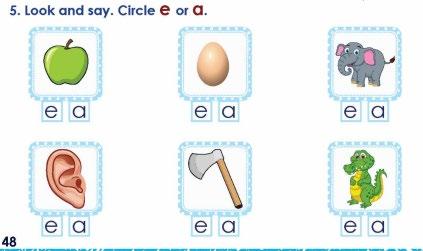


• This activity will provide students with the opportunity to practice writing both uppercase and lowercase 'E' and lowercase 'a.' Additionally, they will review the vocabulary terms introduced in this lesson. Students will also engage in sight reading and work on assigning meanings to these words.
• First, you can split the class into groups of 3-4 students. Give each group two sets of flashcards found in this guide. One set contains the images of the vocabulary terms (‘elephant’, ‘ear’, ‘egg’), and the other contains the written form of these words. Task learners with matching the images to the correct words. Once all the flashcards are matched, ask them to practice writing the letters ‘E’ and ‘A’ by tracing it on their flashcards or writing them on a separate piece of paper.
• Walk around the classroom and observe the groups working. Make sure each student gets the chance to practice tracing and/or writing the letters. Observe their writing and provide feedback as needed.
• Once complete, invite learners to turn to page 37 of their Activity Book. Instruct them to first identify which word matches the image above it, and then trace the letters ‘E’ and ‘A’ in the space provided.
Activity 6
• This activity will grant students the opportunity to revise previously learned words and identify the words that begin with ‘E’.
• You may wish to ask the students to look at the images. Say the name of the images one by one.
• Once they come across an image that begins with ‘e’, they shout bingo and then color it.
• In the end, the teacher may ask some students to name the images that begin with ‘e’ only.

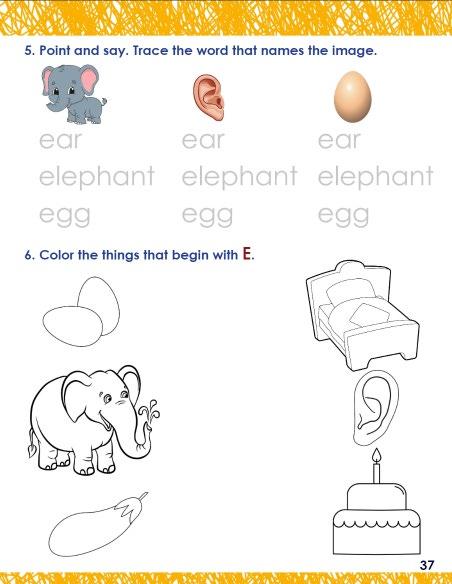
This activity is flashcardsupported
• This activity helps the learners to gain better control of the pencil or crayon, while also developing their fine motor skills.
• The teacher needs to walk around the class to encourage the students to color with the borders of the letter and the image.
• When they finish, the teacher may wish to invite some students to recall the letter name and image.
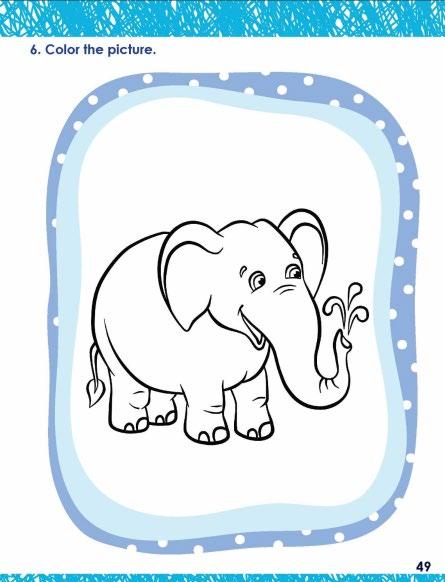
• The key objective of this activity is to develop listening skills and the ability to recognize the initial sounds of words.
• It is a good opportunity to learn new vocabulary items that begin with the same letter/sound of the lesson.
• The teacher may wish to use Presentation Plus to teach this lesson by following the following steps:
o Play the sound of the word several times. At each time, the teacher invites the students to repeat the word and focus on the word pronunciation, especially the beginning sound.
o Repeat the same process as a whole class activity first, then invite as many individual students as possible to ensure mastery over the words and letter sound.
o The teacher can then invite the students to complete the exercise on their books.

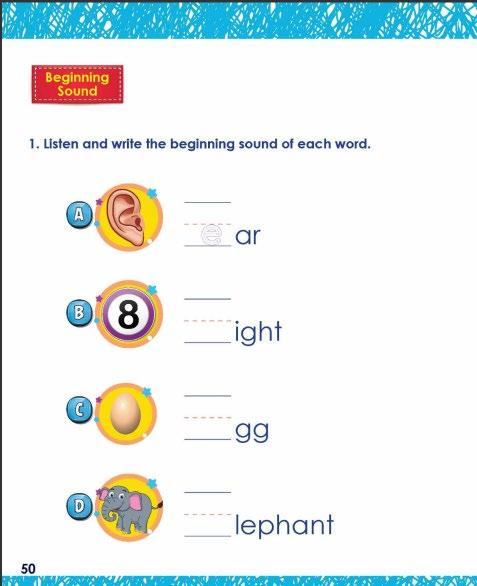
• The primary aim of this activity is to enhance listening skills and the ability to differentiate letter sounds from other noises in this lesson.
• It also aims at helping the students to recognize and recall the words and their sounds in a visual way.
• The teachers may wish to use Presentation PLUS to deliver this part of the lesson:
o Display the slide that show the images. Then play the sound of each word/image several times.
o The teacher invites individual students to answer, then to praise or correct according.
o When all the words and images are completed, the teacher may invite the students to complete the exercise on their books.
o More fun could be added to the exercise by inviting the students to work in pairs. One students points to an image, the other should say the name of the image and the beginning sound of the word.
• The teach invites the students to use their imaginations and knowledge to draw something that begins with “d’.
• You can invite selected students to talk about their drawing in front of the class, which will develop their presentational and leadership skills, as well as the speaking skills.

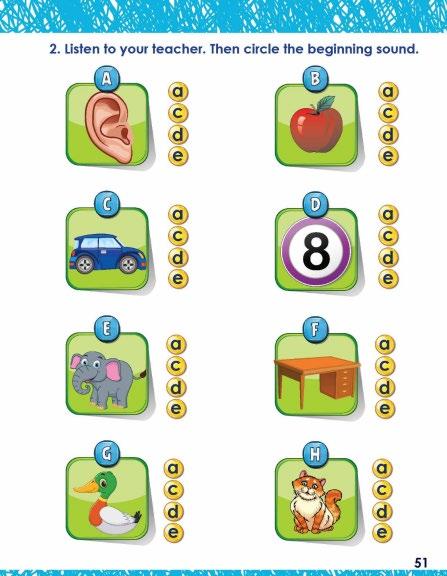
• The main objective of this activity is to enhance reading skills and help students become fluent readers in the future. It is essential to teach sight words as visual representations rather than prompting students to decode the words while reading.
• To achieve this, the teacher might consider presenting the sight word alongside a picture and prompting the students to repeat it several times. Afterward, the teacher can invite the students to identify the word among other words in a word-salad exercise using Presentation PLUS, and then again in their books.
• Next, the teacher asks the students to sit in groups, gives them flashcards related to this exercise, and asks them to reorder the letters to make words. Then, they write the missing letters to complete the words.
• Finally, the teacher uses Presentation PLUS to motivate the students to read the provided sentences in Exercise 3, which combines picture and word reading.

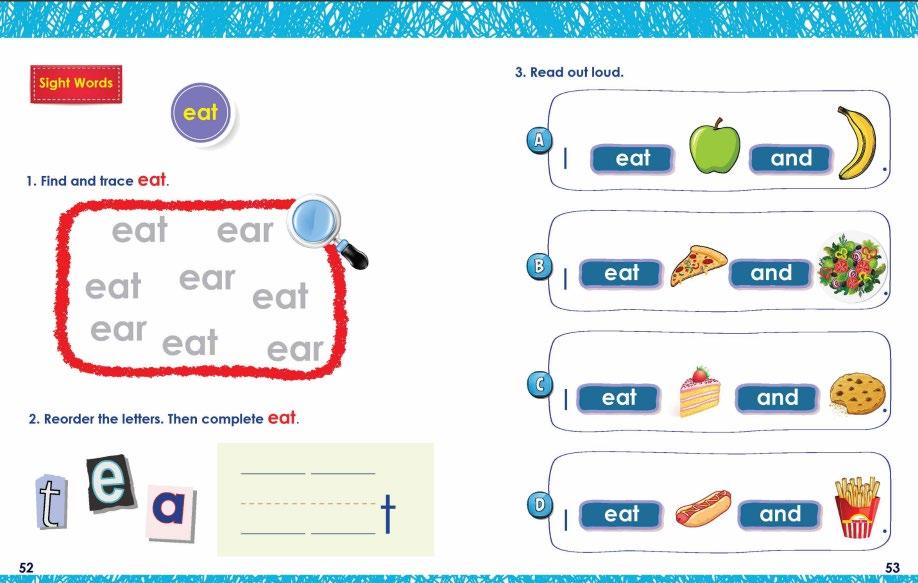

Activity 7: The key objective of this activity is to develop reading skills and to prepare the students to be fluent readers in the future.
• By using Presentation PLUS, you may wish to invite some students to read the first sentence out loud. Then invite others to point to the image that represents the sentence.
• Next, you can ask the students to match the sentences to the pictures correctly.
• More fun could be added to this exercise by asking the students to sit in pairs. Each student tells the other what they want to eat.
• Finally, you can encourage the students to use the same structure to make sentences of their own.
• Activity 8 & 9: Finally, they can complete the homework at home. This is an eye-opener for the students since it encourages them to use what they learned at school in the real life outside of the school.
• Art is vital for developing creativity and imagination, especially in helping children express themselves through art and drawing

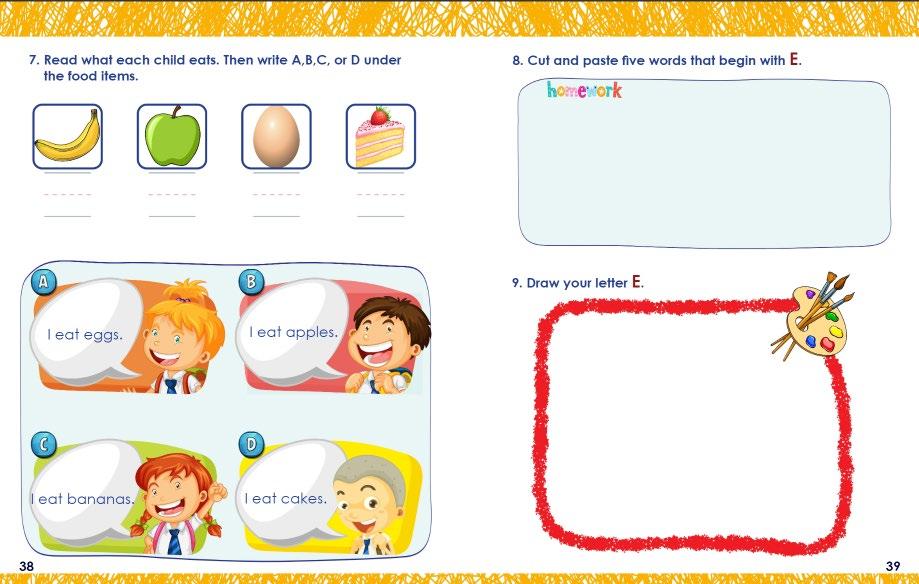

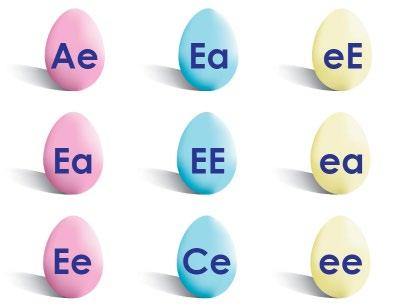












The key objectives of this lesson are for children to:
• Write the uppercase and lowercase forms of the letter ‘F’.
• Recognize the uppercase and lowercase forms of the letter ‘F’ alone and within words.
• Understand that uppercase and lowercase ‘F’ represent the same letter.
• Learn vocabulary associated with the letter ‘F’, specifically ‘fish’, ‘fire’, and ‘fox’.
• Identify words and objects that start with, or contain, the letter ‘F’ in real-life scenarios.
• Listen to and identify familiar and unfamiliar words starting with the sound ‘f’.
• Review how to visually and auditorily identify words starting with the letter and sound ‘C’, ‘D’, and ‘E’.
• Practice reading, writing, and auditorily identifying the letter and sound ‘F’.
• Revise sight-reading and assigning meaning to vocabulary starting with the letter ‘F’.
• Revise writing and identifying objects that start with the letters ‘D’, ‘E’, and ‘C’.
• Practice pencil control and grip.
• The purpose of this activity is for children to practice writing both the uppercase and lowercase forms of the letter ‘F’.
• Starting with uppercase ‘F’, describe the components of the letter and its shape. Invite students to contribute to the description, identifying any key features they think are interesting or important, or any shapes/objects they think are familiar to the letter.
• After that, demonstrate how to form the letter by tracing its shape on an A4 flashcard, then in the air in front of the class. Invite students to join you in practicing the tracing motion in the air and allow them to become familiar with forming this shape. Specify that letters are always formed from top to bottom and use the numbered diagram from this activity to guide students step by step.
• Next, you can provide students with the opportunity to practice forming letters in a multisensory and kinesthetic way Using building blocks or dominoes, ask students to arrange these items to form the shape of the letter ‘F.’ Alternatively, they can use pieces of string, or wool to do so as well.
• For more direct practice, you can also bring students outside to the playground and have them trace the shape of ‘F’ in the sand. This can be done inside the classroom as well by bringing in trays of sand for students to use.
• Next, complete this activity interactively as a class by using Presentation Plus. The teacher should first demonstrate how to write ‘F’ on the board. Afterward, students can take turns writing the letter on the board and receiving individualized feedback from the teacher.
• After that, demonstrate how to form the letter by tracing its shape on an A4 flashcard, then in the air in front of the class. Invite students to join you in practicing the tracing motion in the air and allow them to become familiar with forming this shape. Specify that letters are always formed from top to bottom and use the numbered diagram from this activity to guide students step by step.
• This is a good time to walk around the classroom and check students’ work. Take notice of how they trace and write the letter and correct any mistakes.
• Once complete, repeat the above steps for the lowercase form of the letter ‘F.’
Note: It may be helpful to remind students of the proper way to grip a pencil before this activity.
• This exercise can be completed after Activity 1 from Pupil’s Book 1 for further handwriting practice.
• Before writing directly in the book, invite students to refamiliarize themselves with the shape of the letter ‘F’ and ‘f’ by asking them to first describe the letter and then practice writing it by tracing its shape in the air. They can also use building blocks, dominoes, string, or sand as described above. Be sure to correct any mistakes you notice.
• Afterward, invite them to turn to page 40 of Activity Book 1. First, instruct them to trace the letters with their fingers, then once they feel confident, allow them to use a pencil to trace and write the letters in the space provided.
• Ensure you instruct students to follow the writing pattern demonstrated in the first line. Specifically, rather than writing all the uppercase letters first and lowercase letters second, they should alternate writing one uppercase, and one lowercase letter as indicated in the activity book. This will allow them to practice writing letters as they would appear in a word or sentence, with the uppercase letter first and the lowercase second.
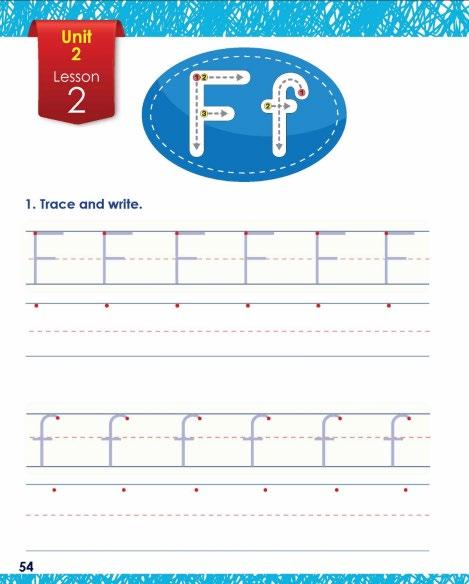


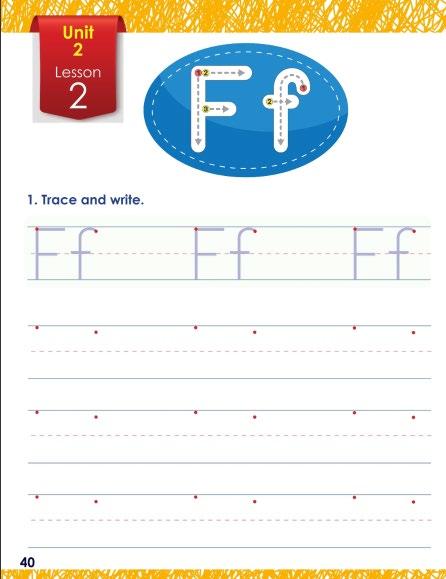
• This activity will help students match letters and understand that both uppercase and lowercase variants represent the same letter. Additionally, it will help them revise different forms of the letters ‘A’, ‘B’, ‘C’, ‘D’, and ‘E’ that they learned in previous lessons.
• To begin, play a game of hopscotch with students to help them revise matching letters. Using a piece of chalk, draw different combinations of the letters F,’ ‘A’, ‘B’, ‘C’, ‘D’, and ‘E’ on the floor as displayed in Activity 2. For example, FE, FF, Fe, CF, ff, fF, fd, ef, etc. There should be at least ten pairs of letters on the floor, spaced evenly apart. This can be done in or out of the classroom.
• Taking turns, ask each student to make it to the other side of the classroom or playground by jumping only on the pairs of matching letters. You can repeat this multiple times. By the end of the activity, each student should have successfully made it to the other side of the room by jumping only on matching letters.
• This is a great way for students to match uppercase and lowercase ‘F’s in a fun and active manner. While students are playing, observe where they jump, taking notice of any common mistakes they may make
• This game also presents a great opportunity for students to revise the uppercase and lowercase forms of ‘A’, ‘B’, ‘C’, ‘D’, and ‘E’ that they have already learned. If you have time, you can expand the activity to include more combinations of letters with a focus on ‘A,’ ‘B’, ‘C’, ‘D’, and ‘E’
• When the activity is over, invite students to individually complete Activity 2 in their books Instruct students to help Fatima get to her tent by tracing a path through the stones that contain matching letters only. For bonus points, you can ask them to circle the stones that have matching letters that are not ‘F’ as well. Take this time to walk around the class and observe the students’ work, taking care to correct any mistakes if present.

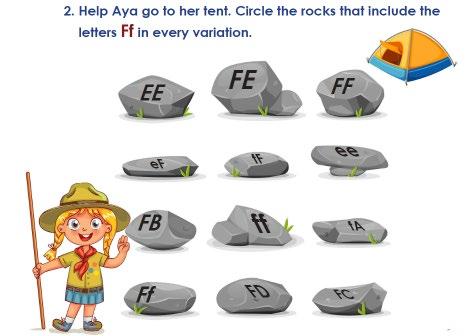
• This activity encourages students to find examples of both forms of the letter ‘F’ in real life.
• Following the theme of this activity, give students practice identifying the letter ‘F’ in the real world by providing them with a menu of different food items. This menu should include food items that start with the letter ‘F’, as well as items that don’t. For example, Fries, Fruit, Falafel, Milkshake, Vegetables, etc.
• Before this lesson, create and print a menu of at least ten food items. A minimum of five should start with or include the letter ‘F’.
• During class, distribute the menu amongst the students. You can give them one menu each or ask pairs to share. Task the students with finding as many examples of the letter ‘F’ in their menus as they can. When they find ‘F’, ask them to circle or highlight it on their menu.
• Encourage learners to point out examples they can see and discuss them with their classmates. Urge them to ask questions and come up with their own examples of the letter ‘F’ that may be missing. For example, fish, tofu, flapjack, etc.
• Once this exercise is complete and students have found as many examples as they can of both forms of the letter ‘F’, complete this activity interactively in class using Presentation Plus. Ask students to identify all the instances of the letter ‘F’ that they can see on the board, as well as their positions at the beginning, middle, or end of a word. You can also invite individual students to come up and circle the letters. Once the class has reached an agreement, the presentation will display the correct answers by circling each letter one-by-one for additional real-life practice, you can take students to the school cafeteria and ask them to identify instances of the letter ‘F’ in this familiar environment.
• Finally, ask students to complete Activity 2 in their books. Instruct them to circle all the examples of uppercase and lowercase ‘F’ that they can find. Take this time to walk around the class and observe the students’ work. Point out any instances of ‘F’ they may have forgotten or missed.


• At the end of this activity, ask students to bring two examples of the letter ‘F’, one uppercase and one lowercase, into class the next day. This can be within a book or magazine, or on a label from their favorite snack.
• Once students have brought their examples, invite them to present them in front of the class. Ask students to state where they found this example, why they chose it, where the letter ‘F’ is, and whether it is uppercase or lowercase.
• This exercise will grant learners the opportunity to actively search for examples of the letter ‘F’ when they are not in school and will also enhance their presentation skills and confidence.
• Once in class, if students have brought examples that can be kept in class, work together as a group to create a large collage with all the examples from each student. This can be then hung in the classroom for students to refer back to and feel a sense of pride. Invite students to decorate this collage however they would like.
• The purpose of this activity is to introduce learners to new vocabulary words that start with the letter ‘F’ and give them the opportunity to practice tracing, writing, and identifying the letter ‘F’ within these words. Students should be confident in each vocabulary term by the end of the lesson.
• First, using the flashcards found in this guide, introduce the word to students. Identify the word, explain what it means, demonstrate how to pronounce it, and then indicate where the letter ‘F’ is in each one.
• After that, invite students to repeat the word with you. You can also call on individual learners or the class to pinpoint where they can see the letter ‘F’. Repeat the word and identify the letter as many times as needed until learners are confident in the vocabulary term and the position of ‘F’. You can use the familiar sentence structure “F is for…” or “It is a…” when discussing each image.
• It is also helpful to use the word in multiple contexts and different sentences. Engage with students by asking them where they would normally see a ‘fish’, ‘fire’, or ‘fox’, and what they like about those things. This helps ground new vocabulary in real-life scenarios and existing knowledge, assisting with learners’ understanding and memory.
• Next, complete this activity interactively as a class using Presentation Plus. First, ask for the students’ help with identifying each image on the screen. Repeat each word multiple times with the students, referencing both the image and the written form of the word so that they become comfortable sight-reading. Next, ask them to point out where the letter ‘F’ is located. Finally, demonstrate how to write the letters on the board and invite individual students to practice writing with you. This is a great opportunity to provide individualized feedback regarding students’ writing and letter formation. Learners can come up to the board in pairs, with one writing an uppercase ‘F’ and one writing a lowercase ‘F’. On their next turn, they can switch. Repeat this activity until each student has had a chance to practice writing both forms of ‘F’ at least once.

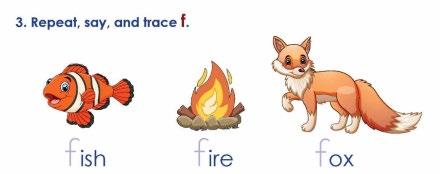
This activity is flashcardsupported.
• After using Presentation Plus, you can also play a game with the students to practice the newly learned vocabulary. Separate the students into groups and task each group with creating a short story using the three new vocabulary words. They can get bonus points if they include other words beginning with ‘F’ as well. This is a great way for learners to practice using new vocabulary in context and generalize their learning to existing knowledge. When everyone is ready, each group can present their story to the rest of the class. The best story can get a prize.
• Once the class activities are complete, encourage students to complete this activity in their workbook. Instruct them to do so step by step, first saying the word out loud, then tracing the shape of the letters, first with their finger, then with a pencil.

• This activity helps learners practice matching and recognizing uppercase and lowercase forms of the letter ‘F’ separately.
• Before completing this activity in the workbook, play a game with students to help them practice matching lowercase and uppercase ‘F’s.
• Using a marker and some colorful inflated balloons, write an uppercase or lowercase ‘F’ on each balloon and throw them into the middle of the classroom. Ask the students to sort the balloons into pairs of matching uppercase and lowercase ‘F’s. Encourage them to work collaboratively and communicate with each other until all the balloons are sorted into pairs.
• Alternatively, you can give each student one balloon and then ask them to find a friend with a balloon that has a matching letter. By the end of the activity, all the students should be in pairs, with their peers holding a balloon that matches theirs.
• Once these in-class activities are complete, encourage students to complete Activity 3 in their Activity Book. Instruct them to draw lines to match the relevant letters and walk around the classroom to correct any mistakes you notice.

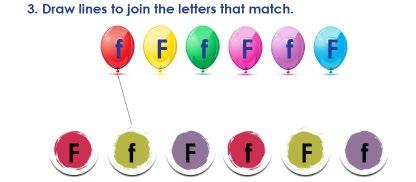

• This activity reinforces students’ ability to recognize words beginning with the sound ‘f’ and allows them to review how to recognize words beginning with the sounds ‘d’ and ‘e’.
• First, using Presentation Plus, go through and review the vocabulary terms on the board. Ask for the students’ help identifying each image and then ask them to repeat each word with you at least three times. These terms should be familiar to students from previous lessons and activities.
• Once the students are refamiliarized and comfortable with all the vocabulary terms, go through them one by one and ask learners to identify which sound each word starts with. They can do this by jumping up if a word begins with the sound ‘f’, clapping if it begins with ‘e’, and raising both hands in the air if it begins with ‘d’. This is a great way to redirect any restless energy back into the learning activity.
• When the students have collectively made their choice, you can invite one to come up to the board and trace the chosen answer.
• You can repeat this multiple times until the class can correctly identify the sound at the start of each vocabulary word in this exercise.
• Once complete, instruct students to complete Activity 4 in their Pupil’s Book. Ask them to first say the words out loud and then trace the appropriate sound. Take this time to walk around the class and observe the students’ work, correcting any mistakes you may notice.

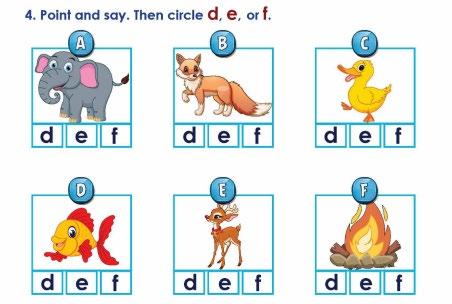

• Page 42 of Activity Book 1 contains a reader focused on a specific letter ‘F’ and identifying it in the vocabulary learned earlier specifically ‘fish’. This page encourages students to verbally identify words that start with the letter ‘F’ and practice writing the letter. Additionally, it continues students’ development in dealing with words in context by adding a description to familiar vocabulary in a story about a pet fish.
• To begin with, ask the students the following questions:
Frame 1: “What can you see?”
Frame 2: “Is the fish big or small?”
Frame 3: “What color is the fish?”
• The students have learned the sight words “big” and “can” in addition to the primary colors. So, they will be able to read the reader in the frames easily.
• You can invite good readers to read the frames one by one as a model and a peer-teaching strategy. Then invite some slow readers to read the same frame after them.
• Afterward, the class can be split into pairs to complete the activity more independently. One student can point to the picture and the other can ‘read’ the sentence. Then they can switch. This will allow for more individual time to practice and will help build students’ confidence.
• Once complete, ask students to do Activity 4 in their books. Ask them to read each sentence and then fill in the missing letters when they are ready.
• It is highly recommended to use Presentation PLUS in this activity.

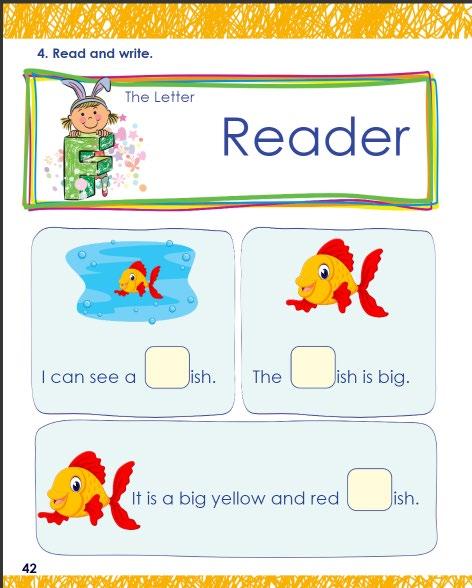
• This activity reinforces learners’ ability to write the uppercase form of ‘F’ and practice writing an uppercase ‘E’ and ‘C’ in relation to vocabulary terms they have already learned. It also grants them the opportunity to practice sight-reading and recognizing familiar vocabulary.
• First, go through and review the vocabulary words with students using the flashcards from this guide. Go through both the images and the written forms of the words and ask students to identify and repeat each word after you Then, ask them to specify where the letters ‘F’, ‘E’, and ‘C’ are in the written words.
• Next, show them each flashcard (word and image) and ask them to identify each one without your help. Do this until the students are comfortable sight-reading the vocabulary words from this exercise. Students should already be familiar with the vocabulary from previous lessons and activities, so this can be completed as a revision exercise.
• After this, play a game with students to help them practice matching different aspects of vocabulary terms with each other. Split the class into three groups. Give one-third of the class flashcards with a picture of the vocabulary term on it, give another third of the class flashcards with the written form of the word on it, and give the remaining third flashcards with the letters ‘C’, ‘E’, or ‘F’ on them. Each student should have one flashcard with either a picture, letter, or word on it. Then, instruct the class to find the other students who have flashcards that match theirs (picture, letter, and word). Once the students have found each other, they should move to one area of the room. At the end of this activity, there should be six groups of students, each representing one vocabulary term.
• Alternatively, you can play this game in class with smaller groups. Separate the students into groups of 3-4 and give each group three sets of flashcards. One set should contain the pictures of the vocabulary terms, one should contain the words, and one the letters. Task each group by matching the items with each other.
• You can also use the worksheet from this guide. Give each group of 3-4 students one worksheet depicting a train with animals on it, as well as two sets of flashcards, one with the written form of the vocabulary words and one with the letters ‘C’, ‘E’, and ‘F’. Ask each group to arrange the flashcards on the worksheet so that the words representing each image are on top of the corresponding pictures on the train, and the letters each word starts with are below the train.
• Next, complete this activity interactively as a class using Presentation Plus. Go through each image and word one by one, asking the students to repeat after you. Then ask them to say each word independently without your help. Next, ask the students to help you match the pictures to the words and determine what letter each word starts with, by saying it out loud. When the class has decided on an answer for the first word, invite one pair of students to the board. One student can write the letter (‘F’, ‘C’, ‘E’) and the other can draw a line to match the word to the image. Repeat this for each word, and you can repeat the entire activity as many times as needed.
• Finally, instruct students to complete this activity in their workbook. Tell them to first say the words out loud before tracing and matching. This is a great opportunity to walk around the classroom and check students’ work.
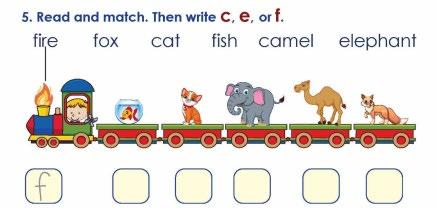



Activity 5
• This activity will grant students the opportunity to practice writing an uppercase ‘F’ and will introduce them to tracing full words and unfamiliar letters within familiar vocabulary. In addition, they will revise the vocabulary terms from this lesson and will practice sight reading and assigning meaning to these words.
• First, you can split the class into groups of 3-4 students. Give each group two sets of flashcards found in this guide. One set contains the images of the vocabulary terms (‘fish’, ‘fire’, ‘fox’), and the other contains the written form of these words. Task learners with matching the images to the correct words. Once all the flashcards are matched, ask them to practice tracing these words on their flashcards and practice writing the letter ‘F’ on a separate piece of paper.
• Walk around the classroom and observe the groups working. Make sure each student gets the chance to practice tracing and/or writing the letters. Observe their writing and provide feedback as needed.
• Once complete, invite learners to turn to page 43 of their Activity Book. Instruct them to first identify which word matches the image above it, and then trace the correct word in the space provided.
Activity 6
• This activity will grant students the opportunity to revise previously learned words and identify the words that begin with ‘f’.
• You may wish to ask the students to look at the images. Say the name of the images one by one.
• Once they come across an image that begins with ‘f’, they shout bingo and then color it.
• In the end, the teacher may ask some students to name the images that begin with ‘f’ only.
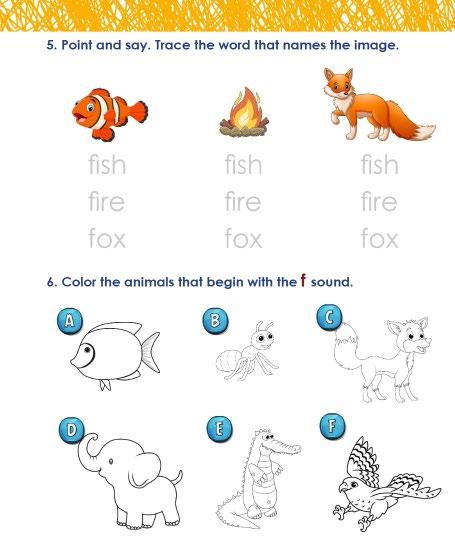

This activity is flashcardsupported
• This activity reinforces learners’ ability to have more control on the pencil or crayon. It also develops the fine motor skills as well as creativity.
• The teacher needs to walk around the class to encourage the students draw and color a fish.
• When they finish, the teacher may wish to invite some students present their fish and talk about it. This will be a good opportunity to ask the students about the color and size of their fish while presenting their work.

• The key objective of this activity is to develop listening skills and the ability to recognize the initial sounds of words.
• It is a good opportunity to learn new vocabulary items that begin with the same letter/sound of the lesson.
• The teacher may wish to use Presentation Plus to teach this lesson by following the following steps:
o Play the sound of the word several times. At each time, the teacher invites the students to repeat the word and focus on the word pronunciation, especially the beginning sound.
o Repeat the same process as a whole class activity first, then invite as many individual students as possible to ensure mastery over the words and letter sound.
o The teacher can then invite the students to complete the exercise on their books.

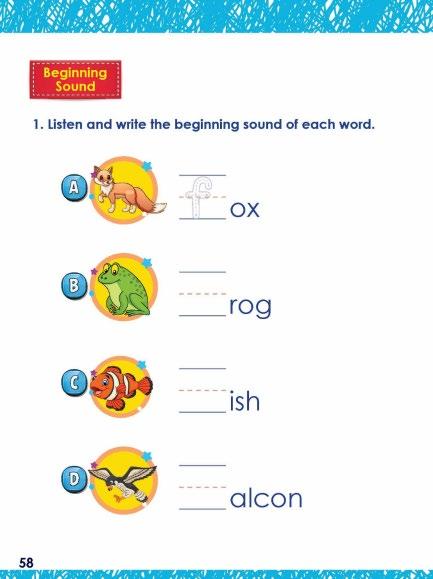
• The primary aim of this activity is to enhance listening skills and the ability to differentiate letter sounds from other noises in this lesson.
• It also aims at helping the students to recognize and recall the words and their sounds in a visual way.
• The teachers may wish to use Presentation PLUS to deliver this part of the lesson:
o Display the slide that show the images. Then play the sound of each word/image several times.
o The teacher invites individual students to answer, then to praise or correct according.
o When all the words and images are completed, the teacher may invite the students to complete the exercise on their books.
o More fun could be added to the exercise by inviting the students to work in pairs. One students points to an image, the other should say the name of the image and the beginning sound of the word.
• The teach invites the students to use their imaginations and knowledge to draw something that begins with “d’.
• You can invite selected students to talk about their drawing in front of the class, which will develop their presentational and leadership skills, as well as the speaking skills.

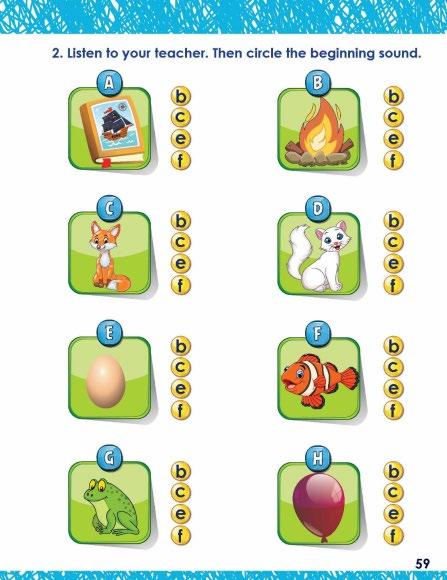
• The main objective of this activity is to enhance reading skills and help students become fluent readers in the future. It is essential to teach sight words as visual representations rather than prompting students to decode the words while reading.
• To achieve this, the teacher might consider presenting the sight word alongside a picture and prompting the students to repeat it several times. Afterward, the teacher can invite the students to identify the word among other words in a word-salad exercise using Presentation PLUS, and then again in their books.
• Next, the teacher asks the students to sit in groups, gives them flashcards related to this exercise, and asks them to reorder the letters to make words. Then, they write the missing letters to complete the words.
• Finally, the teacher uses Presentation PLUS to motivate the students to read the provided sentences in Exercise 3, which combines picture and word reading.

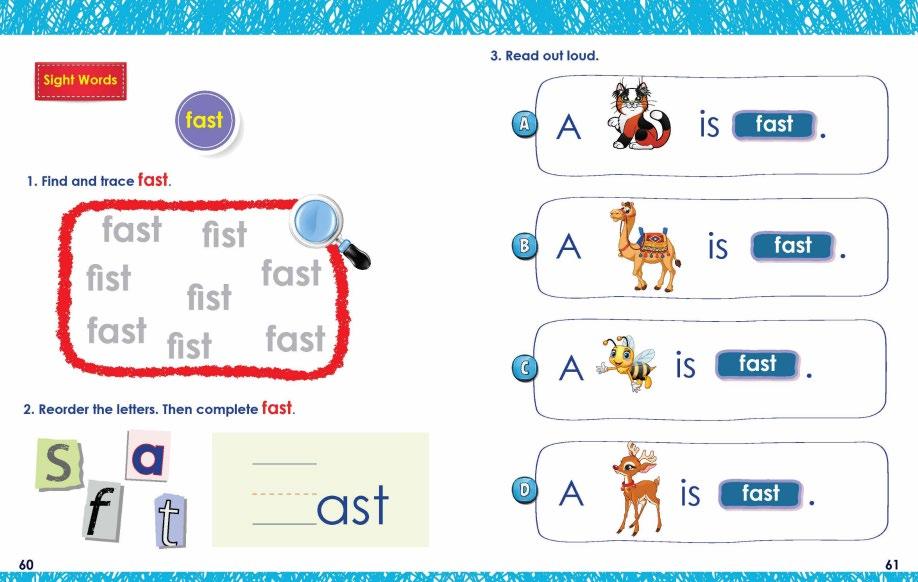

Activity 7: The key objective of this activity is to develop reading skills and to prepare the students to be fluent readers in the future.
• By using Presentation PLUS, you may wish to invite some students to read the first sentence out loud. Then invite others to point to the image that represents the sentence.
• Next, you can ask the students to match the sentences to the pictures correctly.
• More fun could be added to this exercise by asking the students to sit in pairs. Each student tells the other what they want to eat.
• Finally, you can encourage the students to use the same structure to make sentences of their own.
• Activity 8 & 9: Finally, they can complete the homework at home. This is an eye-opener for the students since it encourages them to use what they learned at school in the real life outside of the school.
• Art is vital for developing creativity and imagination, especially in helping children express themselves through art and drawing

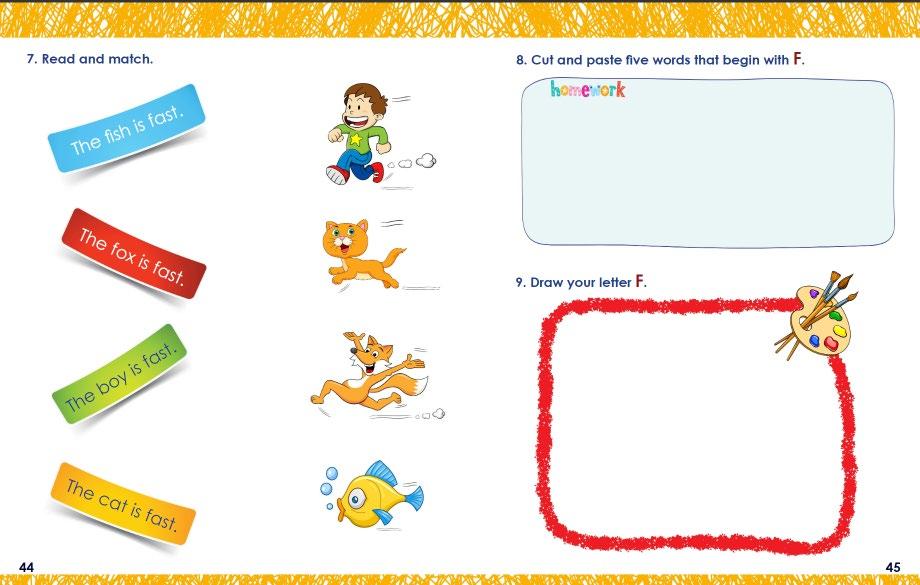


















The key objectives of this lesson are for children to:
• Write the uppercase and lowercase forms of the letter ‘G’.
• Recognize the uppercase and lowercase forms of the letter ‘G’ alone and within words.
• Understand that uppercase and lowercase ‘G’ represent the same letter.
• Learn vocabulary associated with the letter ‘G’, specifically ‘goose’, ‘goat’, and ‘gift’.
• Identify words and objects that start with, or contain, the letter ‘G’ in real-life scenarios.
• Listen to and identify familiar and unfamiliar words starting with the sound ‘g’.
• Review how to visually and auditorily identify words starting with the letter and sound ‘E’ and ‘F’.
• Practice reading, writing, and auditorily identifying the letter and sound ‘G’.
• Revise sight-reading and assigning meaning to vocabulary starting with the letter ‘G’.
• Revise writing and identifying objects that start with the letters ‘E’ and ‘F’.
• Practice pencil control and grip.
• The purpose of this activity is for children to practice writing both the uppercase and lowercase forms of the letter ‘G’.
• Starting with uppercase ‘G’, describe the components of the letter and its shape. Invite students to contribute to the description, identifying any key features they think are interesting or important, or any shapes/objects they think are familiar to the letter.
• After that, demonstrate how to form the letter by tracing its shape on an A4 flashcard, then in the air in front of the class. Invite students to join you in practicing the tracing motion in the air and allow them to become familiar with forming this shape. Specify that letters are always formed from top to bottom and use the numbered diagram from this activity to guide students step by step.
• Next, students can familiarize themselves with the physical shape using block letters. They can also practice forming and writing the letter using Play-Doh or by going outside and tracing it in the sand. This can be done inside the classroom by using a tray or shallow box with sand inside. They can practice as many times as they need until they have a solid understanding of the letter’s shape. This provides a great opportunity for children to learn letters in a kinesthetic and multisensory way.
• Next, complete this activity interactively as a class by using Presentation Plus. The teacher should first demonstrate how to write ‘G’ on the board. Afterward, students can take turns writing the letter on the board themselves and receiving individualized feedback from the teacher.
• Once students understand the basic shape of the letter ‘G’ and how to form it, ask them to turn to page 62 of Pupil’s Book 1 and complete the activity. Instruct them to first trace the shape of the letter using their finger, then trace with their pencil, and then once they feel comfortable, ask them to practice writing the letter in the space provided.
• This is a good time to walk around the classroom and check students’ work. Take notice of how they trace and write the letter and correct any mistakes.
• Finally, you can also play a game with students to help them practice writing ‘G’ and revise the other letters they have learned. Split the class into pairs. One student can trace the shape of a letter on their friend’s back, and their friend can guess what letter they have traced. After three letters, they can switch so the student who was writing will now guess and the student who was guessing will now write on their friend’s back. This is the perfect opportunity to review not only ‘G’ but all the letters they have learned so far.
• Once complete, repeat the above steps for the lowercase form of the letter ‘G’.
Note: It may be helpful to remind students of the proper way to grip a pencil before this activity.

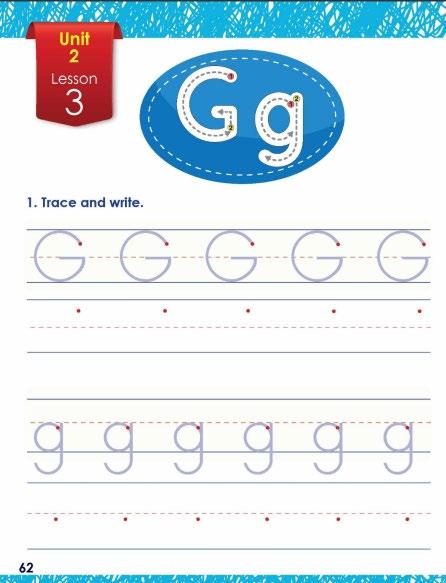
• This exercise can be completed after Activity 1 from Pupil’s Book 1 for further handwriting practice.
• Before writing directly in the book, invite students to refamiliarize themselves with the shape of the letter ‘G’ and ‘g’ by asking them to first describe the letter and then practice writing it by tracing its shape in the air. They can also use Play-Doh and sand as described above. Be sure to correct any mistakes you notice.
• Afterward, invite them to turn to page 46 of Activity Book 1. First, instruct them to trace the letters with their fingers, then once they feel confident, allow them to use a pencil to trace and write the letters in the space provided.
• Ensure you instruct students to follow the writing pattern demonstrated in the first line. Specifically, rather than writing all the uppercase letters first and lowercase letters second, they should alternate writing one uppercase and one lowercase letter as indicated in the activity book. This will allow them to practice writing letters as they would appear in a word or sentence, with the uppercase letter first and the lowercase second.

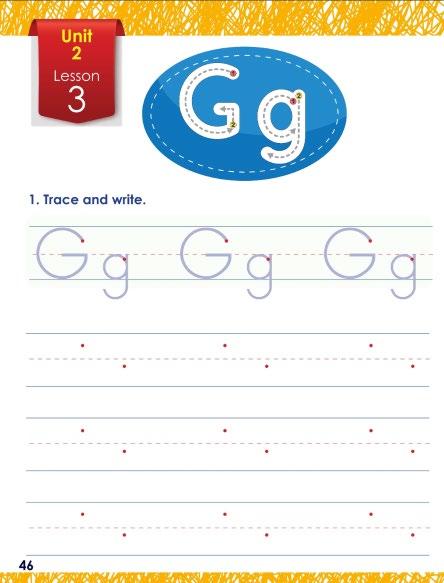

• This activity will help students match letters and understand that both uppercase and lowercase variants represent the same letter. Additionally, it will help them revise different forms of the letters ‘A’ to ‘F’ that they learned in previous lessons.
• Before writing in the Activity Book, play a game with the students to help them practice identifying matching letters.
• Using a marker and some post-it notes or pieces of card, write at least nine different combinations of an uppercase and lowercase ‘A’, ‘B’, ‘C’, ‘D’, ‘E’, ‘F’, and ‘G’ on each one (as depicted in Activity 2), such that each post-it note/card has two letters on it. For example, gg, gf, Gg, gc, GG, ge, gD, etc.
• Mix the post-it notes or cards to create a pile in the center of the classroom. Next, instruct each student to find a card or post-it note that depicts a pair of matching letters (this is not case sensitive, meaning dD is a correct answer alongside dd and DD). Once the student has found a matching pair of letters, instruct them to keep the card with them and stand at the front of the classroom. You can encourage students by giving stars and stickers to those who find the correct card.
• This game presents a great opportunity for students to revise the uppercase and lowercase forms of the letters ‘A’ to ‘G’ that they have previously learned. You can expand the activity to include more combinations of letters and ask students to find instances of other matching letters as well.
• When the activity is over, invite students to individually complete Activity 2 in their book. Instruct students to circle the boxes that contain matching letters.
• You can take this time to walk around the class and observe the students’ work, taking care to correct any mistakes if present.

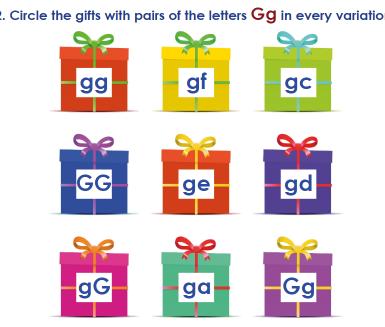
• This activity encourages students to find examples of both forms of the letter ‘G’ in real life.
• Following the theme of this activity, give students practice identifying the letter ‘G’ in the real world by providing them with a grocery list. This list should include items that start with or include the letter ‘G’ and those that don’t. For example, Eggs, Grapes, Garlic, Potatoes, etc.
• Before this lesson, create and print a grocery list of at least ten items. A minimum of five should start with or include the letter ‘G’.
• During class, distribute the grocery list amongst the students. You can give them one list each or ask pairs or groups to share. Task the students with finding as many examples of the letter ‘G’ in their grocery lists as they can. When they find ‘G’, ask them to circle or highlight it on their list.
• Encourage learners to point out examples they can see and discuss them with their classmates. Urge them to ask questions and come up with their own examples of the letter ‘G’ that may be missing. For example, Guava, Guacamole, etc.
• Once this exercise is complete and students have found as many examples as they can of both forms of the letter ‘G’, complete this activity interactively as a class using Presentation Plus. Ask students to identify all the instances of the letter ‘G’ that they can see on the board, as well as their positions at the beginning, middle, or end of a word. You can also invite individual students to circle the letters. Once the class has reached an agreement, the presentation will display the correct answers by circling each letter one-byone.
• Finally, ask students to complete Activity 2 in their books. Instruct them to circle all the examples of uppercase and lowercase ‘G’ that they can find. Take this time to walk around the class and observe the students’ work. Point out any instances of ‘G’ they may have forgotten or missed.


• At the end of this activity, ask students to bring two examples of the letter ‘G’, one uppercase and one lowercase, into class the next day. This can be within a book or magazine, or on a picture from their community.
• Once students have brought their examples, invite them to present them in front of the class. Ask students to state where they found this example, why they chose it, where the letter ‘G’ is, and whether it is uppercase or lowercase.
• This exercise will grant learners the opportunity to actively search for examples of the letter ‘G’ when they are not in school and will also enhance their presentation skills and confidence.
• Once in class, if students have brought examples that can be kept in class, work together as a group to create a large collage with all the examples from each student. This can be then hung in the classroom for students to refer back to and feel a sense of pride. Invite students to decorate this collage however they would like.
• The purpose of this activity is to introduce learners to new vocabulary words that start with the letter ‘G’ and give them the opportunity to practice tracing, writing, and identifying the letter ‘G’ within these words. Students should be confident in each vocabulary term by the end of the lesson.
• First, using the flashcards found in this guide, introduce the word to students. Identify the word, explain what it means, demonstrate how to pronounce it, and then indicate where the letter ‘G’ is located in each one.
• After that, invite students to repeat the word with you. You can also call on individual learners or the class as a whole to pinpoint where they can see the letter ‘G’. Repeat the word and identify the letter as many times as needed until learners are confident in the vocabulary term and the position of ‘G’. Then, go through the flashcards and ask students to repeat the words without your help.
• It is also helpful to use the word in multiple contexts and different sentences. Engage with students by asking them where they would normally see a ‘goose’, ‘goat’, or ‘gift’, and what they like about those things. This helps ground new vocabulary in real-life scenarios and existing knowledge, assisting with learners’ understanding and memory.
• Next, complete this activity interactively as a class using Presentation Plus. First, ask for the students’ help with identifying each image on the screen. Repeat each word multiple times with the students, referencing both the image and the written form of the word so that they become comfortable sight-reading. Next, ask them to point out where the letter ‘G’ is located. Finally, demonstrate how to write the letters on the board and invite individual students to practice writing with you. This is a great opportunity to provide individualized feedback regarding their writing and letter formation
Students can come up to the board in pairs, with one writing an uppercase ‘G’ and one writing a lowercase ‘G’. On their next turn, they can switch. Repeat this activity until each student has had a chance to practice writing both forms of ‘G’ at least once and they are all comfortable identifying and sight-reading each word.
• After using Presentation Plus, play a game with students to practice these vocabulary terms. Using three balls or balloons, write or stick each vocabulary term on a ball. Then, ask students to form a circle and throw each ball randomly to a student. When the student catches the ball, they have to ‘read’ the word out loud and then trace the shape of the letter it starts within the air before throwing the ball to a peer. Play this game until each student has had the chance to practice each vocabulary word at least once.
• Once the class activities are complete, encourage students to complete this activity in their workbook. Instruct them to do so step by step, first saying the word out loud, then tracing the shape of the letters, first with their finger, then with a pencil.
activity is flashcardsupported

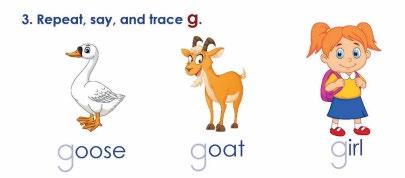
• This activity helps learners practice matching and recognizing uppercase and lowercase forms of the letter ‘G’.
• Before completing this activity in the workbook, play a game with students to help them practice matching lowercase and uppercase ‘G’s.
• First, separate the students into pairs. Give each pair two flashcards, one denoting an uppercase ‘G’ and one denoting a lowercase ‘G’, as well as a pencil and paper.
• Task one student in the pair with holding up a flashcard at random, and the other student with writing the corresponding letter on the paper. In other words, one student will hold up either the uppercase or lowercase ‘G’ flashcard. If they hold up an uppercase ‘G’, their partner should write a lowercase ‘G’ on the piece of paper, and vice versa. After five turns, the pair should switch roles so that the person writing now holds up the flashcards and the person holding flashcards now writes. This is a great way for students to collaboratively and directly practice writing and matching letters.
• You can repeat this activity as many times as needed and can have students do this in multiple different pairs.
• Once complete, encourage students to do Activity 3 in their Activity Book. Instruct them to write in the missing, and matching, letters and walk around the classroom to correct any mistakes you notice.

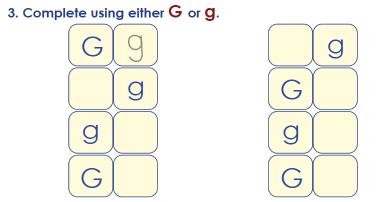
This activity is flashcardsupported
• This activity reinforces students’ ability to recognize familiar words beginning with the sound ‘g’ and allows them to review how to recognize familiar words beginning with the sound ‘f’.
• First, using Presentation Plus, go through the vocabulary terms on the board. Ask for the students’ help identifying each image and then ask them to repeat each word with you at least three times. This should be easy as students are already familiar with this vocabulary from previous lessons and activities.
• Once the students have reviewed all the vocabulary terms, ask them to identify which sound each word starts with one by one. You can say the word out loud, and students can walk to one side of the classroom to indicate ‘g’ and the other side of the room to indicate ‘f’. Alternatively, students can stand up to indicate ‘g’ and sit down to indicate ‘f’. This is a great way to redirect any restless energy into focus on the learning activity.
• When the students have made their choice as a class, you can invite one to come up to the board and circle the chosen answer.
• You can repeat this activity as many times as needed until students are comfortable identifying the sounds at the start of each vocabulary term.
• Finally, instruct students to complete Activity 4 in their Pupil’s Book. Ask them to first say the words out loud and then circle the appropriate sound. Take this time to walk around the class and observe the students’ work, correcting any mistakes you may notice.

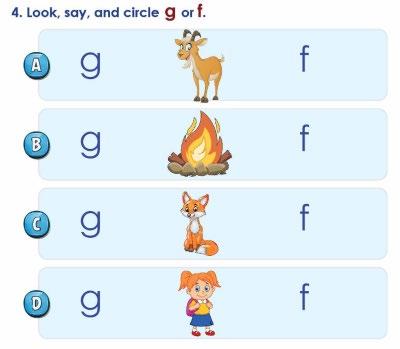
• Page 48 of Activity Book 1 contains a reader focused on a specific letter ‘G’ and identifying it in the new vocabulary words learned earlier. This page encourages students to verbally identify words that start with the letter ‘G’ and practice writing the letter. Additionally, it introduces the concept of identifying oneself and one’s name to other people
• To begin, introduce and review the concept of “I can see a…” with the students, as these sentence structures appear in the reader. Discuss what this sentence structure means and when it may be used. Then, give examples of these sentences that are different from those in the reader.
• Next, show the students some pictures and encourage them to answer using “I can see a…”.
• Once the class is familiar with these sentence structures, go through the reader with the students and read each sentence. Ask students to repeat after you and make sure to emphasize the letter ‘G’ for each vocabulary term. You can also ask students questions about each sentence to solidify their comprehension. E.g.
o How many animals can the girl see?
o Which animal has two legs?
o Which one has four legs?

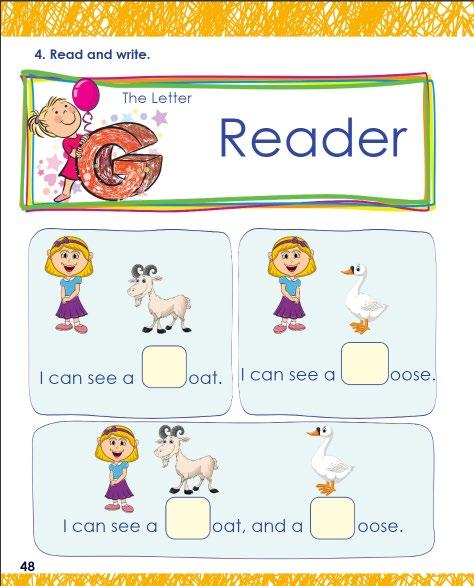

• At the end of the class, ask students to bring in their favorite items from home to the next lesson for show and tell. For example, a favorite stuffed animal or toy.

• In the next lesson, give each student the chance to present their item to the rest of the class. Ask them to first introduce themselves using the “I am…” sentence structure and then introduce the object using “I have got…”. As a continuation of the previous lesson, ask them to describe their objects as well. For example, “It is big and blue.”
• This is a great way for students to review the use of context and adjectives when discussing items from their personal lives.
• This activity reinforces learners’ ability to write the uppercase form of ‘G’ and practice writing an uppercase ‘E’ and ‘F’ in relation to vocabulary terms they have already learned.
• First, go through and review the vocabulary words with students using the flashcards from this guide. Go through both the images and the written forms of the words and ask students to identify and repeat each word after you. Then, ask them to specify where the letters ‘F’, ‘E’, and ‘G’ are in the written words.
• Next, show them each flashcard (word and image) and ask them to identify each one without your help. Do this until the students are comfortable sight-reading the vocabulary words from this exercise. Students should already be familiar with the vocabulary from previous lessons and activities.
• After this, separate students into groups of 3-4. Give each group two sets of flashcards, one containing the images of vocabulary from this activity, and one containing the words with the missing first letters. Ask students in their groups to first fill in the missing letters on the flashcards, then match the images to the newly completed words. Take this opportunity to walk around the classroom and observe the group's work, correcting mistakes as needed.
• Next, complete this activity interactively as a class using Presentation Plus. Go through each image and word one by one. First, ask the students to say each word out loud, then ask them to help you fill in the missing letters and determine which picture matches which (now complete) word. When the class has decided on an answer for the first word, invite one pair of students to the board. One student can write the missing letter and the other can draw a line to match the word to the image. Repeat this for each word, and you can repeat the entire activity as many times as needed.
• Finally, instruct students to complete this activity in their workbook. Tell them to first read each word out loud, then fill in the missing letters, and lastly match the images to the words.

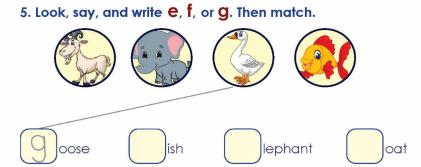
This activity is flashcardsupported

• This activity will grant students the opportunity to practice writing an uppercase ‘G’ and will introduce them to tracing full words and unfamiliar letters within familiar and unfamiliar vocabulary. In addition, they will revise the vocabulary terms from this lesson and will practice sight reading and assigning meaning to these words.
• First, you can split the class into groups of 3-4 students. Give each group two sets of flashcards found in this guide. One set contains the images of the vocabulary terms (‘goat’, ‘goose’, and ‘giraffe’), and the other contains the written form of these words. Task learners with matching the images to the correct words. Once all the flashcards are matched, ask them to practice tracing these words on their flashcards, and practice writing the letter ‘G’ on a separate piece of paper.
• Walk around the classroom and observe the groups working. Make sure each student gets the chance to practice tracing and/or writing the letters. Observe their writing and provide feedback as needed.
• Once complete, invite learners to turn to page 49 of their Activity Book. Instruct them to first identify which word matches the image above it, and then trace the correct word in the space provided.

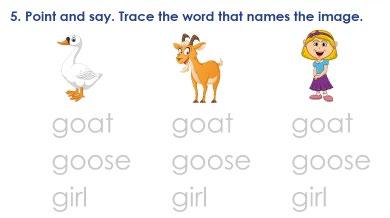
• This activity reinforces learners’ ability to have more control on the pencil or crayon. It also develops the fine motor skills as well as creativity.
• The teacher needs to walk around the class to encourage the students to color the image.
• When they finish, the teacher may wish to invite some students present their fish and talk about it. This will be a good opportunity to ask the students about the color and size of their fish while presenting their work.

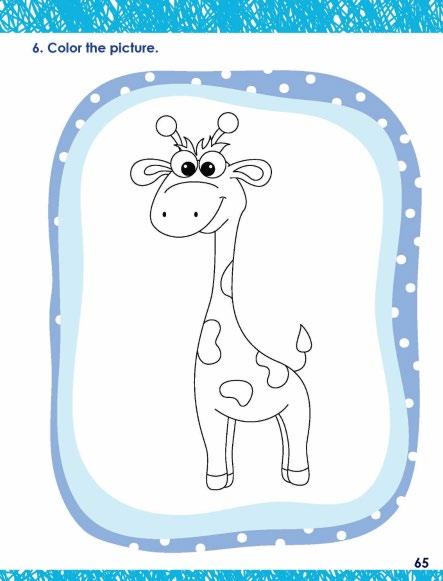
• This activity focuses on recognizing the beginning sounds of current and previously learned words.
• You may wish to use Presentation PLUS to demonstrate the images one by one.
• Let the students listen to the word, then ask the class collectively to determine the beginning sound.
• Repeat the same steps to complete the exercise.
• Then invite the students to complete the task individually on their books.
• More fun could be added to the activity by asking the students to sit in pairs. One student to point to an image, and the other is to say the word and its beginning sound.
• You may also wish to ask about the number of words that begin with the ‘g’ sound, and then to name them.

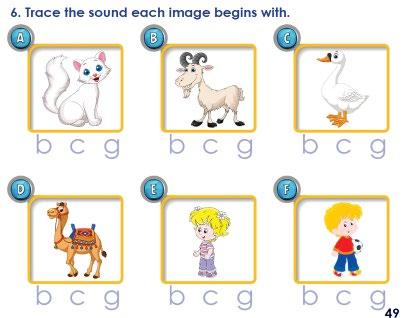
• The key objective of this activity is to develop listening skills as well as the ability to recognize the beginning sound of words.
• It is a good opportunity to learn new vocabulary items that begin with the same letter/sound of the lesson.
• The teacher may wish to use Presentation Plus to teach this lesson by following the following steps:
o Play the sound of the word several times. At each time, the teacher invites the students to repeat the word and focus on the word pronunciation, especially the beginning sound.
o Repeat the same process as a whole class activity first, then invite as many individual students as possible to ensure mastery over the words and letter sounds
o The teacher can then invite the students to complete the exercise on their books.

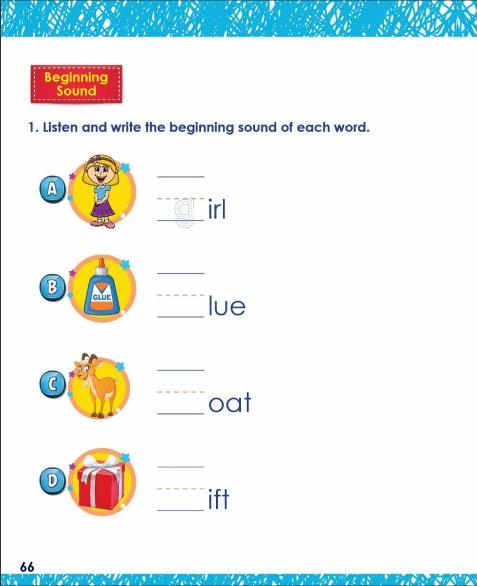
• The key objective of this activity is to develop listening skills as well as the ability to distinguish the letter sound in this lesson among other sounds.
• It also aims at helping the students to recognize and recall the words and their sounds in a visual way.
• The teachers may wish to use Presentation PLUS to deliver this part of the lesson:
o Display the slide that shows the images. Then play the sound of each word/image several times.
o The teacher invites individual students to answer, and then to praise or correct according.
o When all the words and images are completed, the teacher may invite the students to complete the exercise on their books.
o More fun could be added to the exercise by inviting the students to work in pairs. One student points to an image, the other should say the name of the image and the beginning sound of the word.
• This activity builds on children’s creativity and love of coloring and helps learners focus on pencil/crayon control. It also adds fun to the lesson in a controlled manner.
• First, re-establish and demonstrate the correct way to grip a pencil.
• Next, give students explicit instructions to color inside the lines of the picture.
• Allow students to color individually but move around the classroom and correct students on their grip and whether they are staying within the lines. Make sure to speak loudly in an encouraging manner so all students can hear the correct practice.
• You can give stickers to students who remain inside the lines and to those who demonstrate creativity in their coloring task.
• You can invite selected students to talk about the images that start with “g” as a speaking activity. You may wish to ask questions like, “Is it big?”, “What color is it? etc…

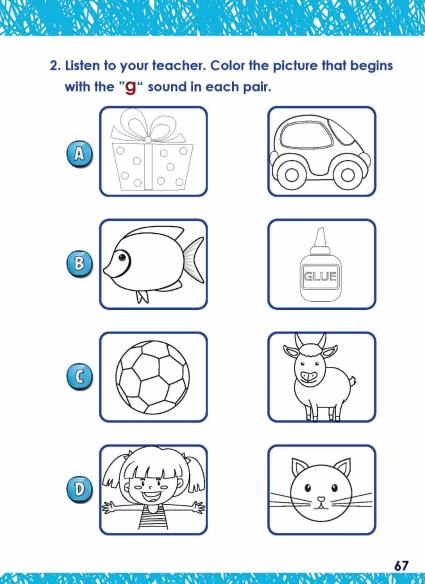
• The main objective of this activity is to enhance reading skills and help students become fluent readers in the future. It is essential to teach sight words as visual representations rather than prompting students to decode the words while reading.
• To achieve this, the teacher might consider presenting the sight word alongside a picture and prompting the students to repeat it several times. Afterward, the teacher can invite the students to identify the word among other words in a word-salad exercise using Presentation PLUS, and then again in their books.
• Next, the teacher asks the students to sit in groups, gives them flashcards related to this exercise, and asks them to reorder the letters to make words. Then, they write the missing letters to complete the words.
• Finally, the teacher uses Presentation PLUS to motivate the students to read the provided sentences in Exercise 3, which combines picture and word reading.

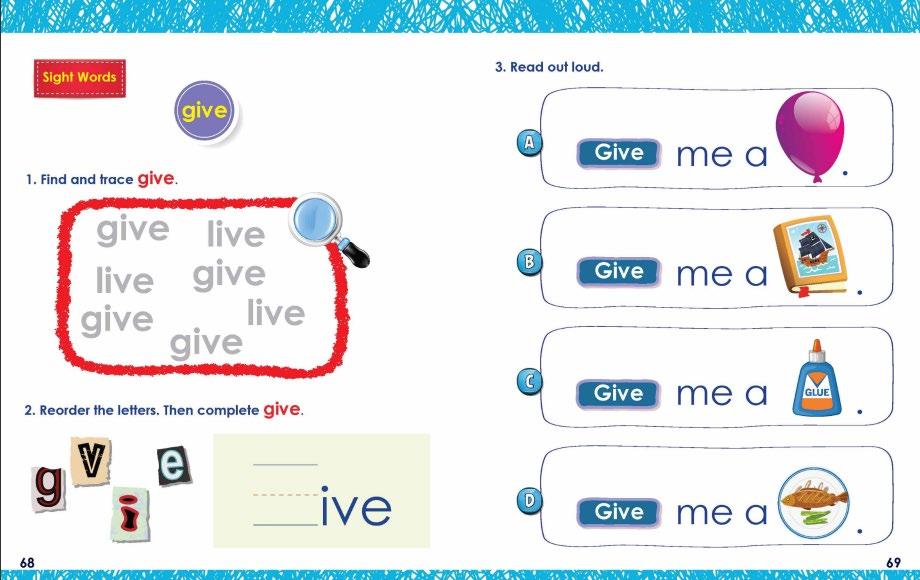
Activity 7: The key objective of this activity is to develop reading skills and to prepare the students to be fluent readers in the future.
• By using Presentation PLUS, you may wish to invite some students to read the first sentence out loud. Then invite others to point to the image that represents the sentence.
• Next, you can ask the students to match the sentences to the pictures correctly.
• More fun could be added to this exercise by asking the students to sit in pairs. Each student tells the other what they want to eat.
• Finally, you can encourage the students to use the same structure to make sentences of their own.
• Activity 8 & 9: Finally, they can complete the homework at home. This is an eye-opener for the students since it encourages them to use what they learned at school in the real life outside of the school.
• Art is vital for developing creativity and imagination, especially in helping children express themselves through art and drawing.

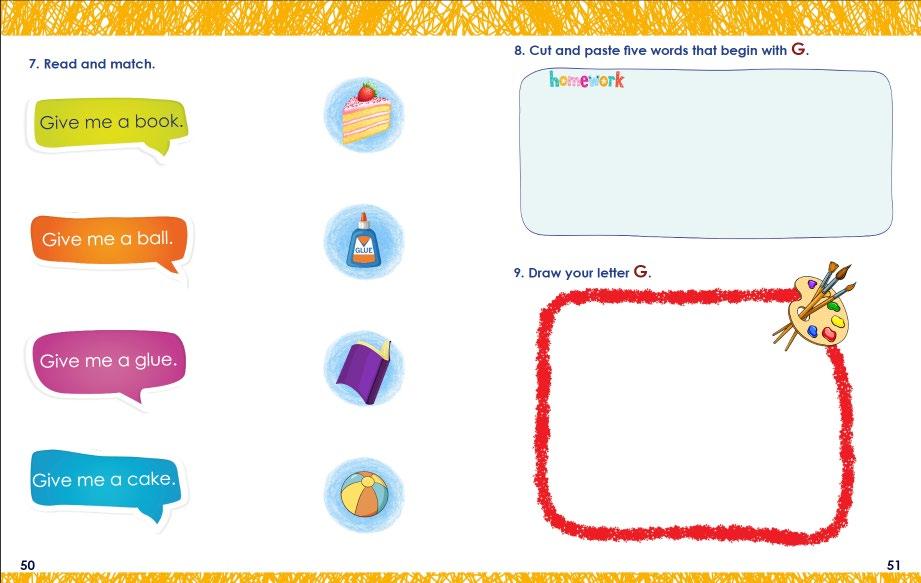














The key objectives of this lesson are for children to:
• Write the uppercase and lowercase forms of the letter ‘H’.
• Recognize the uppercase and lowercase forms of the letter ‘H’ alone and within words.
• Understand that uppercase and lowercase ‘H’ represent the same letter.
• Learn vocabulary associated with the letter ‘H’, specifically ‘hand’, ‘horse’, and ‘house’.
• Identify words and objects that start with, or contain, the letter ‘H’ in real-life scenarios.
• Listen to and identify familiar and unfamiliar words starting with the sound ‘h’.
• Review how to auditorily identify words starting with the sounds ‘a’ to ‘g’.
• Practice reading, writing, and auditorily identifying the letter and sound ‘H’.
• Revise sight-reading and assigning meaning to vocabulary starting with the letter ‘H’.
• Revise writing, and identifying objects that start with, the letters ‘F’ and ‘G’.
• Identify matching sounds in familiar vocabulary.
• Practice pencil control and grip.
• The purpose of this activity is for children to practice writing both the uppercase and lowercase forms of the letter ‘H’.
• Starting with uppercase ‘H’, describe the components of the letter and its shape. Invite students to contribute to the description, identifying any key features they think are interesting or important, or any shapes/objects they think are familiar to the letter.
• After that, demonstrate how to form the letter by tracing its shape on an A4 flashcard, then in the air in front of the class. Invite students to join you in practicing the tracing motion in the air and allow them to become familiar with forming this shape. Specify that letters are always formed from top to bottom and use the numbered diagram from this activity to guide students step by step.
• Next, students can familiarize themselves with the physical shape by using stamp pads and/or chalk. Give a blank piece of A4 paper to each student and a stamp pad for pairs or groups to share. Ask students to press their fingers into the stamp pads, then use the ink on their fingers to create the shape of the letter ‘H’ on their A4 paper. They can create multiple ‘H’s and practice as many times as needed.
At the end of the class, you can create a poster collage with all the A4 papers from the students. This provides a great opportunity for children to learn letters in a kinesthetic and multisensory way.
• Alternatively, you can go outside and give each student a piece of chalk. Ask them to practice writing the letter ‘H’ on the ground as many times as they need to feel comfortable with the letter. This activity can also be done inside the classroom on the tiles.
• Teachers can also use any other materials and resources they have available, or find suitable, to execute this exercise in class.
• Next, complete this activity interactively as a class by using Presentation Plus. The teacher should first demonstrate how to write ‘H’ on the board. Afterward, students can take turns writing the letter on the board themselves and receiving individualized feedback from the teacher.
• Once students understand the basic shape of the letter ‘H’ and how to form it, ask them to turn to page 70 of Pupil’s Book 1 and complete the activity. Instruct them to first trace the shape of the letter using their finger, then trace with their pencil, and then once they feel comfortable, ask them to practice writing the letter in the space provided.
• This is a good time to walk around the classroom and check students’ work. Take notice of how they trace and write the letter and correct any mistakes.
• Once complete, repeat the above steps for the lowercase form of the letter ‘H’.
Note: It may be helpful to remind students of the proper way to grip a pencil before this activity.

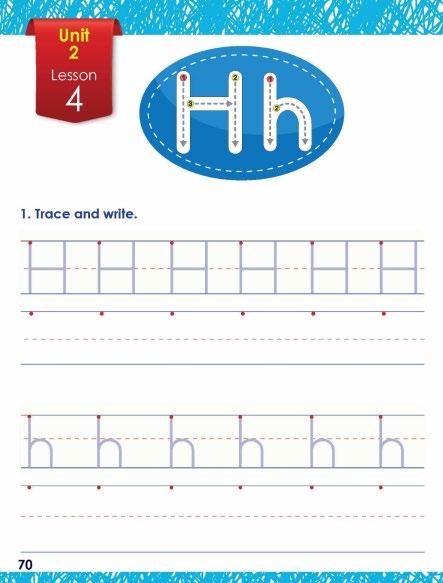

• At the end of the class, ask students to create their own uppercase and lowercase ‘H’ at home to bring into school the next day. They can use whatever materials they have and can decorate the letters however they’d like.

• This is a great way for students to continue practicing letters in a creative and fun way outside the classroom.
• When all the students bring their letters into class, you can ask them to help you create a poster or collage with the whole class’s letters.
• This exercise can be completed after Activity 1 from Pupil’s Book 1 for further handwriting practice.
• Invite students to turn to page 52 of Activity Book 1. First, instruct them to trace the letters with their fingers, then once they feel confident, allow them to use a pencil to trace and write the letters in the space provided.
• Ensure you instruct students to follow the writing pattern demonstrated in the first line. Specifically, rather than writing all the uppercase letters first and lowercase letters second, they should alternate writing one uppercase and one lowercase letter as indicated in the activity book. This will allow them to practice writing letters as they would appear in a word or sentence, with the uppercase letter first and the lowercase second.
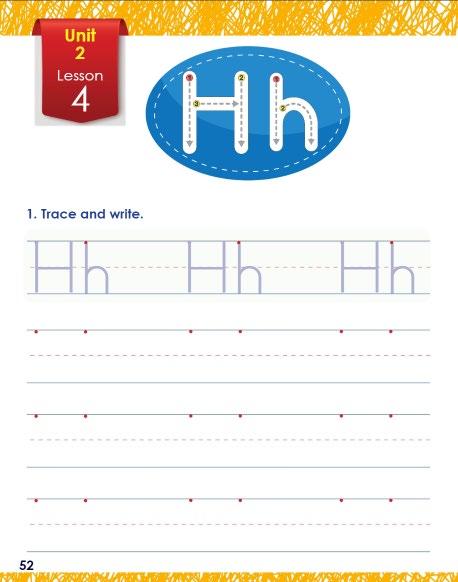

• This activity will help students match letters and understand that both uppercase and lowercase variants represent the same letter. Additionally, it will help them revise different forms of the letters ‘A’ to ‘G’ that they learned in previous lessons.
• Before writing in the Activity Book, play a game with the students to help them practice identifying matching letters.
• Using a marker and some popsicle sticks, write at least ten different combinations of an uppercase and lowercase ‘A’, ‘B’, ‘C’, ‘D’, ‘E’, ‘F’, ‘G’, and ‘H’, on each one (as depicted in Activity 2), such that each stick has two letters on it. For example, hh, hf, Hh, hc, HH, HA, hE, etc.
• Separate the students into groups of three or four and give each group a minimum of 10 popsicle sticks. Ask the students to sit in a circle, with the popsicle sticks scattered on the floor or table in between them face down. The students should then take turns picking up a popsicle stick at random and identifying whether the pair of letters on it matches or not. If they correctly identify a matching pair, the student can keep the stick, and if they are wrong, they must put it back in the circle along with one of their previously won sticks. Students can take turns doing so until they have collected all the matching sticks. The student with the most popsicle sticks wins the game. You can give a prize to the winners from each group.
• This game also presents a great opportunity for students to revise the uppercase and lowercase forms of the letters ‘A’ to ‘H’ that they have previously learned. You can expand the activity to include more combinations of letters and ask students to find instances of other matching letters as well.
• Teachers can also use any other materials and resources they have available, or find suitable, to execute this exercise in class.
• When the activity is over, invite students to individually complete Activity 2 in their book. Instruct students to circle or color the clouds that contain matching letters.
• You can take this time to walk around the class and observe the students’ work, taking care to correct any mistakes if present.

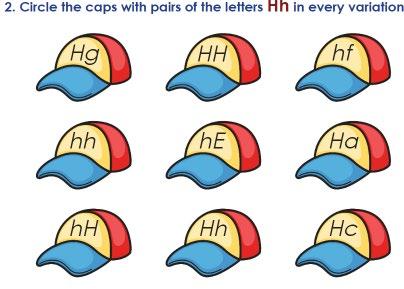
• This activity encourages students to find examples of both forms of the letter ‘H’ in real life.
• allow students to practice identifying the letter ‘H’ in the real world by playing a fun game in class.
• Before this lesson, stick pictures of different words starting with the letter ‘H’ in random places around the classroom. Use a minimum of ten words total.
• During class, divide the students into two teams and invite them to stand at one side of the classroom. Give each group a stack of colored post-it notes; a different color to represent each team.
• Ask the students to perform a relay race to find as many examples of the letter ‘H’ in the classroom as they can. After the teacher says “Go!”, one representative from each team must search the classroom for an example of the letter “H”. When they find one, they should stick a post-it note of their team’s color on the letter, then run back to their group and tag another member of their team. Then, it is the next person’s turn to find an example of “H”. The relay race should continue until the students have identified all the examples of “H” around the classroom. The winner is the team that finds the most examples of “H”. They can get a prize from the teacher.
• Teachers can also use any other materials and resources they have available, or find suitable, to execute this exercise in class.
• Once this exercise is complete and students have found as many examples as they can of both forms of the letter ‘H’, complete this activity interactively as a class using Presentation Plus. Ask students to identify all the instances of the letter ‘H’ that they can see on the board, as well as their positions at the beginning, middle, or end of a word. You can also invite individual students to circle the letters. Once the class has reached an agreement, the presentation will display the correct answers by circling each letter one by one.
• Finally, ask students to complete Activity 2 in their books. Instruct them to circle all the examples of uppercase and lowercase ‘H’ that they can find. Take this time to walk around the class and observe the students’ work. Point out any instances of ‘H’ they may have forgotten or missed.
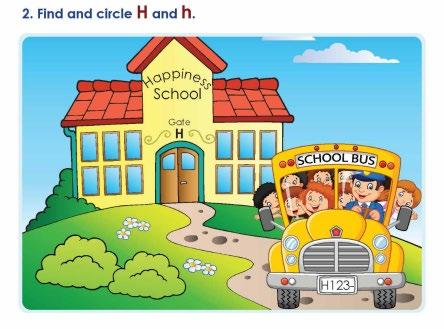

• The purpose of this activity is to introduce learners to new vocabulary words that start with the letter ‘H’ and give them the opportunity to practice tracing, writing, and identifying the letter ‘H’ within these words. Students should be confident in each vocabulary term by the end of the lesson.
• First, using the flashcards found in this guide (or Presentation Plus), introduce the words to students. Identify each word, explain what it means, demonstrate how to pronounce it, and then indicate where the letter ‘H’ is in each one.
• After that, invite students to repeat the word with you. You can also call on individual learners or the class to pinpoint where they can see the letter ‘H’. Repeat the word and identify the letter as many times as needed until learners are confident in the vocabulary term and the position of ‘H’. Then, go through the images and ask students to repeat the words without your help.
• It is also helpful to use the word in multiple contexts and different sentences. Engage with students by asking them where they would normally see a ‘hand’, ‘horse’, or ‘house’, and what they like about those things. This helps ground new vocabulary in real-life scenarios and existing knowledge, assisting with learners’ understanding and memory. Next, complete this activity interactively as a class using Presentation Plus. Again, ask for the students’ help with identifying each image on the screen. Repeat each word multiple times with the students, referencing both the image and the written form of the word so that they become comfortable sight-reading. Next, ask them to point out where the letter ‘H’ is located. Finally, demonstrate how to write the letters on the board and invite individual students to practice writing with you.
• This is a great opportunity to provide individualized feedback regarding their writing and letter formation. Students can come up to the board in pairs, with one writing an uppercase ‘H’ and one writing a lowercase ‘H’. On their next turn, they can switch. Repeat this activity until each student has had a chance to practice writing both forms of ‘H’ at least once and they are all comfortable identifying and sight-reading each word.
• After using Presentation Plus, invite students to play a game so they can practice these vocabulary terms more independently. Separate the students into pairs and ask them to open their books Task one student with pointing to the picture and the other with identifying the vocabulary term. Then they can switch. This will allow for more individual time to revise the vocabulary and will help build students’ confidence.
• Teachers can use whatever materials and resources they have available, or find suitable, to execute these activities in class.
• Once these activities are complete, encourage students to complete this activity in their workbook independently. Instruct them to do so step by step, first saying the word out loud, then tracing the shape of the letters, first with their finger, then with a pencil.
•
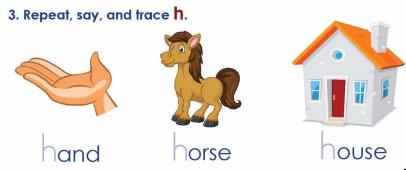

• This activity helps learners practice matching and recognizing uppercase and lowercase forms of the letter ‘H’.
• Before completing this activity in the workbook, play a game with students to help them practice matching lowercase and uppercase ‘H’s.
• First, separate the students into groups of 3-4 students. Give each group a minimum of ten coin-shaped flashcards from this guide. Each flashcard should denote either an uppercase ‘H’ or a lowercase ‘H’. Ask the students to work with their groupmates to write an uppercase ‘H’ on the back of the coins with a lowercase ‘H’ and vice versa. This is a great way for students to collaboratively and directly practice writing and matching letters.
• This activity can also be completed using pieces of paper or post-it notes. Teachers can use whatever materials they have available in class that they find suitable to execute this exercise.
• Once complete, encourage students to do Activity 3 in their Activity Book. Instruct them to write in the missing, and matching, letters and walk around the classroom to correct any mistakes you notice.
This activity is flashcardsupported
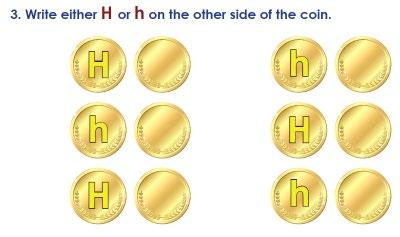

• This activity reinforces students’ ability to recognize familiar words beginning with the sound ‘h’ and allows them to review how to recognize familiar words beginning with the sounds ‘f’ and ‘g’.
• First, using Presentation Plus, go through the vocabulary terms on the board. Ask for the students’ help identifying each image and then ask them to repeat each word with you at least three times. This should be easy as students are already familiar with this vocabulary from previous lessons and activities.
• Once the students have reviewed all the vocabulary terms, ask them to identify which sound each word starts with one by one. You can say the word out loud, and they can indicate their choice of answer by shouting out loud or performing a different action for each sound. For example, clapping for ‘g’, standing for ‘h’, and jumping for ‘f’. This is beneficial for redirecting restless energy into focus on the learning activity.
• When the students have made their choice as a class, you can invite one to come up to the board and write the correct letter.
• You can repeat this activity as many times as needed until students are comfortable identifying the sounds at the start of each vocabulary term.
• As a supplement, you can also separate students into groups of 3-4 and give each group the flashcards from this guide. Task each group with matching the images to the letter sounds they begin with. You can make this a game by giving a prize to the group that matches all their flashcards the fastest. Teachers can also use any other materials and resources they have available, or find suitable, to execute this exercise in class.
• Finally, instruct students to complete Activity 4 in their Pupil’s Book. Ask them to first say the words out loud and then trace the appropriate sound. Take this time to walk around the class and observe the students’ work, correcting any mistakes you may notice.
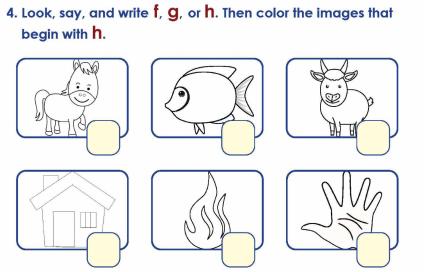

• Page 54 of Activity Book 1 contains a reader focused on a specific letter ‘H’ and identifying it in the new and familiar vocabulary words. This page encourages students to verbally identify words that start with the letter ‘H’ and practice writing the letter.
• To begin, introduce and review the concepts of “I have, as this sentence structure appears in the reader. Discuss what this sentence structure means and when it may be used. Then, give examples that are different from those of the reader.
• Next, ask students questions that require them to answer with “I have…”. For example, “Do you see a big or small house?”, “Do you have a car?”, etc. Give each student a chance to answer these questions using the sentence structures discussed above.
• Once the class is familiar with these sentence structures, go through the reader with the students and read each sentence. Ask students to repeat after you and make sure to emphasize the letter ‘H’ for each vocabulary term. You can also ask students questions about each sentence to solidify their comprehension. For example, “How many hens do you have?”.
• Next, ask the students to ‘read’ each sentence without you. For example, point to the relevant section of the reader and ask “Look! What does this say?”. You can ask the class as a whole or point to individual learners who are more confident in their reading ability.
• Afterward, the class can be split into pairs to complete the activity more independently. One student can point to the picture and the other can ‘read’ the sentence. Then they can switch. This will allow for more individual time to practice and will help build students’ confidence.
• After reading page 54 as a class and in pairs, engage the students in using these sentence structures in relation to themselves. Ask the students to take turns introducing what they have using the sentence structures in this reader. For example, “I have a toy” Each student should get a chance to introduce what they have
• Once complete, ask students to do Activity 4 in their books. Ask them to read each sentence and then fill in the missing letters when they are ready.
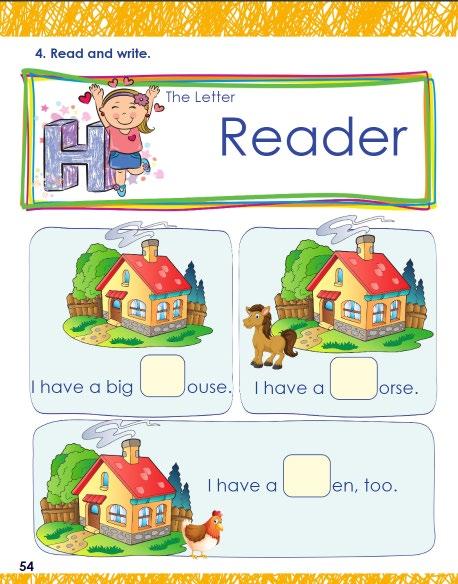

• This activity will grant students the opportunity to practice writing an uppercase ‘H’ and review writing a lowercase ‘A’, ‘D’, and ‘E’. In addition, they will revise the vocabulary terms from this lesson and will practice sight reading and assigning meaning to these words.
• First, you can split the class into groups of 3-4 students. Give each group two sets of flashcards found in this guide. One set contains the images of the vocabulary terms (‘horse’, ‘hand’, ‘house’), and the other contains the written form of these words with missing letters in blocks as in the activity. Additionally, give each group flashcards of the individual letters ‘h’, ‘a’, ‘d’, or ‘e’ or post-it notes with these letters written on them. Task learners with first completing the words using the letter flashcards, and then matching the images to the corresponding words.
• Walk around the classroom and observe the groups working. Take note of where students place the letters and how they match words and images. Correct any mistakes you may notice.
• Teachers can also use any other materials and resources they have available, or find suitable, to execute this exercise in class. For example, simply writing the incomplete word on the whiteboard, and inviting individual students to fill in the missing letters using a marker or post-it notes.
• Once complete, invite learners to turn to page 55 of their Activity Book. Instruct them to first write in the missing letters, then match the newly completed word to the corresponding image.
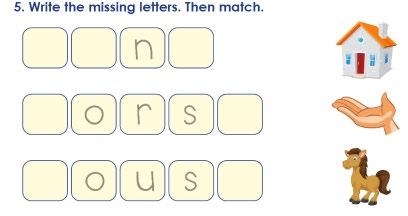

• This activity reinforces learners’ ability to recognize and match familiar and unfamiliar words beginning with the same sound. Specifically, ‘b’, ‘c’, ‘f’, and ‘g’.
• First, go through and review the vocabulary words with students using the flashcards from this guide or Presentation Plus. Ask students to identify and repeat each word after you at least three times until students are confident in each one. Next, ask them to identify each image/flashcard without your help. Students should already be familiar with most of the vocabulary from previous lessons and activities.
• After this, separate students into groups of 4. Give each group flashcards that depict the images of vocabulary from this activity. Ask students in their groups to match the images that begin with the same sounds. Take this opportunity to walk around the classroom and observe the group's work, correcting mistakes as needed.
• Teachers can also use any other materials and resources they have available, or find suitable, to execute this exercise in class.
• Next, complete this activity interactively as a class using Presentation Plus. Go through each image one by one. First, ask the students to say each word out loud, then ask them to help you determine which images begin with the same sound. When the class has decided on an answer for one pair, invite a student at random to draw a line and match the pictures on the board. Repeat this for each word, and you can repeat the entire activity as many times as needed.
• Finally, instruct students to complete this activity in their workbook. Tell them to first read each word out loud, then match the images that start with the same sound.
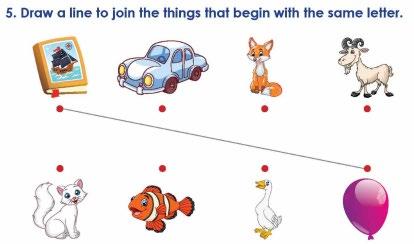

• This activity reinforces learners’ ability to have more control on the pencil or crayon. It also develops the fine motor skills as well as creativity. Also to express themselves through art.
• The teacher needs to walk around the class to encourage the students to draw and color an image of anything that begins with “h”.
• First, re-establish and demonstrate the correct way to grip a pencil.
• Next, give students explicit instructions to color inside the lines of the picture.
• Allow students to color individually but move around the classroom and correct students on their grip and whether they are staying within the lines. Make sure to speak loudly in an encouraging manner so all students can hear the correct practice.
• You can give stickers to students who remain inside the lines and to those that demonstrate creativity in their coloring task.
• When they finish, the teacher may wish to invite some students present their fish and talk about it. This will be a good opportunity to ask the students about the color and size of their fish while presenting their work.

• This activity focuses much on the letter recognition of the uppercase H and the lowercase h among a combination of other letters.
• The teacher can ask the students to work in pairs and to start line by line. Encourage them to go through the letters from left to right. When they come across H or h, they shout "bingo" and circle the letter.
• They can repeat the same tactic moving forward line by line.
• The use of Presentation PLUS could be helpful to make this activity a whole-class activity. Here you can ask the whole class to identify H and h. Invite one student to come to the smart board and circle the letter they picked.
• Praising the students for their good work is advisable since this could be a good motivator for them to keep participating in the whole classroom activities.
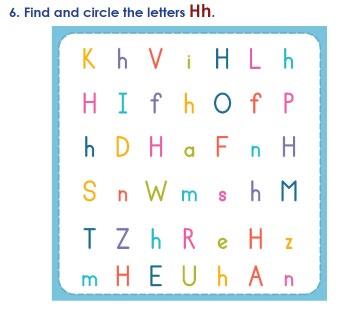

• The key objective of this activity is to develop listening skills as well as the ability to recognize the beginning sound of words.
• It is a good opportunity to learn new vocabulary items that begin with the same letter/sound of the lesson.
• The teacher may wish to use Presentation Plus to teach this lesson by following the following steps:
o Play the sound of the word several times. At each time, the teacher invites the students to repeat the word and focus on the word pronunciation, especially the beginning sound.
o Repeat the same process as a whole class activity first, then invite as many individual students as possible to ensure mastery over the words and letter sounds
o The teacher can then invite the students to complete the exercise on their books.

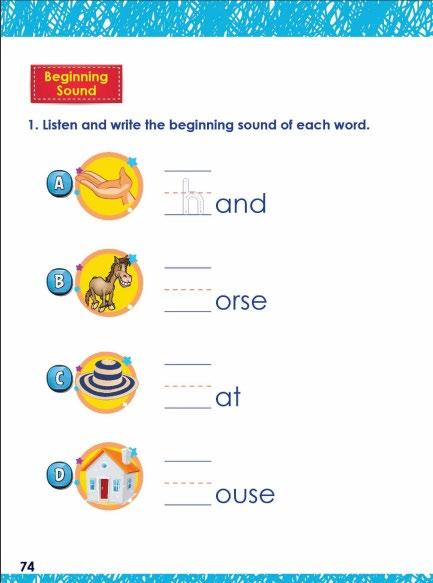
• The key objective of this activity is to develop listening skills as well as the ability to distinguish the letter sound in this lesson among other sounds.
• It also aims at helping the students to recognize and recall the words and their sounds in a visual way.
• The teachers may wish to use Presentation PLUS to deliver this part of the lesson:
o Display the slide that shows the images. Then play the sound of each word/image several times.
o The teacher invites individual students to answer, and then to praise or correct according.
o When all the words and images are completed, the teacher may invite the students to complete the exercise on their books.
o More fun could be added to the exercise by inviting the students to work in pairs. One student points to an image, the other should say the name of the image and the beginning sound of the word.
• This activity builds on children’s creativity and love of coloring and helps learners focus on pencil/crayon control. It also adds fun to the lesson in a controlled manner.
• First, re-establish and demonstrate the correct way to grip a pencil.
• Next, give students explicit instructions to color inside the lines of the picture.
• Allow students to color individually but move around the classroom and correct students on their grip and whether they are staying within the lines. Make sure to speak loudly in an encouraging manner so all students can hear the correct practice.
• You can give stickers to students who remain inside the lines and to those who demonstrate creativity in their coloring task.
• You can invite selected students to talk about the images that start with “h” as a speaking activity. You may wish to ask questions like, “What do you have?”, “What color is it? etc…

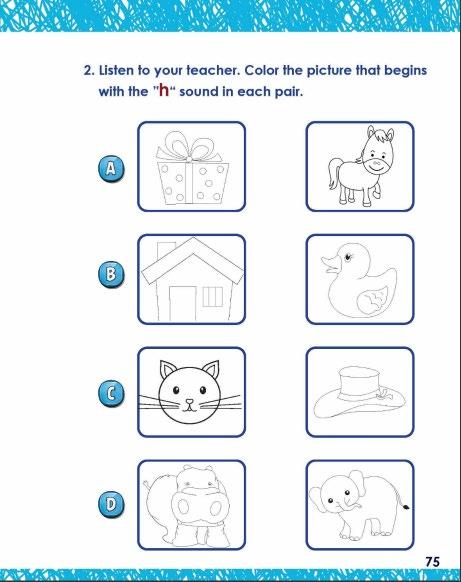
• The main objective of this activity is to enhance reading skills and help students become fluent readers in the future. It is essential to teach sight words as visual representations rather than prompting students to decode the words while reading.
• To achieve this, the teacher might consider presenting the sight word alongside a picture and prompting the students to repeat it several times. Afterward, the teacher can invite the students to identify the word among other words in a word-salad exercise using Presentation PLUS, and then again in their books.
• Next, the teacher asks the students to sit in groups, gives them flashcards related to this exercise, and asks them to reorder the letters to make words. Then, they write the missing letters to complete the words.
• Finally, the teacher uses Presentation PLUS to motivate the students to read the provided sentences in Exercise 3, which combines picture and word reading.

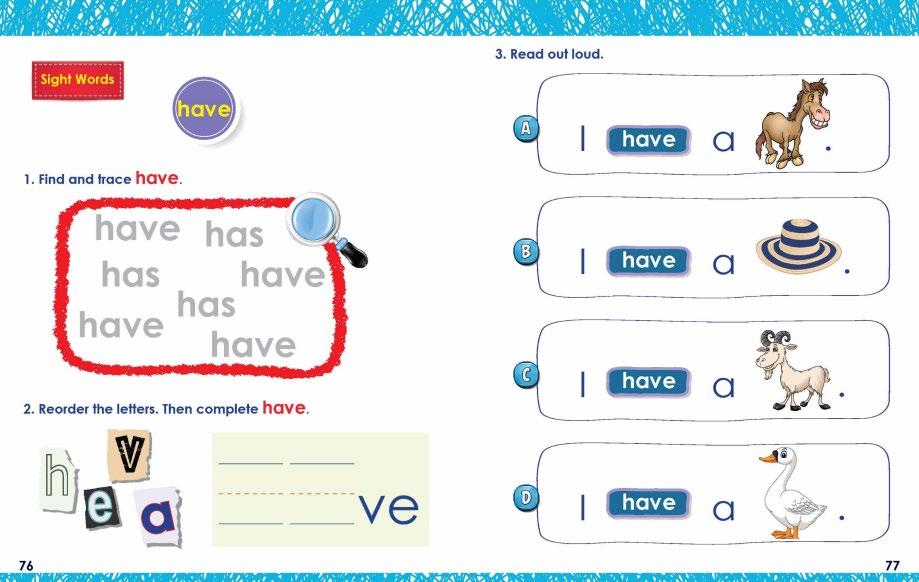
7, 8 & 9
The key objective of this activity is to develop reading skills and to prepare the students to be fluent readers in the future.
• You may wish to invite some students to read the first sentence out loud. Then invite others to point to the image that represents the sentence.
• Next, you can ask the students to match the sentences to the pictures correctly.
• More fun could be added to this exercise by asking the students to sit in pairs. One student to say e.g. a cat runs fast. The other one is to guess and point to the image of the cat.
• After that, you can encourage the students to use the same structure to make sentences of their own.
• Finally, they can complete the homework at home. This is an eye-opener for the students since it encourages them to use what they learned at school in the real life outside of the school.
• Art is extremely important to develop creativity and imagination. Most importantly, to help the children express themselves through art and drawing.

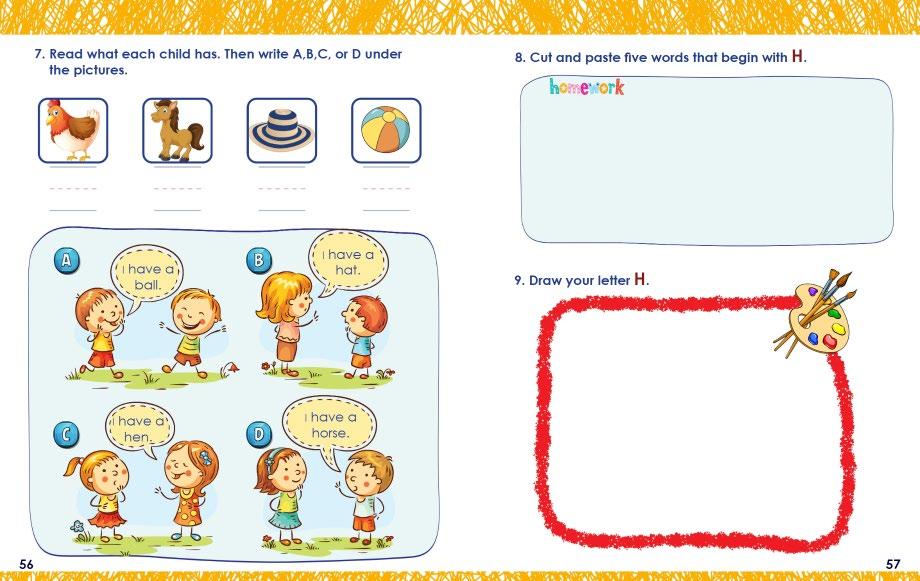









n s r o s u o