
4 minute read
Perfect Landscape FOR YOUR HOME

from Landscaping 101

The first step to planning your landscape is layout. This may seem daunting at first, but it’s just a matter of thinking about how you want to use your space while figuring out how to add beauty and utility into your design. Start by imagining your dream yard, then work on sketching a plan to make it happen (you can always scale back your design to fit your budget). With your plan in hand, you can do it yourself or work with a professional to transform your ideas into reality.
Setting Landscape Layout Goals
Advertisement
Think of landscape layout as a trouble-shooting and problem-solving process that will make your life easier. Just as you would with a kitchen remodel, begin your planning with a list of qualities you want. Landscape changes could include adding privacy screening; dealing with an eroding slope; creating beautiful views from inside the house; starting a new vegetable garden; building a storage shed; or making your entryway and front walk more welcoming. At this stage, go wild. It costs nothing to dream, and you can always execute your plan in stages as time and budget allow.
How To Evaluate Your Landscape
Before you physically add your dream landscape elements, take notes to evaluate what you like and don’t like about your yard. Walk around the perimeter of your property as if you were a stranger, objectively viewing the space. This site analysis will become your road map for change.
Make two lists of your best assets: one for the house and one for the yard. Notice what’s behind overgrown shrubs or vines. You may have hidden treasures (an attractive set of stairs, a brick patio, a lovely view) already there, just waiting to be noticed. Concentrate on the details: steps, paving patterns, views toward and away from each area, and locations of doors.
You also need a list of liabilities. Maybe there’s an unattractive yard or garage next door you’d want to screen out. Maybe one of your home’s attractive features (a side entry to the kitchen, for example) lacks landscaping. Then think about how to turn that liability into an asset. That blank side entry area may be the perfect location to install a kitchen garden, a patio for entertaining, or a place for the grill.
Note the topography, showing which locations are sloped, sunny, or shaded (don’t forget to make a note of sun and wind patterns). The southern or southeastern face of your house provides warming rays in winter and sun all day in summer. Year-round outdoor regions are perfect locations for sitting areas because they’re protected from harsh northwestern winds. However, in summer those same spots might be too bright and hot to be comfortable.
Choosing Landscape Features
Once you have a good sense of what you’d like to change about your landscape, you can think about what to add. Consider these items for your wish list:
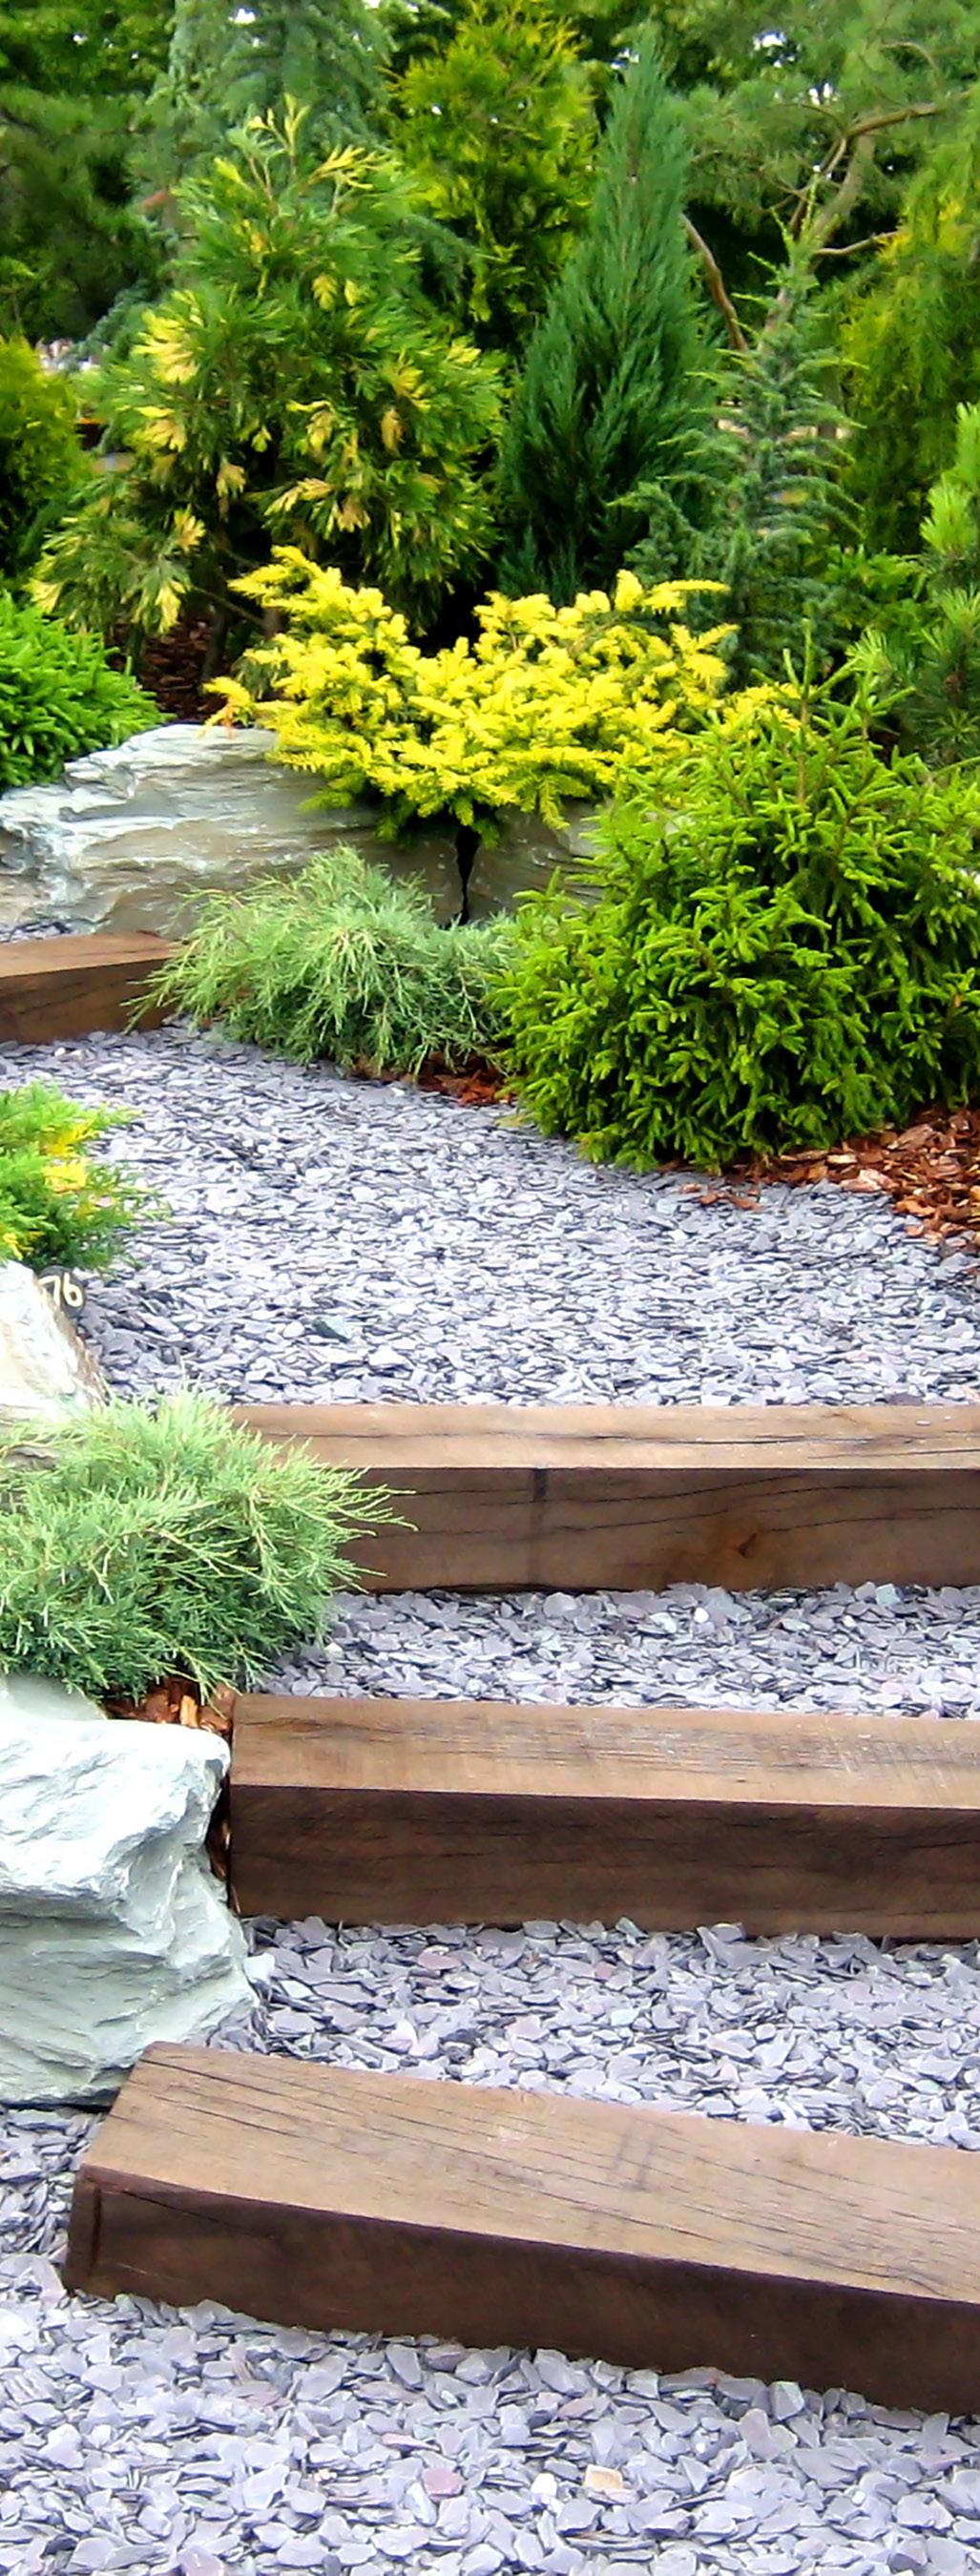
STEPS
Timber and brick
Concrete
Stone
PATHS
Brick
Concrete pavers


Crushed stone

Loose-fill
Flagstone
STRUCTURES
Pergola
Arched arbor
Square arbor
Triangular arbor
Lattice arbor and fence
Picket fence and gate

Arched gateway
Screened seating area
WALLS
Stone
Timber
DECKS
Wraparound
Geometric
PATIOS
Brick
Tile
Stone
OTHER ELEMENTS
Window box
Planter
Tree-surround bench
Outdoor lighting
Ponds and waterfalls

Children’s play area
Garden shed

Potting bench
Raised beds
Compost bins
Rain garden
How To Create A Base Map
It’s time to add sketches to your notes to help you see what’s there and generate new ideas so you can select the best options. It’s a low-cost way to explore choices and prevent costly mistakes. You can create a base map for your landscape layout either on paper or on your computer with an online program or downloadable application. Either way, it’s important to have a visual representation of your thoughts.
Your base map should show the outside dimensions of your house and the perimeter lines of your property. For a head start on these dimensions, use the plot plan (also called a survey or plat) you received when you bought your home. Many city or county assessors also provide these online.
On the base map, sketch in existing features that aren’t going to change, such as the property line, existing trees and shrubs you plan to keep, walkways, walls, outbuildings, fences, and patios. Note the locations of doors, windows, the air conditioner, utilities, and other services, including septic systems.
When you finish a base plan, make several copies. Or if you’re using paper, place tracing paper on top so you can make additions and subtractions without ruining the original. Then you can start playing with the landscape layout!
Finalize The Design Concept
On your base map, draw circular or blobby areas (bubble diagrams) to represent the ways you want to use different areas of your yard. Your bubbles don’t have to be round; draw them in different configurations and shapes as needed, but remember to label each one with its intended use. Don’t worry about cost at this point; it’s a brainstorming activity. And if some of your ideas seem odd or unattainable at first, keep them for now because they’ll eventually help you hone in on the right decisions for your space.
Your bubbles might include screening the view of the neighbor’s yard, pathways, new flowerbeds, a patio, and a location for the kids’ swing set. It may show where you want to plant trees and shrubs, or where you want them removed.
When you’ve placed your bubbles in the best spots, make a new, clean, final drawing. This is your design concept. It should include every decision you’ve made. Each of these bubbles represents one project or phase of your landscape plan.
By referring to the design concept every time you begin one of the projects, your landscape layout vision will remain cohesive so that the final results will reflect your well-thought-out plan.


