12 minute read
Expensify User Guide

Purpose Of This Document
This document provides step by step directions for Fugees’ staff to properly request and receive an expense reimbursement, mileage reimbursement, and/or document purchases charged to a Fugees’ credit card. This document discusses process but not policy. Please contact the your operations team for additional details about allowable expenses.
Advertisement
Throughout this document, there are items surrounded by an orange box or in orange font. This is meant to emphasize the point to the reader. At the end of this document, users can find links to additional training (written, video, Q/A, and webinars) in the “Expensify Community.”
Please bookmark the Expensify login page: https://www.expensify.com/
Overview Of Expensify Workflow
Mobile Access vs Web Access
The same user can enter information in Expensify through the web and/or the Expensify app. The user interface for mobile vs web differs slightly. Mobile has its own shortcuts and user suggestions, however the steps in the workflow for mobile and web are the same The user makes a purchase which is either reimbursable or directly charged to the Fugees credit card The user will: o collect the receipt o store the receipt in Expensify o create an expense record supported by the receipt o attach the expense(s) to an Expense Report, which will be submitted for approval o upon approval, the user is reimbursed, or the receipt is used to reconcile the business card
Receipt or No Receipt?
Within Expensify, business expenses, whether on a personal card or a Fugees issued credit card, must have an attached receipt Expensify also requires a “receipt” for mileage reimbursements; however, the web version will automatically mileage receipt within Expensify based on user input, but the mobile version will NOT automatically generate a mileage receipt based upon the starting and ending destinations entered by the user or relying on GPS in real-time, which is not convenient in real life. The mobile version requires more work on behalf of the user. More about this later in this document.
Whether a reimbursement request is entered by mobile or desktop, the user must attach a digital receipt using 1 of the 3 ways below.
1)use the app to capture the image with your mobile camera
2)email to receipts@expensify.com - Expensify will recognize the username and assign to the user’s personal/private Expensify workspace
3)upload files from a drive (web on laptop)
Expensify App
Download
Download the Expensify app from the Apple store or Google Play store. Access Expensify by downloading the Expensify app or logging in at https://new.expensify.com/
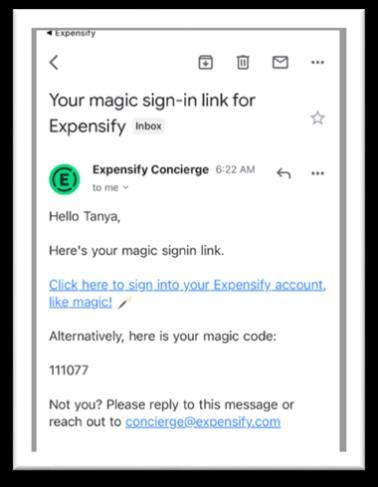
Magic Code/Link
When signing on via the web or the app, Expensify generates a “magic sign in link” or “magic code” rather than a password. The user will receive a new magic code by email every time they sign in.
One Time User Setup
Upon the initial login, users will set up a profile. Concierge, the Expensify assistant, will notify or prompt the user to take actions as needed.
After logging in, users land on a Home page with several sections that can be expanded or collapsed by clicking on the carat on the far left. Expensify likes to advertise its products and deals. You can hide sections by clicking on the carat. The following options are suggested for setup
Setup can be performed through a web or the app, but the order and number of Concierge panels differ. Regardless, the information below will indicate which panels to use and which panels to skip.
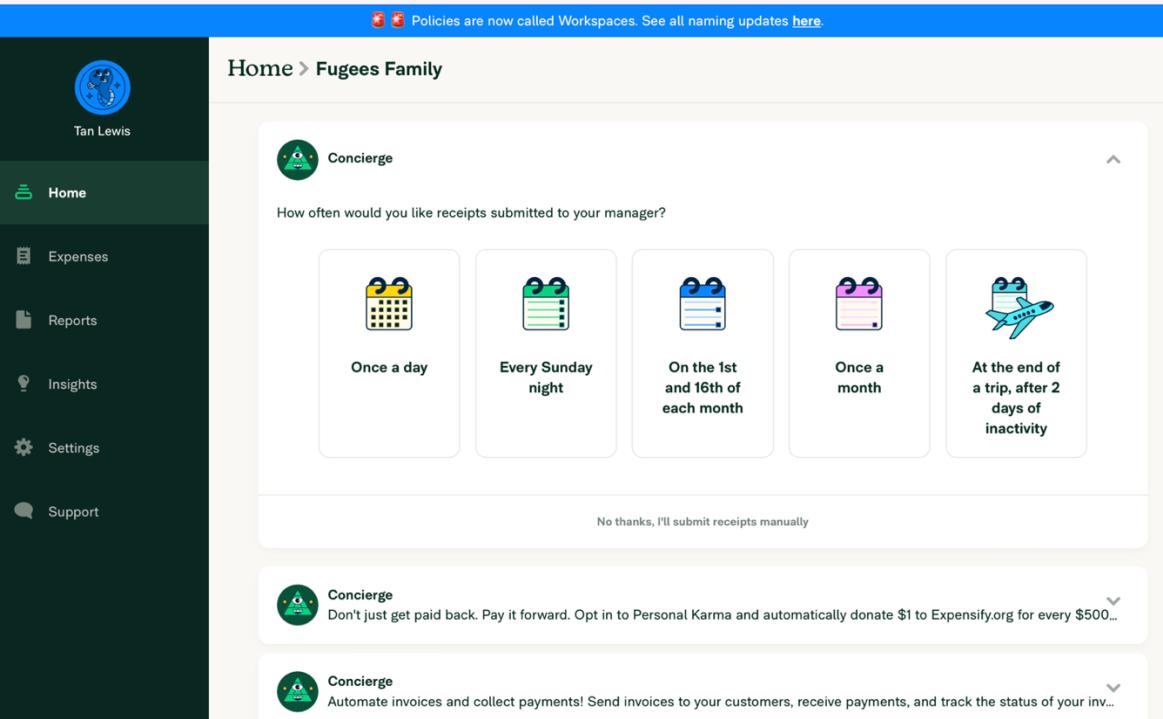
1. How often would you like receipts submitted? Select “No thanks, I’ll submit receipts manually” in gray under the row of calendar icons.
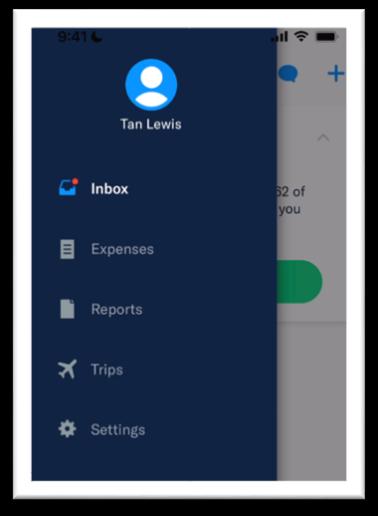
In the app, the navigation bar minimizes and maximizes from the left side. The Home page is called “inbox.”
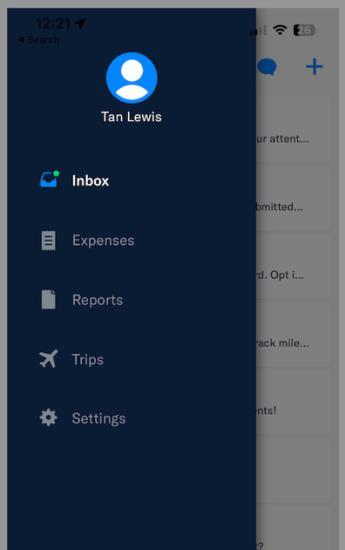
Homepage = Inbox carat symbol →
The black navigation bar will always be on the left in the window
Concierge will guide the user through each panel. The user can also click each successive carat to setup or change an option later.
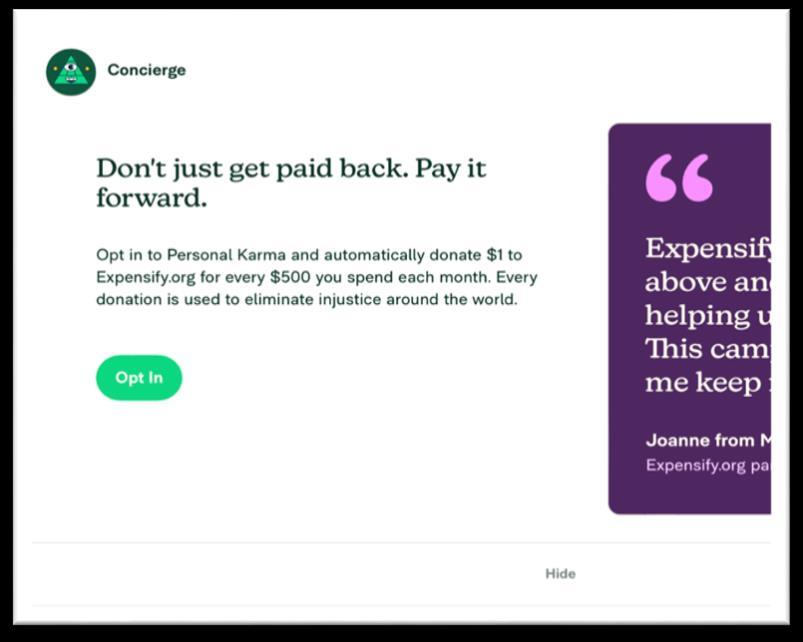
2. Click HIDE at “Don’t just get paid back. Pay it forward.”
3. Click either Hide, Not Now, or I don’t have a receipt yet on the next sequence of Concierge panels that start with the phrases: a) “Automate invoices and collect payments…” b) “Expensify now supports Bills!” c) “Ready to smart scan…” d) Mobile setup will ask “Do you want to use your location to track mileage?” a) Add your First and Last Name b) <optional>Upload a photo c) Click Confirm (green button)

The order and inclusion of the following panels differ on mobile vs web but the panels with which you will interact during setup are emphasized.

4. Concierge will display your Fugees email address.
5. If using Mobile, it is recommended that you select Add to contacts (green button) at the Concierge panel that starts with the phrase “Email receipts to….”
Depending on your access (mobile or web) the last panel may have an option that says “Got it. Thanks.” If it appears, select “Got it..” and the panels should collapse automatically.
Expense Workspace
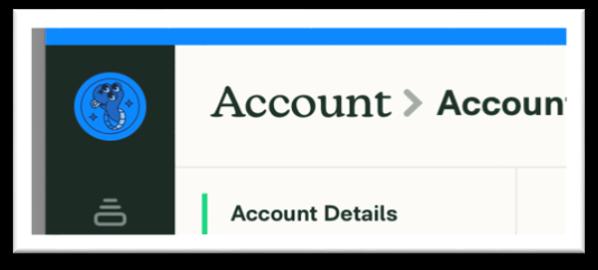
Each Expensify account is randomly assigned a round profile icon until the user customizes it. In this case, the round icon is dark blue on the black background. It may be difficult to see, but there is a carat on the immediate right (center) of the round profile icon. The carat is bright green. When the user clicks, the window shown below on the right will popup. The green check mark should always be beside “Fugees Family.”

Notification by Email
Users can receive emails about outstanding tasks and status reports in their Fugee email, or the user can log in periodically to get updates and determine if action is needed.

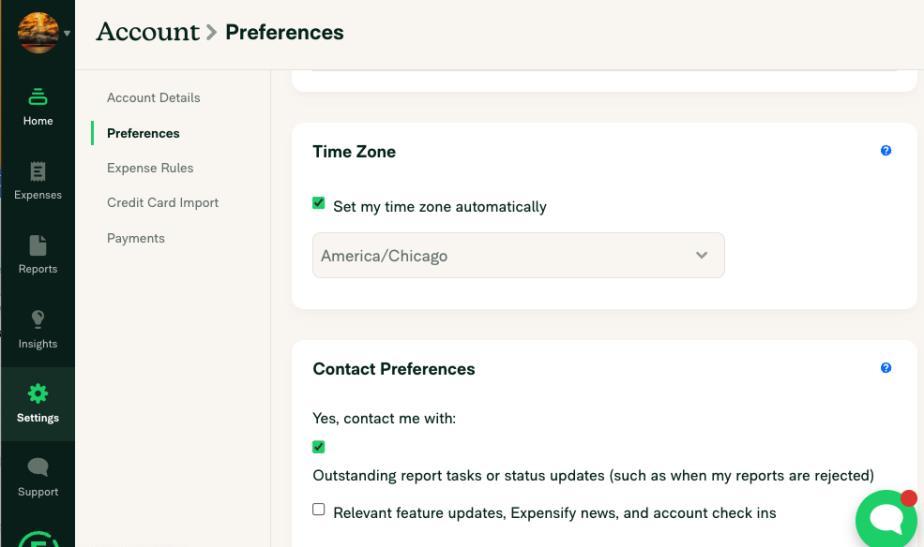
Email notification to a work email can be turned on or off in Account >Preferences
Recommendation: Uncheck the box for “Relevant feature updates, Expensify news….”
From this point onward, this guide will focus on working in the mobile interface (app) except for mileage reimbursements. Users can still apply these actions to web access when using a laptop/desktop Although the mobile and web layout are not identical, this doc can still guide a web user through each process.
Periodic Sync of App and Web
IMPORTANT ACTION: After initial setup, you must Sync Account within the app. As a precaution, users should periodically (once a week) navigate to Settings and Sync Account. Even if the user does not want to ever access Expensify via the web, it is still VERY critical that to sync the account.

Capture Receipts On The Go
Receipts must be submitted, saved, then processed, but not all at the same time. The user can capture receipts using their phone’s camera or forwarding a digitized receipt to Expensify
SmartScan
Expensify has a paid feature called SmartScan. It uses OCR to transfer information from the receipt to an expense. The Fugees’ account comes with 25 free SmartScan per month.
NOTE: Even without the cost, SmartScan is inconsistent. If a receipt has an unusual layout, is blurry or damaged, SmartScan may run in the background for up to an hour only to result in an error. A more reliable alternative for the user is to take a picture of the receipt and enter details manually.
SmartScan cannot be permanently disabled on Fugees Expensify account type at this time.

Receipt Capture with Cell – Option 1

During a trip or immediately after a purchase, a user can quickly capture and save a paper receipt(s) for review later by doing the following to capture one receipt or multiple receipts in rapid succession.
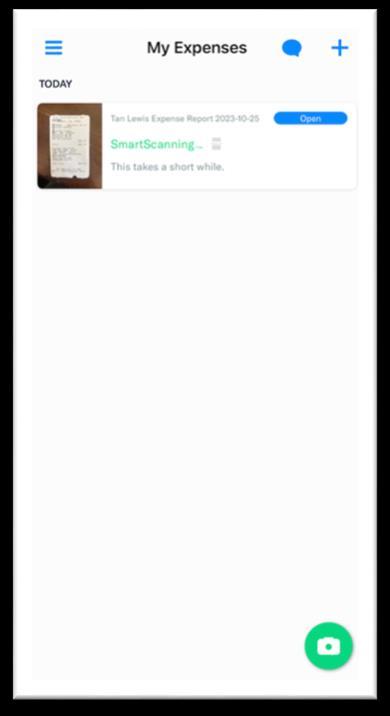
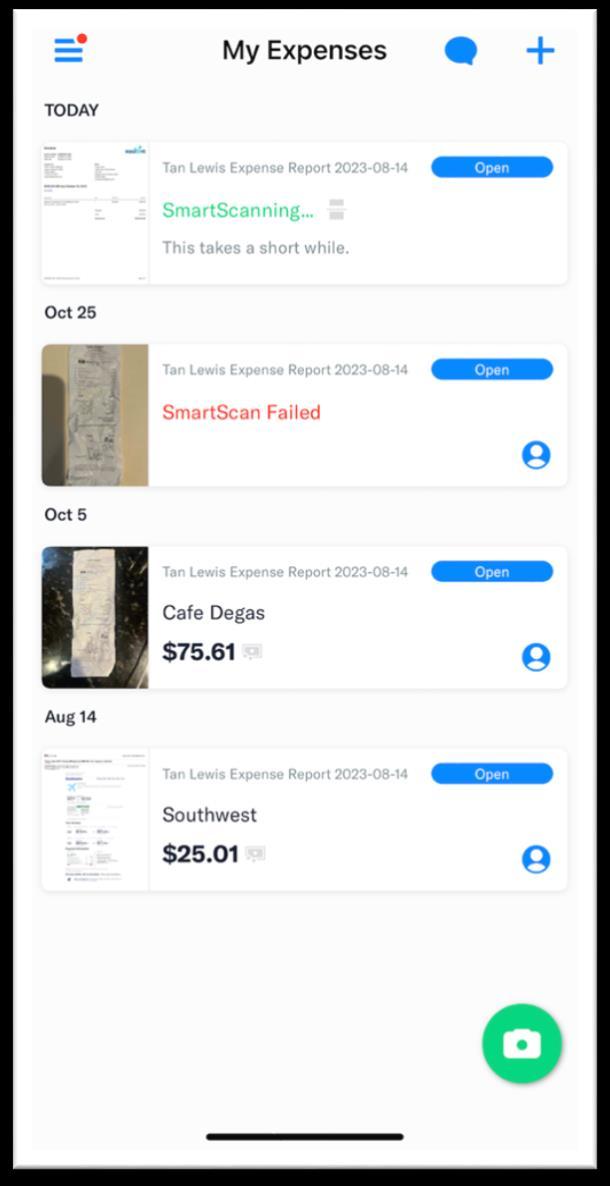
1. Open the Expensify app and click Expenses from the Home page.
2. Click on the green camera icon in the bottom right corner,
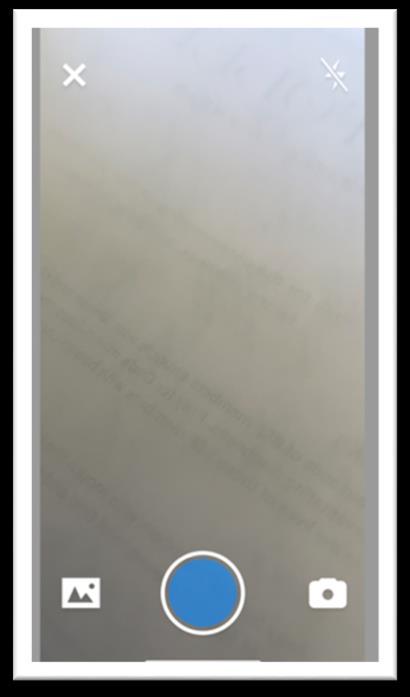
3. This will launch another window connected to your cell phone camera. (You may have to grant the app permission to your camera.)
4. Take a picture of one receipt by clicking the blue button at the bottom of the screen. Make sure all the data is visible and in focus.
5. When the picture loads, click Save, blue font, in the top right corner. NOTE: The user does not have to enter any details at this step.
6. The expense will be saved and held in “My Expenses” until further action is taken.
7. To add a second receipts, click on the green camera icon and repeat the process or switch to Rapid Fire Mode. See “TIP” below.
TIP: Tapping the white camera icon toggles the system to Rapid Fire Mode. It allows the user to take pictures of a stack of receipts without pausing to key in other information.

Email – Option 2
Digital receipts can be emailed to receipts@expensify,com as long as the email originates from the same email registered in Expensify. The expense will be in a private workspace until the user is ready to enter expense details and submit an Expense Report.

No email subject is required, and no message in the email body is required.
Expensify extracts the email attachment and stores it in an area called “My Expenses.”
Creating Expenses From A Receipt
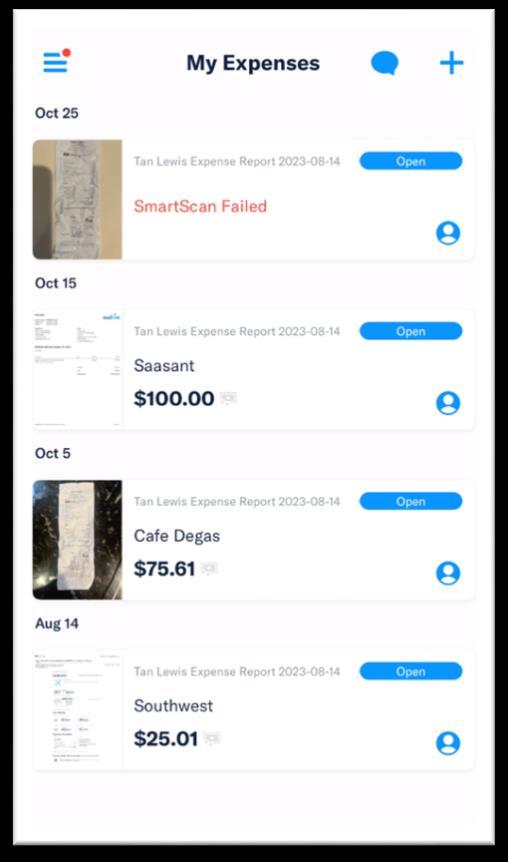
From the mobile menu, select Expenses. All the user’s open (unprocessed) expenses will appear in the My Expenses list. All unprocessed expenses will be displayed. Select an open expense.
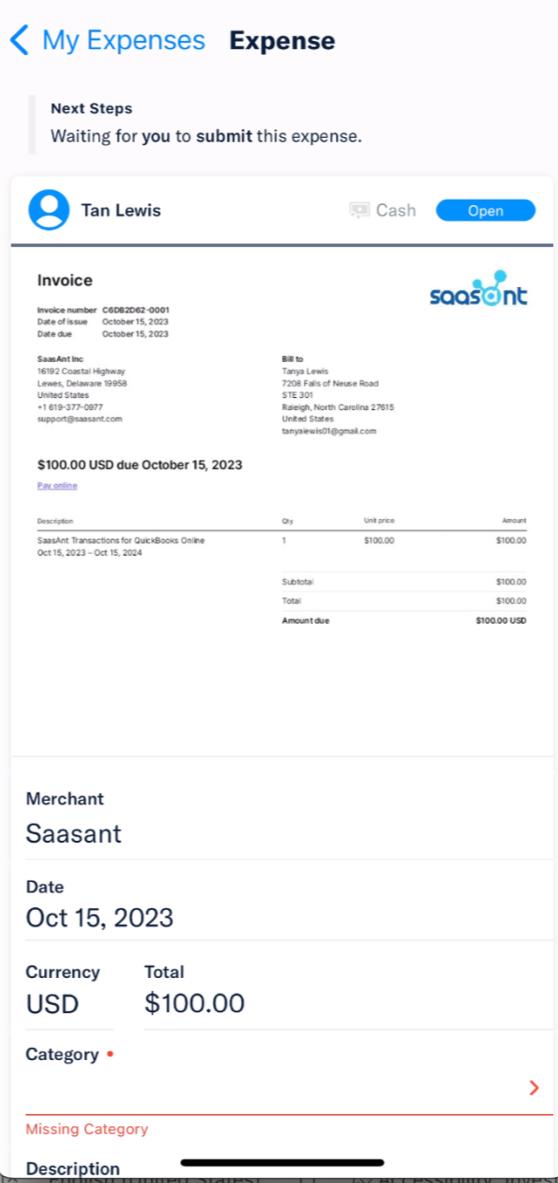
Example: Select Saasant dated Oct 15
The screen expands to reveal fields for Merchant, Date, etc. The receipt is displayed at the top. If the receipt appears truncated, click anywhere on the document. This will open the picture of the receipt in a new window. Select “Expense” in the top left corner to return to the Expense page.
Coding Expenses
The next step requires the user to “code” the expense which provides a description of the purchase to supporting accounting processes and establishes a link to the budget. Mandatory fields are marked with a red asterisk.
Merchant: Expensify will often insert the vendor’s name. This is not part of the SmartScan process. The user should still check for accuracy.
Date: Expensify will often insert the transaction date. The user should always use the date on the receipt regardless of when the funds posted to the bank or credit card.

Currency defaults to USD.
Total: Again, Expensify will insert a total if the layout of the receipt is straightforward. The user should still check that Expensify has inserted the total (after tax, tip, or other service fees).
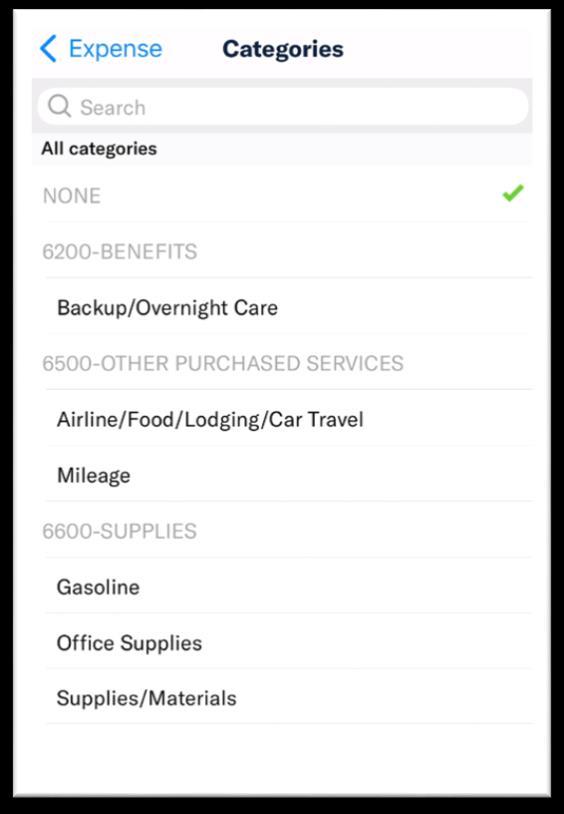
Category: A list of category choices will be displayed by clicking on the red carat. The choices in the Categories list are a select number of account codes from QuickBooks. If a user believes the expense does not practically fit in any of the displayed categories, they should email xxxxxx to request that an additional category be activated. Conversely, if an account code is retired from QB, it will be no longer appear in the list.
Description is not considered a mandatory field by Expensify, but it is VERY important. The user should provide a brief but informative description of what was purchased.
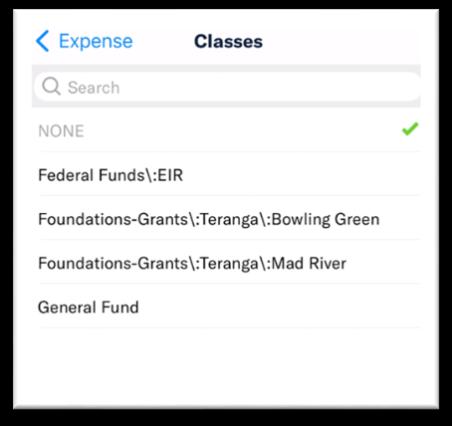
Class is used to identify the type of budget funding. Click the red carat to expand the list. This mandatory field is also linked to QB with select classes made available. If a user believes that an expense should be funded by a source not listed, email the operations team.

Customers/Projects: This is used to identify a specific Donor or specific source. If the expense is not tied to a specific donation or funding stream, leave this field blank.
Select More Options to expand the form.

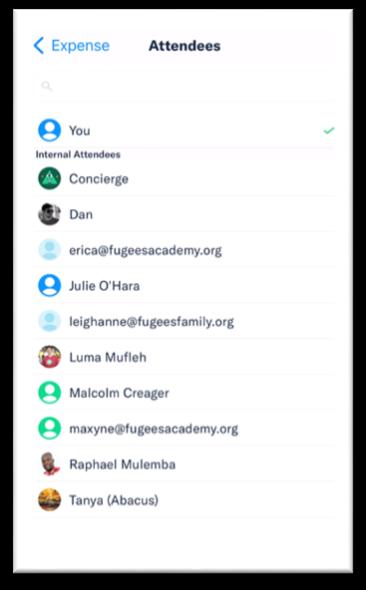
Attendees: This defaults to the user. Typically, this is not used, but if the user makes a purchase on behalf of other team members, those names should be selected by using the blue carat.
Example: a team dinner
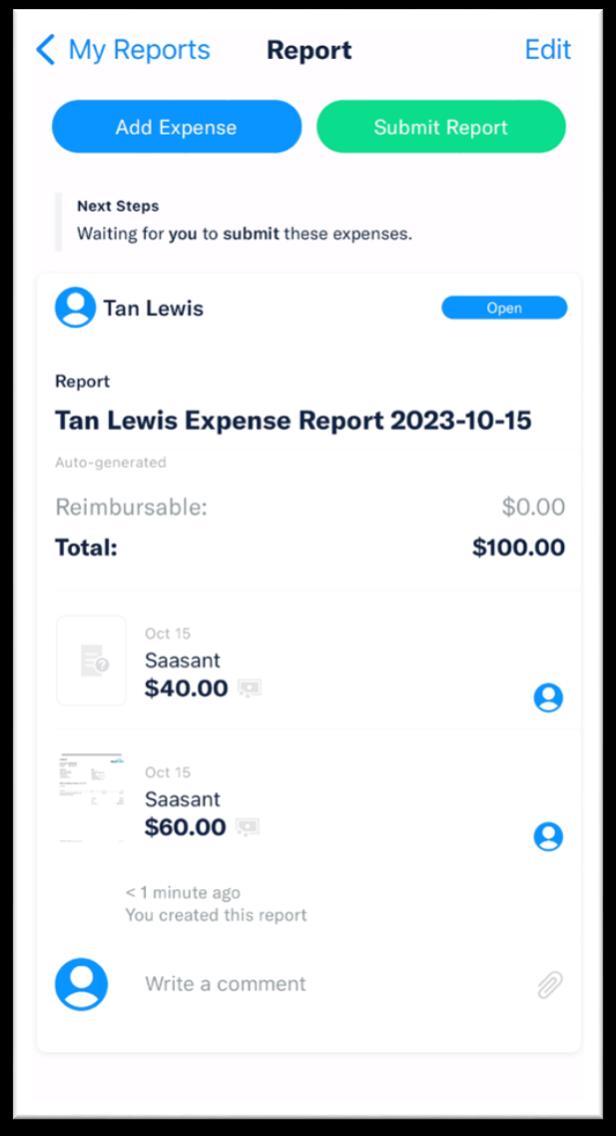
Report: Expenses are in an “open state” until the user assigns them to an Expense Report. An Expense Report can have a single expense, or it can have dozens of expenses. By default, Expensify will assign the expense to an open report, but the user can unassign the expense, move it to another open Expense Report, or create a new Expense Report by selecting the blue + sign in the top corner.

After the user accepts one of those options, they can rename the open Expense Report. Example: Expense Report 2023-10-26 could be renamed to something more meaningful like “ TL October Expenses” recommend the creation of an Expense Report using the date of the receipt.


Reimbursable or NOT Reimbursable
Reimbursable is a key field/button. By default, the button is toggled to green which affirms that this is a personal reimbursement. If the receipt/expense was paid by a Fugees credit card, the user must toggle this switch off (no green).


+ Add Split allows the user to distribute the total expense to 2 or more account codes. The user can select + Add Split to add one, two, or more lines. Example: If a user makes a purchase at one store for 2 different programs, then the costs should be allocated to the corresponding budget lines of each program. Expensify will ensure the split is never more or less than the total receipt.


Users should be very careful before splitting an expense on the app. If the split needs to be reversed or updated, the user can merge the expenses back into a single expense, but this must be done through the web.
Visit the following links for more information about the advantages and disadvantages of splitting expenses and merging expenses.
After open expense are fully coded and added to an open Expense Report, the user can select Submit Report, which send the report to the admin inbox for processing.
Users are given one more opportunity to review the Expense Report and must Submit again. Expensify will automatically route a user’s report to the appropriate team member for review/approval.
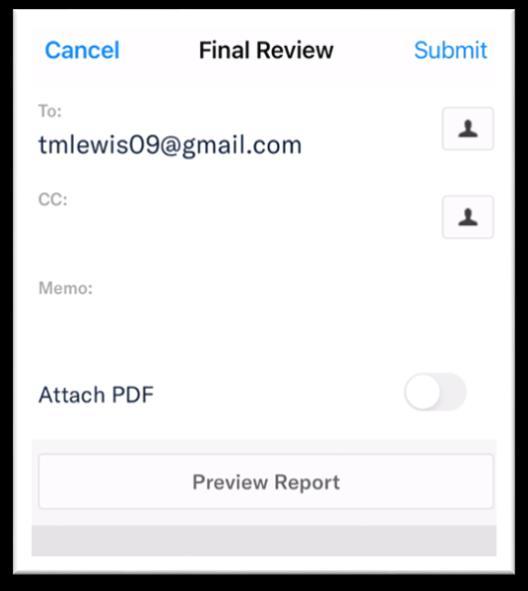
Although Expensify provides fields to copy other email addresses and attach a PDF, this is not the normal protocol. If the user wants to share information with a team member or attach additional supports, this is the opportunity to do so.
Example: A user might cc someone on the Finance team that paperwork for a certain funding source has been submitted.
Example: A user might attach additional paperwork to support an unusual expense.
Generally, a user will not add a cc, memo, or attachment. Usually, the user will only Submit
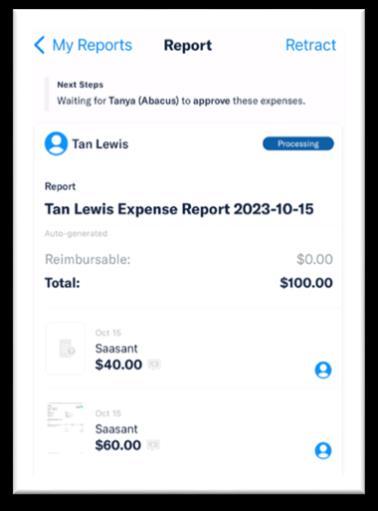
A user can Retract an Expense Report that has been submitted but still in the queue for admin review. (The report will have a status of “Processing.”)

Violations and Notes
Expensify will allow the user to save an expense with incomplete or missing fields, but the user will receive an error message in their Inbox.
The user can select Fix Violations and allow the Concierge to walk them through each correction.

Certain violations are warnings and will not stop the user from submitting an Expense Report.
For example, if an expense is more than xxx days old, the user will get a warning, but the user can acknowledge the violation by clicking through the message to get to the Submit button. Expensify will flag the old transaction violation for the admin approver. The approver can accept or reject the entire Expense Report or a part of it. The user will get an Inbox message with comments to explain the rejection and possible resubmission.

If a user is unclear on the violations and how to make corrections, it is recommended that they access the Inbox via the web. When information needs to be corrected, most users will find the web version more practical.
(On the left) Two examples of violations and warnings to the user.
(On the right) The red exclamation mark on the document icon means the receipt is missing.”
The line item exceeds Fugees internal expense limit.
Comments

Expensify allows the user and admin approver to communicate through comments. Comments also act as an audit trail allowing the user to see when/what was done during processing. If a policy is violated but the user knows it is a legitimate expense, they can enter a comment at the bottom of the Expense Report. Comments will always remain on the transaction, so economy of language is recommended.
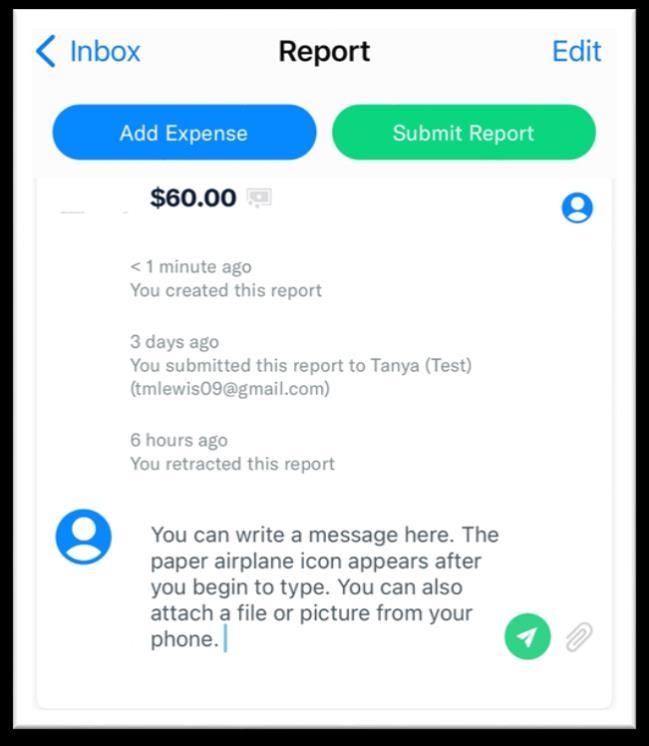

The user cannot edit until the status of the Expense Report is changed from “Processing” to “Open.”
The user will > Retract > Edit >Submit Report
The user can include clarifying notes in the report under “Comments.”
Mileage Reimbursement
There is one area, aside from setup, in which the web’s ease of use far surpasses mobile, and that is mileage reimbursements. When a user requests mileage through the web, Expensify’s built-in mapping function, which can accommodate a trip with multiple destinations, converts addresses to a map which becomes the user’s receipt/attachment. Expensify has not equipped Mobile with this function When using the app, the user must document the mileage outside of Expensify and import the total mileage like any other receipt.
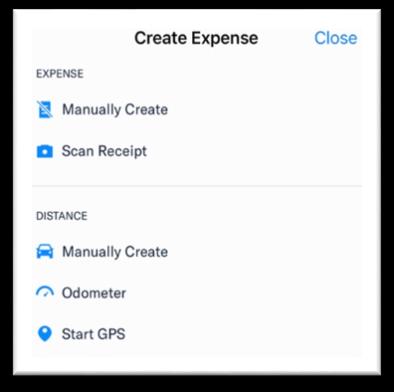
Although Odometer and Start GPS are options, they require the user to create another workflow while actively traveling. The Odometer requires a receipt which is a picture of the user’s starting and ending mileage at major points in the trip. The user must remember to turn GPS on and off throughout the trip.
Recommendation: The user should consider batching mileage reimbursements and code then submit once or twice a month using the web. Click here for more information about mileage on the web.
The reimbursement rate within Expensify defaults to the IRS’s standard mileage rate for the period in which the travel occurred.
To process a mileage reimbursement via mobile:
1. A mileage screenshot is stored on the user’s camera roll. The shot must clearly show the address or name of each destination and the total mileage (round trip).
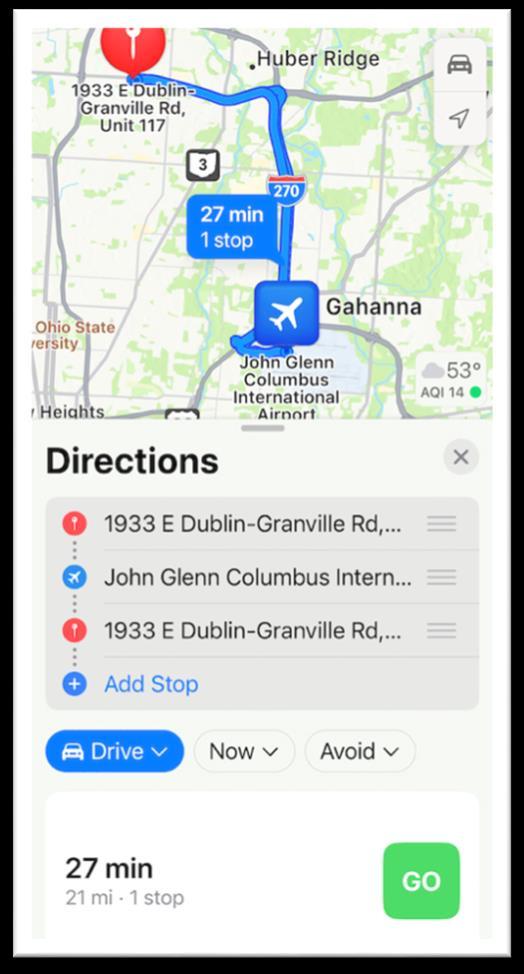
In the example (left), the trip from Fugees to the airport and back to Fugees is 21 miles. Note: If the mileage is calculated at 21.5 or 18.93 then do NOT round the number. Enter the mileage exactly as it appears on the map.
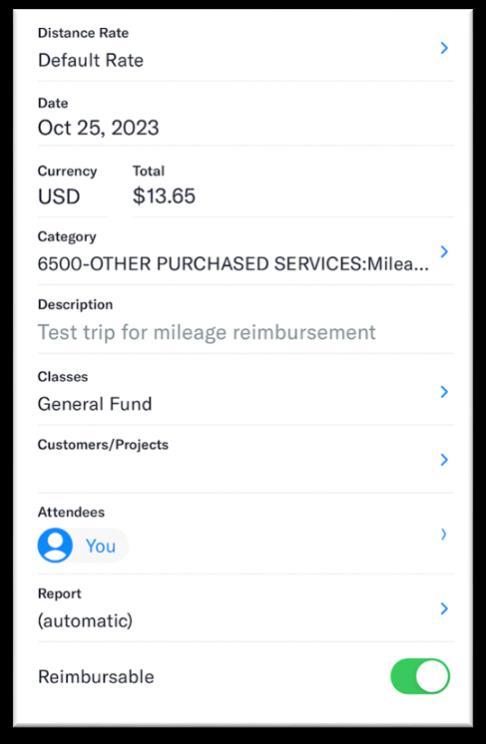
2. Open the app, select Expenses from the navigation bar on the left. In the popup window under DISTANCE, select Manually Create.
3. Tap on the receipt icon and upload the screenshot from the camera roll as the receipt.
4. Complete the other fields as previously discussed.
Total Distance: Number from the map


Default Rate: The user may have to select Default Rate the first time this screen is used. Each time after that, the rate field will auto populate.
Date: Use the last date of the trip.
Category will default to 6500: Mileage
Reminder: The user can leave the Report option (automatic) or assign the mileage request to a new Expense Report.
The user can Save and Submit.