
1 minute read
Making Adjustments


Fig. 19-40: Custom canopies (reviewed in Chapter 14).

Advertisement
Fig. 19-41: Playground equipment.
Making Adjustments
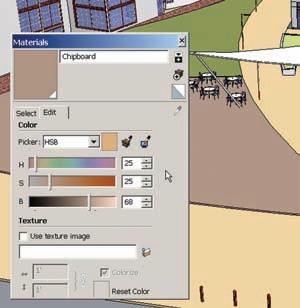
Material colors can be adjusted. They can be reapplied or tweaked in the Materials menu. Using the eyedropper in the Materials palette, you can select colors directly from the model. Then, using the Edit tab, you can change colors using the slider bars or by entering specific color tone values (Fig. 19-42, Fig. 19-43).
Furthermore, materials that utilize a texture-image can be tweaked in PhotoShop or other photo editors. With the material selected, select the Edit option in the Materials menu. Under Texture and to the right of the image name are two buttons; the one further to the right, when selected, will open the texture-image in an external editor. You can then apply filters or any other adjustments to the texture-image. Saving the image (keeping the same file name) will automatically update it in SketchUp. This option is only available in SketchUp 7 Pro or later.
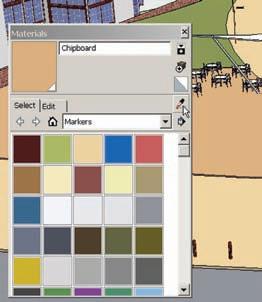
Fig. 19-42: You can adjust colors in the Materials Edit menu. Fig. 19-43: Once the color is selected, select Edit. You can adjust the color by using the sliders or by entering numeric values.
Components can be adjusted to achieve specific results. For example, it is suggested you select the tree and other 3D vegetation components and apply the Randor script to them, creating a more-natural tree habitat (Fig. 19-44, Fig. 19-45).

Fig. 19-44: Inserted trees before Randor is applied


