LESSON 04
TOPIC: Geography – World Map and Data – L4
LESSON TYPE: Multimedia
PRIOR KNOWLEDGE: Previous lessons.
KEY VOCABULARY: Advantage, disadvantage, live.
MATERIALS
• Worksheet 2 – Geography – World Map and Data – L3;
• Worksheet 1 – Geography – World Map and Data – L4;
• Digital devices with Internet access;
• Suggested links:
• “United States versus China” - https://s.systemic.com.br/usxchina ¹
• “NationMaster” - https://s.systemic.com.br/nationmaster ²
PREPARATION IN ADVANCE
• If you plan to follow procedure 5, check the website in advance.
OBJECTIVES
Teacher Objectives
• To teach about different countries and make comparisons
• To enable students to be aware of the basic differences between countries
• To show some countries data
• To elicit about countries
• To show comparative and superlative
Student Outcomes
• Compare different countries
• Compare places and facts
• Search websites to find informations
• Write sentences comparing countries and facts
• Present their answers
• Develop social skills
COMPETÊNCIAS:
• Conhecimento Valorizar e utilizar os conhecimentos historicamente construídos sobre o mundo físico, social, cultural e digital para entender e explicar a realidade, continuar aprendendo e colaborar para a construção de uma sociedade justa, democrática e inclusiva.
• Pensamento Científico, Crítico e Criativo Exercitar a curiosidade intelectual e recorrer à abordagem própria das ciências, incluindo a investigação, a reflexão, a análise crítica, a imaginação e a criatividade, para investigar causas, elaborar e testar hipóteses, formular e resolver problemas e criar soluções (inclusive tecnológicas) com base nos conhecimentos das diferentes áreas.
• Comunicação Utilizar diferentes linguagens – verbal (oral ou visual-motora, como Libras, e escrita), corporal, visual, sonora e digital –, bem como conhecimentos das linguagens artística, matemática e científica, para se expressar e partilhar informações, experiências, ideias e sentimentos em diferentes contextos e produzir sentidos que levem ao entendimento mútuo.
• Cultura Digital Compreender, utilizar e criar tecnologias digitais de informação e comunicação de forma crítica, significativa, reflexiva e ética nas diversas práticas sociais (incluindo as escolares) para se comunicar, acessar e disseminar informações, produzir conhecimentos, resolver problemas e exercer protagonismo e autoria na vida pessoal e coletiva.
• Empatia e Cooperação Exercitar a empatia, o diálogo, a resolução de conflitos e a cooperação, fazendo-se respeitar e promovendo o respeito ao outro e aos direitos humanos, com acolhimento e valorização da diversidade de indivíduos e de grupos sociais, seus saberes, identidades, culturas e potencialidades, sem preconceitos de qualquer natureza.
ÁREAS DE CONHECIMENTO:
1. LÍNGUA INGLESA
Unidade temática
• Interação discursiva
• Práticas de leitura e pesquisa
• Práticas de leitura e construção de repertório lexical
• Gramática
Objetos de conhecimento
• Construção de laços afetivos e convívio social
• Funções e usos da língua inglesa em sala de aula (classroom language)
• Funções e usos da língua inglesa: convivência e colaboração em sala de aula
Objetivos de leitura
• Leitura de textos digitais para estudo
• Construção de repertório lexical e autonomia leitora
• Comparativos e superlativos
2. GEOGRAFIA
Unidade temática
• O sujeito e seu lugar no mundo Objetos de conhecimento
• Território e diversidade cultural
• Pontos de referência
HABILIDADES:
• (EF06LI01) Interagir em situações de intercâmbio oral, demonstrando iniciativa para utilizar a língua inglesa.
• (EF06LI03) Solicitar esclarecimentos em língua inglesa sobre o que não entendeu e o significado de palavras ou expressões desconhecidas.
• (EF07LI01) Interagir em situações de intercâmbio oral para realizar as atividades em sala de aula, de forma respeitosa e colaborativa, trocando ideias e engajando-se em brincadeiras e jogos.
• (EF07LI09) Selecionar, em um texto, a informação desejada como objetivo de leitura.
• (EF07LI10) Escolher, em ambientes virtuais, textos em língua inglesa, de fontes confiáveis, para estudos/pesquisas escolares.
• (EF06LI11) Explorar ambientes virtuais e/ou aplicativos para construir repertório lexical na língua inglesa.
• (EF08LI15) Utilizar, de modo inteligível, as formas comparativas e superlativas de adjetivos para comparar qualidades e quantidades.
• (EF04GE01) Selecionar, em seus lugares de vivência e em suas histórias familiares e/ou da comunidade, elementos de distintas culturas (indígenas, afrobrasileiras, de outras regiões do país, latino-americanas, europeias, asiáticas etc.), valorizando o que é próprio em cada uma delas e sua contribuição para a formação da cultura local, regional e brasileira.
• (EF01GE09) Elaborar e utilizar mapas simples para localizar elementos do local de vivência, considerando referenciais espaciais (frente e atrás, esquerda e direita, em cima e embaixo, dentro e fora) e tendo o corpo como referência.
PROCEDURES
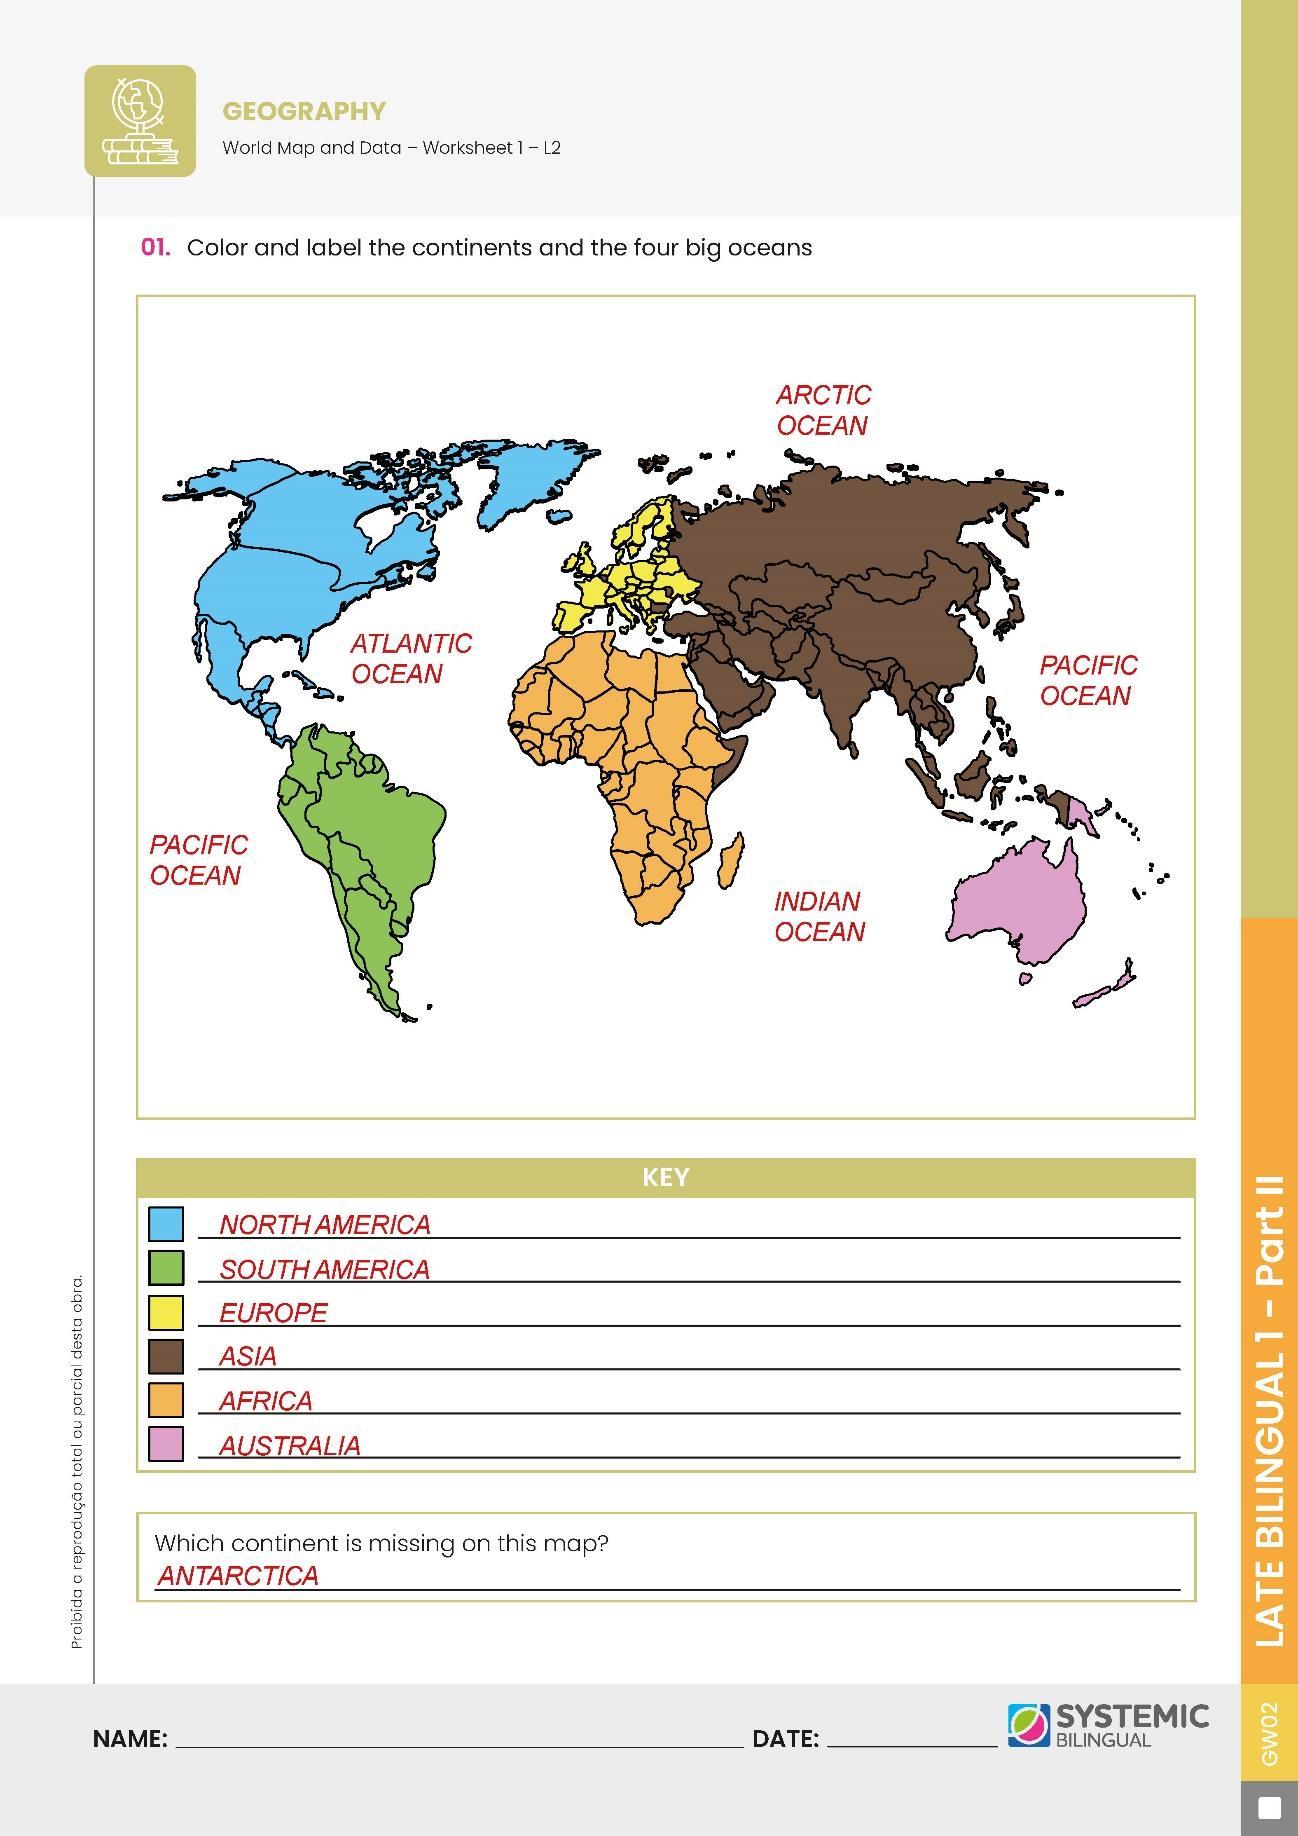
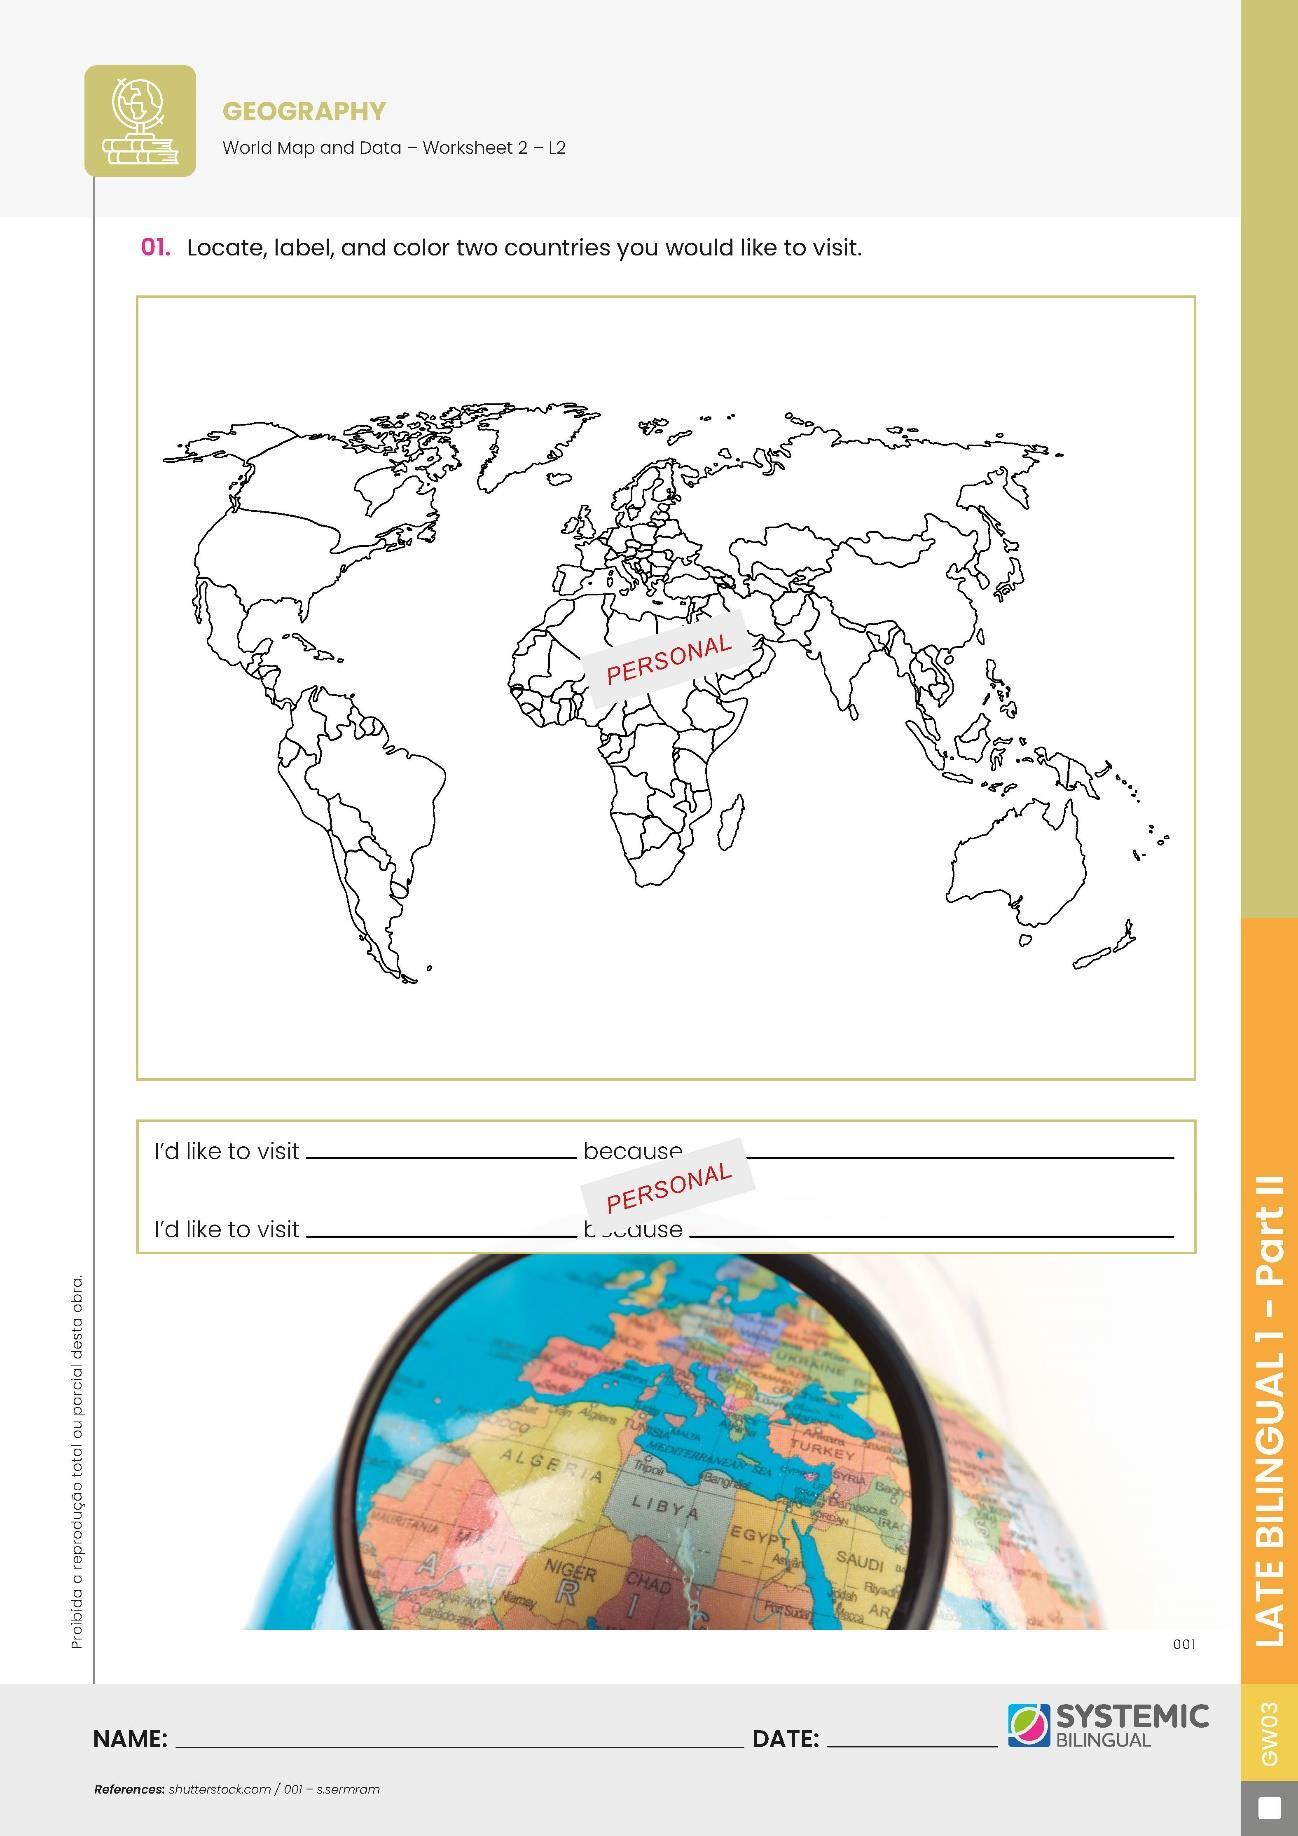
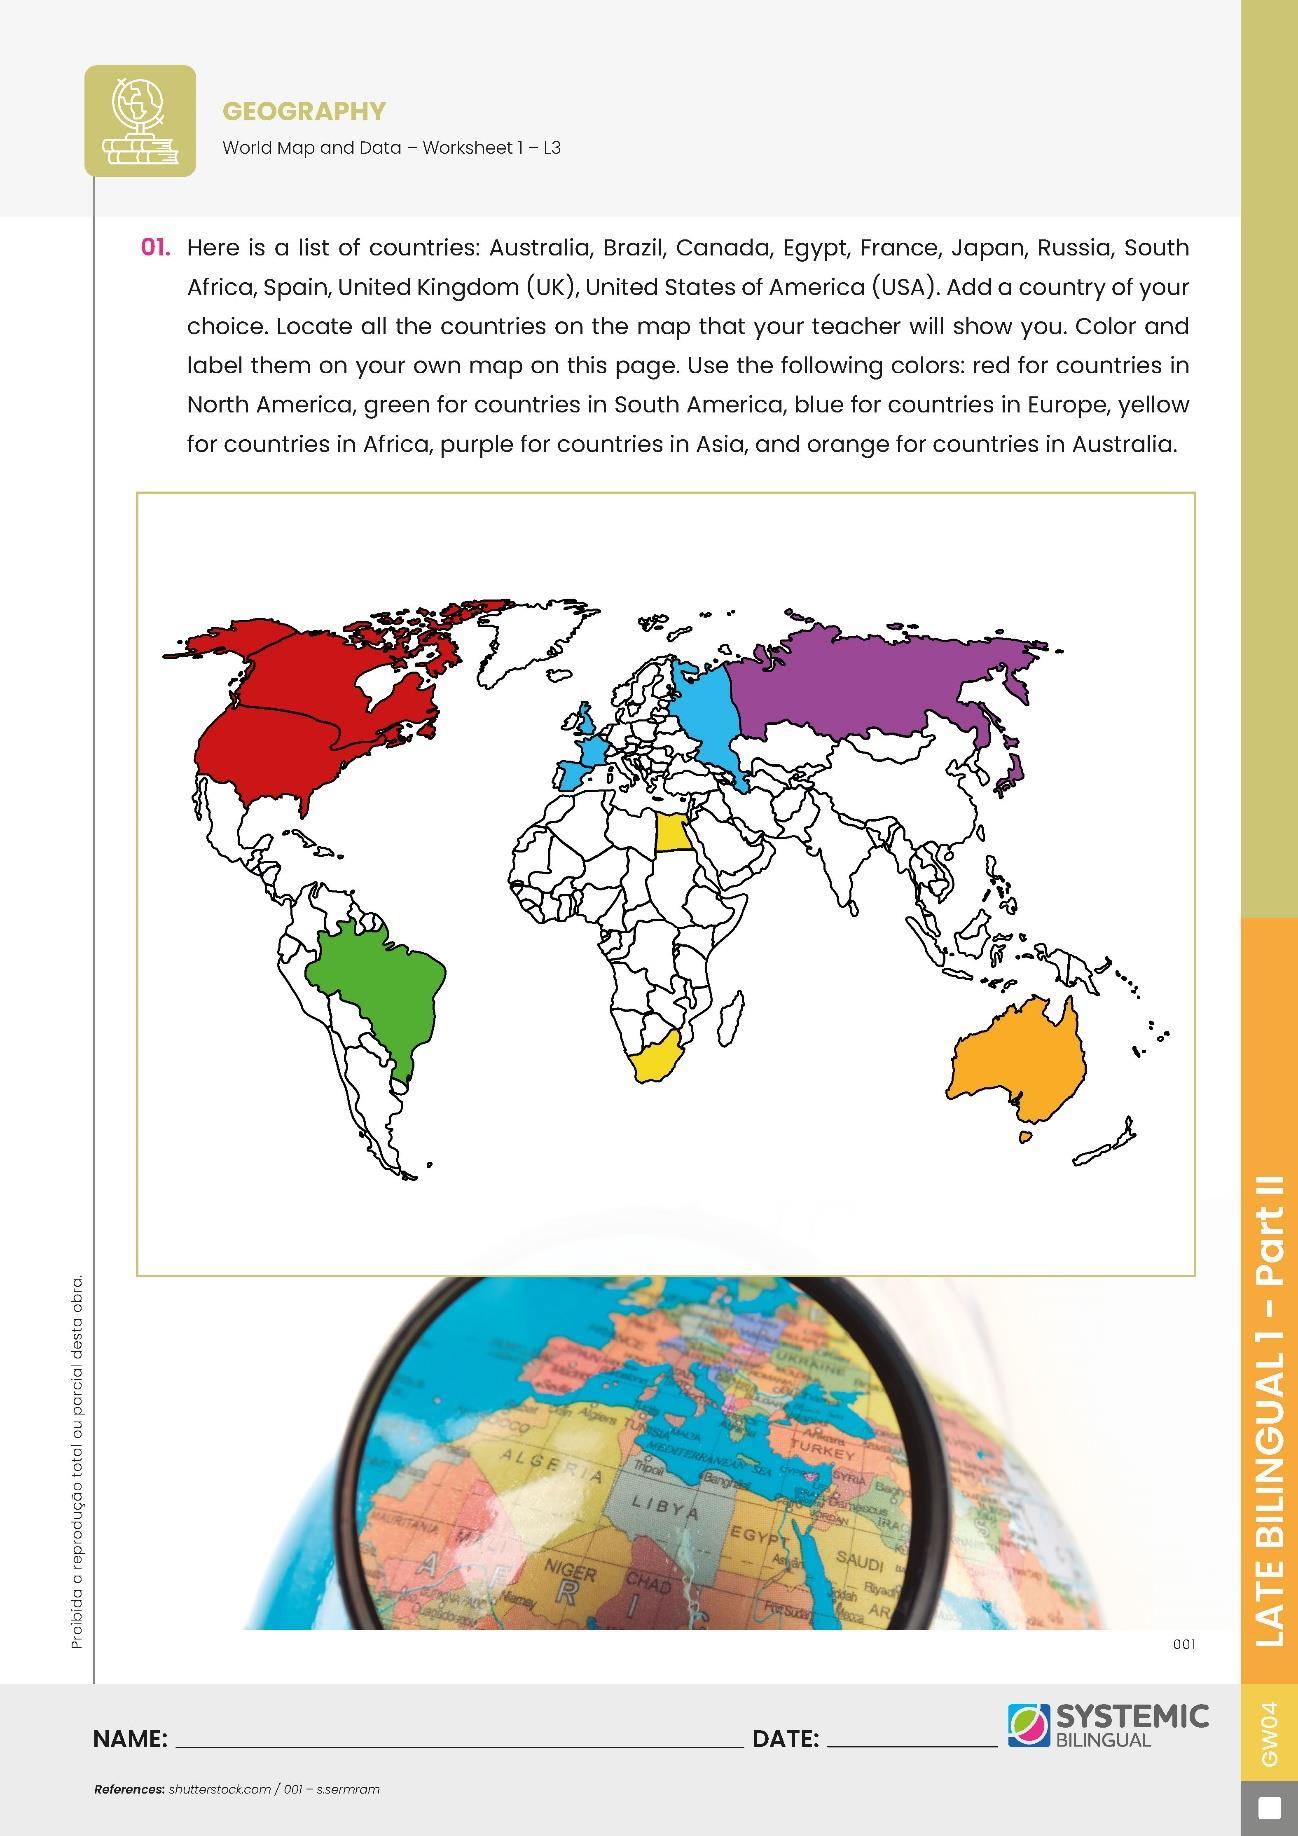
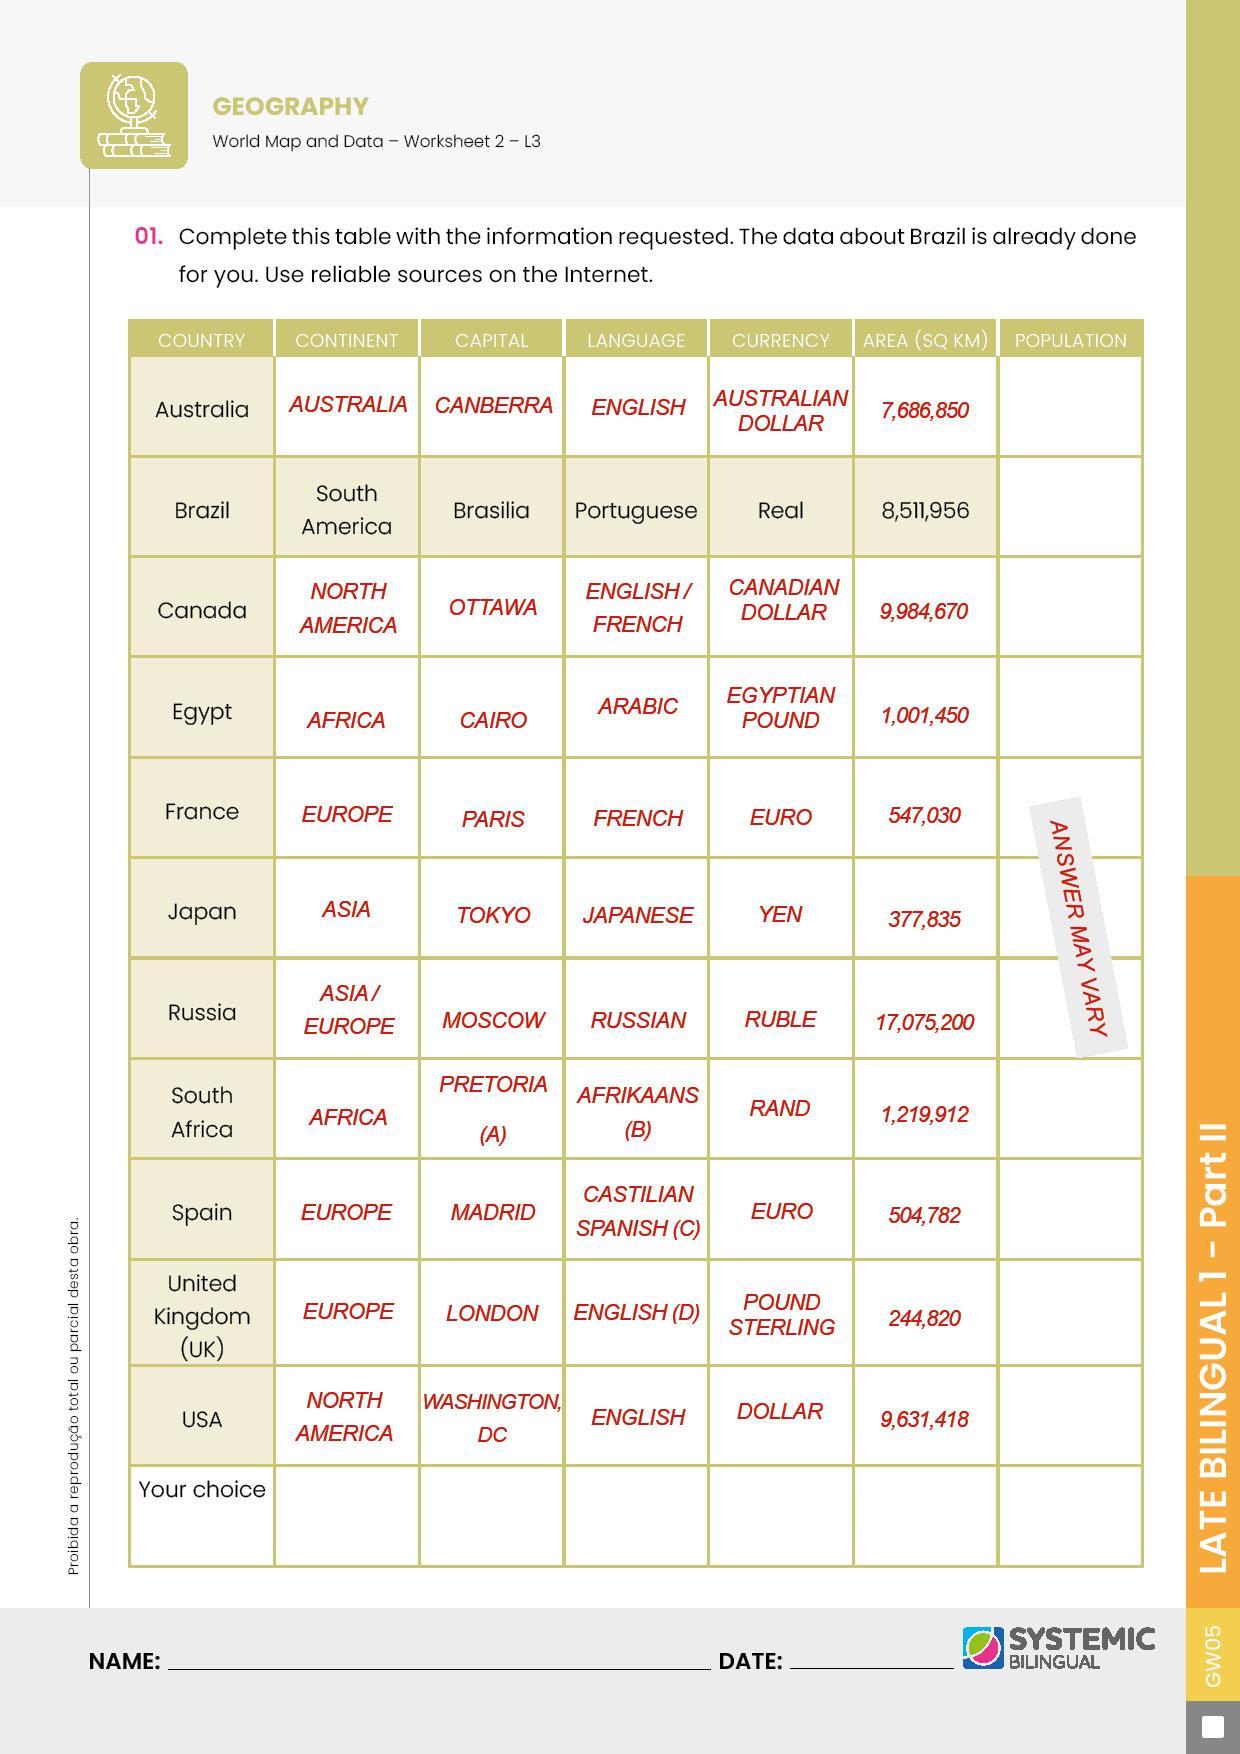
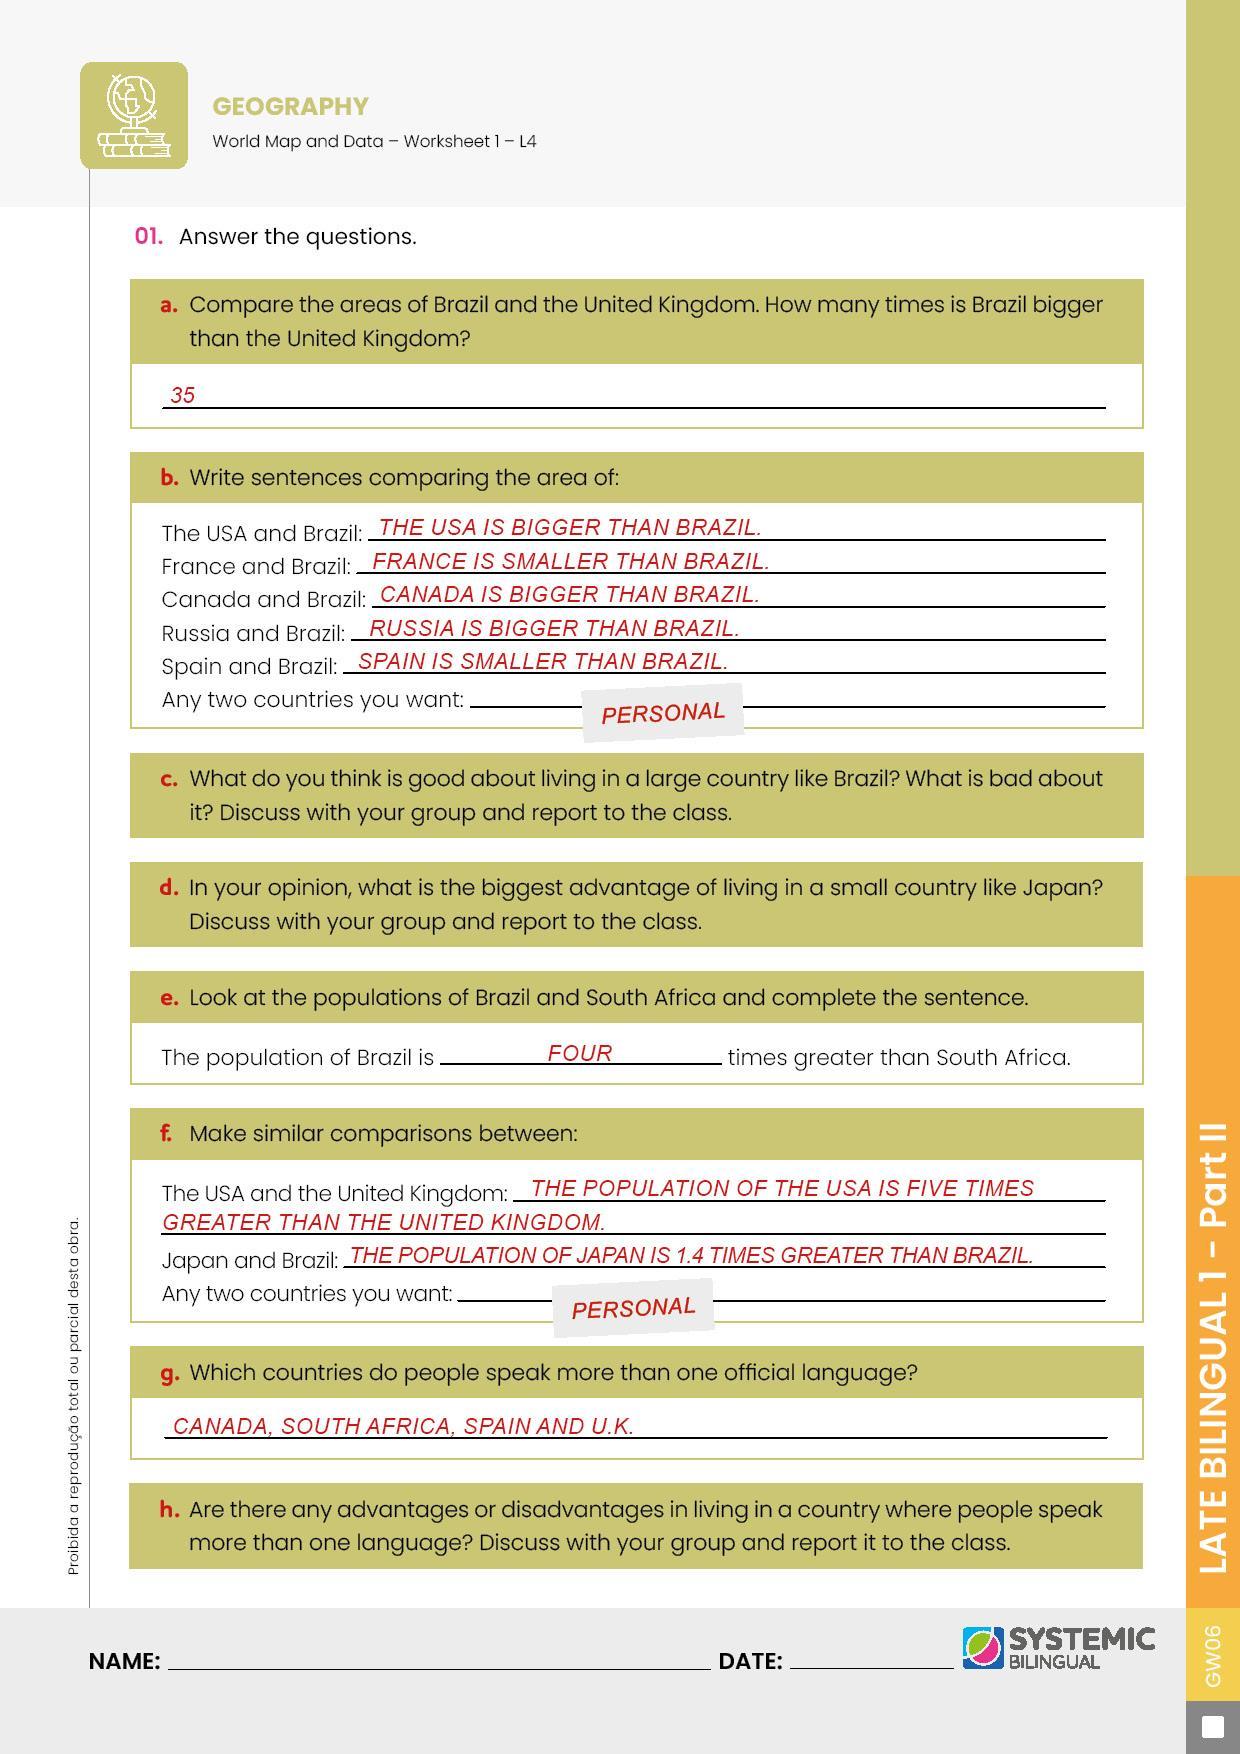
1. Give out Worksheet 1 – L3. Ask students to complete it in pairs or in small groups. Tell them that they will need Worksheet 2 – L2 completed.
2. Assist them at all times because they will certainly need help with language in order to produce good answers for questions 3, 4, and 8.
3. When they finish, check questions 1, 2, 5, 6, and 7.
4. For questions 3, 4, and 8, ask students to report their answers to the rest of the class. As each group presents their answers, ask the rest of the class questions, such as: “DO YOU ALL AGREE?” Encourage students to make their presentations. Praise them.
5. If you have time, take your students to the computer lab to access the suggested websites where they can find online comparisons between countries.
Note: it might take you more than one class to give this lesson. Take your time, do not rush. Encourage your students to think carefully and produce good sentences/texts. Obviously, students will produce wrong sentences. If you think it is necessary, explain how the language works and take this time to clarify grammar points. This is exactly the time when students can learn from their mistakes. Do not waste this opportunity to correct and format their language
ANSWER KEY
LESSON 05
TOPIC: Math – Percentage – L1
Lesson Type: Regular
PRIOR KNOWLEDGE: None.
KEY VOCABULARY: Tally mark, bar graph, circle graph, frequency, percentage, there to be, more than, fewer than, as many as.
MATERIALS
• Worksheet 1 – Math – Percentage – L1
• Worksheet 2, Pages 1 and 2 – Math – Percentage – L1;
• Appendix 1 – Math – Percentage – L1;
• Calculators;
• Rulers;
• Colored pencils.
PREPARATION IN ADVANCE
• Provide students colored pencils on the colors: green, blue, brown, and hazel.
OBJECTIVES
Teacher Objectives
• To give students practice in collecting and organizing data
• To enable students to complete a frequency table, interpret it and write conclusions
• To enable students to construct a circle graph and create a bar graph
• To introduce percentage
• To show what tally marks are
• To guide students solving Math problems involving percentage
Student Outcomes
• Collect and organize data
• Interpret and complete tables
• Build graphs
• Understand what a bar graph is
• Recognize a circle graph
• Comprehend percentage
• Use Tally marks
• Draw a frequency table
BNCC
COMPETÊNCIAS:
• Pensamento Científico, Crítico e Criativo Exercitar a curiosidade intelectual e recorrer à abordagem própria das ciências, incluindo a investigação, a reflexão, a análise crítica, a imaginação e a criatividade, para investigar causas, elaborar e testar hipóteses, formular e resolver problemas e criar soluções (inclusive tecnológicas) com base nos conhecimentos das diferentes áreas.
• Comunicação Utilizar diferentes linguagens – verbal (oral ou visual-motora, como Libras, e escrita), corporal, visual, sonora e digital –, bem como conhecimentos das linguagens artística, matemática e científica, para se expressar e partilhar informações, experiências, ideias e sentimentos em diferentes contextos e produzir sentidos que levem ao entendimento mútuo.
• Empatia e Cooperação Exercitar a empatia, o diálogo, a resolução de conflitos e a cooperação, fazendo-se respeitar e promovendo o respeito ao outro e aos direitos humanos, com acolhimento e valorização da diversidade de indivíduos e de grupos sociais, seus saberes, identidades, culturas e potencialidades, sem preconceitos de qualquer natureza.
ÁREAS DE CONHECIMENTO:
1. LÍNGUA INGLESA
Unidade temática
• Interação discursiva Objetos de conhecimento
• Construção de laços afetivos e convívio social
• Funções e usos da língua inglesa em sala de aula (classroom language)
• Funções e usos da língua inglesa: convivência e colaboração em sala de aula
2. MATEMÁTICA
Unidade temática
• Probabilidade e estatística Objetos de conhecimento
• Leitura, interpretação e representação de dados em tabelas de dupla entrada e gráficos de barras
• Coleta, classificação e representação de dados referentes a variáveis categóricas, por meio de tabelas e gráficos
HABILIDADES:
• (EF06LI01) Interagir em situações de intercâmbio oral, demonstrando iniciativa para utilizar a língua inglesa.
• (EF06LI03) Solicitar esclarecimentos em língua inglesa sobre o que não entendeu e o significado de palavras ou expressões desconhecidas.
• (EF07LI01) Interagir em situações de intercâmbio oral para realizar as atividades em sala de aula, de forma respeitosa e colaborativa, trocando ideias e engajandose em brincadeiras e jogos.
• (EF03MA27) Ler, interpretar e comparar dados apresentados em tabelas de dupla entrada, gráficos de barras ou de colunas, envolvendo resultados de pesquisas significativas, utilizando termos como maior e menor frequência, apropriando-se
desse tipo de linguagem para compreender aspectos da realidade sociocultural significativos.
• (EF03MA28) Realizar pesquisa envolvendo variáveis categóricas em um universo de até 50 elementos, organizar os dados coletados utilizando listas, tabelas simples ou de dupla entrada e representá-los em gráficos de colunas simples, com e sem uso de tecnologias digitais.
PROCEDURES
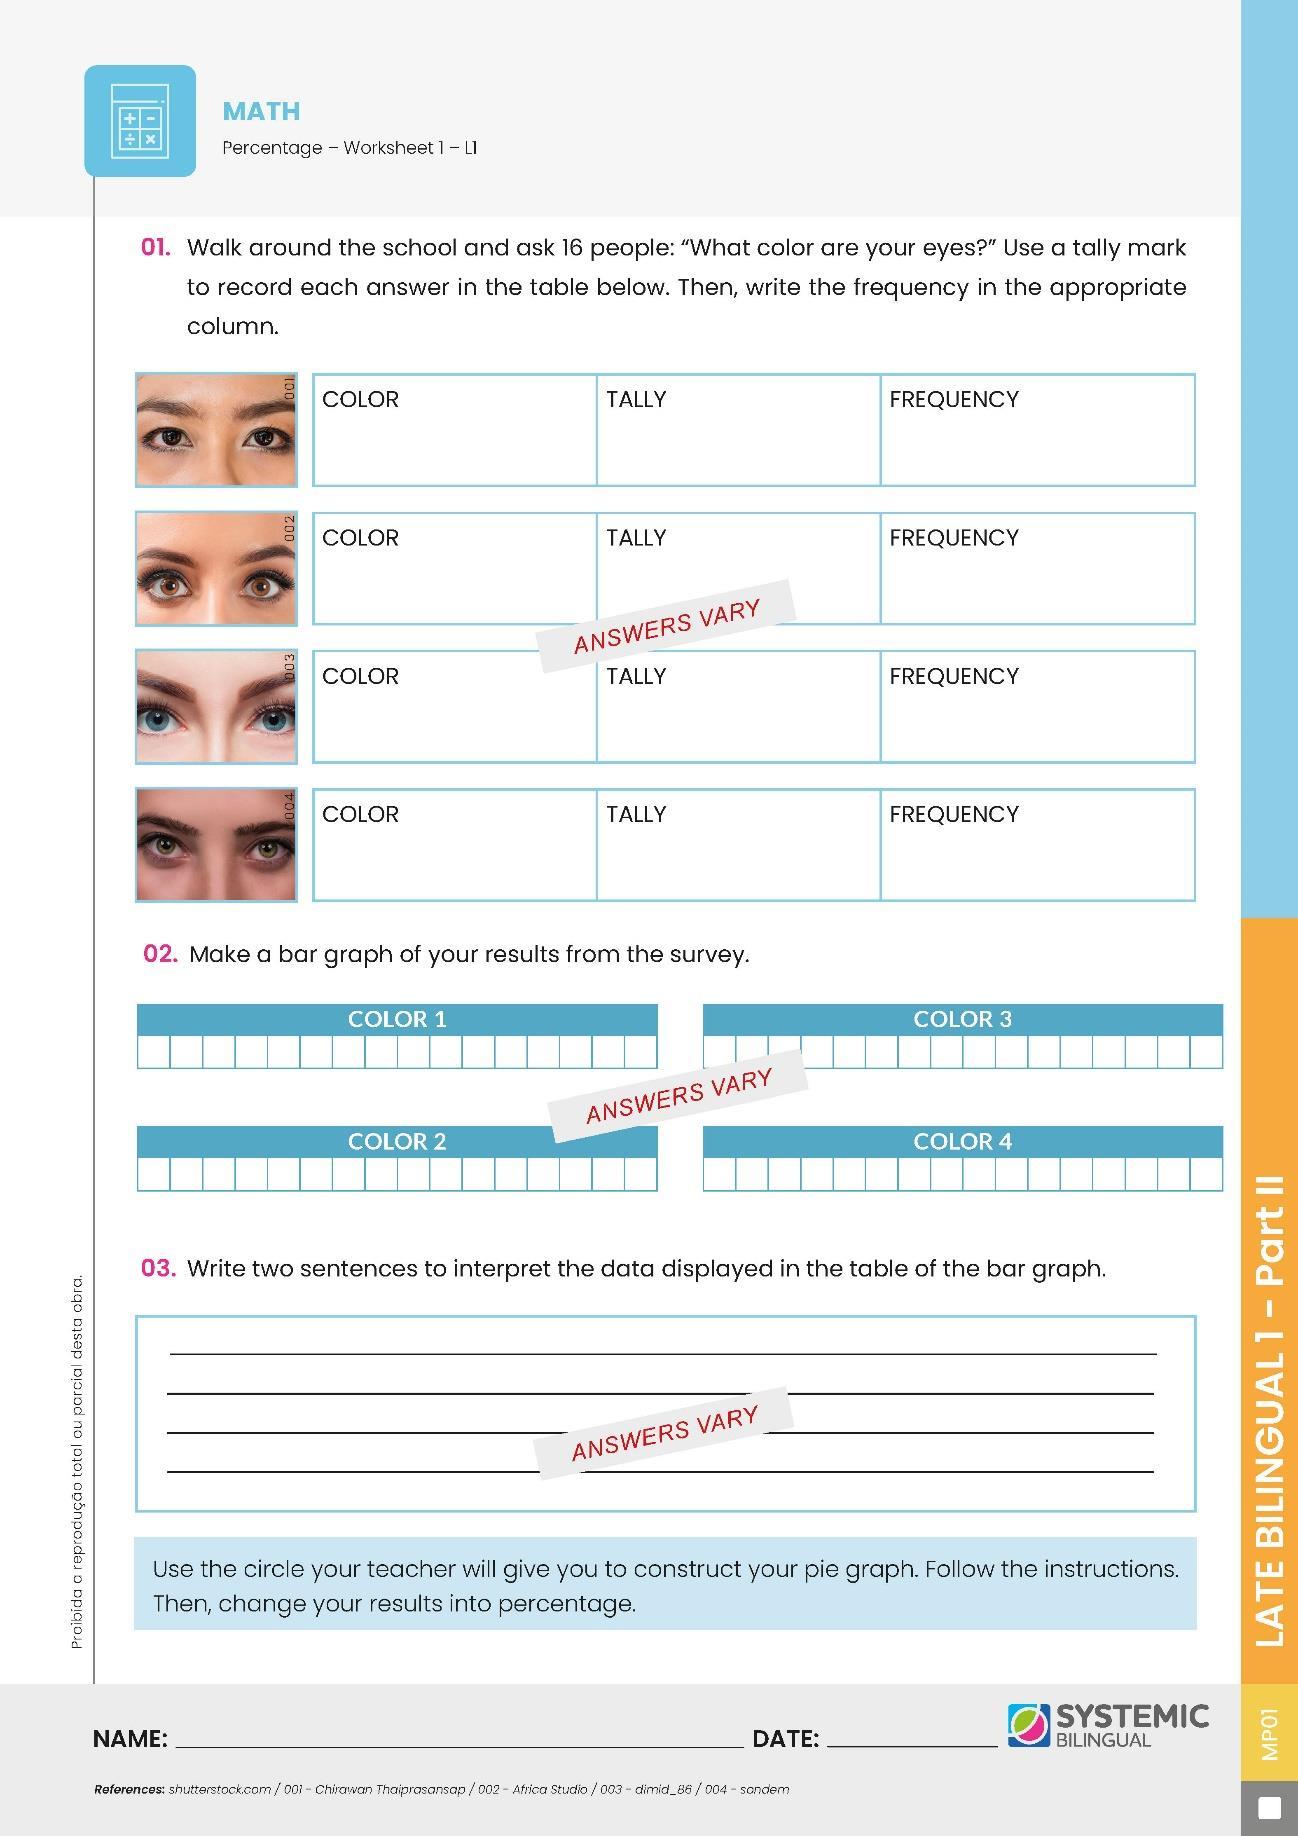
1. Draw the same frequency table from Worksheet 1 on the board and ask students:
“WHAT COLOR ARE YOUR EYES?”
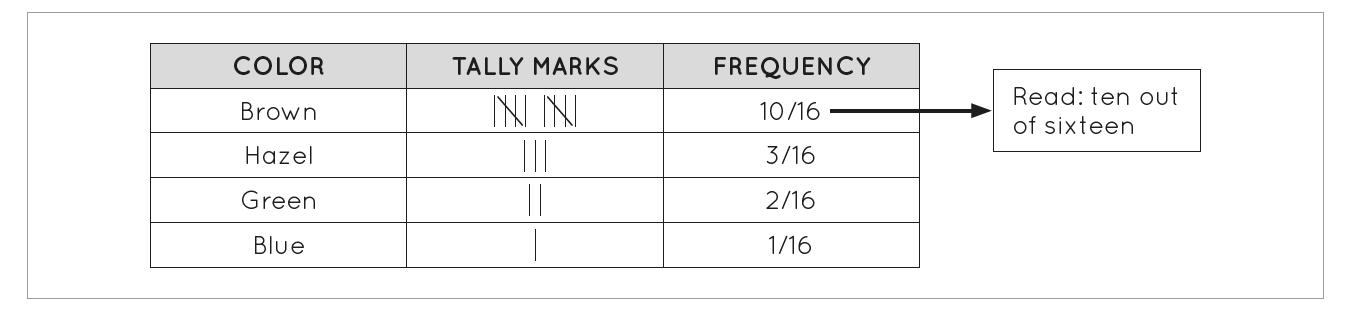
Use tally marks to show the results as you collect the data, then write the frequency in the appropriate column. Here is an example: suppose you have 16 students, 10 of them have dark brown eyes, 3 have light brown eyes, 2 have green eyes and 1 has blue eyes. Your frequency table should be as follows:
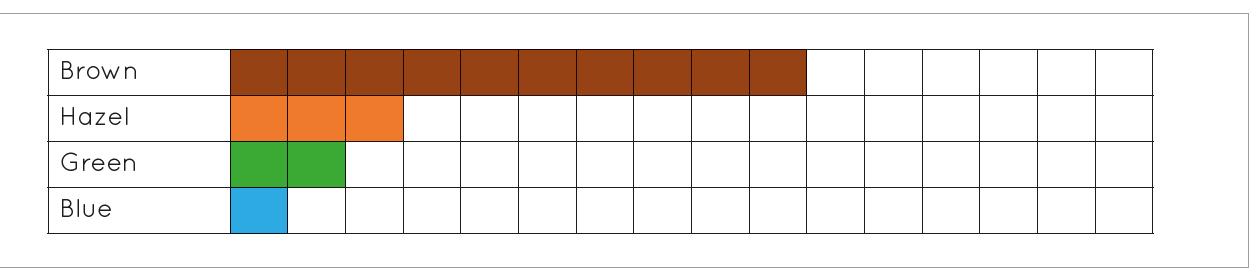
2. Draw a bar graph and display the results. Do the same with a circle graph. Remember that your circle graph will have as many parts as the number of students interviewed in class. Using the same example from Procedure 1 the bar graph should be as follows:
And the circle graph:
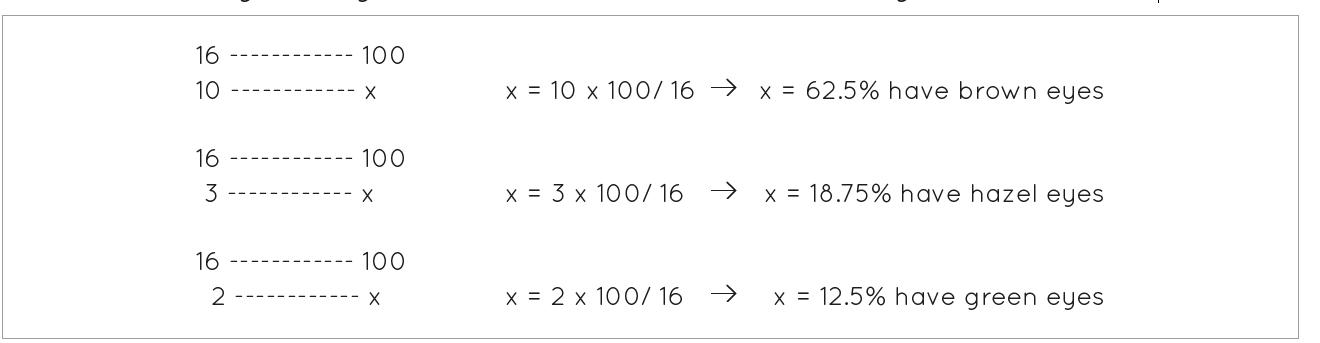
3. Teach them how to turn the results into percentage. E.g. you have 16 students, 10 of them (10/16) have brown eyes, 3 of them (3/16) have hazel eyes, 2 of them (2/16) have green eyes, and 1 of them (1/16) has blue eyes. So, we have:
4. Give out Worksheet 1 and read the instructions with them.
5. When they come back, help them complete the bar graph and make conclusions about the result. They should now write their conclusions. Help them write sentences such as: There are more people with brown eyes than people with hazel eyes. There are as many people with blue eyes as people with green eyes. There are fewer people with green eyes than people with brown eyes.
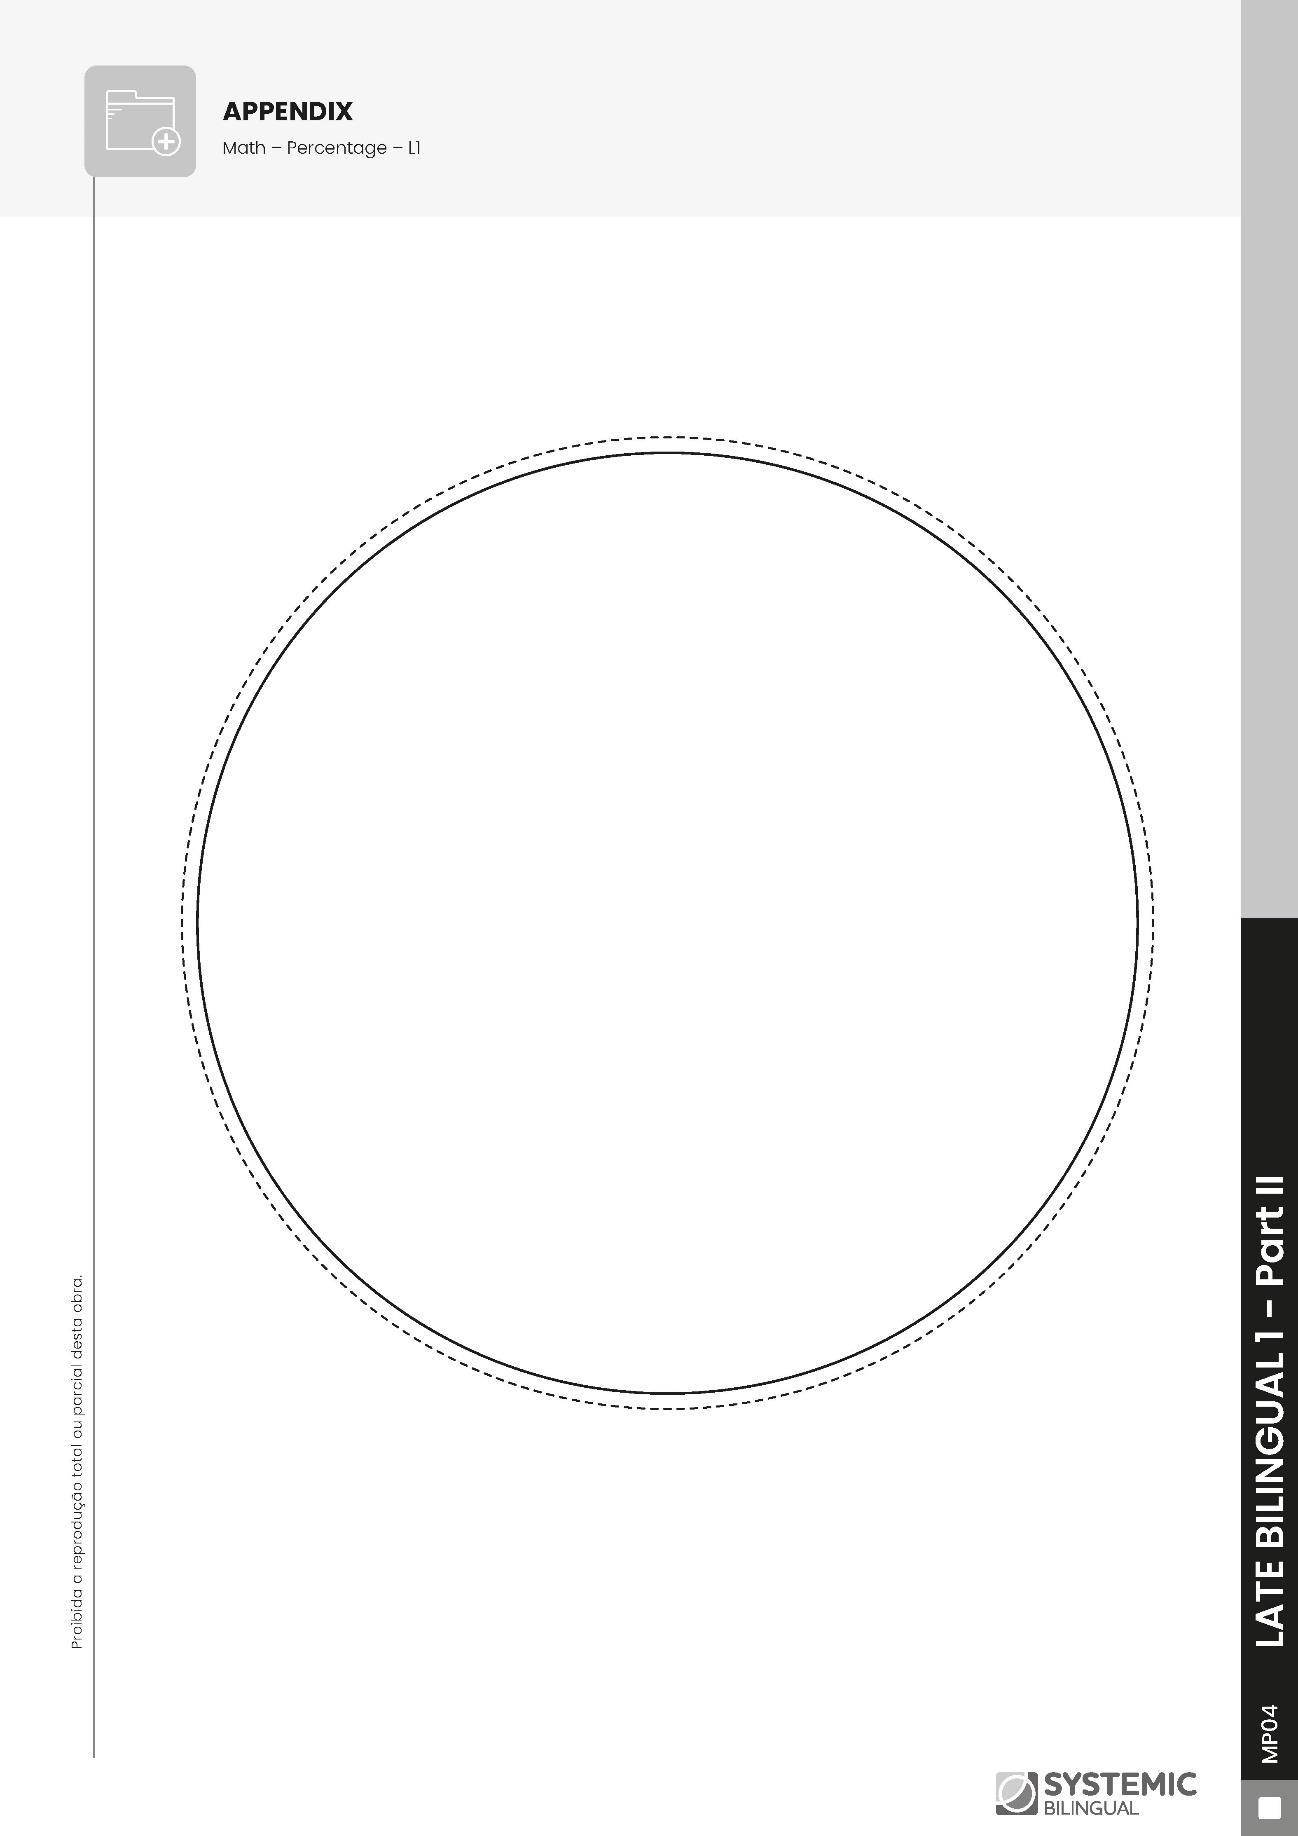
6. Give out a copy of the circle from Appendix 1 (one circle for each student). Tell them to fold the circle in 16 parts (fold it 4 times). Then, ask them to cover the lines with a pencil using a ruler. They have to make the circle graph according to the results. Tell them to use colors to represent each eye color.
7. Ask them to calculate the percentage of each result. A good idea would be to write the percentage in the circle graph.
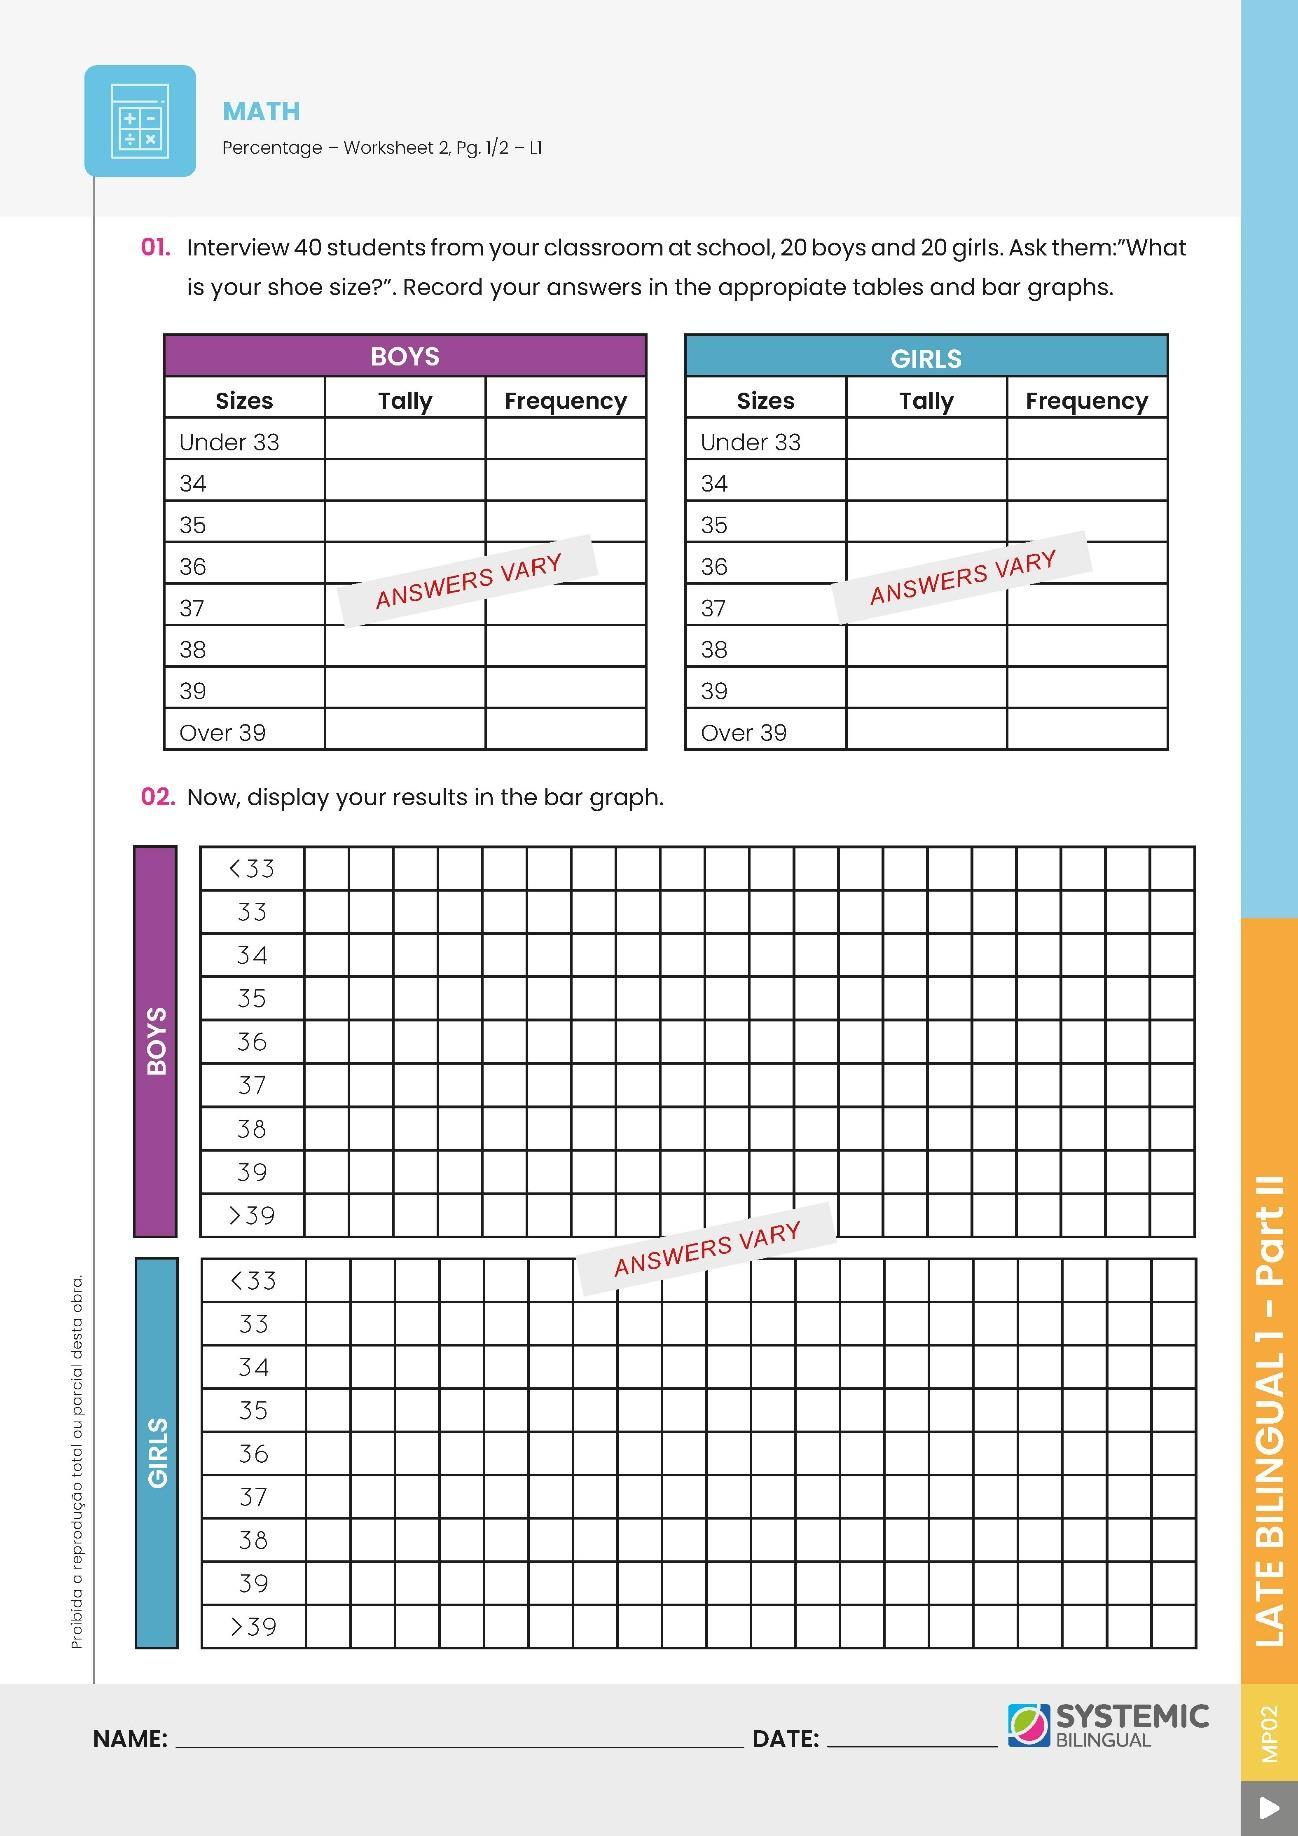
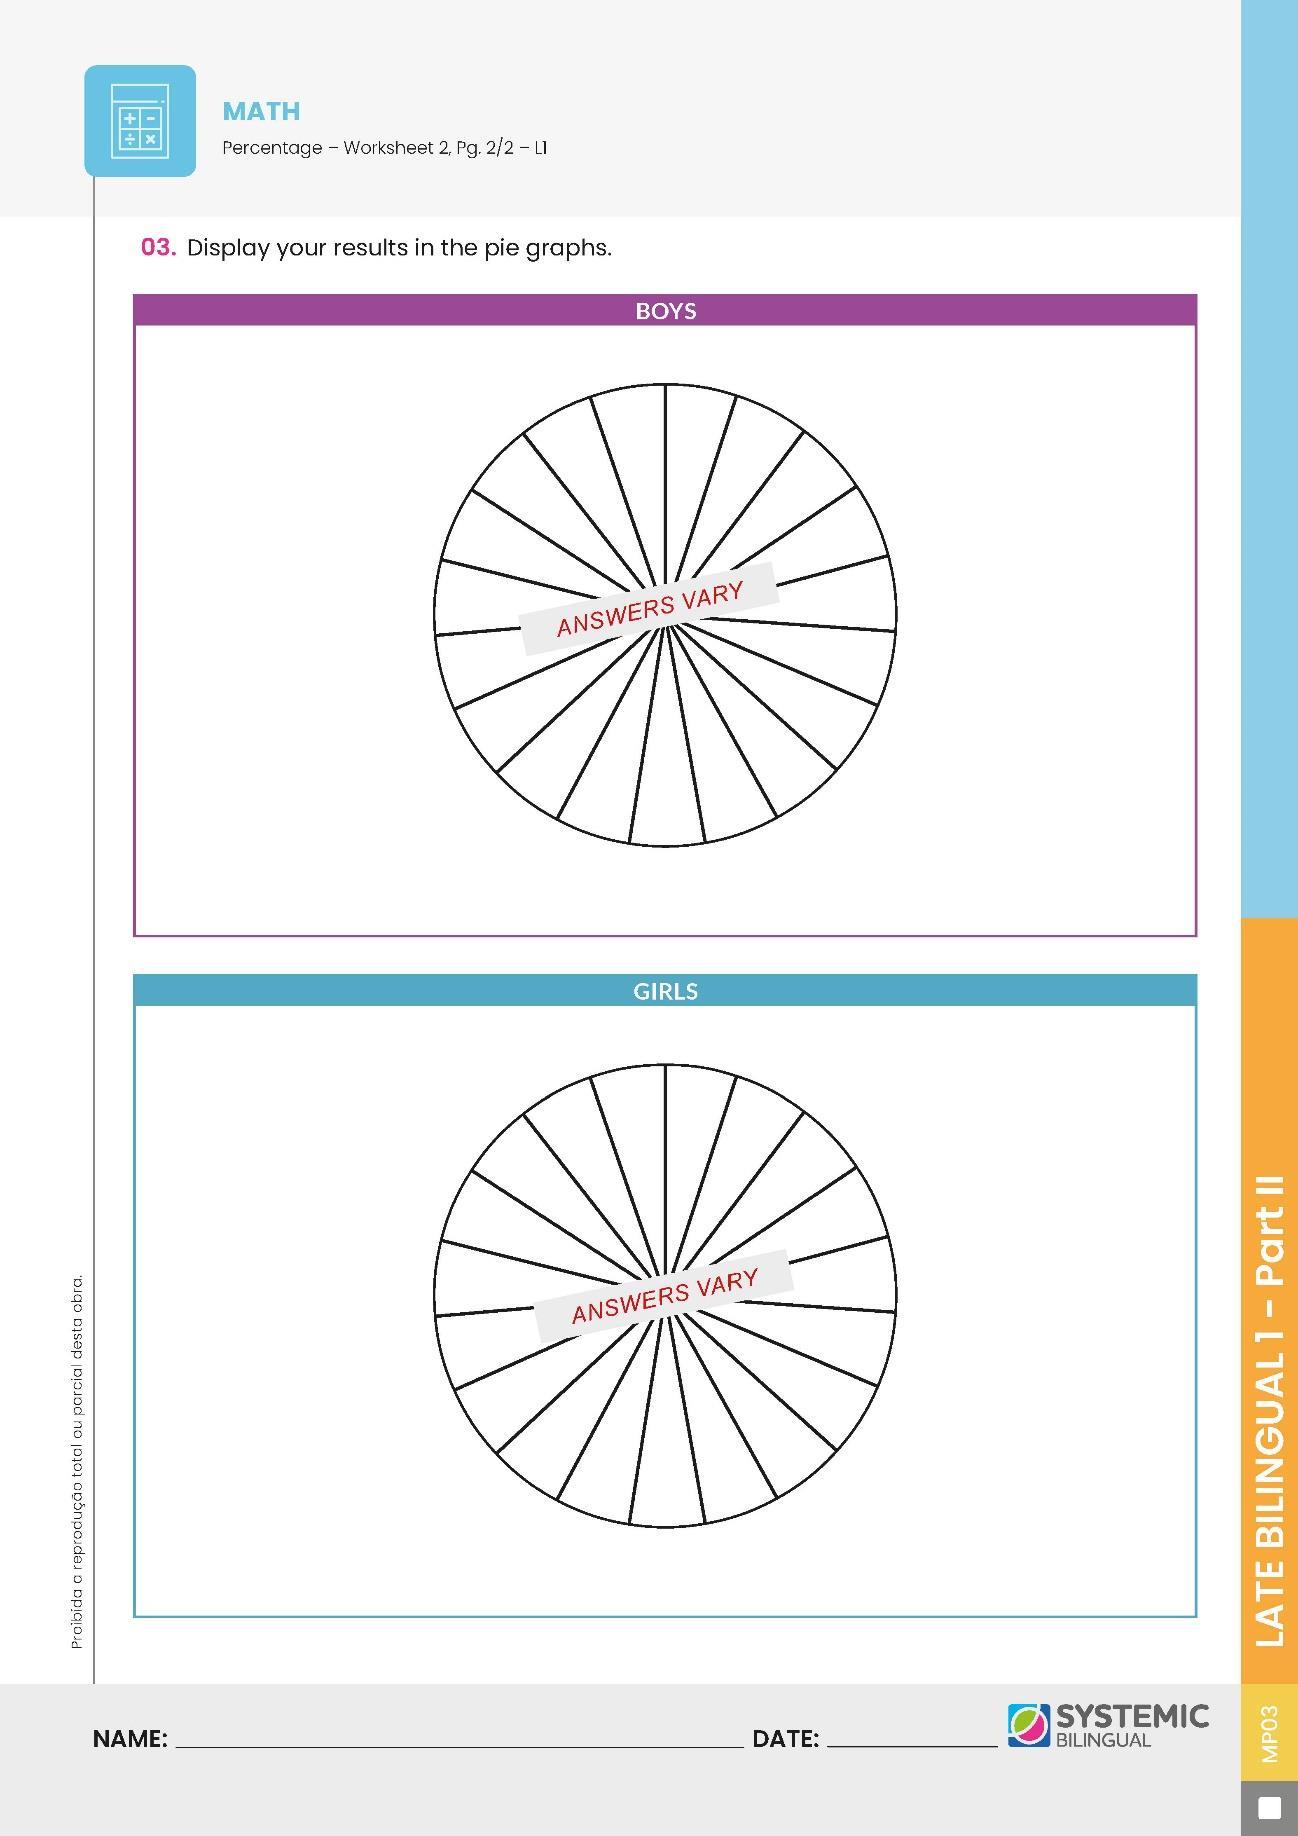
8. Give out Worksheet 2 and have students complete it.
ANSWER KEY
LESSON 06
Topic: Math – Percentage – L2
Lesson Type: Regular
PRIOR KNOWLEDGE: Previous lesson.
KEY VOCABULARY: Numbers.
MATERIALS
• Worksheet 1 – Math – Percentage – L2;
• Worksheet 2 – Math – Percentage – L2;
• Colored peanuts;
• Plastic cups;
• Calculators;
• Blank sheets;
• Colored pencils.
PREPARATION IN ADVANCE
• Buy 1 kg of colored peanuts or any other colored candy.
OBJECTIVES
Teacher Objectives
• To enable students to interpret collected data and write conclusions about the results they found
• To enable students to practice percentage
• To guide students into a math discussion
Student Outcomes
• Practice percentage
• Interpret collected data
• Write conclusions
• Count objects and categorize them
• Calculate percentage using colored objects
• Build a bar graph
BNCC HABILIDADES:
• (EF06LI01) Interagir em situações de intercâmbio oral, demonstrando iniciativa para utilizar a língua inglesa.
• (EF06LI03) Solicitar esclarecimentos em língua inglesa sobre o que não entendeu e o significado de palavras ou expressões desconhecidas.
• (EF07LI01) Interagir em situações de intercâmbio oral para realizar as atividades em sala de aula, de forma respeitosa e colaborativa, trocando ideias e engajando-se em brincadeiras e jogos.
• (EF02MA02) Fazer estimativas por meio de estratégias diversas a respeito da quantidade de objetos de coleções e registrar o resultado da contagem desses objetos (até 1000 unidades).
• (EF03MA28) Realizar pesquisa envolvendo variáveis categóricas em um universo de até 50 elementos, organizar os dados coletados utilizando listas, tabelas simples ou de dupla entrada e representá-los em gráficos de colunas simples, com e sem uso de tecnologias digitais.
• (EF01MA02) Contar de maneira exata ou aproximada, utilizando diferentes estratégias como o pareamento e outros agrupamentos.
• (EF08MA04) Resolver e elaborar problemas, envolvendo cálculo de porcentagens, incluindo o uso de tecnologias digitais.
PROCEDURES
1. Check the activity from the previous class. Discuss the results with students and help them with their conclusions.
2. Divide the class into groups of 3 or 4 students. Give each group 250g of colored peanuts and as many cups as the number of colors in the pack. They have to count the peanuts and record the results on a blank sheet. Ask them to sort the peanuts out according to the colors. Each color should be put in a different cup. Now, they have to count each color and calculate the percentage. The groups should now discuss their results. Their results should be approximately the same, not exactly.
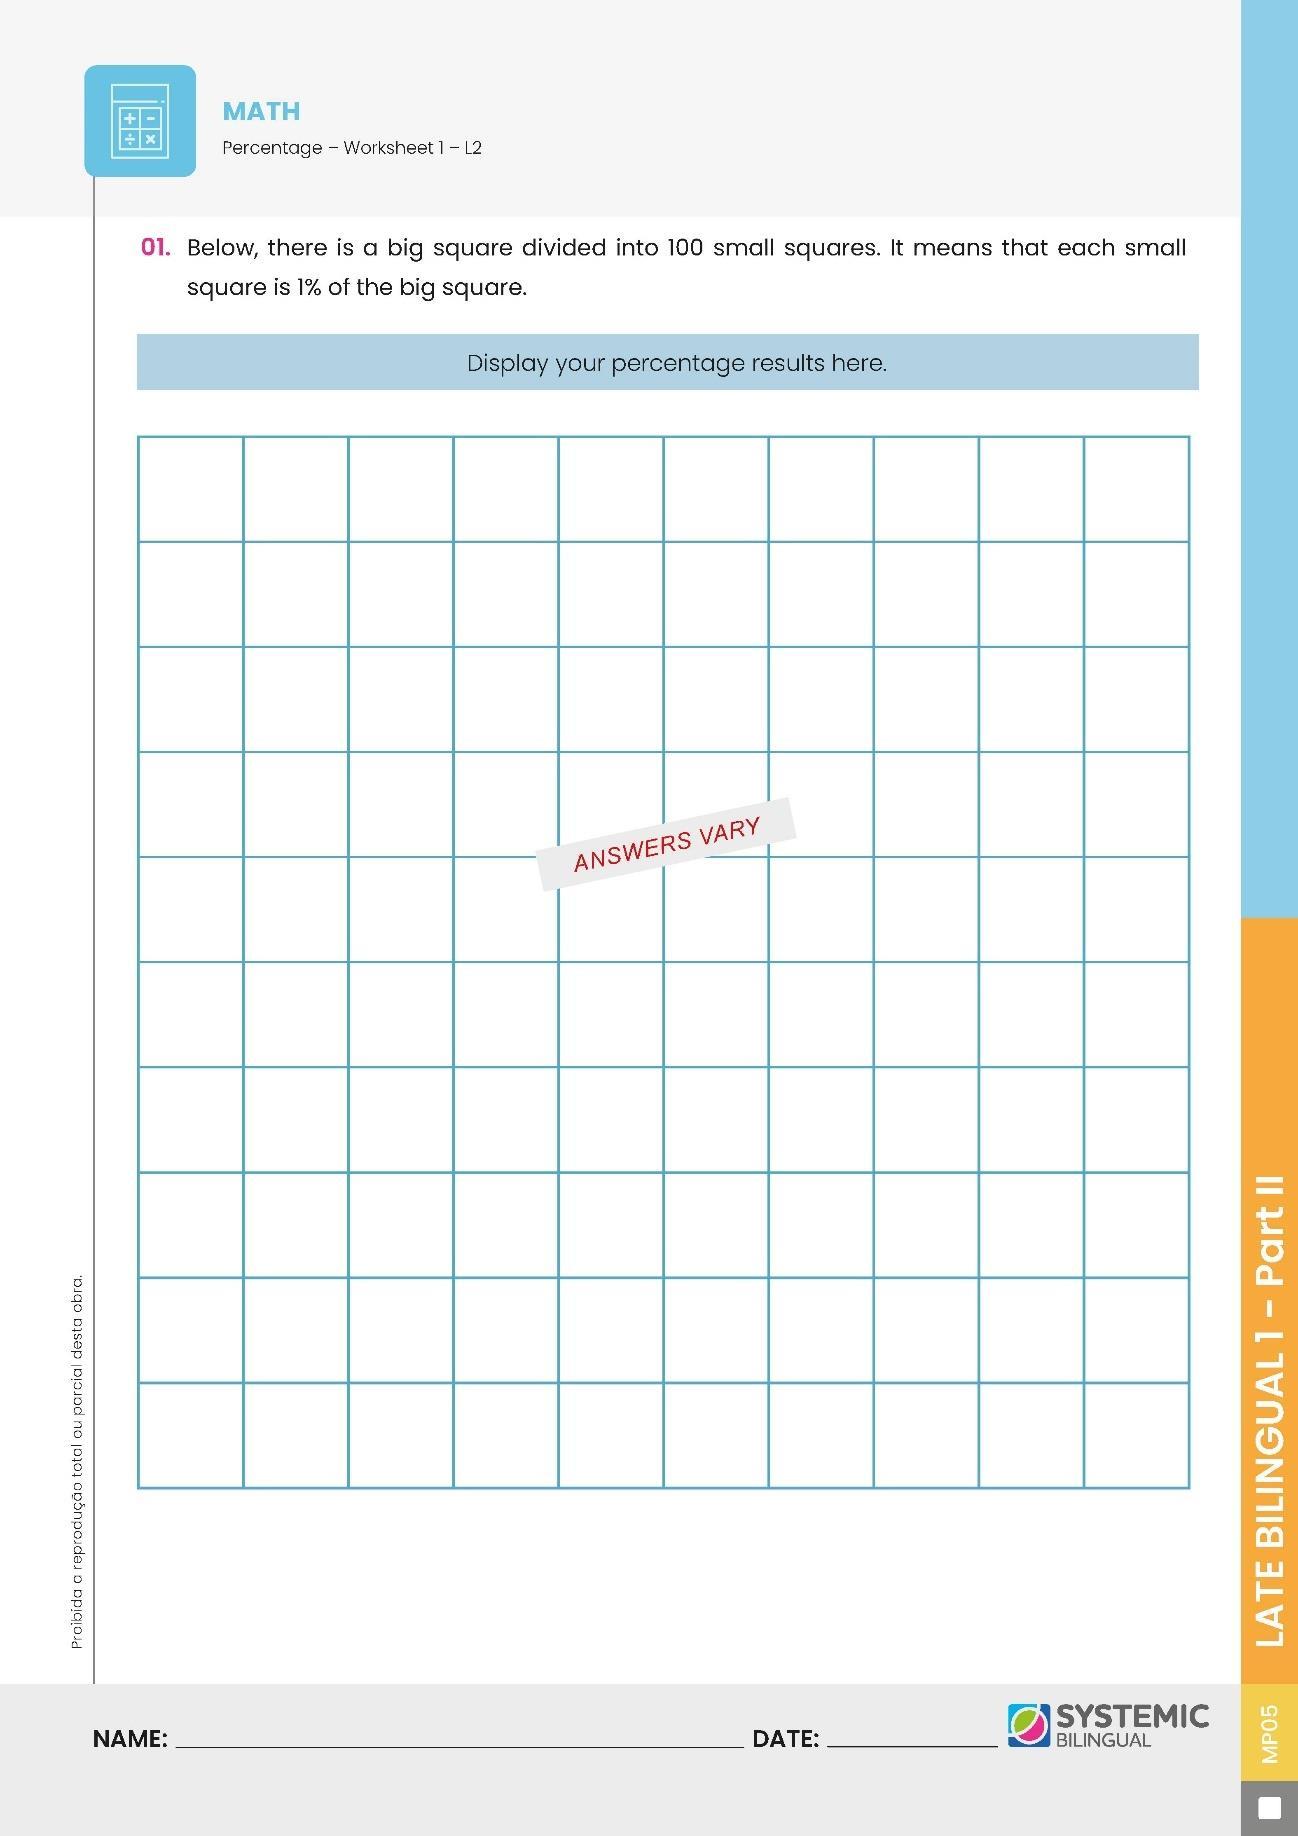
3. Give out Worksheet 1. They have to display their results (percentage) on the square and compare the results among themselves. If necessary, round the results for them.
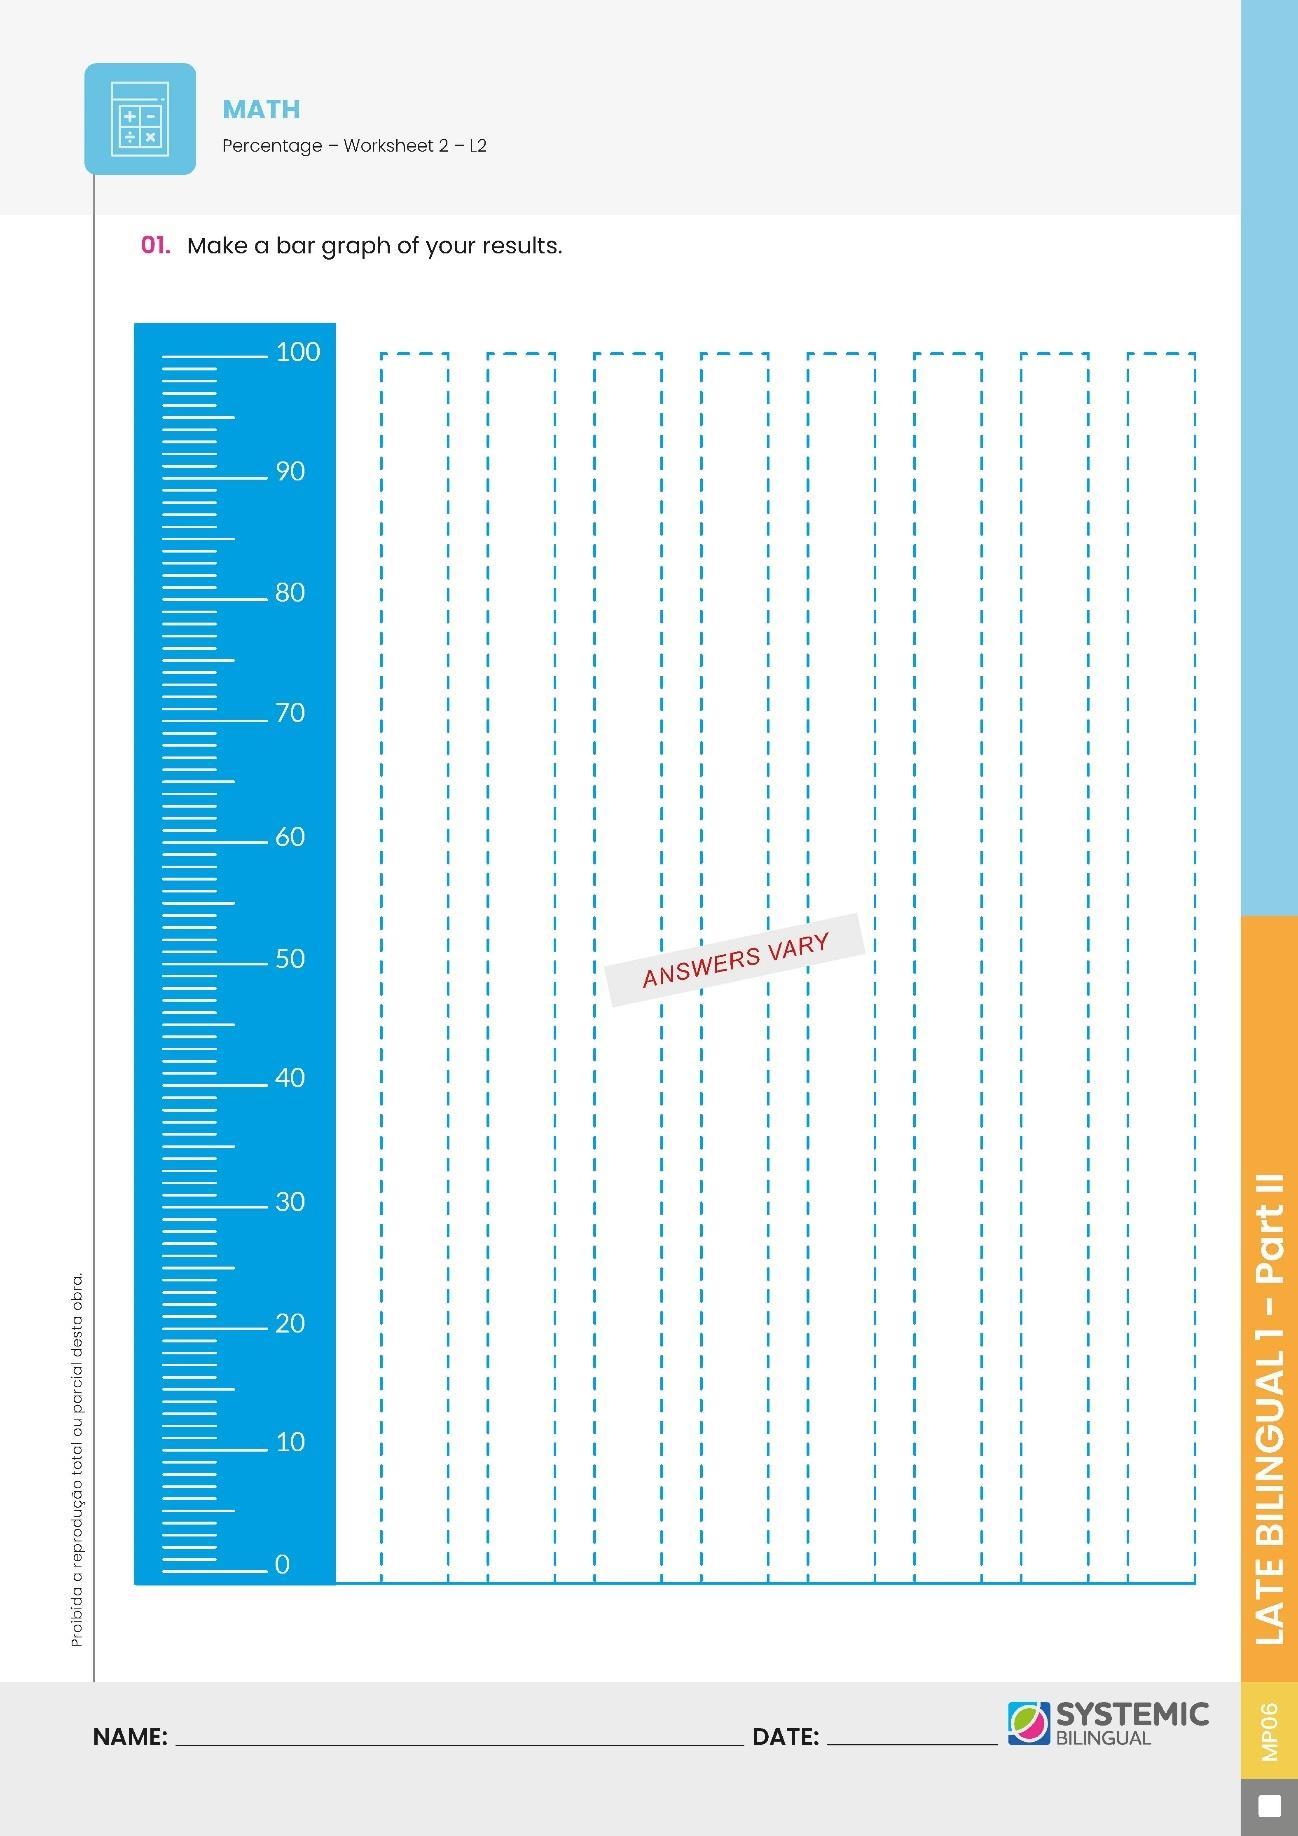
4. Give out Worksheet 2. Each student should also display their percentage results from the peanut activity into a bar graph. They should construct it by using a different vertical bar for each color.
ANSWER KEY
LESSON 07
Topic: Math – Percentage – L3
Lesson Type: Regular
PRIOR KNOWLEDGE: Previous lessons.
KEY VOCABULARY: Numbers.
MATERIALS
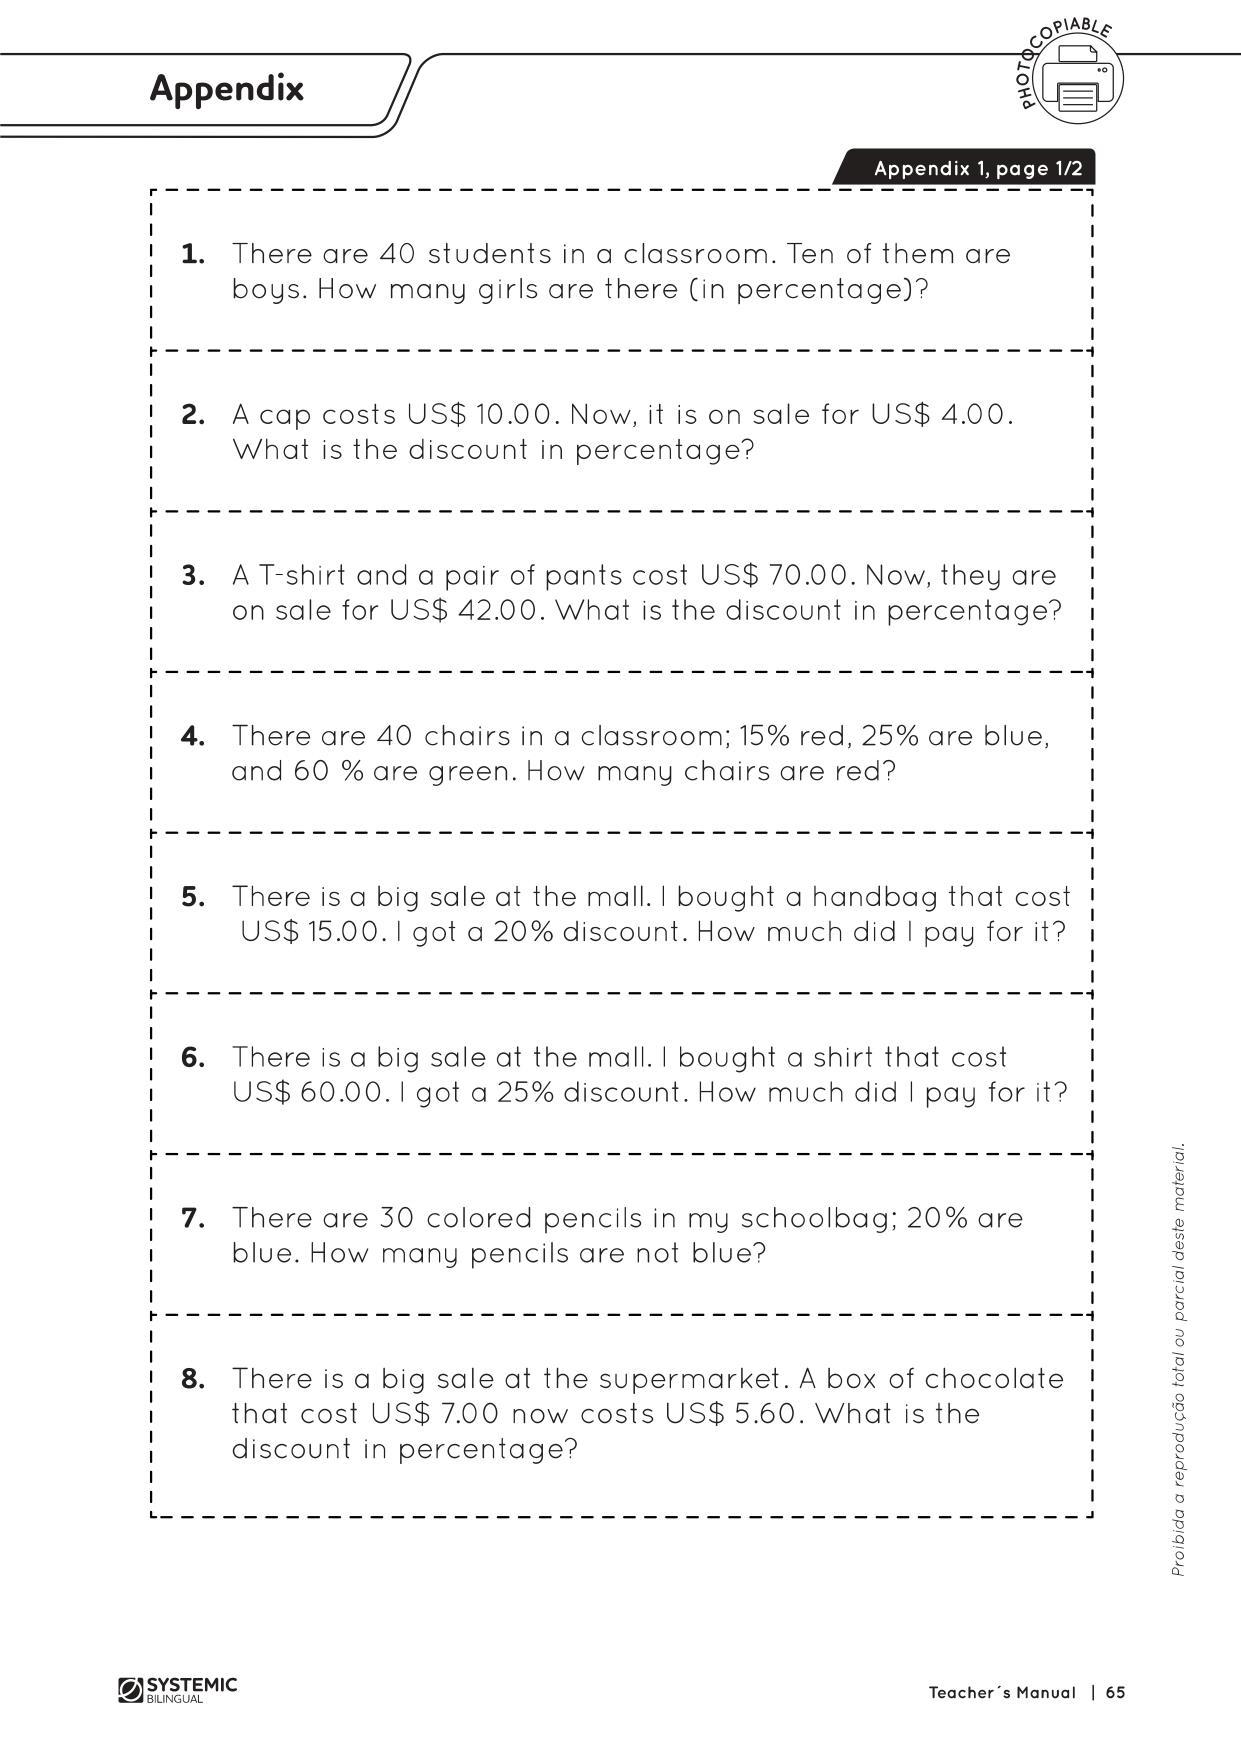
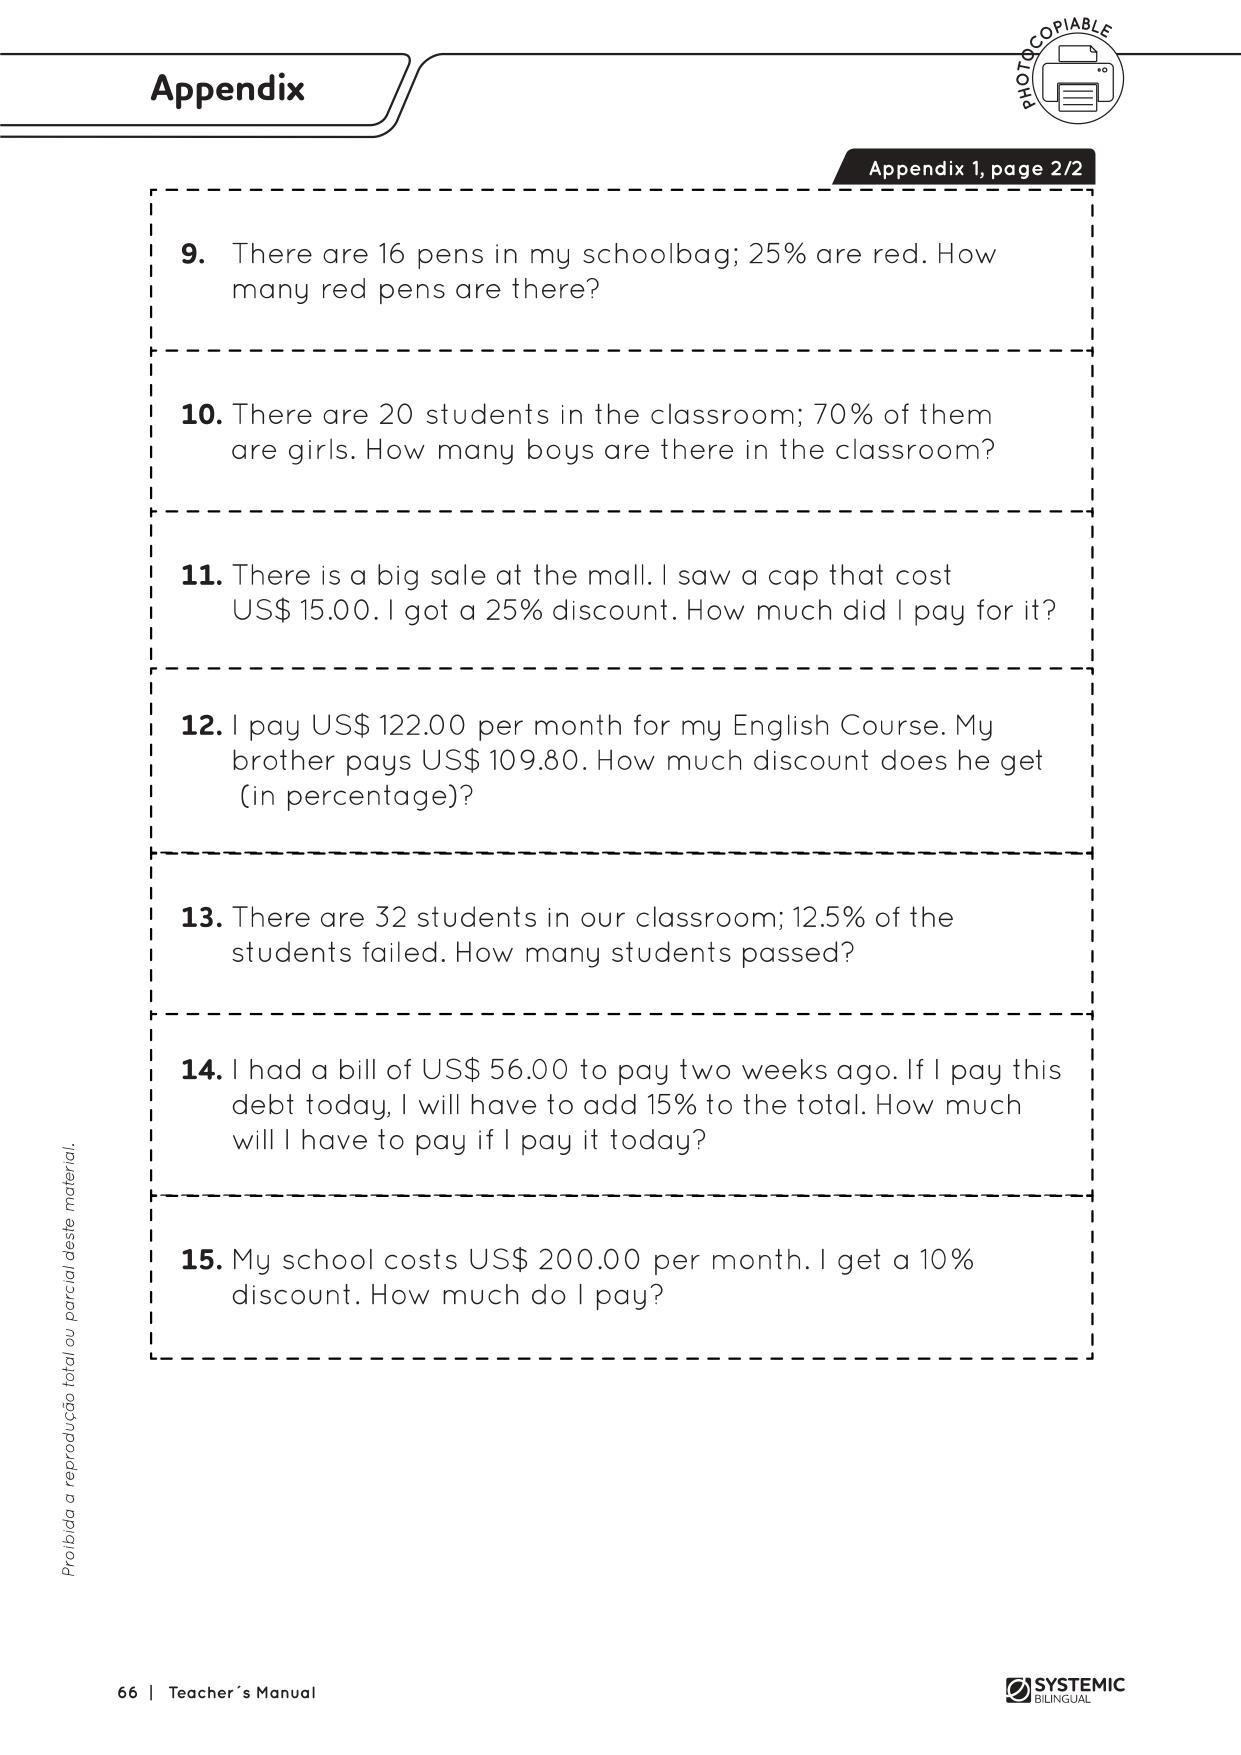
• Appendix 1, Pages 1 and 2 – Math – Percentage – L3;
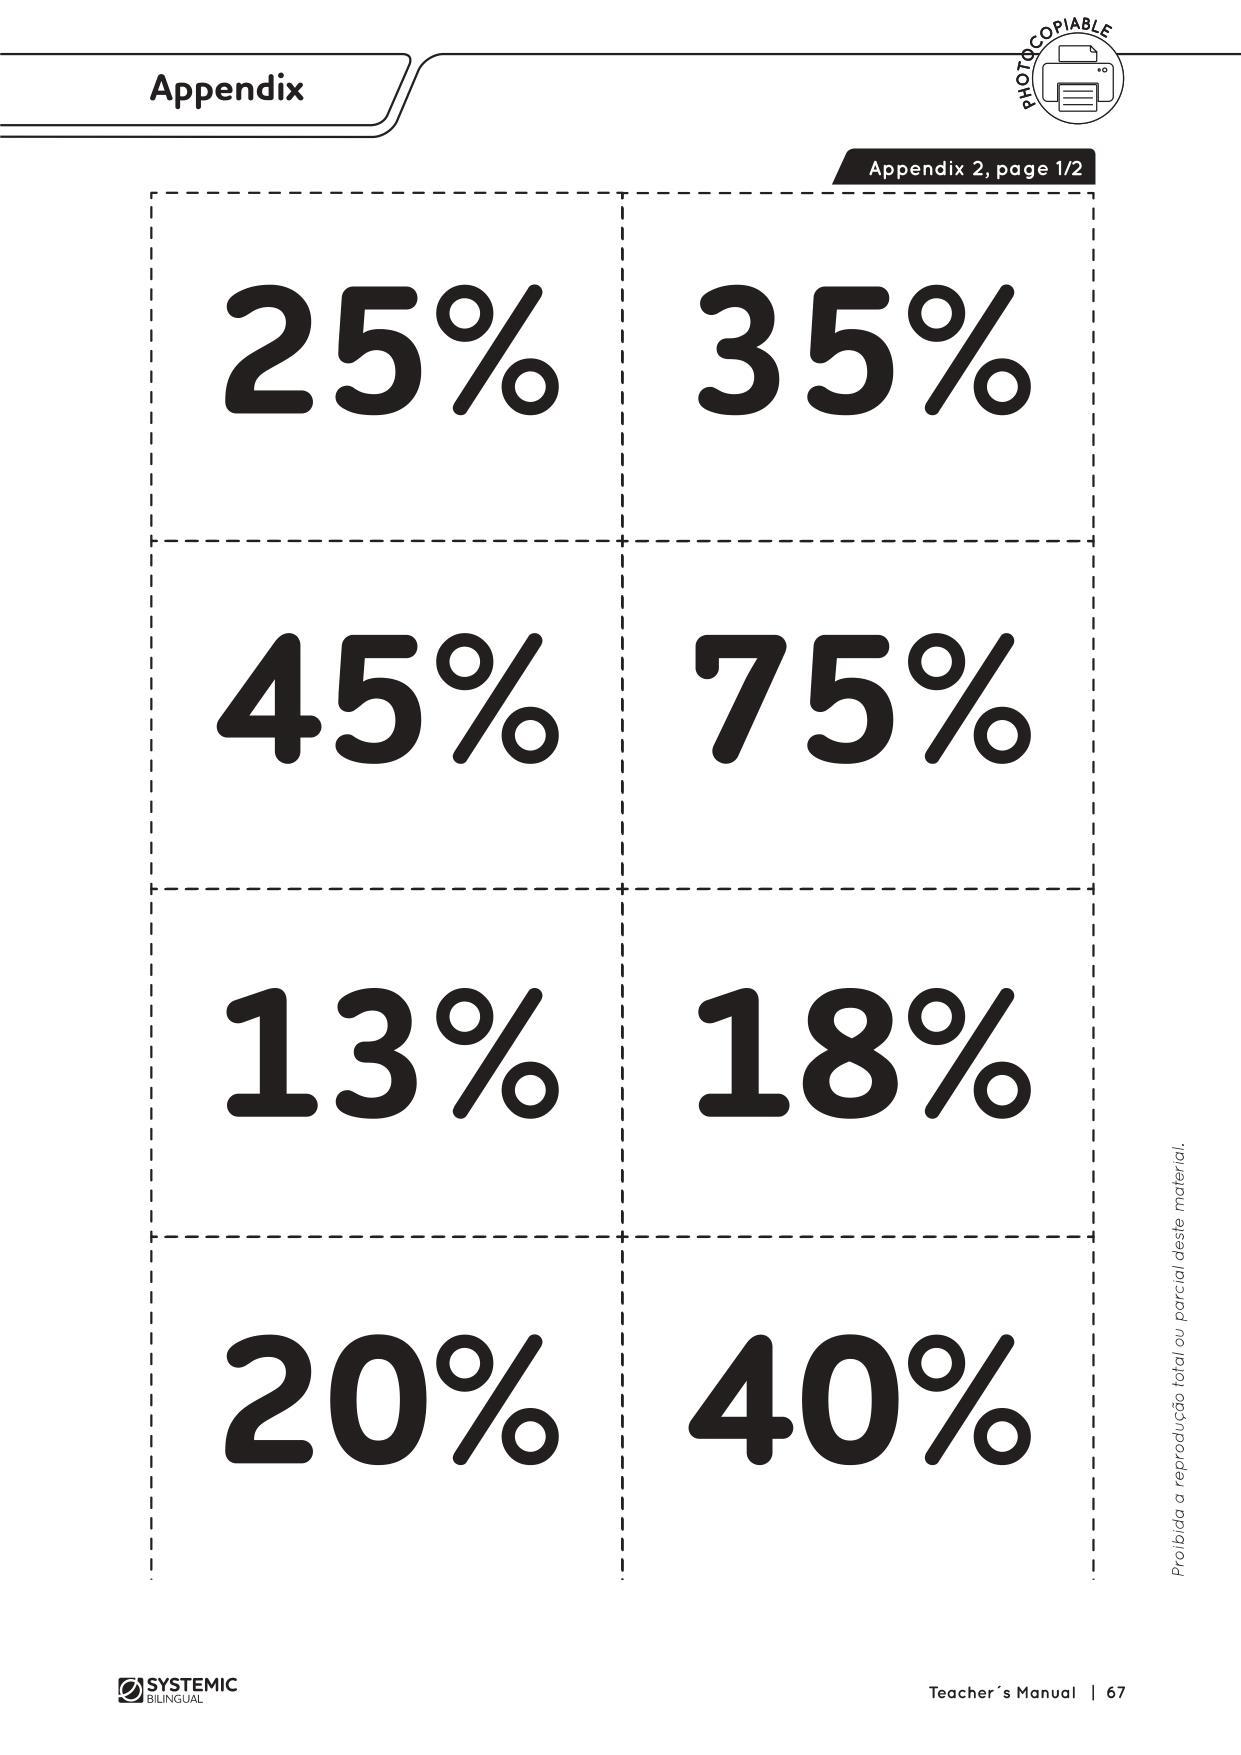
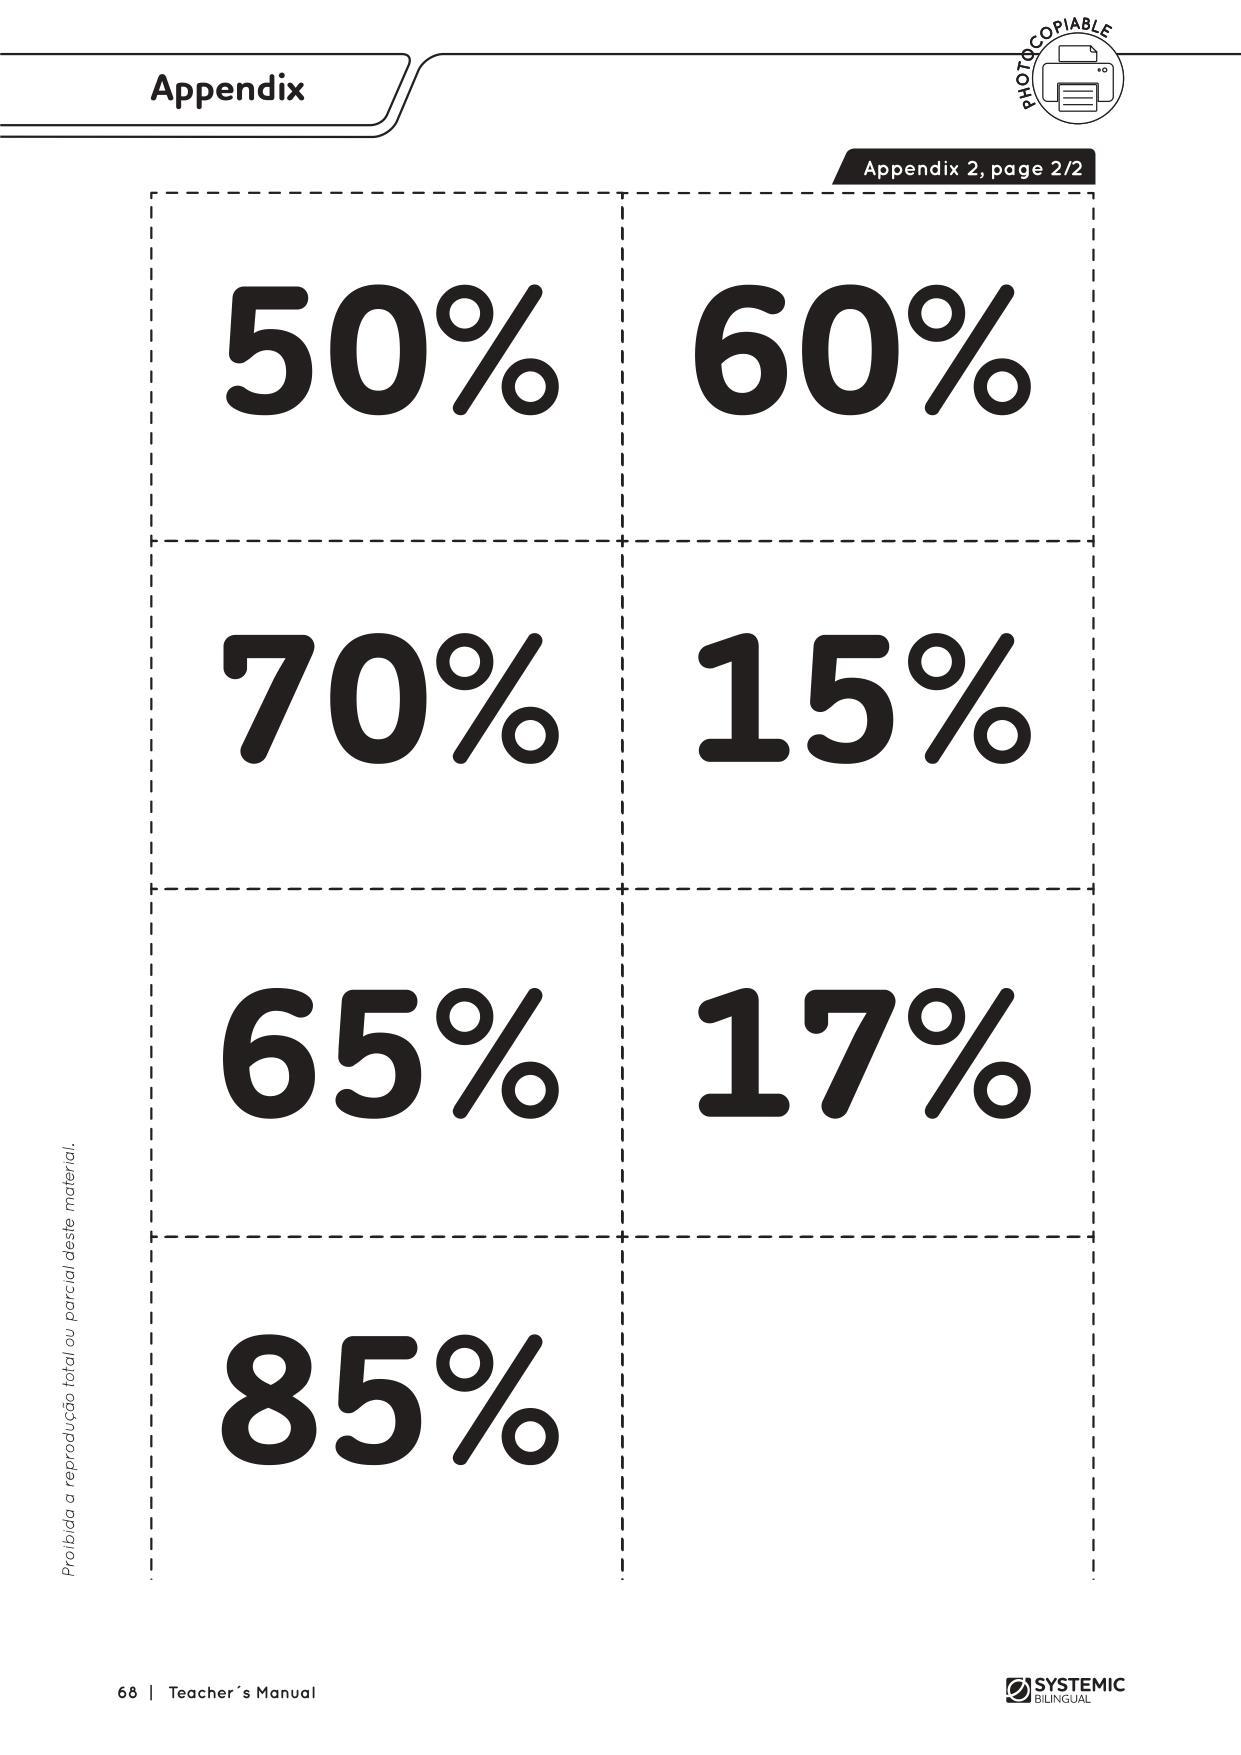
• Appendix 2, Pages 1 and 2 – Math – Percentage – L3;
• Calculators;
• Blank sheets.
PREPARATION IN ADVANCE
• Make two copies and cut out the cards from Appendix 2 and the problems from Appendix 1.
OBJECTIVES
Teacher Objectives
• To have students practice more percentage
• To have students practice problem solving
• To show some Math problems
Student Outcomes
• Calculate percentages
• Practice solving problems
• Create Math problems
• Interpret data
HABILIDADES:
• (EF06LI01) Interagir em situações de intercâmbio oral, demonstrando iniciativa para utilizar a língua inglesa.
• (EF06LI03) Solicitar esclarecimentos em língua inglesa sobre o que não entendeu e o significado de palavras ou expressões desconhecidas.
• (EF07LI01) Interagir em situações de intercâmbio oral para realizar as atividades em sala de aula, de forma respeitosa e colaborativa, trocando ideias e engajando-se em brincadeiras e jogos.
• (EF08MA04) Resolver e elaborar problemas, envolvendo cálculo de porcentagens, incluindo o uso de tecnologias digitais.
PROCEDURES
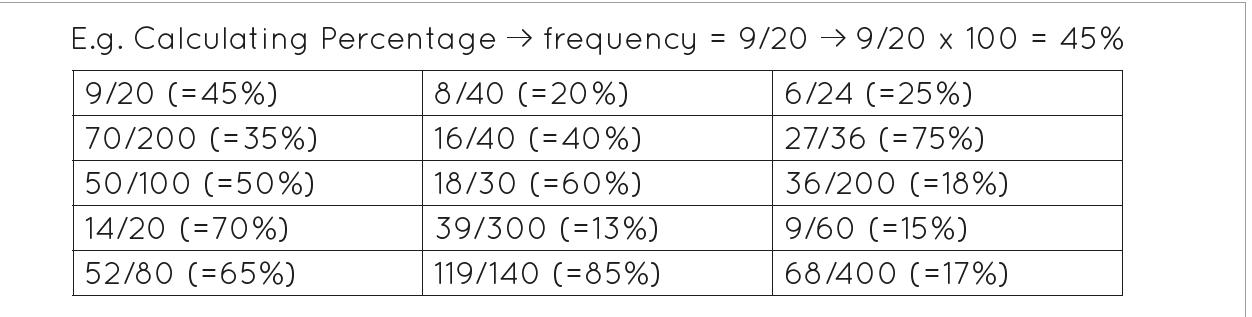
1. Game. Stick the cards from Appendix 2 (or write them) on the board. Divide the class into two or three groups. The teacher says one frequency from the list below. One pair from each group calculates the percentage and one of them runs to the board to touch the correct result. (9/20 – read: nine out of twenty.)
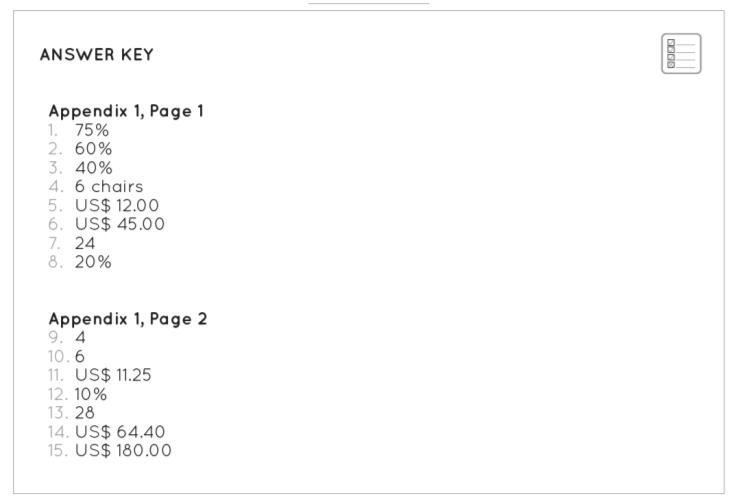
2. Divide the class into 2 groups. Give problem 1 from Appendix 1 to each group. The group that gives the correct answer first, scores a point. When they finish problem 1, give them problem 2 and so on. Have them give complete answers. They might need assistance.
3. Writing activity: each group creates problems for the other group to solve. They can keep the problems from the previous game to use as examples.
4. Give students some time to create a problem using percentage.
LESSON 08
Topic: Geography – World Map and Data – L5
Lesson Type: Assessment
PRIOR KNOWLEDGE: Previous lessons.
KEY VOCABULARY: Same as the previous classes.
MATERIALS
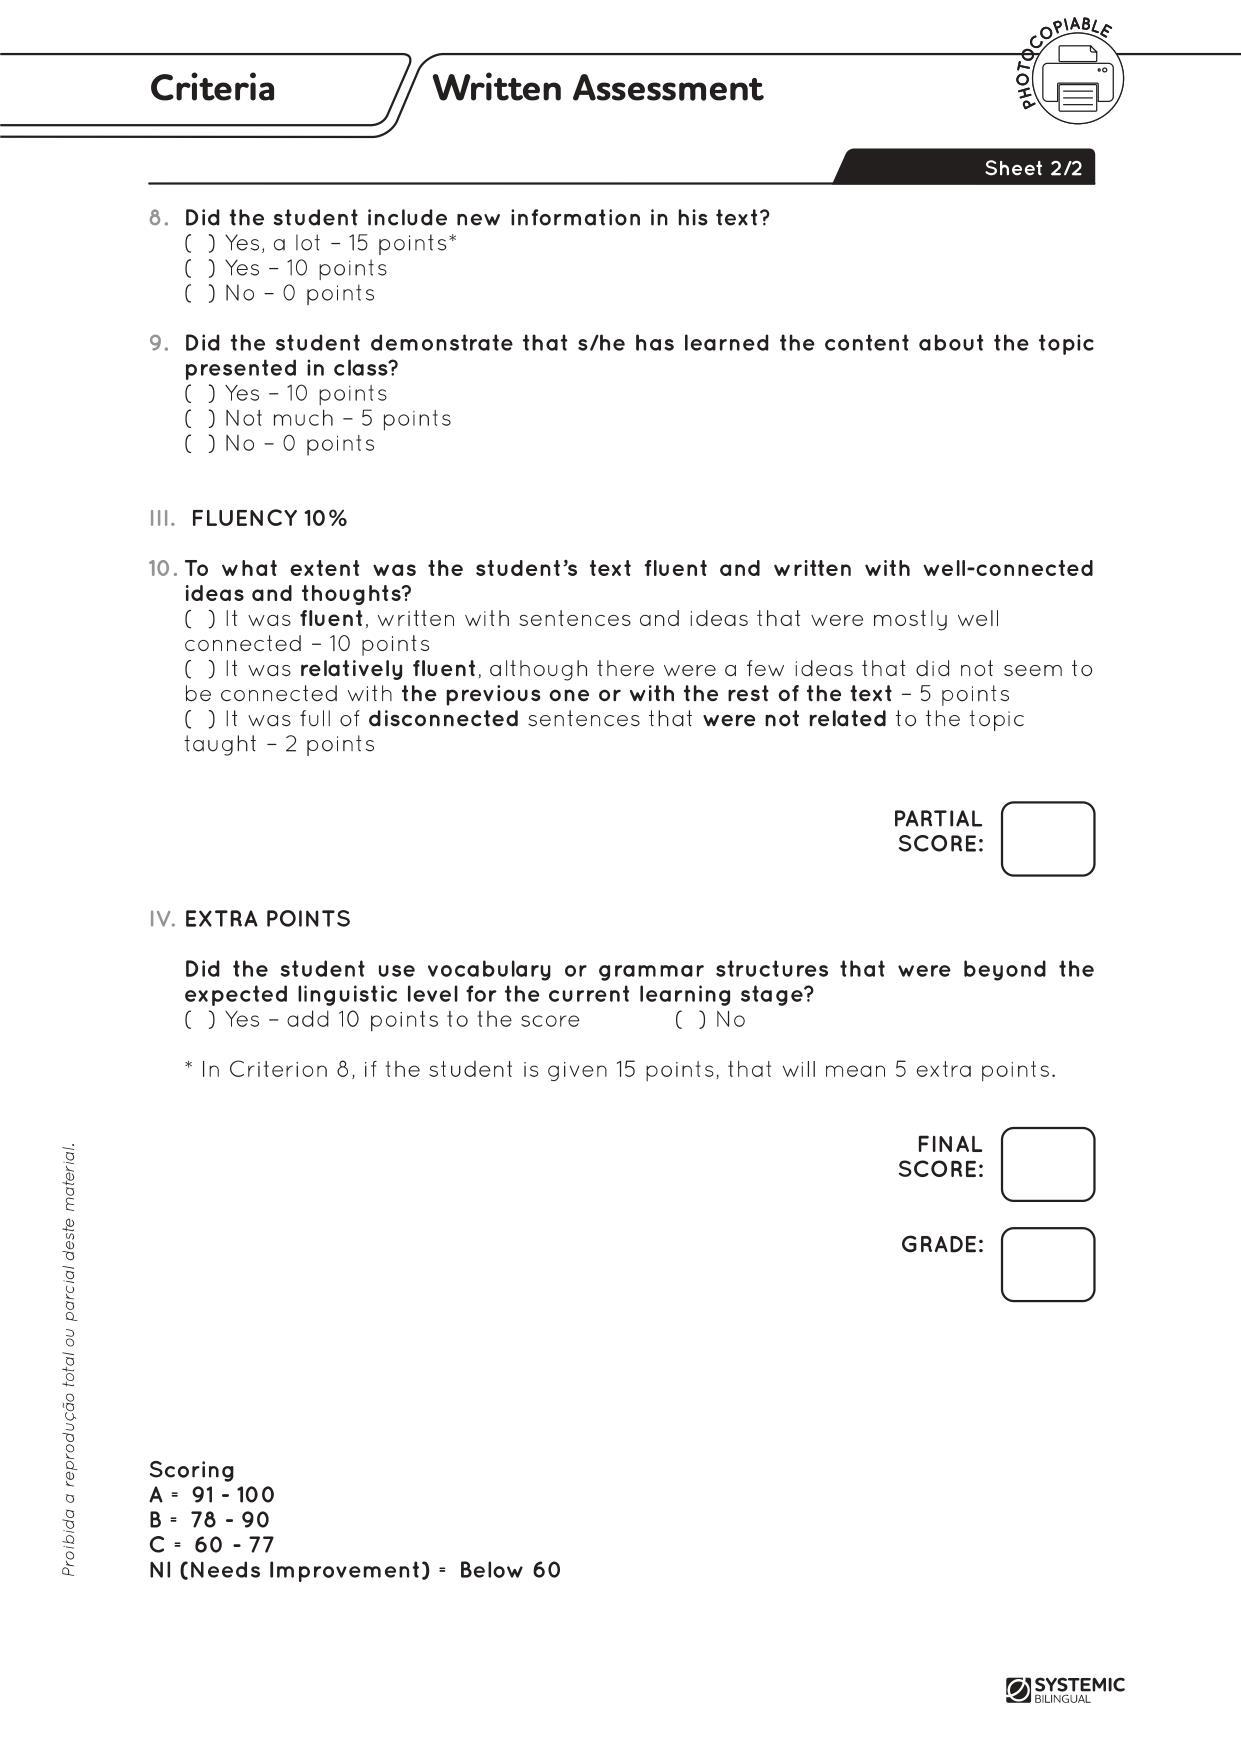
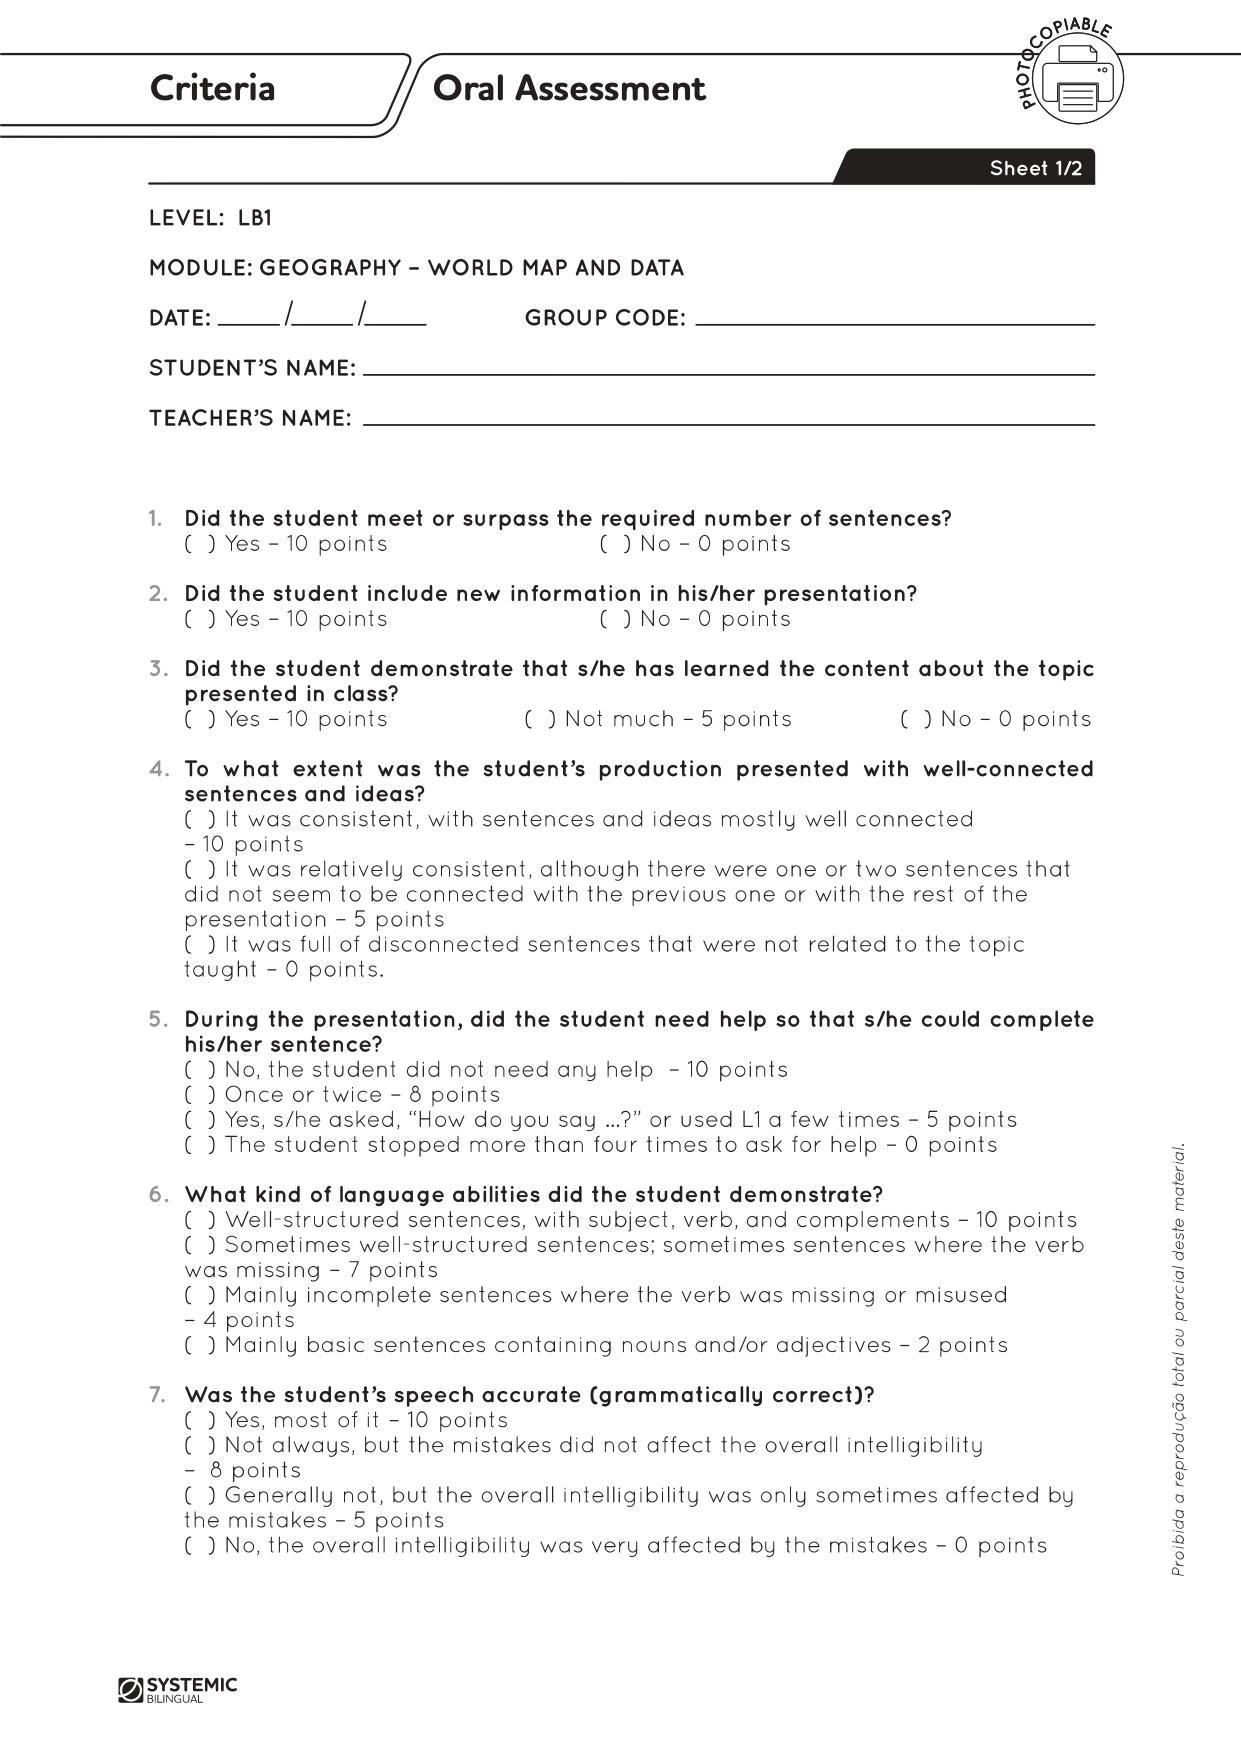
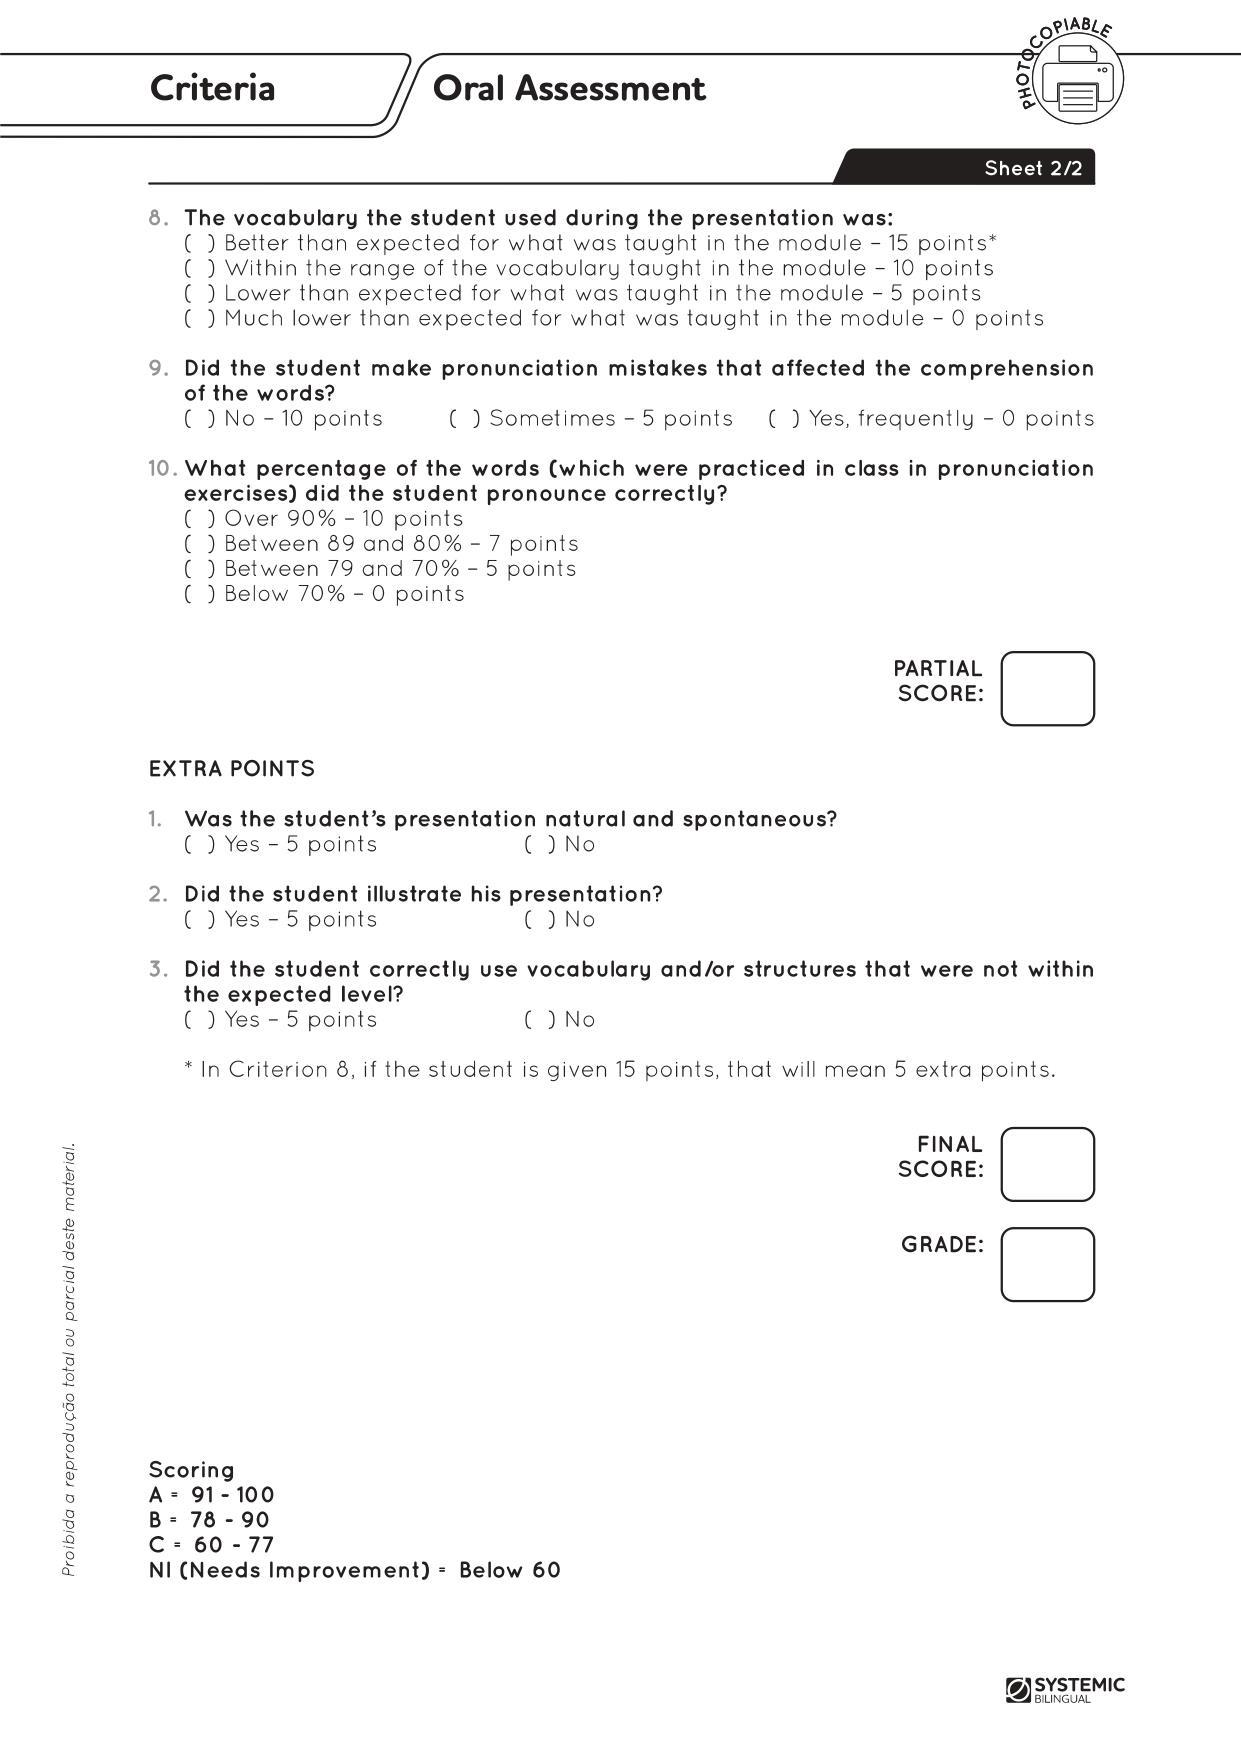
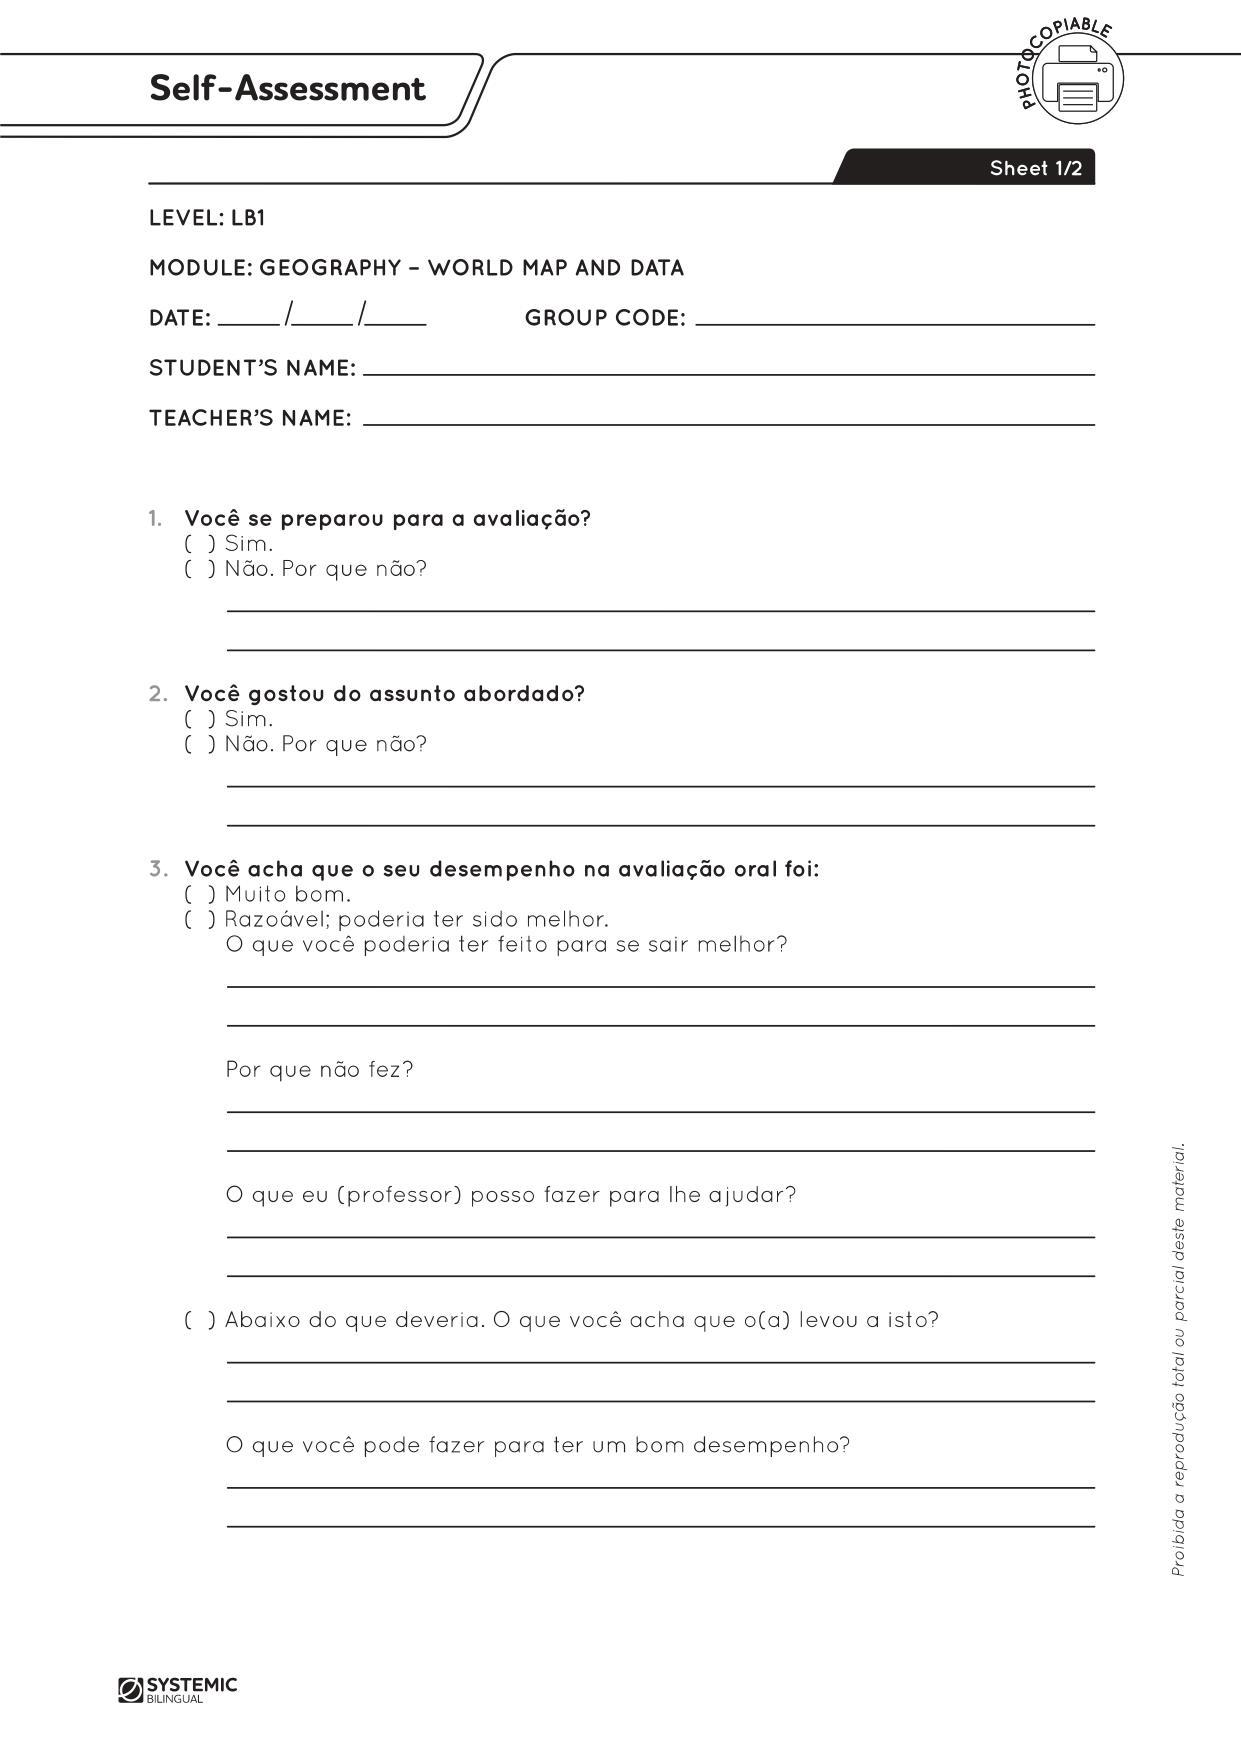
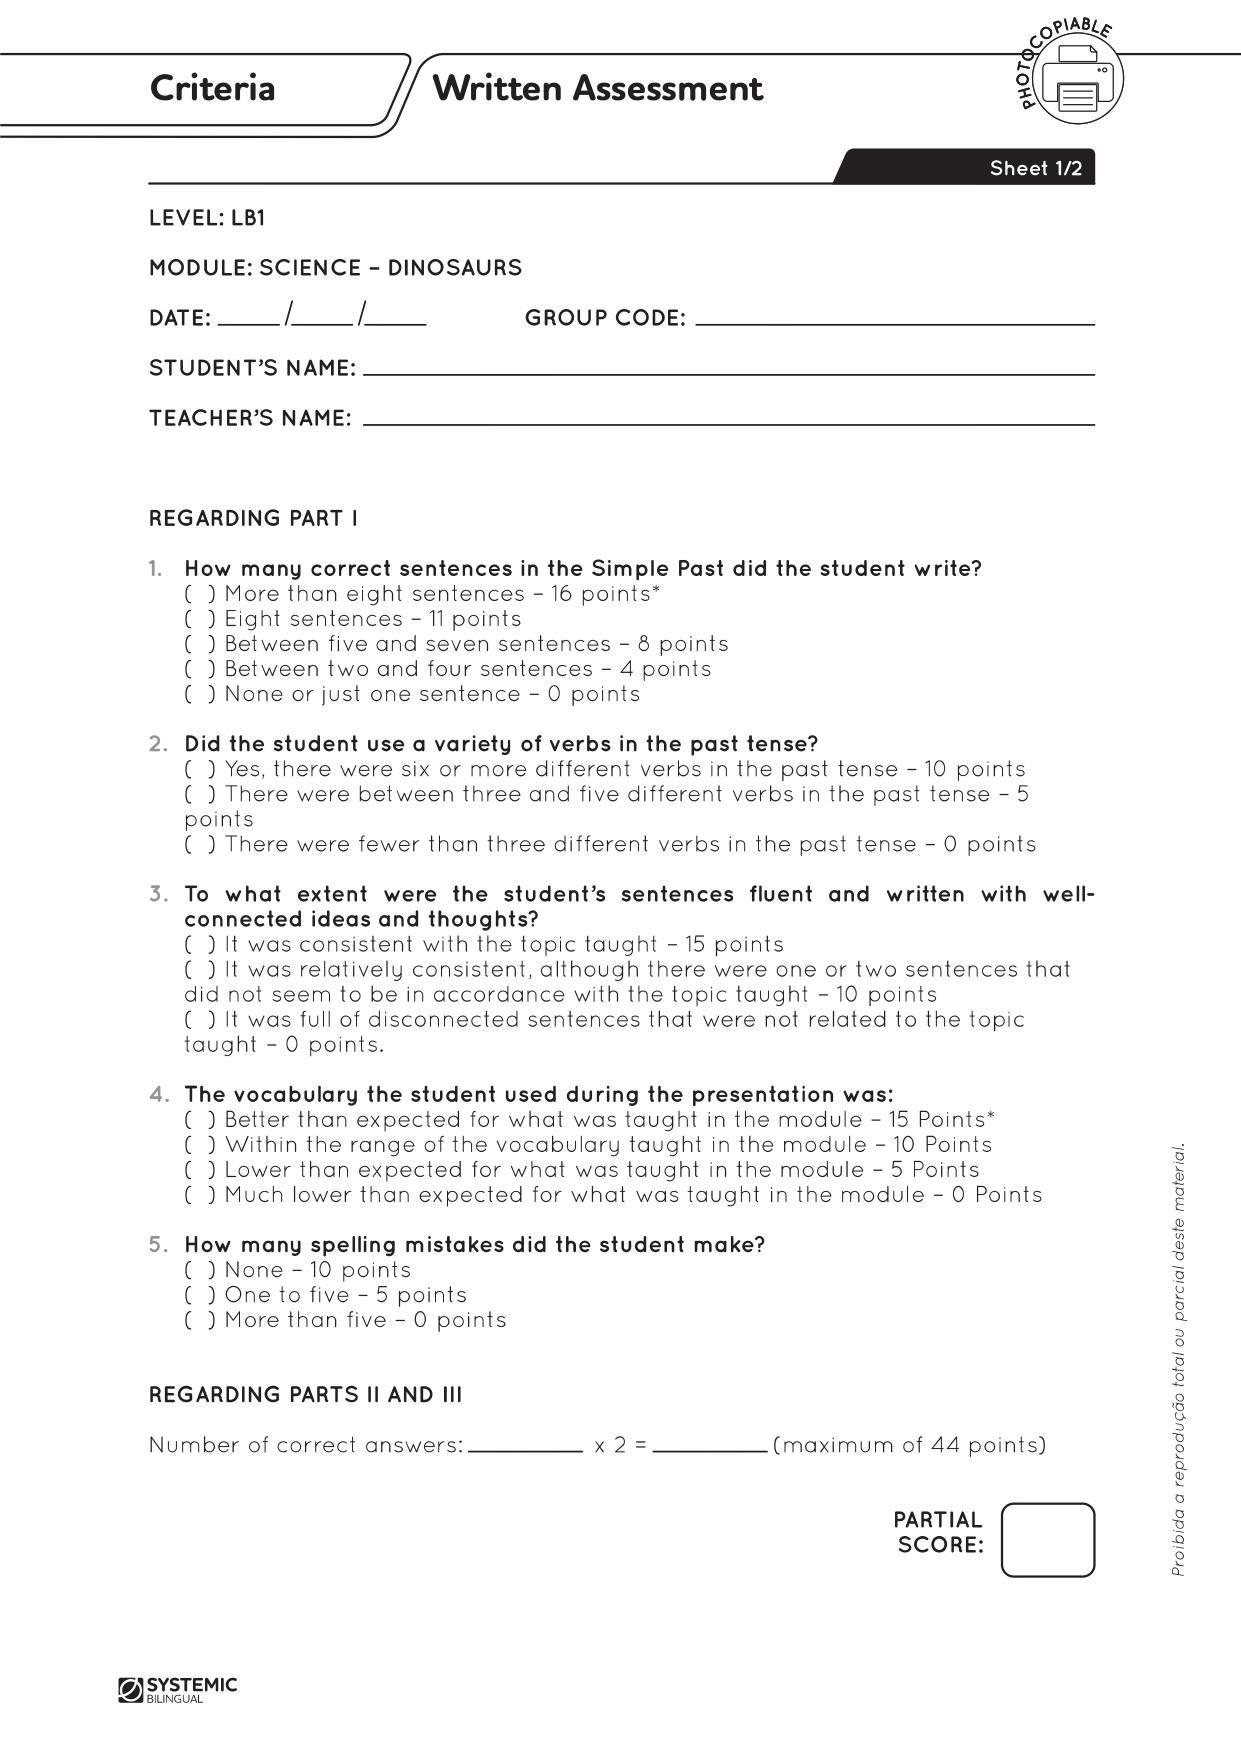
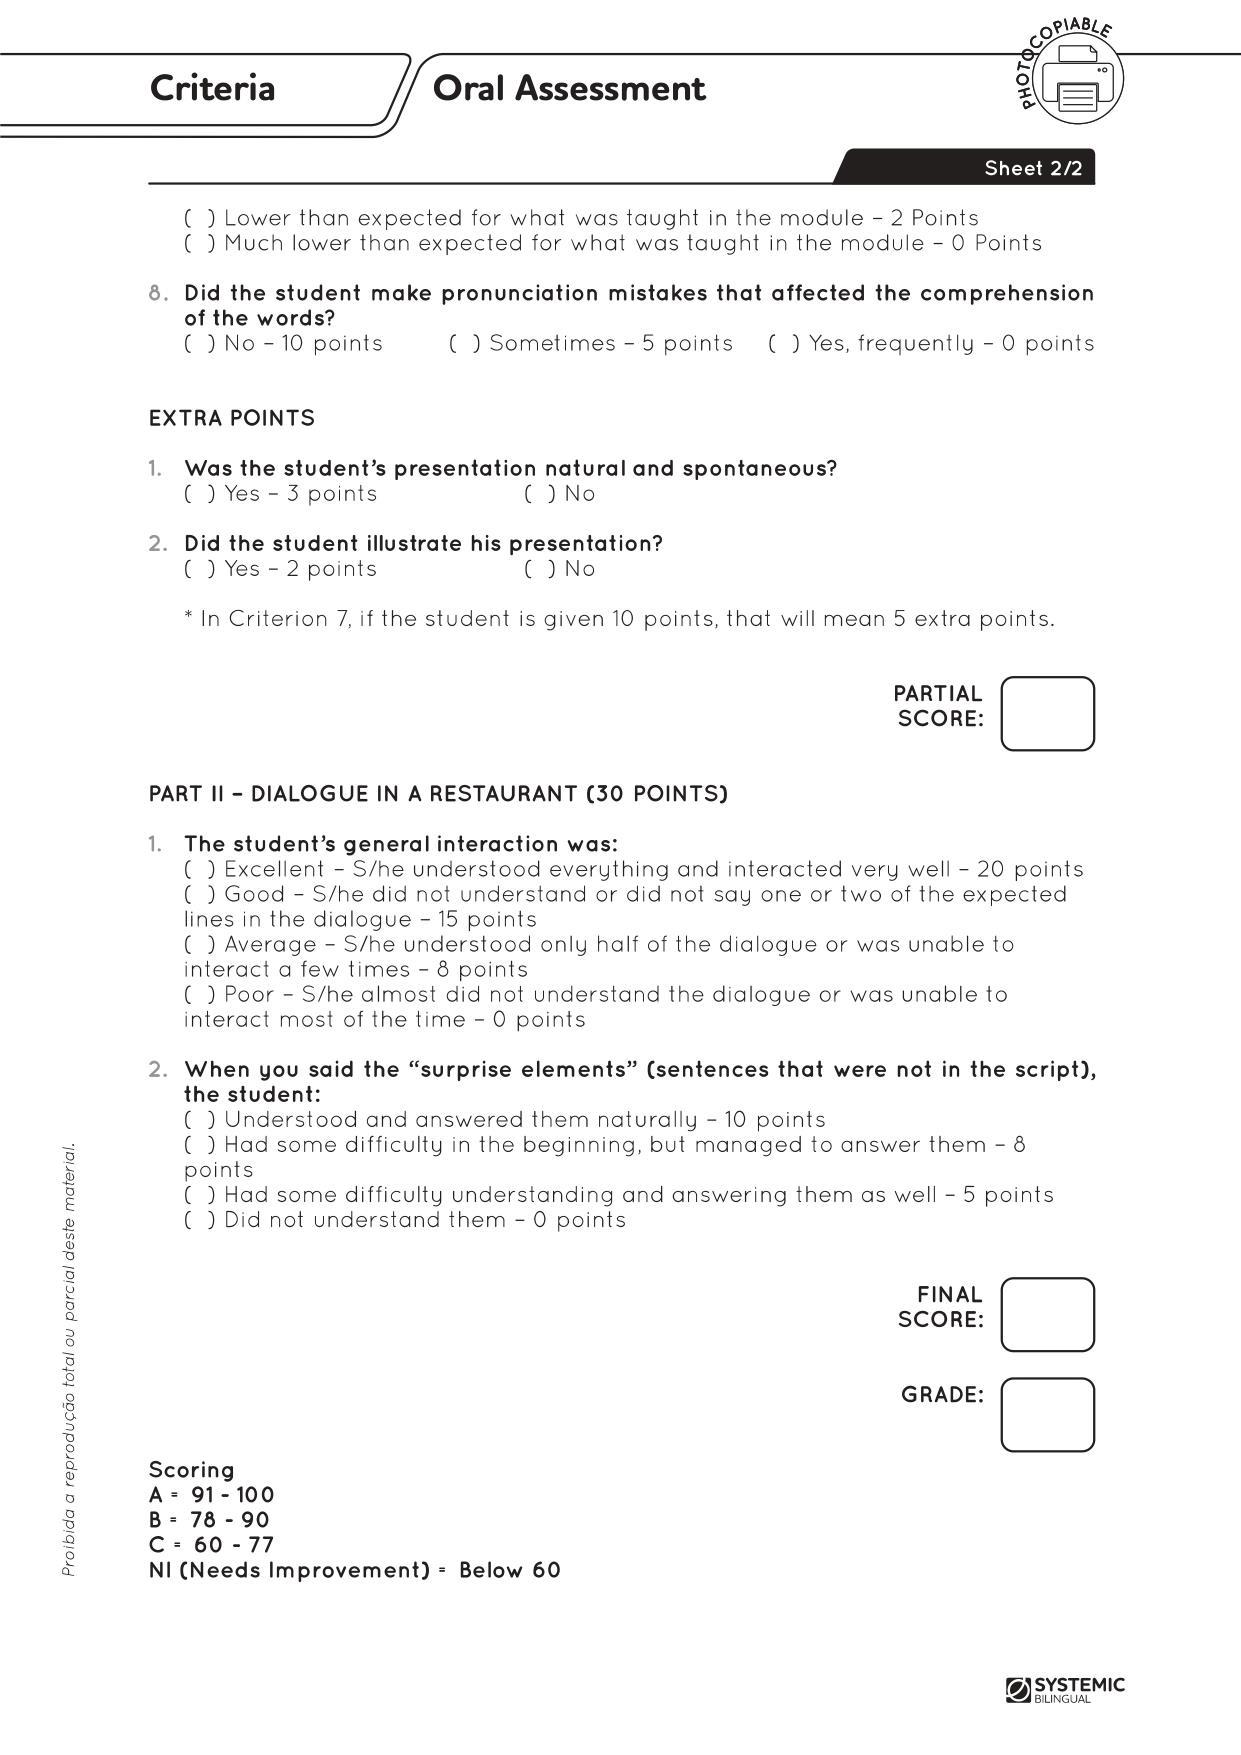
• Copies of the letter to parents/guardians with the evaluation criteria for the module, one for each student;
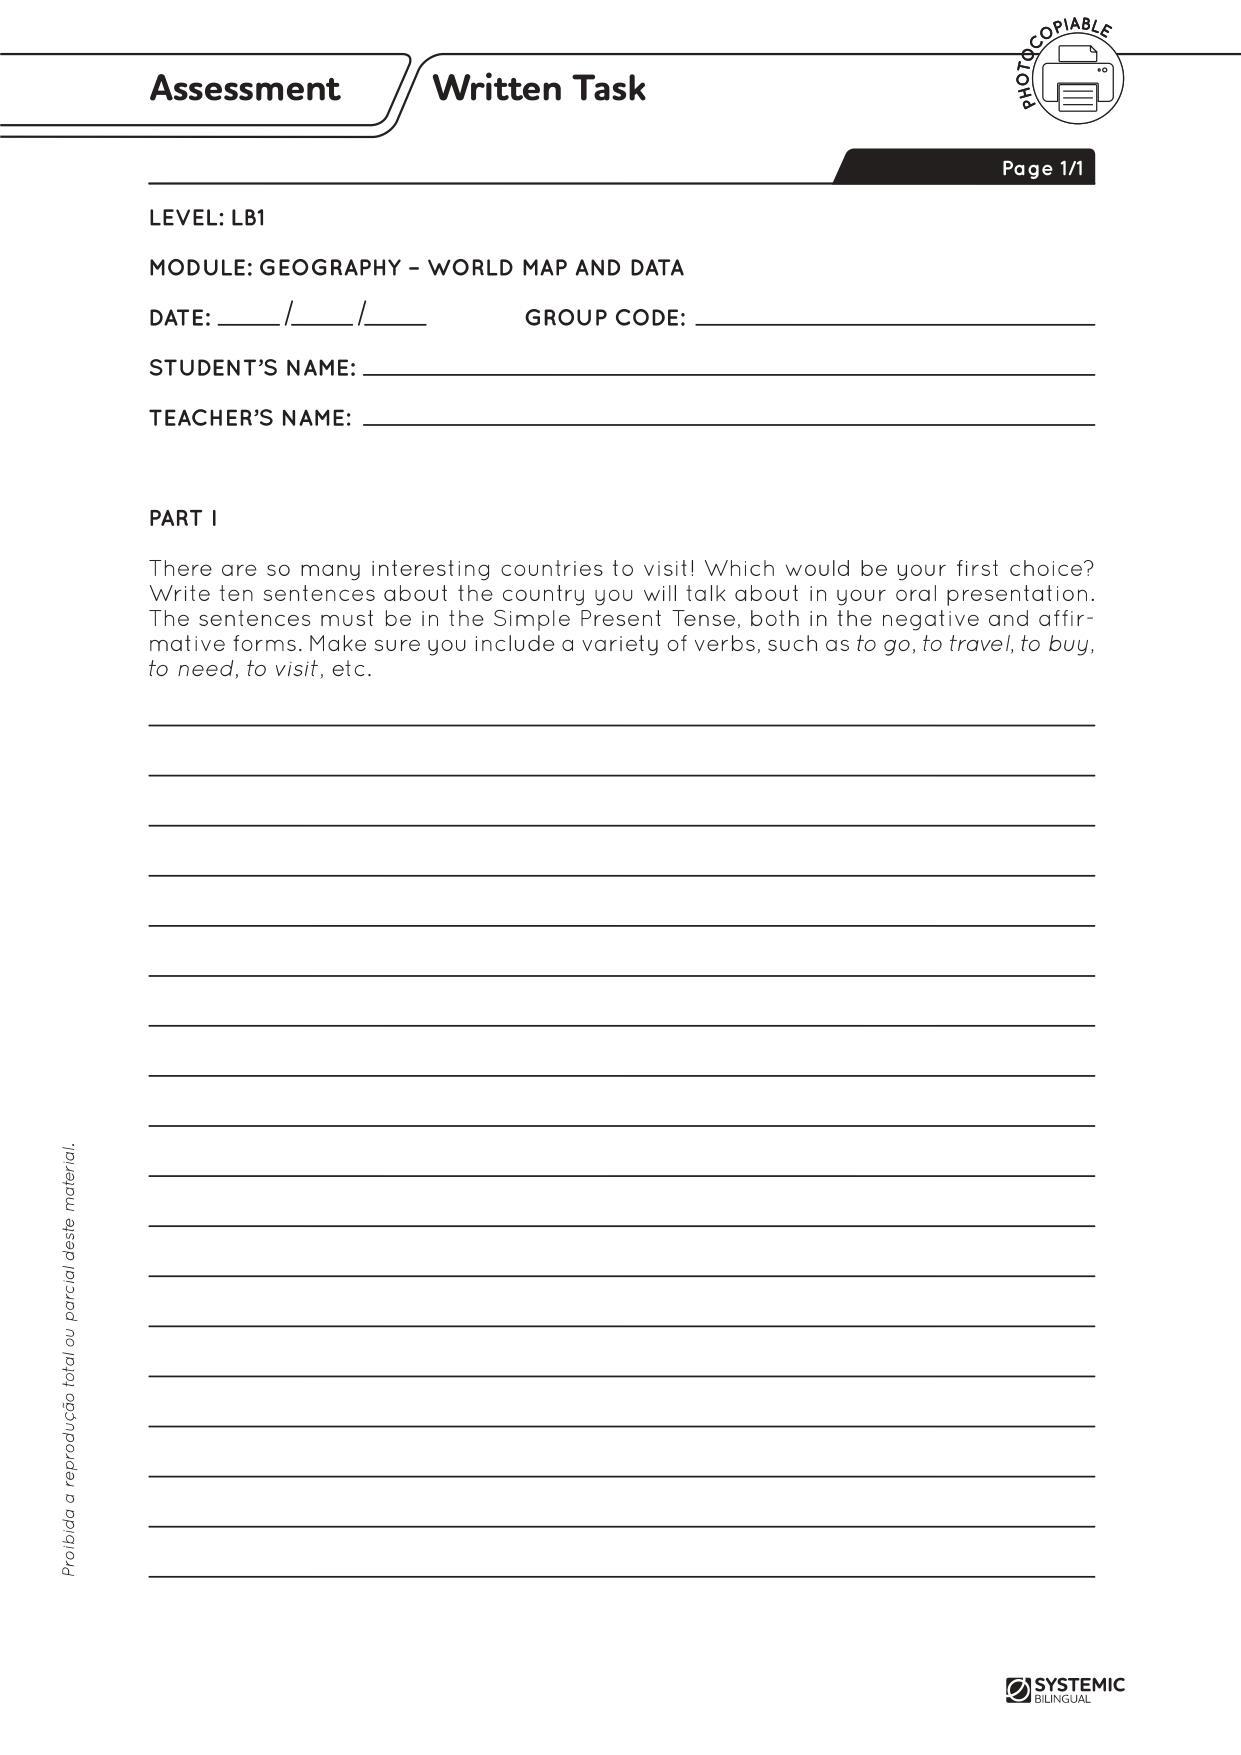
• Copies of the Written Task Assessment, one for each student;
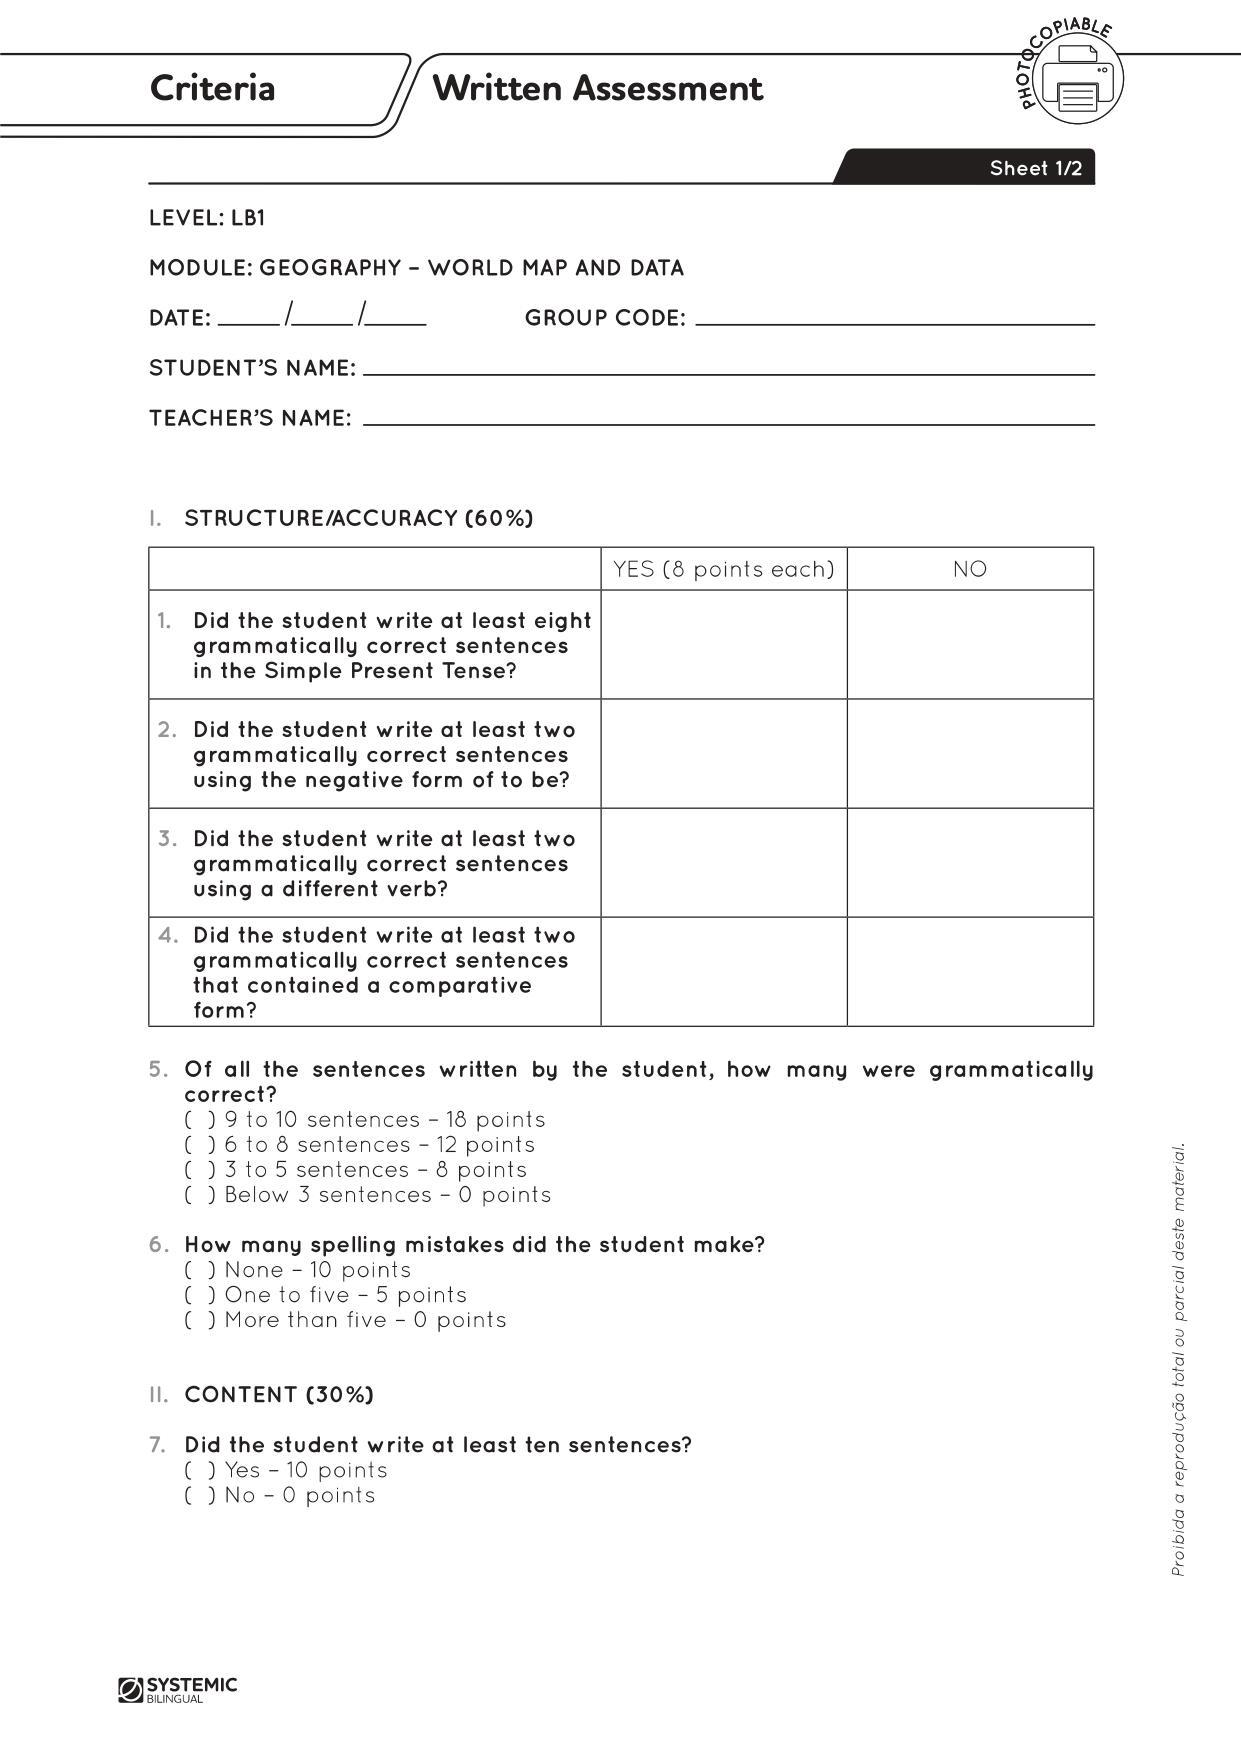
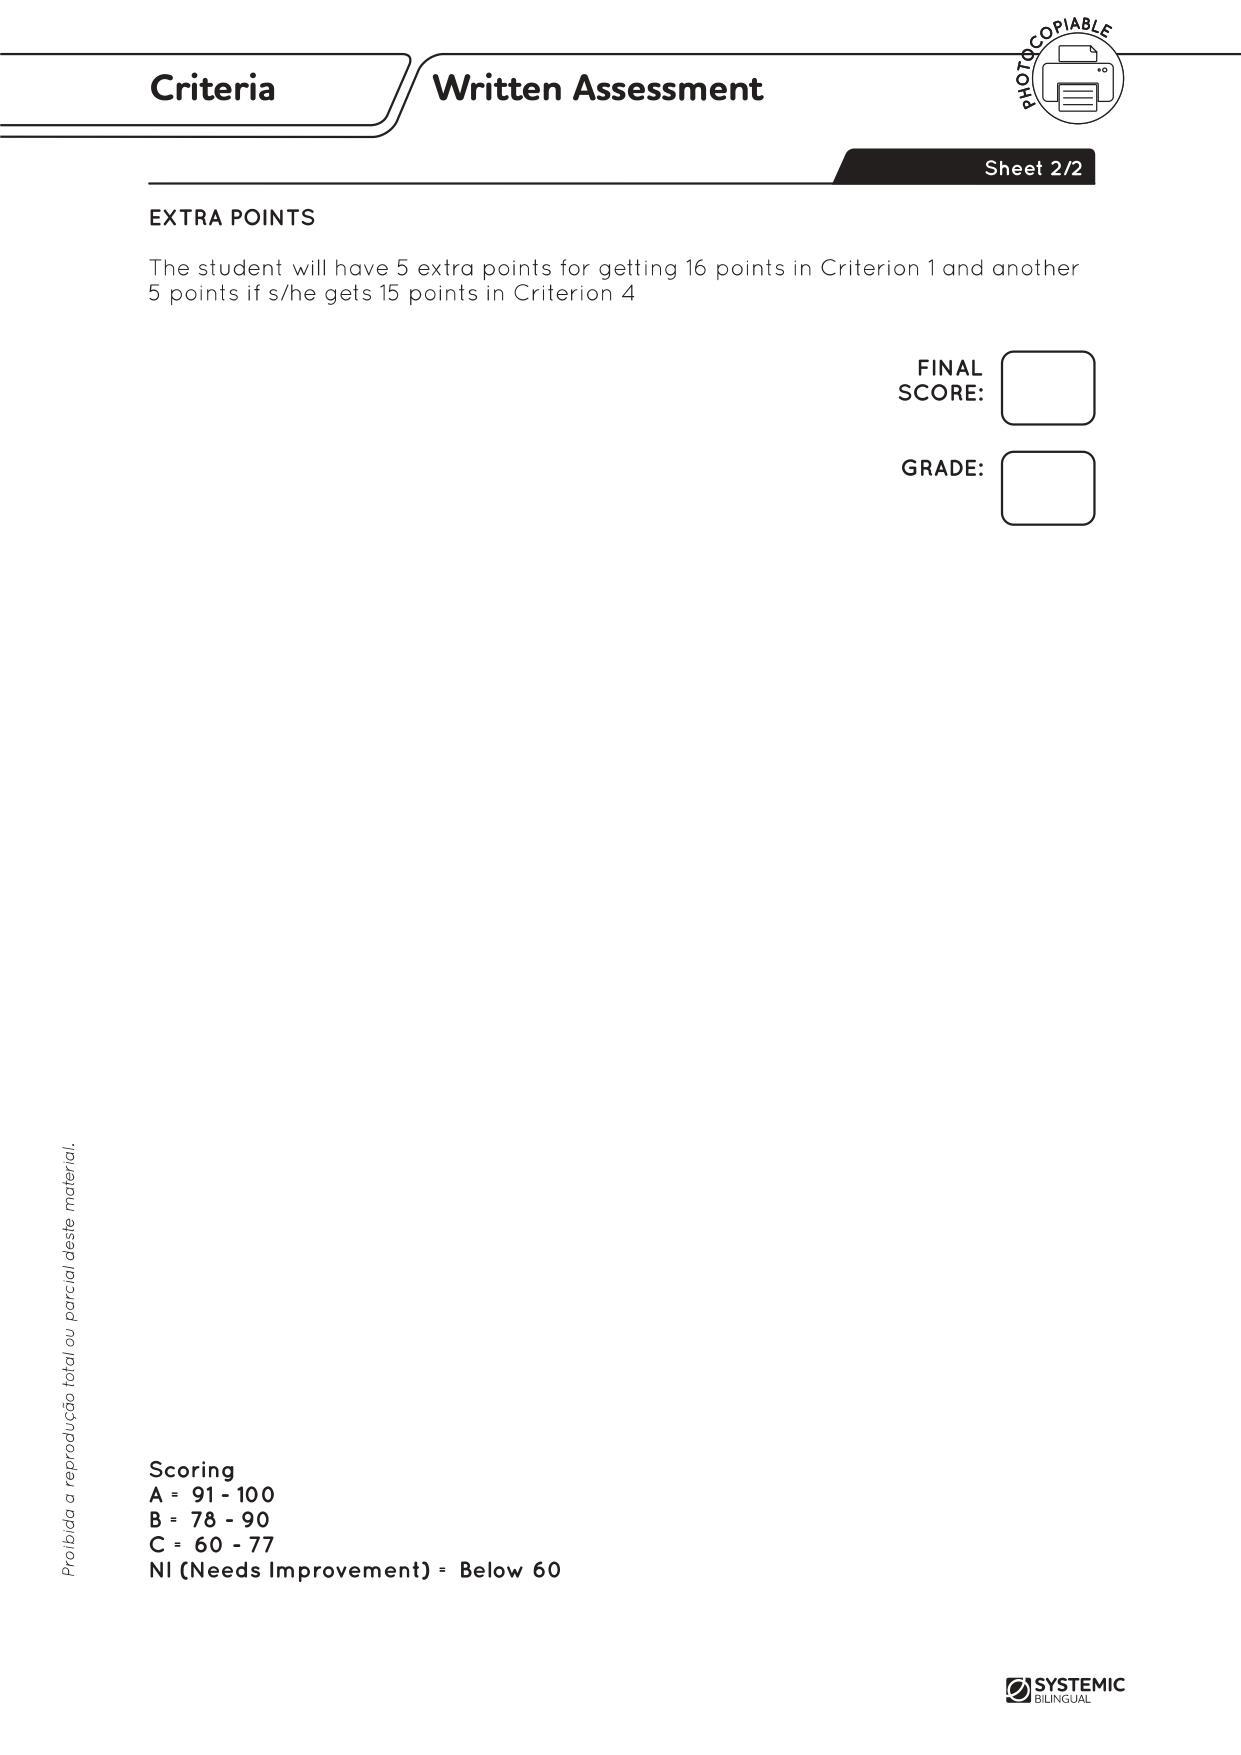
• Copies of the Written Assessment criteria sheet, one for each student;
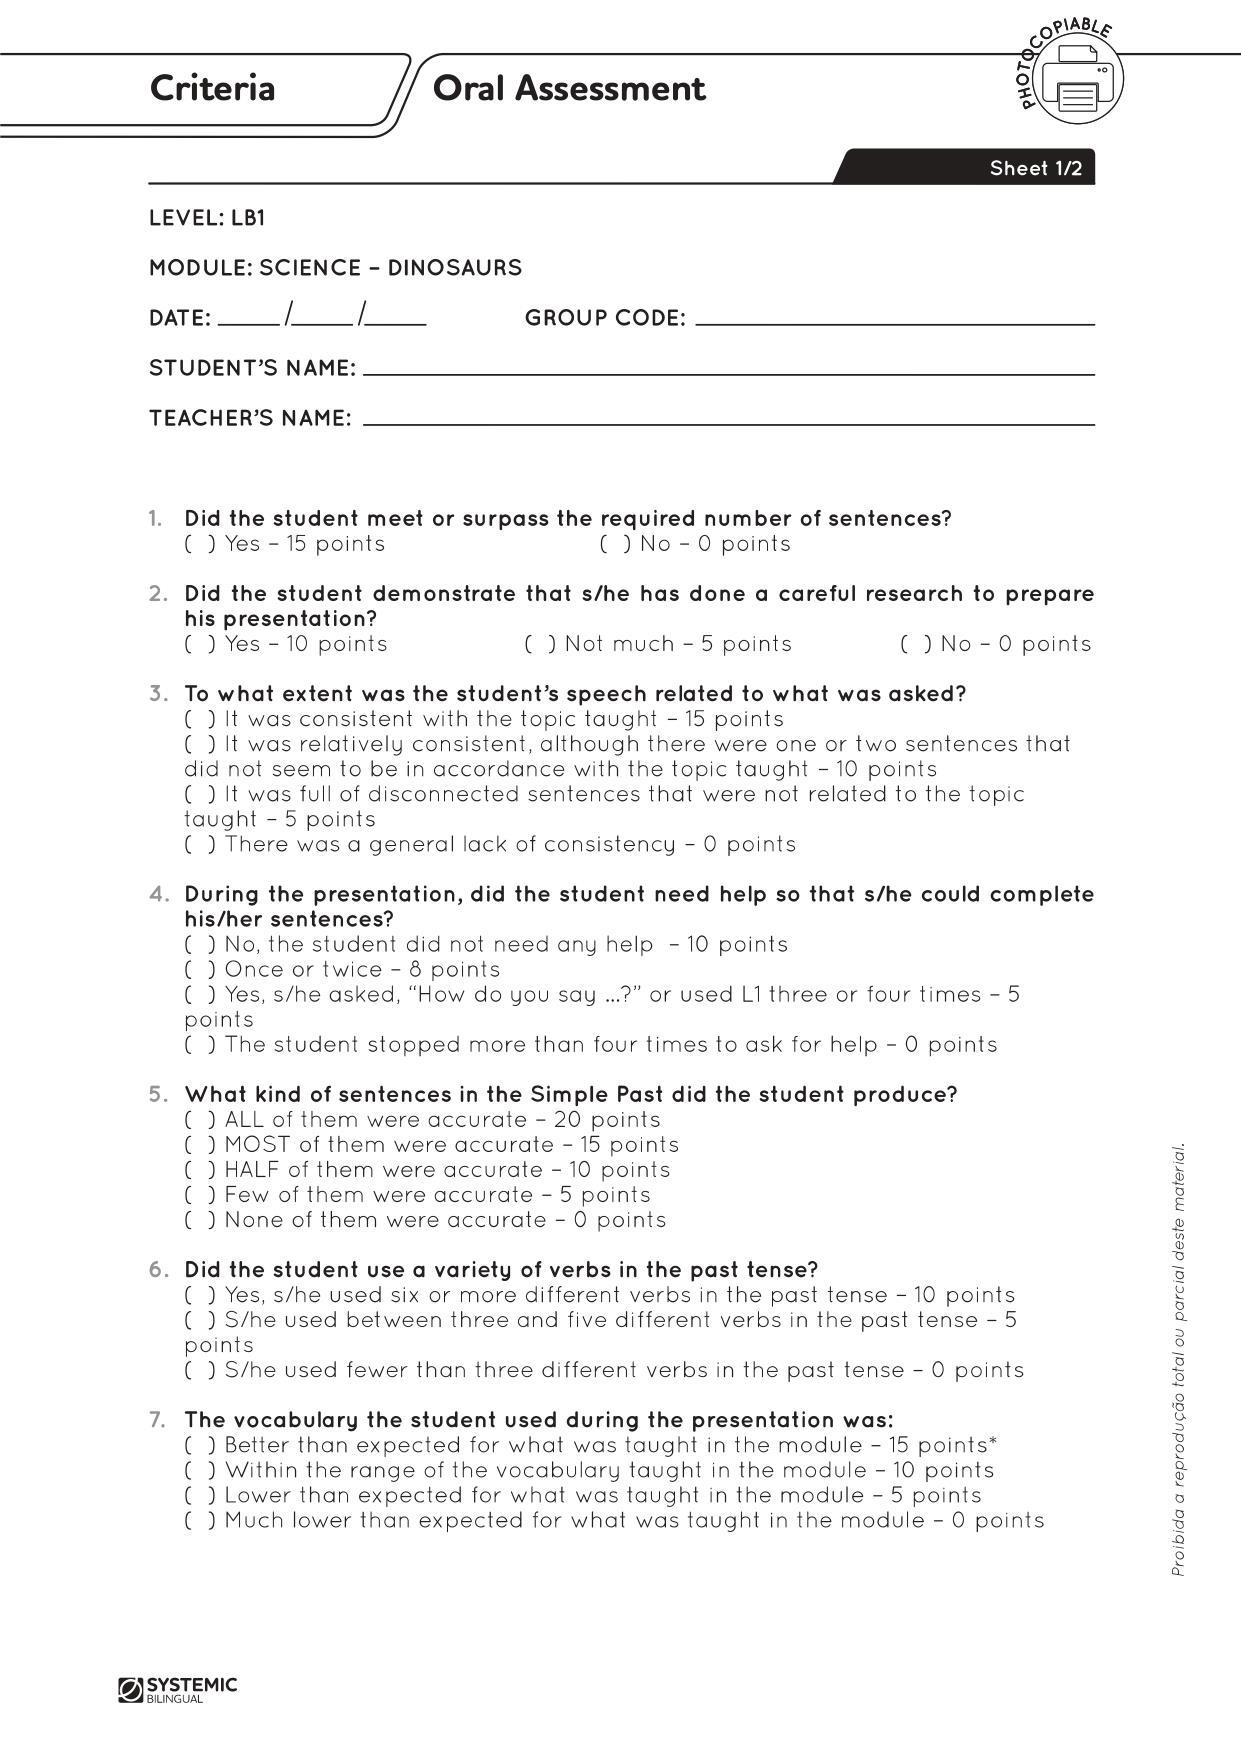
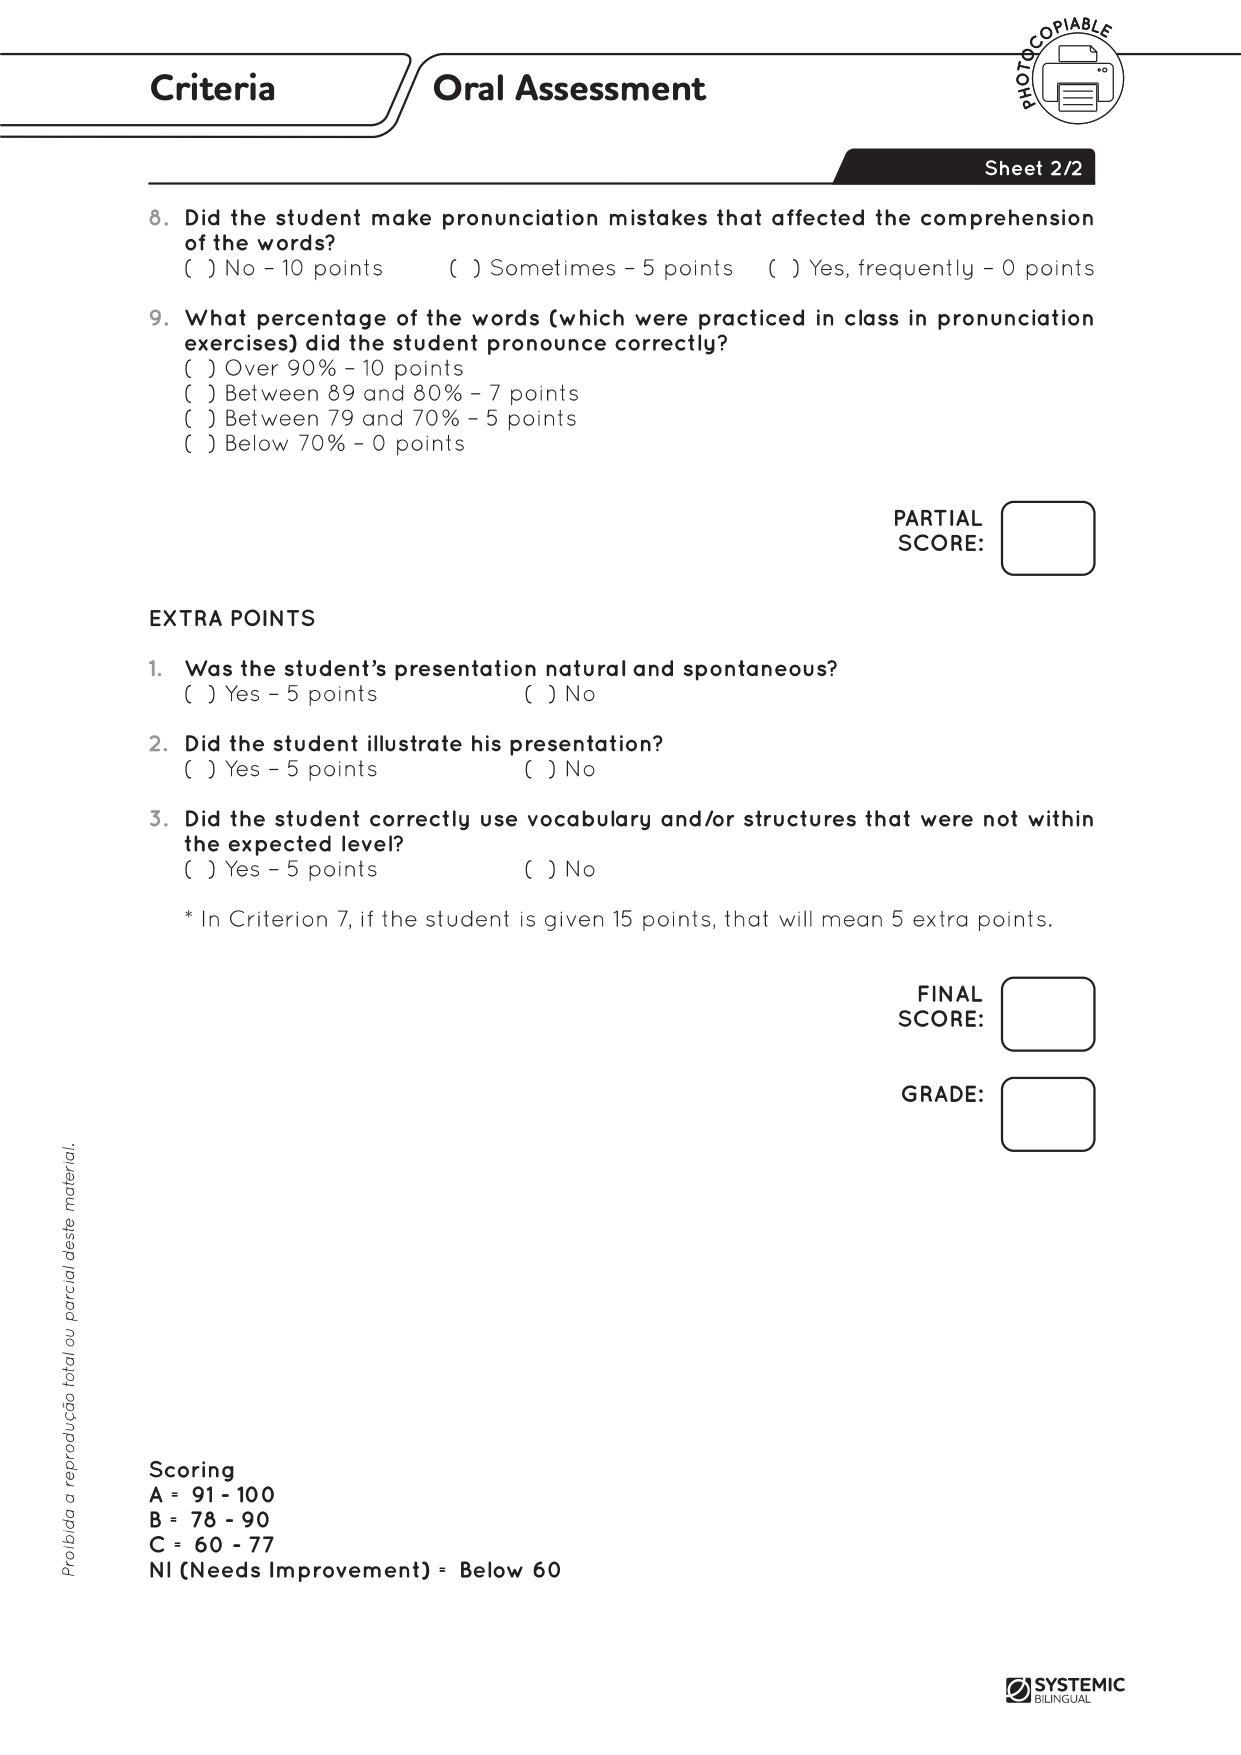
• Copies of the Oral Assessment criteria sheet, one for each student;
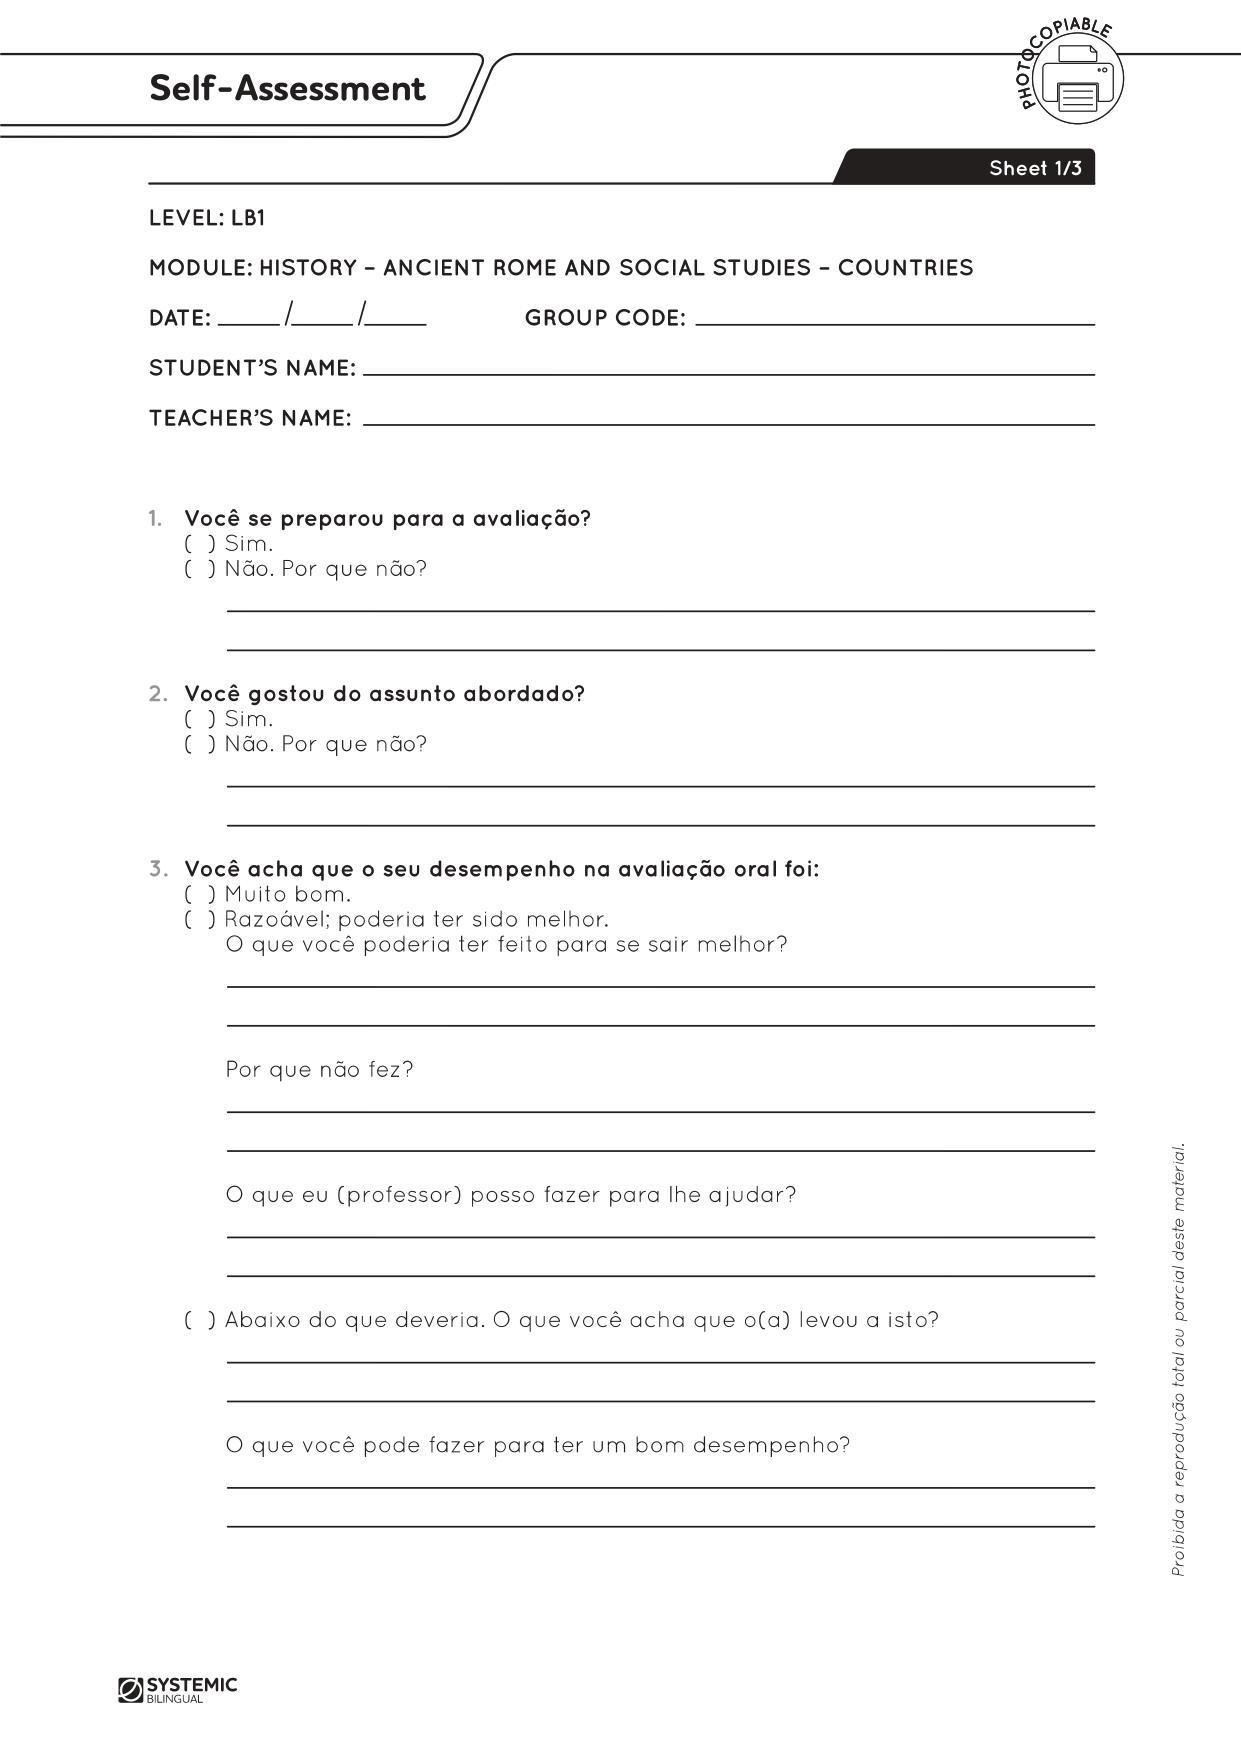
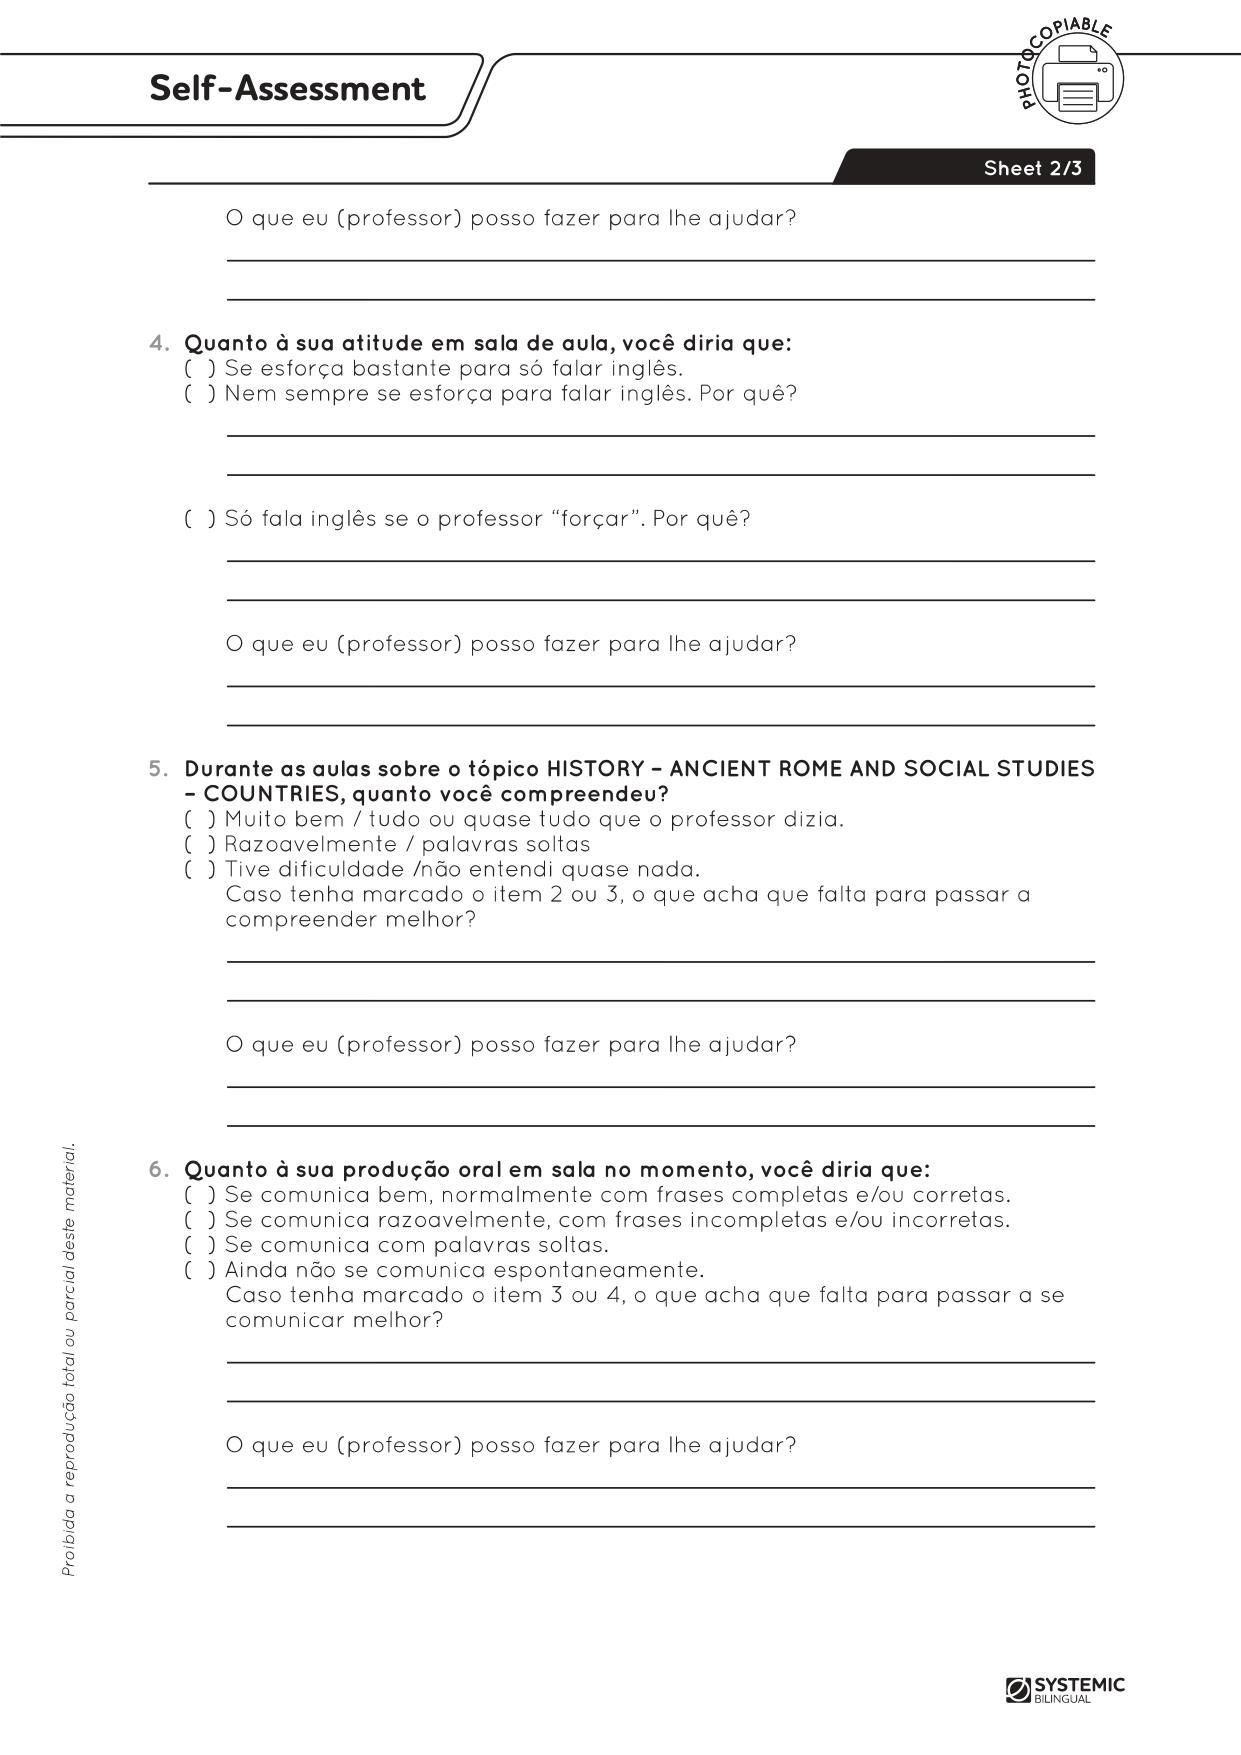
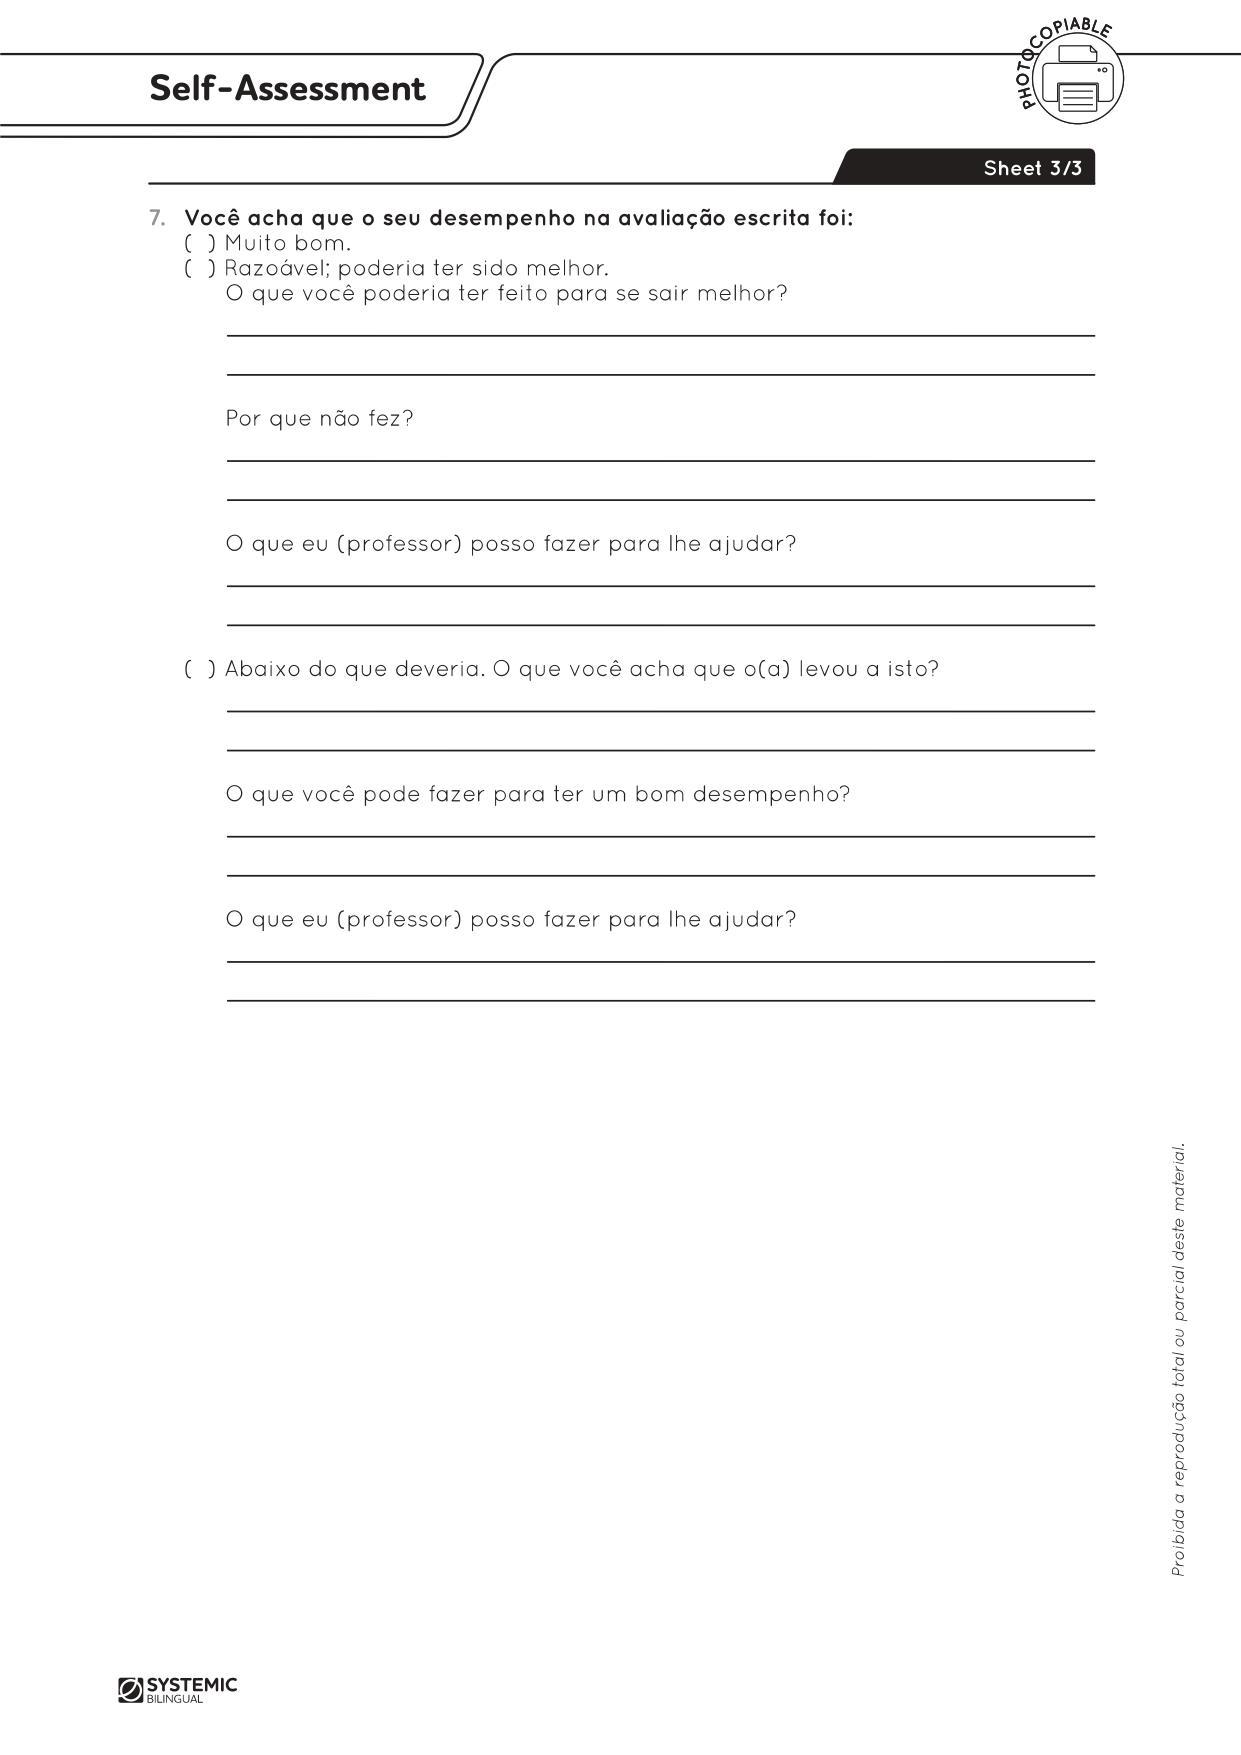
• Copies of the Self-Assessment sheet, one of each for each student.
PREPARATION IN ADVANCE
• Send a dated letter to parents/guardians before or upon completion of the module. It is advisable that parents sign and return the bottom part of the letter to acknowledge receipt.
OBJECTIVES
Teacher Objectives
• To assess students’ oral and written production about countries
• To have students research information about different countries
• To inform the families previously
• To explain the presentation structure
• To revise the students’ written productions
• To guide the students during preparation
• To elicit from students informations about Geography
• To discuss self-assessment individually
• To show how to improve it
• To prepare activities that can help students improving skills
Student Outcomes
• Write sentences about Countries
• Use simple present and comparative
• Research on the topic using internet or encyclopedias
• Prepare an oral presentation
• Develop social skills
• Improve pronunciation
HABILIDADES:
• (EF06LI03) Solicitar esclarecimentos em língua inglesa sobre o que não entendeu e o significado de palavras ou expressões desconhecidas.
• (EF06LI16) Construir repertório relativo às expressões usadas para o convívio social e o uso da língua inglesa em sala de aula.
• (EF07LI01) Interagir em situações de intercâmbio oral para realizar as atividades em sala de aula, de forma respeitosa e colaborativa, trocando ideias e engajando-se em brincadeiras e jogos.
• (EF08LI15) Utilizar, de modo inteligível, as formas comparativas e superlativas de adjetivos para comparar qualidades e quantidades.
• (EF06LI19) Utilizar o presente do indicativo para identificar pessoas (verbo to be) e descrever rotinas diárias.
• (EF07LI10) Escolher, em ambientes virtuais, textos em língua inglesa, de fontes confiáveis, para estudos/pesquisas escolares.
• (EF07LI12) Planejar a escrita de textos em função do contexto (público, finalidade, layout e suporte).
• (EF69LP38) Organizar os dados e informações pesquisados em painéis ou slides de apresentação, levando em conta o contexto de produção, o tempo disponível, as características do gênero apresentação oral, a multissemiose, as mídias e tecnologias que serão utilizadas, ensaiar a apresentação, considerando também elementos paralinguísticos e cinésicos e proceder à exposição oral de resultados de estudos e pesquisas, no tempo determinado, a partir do planejamento e da definição de diferentes formas de uso da fala – memorizada, com apoio da leitura ou fala espontânea.
• (EF03GE03) Reconhecer os diferentes modos de vida de povos e comunidades tradicionais em distintos lugares.
• (EF01GE09) Elaborar e utilizar mapas simples para localizar elementos do local de vivência, considerando referenciais espaciais (frente e atrás, esquerda e direita, em cima e embaixo, dentro e fora) e tendo o corpo como referência.
PROCEDURES
1. Tell students that now that they have learned a lot of facts about different countries, they will write some sentences about them. These sentences will also be used in preparation for their oral presentation.
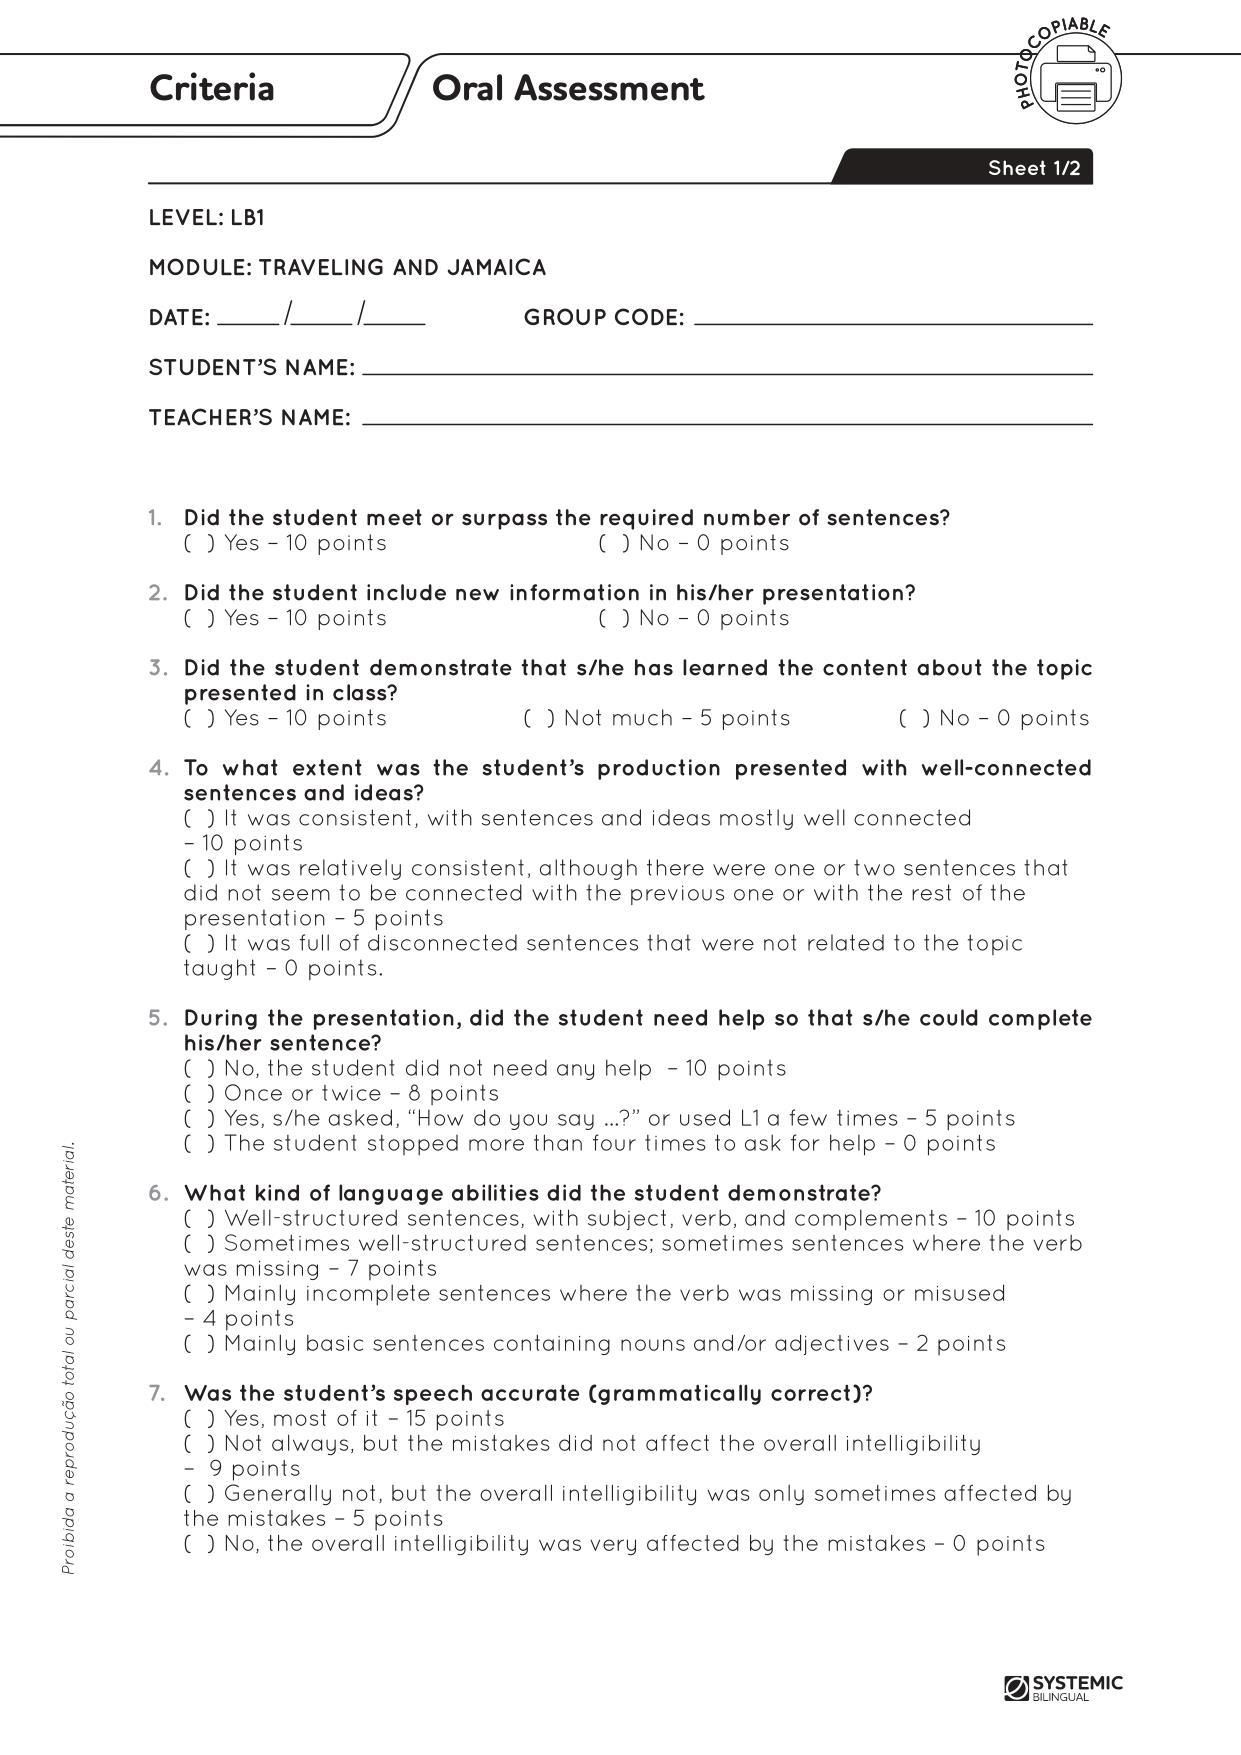
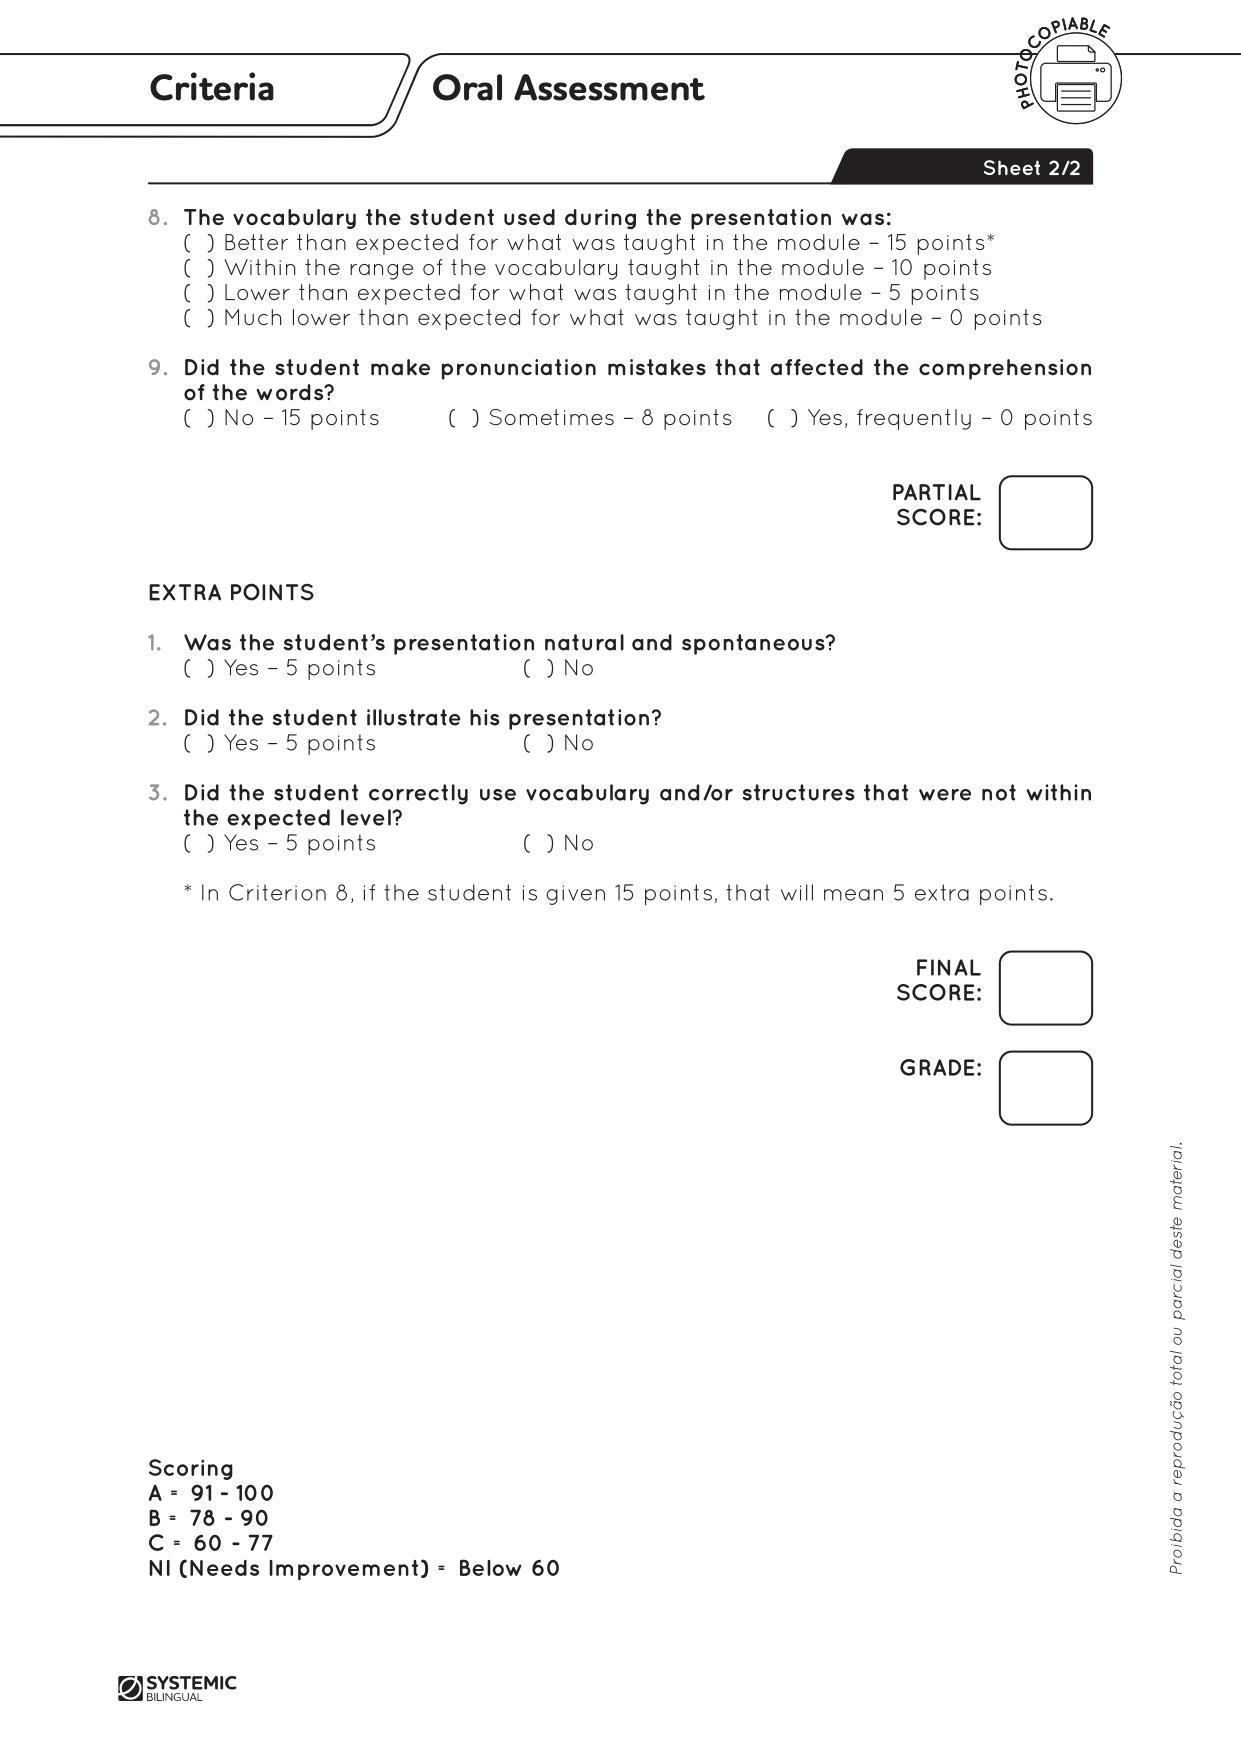
2. Give out the letter addressed to parents/guardians and read it in class. Clarify any questions students might have about how they are going to be assessed. Do not forget to date the letter and remind everyone that parents/guardians must acknowledge that they received it.
3. Part I – the oral assessment: in preparation for their oral presentation, students need to write ten sentences in the Simple Present Tense about one of the countries they studied. They must write:
– Grammatically correct sentences using the verb to be and other verbs in the affirmative and at least two in the negative form.
– At least two correct sentences in the comparative form.
4. Students may do some research on the Internet and/or use the information from their worksheets. Encyclopedias or other books may also be used. Emphasize that they cannot use any translator browser, only references with content already in English. The idea is for them to use only authentic material for two reasons: it is a reliable source of information and it will keep learners from making bad translations from L1 into English. More than two sources must be used.
5. Revise the students’ work. First, mark the mistakes and give them a chance to edit their work themselves. Then, do a final revision.
Note: check Appendix 1 for further explanation about how to proceed at this moment.
6. Encourage students to illustrate their oral presentation with pictures that may be displayed on a poster or a presentation. This step may be done at home.
7. Students are not allowed to read during their oral presentation, so there must be no written texts on their posters or presentations. These aids are only meant to guide and enhance.
Note: since the theme is the same for everyone, it is advisable that students do not see each other’s presentation in advance.
8. Help students prepare for their presentations by asking them open-ended questions or encouraging them to look up lesser-known facts. Here are some suggestions:
–Tell me something else about… –Repeat what you said about…, please.
–Compare ______ to ______.
–What are the main differences between _______ and _______?
–What piece of information did you enjoy learning? Why?
Note: check Appendix 2 for further information aboutopen-ended/backup questions and samples.
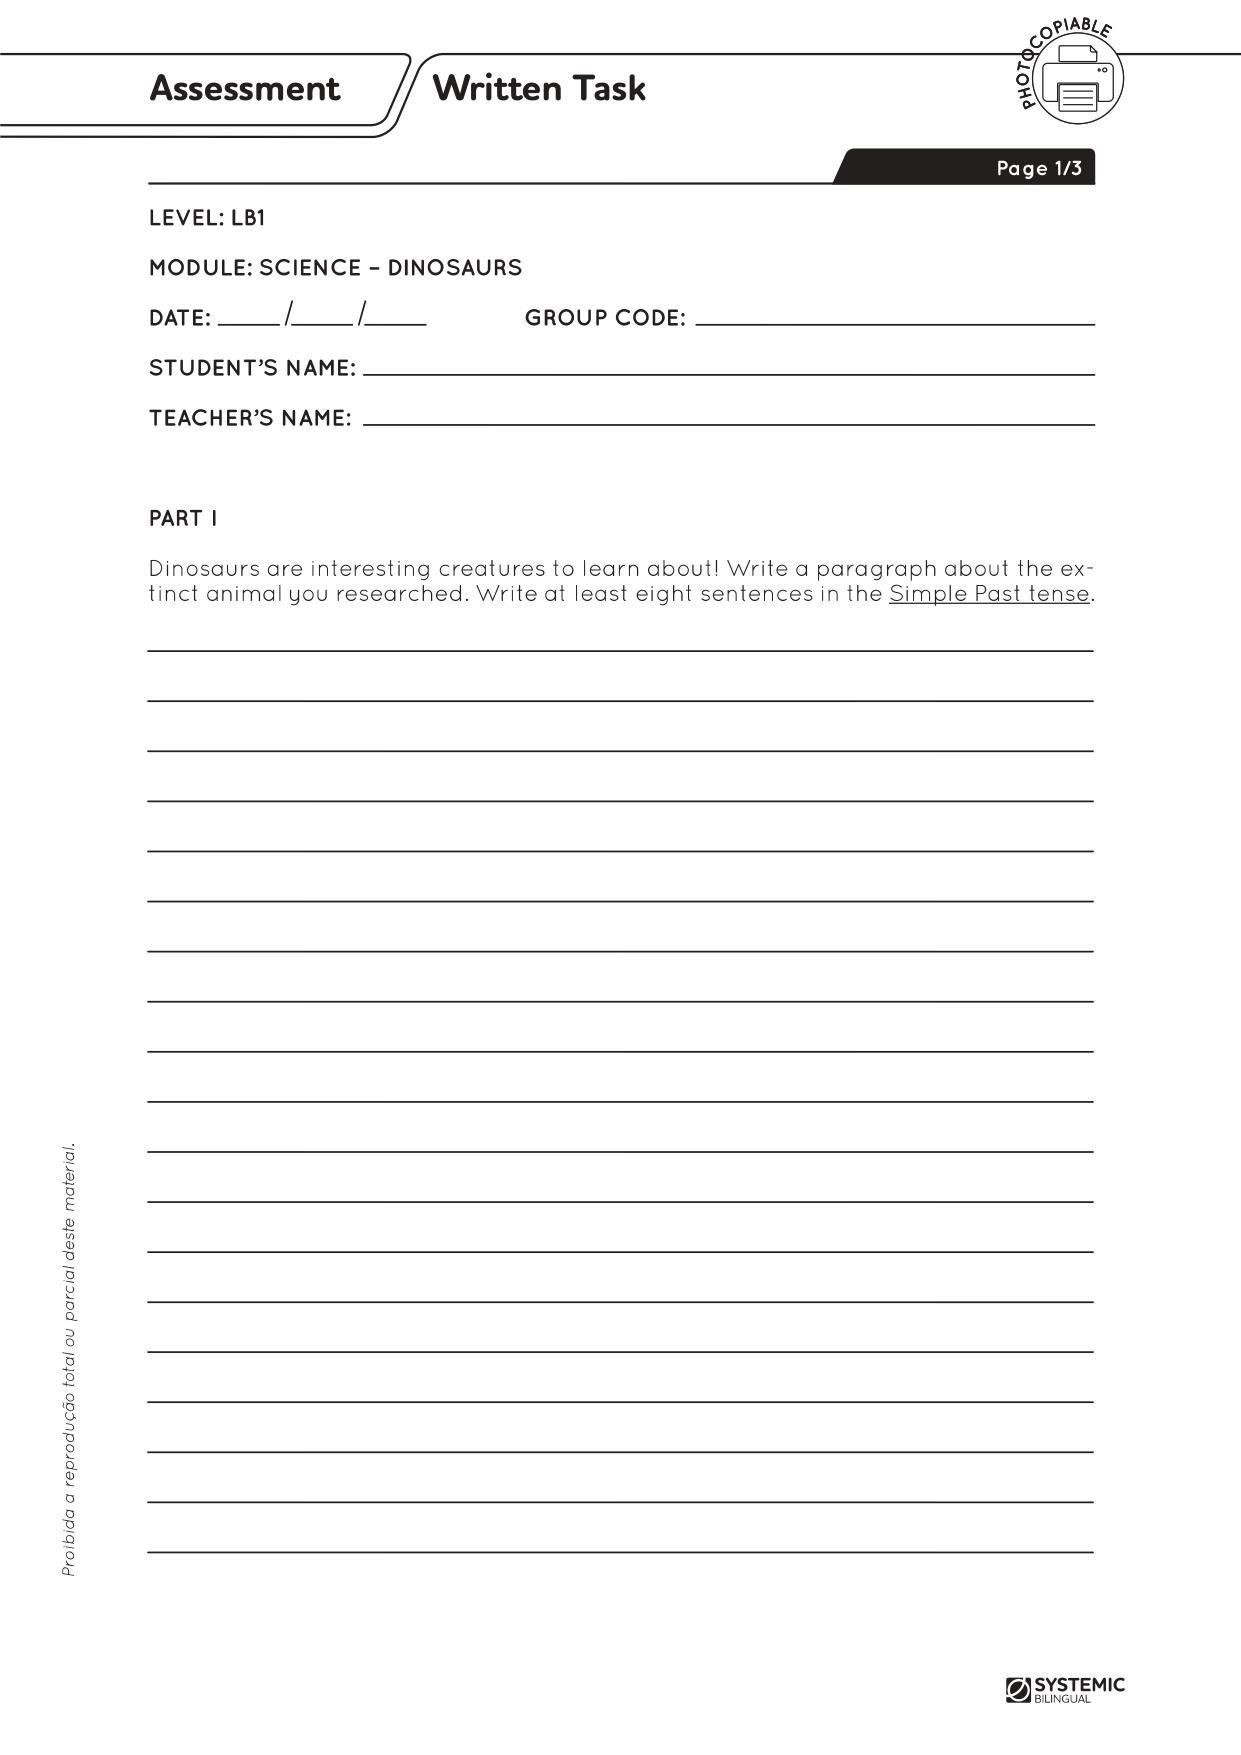
9. Part II – the written assessment: give students the Written Task Assessment and ask them to write at least ten sentences about the selected country.
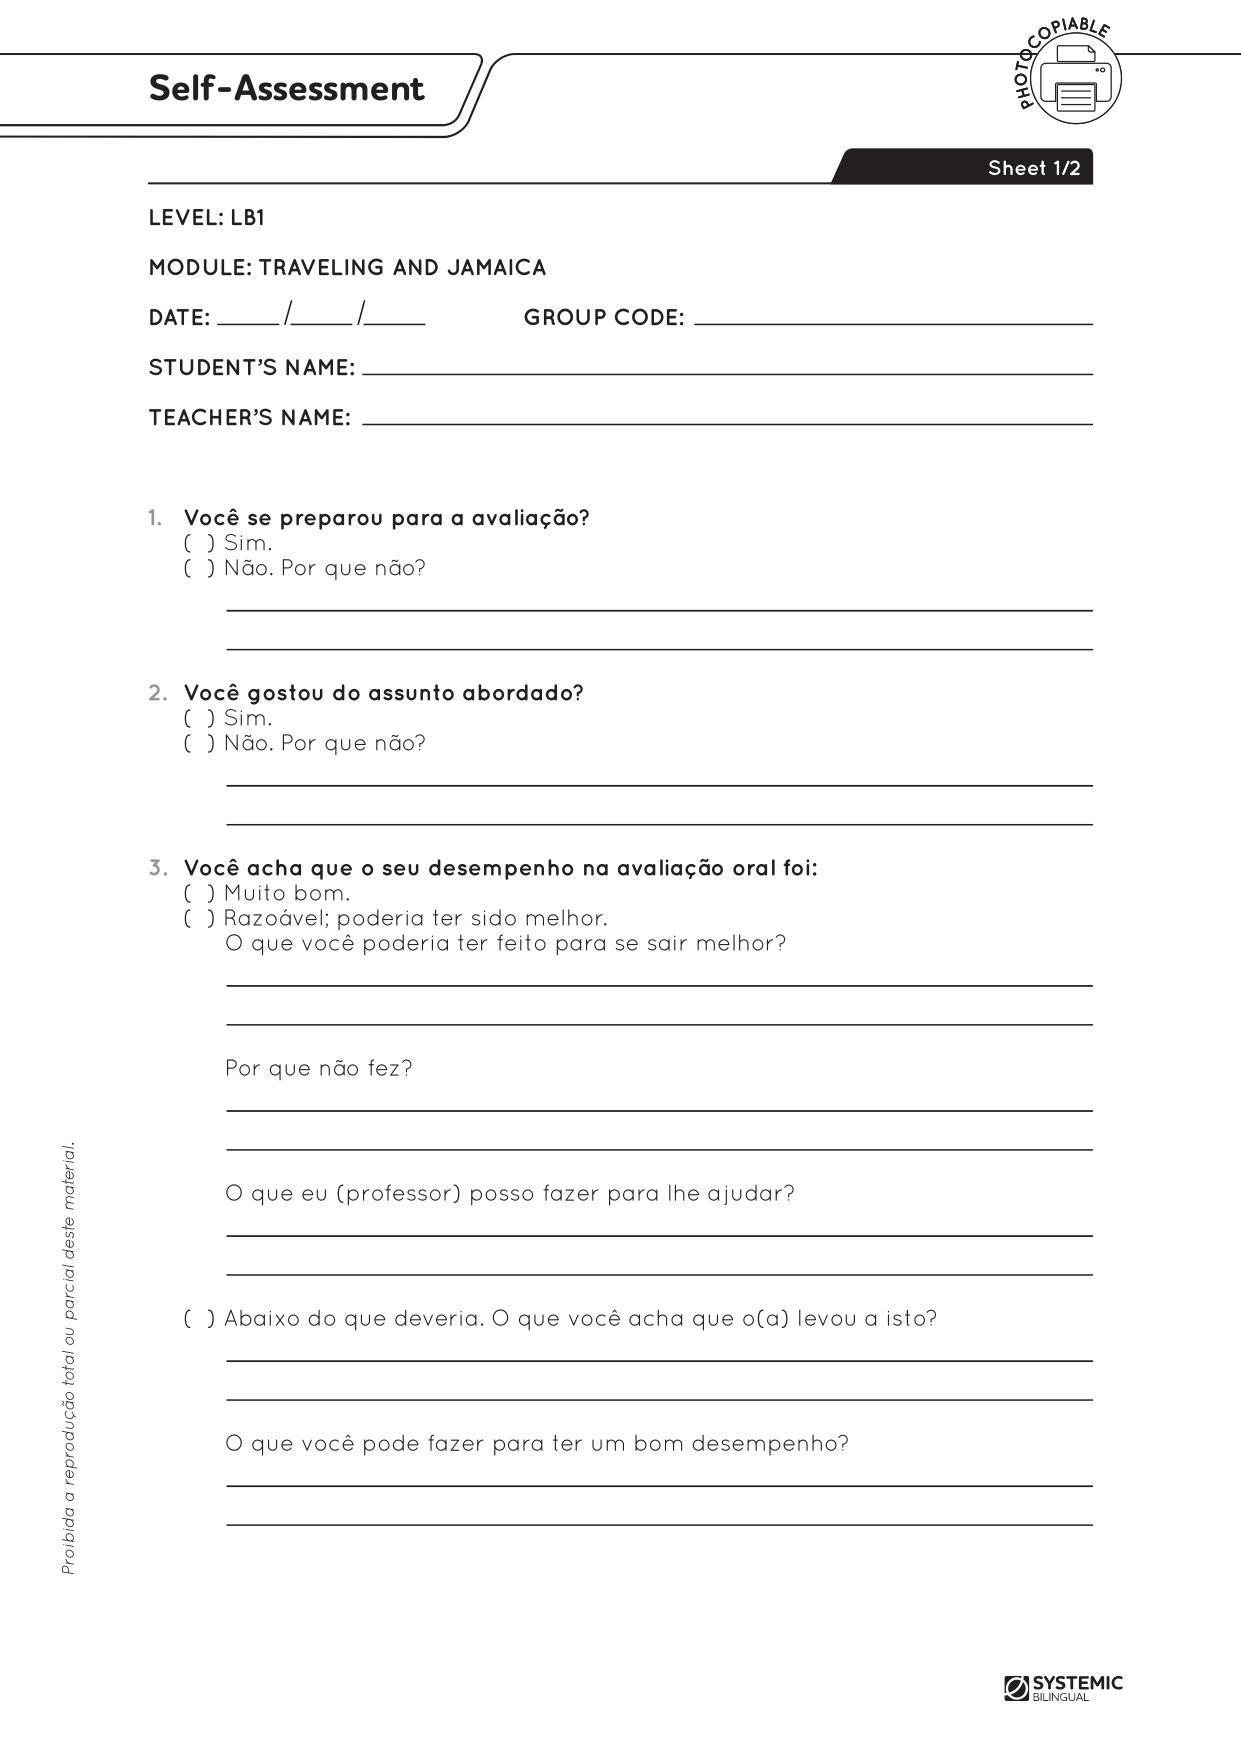
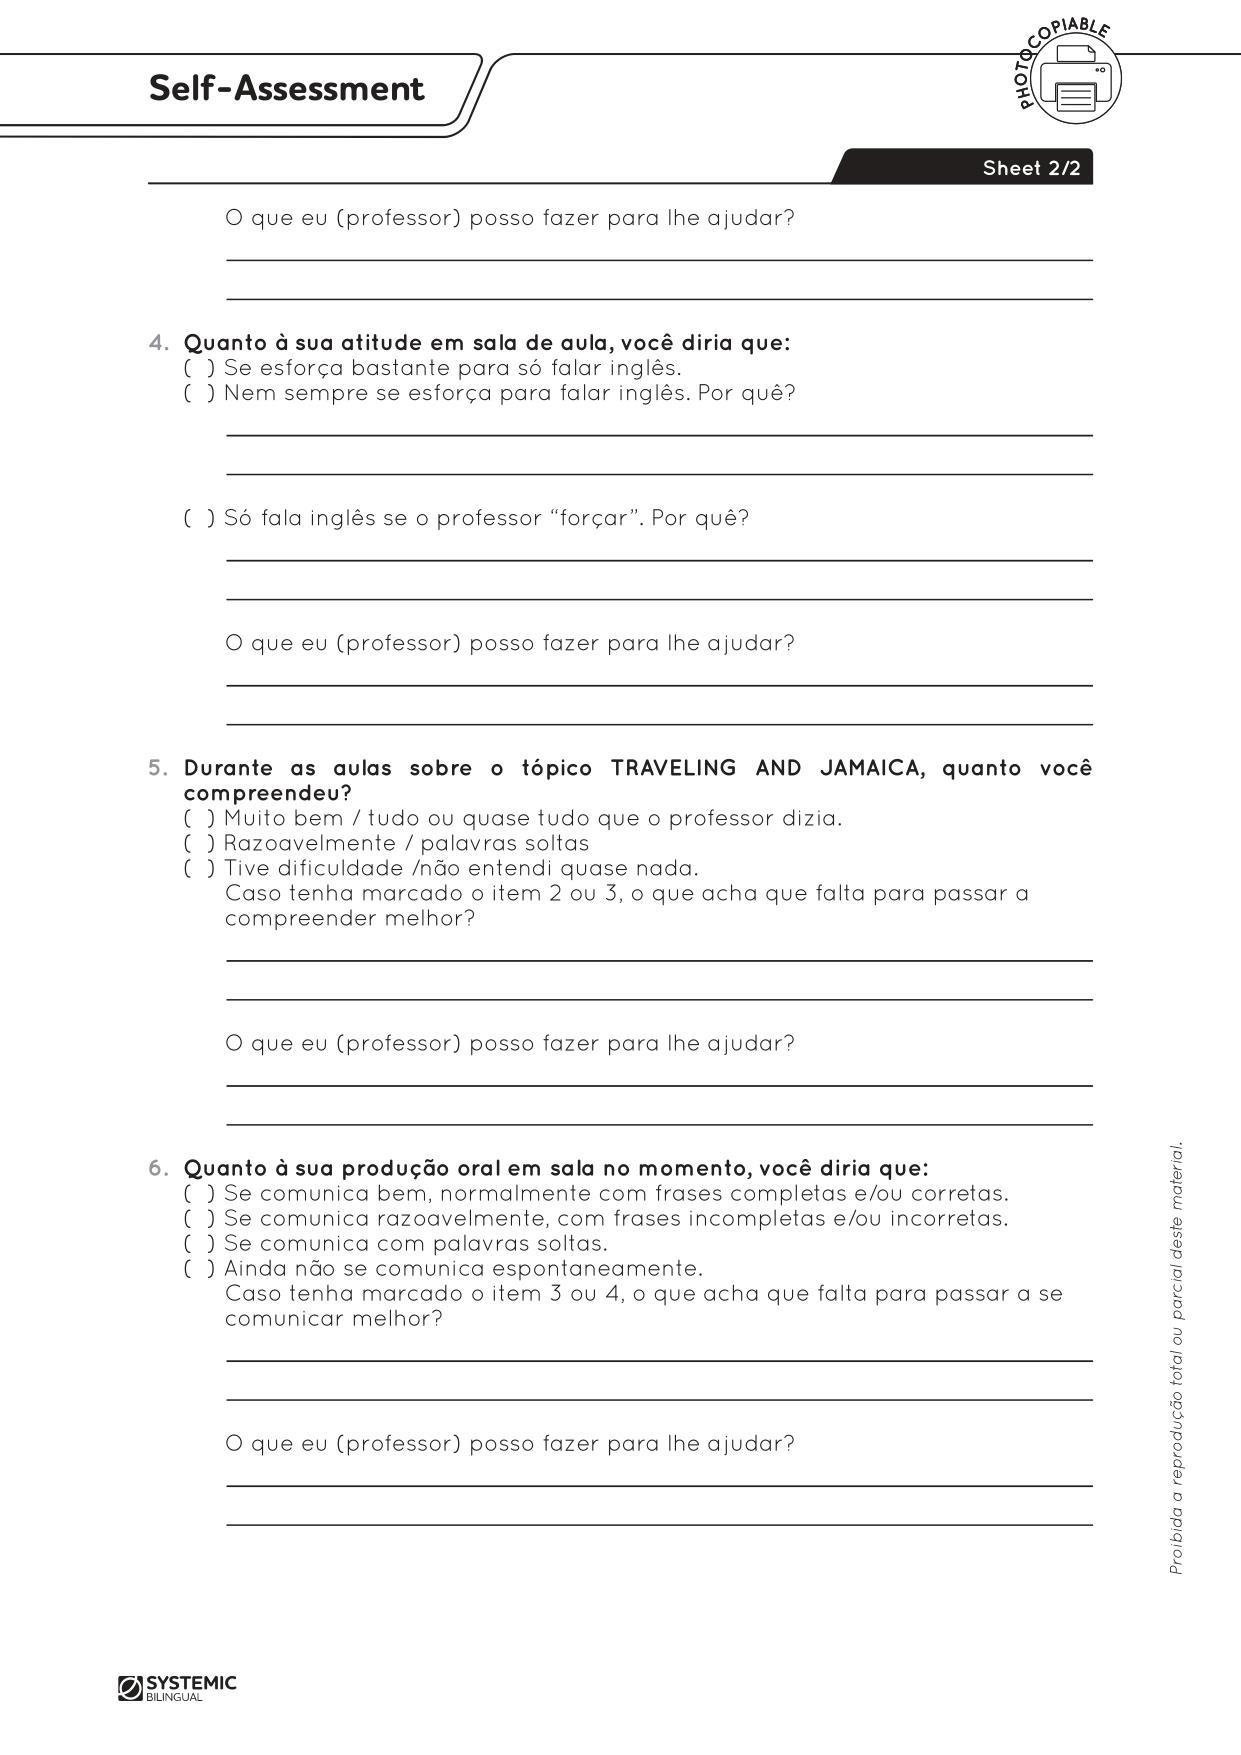
10. Upon completion of this activity, students must fill in the attached Self-Assessment sheet.
11. If time allows, discuss students’ self-assessment individually. Remind them that the two main objectives of this activity are to inform them about what they have and have not learned, and to discuss how they can improve. Upon the end of the assessment, collect all the worksheets and hand them in to the coordinators. Please, make sure that all papers have students’ names, the date, the teacher’s name, and the group code (if there is one).
12. When reading and revising the written assignments, make a list of students’ sentences that contain the most common or basic mistakes. Without mentioning who wrote each sentence, prepare a presentation, a poster, or an activity to be used in class.
13. Project the selected sentences and go over them together in class. This procedure can be done as a game.
14. Prepare a written exercise with those same sentences. Have students work on it individually and turn it in. Check their work and how much progress they have made since the written task.
15. Discuss the student’s progress with the coordinator and what can be done to improve their performance.
LESSON 09
Topic: Geography Integrated with Language – Traveling – L1
Lesson Type: Regular
PRIOR KNOWLEDGE: None.
KEY VOCABULARY: Suitcase, sunglasses, sunscreen, camera, batteries, bottle of water, lip balm, tissues, hat, cap, history book, tennis shoes, bathing suit, walking shoes, raincoat, camel, hot, dry, cold, passport, plane ticket, backpack, means of transportation, scarf, hiking boots, visa, workout, medication, snack, cell phone, dictionary, money, t-shirt, shorts, boots, noisy, funny, creative, impolite, don’t follow rules, serious, open-minded.
MATERIALS
• Worksheet 1, Pages 1 and 2 – Geography Integrated with Language – Traveling –L1;
• Worksheet 2 – Geography Integrated with Language – Traveling – L1;
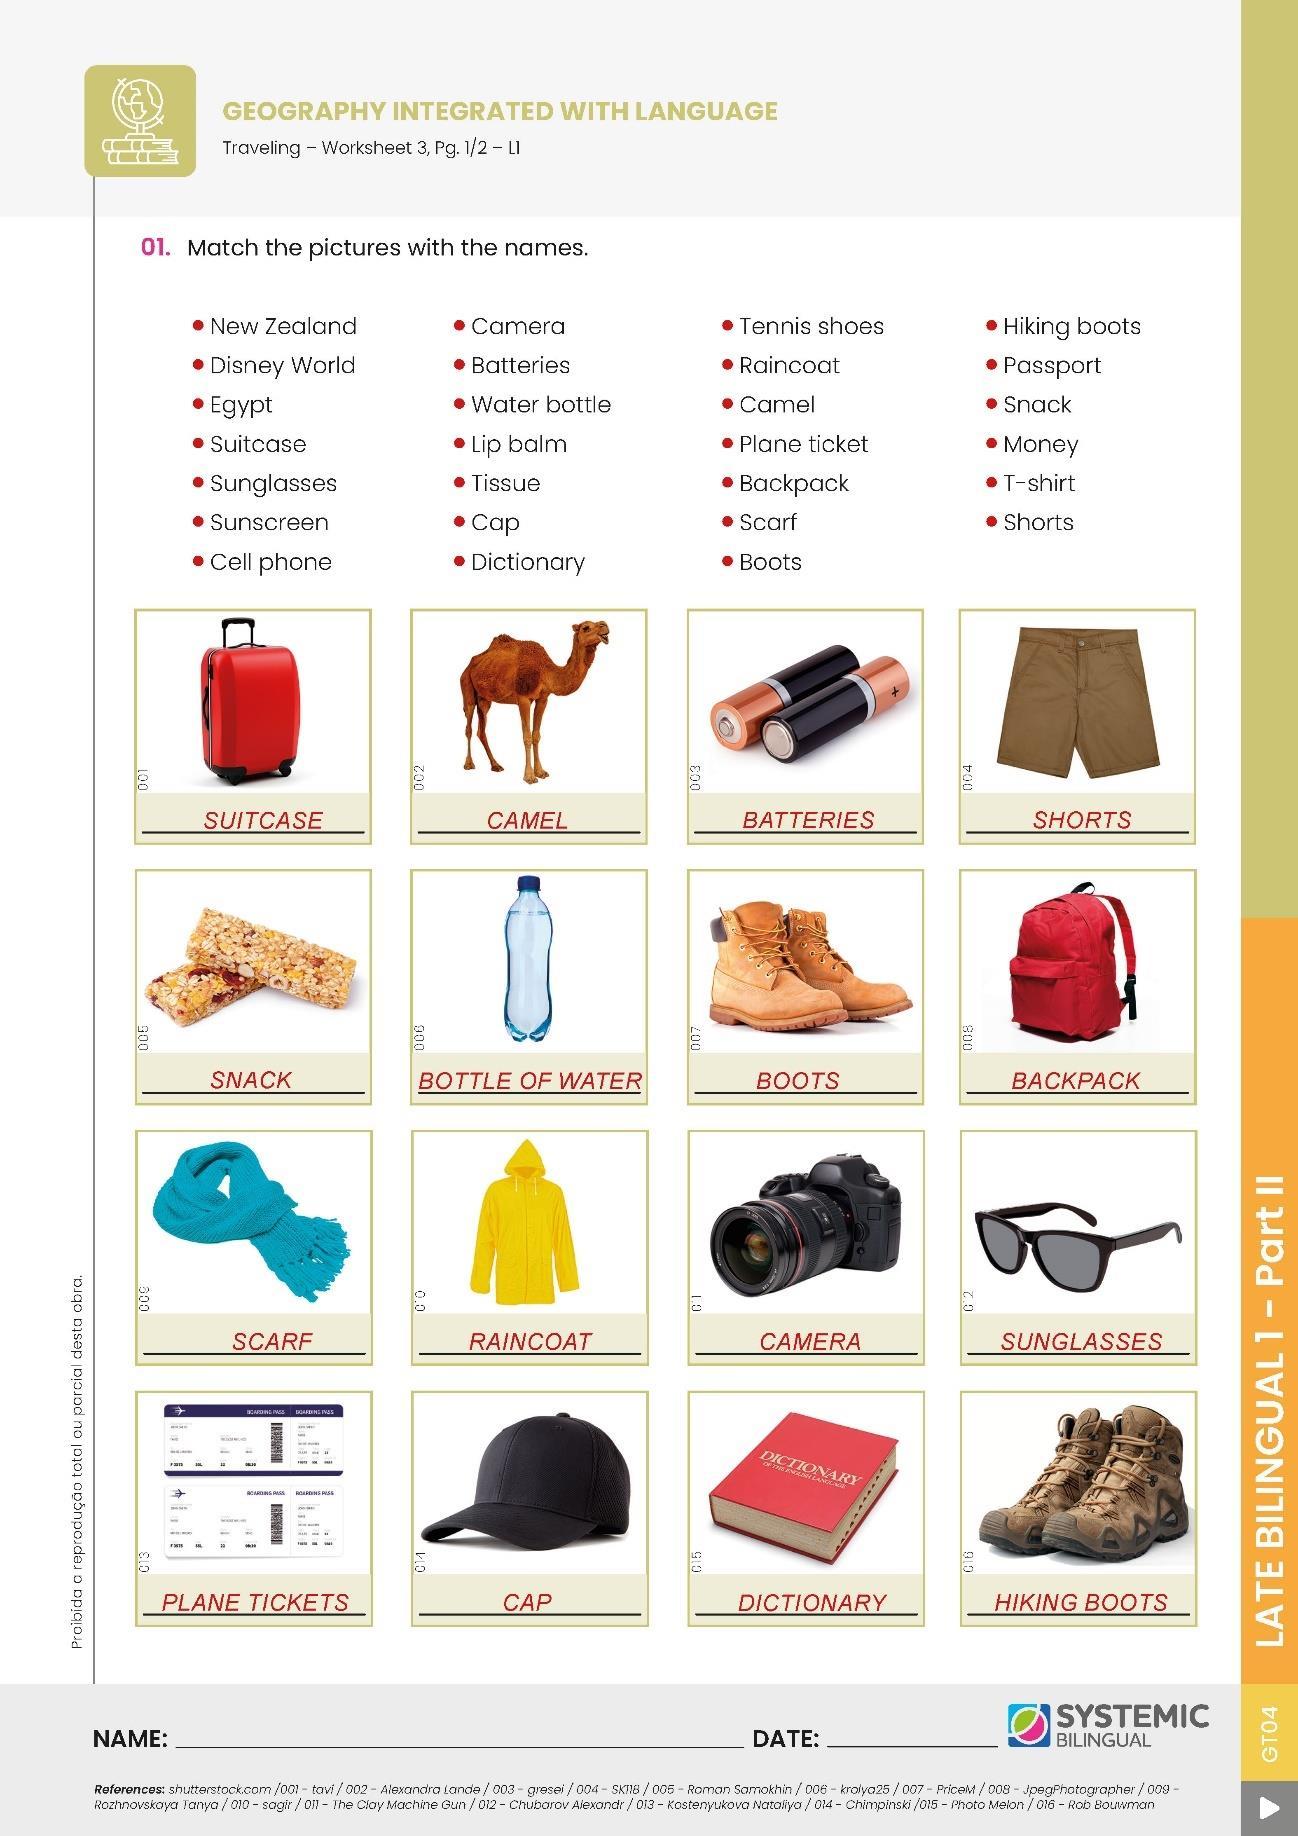
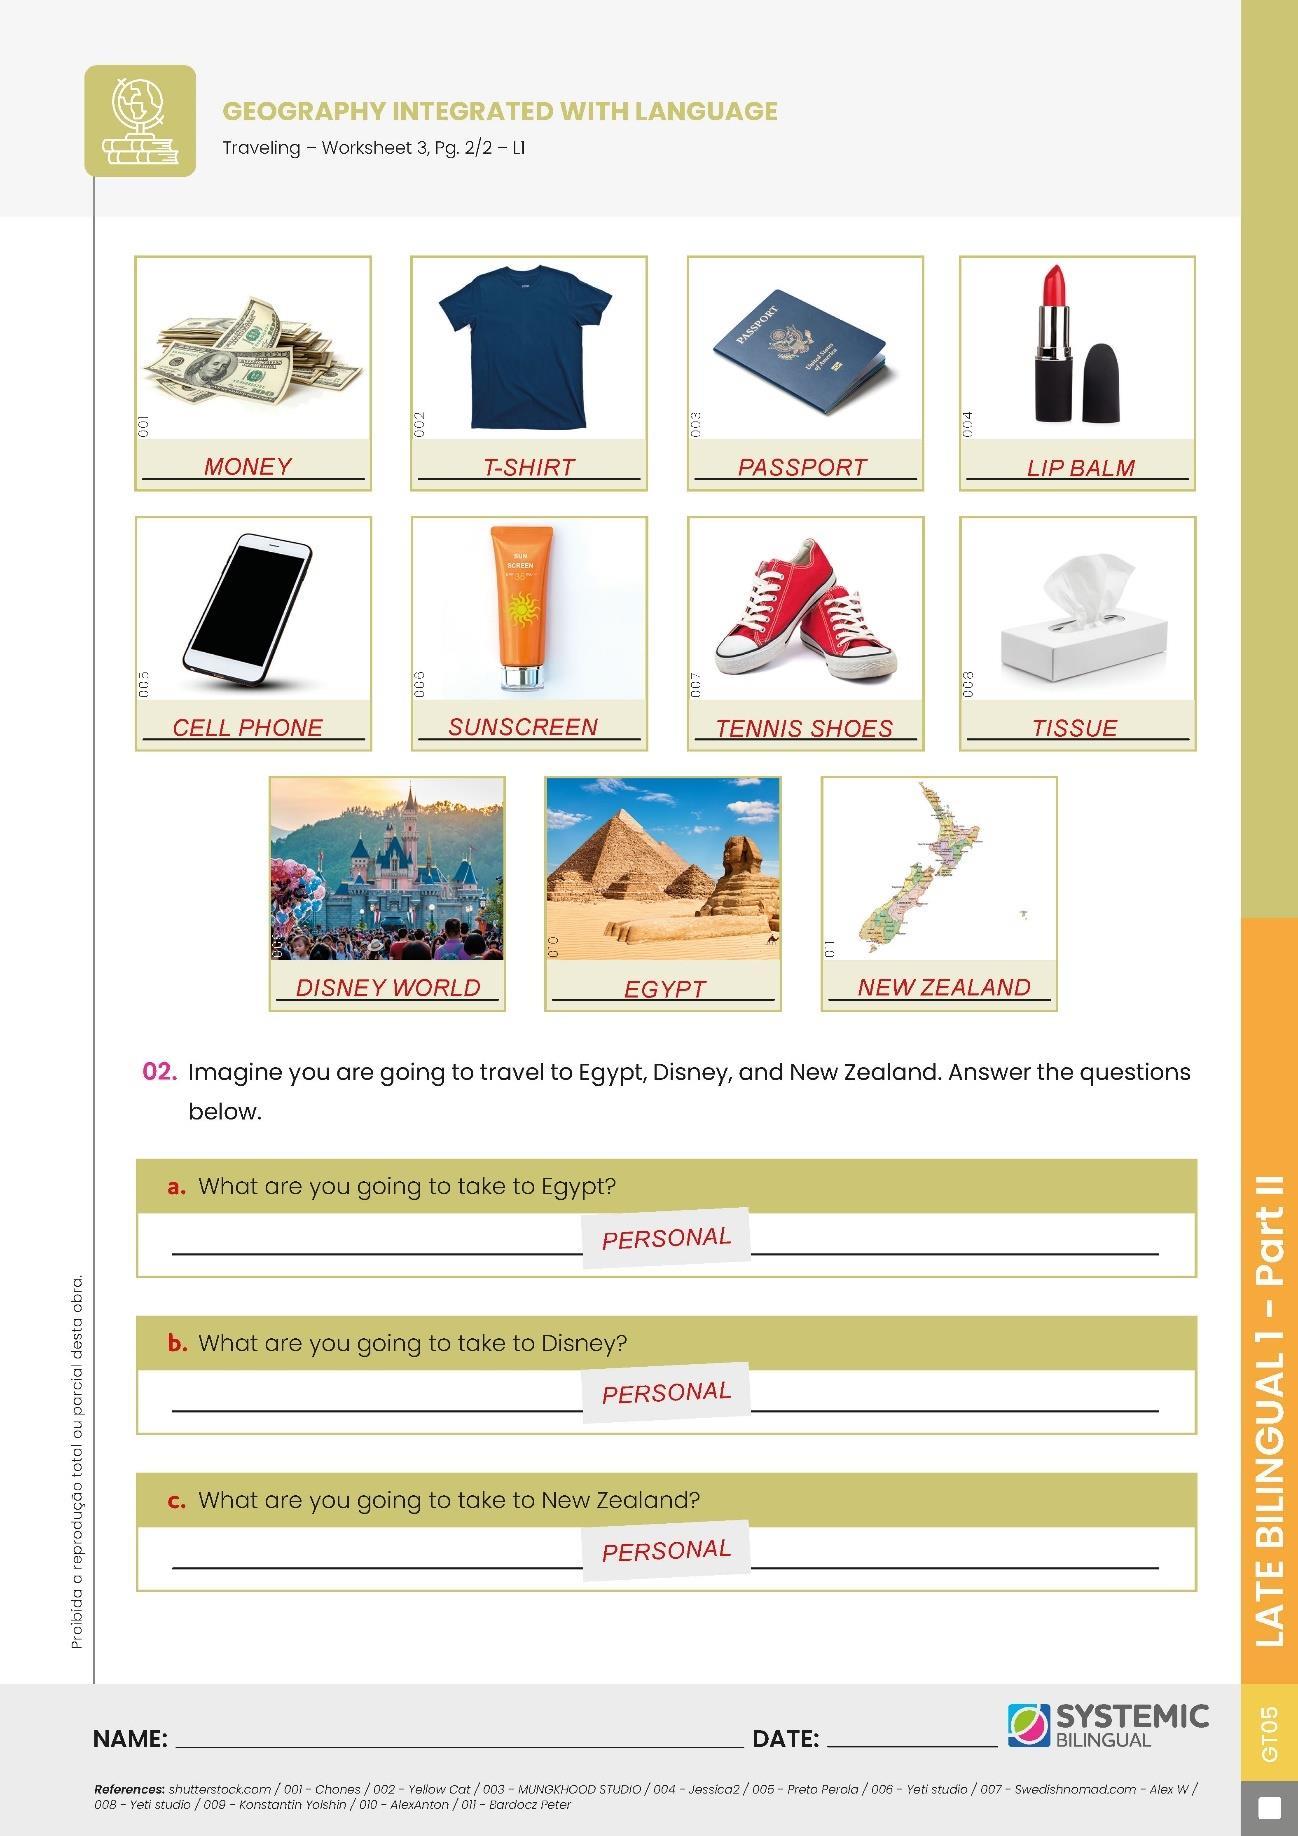
• Worksheet 3, Pages 1 and 2 – Geography Integrated with Language – Traveling –L1;
• Appendix 1 – Geography Integrated with Language – Traveling – L1;
• Flashcards – Geography Integrated with Language – Traveling – L1;
• A suitcase;
• A world map;
• Flashcards or realia of different places;
• Poster boards;
• Colored markers;
• Magazines;
• Scissors;
• Money from different countries.
PREPARATION IN ADVANCE
• Prepare a suitcase with the objects listed for each place. Disney – tennis shoes, sunscreen, hat, bottle of water, raincoat, and backpack. Egypt – cap, sun block, history book, picture of a camel, sunglasses, t-shirt, shorts, bottle of water, snack, digital camera, batteries, lip balm, tissues. New Zealand – walking shoes, UV sunglasses, sunscreen, backpack, scarf, boots.
• Copy Appendix 1 one per group. See Procedure 5.
OBJECTIVES
Teacher Objectives
• To review Simple Present
• To talk about some cultural aspects of different countries
• To enable students to plan a trip
• To show what to take in a suitcase
• To discuss about Egypt, Disney World, and New Zealand
• To show new vocabulary with realia
• To elicit from students about places they have been to
Student Outcomes
• Use simple present sentences
• Comprehend different cultures
• Plan a trip
• Recognize items in a suitcase
• Discuss about Egypt, Disney World and New Zealand
• Make sentences about places they have been to
HABILIDADES:
• (EF06LI03) Solicitar esclarecimentos em língua inglesa sobre o que não entendeu e o significado de palavras ou expressões desconhecidas.
• (EF06LI16) Construir repertório relativo às expressões usadas para o convívio social e o uso da língua inglesa em sala de aula.
• (EF07LI01) Interagir em situações de intercâmbio oral para realizar as atividades em sala de aula, de forma respeitosa e colaborativa, trocando ideias e engajando-se em brincadeiras e jogos.
• (EF06LI19) Utilizar o presente do indicativo para identificar pessoas (verbo to be) e descrever rotinas diárias.
• (EF15AR04) Experimentar diferentes formas de expressão artística (desenho, pintura, colagem, quadrinhos, dobradura, escultura, modelagem, instalação, vídeo, fotografia etc.), fazendo uso sustentável de materiais, instrumentos, recursos e técnicas convencionais e não convencionais.
• (EF03GE03) Reconhecer os diferentes modos de vida de povos e comunidades tradicionais em distintos lugares.
• (EF01GE09) Elaborar e utilizar mapas simples para localizar elementos do local de vivência, considerando referenciais espaciais (frente e atrás, esquerda e direita, em cima e embaixo, dentro e fora) e tendo o corpo como referência.
PROCEDURES
1. Write the word “travel” on the board. Elicit from students everything they can think of when talking about traveling. Use a graphic organizer – a circle in the middle with rays radiating from the center where you will write their associations. Elicit places they have been to, who they went with, what they took, how the trip was, how long they stayed there, the different types of money they are familiar with, etc. Write what they say on the board. Elicit from them as much as you can. Help them or ask other students to help when necessary. Ask them if they like to travel. If they prefer going by car or plane, train or ship, what are the advantages and disadvantages of traveling by car and by plane. Write their answers on the board in a graphic organizer T chart. Draw a T on the board and put Disadvantages at the top of one column and Advantages in the other. On the side, put car and below car write plane. Ask them if they have ever traveled by ship. Ask them where they went, who they went with, how they felt (ask them if they felt sea sick).
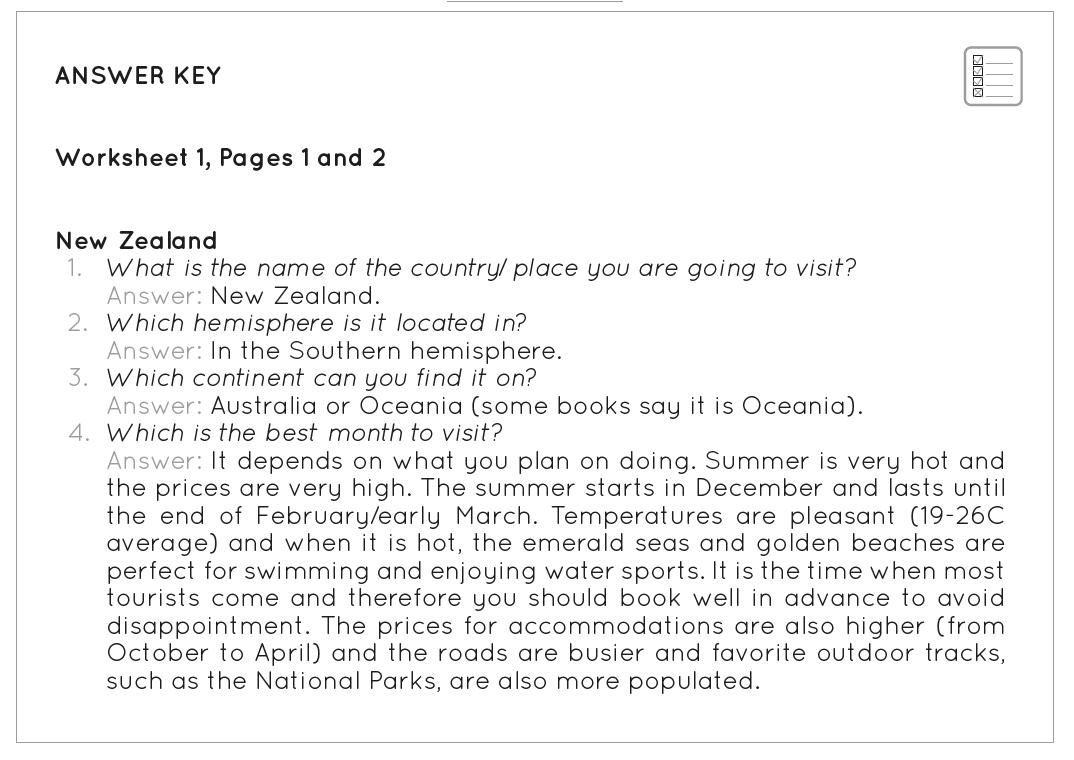
2. Elicit from students places they would like to visit. Ask them if they have ever traveled alone. Write the names of the places on the board. Show them the places on the map. If they do not say the names of the places you are going to focus on, try to guide them to say them. Ask them questions about these places, such as:
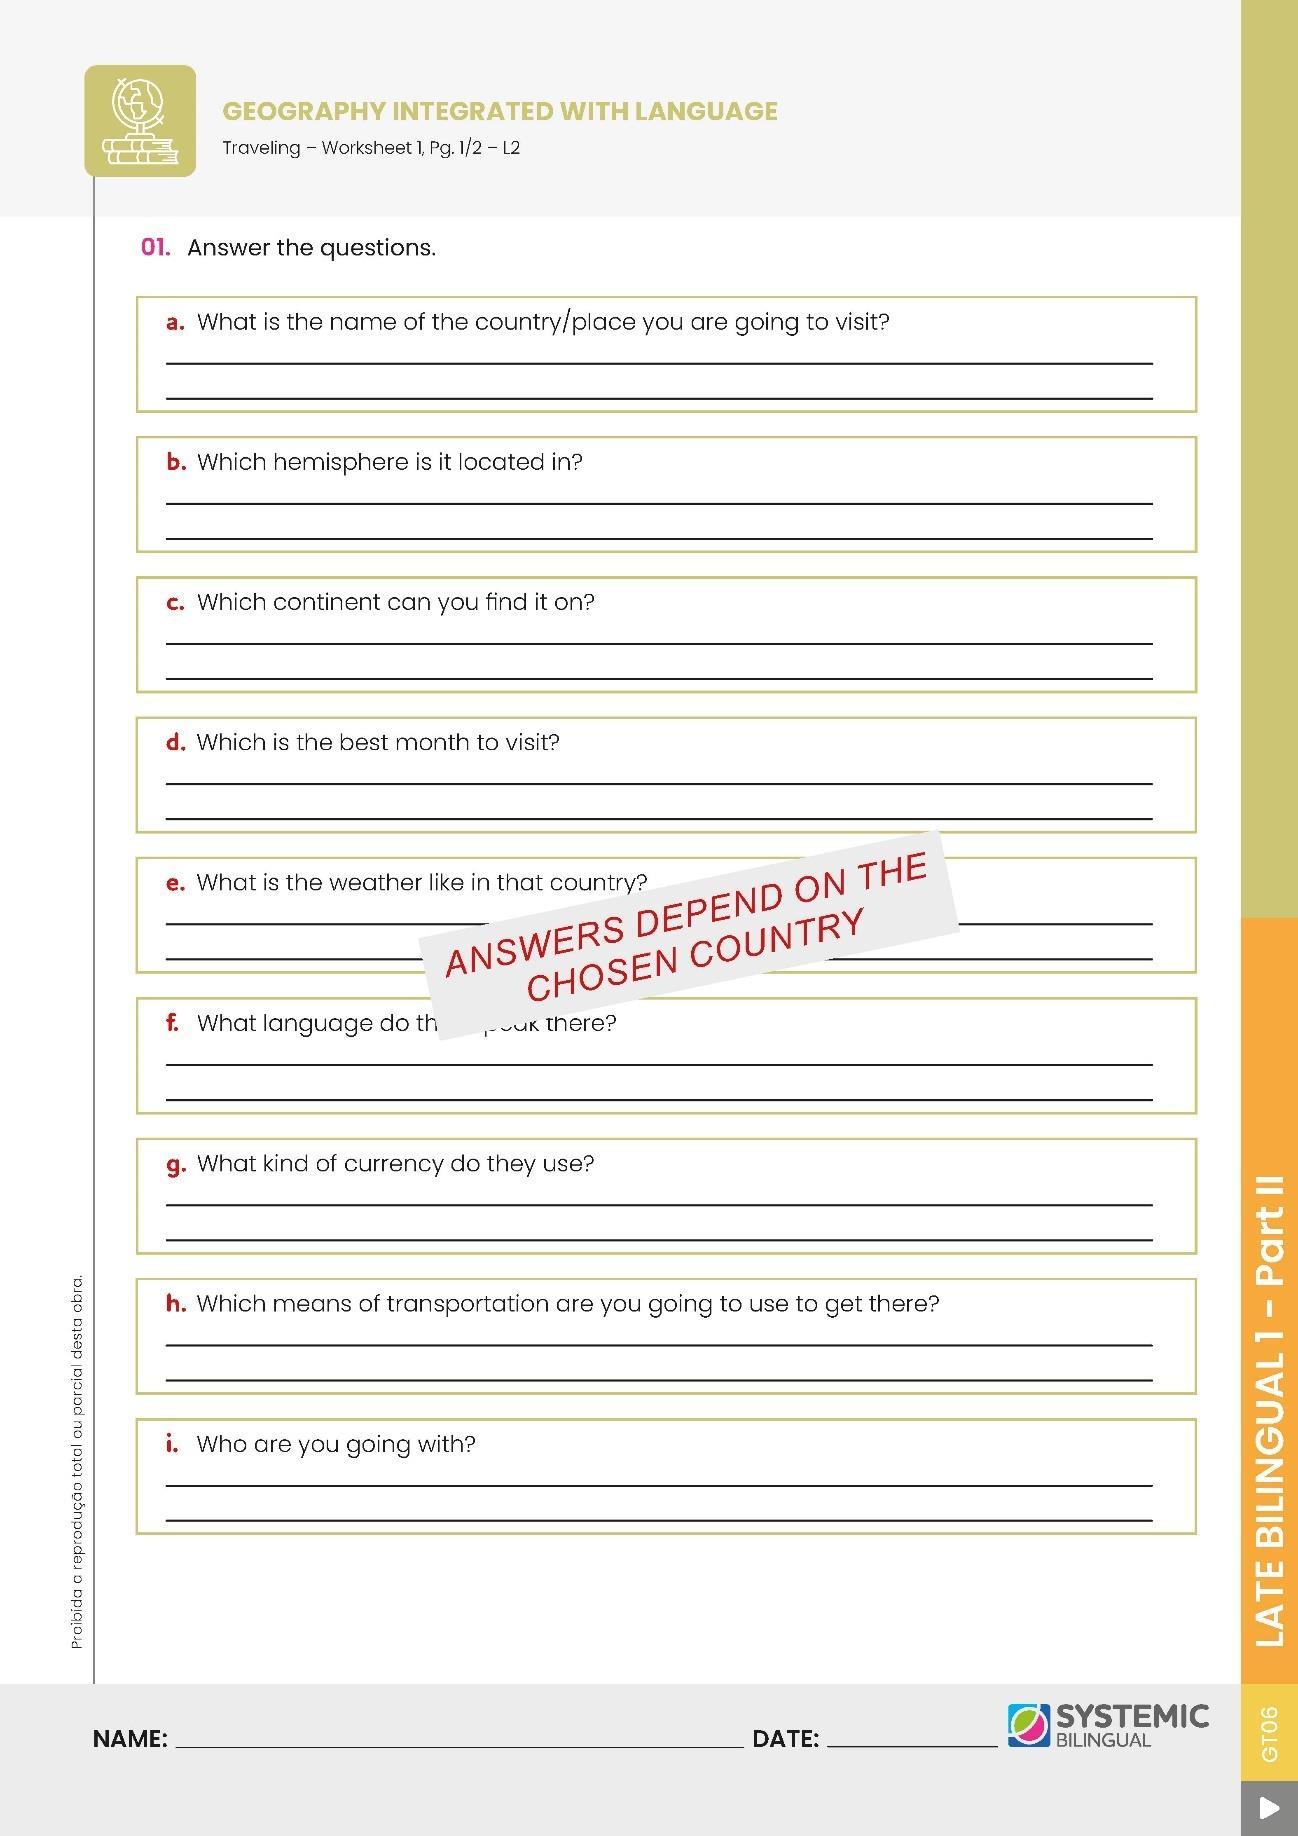
(?) “IN WHICH HEMISPHERE IS IT LOCATED?”
(?) “ON WHICH CONTINENT CAN YOU FIND IT?”
(?) “DO YOU NEED A VISA TO ENTER THIS COUNTRY?”
(?) “HOW IS THE WEATHER IN THIS COUNTRY?”
(?) “WHAT LANGUAGE DO THEY SPEAK THERE?”
(?) “WHICH MONETARY UNIT DO THEY USE?”
(?) “WHICH MEANS OF TRANSPORTATION WOULD YOU USE TO GET THERE?”
(?) “WHO WOULD YOU GO WITH?”
(?) “HOW MUCH MONEY WOULD YOU NEED TO TAKE?”
(?) “HOW LONG WOULD YOU LIKE TO STAY THERE?”
(?) “WHAT KIND OF CLOTHES WOULD YOU HAVE TO TAKE?”
3. Elicit from students things they would need to do before traveling: getting a visa, passport, buy a ticket, book a hotel, learn the language or buy a dictionary, prepare suitcases or backpack, learn a bit about their culture. Help them when necessary.
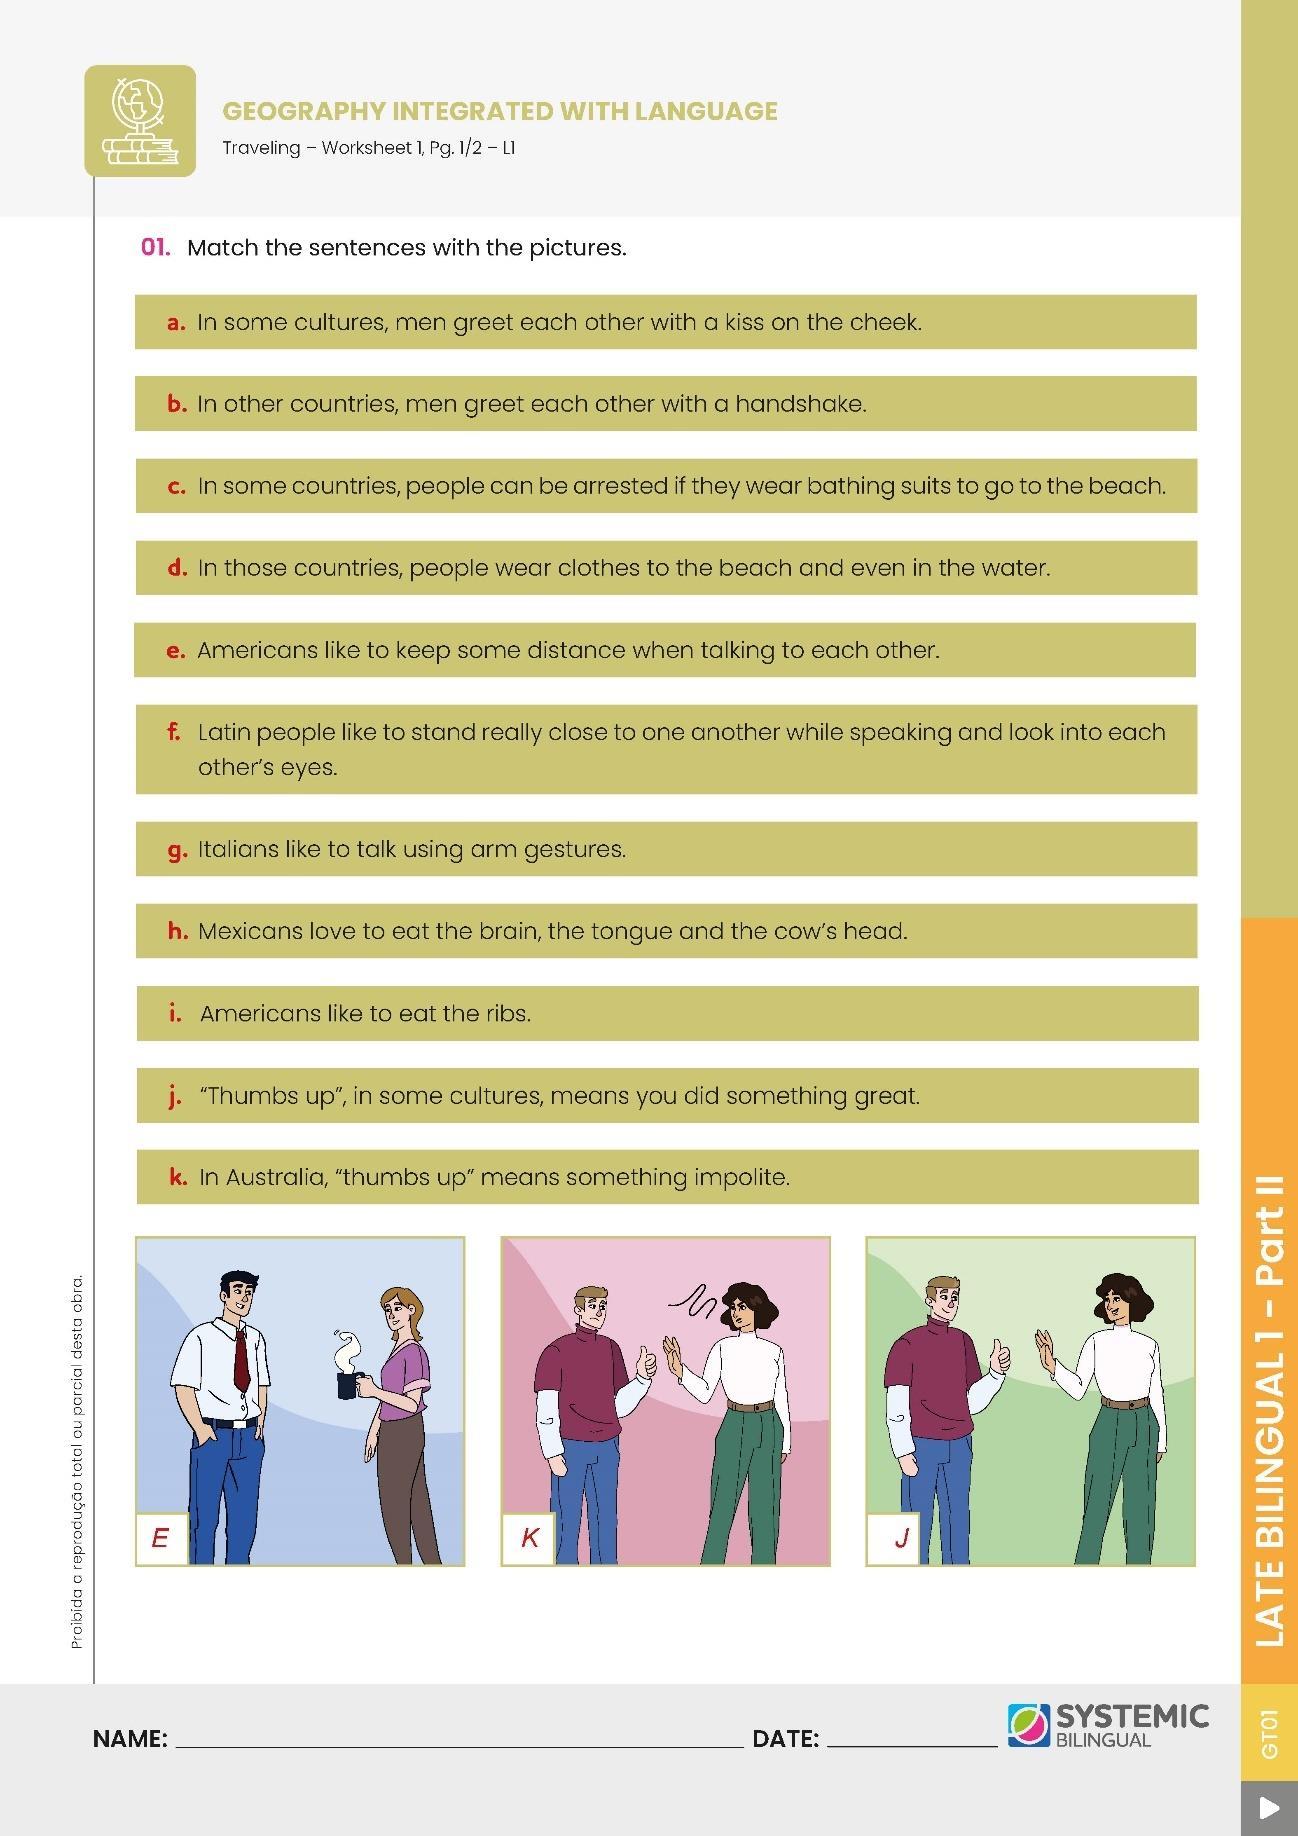
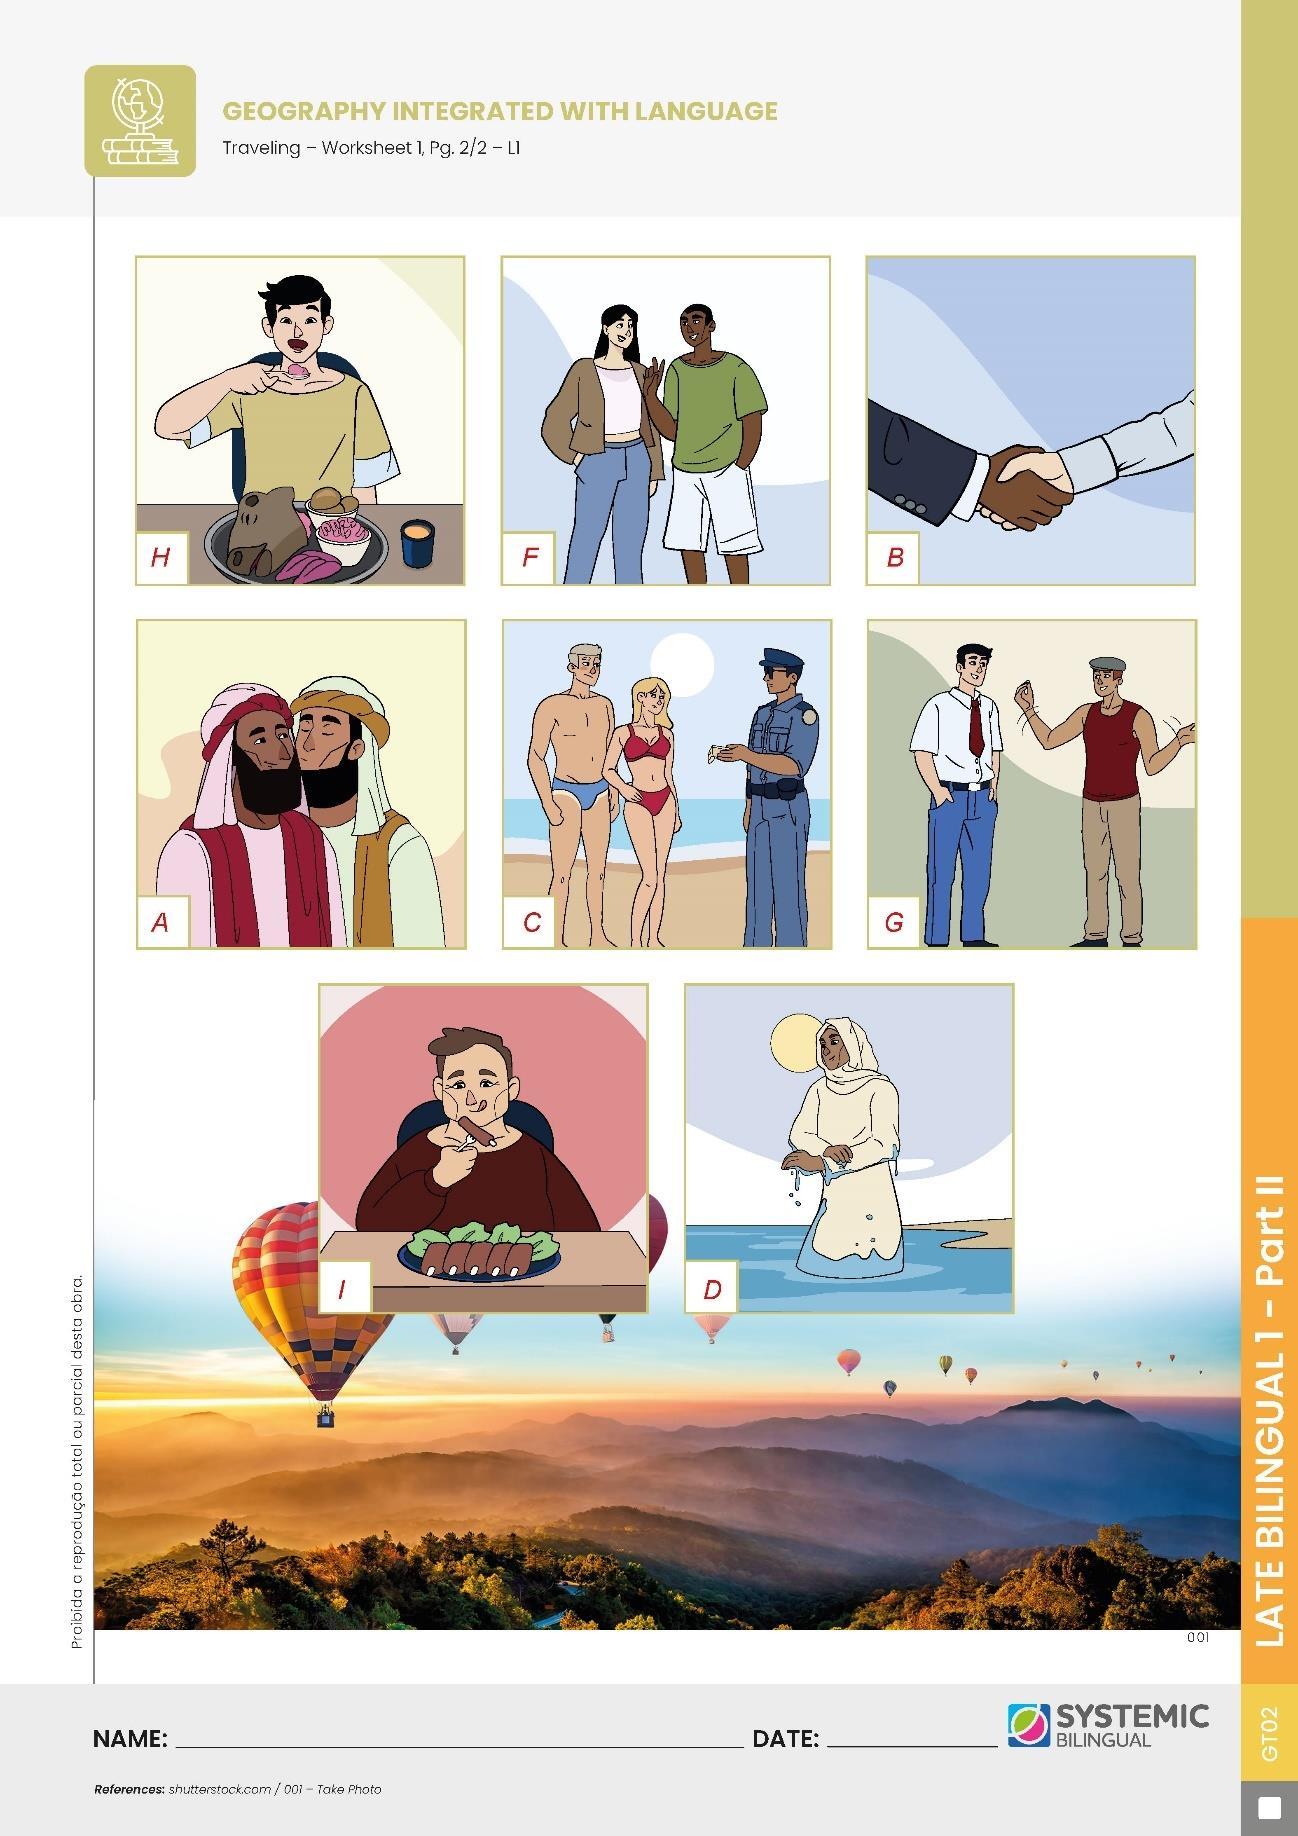
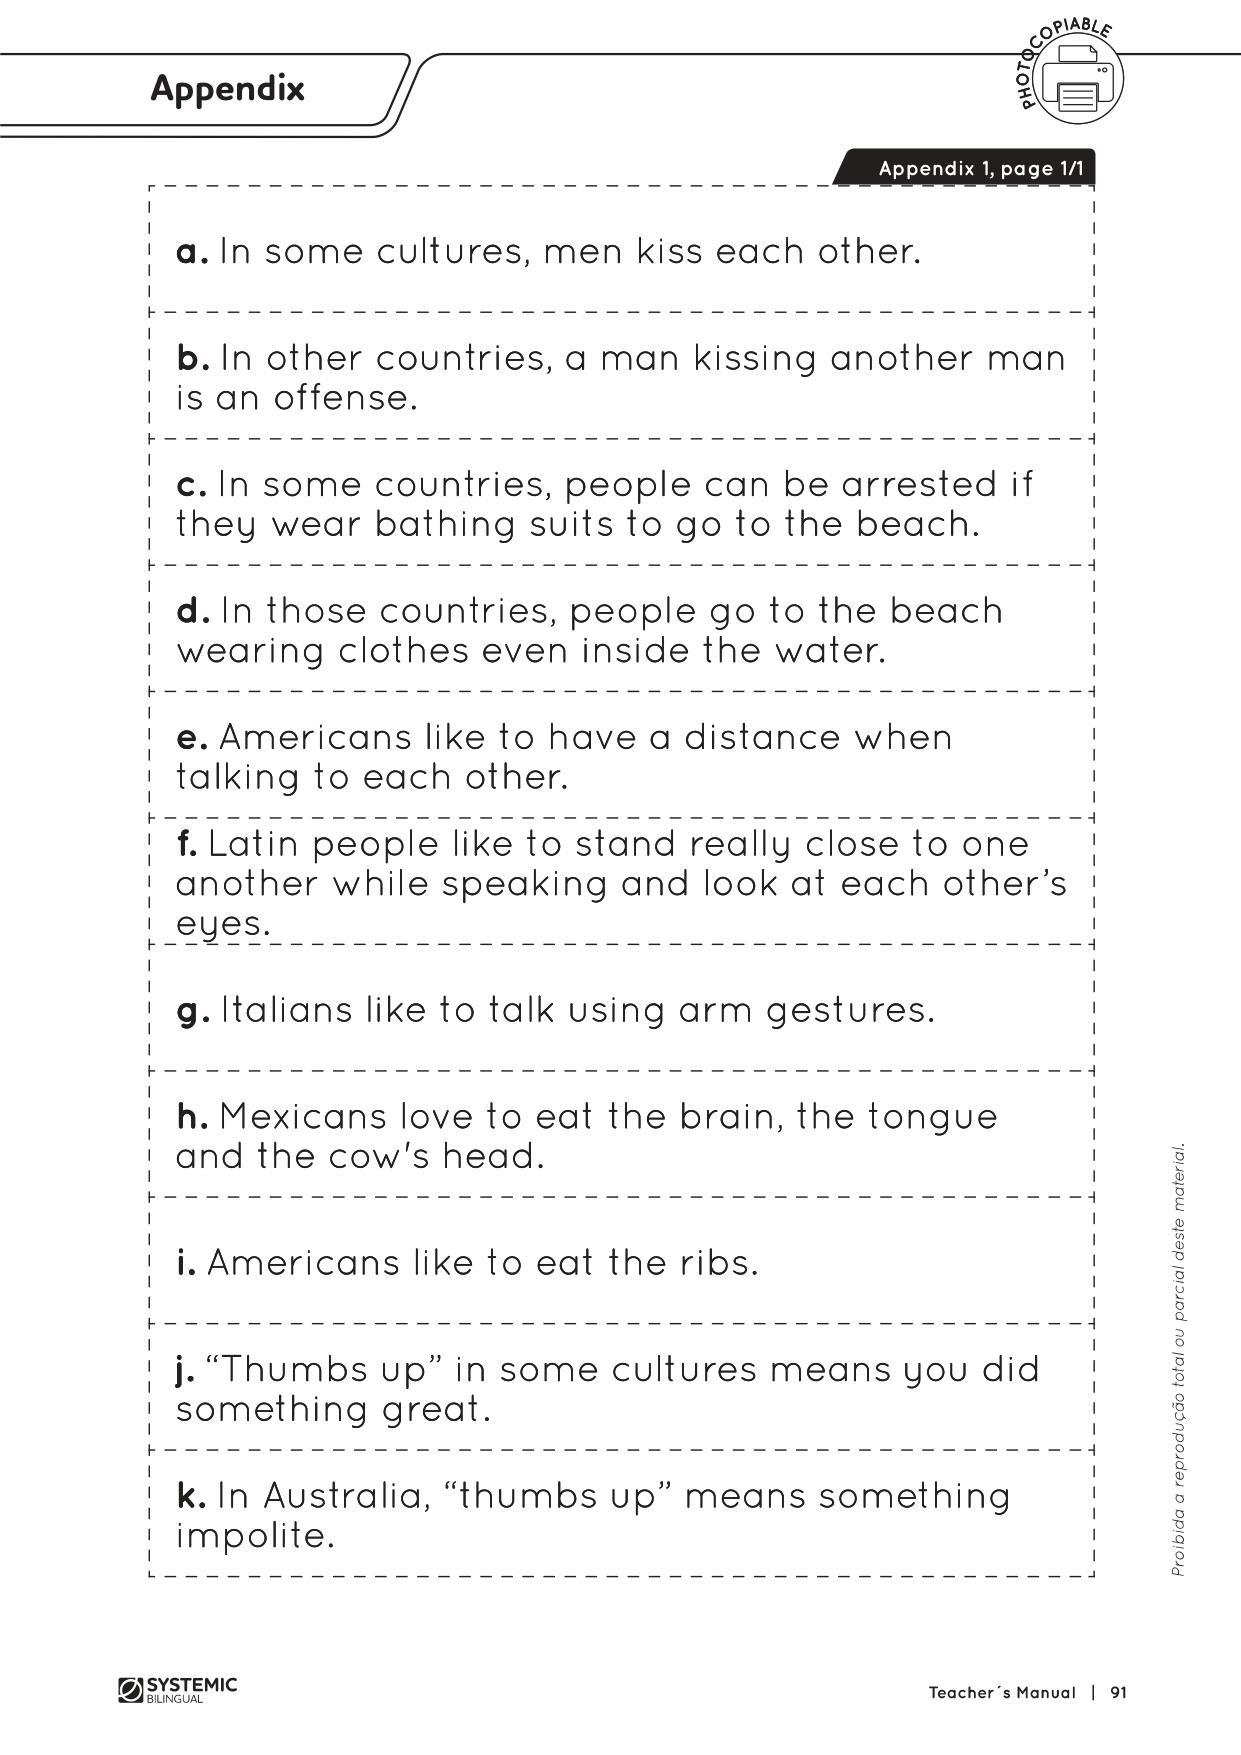
4. Knowing about the culture of the country is another important aspect. Tell students how important it is to know about the cultural aspects of the country, because some things might seem nice to you but extremely impolite for other cultures. Show students the flashcards to give examples. In some countries men kiss each other and in others this is an offense. Some people have been arrested because of the type of clothes they were wearing. In Kuwait, if you go to the beach wearing a bathing suit, you will get arrested. They can only go to the beach wearing clothes, even in the water. Latin people like to stand really close to one another while speaking and look at each other’s eyes (show them usinga student as a volunteer). Americans like to have some distance (show them using a student as a volunteer). Italians like to talk using arm gestures. A gesture that could create enemies in some cultures is the “thumbs up” gesture. In some cultures, this means you did something great, in Australia it means something impolite. Food is another cultural problem if you do not know how to deal with it. Take Mexicans, for example: they love to eat the brain, the tongue and the cow’s head. This is very different from Americans who like the ribs, etc. Elicit from them any funny situation they have ever had because of cultural differences.
5. Divide the class into two or three groups. Stick the flashcards to a wall or to the board. Hand out a copy of Appendix 1 to each group. Ask them to put the sentences in order according to the flashcards they can see on the wall or on the board.
6. Hand out Worksheet 1, Pages 1 and 2. Give students some time to do it. Correct it.
7. Elicit from students what they think other countries think of their country. Make a chart of positive and negative thoughts. On the board, draw a T chart with “positive” and “negative” as column headings. Elicit the information from the students and write their responses in the correct column. Help them with vocabulary. Use words, such as: noisy, funny, creative, impolite, don’t follow rules, serious, open-minded, etc.
8. Hand out the poster board, the magazines, scissors, and glue. Ask students to divide the poster board into two parts. Have students make a poster with pictures of positive and negative aspects of their country.
9. Hand out Worksheet 2. Give students a few minutes to write the positive and negative aspects of their country.
10. Place the world map on the board. Divide your class into pairs or groups of three. Tell them they are going to play a game. Show students the suitcase you brought. Take out the objects of a specific place, Disney World, for example, and ask what each one is used for. Ask them the name of the object, where they use it or how they use it. Repeat the name of the object once and work on pronunciation. Elicit from them what season of the year they would use it. Show all the objects from that place. Ask them to try to guess which place it would be. When you take out the object, use it if possible. Have students ask questions using Simple Present. Help them make the questions. You can only answer “yes” or “no”.
Example questions:
(?) “IS IT IN THE NORTHERN HEMISPHERE?”
(?) “IS IT COLD?” “IS IT HOT?”
(?) “IS IT NEAR AUSTRALIA?”
11. Repeat the procedure with Egypt and New Zealand.
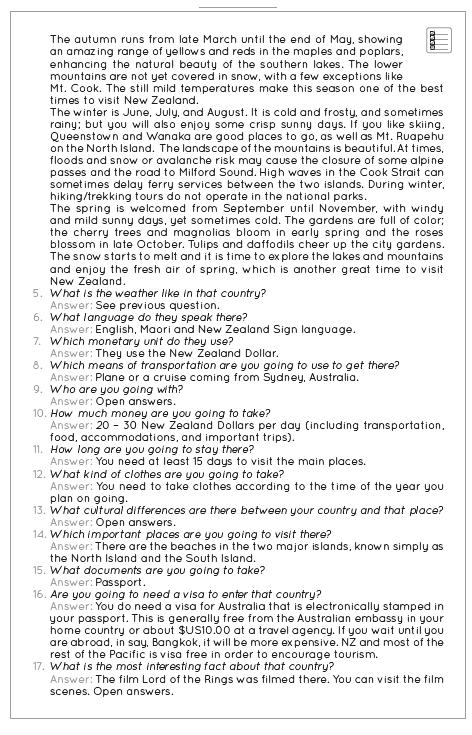
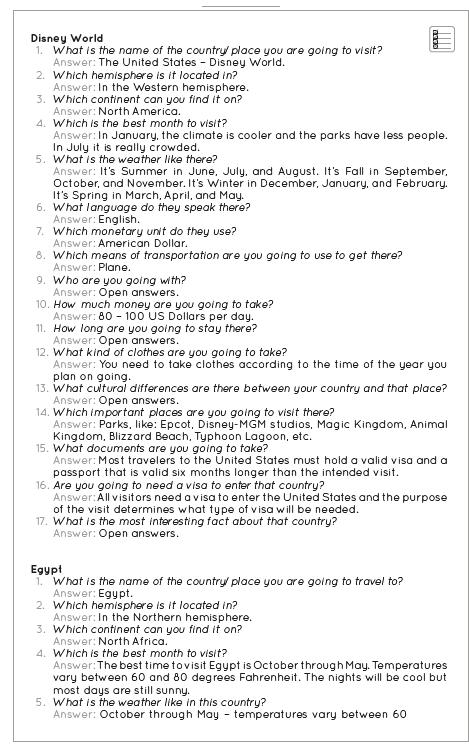
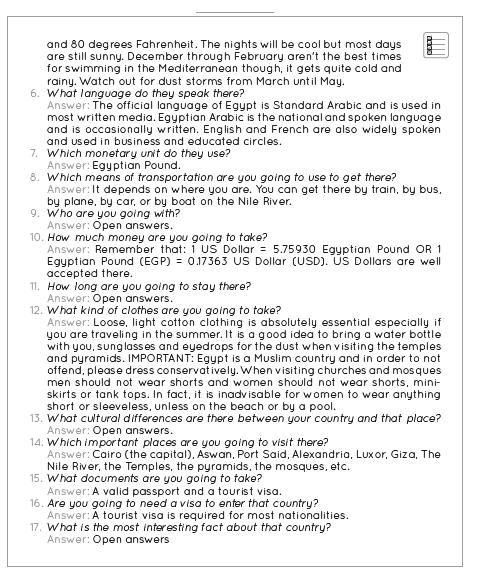
Disney World – It’s a place in the northern hemisphere. It is located in the south of this country. People in this country speak English.
New Zealand – It is a country located in the southern hemisphere. It has beaches and mountains. It is a very hot place because the ozone hole is above this country. It is composed of two islands. It has three official languages, English (similar to Australian English), Maori, and New Zealand sign language (the first country to use a sign language as an official one) which became official in April 2006.
Egypt – It’s a country located in the northern hemisphere. This country has several historical places. These historical places were built thousands of years ago. They have a shape similar to a triangle, but in three dimensions.
12. Hand out Worksheet 3, Pages 1 and 2. Give students some time to answer them. Correct them.
ANSWER KEY
LESSON 10
Topic: Geography Integrated with Language – Traveling – L2
Lesson Type: Multimedia
PRIOR KNOWLEDGE: Previous lesson.
KEY VOCABULARY: Suitcase, sunglasses, sunscreen, digital camera, batteries, bottle of water, lip balm, tissues, cap, history book, tennis shoes, walking shoes, raincoat, bathing suit, camel, hot, dry, cold, passport, plane ticket, backpack, means of transportation, scarf, hiking boots, visa, workout, medication, snack, cell phone, dictionary, money, t-shirt, shorts, boots.
MATERIALS
• Worksheet 1, Pages 1 and 2 – Geography Integrated with Language – Traveling – L2;
• A suitcase;
• A world map;
• Flashcards or realia of different places;
• Sleep mask or a piece of cloth to use as a blindfold;
• Creative paper;
• Colored markers;
• Magazines;
• Scissors;
• Crayons;
• Glue;
• Travel brochure from a different country or place;
• Digital devices with Internet access;
Suggested links:
• “The Geography Portal” - https://s.systemic.com.br/geographyportal ¹
• “Google Earth” - https://s.systemic.com.br/googleearth ²
• “Walt Disney World” - https://s.systemic.com.br/wdw ³
• “Fact Monster” - https://s.systemic.com.br/factmonster 4
PREPARATION IN ADVANCE
• Prepare a suitcase with the objects listed for each place. Disney – tennis shoes, sunscreen, hat, bottle of water, raincoat, and backpack. Egypt – cap, sun block, history book, picture of a camel, sunglasses, t-shirt, shorts, bottle of water, snack, digital camera, batteries, lip balm, tissues. New Zealand – walking shoes, UV sunglasses, sunscreen, backpack, scarf, boots.
• Install Google Earth on all computers they are going to use. Computers must have sufficient memory to use it. If you don’t have this available, use regular websites with information about the country.
OBJECTIVES
Teacher Objectives
• To teach and practice Future – going to
• To enable students to plan a trip and pack a suitcase
• To have students research countries on the Internet
Student Outcomes
• Use future with going to
• Comprehend different cultures
• Plan a trip
• Organize a suitcase
• Research about different countries on the internet
HABILIDADES:
• (EF06LI03) Solicitar esclarecimentos em língua inglesa sobre o que não entendeu e o significado de palavras ou expressões desconhecidas.
• (EF06LI16) Construir repertório relativo às expressões usadas para o convívio social e o uso da língua inglesa em sala de aula.
• (EF07LI01) Interagir em situações de intercâmbio oral para realizar as atividades em sala de aula, de forma respeitosa e colaborativa, trocando ideias e engajando-se em brincadeiras e jogos.
• (EF08LI14) Utilizar formas verbais do futuro para descrever planos e expectativas e fazer previsões.
• (EF07LI10) Escolher, em ambientes virtuais, textos em língua inglesa, de fontes confiáveis, para estudos/pesquisas escolares.
• (EF15AR04) Experimentar diferentes formas de expressão artística (desenho, pintura, colagem, quadrinhos, dobradura, escultura, modelagem, instalação, vídeo, fotografia etc.), fazendo uso sustentável de materiais, instrumentos, recursos e técnicas convencionais e não convencionais.
• (EF03GE03) Reconhecer os diferentes modos de vida de povos e comunidades tradicionais em distintos lugares.
• (EF01GE09) Elaborar e utilizar mapas simples para localizar elementos do local de vivência, considerando referenciais espaciais (frente e atrás, esquerda e direita, em cima e embaixo, dentro e fora) e tendo o corpo como referência.
PROCEDURES
1. Tell students they are going to travel to one of these places - Disney World, New Zealand, or Egypt. Ask them to choose a travel partner. Tell them they are going to research this country: the history, the culture, the monetary unit, the language, and the places to visit as a tourist and as a student. If there are a lot of students wanting to go to
the same country, have them search for different aspects of the country. Tell them they are going to present this country to the class.
2. Hand out Worksheet 1, Pages 1 and 2. Ask students to fill in the information about the place they chose to visit.
3. Take students to the computer lab. They may use an online globe software to see the exact location of the place/country. Ask them to complete Worksheet 1, Pages 1 and 2. If you don’t have an online globe software, ask them to go to the Internet and type the name of the country they are going to research or use the suggested websites in Preparation in Advance.
4. When you return to the classroom, ask students to prepare a brochure about the country. Show them what a brochure looks like. Give them some construction/colored paper, markers, and magazines. Ask them to present the place/country to the other students.
5. Blind Fold Game. Divide the class into pairs or groups of three. Choose one student from one of the groups. The student must be blindfolded. Place one object (from the suitcase) under the student’s feet. They need to guess what the object is, where it is used, and which country it reminds them of. If they answer the three questions, they get three points. Reward the winning group.
ANSWER KEY
LESSON
11
Topic: Social Studies Integrated with Language – Jamaica – L1
Lesson Type: Multimedia
PRIOR KNOWLEDGE: None.
KEY VOCABULARY: Sun tan, Jamaica, waterfall, scuba diving, aqua shoes, itinerary, ackee.
MATERIALS
• Worksheet 1, Pages 1-4 – Social Studies Integrated with Language – Jamaica – L1;
• Appendix 1, Pages 1 and 2 – Social Studies Integrated with Language – Jamaica –L1;
• Reggae music;
• A world map;
• Digital devices with Internet access.
PREPARATION IN ADVANCE
• Make copies of Appendix 1, Pages 1 and 2, one per group.
TEACHER OBJECTIVES
• To enable students to use “will” and “going to”
• To have students practice Future tense with traveling situations
• To have students practice reading comprehension
• To teach about Jamaica
• To stimulate students to write
• To elicit from students about their plans for the future
STUDENT OUTCOMES
• Use future with will and going to
• Practice travelling vocabulary
• Develop reading skills
• Learn about Jamaica
• Practice writing
• Use websites to improve their vocabulary and knowledge when searching about
• different countries
HABILIDADES:
• (EF06LI03) Solicitar esclarecimentos em língua inglesa sobre o que não entendeu e o significado de palavras ou expressões desconhecidas.
• (EF06LI16) Construir repertório relativo às expressões usadas para o convívio social e o uso da língua inglesa em sala de aula.
• (EF07LI01) Interagir em situações de intercâmbio oral para realizar as atividades em sala de aula, de forma respeitosa e colaborativa, trocando ideias e engajando-se em brincadeiras e jogos.
• (EF06LI11) Explorar ambientes virtuais e/ou aplicativos para construir repertório lexical na língua inglesa.
• (EF07LI10) Escolher, em ambientes virtuais, textos em língua inglesa, de fontes confiáveis, para estudos/pesquisas escolares.
• (EF08LI14) Utilizar formas verbais do futuro para descrever planos e expectativas e fazer previsões.
• (EF08LI11) Produzir textos (comentários em fóruns, relatos pessoais, mensagens instantâneas, tweets, reportagens, histórias de ficção, blogues, entre outros), com o uso de estratégias de escrita (planejamento, produção de rascunho, revisão e edição final), apontando sonhos e projetos para o futuro (pessoal, da família, da comunidade ou do planeta).
• (EF03GE03) Reconhecer os diferentes modos de vida de povos e comunidades tradicionais em distintos lugares.
PROCEDURES
1. Ask students what they are going to do when they finish their class. Encourage them to use “going to”.
2. Elicit from students when they will travel again. Ask them where they are going, who they are going with. Elicit from them how much money they will need, how long it will take. Make sure they use "will" in their sentences. When you talk about the future make sure you use gestures.
3. Write “will” and “going to” on the board. Elicit from students the difference between them. If students do not know, write two sentences on the board. Elicit from them what the differences in the sentencesare. In sentencenumber one, thedecision is beingmade while they are speaking and in sentence number two, the decision has already been made before the conversation. Give other examples of “will” and “going to”. Ask students to create sentences using will and going to. You can ask for a volunteer to write on the board. Give students a hint about will. Tell them it is usually used with words that express promise, speculation, uncertainly, guarantees, and with adverbs, such as: possible, probably, definitely. Write sentences three and four on the board. Use a blank for “will” and elicit what they should use there and why. Explain the contracted form and the negative. Remind students when they use “going to” they also need to use the verb to be. Show them the example in sentence two. Repeat procedure with sentence five.
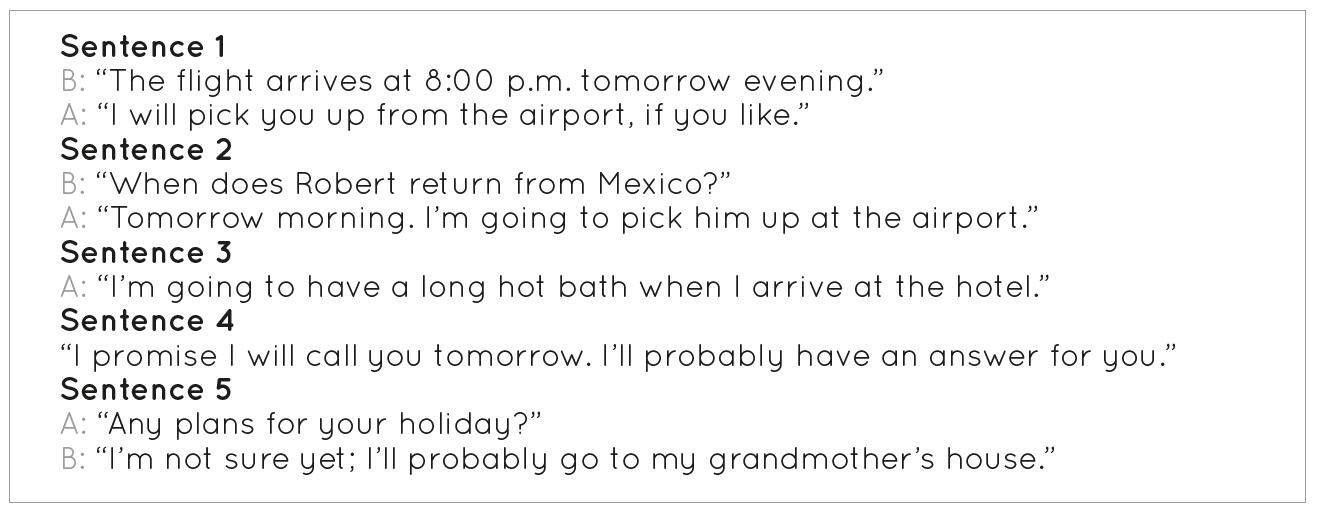
4. Show students a flashcard of a place and an object. Ask them to create a sentence usingwill or goingto. Guide them in this activity. Repeat this procedure with all flashcards and objects.
5. Elicit from students a grammar rule to use for will and going to. Build the rule with them and write it on the board.
6. Play reggae music. Ask students to listen to the song. Let it play for two or three minutes. Elicit from students what place the song reminds them of. Write the word “Jamaica” on the board. Elicit as much as you can from them and write what they say on the board. Where it is located (south of Cuba), the language they speak (English), monetary unit (dollar), part of what continent (America – Central America). It is situated in the Caribbean Sea. Jamaicans are also famous for their athletes; they win several gold medals in competitions. Ask a volunteer to point out Jamaica on the map.
7. Ask them to imagine they are going to travel to Jamaica. Elicit from students what they will take in their suitcase. Encourage students to use will and going to while they are planning. Take sunscreen, flip flops, shorts and t-shirts, sunglasses, aqua shoes to walk on the ocean rocks, pants, a sun dress, hat, sunglasses, an underwater camera, tennis shoes, swimming suit or a bikini, beach towel, and a map, of course.
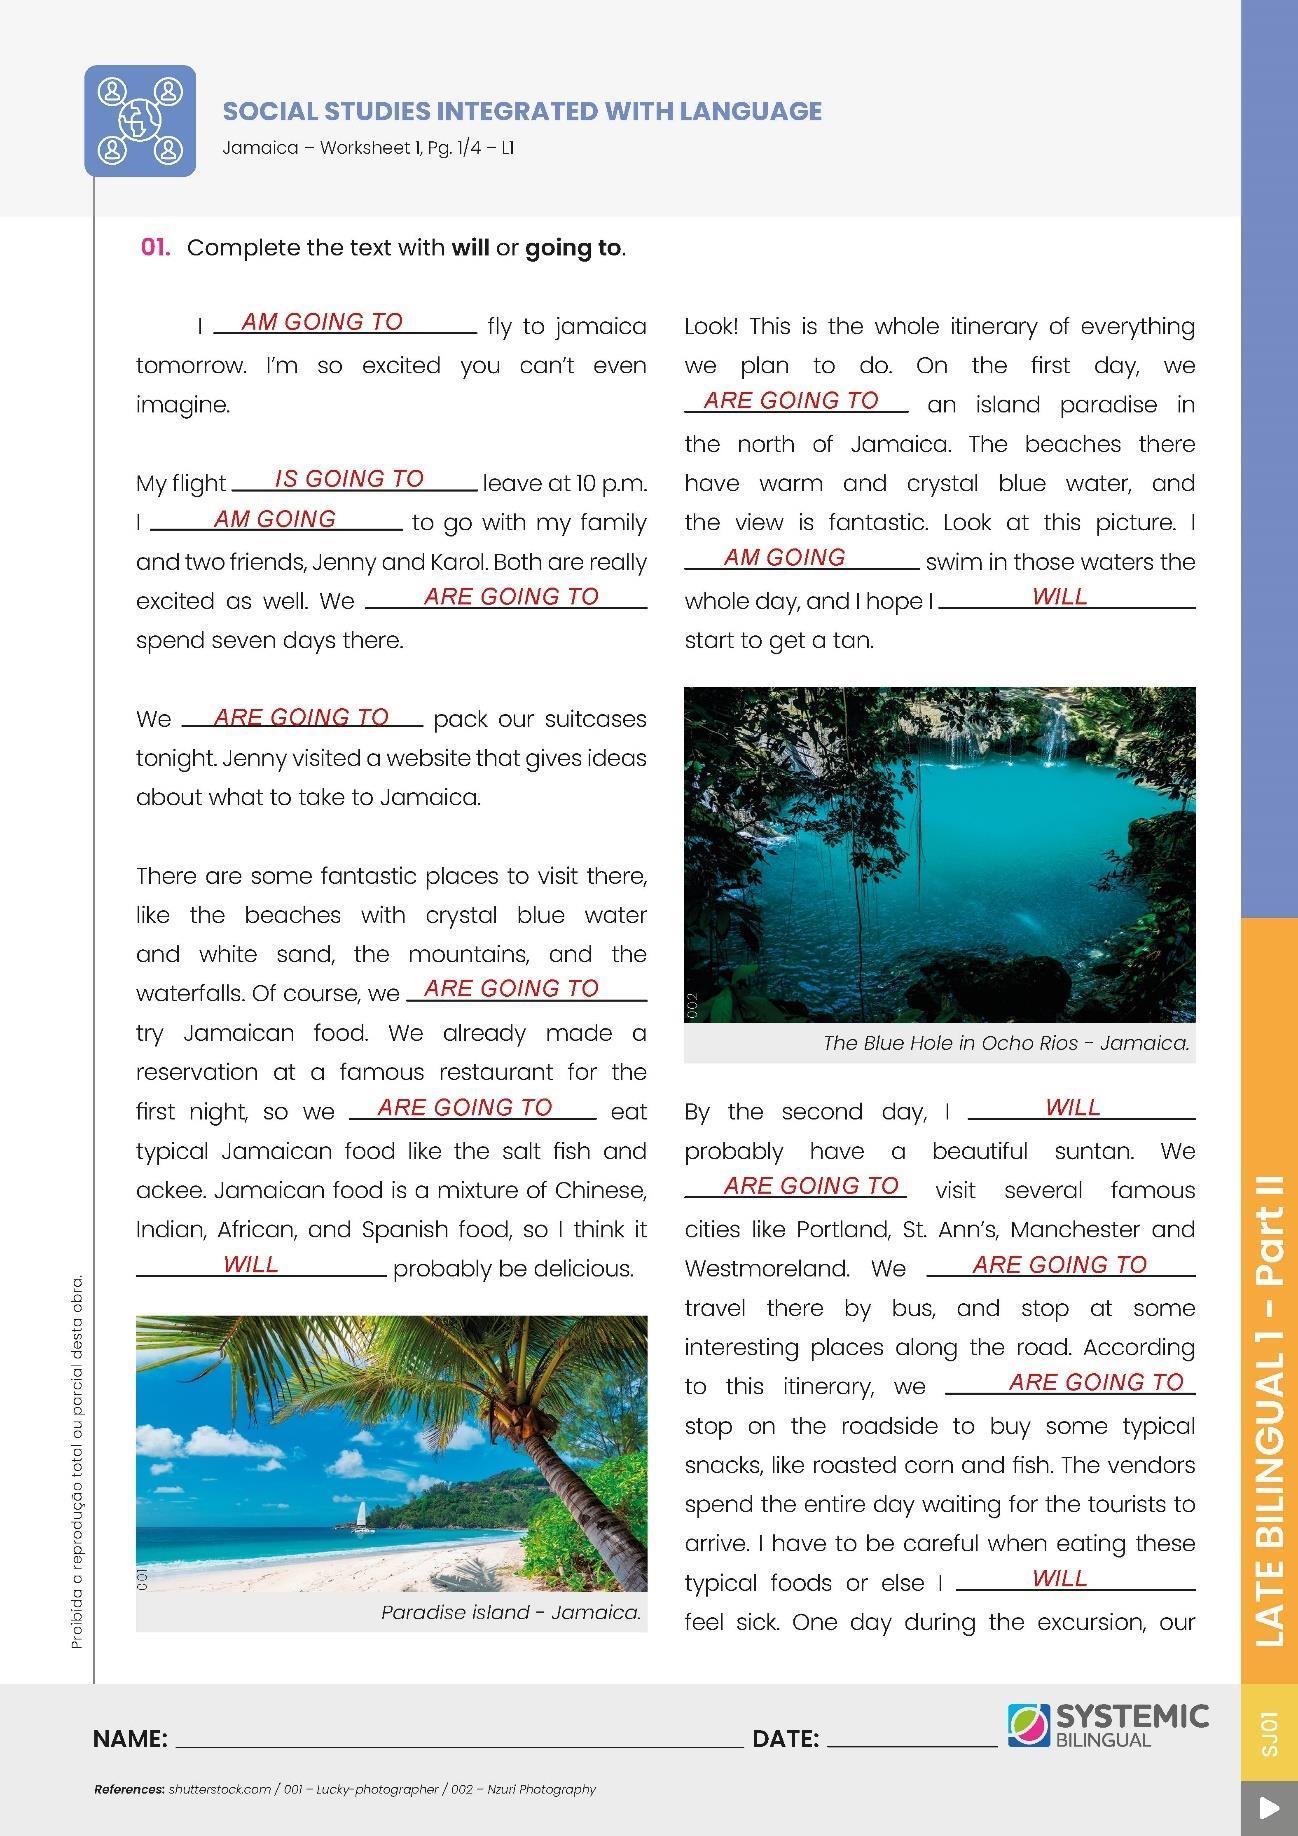
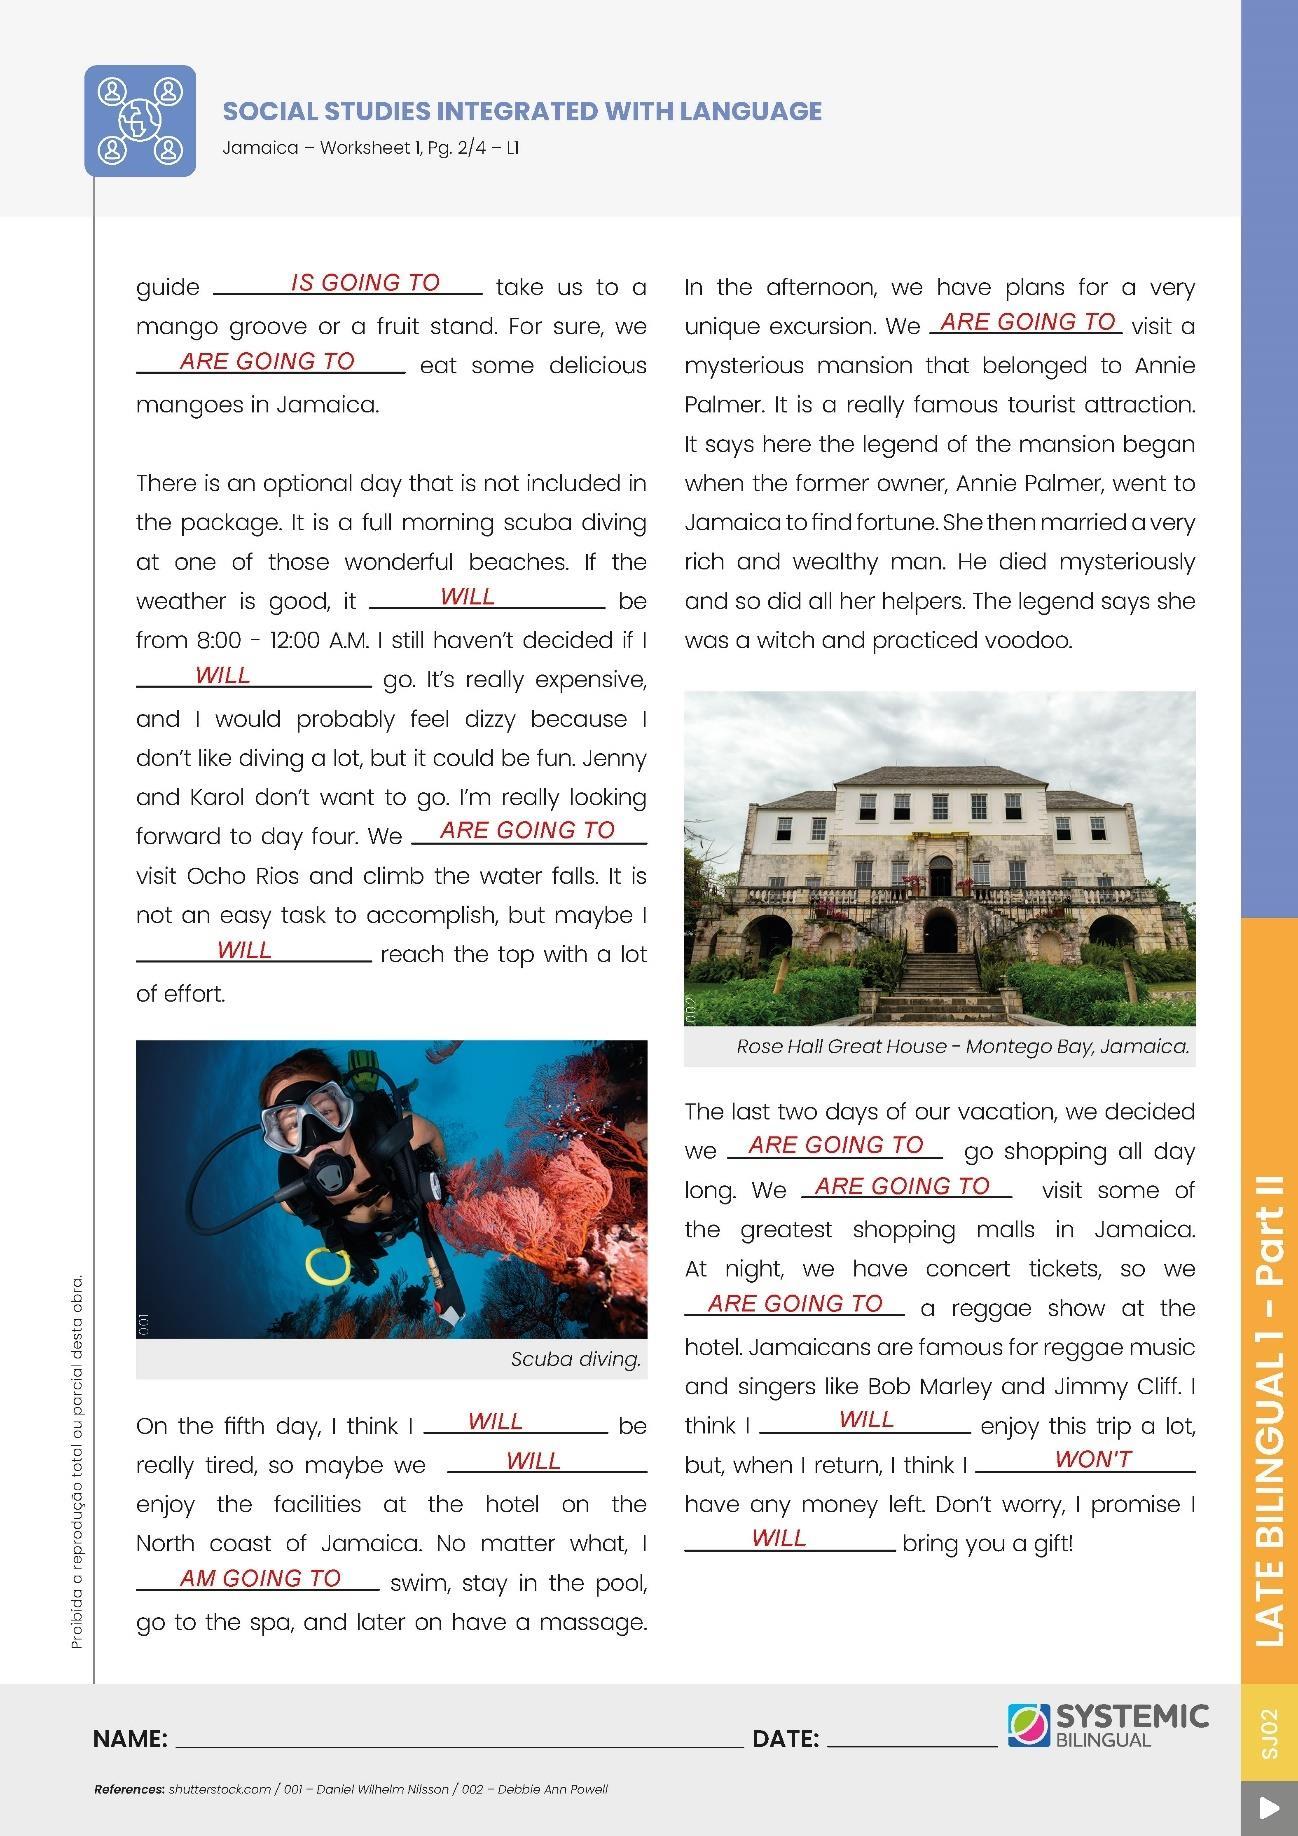
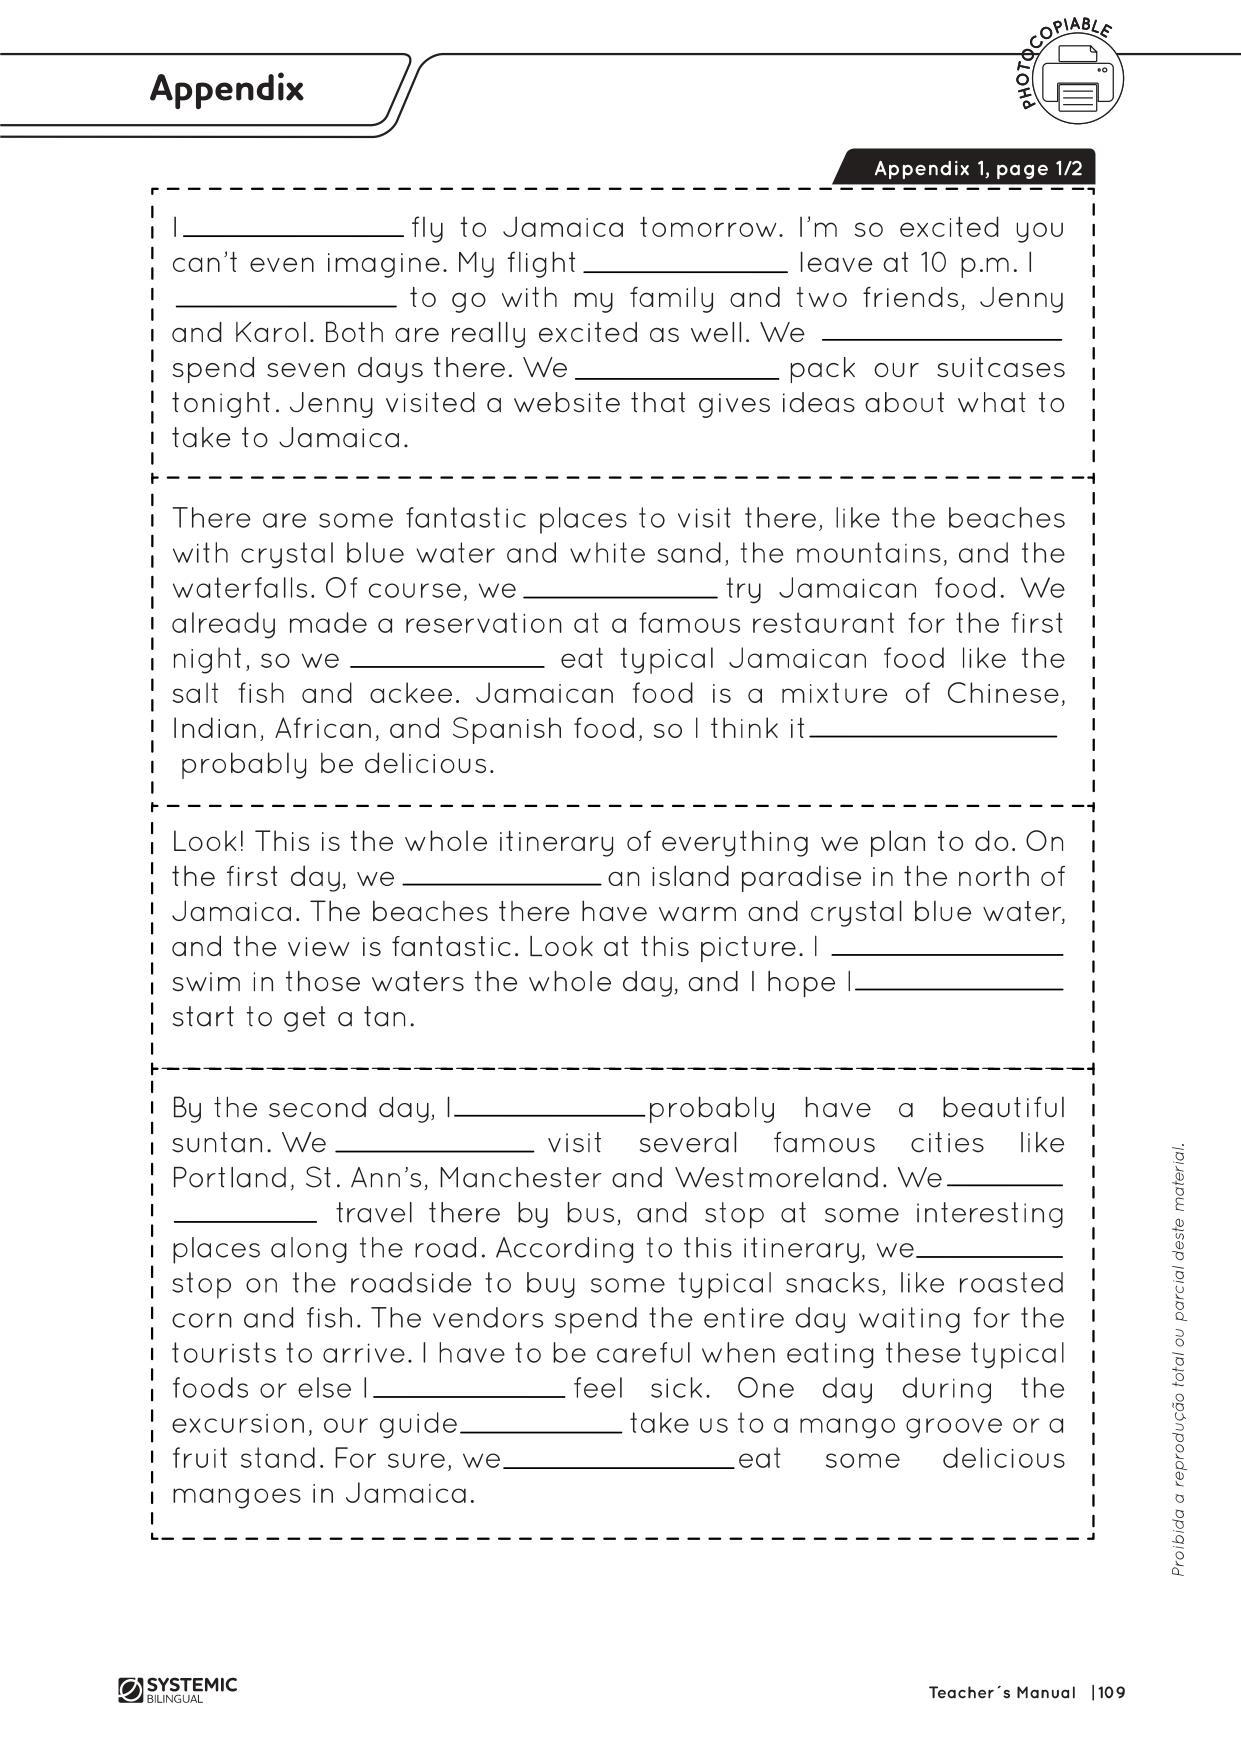
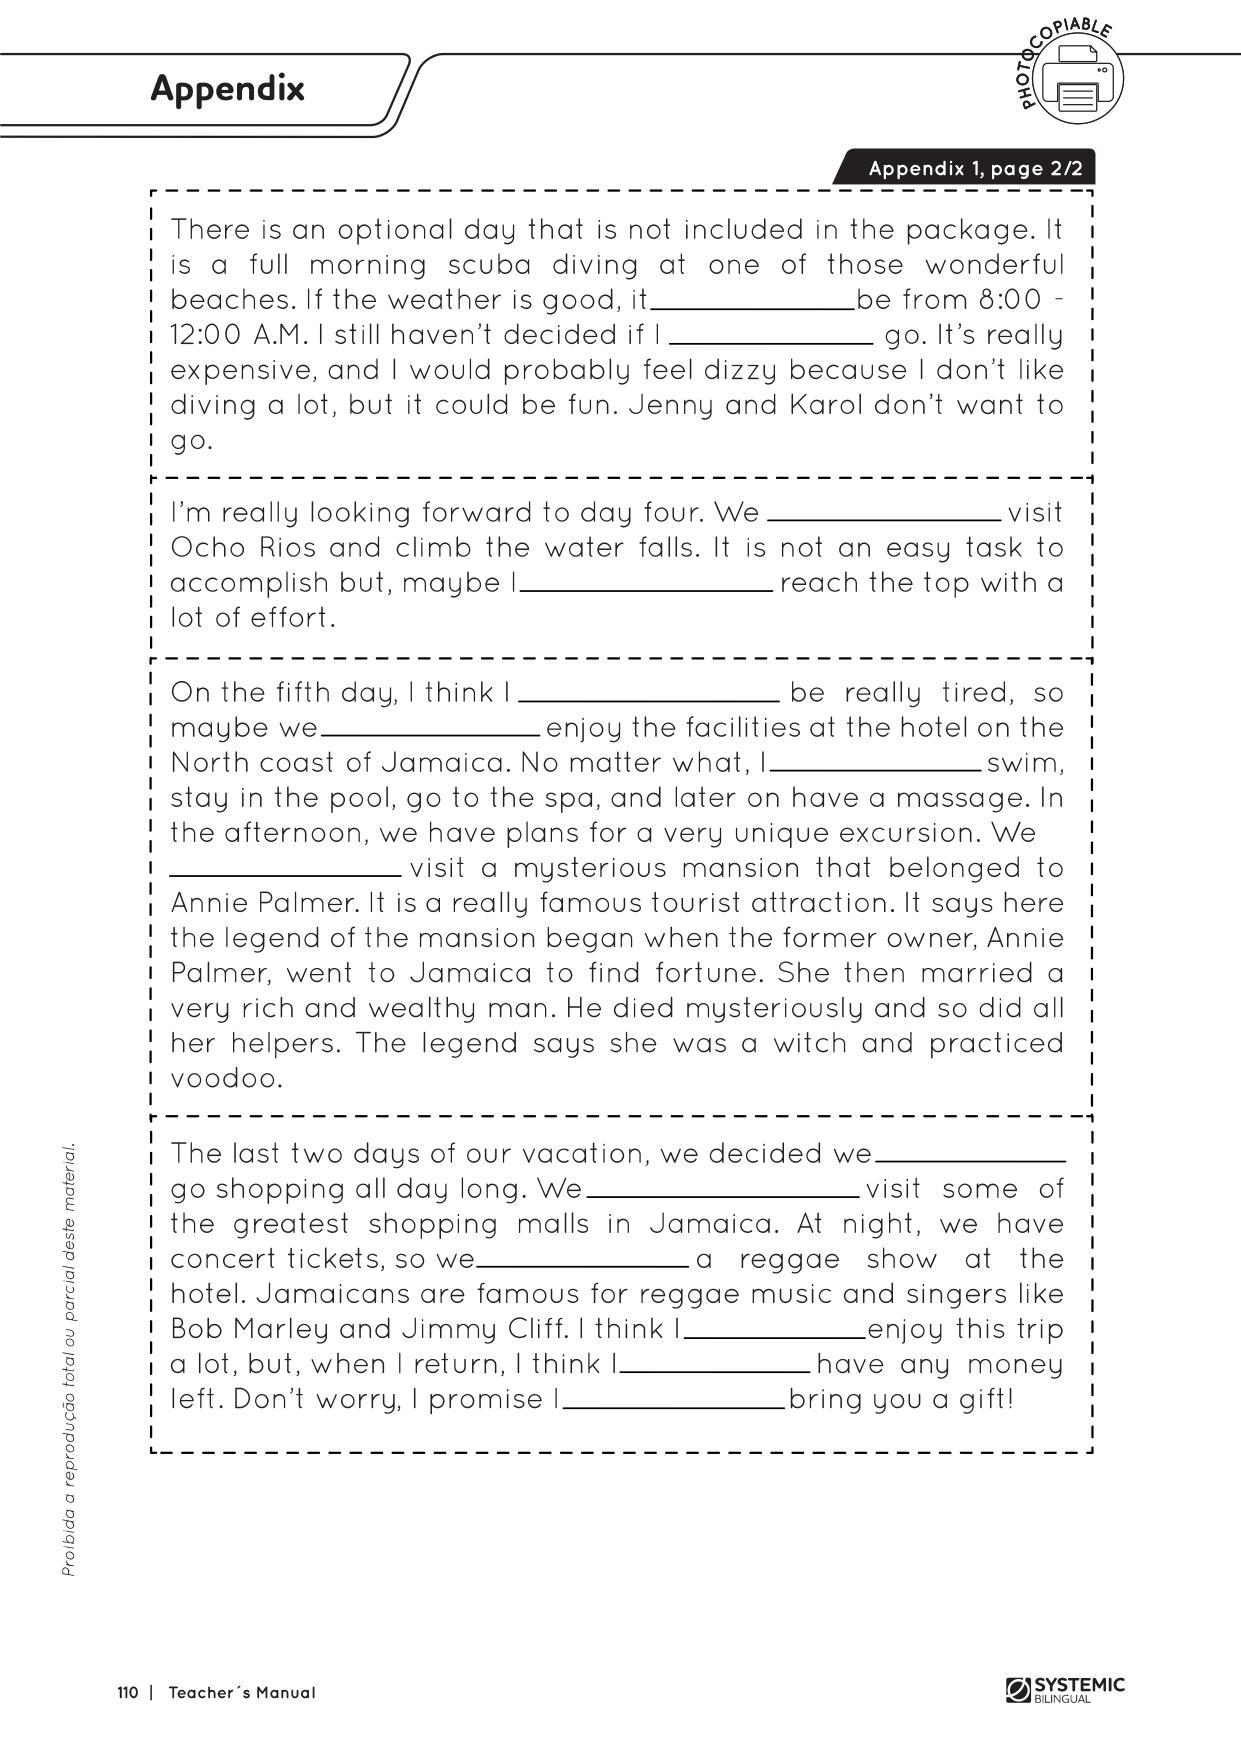
8. Divide your class into pairs or groups of three. Hand out Appendix 1, Pages 1 and 2. Ask students to fill in the blanks with will or going to and put the slips in the correct order. Do this activity as a game. Students must write the correct answer and write why they used it. Reward the winning group.
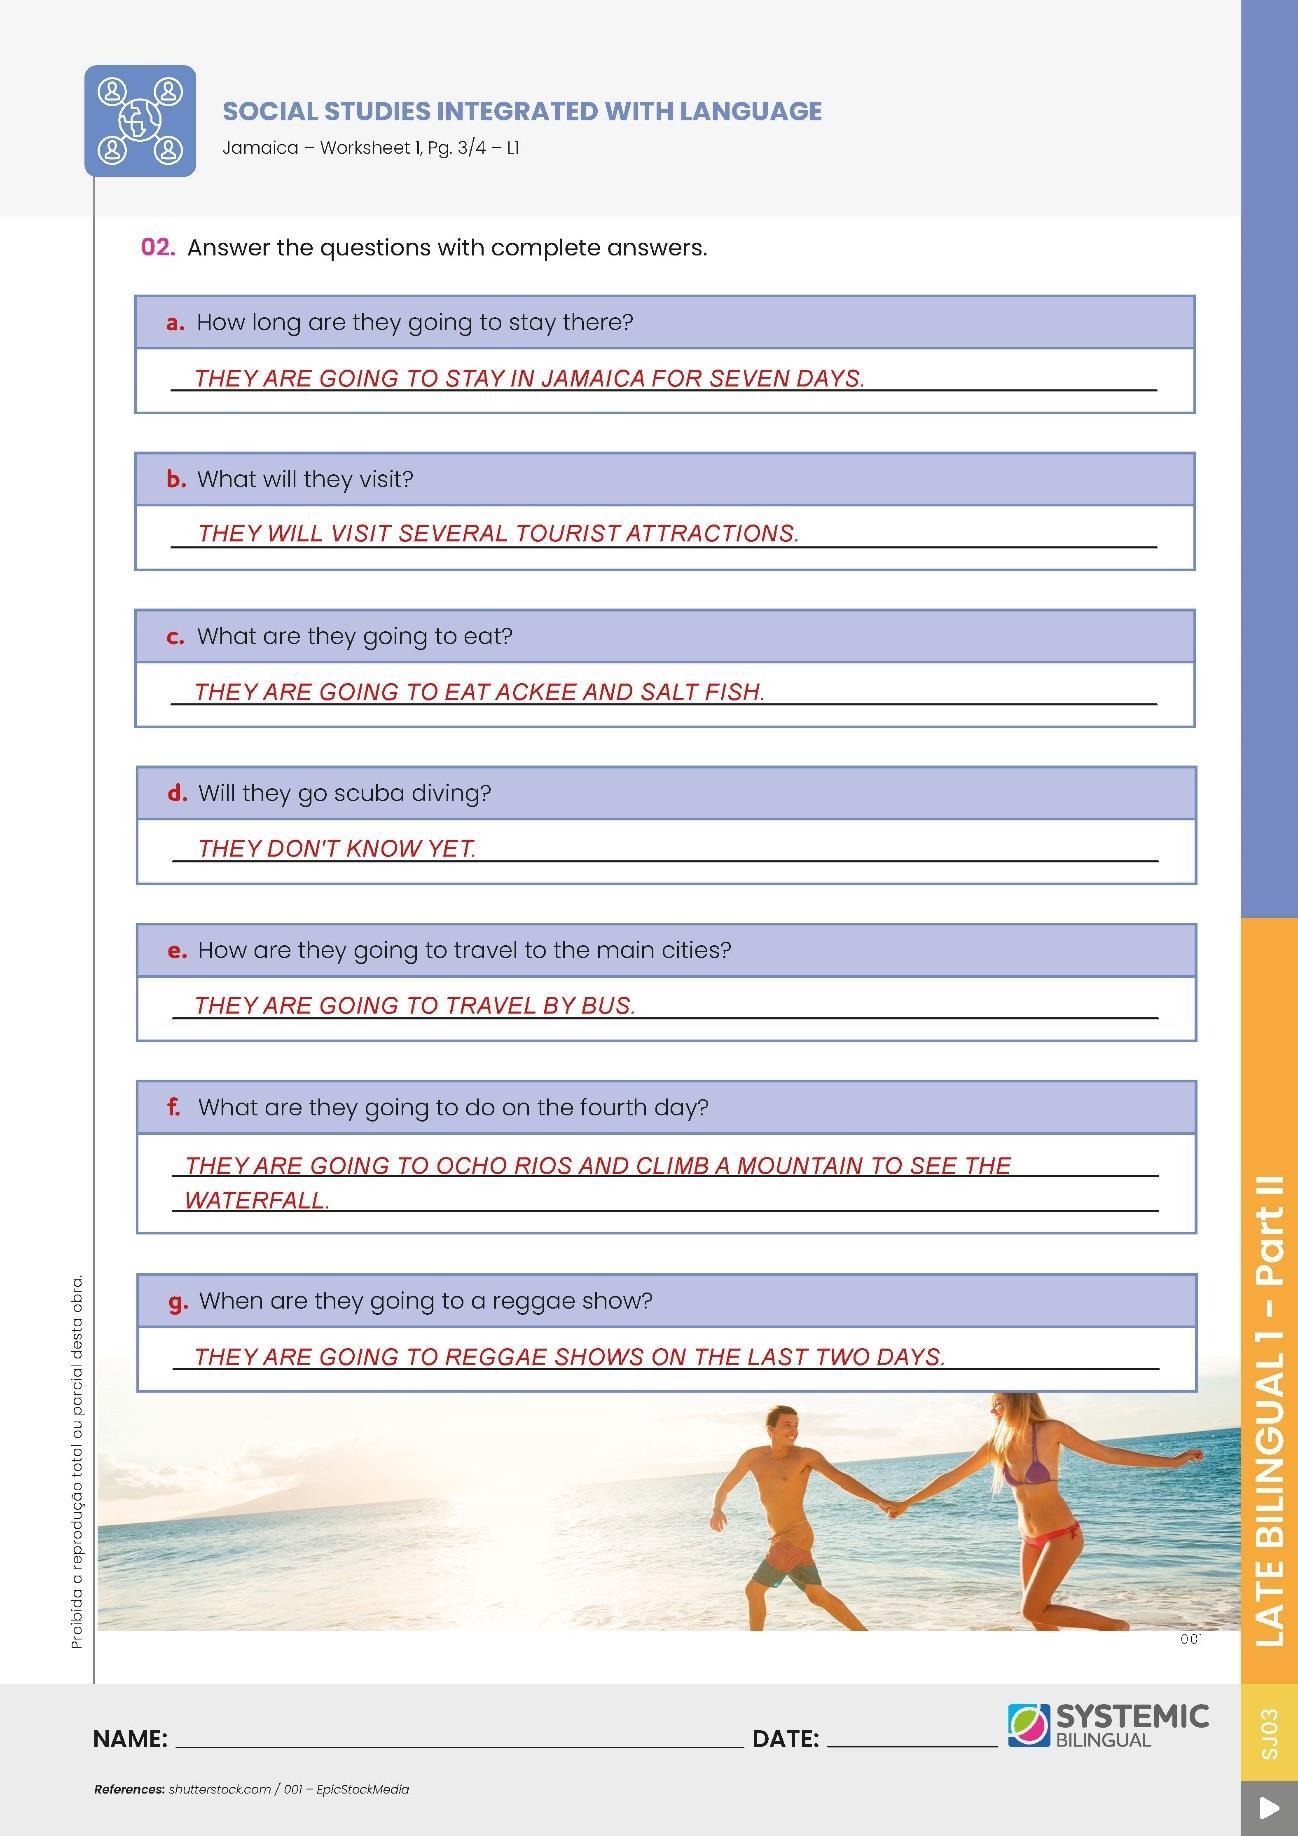
9. Ask students some questions about the text.
(?) “HOW LONG ARE THEY GOING TO STAY THERE?” (They are going to stay in Jamaica for seven days.)
(?) “WHAT WILL THEY VISIT?” (They will visit several tourist attractions.)
(?) “WHAT ARE THEY GOING TO EAT?” (They are going to eat ackee and salt fish.)
(?) “WILL THEY GO SCUBA DIVING?” (They don’t know yet.)
(?) “HOW ARE THEY GOING TO TRAVEL TO THE MAIN CITIES?” (They are going to travel by bus.)
(?) “WHAT ARE THEY GOING TO DO ON THE FOURTH DAY?” (They are going to Ocho Rios and climb a mountain to see a waterfall.)
(?) “WHEN ARE THEY GOING TO A REGGAE SHOW?” (They are going to reggae shows on the last two days.)
10. Hand out Worksheet 1, Pages 1-3. Allow students a few minutes to answer them. Correct it out loud.
11. Ask students to choose a country they would like to travel to individually. Make sure students choose different places. Ask them to write the itinerary. Tell them it will be a contest for the best composition. Hand out Worksheet 1, Page 4, as homework. When they return their story to you, make sure you do not correct the mistakes in the first draft. Hand it back with the mistakes circled, then ask them to figure out what is wrong. Ask them to give itback to you the next class. Repeat theprocedure until the writingis correct. You may even write some questions about the place so students can enrich their writing. Ask questions to make them research more about the place. Tell them the three best compositions will be presented to all students from other classes. Keep their composition to be presented in class or around the school.
12. You may even create a traveling journal with students and each story will be published with their help.
ANSWER KEY
LESSON 12
Topic: Social Studies Integrated with Language – Jamaica – L2
Lesson Type: Regular
PRIOR KNOWLEDGE: None.
KEY VOCABULARY: Scuba diving, golf, sailing, cricket, tennis, river rafting, bobsledding, basketball, football, soccer, swimming, running, jumping, throwing, baseball, track and field, boxing, Olympic Games, helmet, bat, ball, swing, elbow guard, leg pad, gloves, abdomen guard, sled, swimming pool, runs, field, team, players, snowboard, skating, surfing, shin guard, goalkeeper gloves, soccer cleats, medals, place, equipment, tee, golf bag.
MATERIALS
• Worksheet 1, Pages 1 and 2 – Social Studies Integrated with Language – Jamaica –L2;
• Appendix 1, Pages 1-4 – Social Studies Integrated with Language – Jamaica – L2;
• Appendix 2, Pages 1, 2, and 3 – Social Studies Integrated with Language – Jamaica – L2;
• Flashcards – Social Studies Integrated with Language – Jamaica – L2;
• Different size balls from different sports;
• Baseball glove, helmet or any equipment used in sports;
• One glue for each student or sticky tack;
• One scissor for each student;
• Poster board;
• Suggested links:
o “Sports in Jamaica – Topendsports” – https://s.systemic.com.br/topendsports
o “Sports in Jamaica – Embassy of Jamaica” – https://s.systemic.com.br/sportseoj 1. 2.
PREPARATION IN ADVANCE
• To know more about Jamaican sports, visit the suggested websites.
• Get the flashcards.
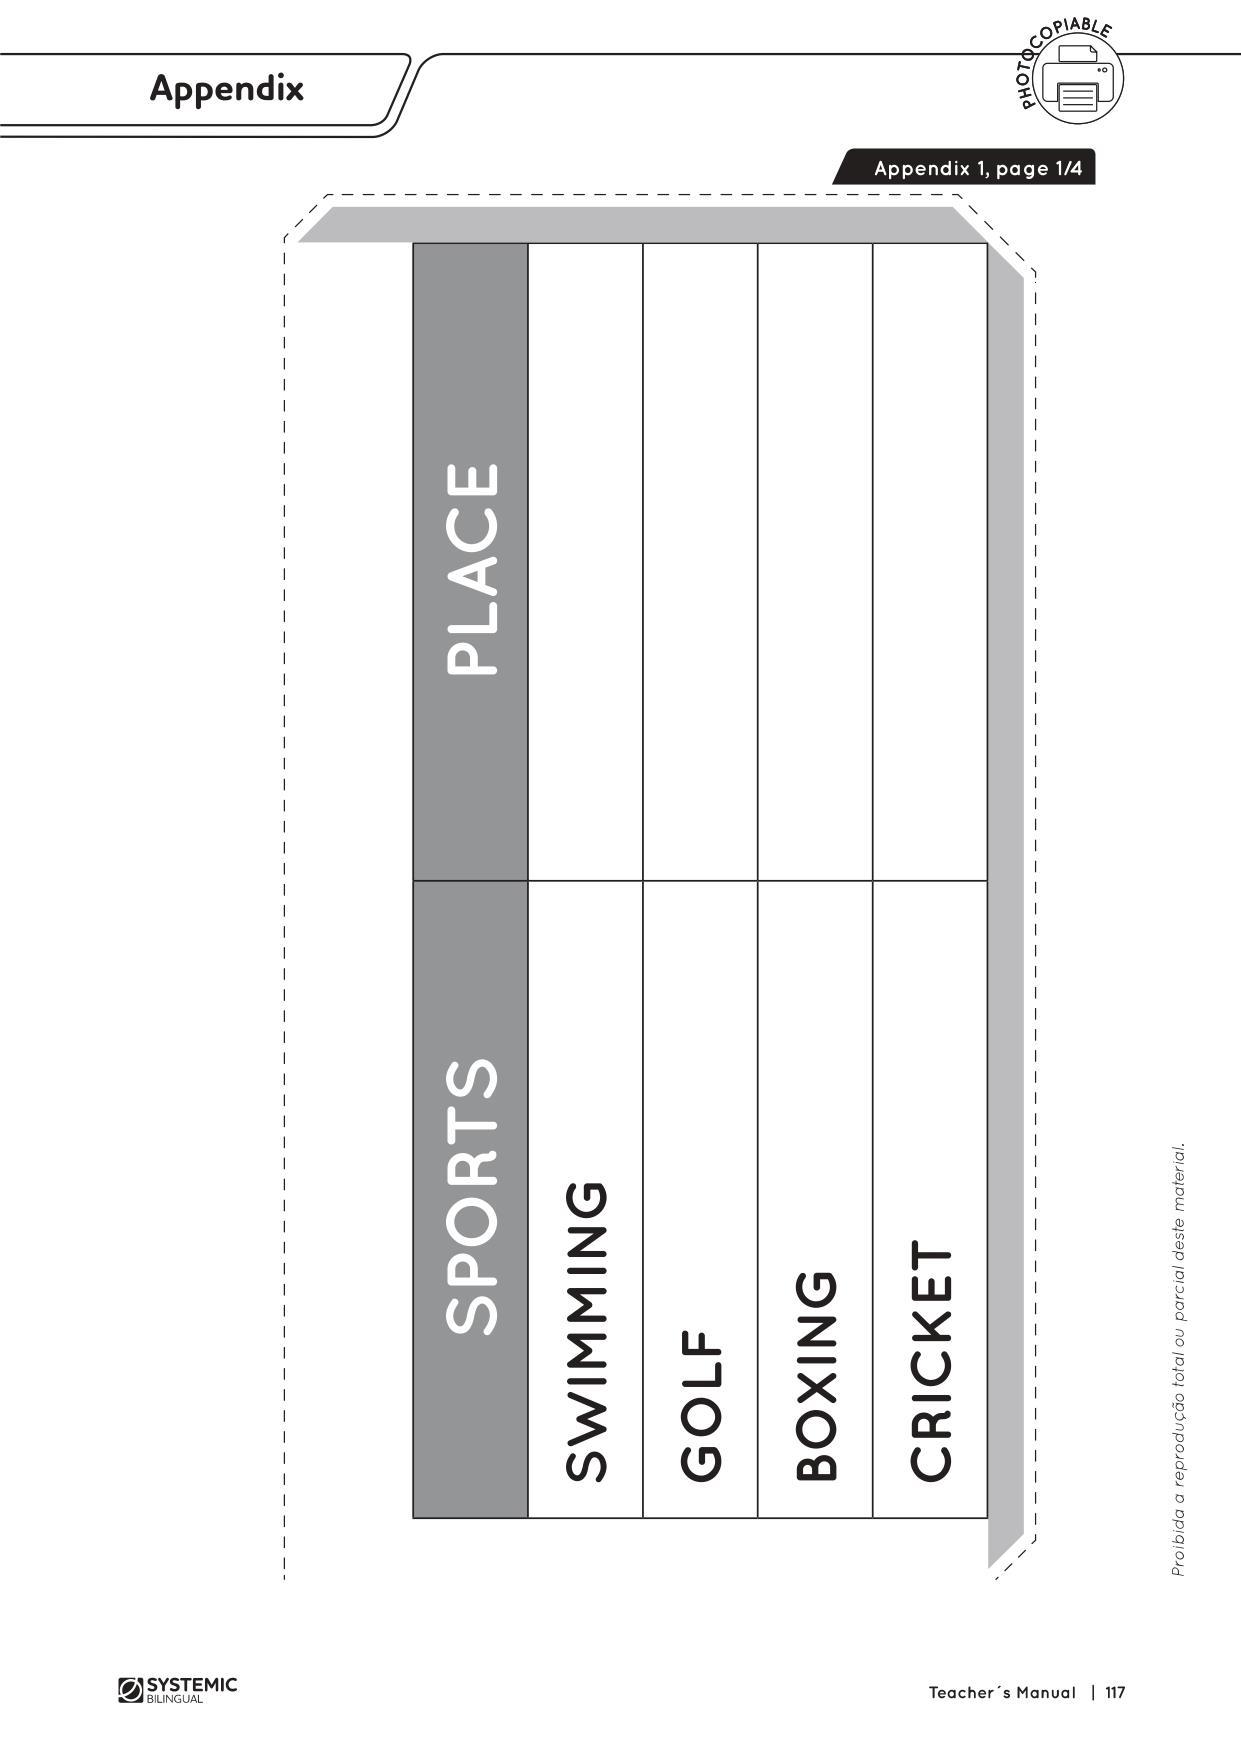
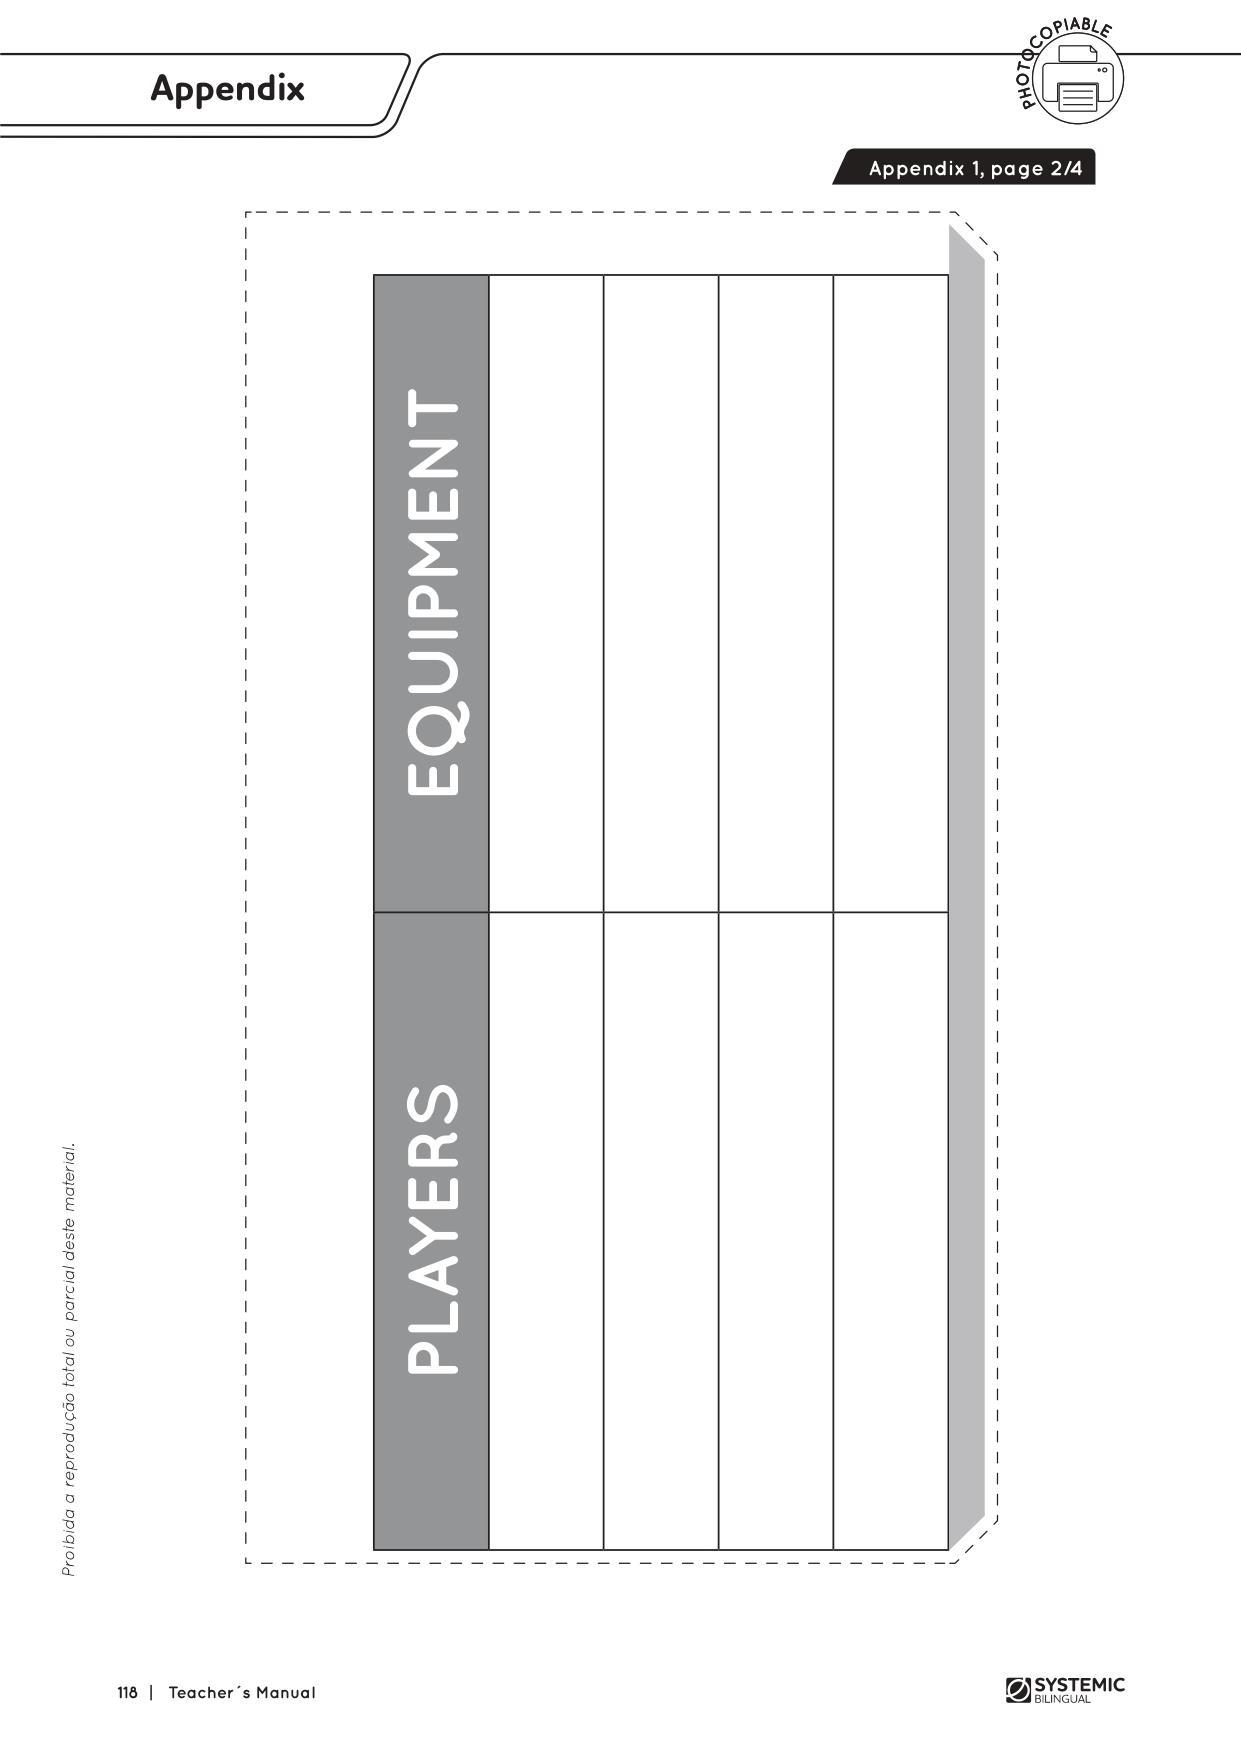
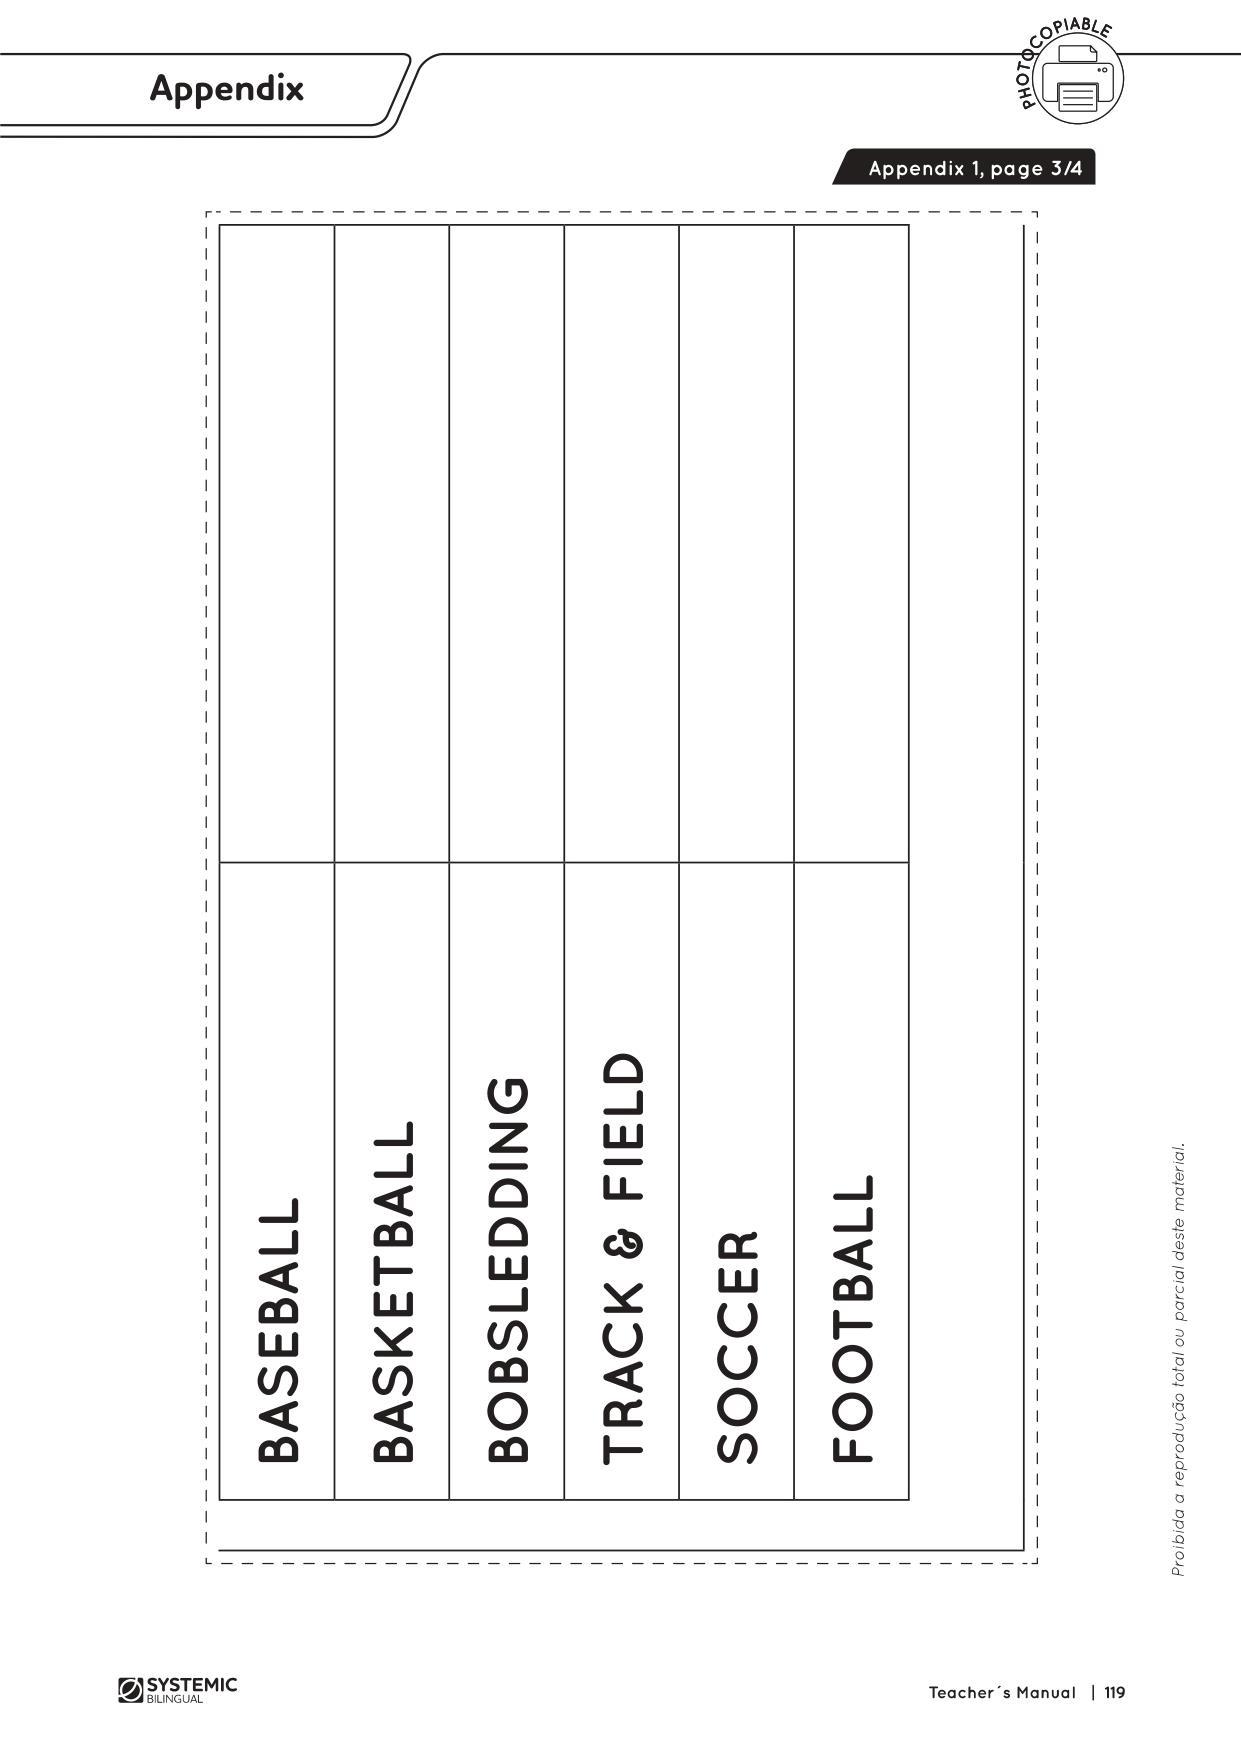
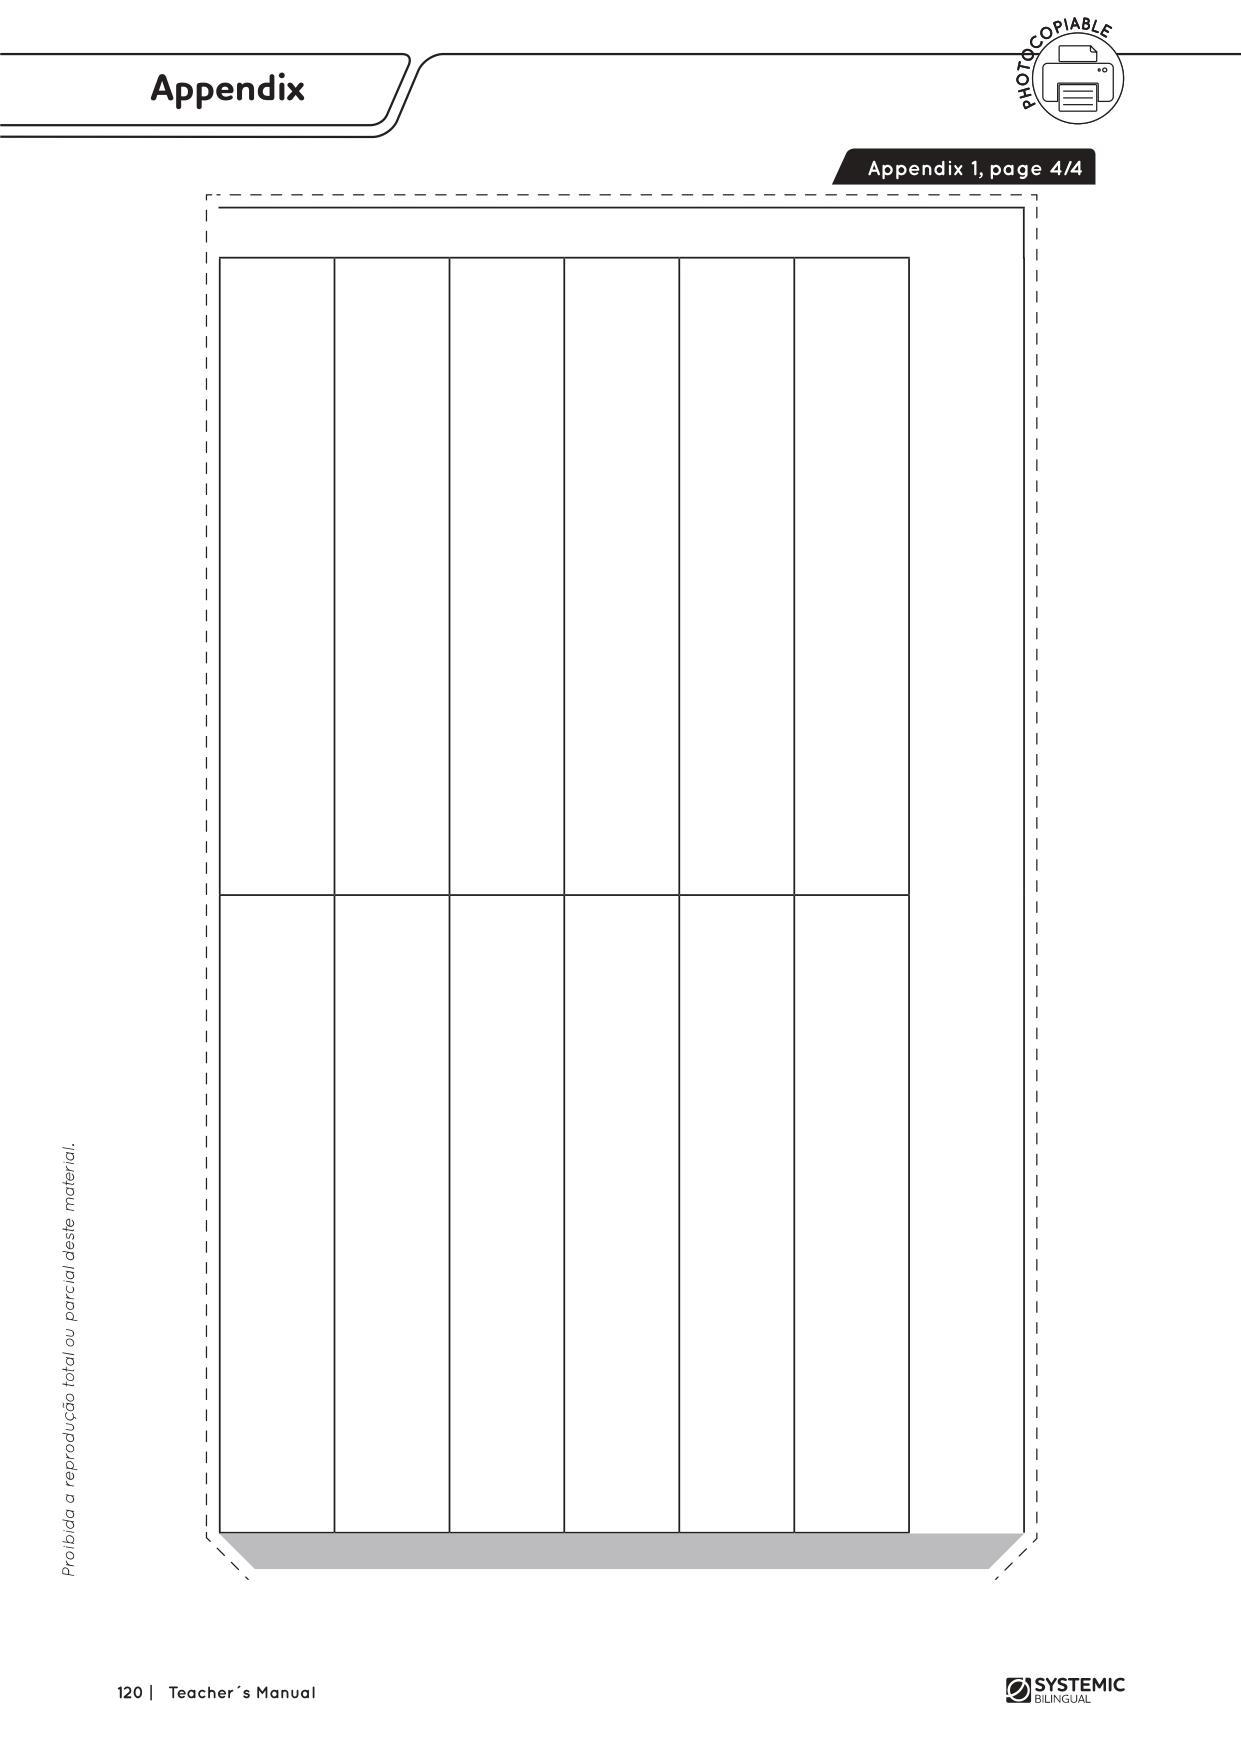
• Copy, cut out and prepare the panel from Appendix 1 by joining the four parts on a poster board.
OBJECTIVES
TEACHER OBJECTIVES
• To enable students to use “can” with adjectives good and bad
• To have students practice Simple Present tense with sports
• To explore Jamaican sports, equipment, and rules
• To illustrate Jamaican sports using flashcards and realia
STUDENT OUTCOMES
• Learn about Jamaican sports
• Practice the simple present
• Use can when talking about sports
• Recognize some sports equipments
• Categorize sports and equipments in columns
HABILIDADES:
• (EF06LI03) Solicitar esclarecimentos em língua inglesa sobre o que não entendeu e o significado de palavras ou expressões desconhecidas.
• (EF06LI16) Construir repertório relativo às expressões usadas para o convívio social e o uso da língua inglesa em sala de aula.
• (EF07LI01) Interagir em situações de intercâmbio oral para realizar as atividades em sala de aula, de forma respeitosa e colaborativa, trocando ideias e engajando-se em brincadeiras e jogos.
• (EF06LI19) Utilizar o presente do indicativo para identificar pessoas (verbo to be) e descrever rotinas diárias.
• (EF07LI20) Empregar, de forma inteligível, o verbo modal can para descrever habilidades (no presente e no passado).
• (EF35EF06) Diferenciar os conceitos de jogo e esporte, identificando as características que os constituem na contemporaneidade e suas manifestações (profissional e comunitária/lazer).
PROCEDURES
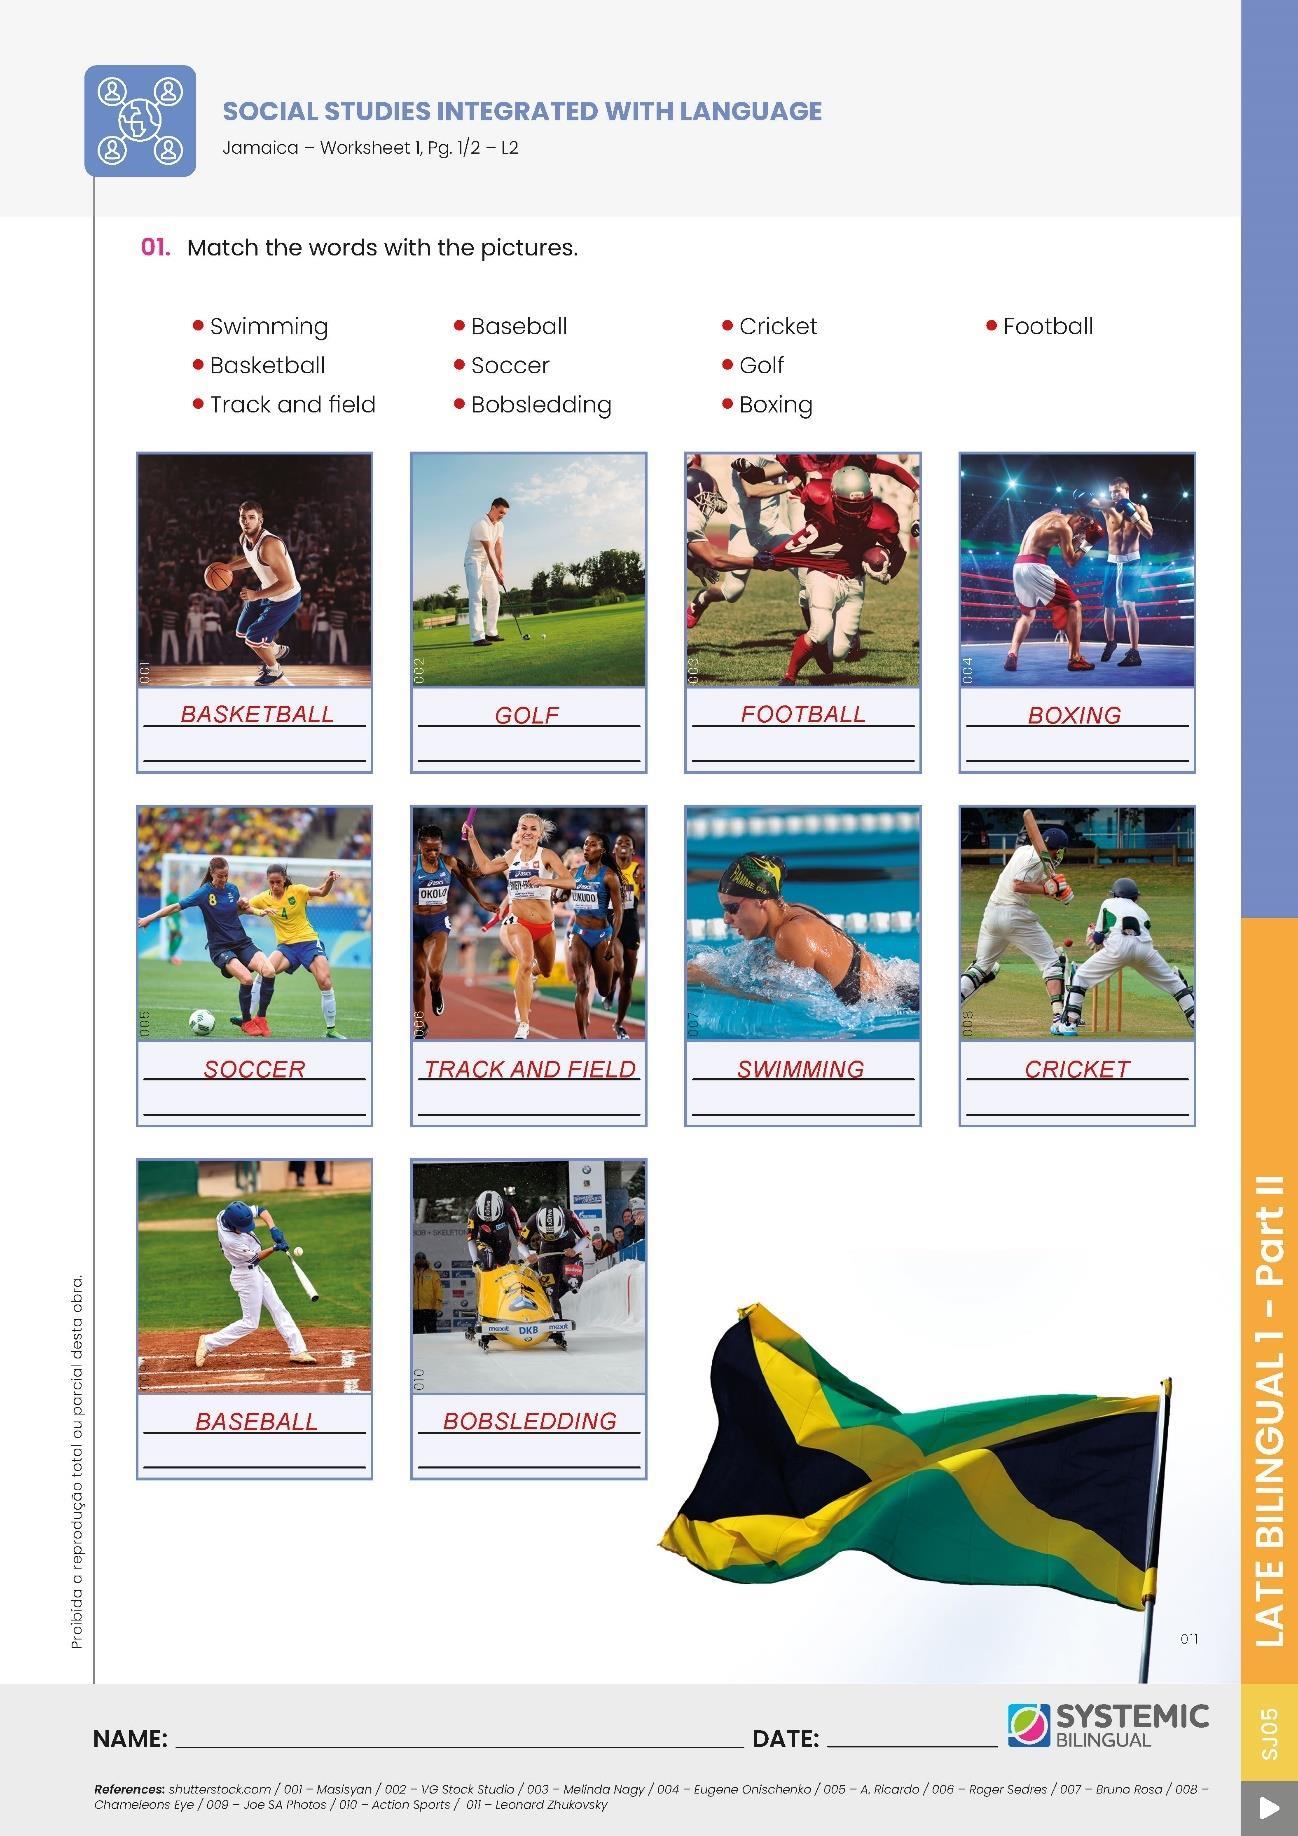
1. Write the word “sports” on the board. Elicit from students names of different sports. Write the information on the board as they say it. Elicit names of sports that use balls (basketball, volleyball, soccer, football, rugby, baseball, water polo, cricket, golf, tennis, table tennis, etc.) Elicit from them where the last Olympic Games were held. Ask them if they watched them and if they remember any games they saw that were interesting.
2. Show students the flashcard of a soccer player. Ask them the name of the sport, what equipment they need to use to play, how many players, rules, names of famous teams, if they can play it, names of famous players, etc. Elicit as much as you can from them. Ask questions, such as:
(?) “HOW MANY PLAYERS DO YOU NEED IN A SOCCER TEAM?” (YOU NEED 11 PLAYERS.)
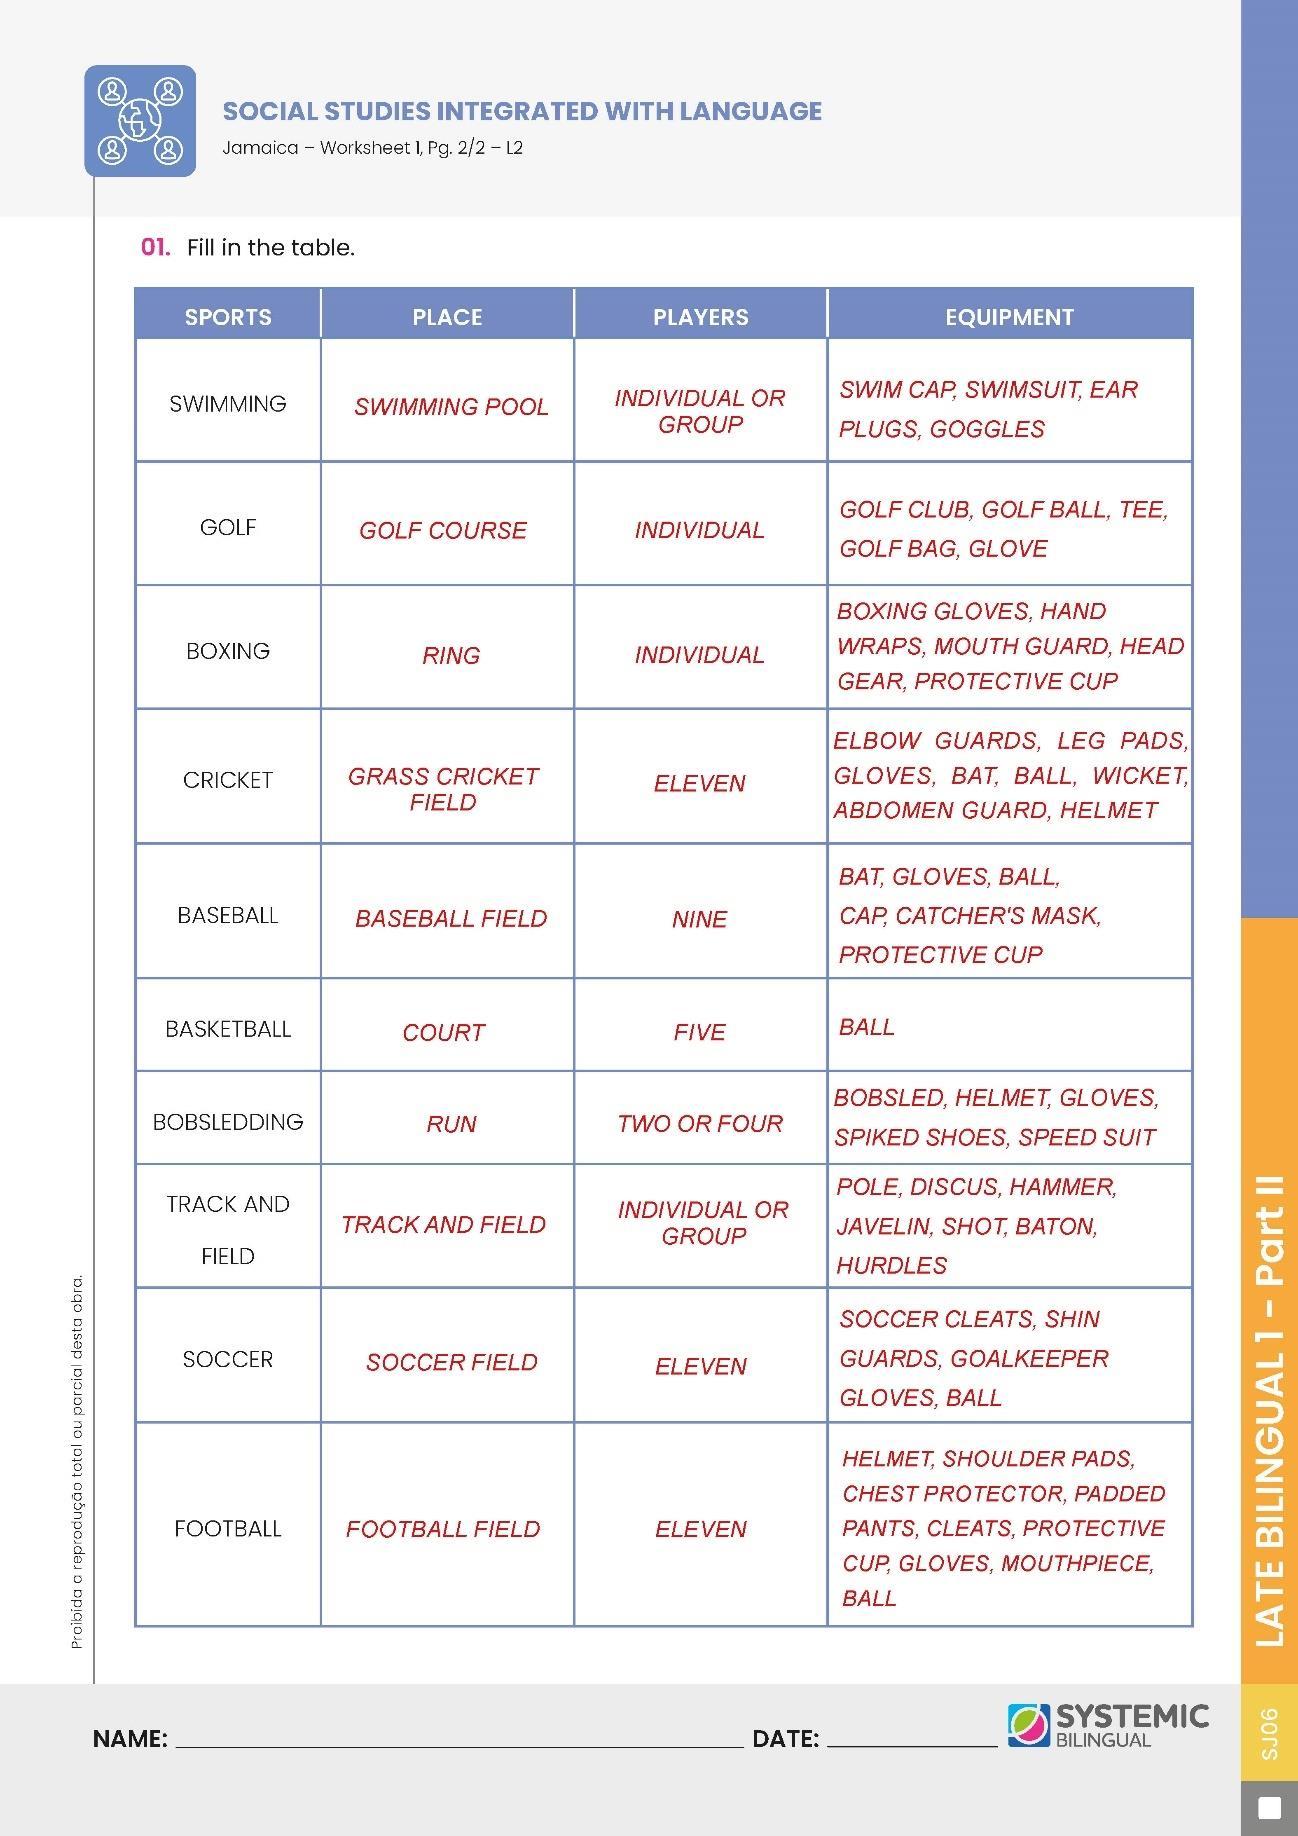
(?) “WHAT EQUIPMENT DO YOU NEED TO PLAY SOCCER?” (YOU NEED A BALL, GLOVES FOR THE GOALKEEPER, SOCCER CLEATS, SHIN GUARDS, AND A UNIFORM.)
(?) “WHERE DO YOU PLAY SOCCER?” (ON A SOCCER FIELD.)
(?) “WHAT IS YOUR FAVORITE SOCCER TEAM?” (OPEN ANSWERS.)
(?) “CAN YOU PLAY SOCCER WELL OR BADLY?” (OPEN ANSWERS. MAKE SURE THEYUSE COMPLETE ANSWERS: I CAN PLAY SOCCER WELL OR I CAN’T PLAY SOCCER WELL.)
(?) “HAVE YOU EVER SEEN A SOCCER GAME? WHEN?” (OPEN ANSWERS.)
(?) “IN YOUR OPINION WHO WAS THE BEST SOCCER PLAYER OF ALL TIME?” (OPEN ANSWERS.)
3. Repeat Procedure 2 with all sports.
4. Show students the equipment you brought to class. Elicit from them what sport uses the equipment, what part of the body they use it on or how it is used. Example: shin guards – used to protect the shins in a soccer game. Do it with all objects.
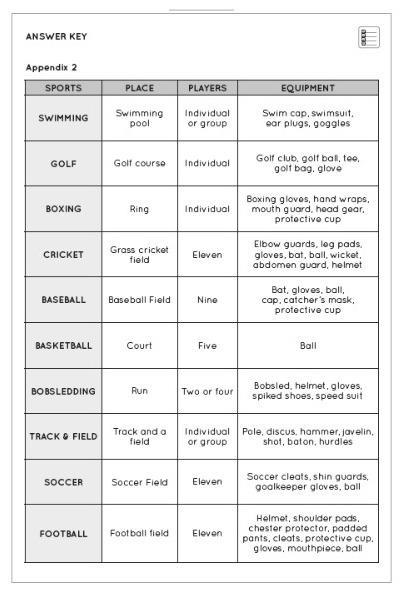
5. Show students the panel from Appendix 1. Elicit some information from them, at least one for each column.
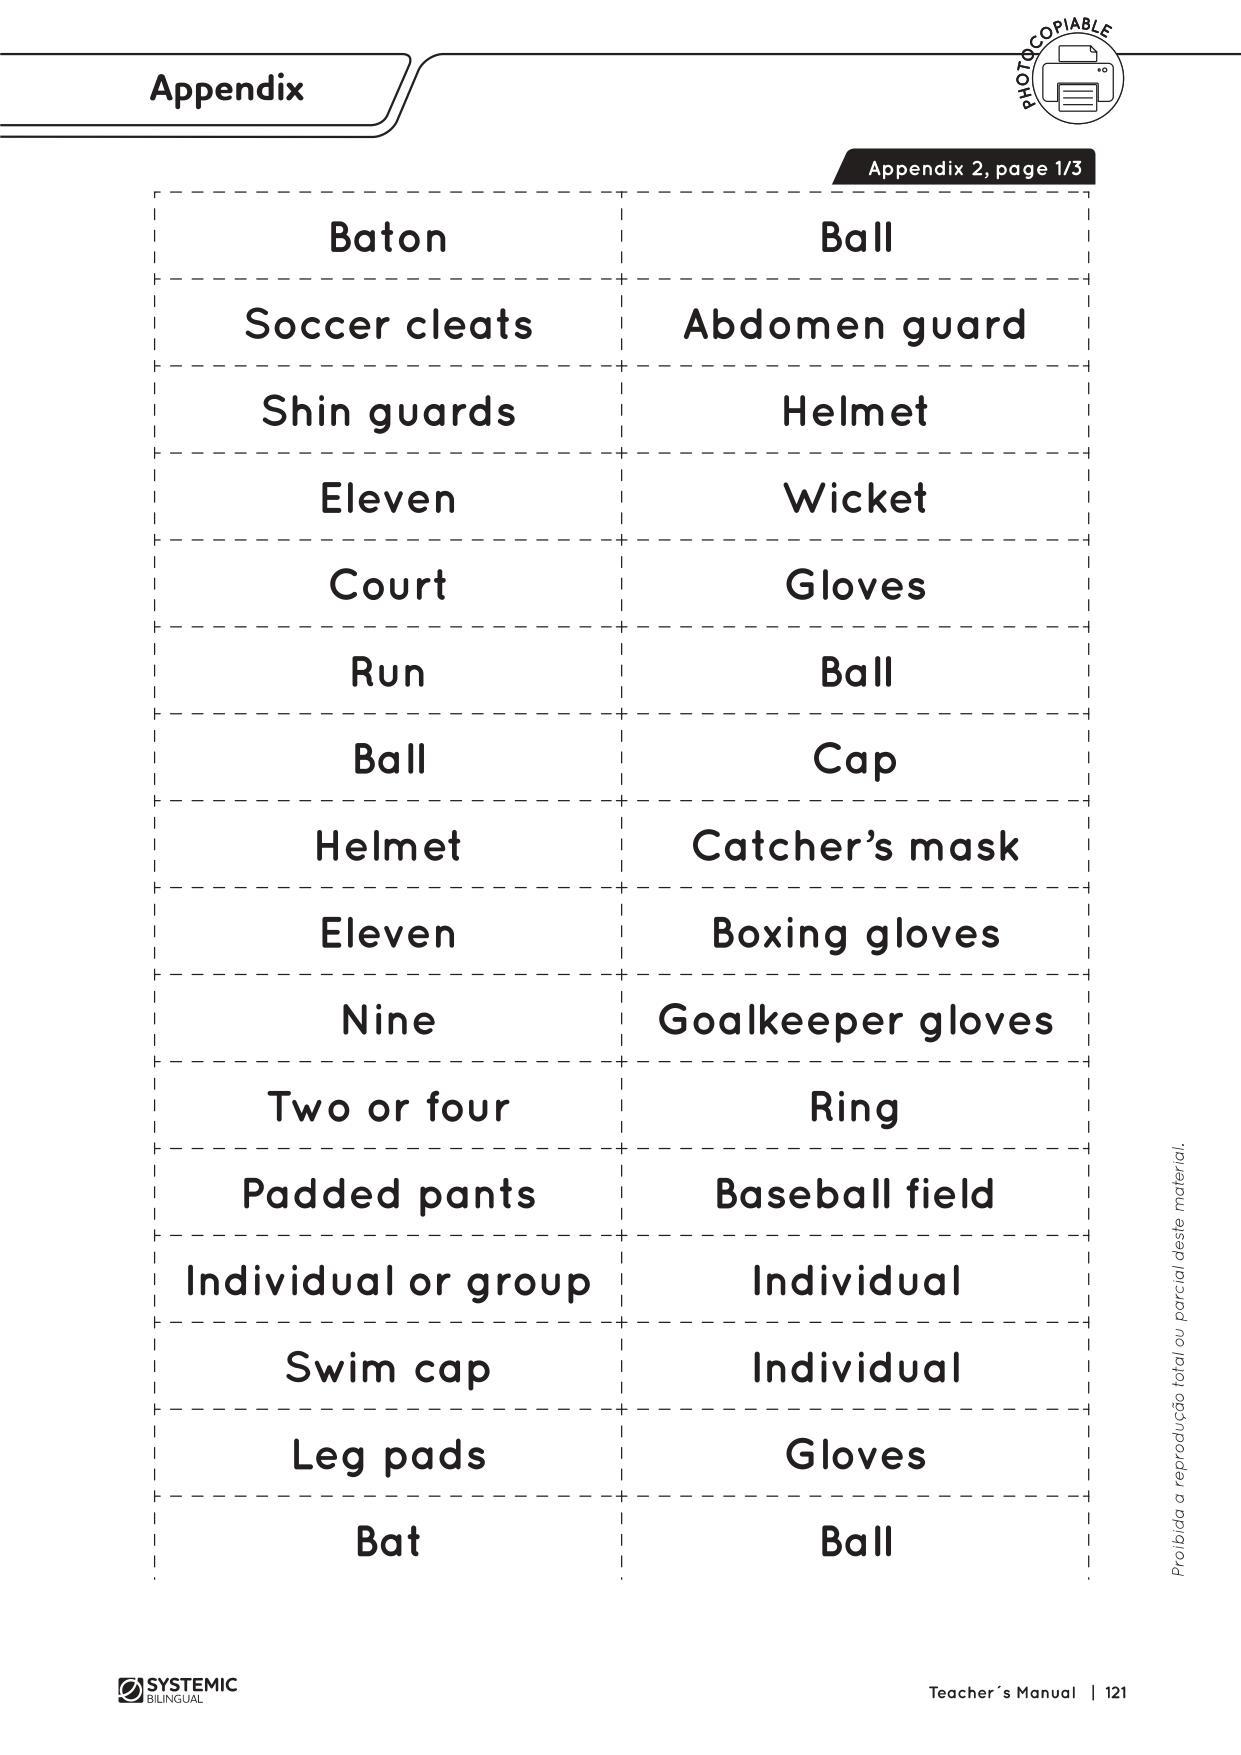
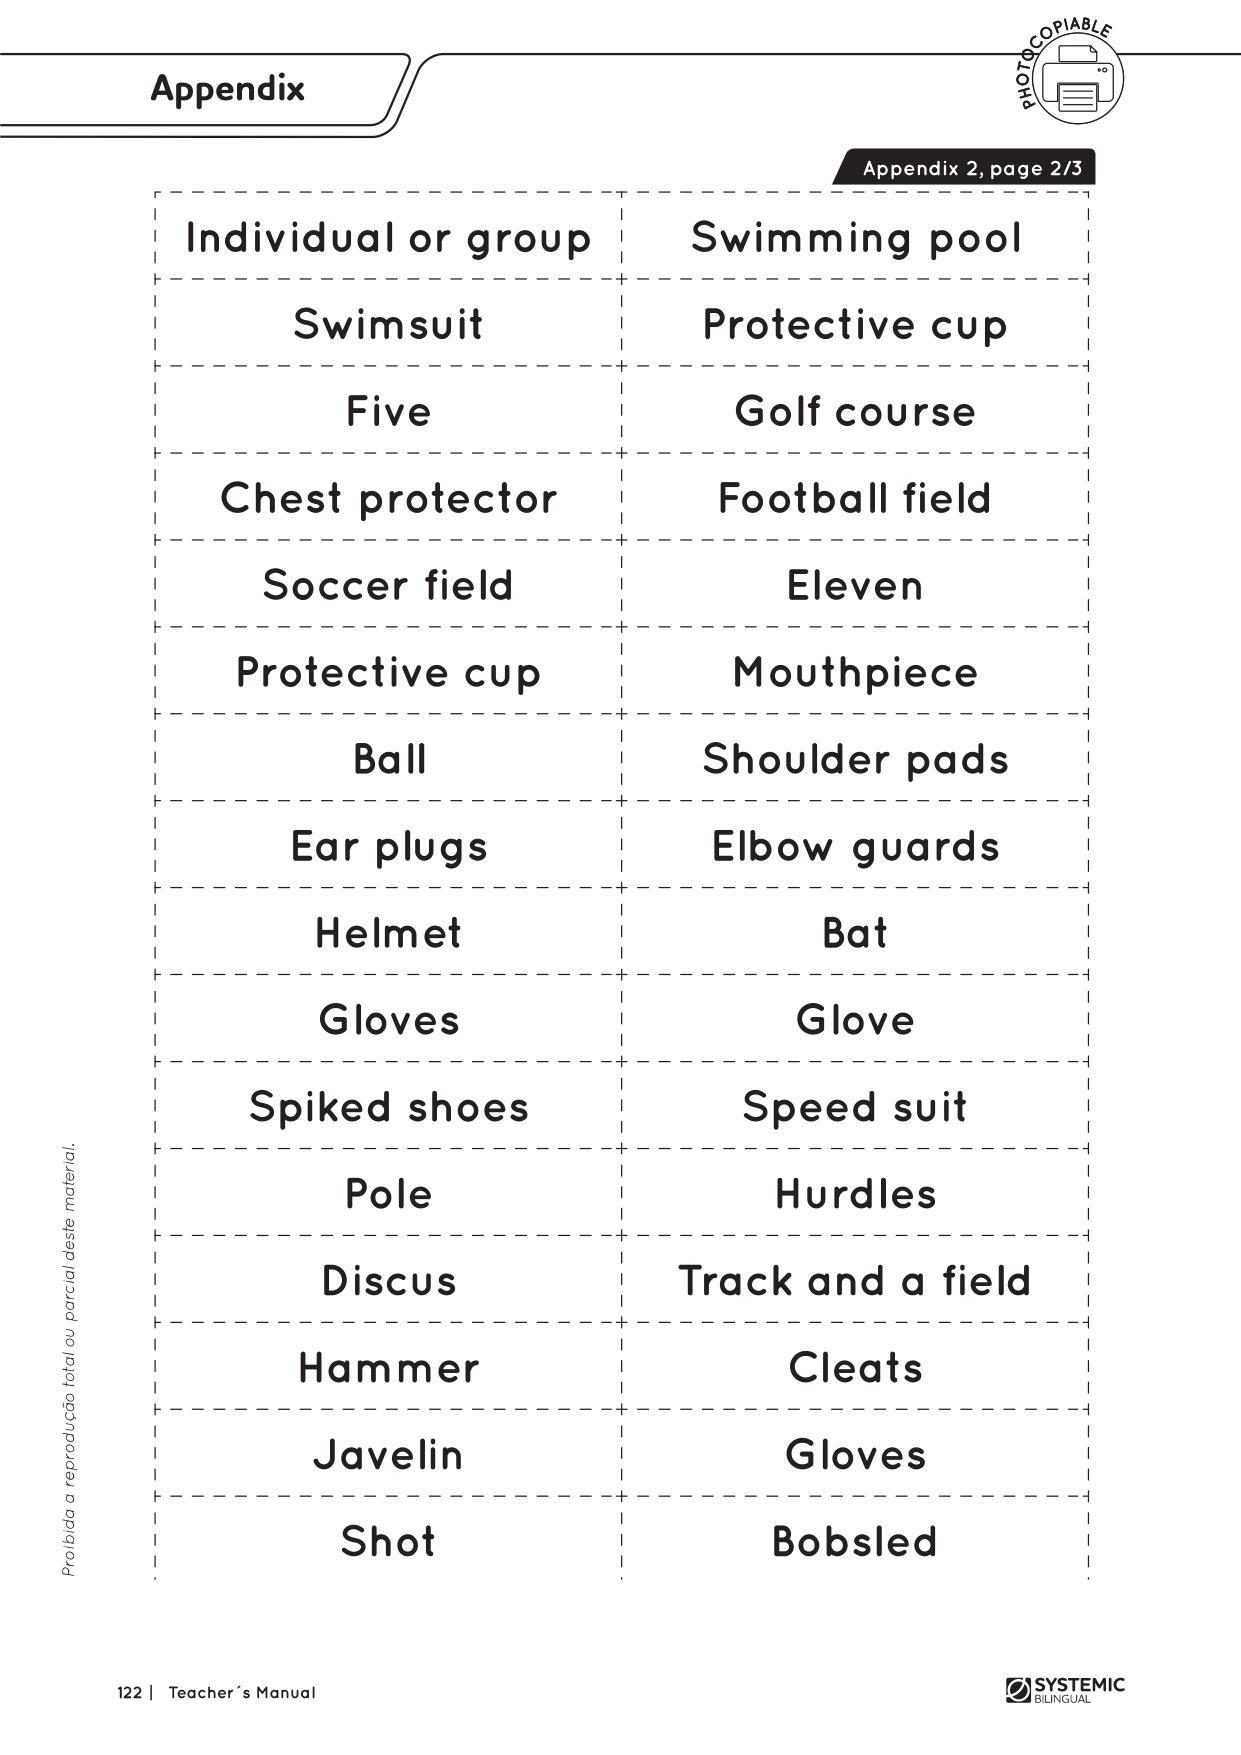
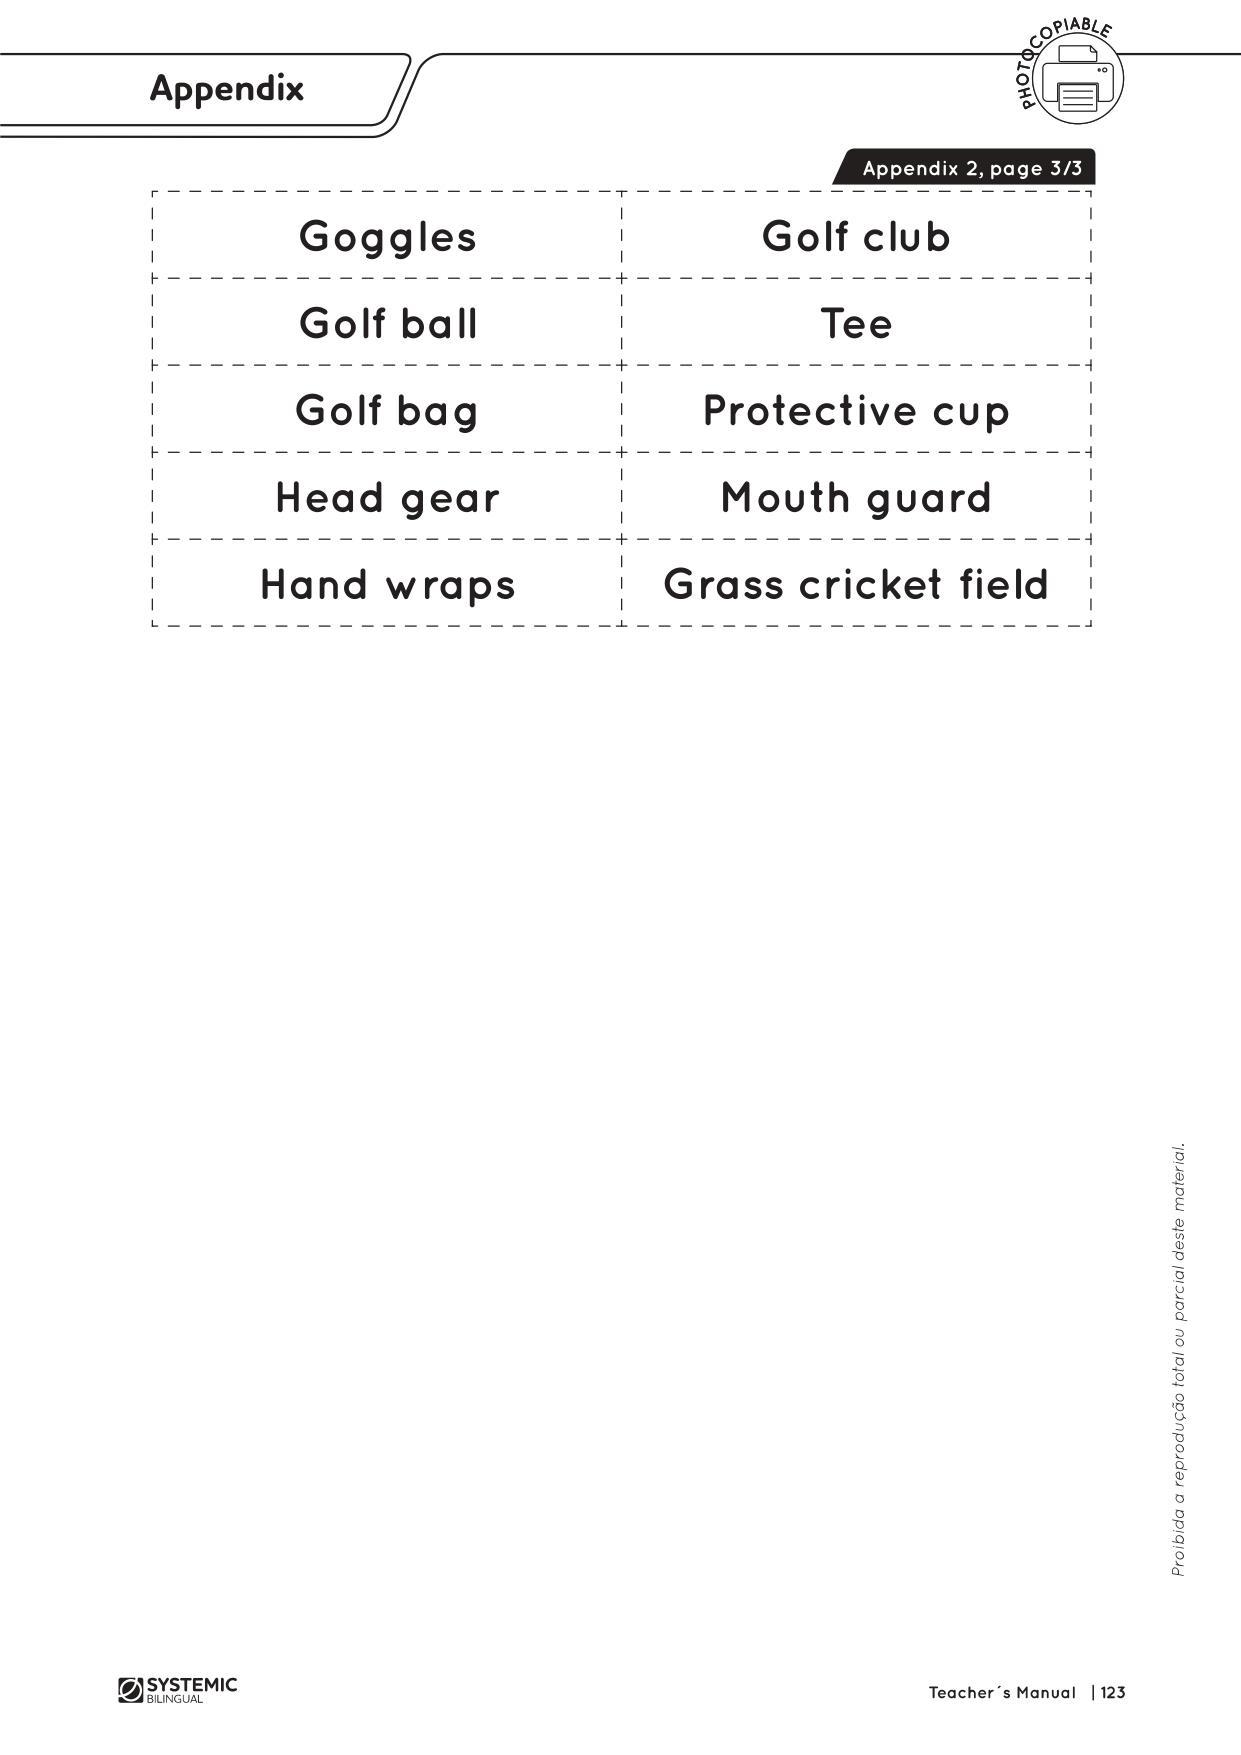
6. Hand out Appendix 2 with the names. Give students scissors and glue. Ask them to cut out the names and glue them on the correct spot. You may use glue or sticky tak. Example: head gear – place it in the boxing equipment column. You may do this activity as a game.
7. Hand out Worksheet 1, Pages 1 and 2. Ask students to answer them. Allow students a few minutes to answer. Correct them in class or do it next class if there is no time. Make sure you take out the poster board before they answer Page 2. You may show it to them at the end when they finish.
ANSWER KEY
LESSON 13
Topic: Social Studies Integrated with Language – Jamaica – L3
Lesson Type: Regular, Video
PRIOR KNOWLEDGE: Previous lessons.
KEY VOCABULARY: Vocabulary from previous class, kickball, rules, rubber ball, kick, roll, run, home, base, catch, out, ball, strike, safe, referee, pitcher, kicker, home plate, tie, scores, hit.
MATERIALS
• Flashcards - Social Studies Integrated with Language – Jamaica – L2;
• Worksheet 1, Pages 1-5 – Social Studies Integrated with Language – Jamaica – L3;
• Appendix 1 – Social Studies Integrated with Language – Jamaica – L3;
• Appendix 2, Pages 1 and 2 – Social Studies Integrated with Language – Jamaica –L3;
• Flashcards – Social Studies Integrated with Language – Jamaica – L3;
• One clipboard for each student;
• A rubber ball;
• Cuisenaire rods or playing pieces to represent the field and the players;
• Four bases;
• Suggested link: “How to play kickball” - https://s.systemic.com.br/wikihowkickball
Suggested video: “How to play kickball” - https://s.systemic.com.br/kickball
PREPARATION IN ADVANCE
• Prepare the place to be the kickball field. If there is not enough area at the school, you may do this class as a field trip. Remember you need parent authorization if you take a field trip.
• Copy and cut out the picture from Appendix 1.
• Copy and cut out the pictures from Appendix 2. Students will have to put them in order.
• For the four bases, they can be cushions, colored tape, or just their tennis shoes to mark the spots. Check Appendix 1.
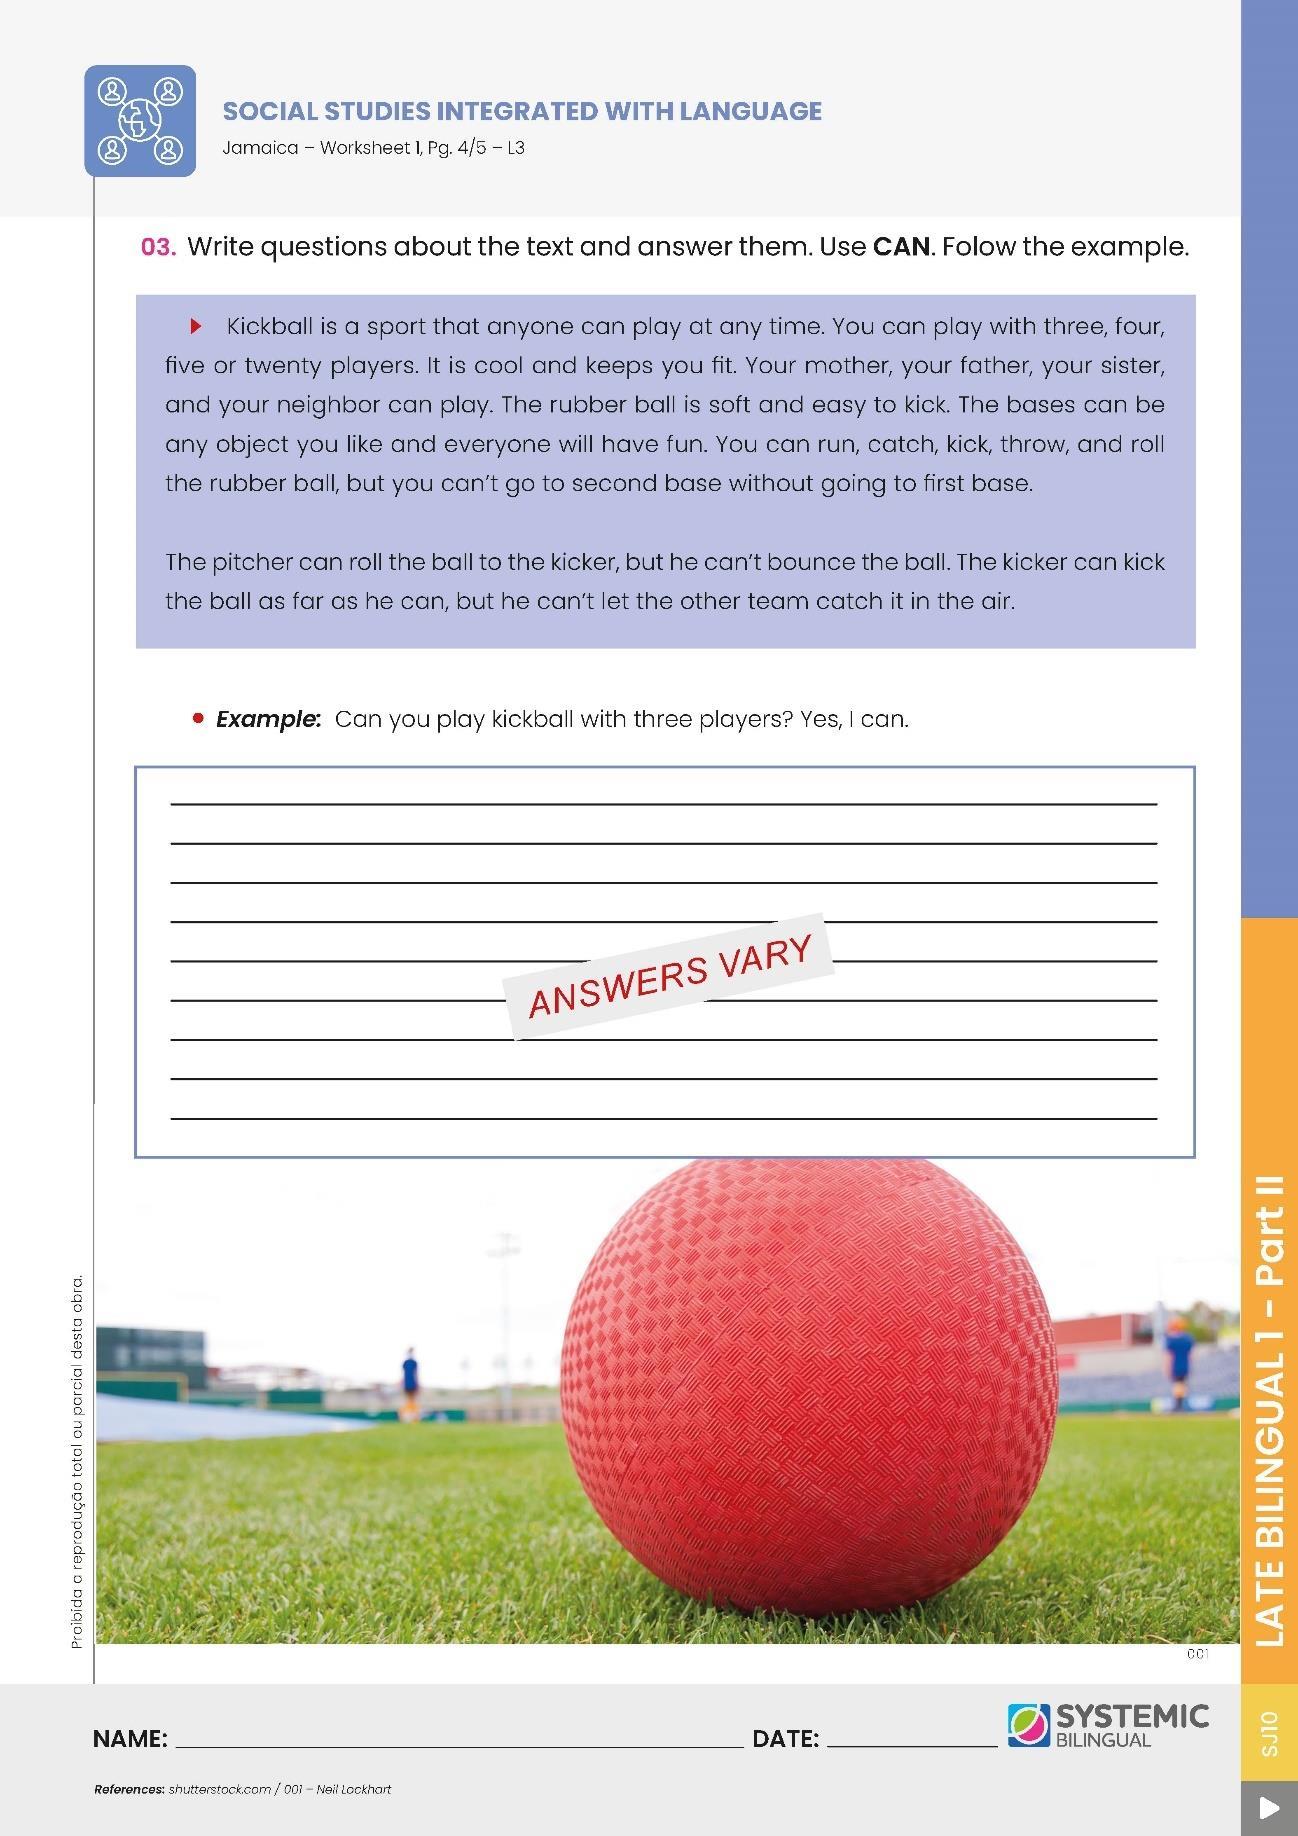
Note: Kickball is a sport that anyone can play at any time. You can play with three, four, five or twenty players. It is cool and keeps you fit. Your mother, your father, your sister, and your neighbor can play. The rubber ball is soft and easy to kick. The bases can be any object you like and everyone will have fun. You can run, catch, kick, throw, and roll the rubber ball, but you can’t go to second base without going to first base. The pitcher can roll the ball to the kicker, but he can’t bounce the ball. The kicker can kick the ball as far as he can, but he can’t let the other team hit him with the ball.
OBJECTIVES
TEACHER OBJECTIVES
• To enable students to use “can” in questions and answers
• To have students practice Simple Present tense with sports
• To review names of sports
• To have students practice kickball rules and play the game
Student Outcomes
• Review Jamaican sports
• Practice the simple present
• Use can when talking about sports
• Understand kickball rules
• Play kickball
HABILIDADES:
• (EF06LI03) Solicitar esclarecimentos em língua inglesa sobre o que não entendeu e o significado de palavras ou expressões desconhecidas.
• (EF06LI16) Construir repertório relativo às expressões usadas para o convívio social e o uso da língua inglesa em sala de aula.
• (EF07LI01) Interagir em situações de intercâmbio oral para realizar as atividades em sala de aula, de forma respeitosa e colaborativa, trocando ideias e engajando-se em brincadeiras e jogos.
• (EF06LI19) Utilizar o presente do indicativo para identificar pessoas (verbo to be) e descrever rotinas diárias.
• (EF07LI03) Mobilizar conhecimentos prévios para compreender texto oral.
• (EF07LI20) Empregar, de forma inteligível, o verbo modal can para descrever habilidades (no presente e no passado).
• (EF12EF05) Experimentar e fruir, prezando pelo trabalho coletivo e pelo protagonismo, a prática de esportes de marca e de precisão, identificando os elementos comuns a esses esportes.
PROCEDURES
1. Elicit from students the names of the sports, names of players, number of players, names of equipment, etc. Use flashcards from Lesson 2.
2. Elicit from students the baseball rules. Elicit the equipment, the number of players, the place, etc.
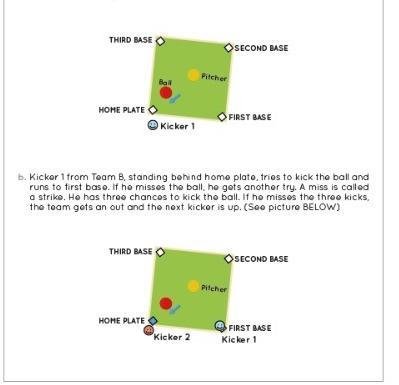
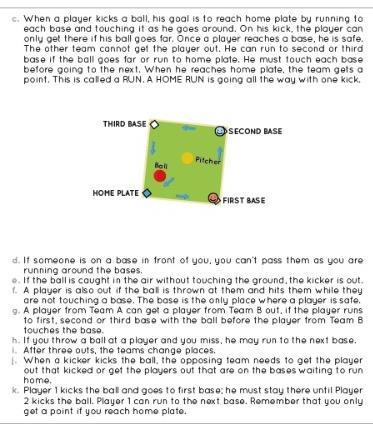
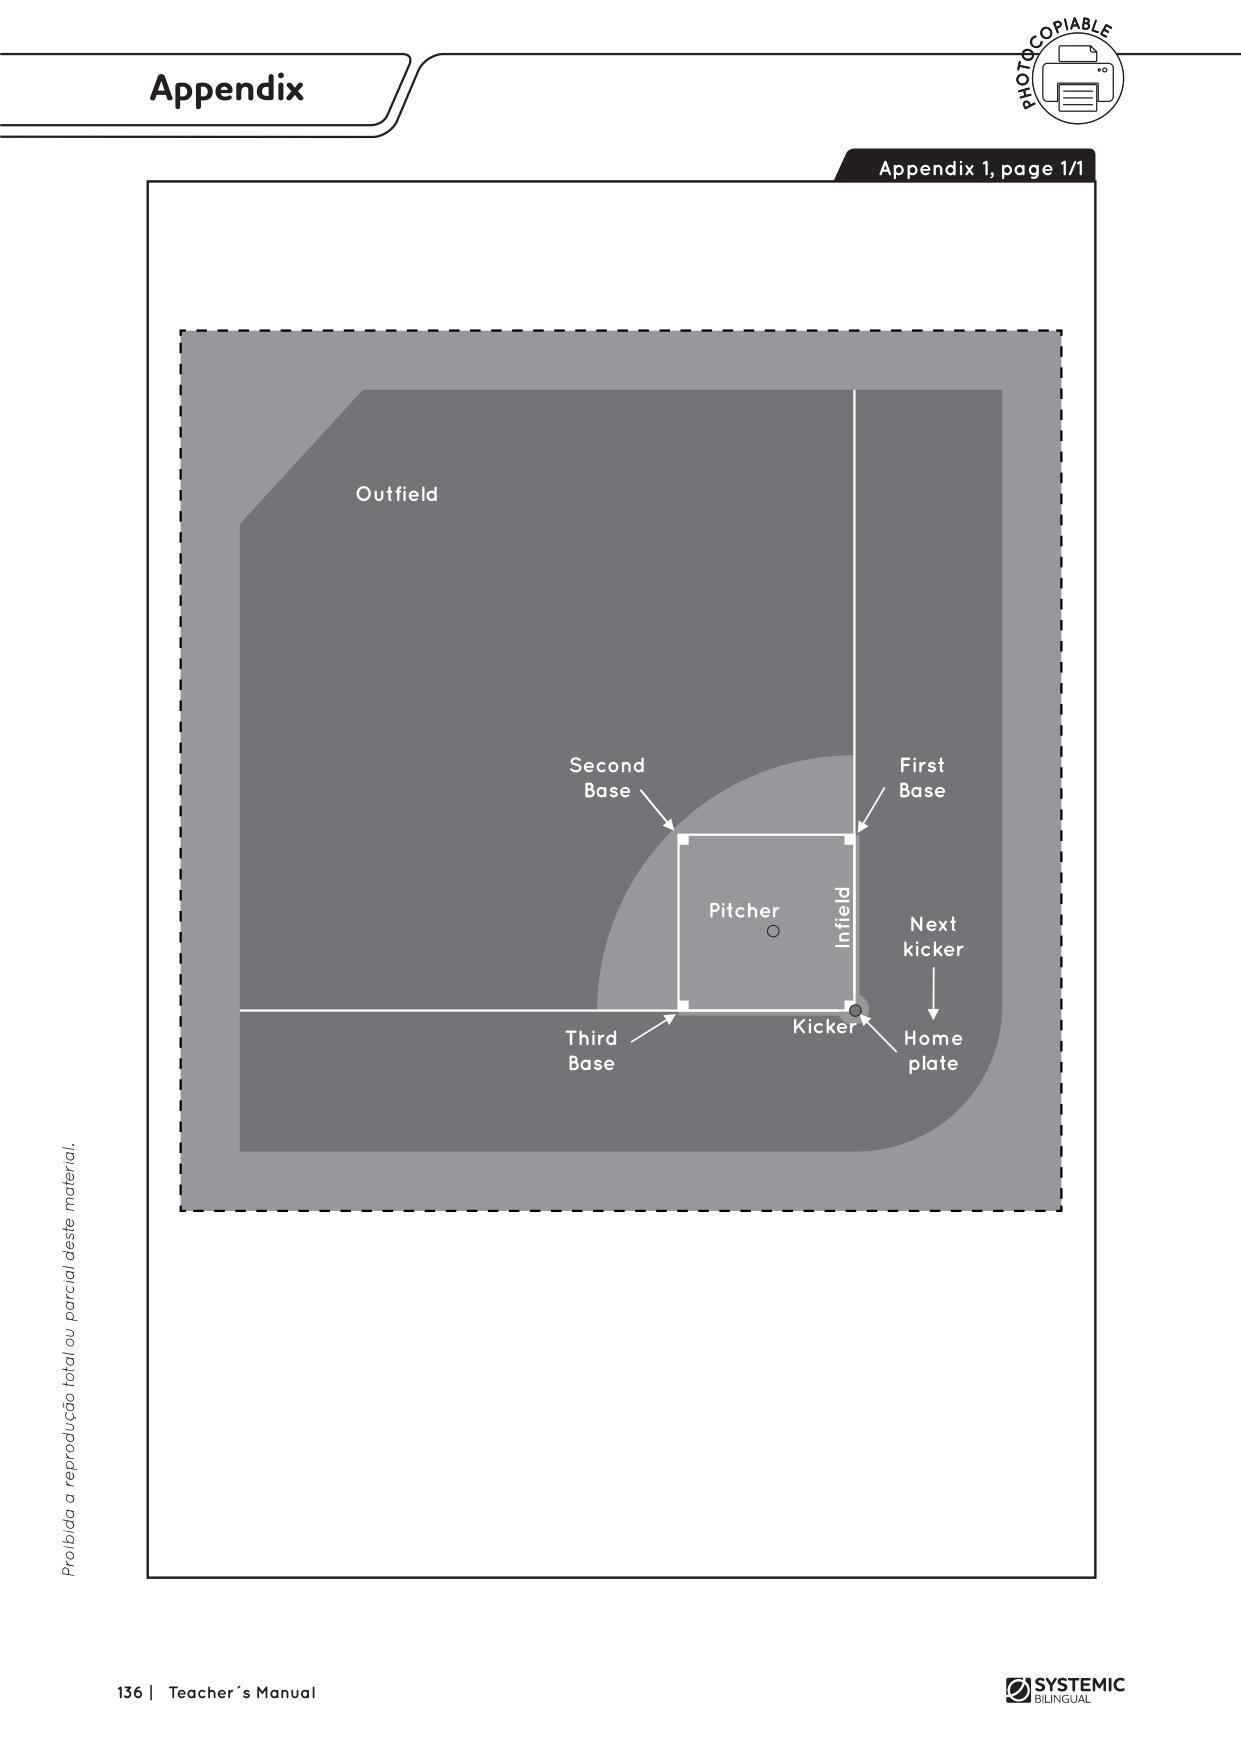
3. Tell students they are going to learn how to play a game similar to baseball, called kickball. Show them the picture of the field from Appendix 1. Show them the spot in the middle of the field, that place is for the pitcher. He is going to roll (show the action using the ball) the ball to the person on the other team standing behind home plate (show the spot on the picture representing the kicker). The other bases are first, second, and third base. Practice the names of the bases and the players. Remember that first base is always the first on the right (See Appendix 1). Tell students the rules are really simple:
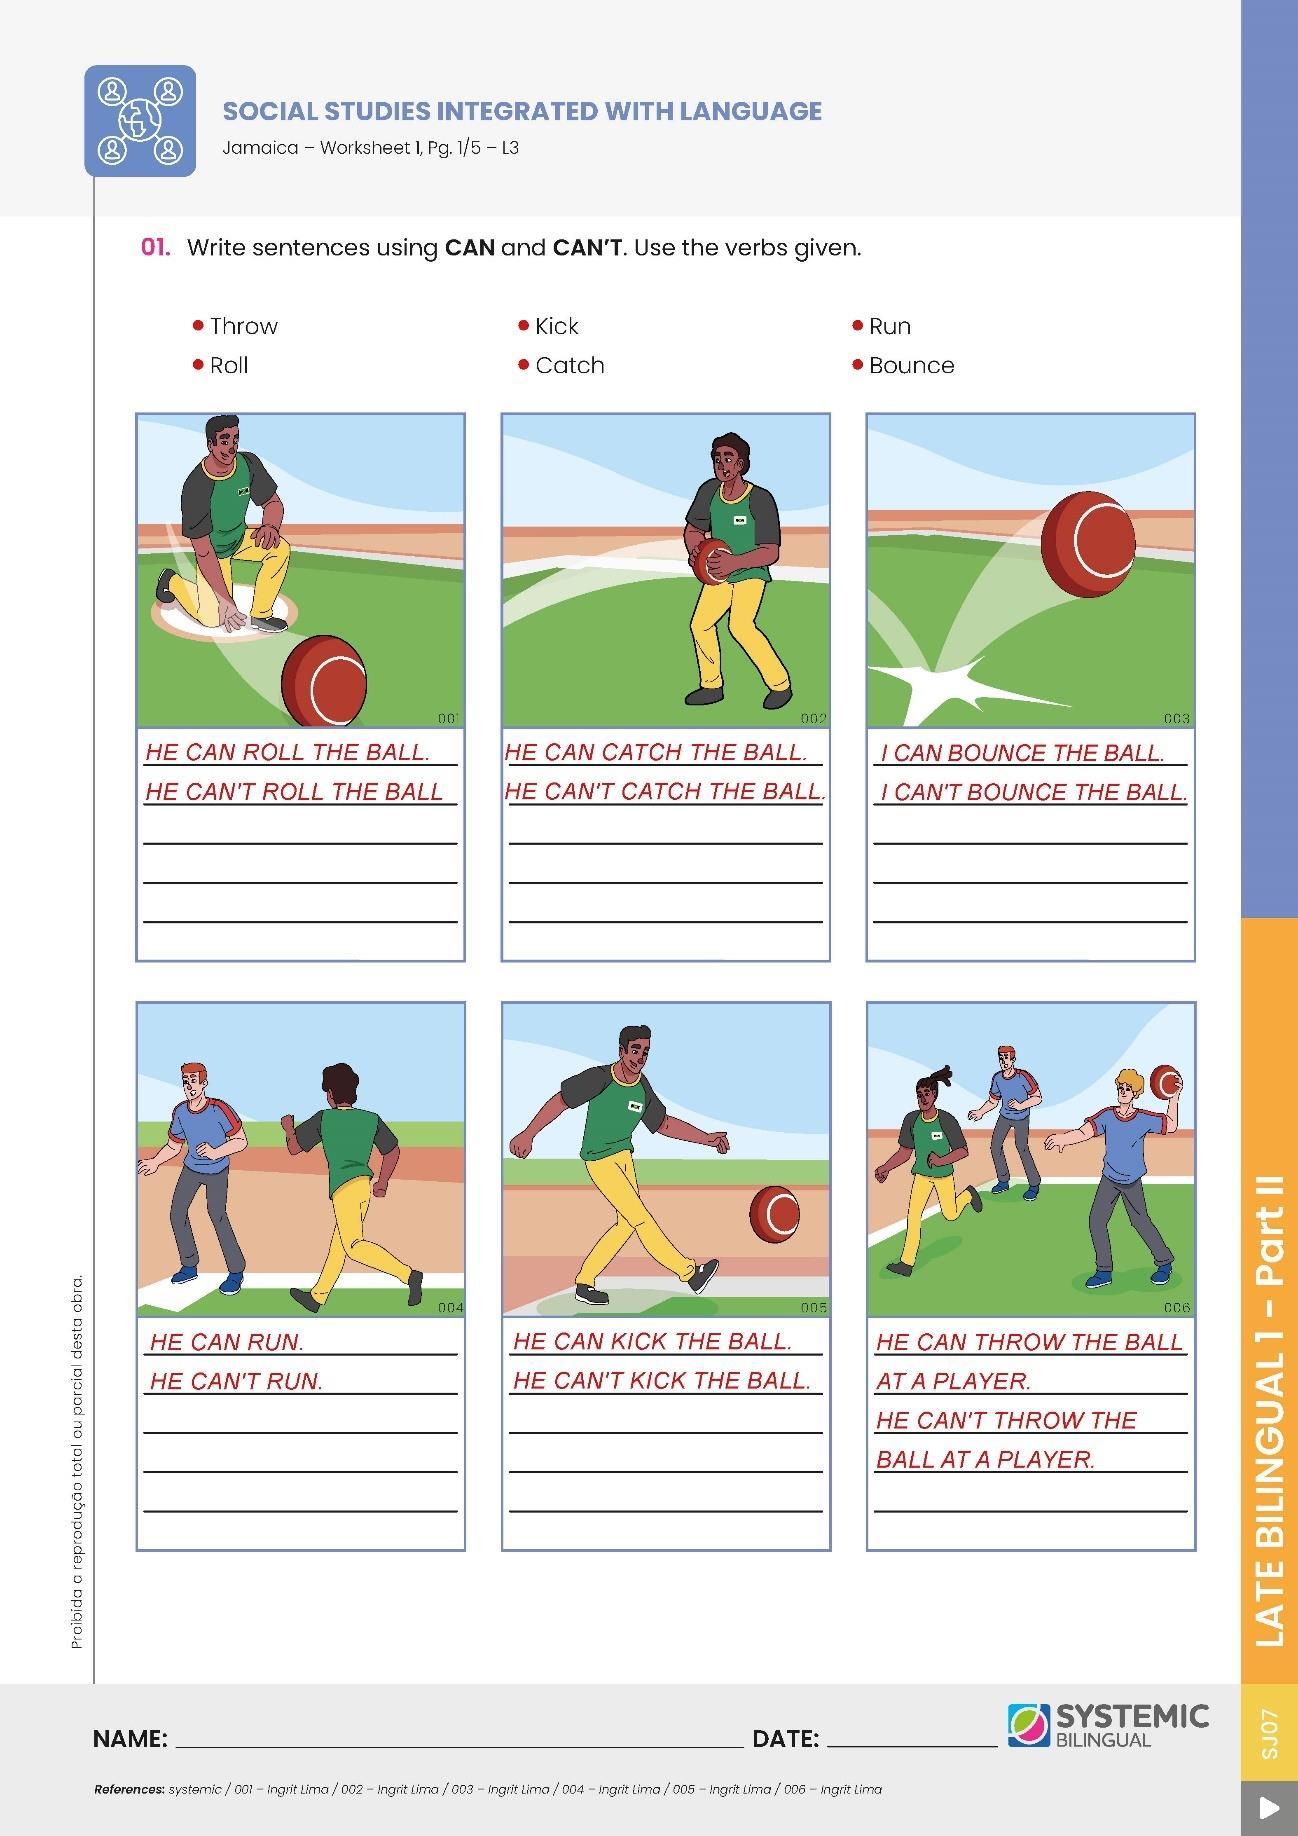
5. 4. Elicit the rules using “can” and “can’t”. Use the first set of flashcards for this class to help them.
• You can pitch from the center of the field.
• You can’t pitch from the home plate.
• The pitcher can roll the ball
• The pitcher can’t bounce the ball.
• You can kick the ball and run to 1st base.
• You can’t kick the ball and run to 2nd base.
• You can throw the ball at someone who is running from one base to another.
• You can’t throw the ball at someone who is on a base.
5. Take students to a multimedia class or the computer lab. Play the video about kickball. Ask them to remember the names of the positions, the equipment, stop the video as you think it is necessary. Show them the runs, the bases, the outs, etc.
6. Take students outside or take them on a field trip. Separate your class into two teams. Go to the place where you chose to play. Elicit from them the names of the bases and where they are located. Ask them who is going to be the kicker and the pitcher. Elicit the rules using “can.” Play the game and reward the teams. Have fun!
7. Hand out Worksheet 1, Pages 1. Correct it in class.
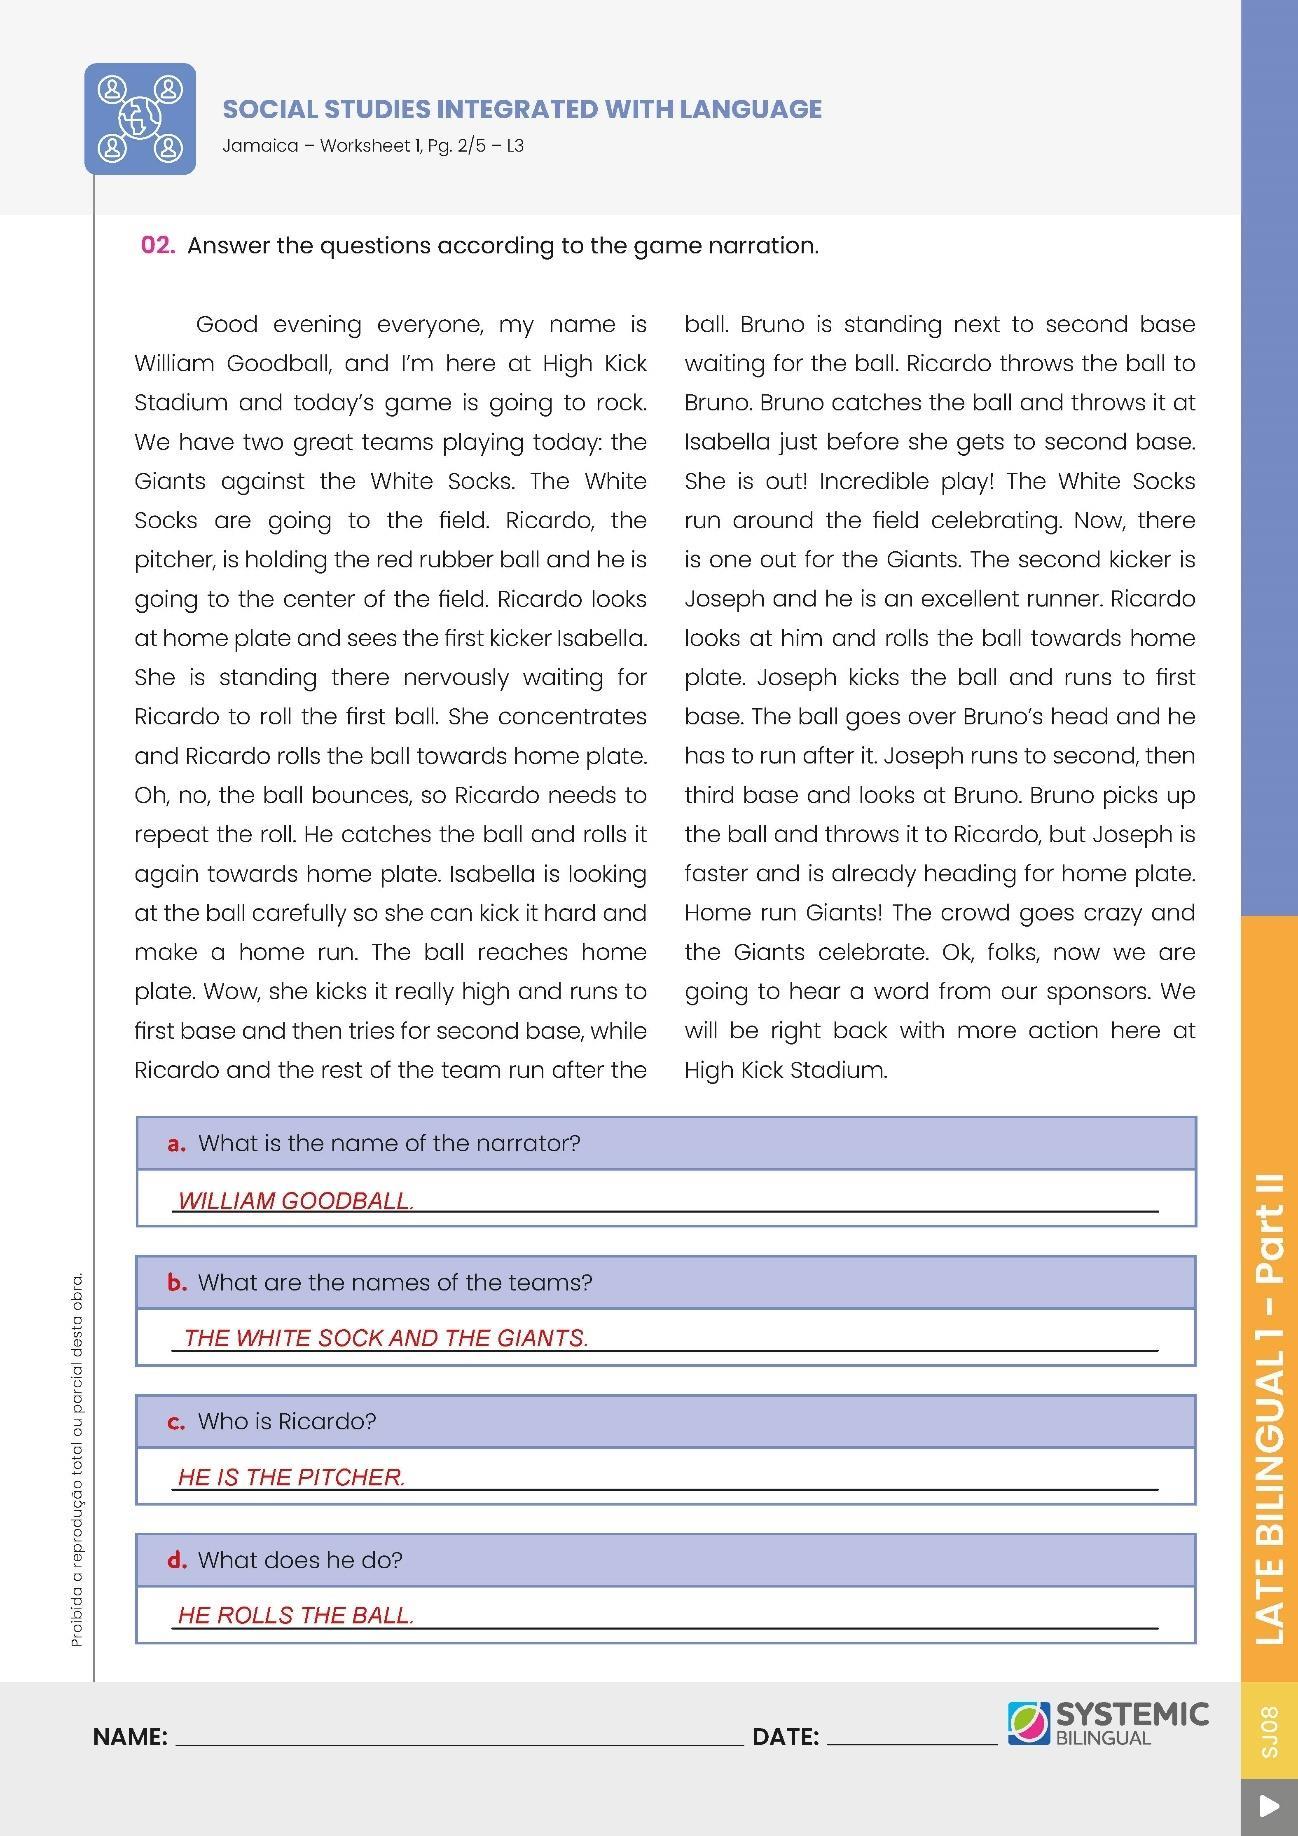
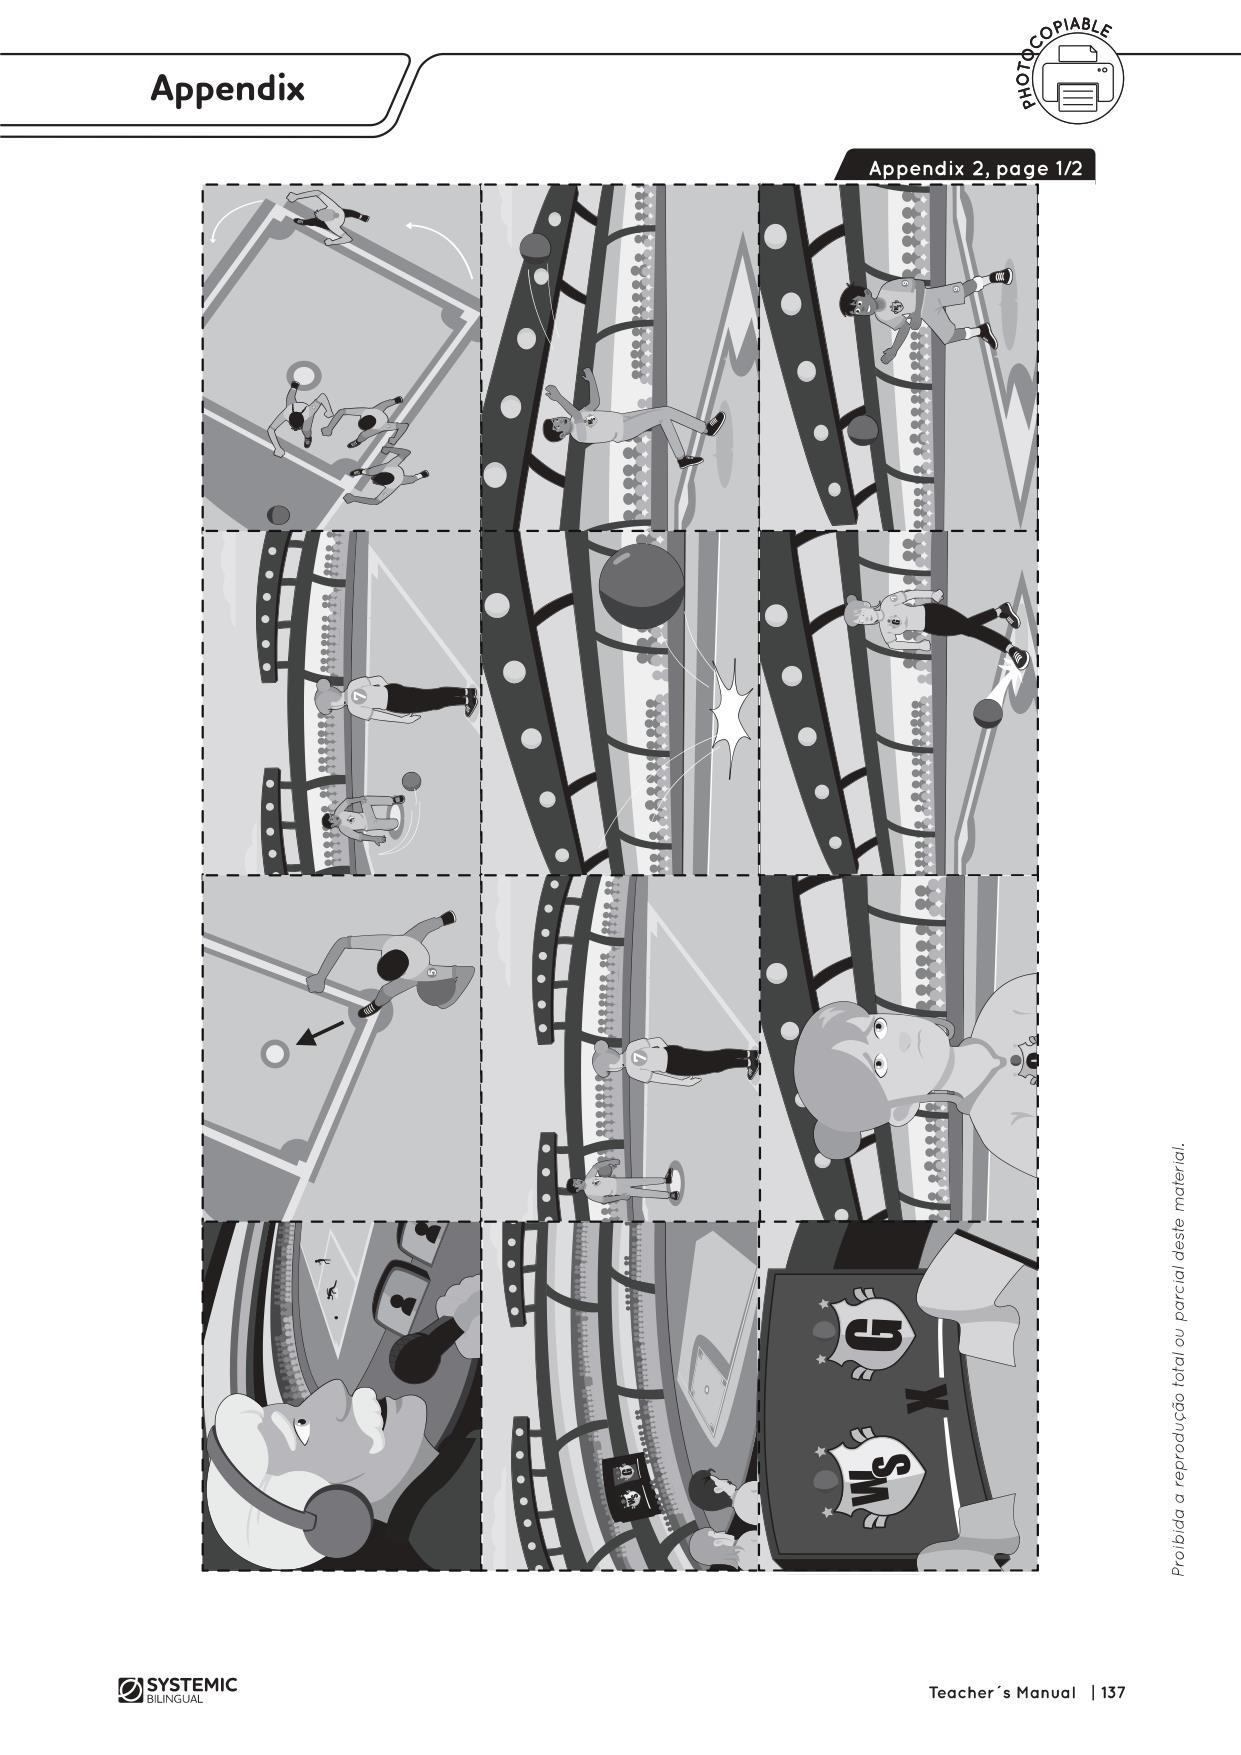
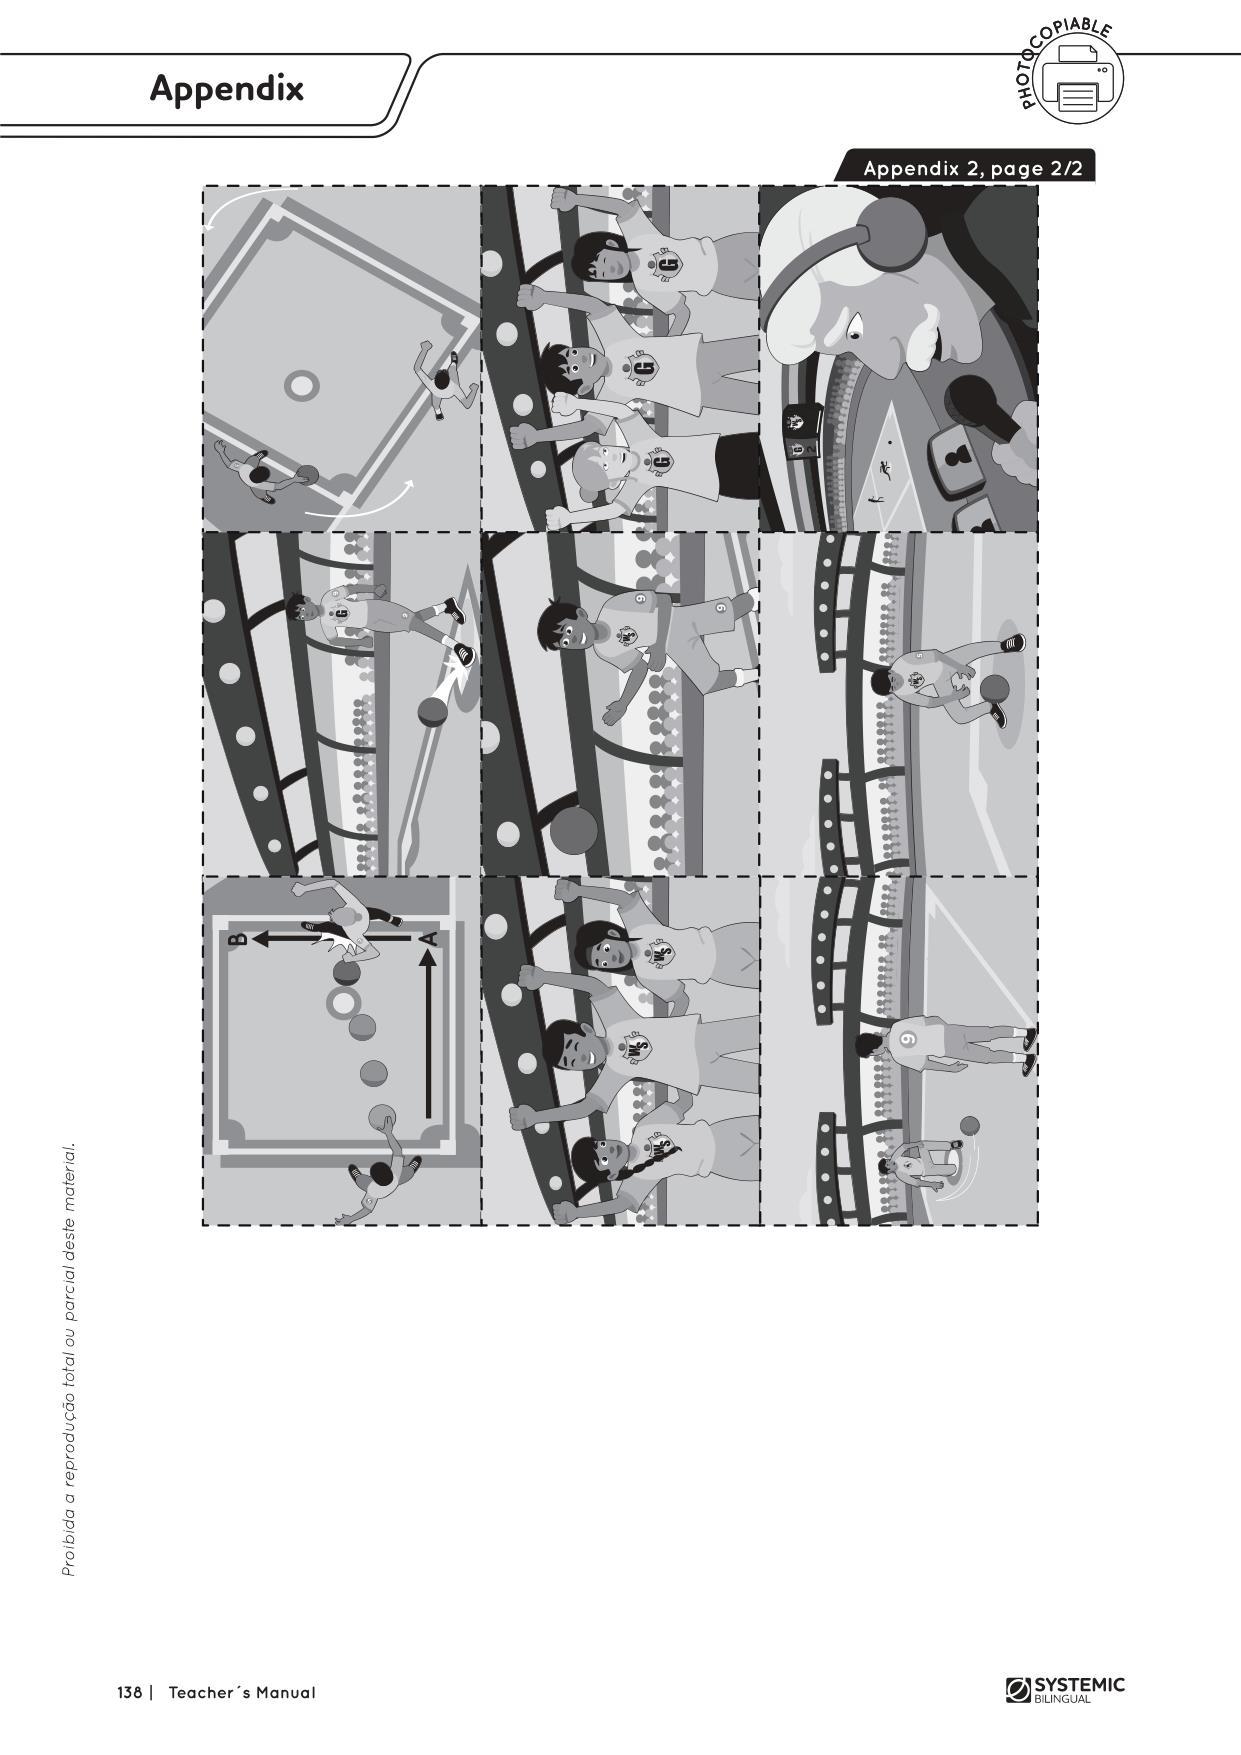
8. Show students the pictures from Appendix 2. Elicit from them what happens in each picture. Make sure they use the vocabulary taught, “can”, and the verbs in the Simple Present. Tell them they are going to listen to a game narration.
9. Divide the class into two groups. Hand out the pictures from Appendix 2 (one set for each group) and read the game narration as if you were the narrator. (Follow the narration on Worksheet 1, Page 2.) Ask students to put the pictures in the correct order. As you read it, ask questions about the game such as:
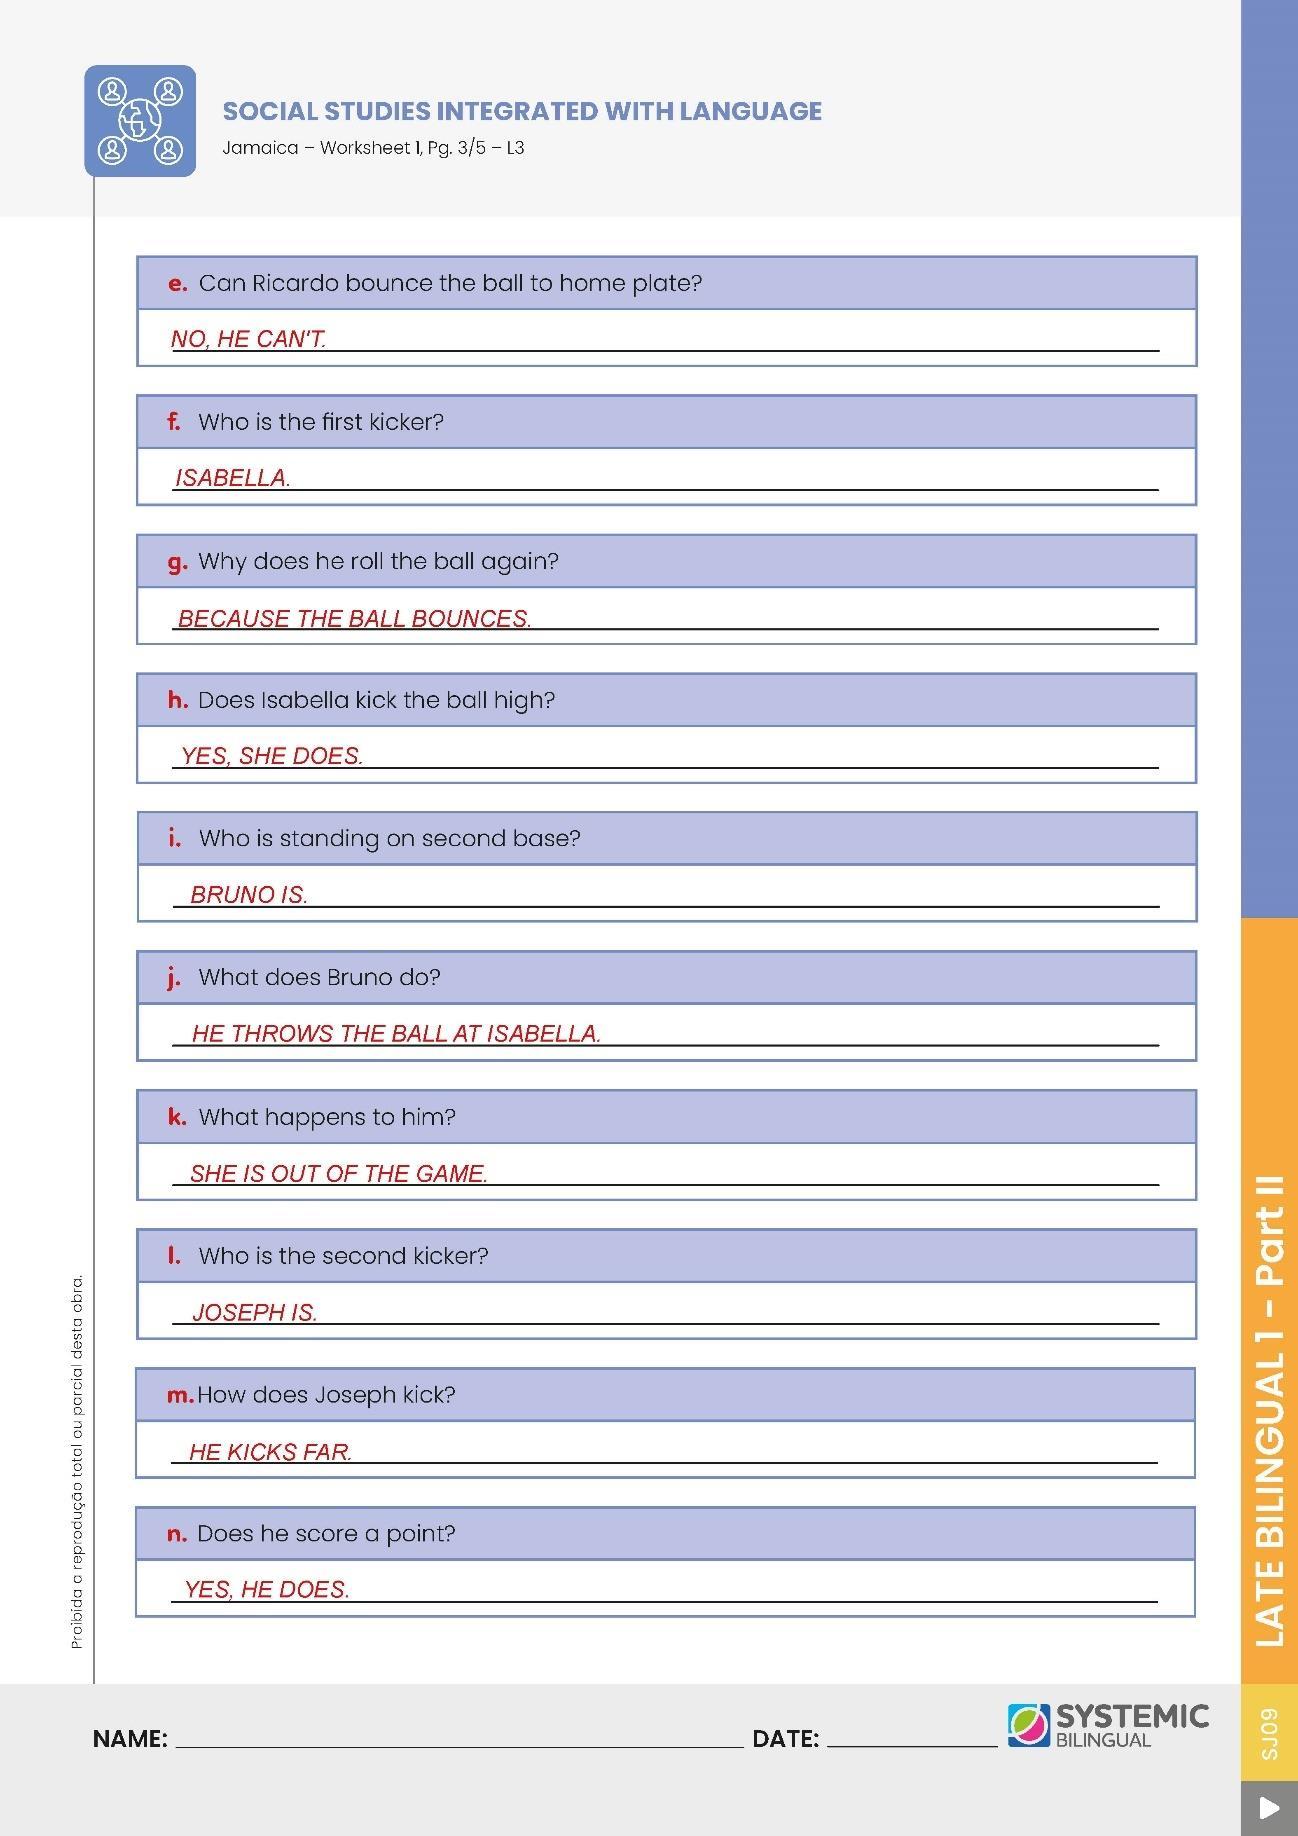
(?) “WHAT IS THE NAME OF THE NARRATOR?” (WILLIAM GOODBALL.)
(?) “WHAT ARE THE NAMES OF THE TEAMS?” (THE WHITE SOCKS AND THE GIANTS.)
(?) “WHO IS RICARDO?” (HE IS THE PITCHER.)
(?) “WHAT DOES HE DO?” (HE ROLLS THE BALL.)
(?) “CAN RICARDO BOUNCE THE BALL TO HOME PLATE?” (NO, HE CAN’T.)
(?) “WHO IS THE FIRST KICKER?” (ISABELLA.)
(?) “WHY DOES HE ROLL THE BALL AGAIN?” (BECAUSE THE BALL BOUNCES.)
(?) “DOES ISABELLA KICK THE BALL HIGH?” (YES, SHE DOES.)
(?) “WHO IS STANDING ON SECOND BASE?” (BRUNO IS.)
(?) “WHAT DOES BRUNO DO?” (HE THROWS THE BALL AT ISABELLA.)
(?) “WHAT HAPPENS TO HER?” (SHE IS OUT OF THE GAME.)
(?) “WHO IS THE SECOND KICKER?” (JOSEPH IS.)
(?) “HOW DOES JOSEPH KICK?” (HE KICKS FAR.)
(?) “DOES HE SCORE A POINT?” (YES, HE DOES.)
When the activity is done, show students the second set of flashcards for this class with the correct order of the pictures for them to check their answers.
10. Hand out Worksheet 1, Pages 2 and 3. Ask them to circle the verbs they see in the text. Ask for a volunteer to read the sentences. Write some of them on the board. Elicit from them the verbs in the sentences. Look at the sentences below, you may use them as examples. Ask them to explain the difference between the two sentences. Ask them to identify the verbs and explain the difference between them. Ask them why there is an “S” in the second sentence and not in the first. Tell them that when we use can in the third person (she, he, and it) the verb maintains its form, but in the second sentence they can see the difference.
– She can kick it hard and make a home run.
– He catches the ball and rolls it again towards home plate.
– The White Socks run around the field celebrating their play.
Elicit from them why in the third sentence the verb does not change.
11. Allow students some time to answer Worksheet 1, Pages 2 and 3. Correct the worksheet as a class.
12. Hand out Worksheet 1, Page 4, and allow students some time to complete it. Correct it together.
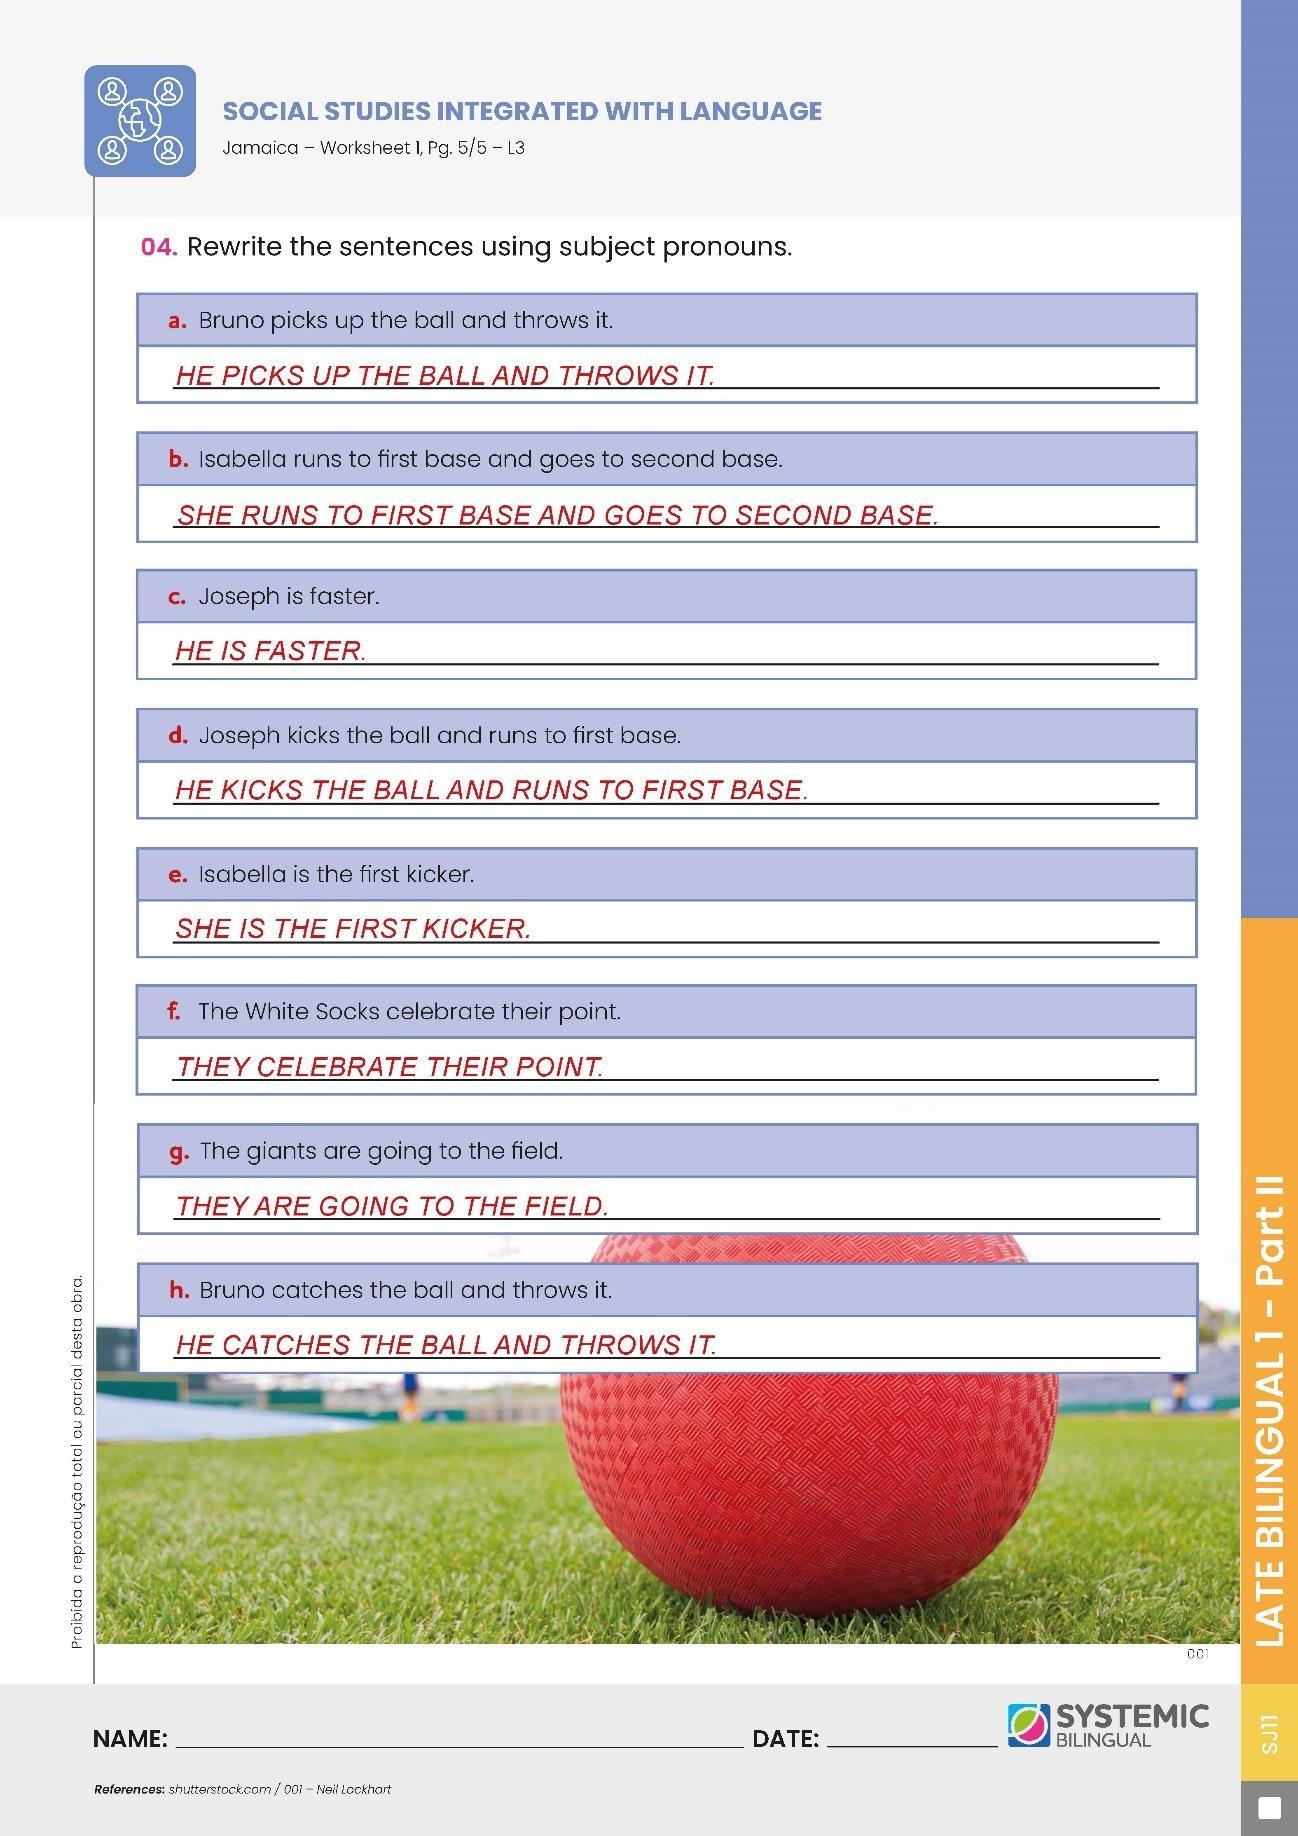
13. Write the following sentences on the board:
– Joseph kicks the ball and runs to first base. He kicks the ball and runs to first base.
– Ricardo looks at home plate. He looks at home plate.
– The White Socks run around the field celebratingtheir play. They run around the field celebrating their play.
Elicit from students the names of the players in the sentences on the board. Ask them, “if you substitute the names for the subject pronoun, how will the sentence be read?” Write the sentence below. Ask them what the subject pronoun would be.
– The White Socks run around the field celebrating their play.
– They run around the field celebrating their play.
14. Hand out Worksheet 1, Page 5. Ask students to answer it using subject pronouns. Correct it on the board.
Good evening everyone, my name is William Goodball, and I’m here at High Kick Stadium and today’s game is going to rock. We have two great teams playing today: the Giants against the White Socks. The White Socks are going to the field. Ricardo, the pitcher, is holding the red rubber ball and he is going to the center of the field. Ricardo looks at home plate and sees the first kicker Isabella. She is standing there nervously waiting for Ricardo to roll the first ball. She concentrates and Ricardo rolls the ball towards home plate. Oh, no, the ball bounces, so Ricardo needs to repeat the roll. He catches the ball and rolls it again towards home plate. Isabella is looking at the ball carefully so she can kick it hard and make a home run. The ball reaches home plate. Wow, she kicks it really high and runs to first base and then tries for second base, while Ricardo and the rest of the team run after the ball. Bruno is standing next to second base waiting for the ball. Ricardo throws the ball to Bruno. Bruno catches the ball and throws it at Isabella just before she gets to second base. She is out!Incredible play! The White Socks run around the field celebrating. Now, there is one out for the Giants. The second kicker is Joseph and he is an excellent runner. Ricardo looks at him and rolls the ball towards home plate. Joseph kicks the ball and runs to first base. The ball goes over Bruno’s head and he has to run after it. Joseph runs to second then third base and looks at Bruno. Bruno picks up the ball and throws it to Ricardo, but Joseph is faster and is already heading for home plate. Home run Giants! The crowd goes crazy and the Giants celebrate. Ok, folks, now we are going to hear a word from our sponsors. We will be right back with more action here at High Kick Stadium.
ANSWER KEY
LESSON 14
Topic: Social Studies Integrated with Language – Jamaica – Jamaican Cake – L4
Lesson Type: Cooking
PRIOR KNOWLEDGE: Previous lessons.
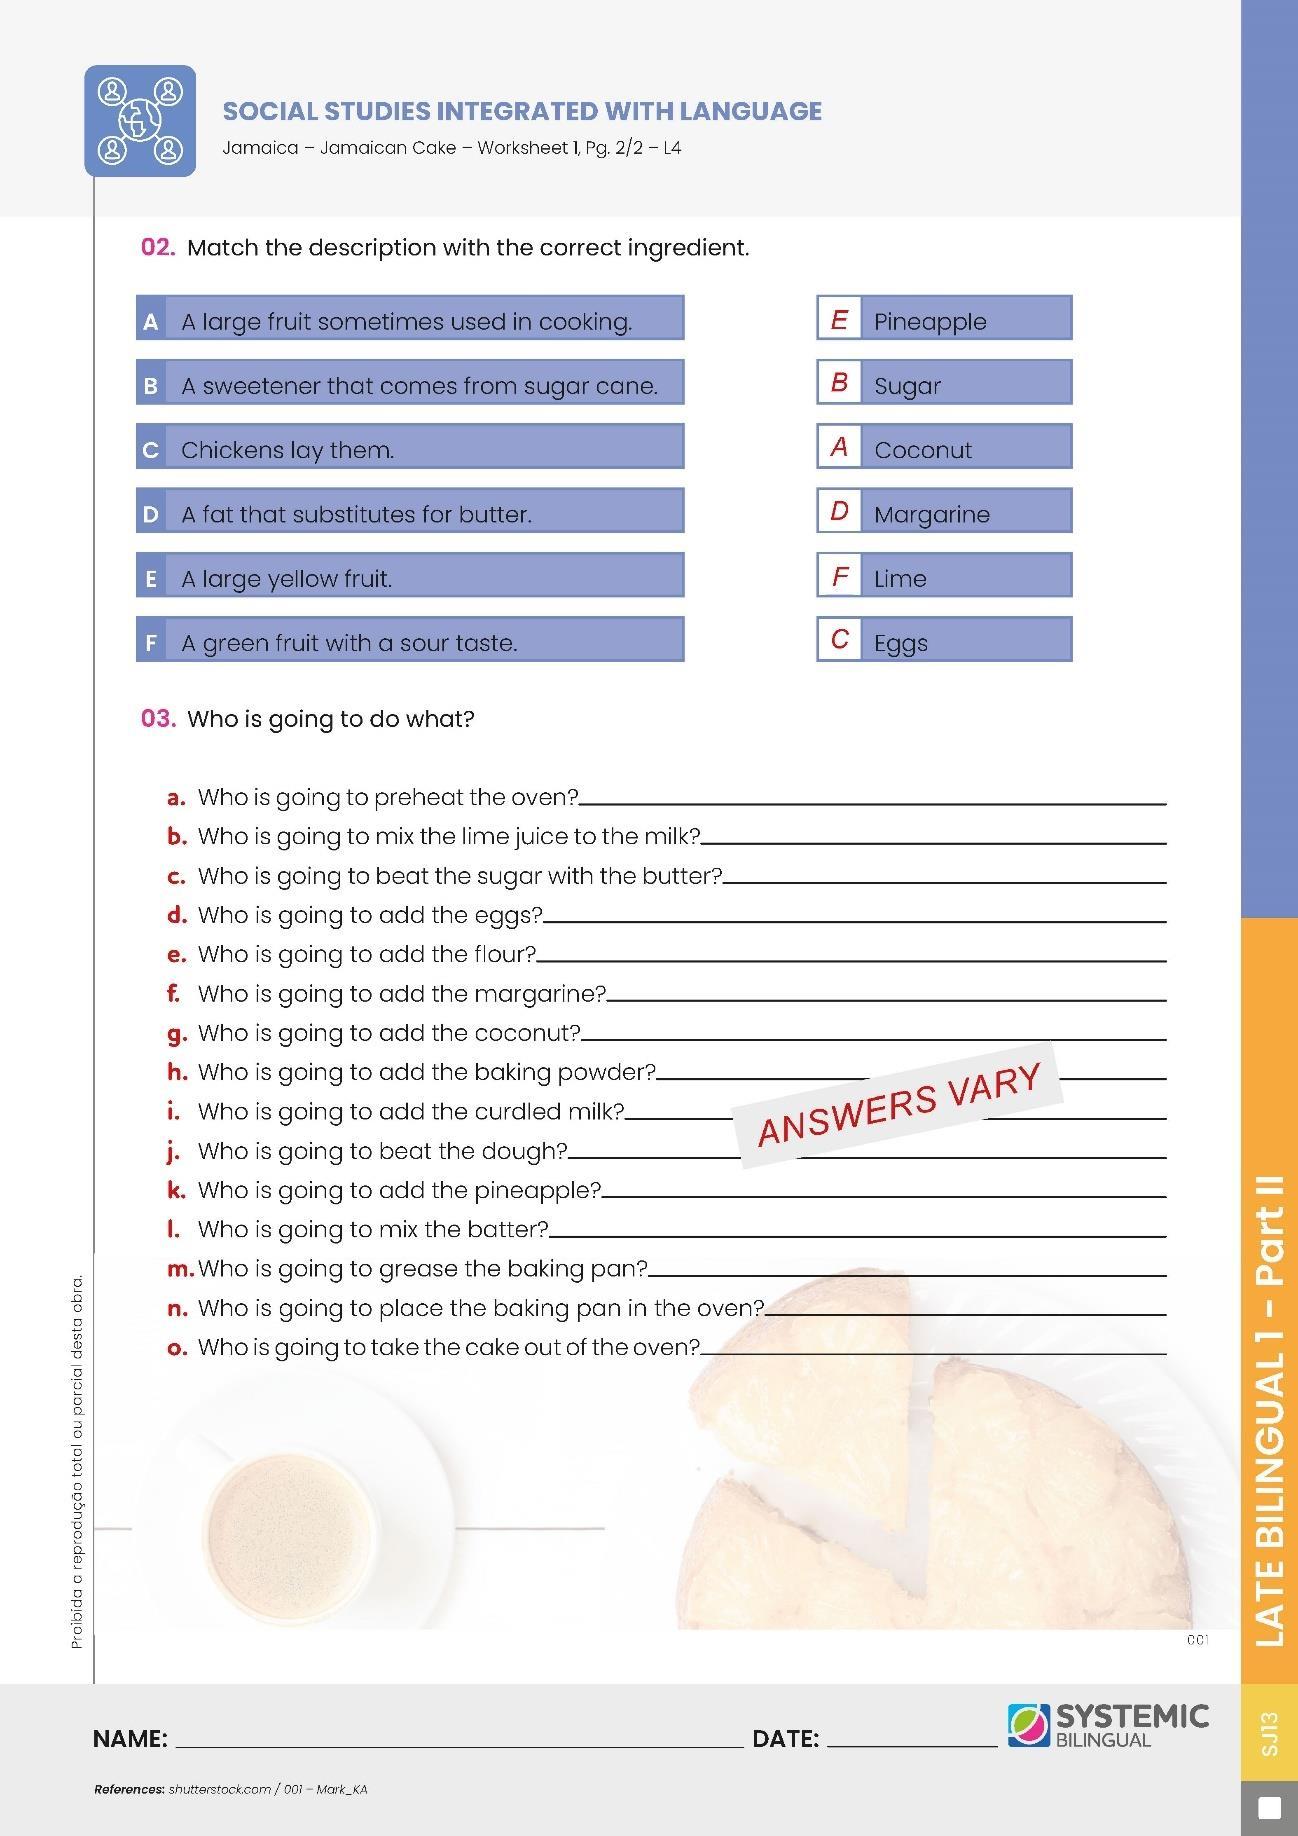
KEY VOCABULARY: Sugar, pineapple, lime juice, coconut, margarine, eggs, baking powder, butter, curdled milk, mix, stir, beat, add, preheat, grease, going to.
MATERIALS
• Worksheet 1, Pages 1 and 2 – Social Studies Integrated with Language –Jamaica – Jamaican Cake – L4;
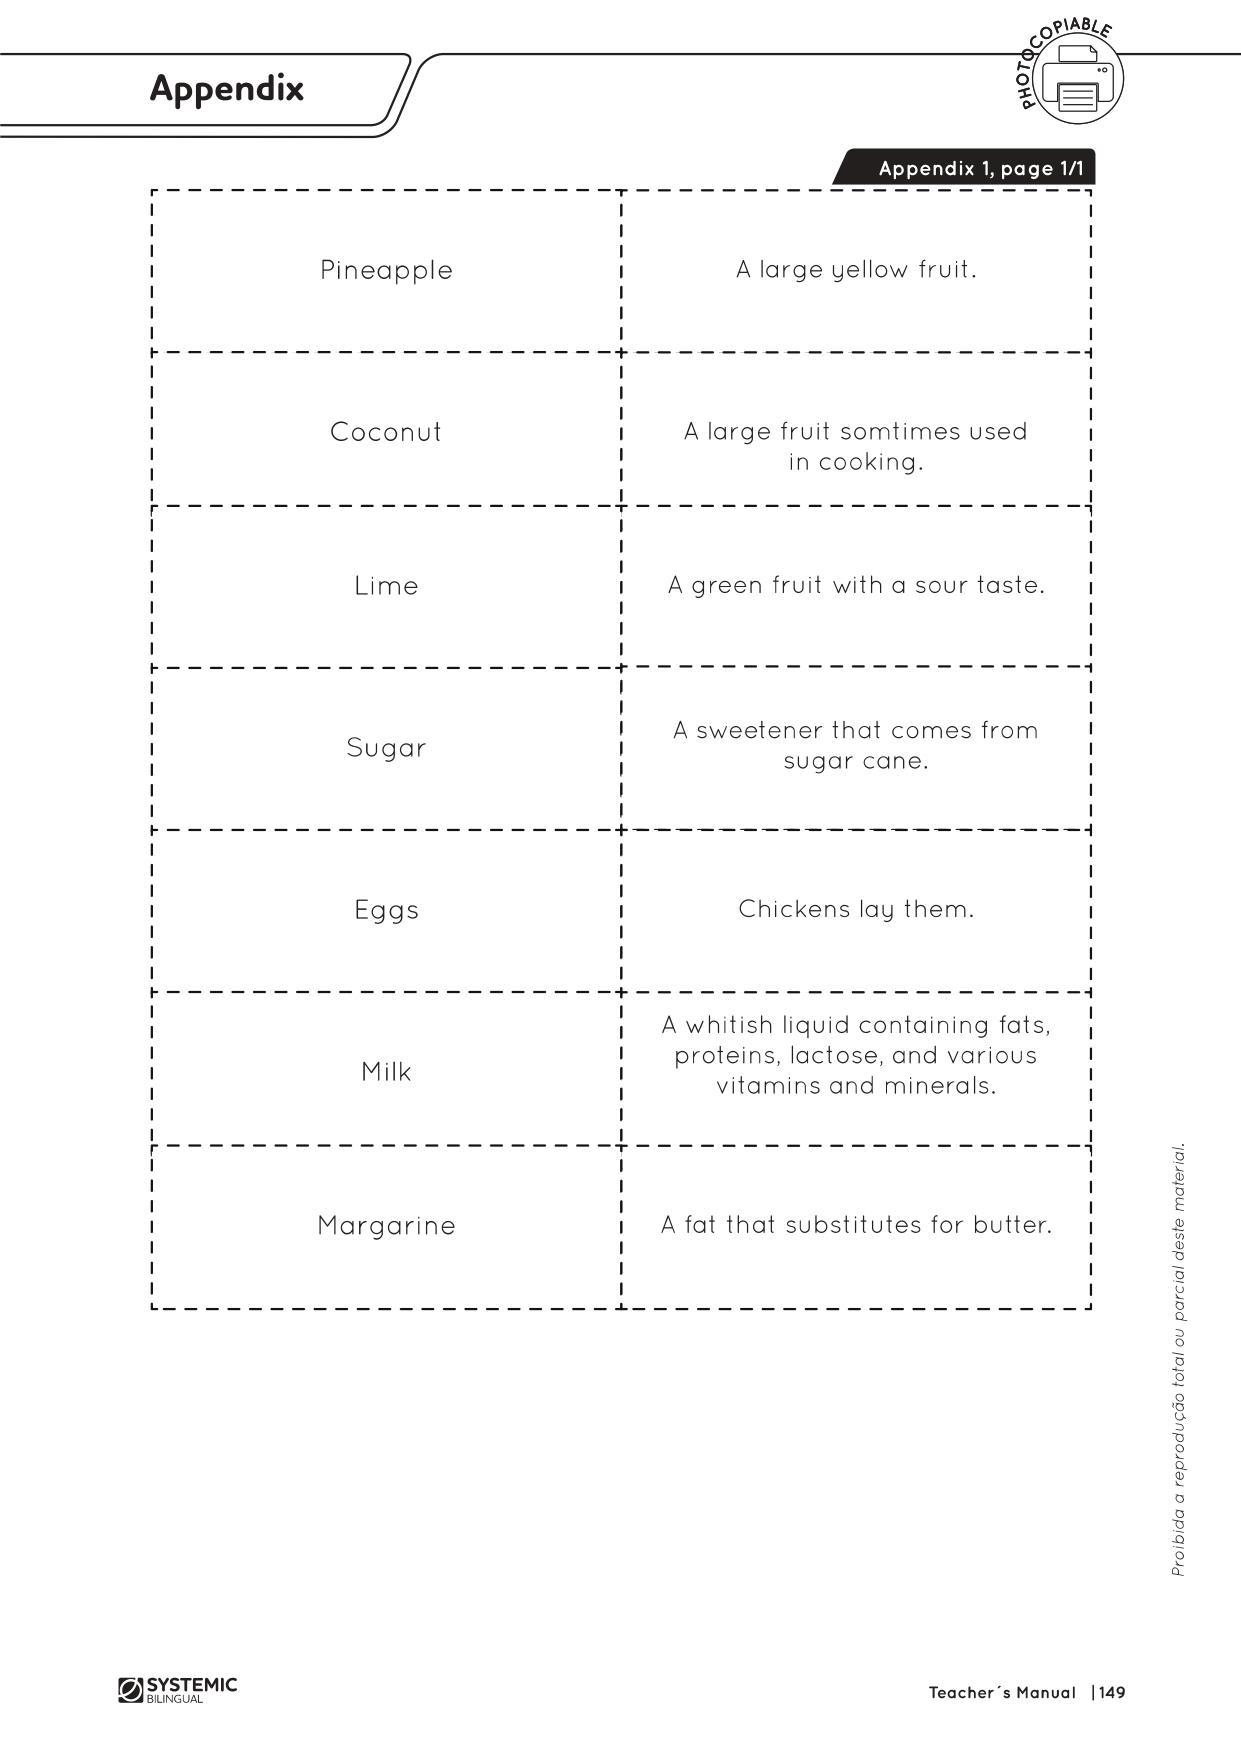
• Appendix 1 – Social Studies Integrated with Language – Jamaica – Jamaican Cake – L4.
Utensils:
• A cup;
• A tablespoon;
• A wooden spoon;
• A mixer;
• A baking pan.
Ingredients:
• 2 and 1/2 cups of white sugar;
• 3 cups of flour;
• 200g of margarine;
• 4 whole of eggs;
• 4 tablespoons of lime juice;
• 200ml of milk;
• 1 tablespoon of baking powder;
• 100g of grated coconut;
• 200g of chopped pineapple;
• Toothpick or knife.
PREPARATION IN ADVANCE
• Buy the ingredients.
• Gather all the needed utensils and ingredients.
• Try the recipe at home at least once.
• Place the utensils and the ingredients on a table in the classroom or in the kitchen.
• Copy and cut out Appendix 1 - one per group.
• Check if it is possible to take students to the kitchen.
• Send a note to parents asking about allergies.
OBJECTIVES
TEACHER OBJECTIVES
• To have students practice “going to” for future actions
• To teach a Jamaican recipe and how to follow it
• To teach action verbs
• To have students practice the Simple Past Tense
• To elicit from students names of ingredients and utensils
• To guide the students in a cooking class
STUDENT OUTCOMES
• Practice going to
• Prepare a Jamaican recipe
• Use action verbs
• Review names of ingredients and kitchen utensils
• Use simple past
HABILIDADES:
• (EF06LI03) Solicitar esclarecimentos em língua inglesa sobre o que não entendeu e o significado de palavras ou expressões desconhecidas.
• (EF06LI16) Construir repertório relativo às expressões usadas para o convívio social e o uso da língua inglesa em sala de aula.
• (EF07LI01) Interagir em situações de intercâmbio oral para realizar as atividades em sala de aula, de forma respeitosa e colaborativa, trocando ideias e engajando-se em brincadeiras e jogos.
• (EF08LI14) Utilizar formas verbais do futuro para descrever planos e expectativas e fazer previsões.
PROCEDURES
1. Show students the pineapple. Elicit from them what it is. Ask them if they have ever eaten pineapple, if they liked it, and how they ate it. Tell them they are going to learn how to make a typical Jamaican food. Ask them to try to guess what they are going to make with the pineapple.
2. Ask students if they have ever eaten cake and what kind of ingredients are usually used. Write the ingredients they say on the board. Tell them this is a different kind of cake because it has pineapple in it. Have them guess what the other ingredients are. Write the name of the dessert on the board “Jamaican Cake.” Ask them what ingredient they are going to use to make it sweet (sugar) and how much they think they will need for this cake (2 and 1/2 cups). Ask a student to point to the cup among the utensils on the table.
3. Ask students to guess what the next ingredient is. Give them the following clues:
A. It is a tropical fruit, green on the outside and white on the inside;
B. Inside the fruit there is water and meat;
C. The water and meat are sweet, but sometimes they are sour, depending on the fruit. If needed, show them a real coconut or the picture of one. Encourage them to speak English at all times, guiding them if necessary.
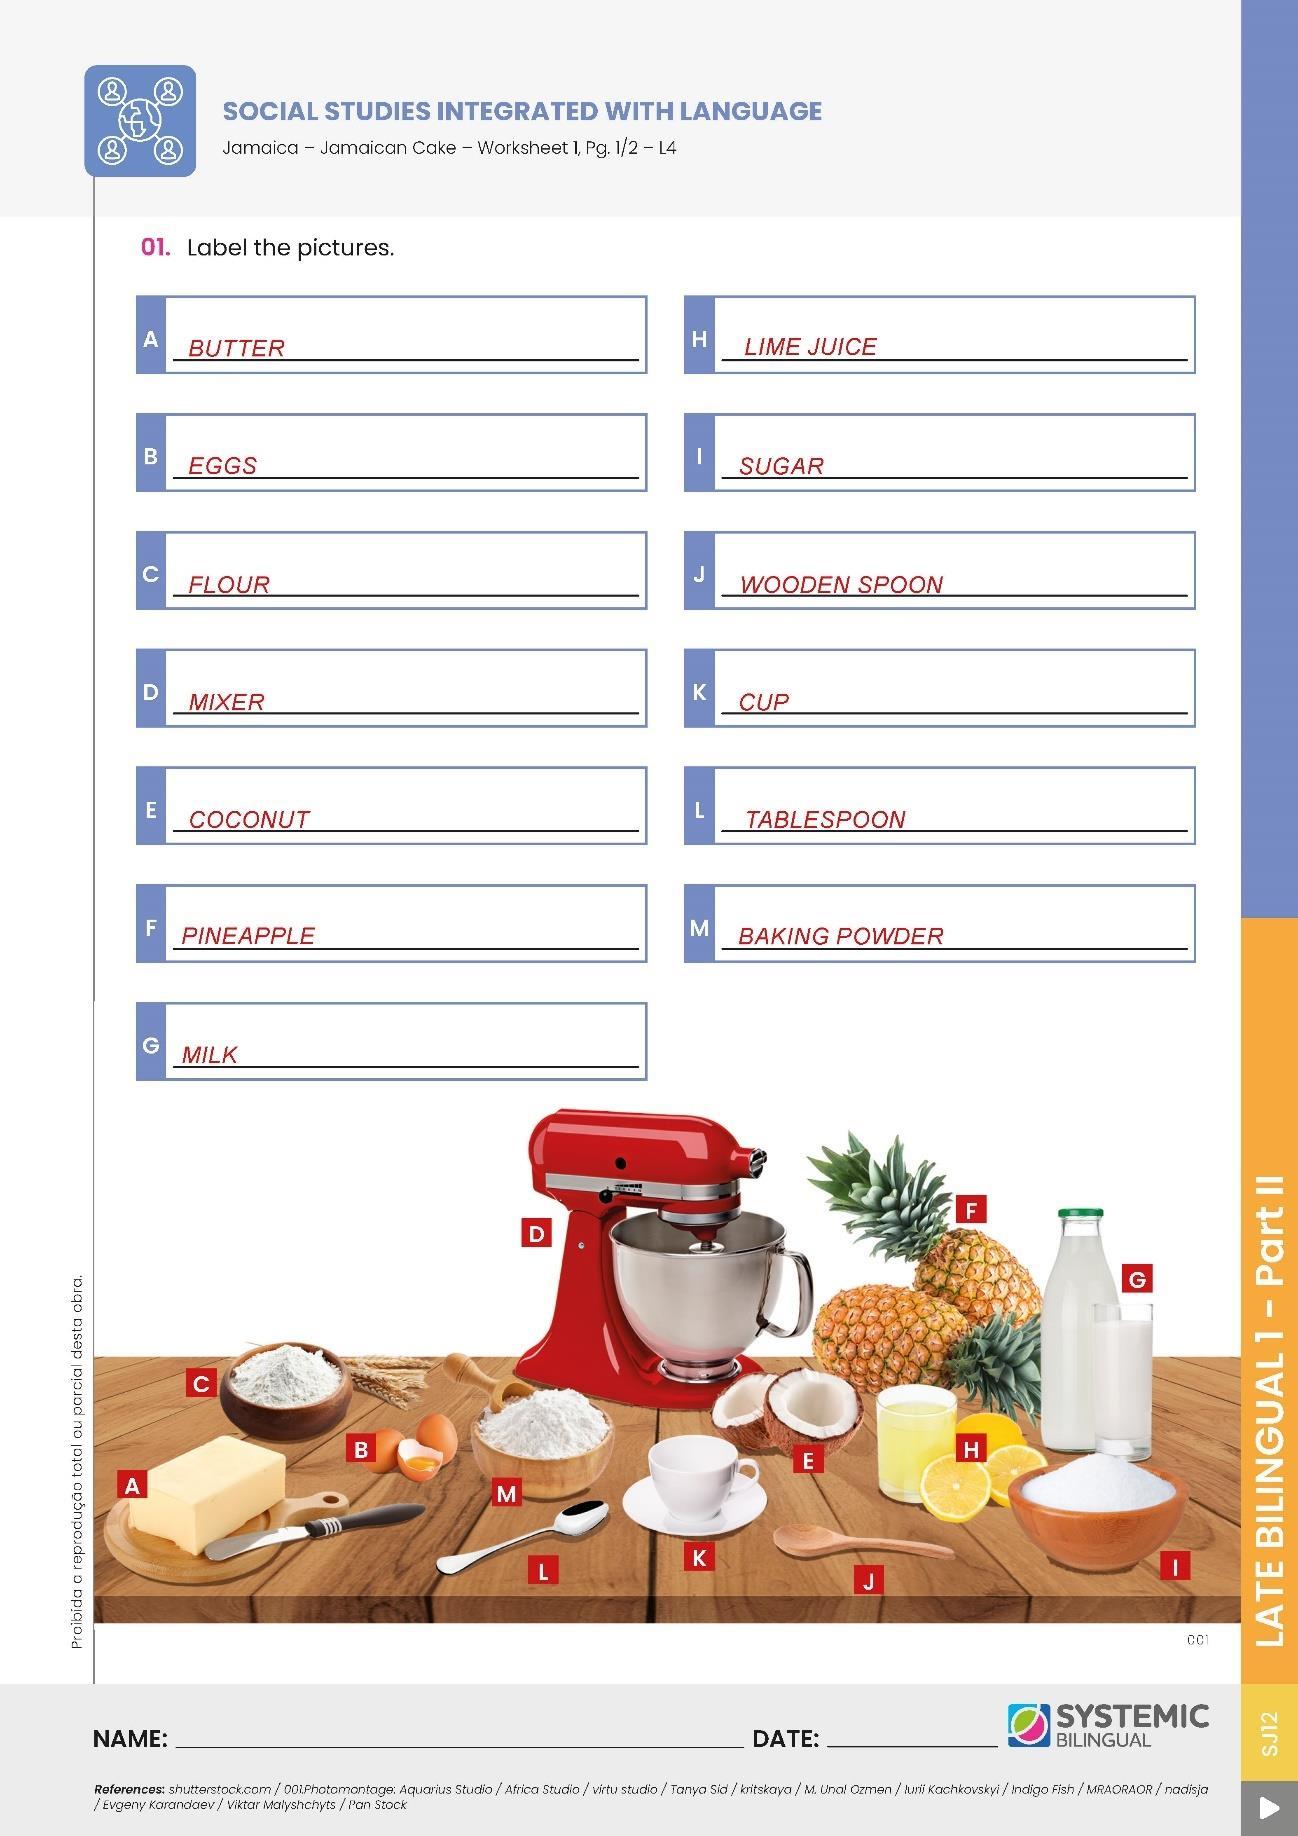
4. Divide the class into groups of two or three. Show students the rest of the ingredients and utensils. Ask them to try to guess the names of everything they see, as well as the amount of each ingredient needed to make the cake. Write their answers on the board. Correct it out loud, giving each group a point for each correct answer.
5. Go through the list of ingredients and utensils one at a time and ask one student from one of the groups to get that corresponding item. Do this with everything on the list. Then, alternate pointing to one student at a time and having him/her hold up the ingredient or utensil they have, asking the rest of the class to repeat the name.
6. Hand out Appendix 1, one per group. Ask students to match the definitions with the words. Do this activity as a game. Reward the winning group.
7. Tell students that each one of them is going to help during the class. Find a volunteer for each action listed on Worksheet 1. Make sure the teacher is the one responsible for preheating the oven, placing the baking pan inside the oven, and taking it out, too. Practice the question: “WHO IS GOING TO…?”
8. Hand out Worksheet 1, Pages 1 and 2. Allow students some time to answer it. Go over it together, writing the answers on the board.
ANSWER KEY
LESSON 15
Topic: Social Studies Integrated with Language – Jamaica – Jamaican Cake –L5
Lesson Type: Cooking
PRIOR KNOWLEDGE: Previous lessons.
KEY VOCABULARY: Sugar, pineapple, lime juice, coconut, margarine, eggs, baking powder, butter, curdled milk, mix, stir, beat, add, preheat, grease, chop, going to.
MATERIALS
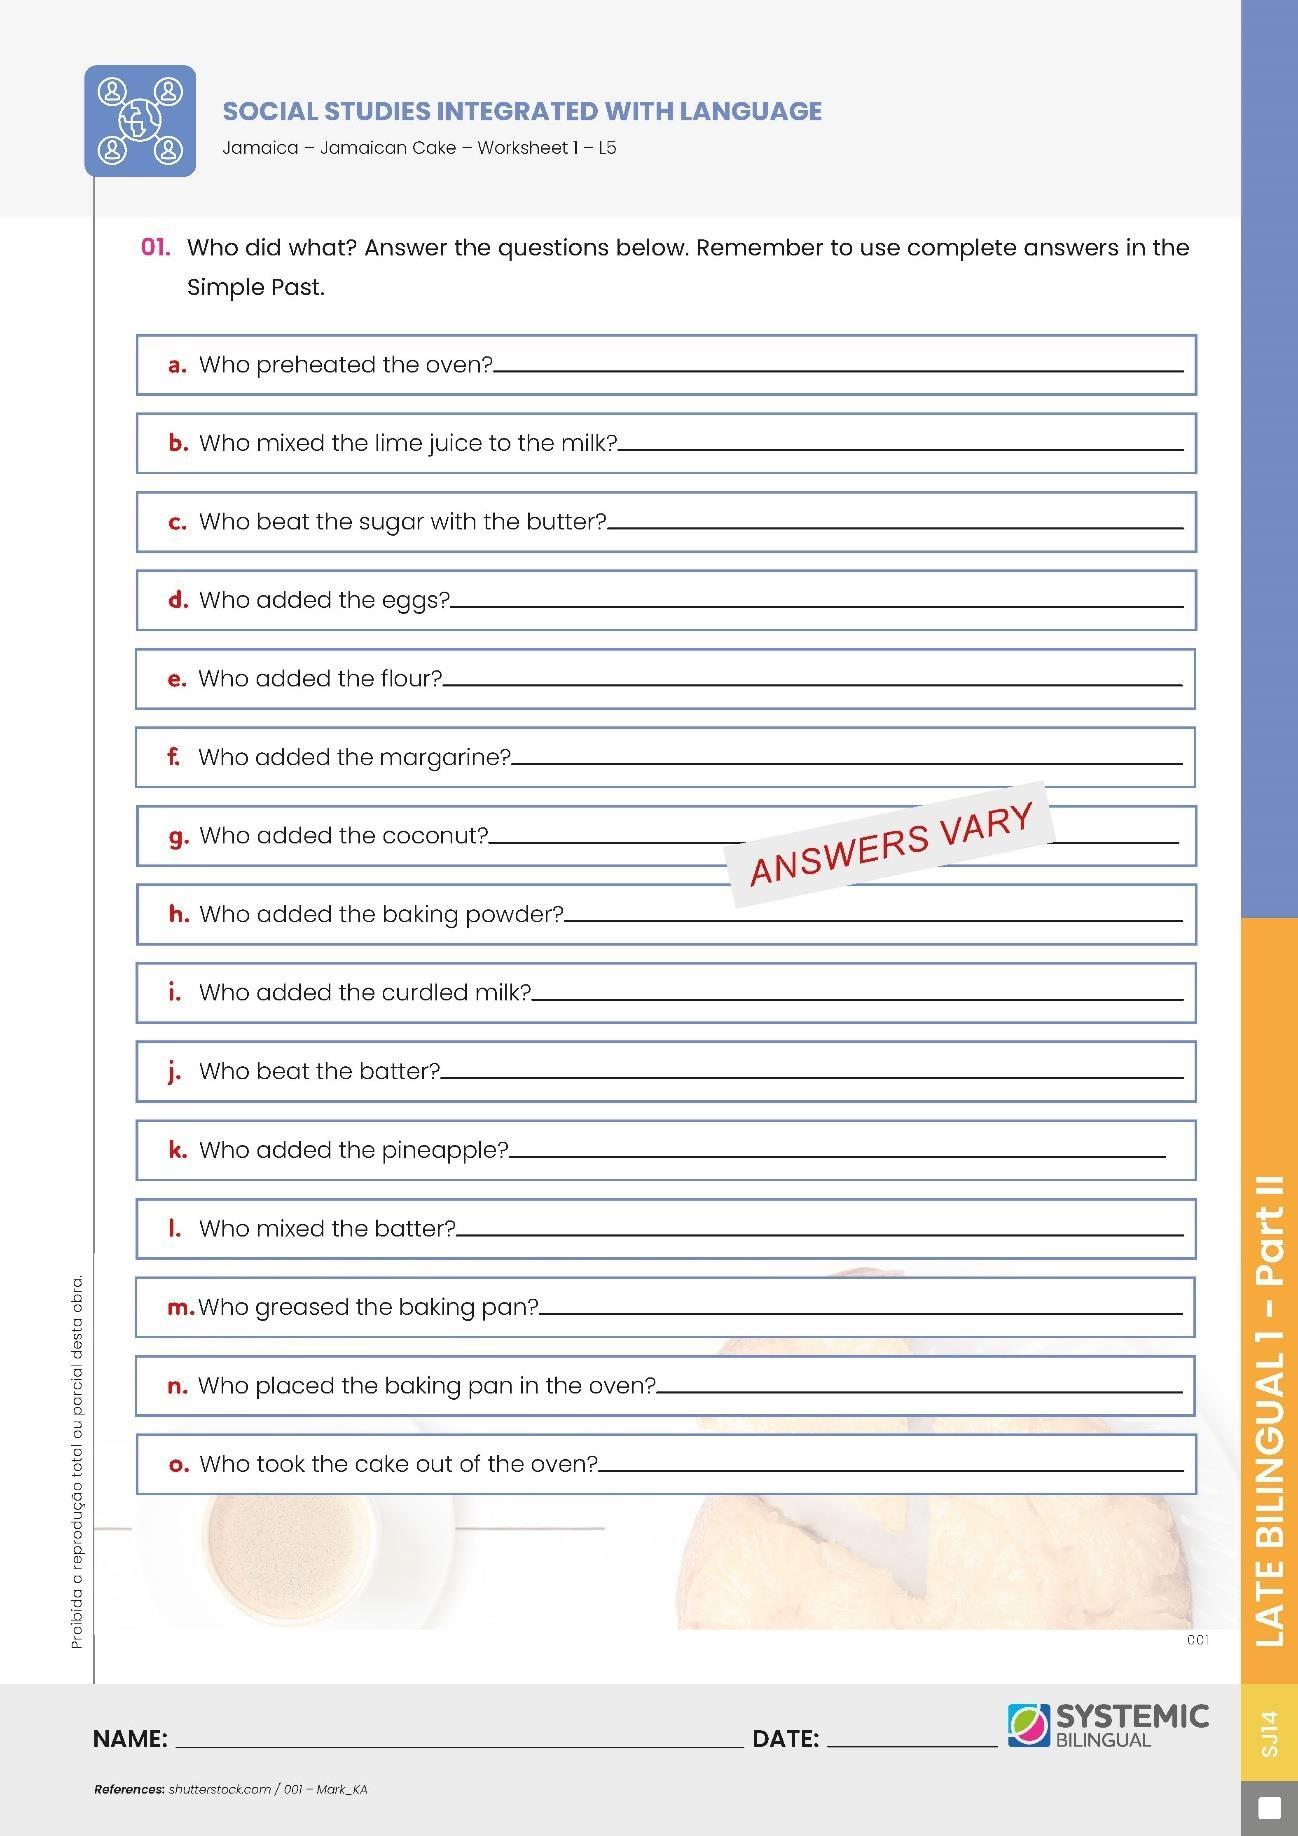
• Worksheet 1 – Social Studies Integrated with Language – Jamaica –Jamaican Cake – L5.
Utensils:
• A cup;
• A knife;
• A tablespoon;
• A wooden spoon;
• A mixer;
• A baking pan.
Ingredients:
• 2 and 1/2 cups of white sugar;
• 3 cups of flour;
• 200g of margarine;
• 4 whole of eggs;
• 4 tablespoons of lime juice;
• 200ml of milk;
• 1 tablespoon of baking powder;
• 100g of grated coconut;
• 200g of chopped pineapple;
• Toothpick or knife.
PREPARATION IN ADVANCE
• Prepare the kitchen with all the ingredients and utensils.
• Gather the utensils and the ingredients.
• Preheat the oven.
• Wash, peel, and chop the pineapple.
• Check if it is possible to take students to the kitchen.
• Send a note to parents asking about allergies.
OBJECTIVES
TEACHER OBJECTIVES
• To have students practice “going to” for future actions
• To teach a Jamaican recipe and how to follow it
• To teach action verbs
• To have students practice the Simple Past Tense
• To elicit from students names of ingredients and utensils
• To guide the students in a cooking class
STUDENT OUTCOMES
• Practice going to
• Prepare a Jamaican recipe
• Use action verbs
• Review names of ingredients and kitchen utensils
• Use simple past
PROCEDURES
1. Elicit from students the name of the ingredients and the utensils. Based on Worksheet 1 – L4 from the previous lesson, ask them who is going to do what.
2. Ask students to wash their hands. Take them to the kitchen.
3. Elicit from students what the next step is. Ask them who is going to mix the lime juice to the milk to curdle. Remind them to use complete sentences. Repeat this procedure with all the ingredients. Ask the one responsible for mixing the batter to mix it well.
4. Ask students who is going to beat the sugar with the butter. Give him/her the beater and ask him/her to beat the sugar with the butter until creamy. Ask them who is going to add the eggs one by one. Stirring constantly, ask students to add the flour, margarine, coconut, baking powder, and the curdled milk.
5. Elicit the name of the student responsible for adding the pineapple. Ask him/her to add it slowly and to mix with a wooden spoon.
6. While the students are mixing the batter, ask someone else to grease the baking pan with butter and sprinkle it with flour.
7. Pour the batter into the baking pan. Put the baking pan in the oven. Leave it there for about 40 minutes or until a toothpick or knife inserted in the middle comes out clean.
8. Hand out Worksheet 1 – L5. Let students answer it while the cake is baking. Correct it on the board if necessary.
9. Take the cake out of the oven and serve it.
RECIPE
Directions:
• Preheat the oven.
• Curdle the milk by adding lime juice to it. Set it aside.
• Peel and chop the pineapple. Set it aside.
• Beat the sugar with the butter until creamy.
• Add the eggs one at a time.
• Stirring constantly, add the flour, margarine, coconut, baking powder, and the curdled milk.
• Add the chopped pineapple and mix with a wooden spoon.
• Pour the batter into a greased and floured baking pan.
• Place the baking pan in the oven and bake in moderate preheated oven for about 40 minutes.
ANSWER KEY
LESSON 16
Topic: Traveling and Jamaica
Lesson Type: Assessment
PRIOR KNOWLEDGE: Previous lessons.
KEY VOCABULARY: Same as the previous classes.
MATERIALS
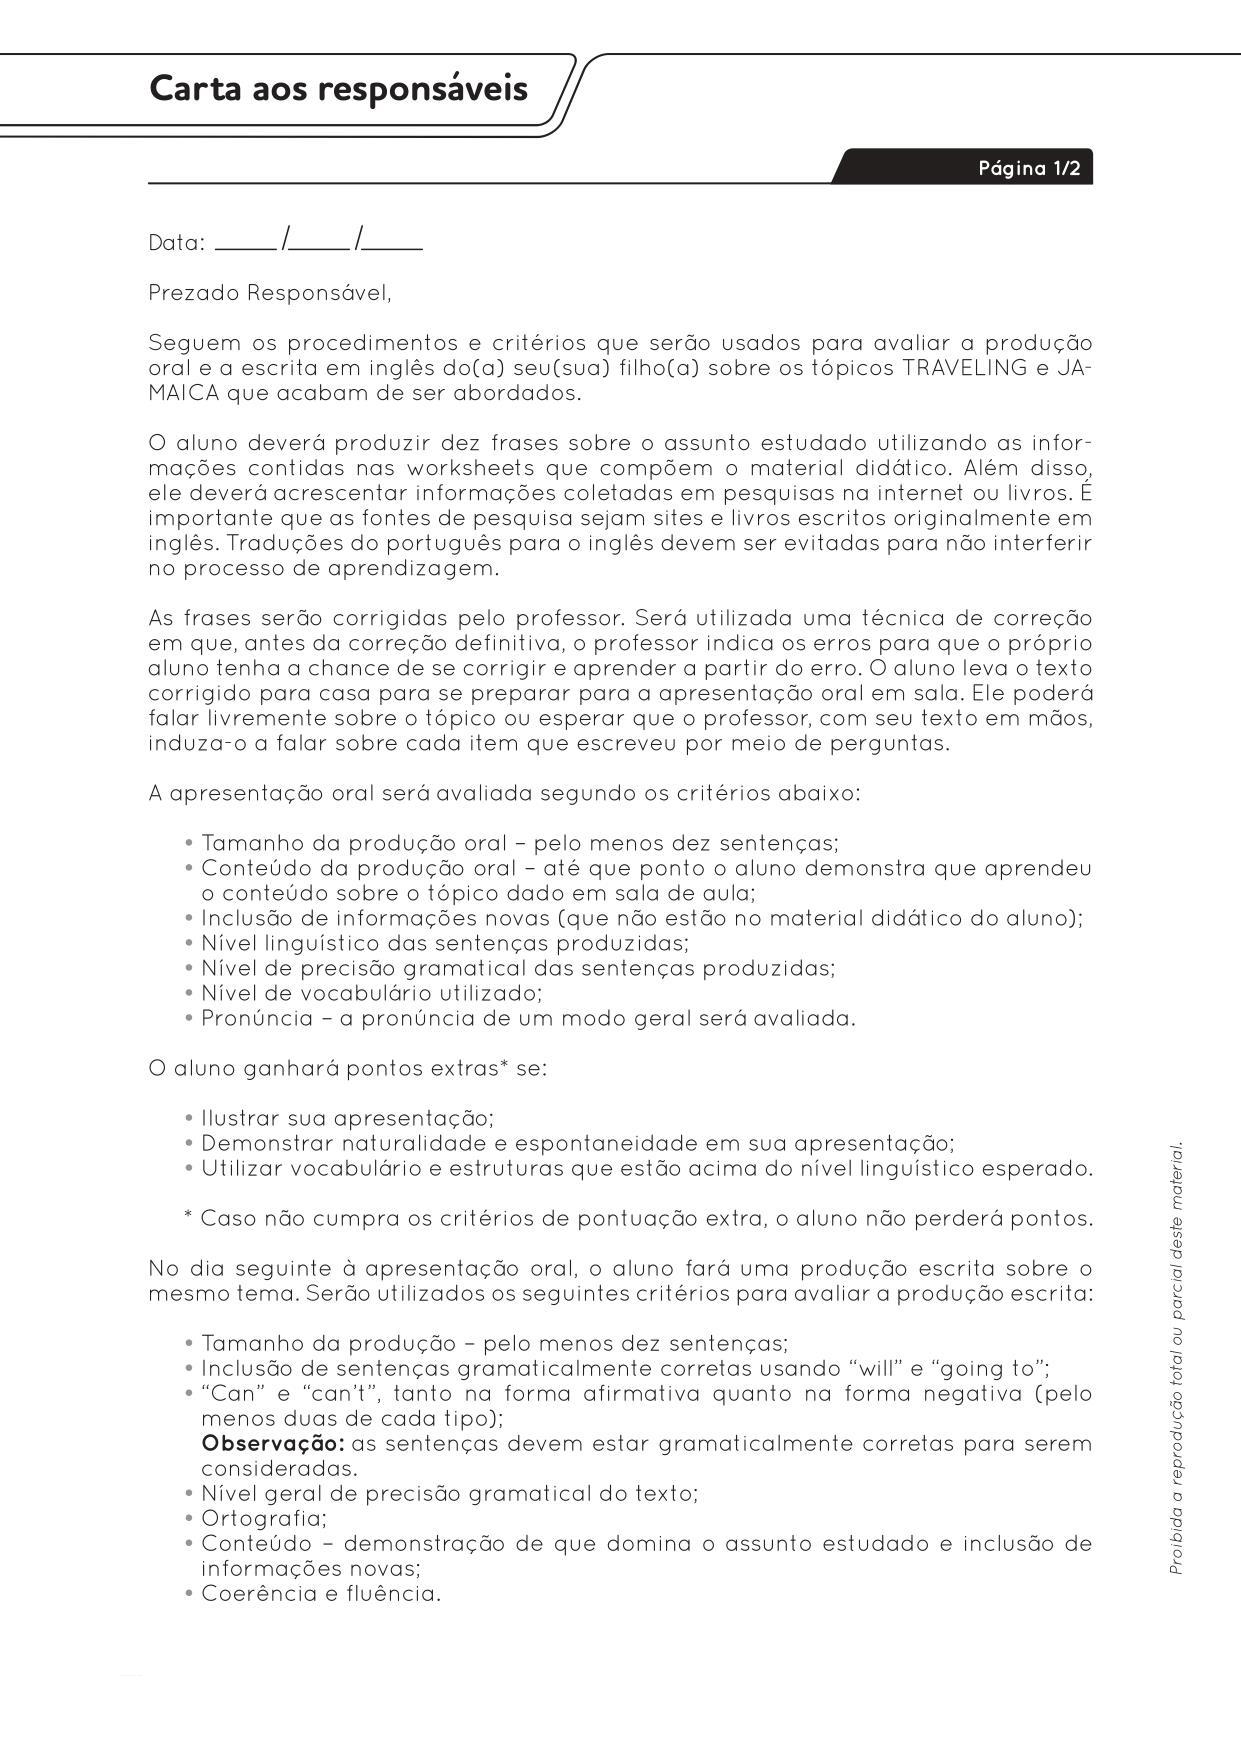
• Copies of the letter to parents/guardians with the evaluation criteria for the module, one for each student;
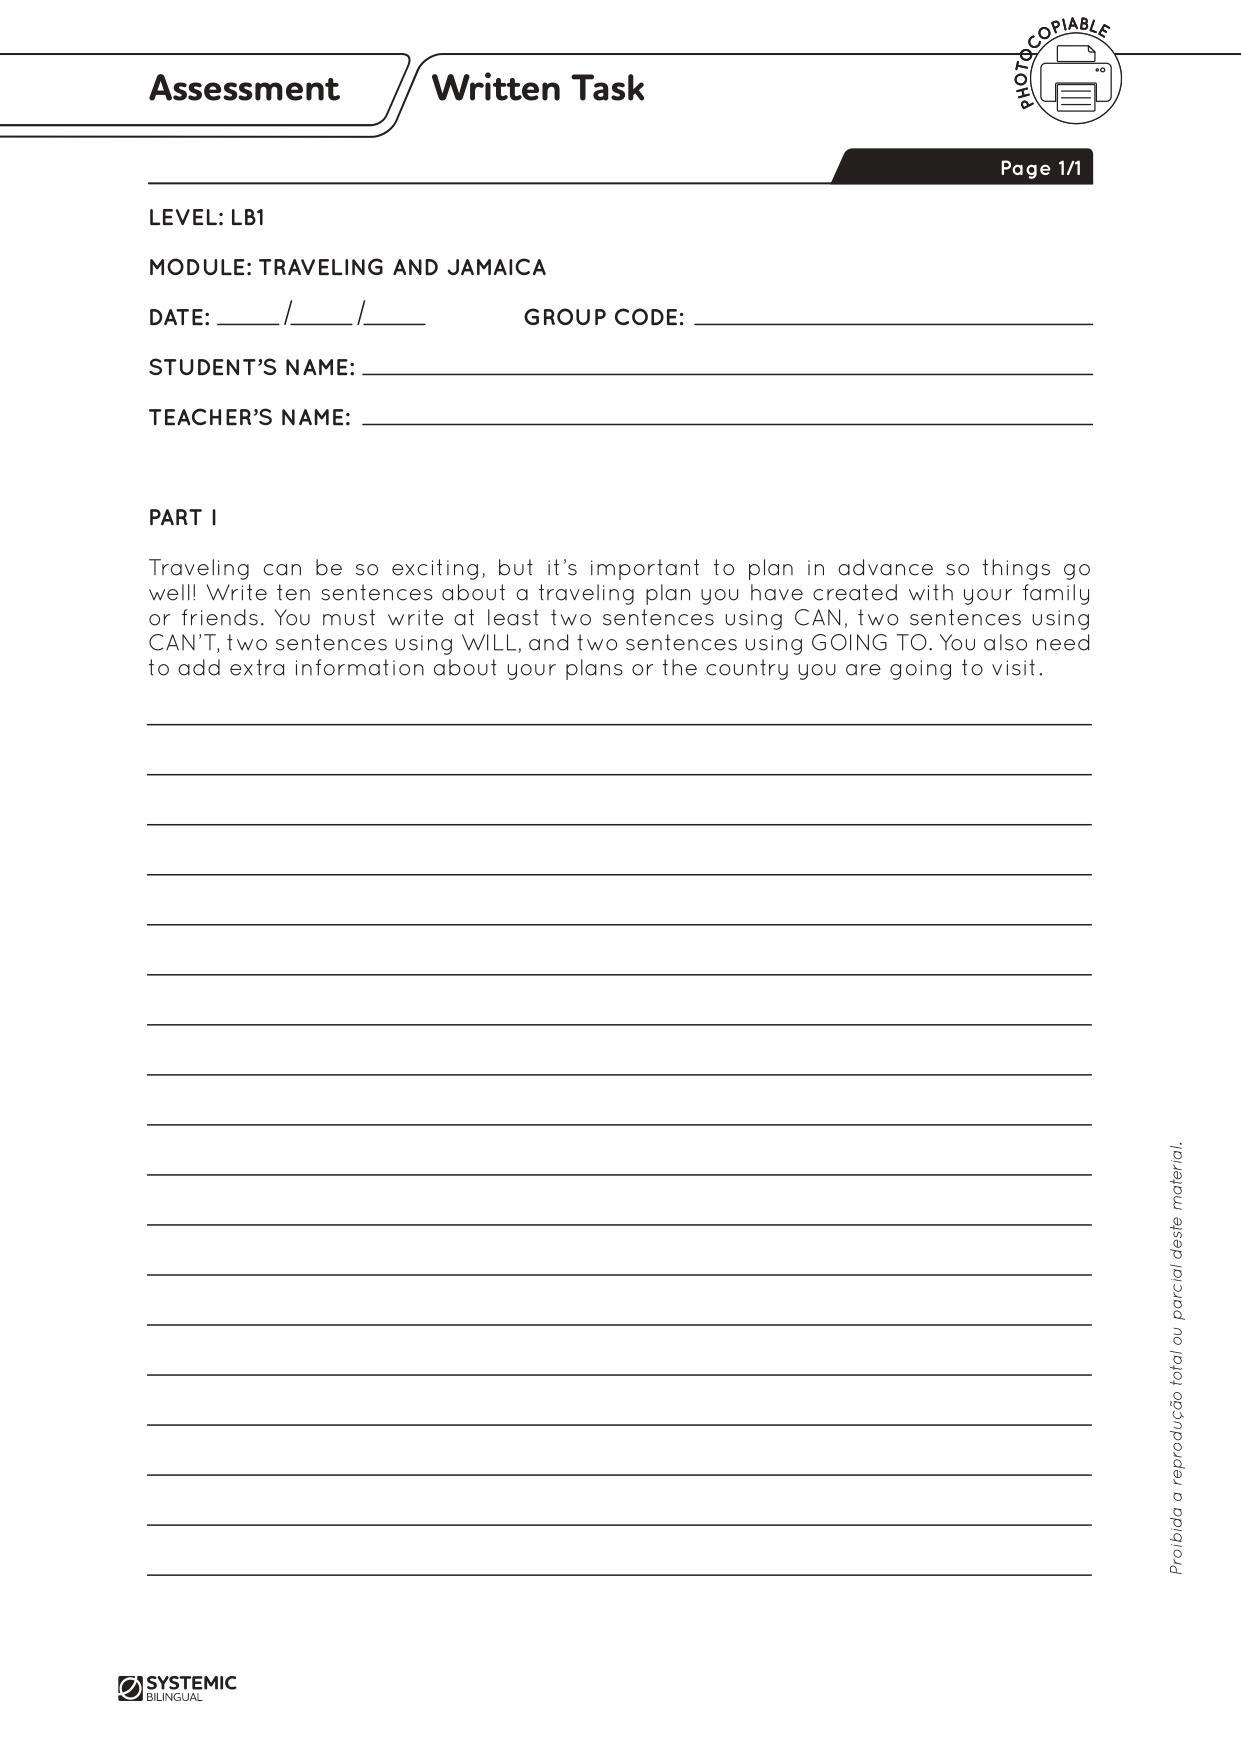
• Copies of the Written Task Assessment, one for each student;
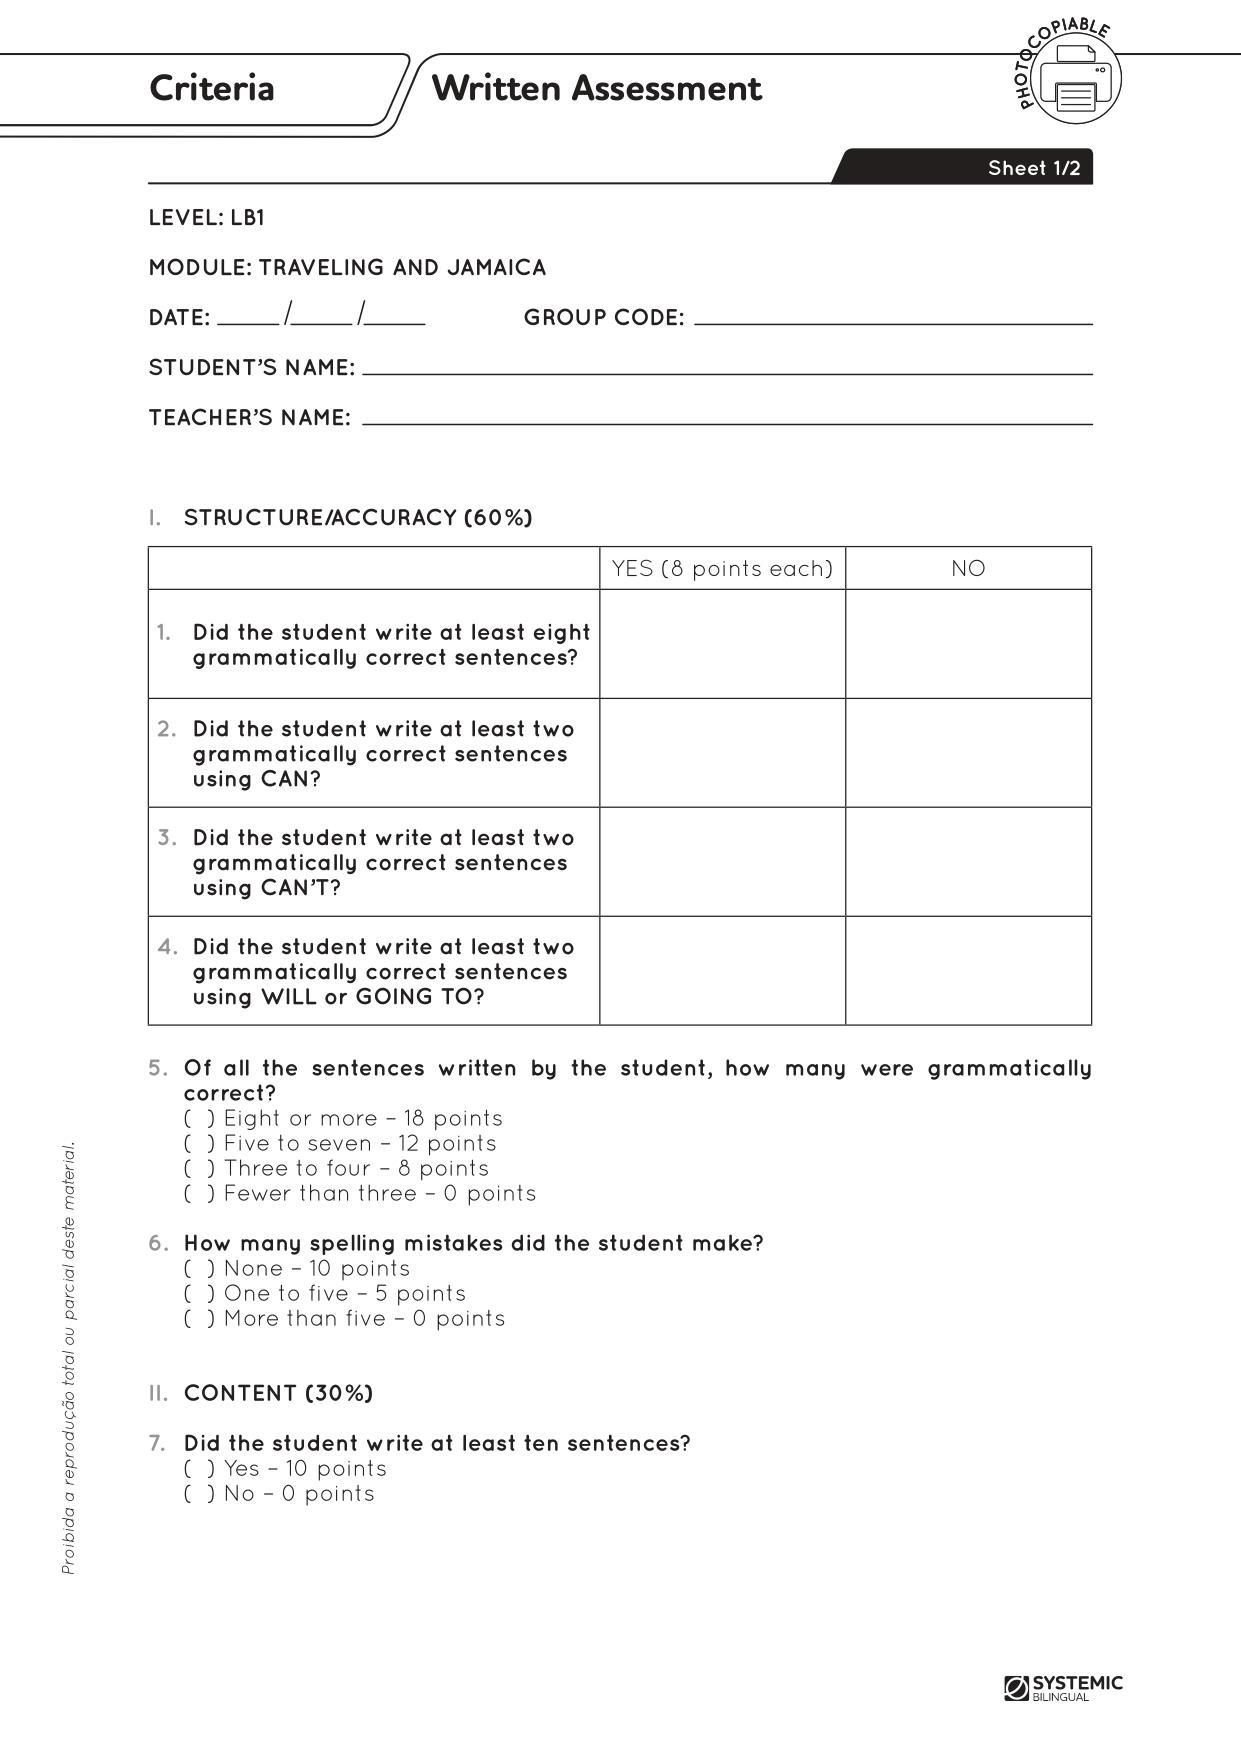
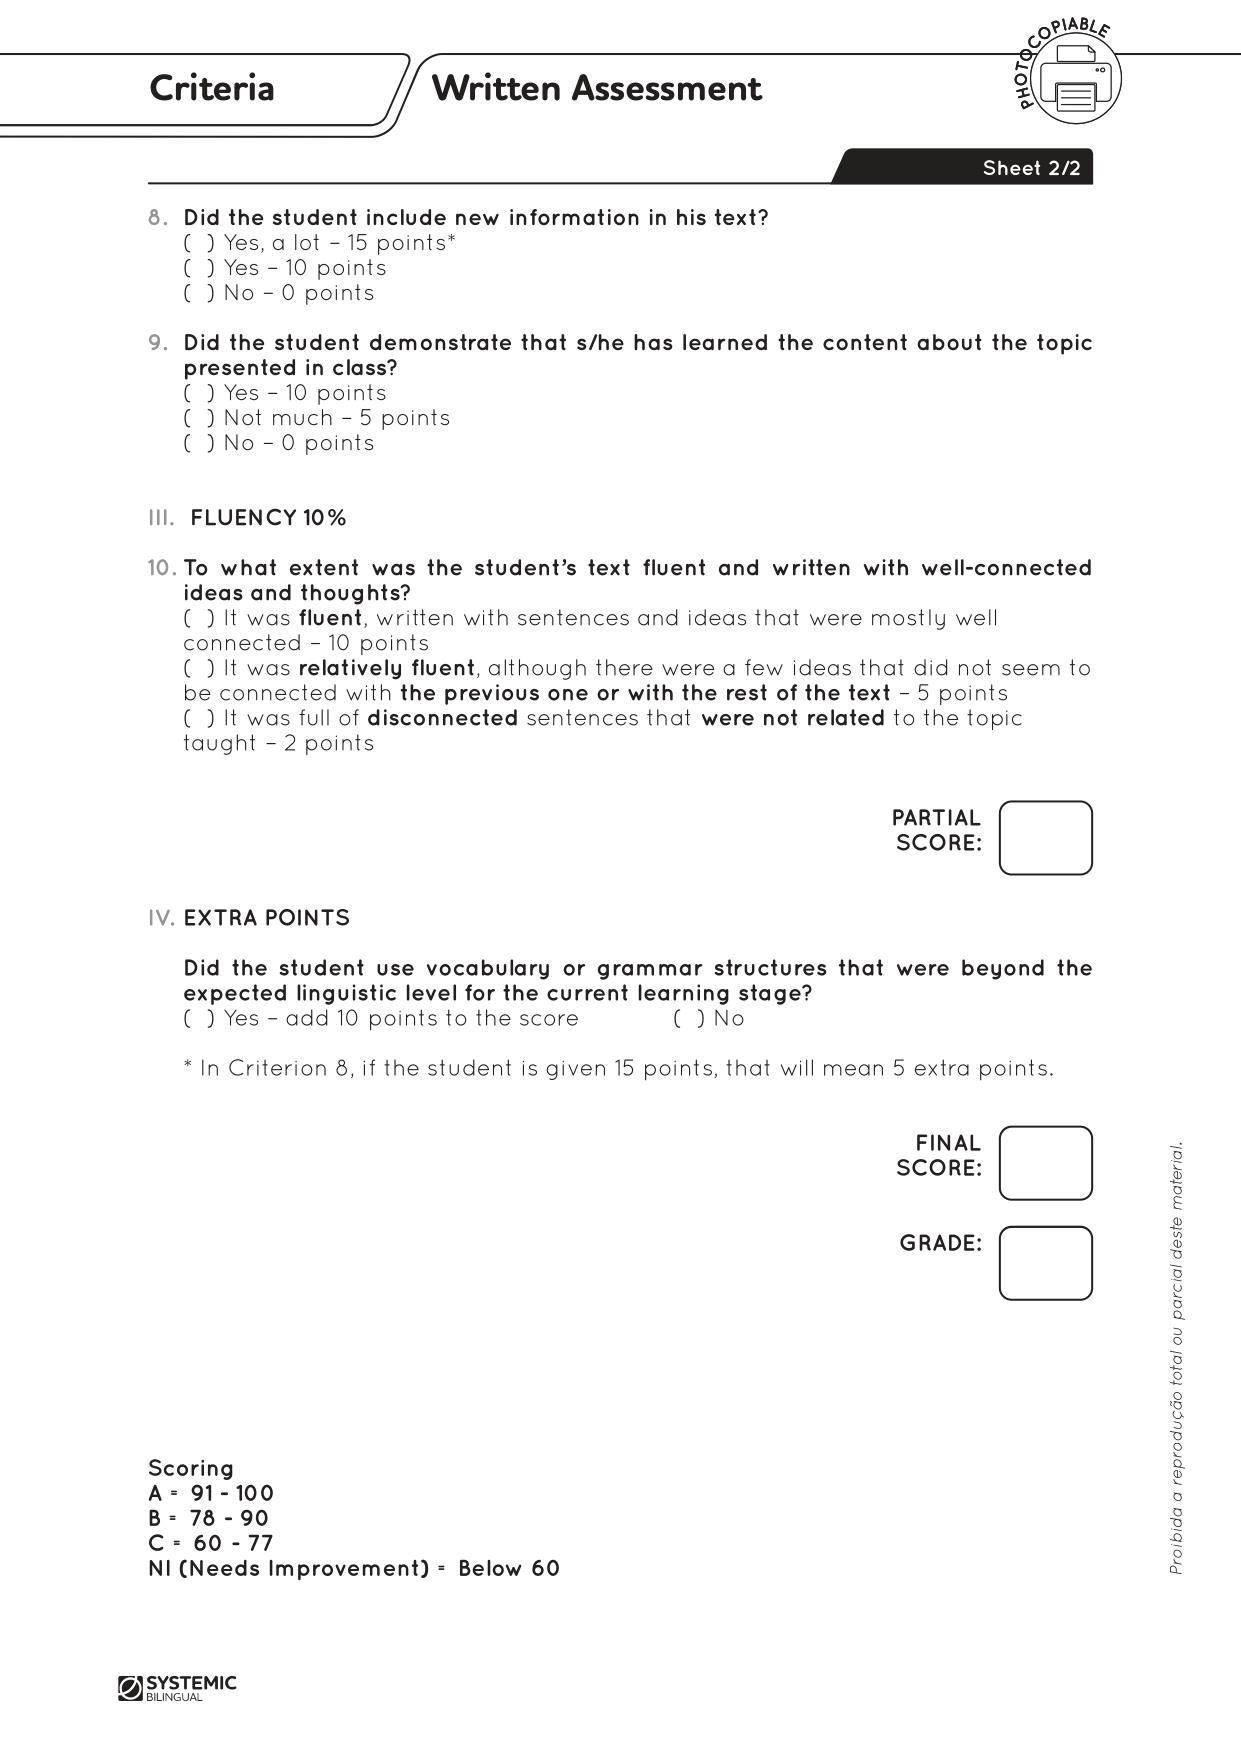
• Copies of the Written Assessment criteria sheet, one for each student;
• Copies of the Oral Assessment criteria sheet, one for each student;
• Copies of the Self-Assessment sheet, one of each for each student.
PREPARATION IN ADVANCE
• Send a dated letter to parents/guardians before or upon completion of the module. It is advisable that parents sign and return the bottom of the letter to confirm receipt.
OBJECTIVES
TEACHER OBJECTIVES
• To assess students’ oral and written production about traveling and Jamaica
• To have students research information about Jamaica
• To inform the families previously
• To explain the presentation structure
• To revise the students’ written productions
• To guide the students during preparation
• To elicit from students information about Jamaica
• To discuss self-assessment individually
• To show how to improve it
• To prepare activities that can help students improving skills
STUDENT OUTCOMES
• Write sentences about Jamaica
• Use simple present and comparative
• Research on the topic using internet or encyclopedias
• Prepare an oral presentation
• Develop social skills
• Improve pronunciation
HABILIDADES:
• (EF06LI03) Solicitar esclarecimentos em língua inglesa sobre o que não entendeu e o significado de palavras ou expressões desconhecidas.
• (EF06LI16) Construir repertório relativo às expressões usadas para o convívio social e o uso da língua inglesa em sala de aula.
• (EF07LI01) Interagir em situações de intercâmbio oral para realizar as atividades em sala de aula, de forma respeitosa e colaborativa, trocando ideias e engajando-se em brincadeiras e jogos.
• (EF08LI15) Utilizar, de modo inteligível, as formas comparativas e superlativas de adjetivos para comparar qualidades e quantidades.
• (EF06LI19) Utilizar o presente do indicativo para identificar pessoas (verbo to be) e descrever rotinas diárias.
• (EF07LI10) Escolher, em ambientes virtuais, textos em língua inglesa, de fontes confiáveis, para estudos/pesquisas escolares.
• (EF07LI12) Planejar a escrita de textos em função do contexto (público, finalidade, layout e suporte).
• (EF69LP38) Organizar os dados e informações pesquisados em painéis ou slides de apresentação, levando em conta o contexto de produção, o tempo disponível, as características do gênero apresentação oral, a multissemiose, as mídias e tecnologias que serão utilizadas, ensaiar a apresentação, considerando também elementos paralinguísticos e cinésicos e proceder à exposição oral de resultados de estudos e pesquisas, no tempo determinado, a partir do planejamento e da definição de diferentes formas de uso da fala – memorizada, com apoio da leitura ou fala espontânea.
• (EF03GE03) Reconhecer os diferentes modos de vida de povos e comunidades tradicionais em distintos lugares.
• (EF01GE09) Elaborar e utilizar mapas simples para localizar elementos do local de vivência, considerando referenciais espaciais (frente e atrás, esquerda e direita, em cima e embaixo, dentro e fora) e tendo o corpo como referência.
• (EF03GE03) Reconhecer os diferentes modos de vida de povos e comunidades tradicionais em distintos lugares.
PROCEDURES
1. Tell students that now that they have learned a lot of facts about traveling in general and the specific country of Jamaica, they will write ten sentences about their traveling plans. They will start off writing the sentences about what they learned. Then, they will also be asked to do an oral presentation using their written work.
2. Give out the letter addressed to parents/guardians and read it in class. Clarify any questions students might have about how they are going to be assessed. Do not forget to date the letter and remind everyone that parents/guardians must acknowledge that they received it.
3. Part I – students will write ten sentences about a traveling plan they will create. They must write:
– two sentences using CAN, and another two using CAN’T;
– two sentences using WILL, and another two using GOING TO.
They have to add extra information to compose their writing.
4. Remember that students are assessed for learning and some of them are not ready to understand the language rules yet. Be patient during this process because they are still building their sense of responsibility too. That being the case, they may forget the assignment day or even refuse to do it. Talk to them in private to encourage and calm them down if necessary. It is also important to talk to their parents, who will likely be ready to assist if they understand the situation.
5. Students may do some research on the Internet and/or use the information from their worksheets. Encyclopedias or other books may also be used. Emphasize that they cannot use any translator browser, only references with content already in English. The idea is for them to use only authentic material for two reasons: it is a reliable source of information and it will keep learners from making bad translations from L1 into English. More than two sources must be used.
6. Revise students’ written production. First, mark the mistakes and give them a chance to edit their work themselves. Then, do a final revision.
Note: check Appendix 1 for further explanation about how to proceed at this moment.
7. Encourage students to illustrate their oral presentation with pictures that may be displayed on a poster or a presentation. This step may be done at home.
8. Students are not allowed to read during their oral presentation, so there must be no written texts on their posters or presentations. These aids are only meant to guide and enhance.
Note: since the theme is the same for everyone, it is advisable that students do not see each other’s presentation in advance.
9. Help students prepare for their presentations by asking open-ended questions. Here are some suggestions:
– Tell me something else about…
– Repeat what you said about…, please.
– Compare ______ to ______.
– What are the main differences between _______ and _______?
– What piece of information did you enjoy learning? Why?
Note: check Appendix 2 for further information aboutopen-ended/backup questions and samples.
10. Part II – the written assessment: give students the Written Task Assessment and ask them to write at least ten sentences about their traveling plans. Their work needs to include:
– at least two sentences using CAN, two sentences using CAN’T, two sentences using WILL, two sentences using GOING TO, and extra information to compose their writing. (Same criteria for Procedure 3 – Part I.)
11. Upon completion of their written production, students must fill in the attached SelfAssessment sheet.
12. If time allows, discuss students’ self-assessment individually. Remind them that the two main objectives of this activity are to inform them about what they have and have not learned, and to discuss how they can improve. Upon the end of the assessment, collect all the worksheets and hand them in to the coordinators. Please make sure that all papers have students’ names, the date, the teacher’s name, and the group code (if there is one).
13. When reading and revising the written assignments, make a list of students’ sentences that contain the most common or basic mistakes. Without mentioning who wrote each sentence, prepare a presentation, a poster, or an activity to be used in class.
14. Project the selected sentences and go over them together in class. This procedure can be done as a game.
15. Prepare a written exercise with those same sentences. Have students work on it individually and turn it in. Check their work and how much progress they have made since the written task.
16. Discuss the students’ progress with the coordinator and what can be done to improve their performance.
LESSON
17
Topic: Science – Dinosaurs – L1
Lesson Type: Regular/Computer Lab
PRIOR KNOWLEDGE: None.
KEY VOCABULARY: Dinosaurs, reptiles, was/were, did, lived, could, fly, invented, century, species, cold-blooded, environment, Mesozoic Era, Triassic, Jurassic, Cretaceous, Carboniferous, and Permian Periods, whale, sheep, chicken, kangaroo, carnivore, herbivore, fossils.
MATERIALS
• Worksheet 1, Pages 1-5 – Science – Dinosaurs – L1;
• Presentation – Science – Dinosaurs – L1;
• 3 cards and a marker per group – See Procedure 7;
• A data projector;
Suggested link:
• “Dinosaurs beginning with A” - https://s.systemic.com.br/dinosinfo
PREPARATION IN ADVANCE
• Check the suggested website.
• Provide a data projector.
OBJECTIVES
TEACHER OBJECTIVES
• To teach about dinosaurs
• To introduce the Simple Past tense
• To show what fossils are
• To introduce some reptiles and dinosaurs
• To show some dinosaurs names
• To explain carnivores, herbivores and omnivores
STUDENT OUTCOMES
• Learn about dinosaurs
• Comprehend the simple past
• Make a research about different types of dinosaurs
• Recognize the main differences between them
• Comprehend what fossils are
• Answer a quiz
• Understand the difference between carnivores, herbivores and omnivores
• Write simple past sentences to describe dinosaurs
• Present a poster with information they have searched
HABILIDADES:
• (EF06LI03) Solicitar esclarecimentos em língua inglesa sobre o que não entendeu e o significado de palavras ou expressões desconhecidas.
• (EF06LI16) Construir repertório relativo às expressões usadas para o convívio social o uso da língua inglesa em sala de aula.
• (EF07LI01) Interagir em situações de intercâmbio oral para realizar as atividades em sala de aula, de forma respeitosa e colaborativa, trocando ideias e engajando-se em brincadeiras e jogos.
• (EF07LI18) Utilizar o passado simples e o passado contínuo para produzir textos rais e escritos, mostrando relações de sequência e causalidade.
• (EF07LI10) Escolher, em ambientes virtuais, textos em língua inglesa, de fontes confiáveis, para estudos/pesquisas escolares.
• (EF07LI12) Planejar a escrita de textos em função do contexto (público, finalidade, layout e suporte).
• (EF69LP38) Organizar os dados e informações pesquisados em painéis ou slides de apresentação, levando em conta o contexto de produção, o tempo disponível, as características do gênero apresentação oral, a multissemiose, as mídias e tecnologias que serão utilizadas, ensaiar a apresentação, considerando também elementos paralinguísticos e cinésicos e proceder à exposição oral de resultados de estudos e pesquisas, no tempo determinado, a partir do planejamento e da definição de diferentes formas de uso da fala – memorizada, com apoio da leitura ou fala espontânea.
• (EF06CI12) Identificar diferentes tipos de rocha, relacionando a formação de fósseis a rochas sedimentares em diferentes períodos geológicos.
PROCEDURES
1. Start by writing the word DINOSAURS in the middle of a circle on the board. Ask students what they know about dinosaurs. Use a graphic organizer in the form of a sun (rays extending from a circle) to write everything they say around the word on the board. If they do notmention fossils, write it anyway and make sure everyone knows what fossils are.Accordingto the Webster’s Dictionary, fossilsarethe mineralized remains of animals or plants or other artifacts such as footprints.
2. Ask students how they think scientists find out the size of a fossilized animal (by rebuildingthe skeleton from the bones they extract). Scientists can also have a very good idea of the muscles the animal had because muscles are fixed onto the bones and the marks can be seen. How about the soft parts, such as the eyes, the tongue, the internal
organs? Ask students how they think scientists reconstruct those parts (either by guessing or by comparing them to living animals).
3. Ask students aboutthe skin texture. Impressions ofdinosaur skinhave been fossilized, so scientists can have a precise idea of the skin texture.
4. Ask students:
(?) “HOW ABOUT THE COLOR OF THE DINOSAURS?”
(?) “CAN SCIENTISTS REALLY KNOW WHAT COLOR THEY WERE?”
Give students some time to discuss it. After having them give their conclusions, tell them that the colors scientists have used to rebuild dinosaurs are just guesswork. No one can really know what color dinosaurs were from the fossils. It is all scientists’ and artists’ imagination.
5. Ask students if they know when dinosaurs lived (they lived in the Mesozoic Era which went from 250 million to 65 million years ago). Ask them: “WHAT KIND OF ANIMALS WERE THEY”? (Reptiles).
6. Ask them:
(?) “WHAT IS THE MAIN DIFFERENCE BETWEEN DINOSAURS AND OTHER REPTILES?” (Their leg anatomy. Dinosaurs had an upright stance on straight legs. In other words, their legs would extend straight under their bodies, not sprawling to the sides as other reptiles.)
To give students a better idea, draw the following on the board:
7. Divide the class into pairs or groups of three students. Give each group three cards and ask them to write a letter on each card from A to C.
8. Show the first question on the Presentation and read it. Give students about 30 seconds to decide their answer and, at your signal, they must raise the card with the answer they have chosen.
9. Have them read their answer aloud so you can work on pronunciation. Give one point for each correct answer.
10. Give out Worksheet 1, Page 1 and tell students they will work in pairs or small groups to find out some data about a dinosaur on the internet. Each pair or group will be assigned a different dinosaur. They must follow the example and give complete answers to the questions on the worksheet.
11. Read the example to them (information from suggested link).
Dinosaur: TROODON [‘troh-o-don]
1. What does its name mean?
Answer: It means “wounding tooth.”
2. How long was it?
Answer: It was 2 m – 3.5 m long.
3. How much did it weigh?
Answer: It weighed 50 kg.
4. Was it a carnivore, herbivore, or omnivore?
Answer: It was a carnivore.
5. What did it eat?
Answer: It ate meat.
6. When did it live?
Answer: It lived about 76-70 million years ago, during the late Cretaceous period.
7. Where did it live?
Answer: It lived in North America (Canada and USA).
8. How did it move?
Answer: It walked fast on two legs.
9. An interesting fact about it:
Answer: It had the largest brain in proportion to its body weight, so it may have been the smartest dinosaur.
12. Here are the names of the dinosaurs students must find out about: Velociraptor, Tyrannosaurus rex, Apatosaurus/Brontosaurus, Iguanodon, Megaraptor, Triceratops, Eoraptor, Brachiosaurus. If there are few students in your group, ask students to choose the dinosaur they want.
13. Tell them that after finishing their research, they will present what they found out to the other students the following class. They may even make a poster to illustrate their work. While they present their poster, the other students will complete Worksheet 1, Pages 2-5 with the information they get from the presentations.
14. Go to the lab and tell students to access the site written on the board: https://s.systemic.com.br/dinosinfo, find their dinosaur and answer the questions. There is a FACT SHEET about each dinosaur and a more detailed page if they click on LIST OF DINOS. They may access a different website as long as they complete their task.
ANSWER KEY
LESSON 18
Topic: Science – Dinosaurs – L2
Lesson Type: Regular
PRIOR KNOWLEDGE: Previous lesson.
KEY VOCABULARY: Legs, fingers, toes, hands, foot, teeth, beak, horn, claw, spike, neck, front, back, long(er), sharp, parrot-like, conical, tiny.
MATERIALS
• Worksheet 1 – Science – Dinosaurs – L2;
• Worksheet 2, Pages 1 and 2 - Science – Dinosaurs – L2;
• Appendix 1 – Science – Dinosaurs – L2.
PREPARATION IN ADVANCE
• Copy and cut out the slips from Appendix 1 (make as many copies as the number of groups).
OBJECTIVES
TEACHER OBJECTIVES
• To talk about dinosaurs
• To review the Simple Past tense
• To elicit about dinosaurs characteristics
• To guide the students into a question and answer game
STUDENT OUTCOMES
• Use the simple past
• Review dinosaurs facts
• Classify dinosaurs according to their characteristics
• Play a question and answer game
• Associate dinosaurs pictures with their definitions
HABILIDADES:
• (EF06LI03) Solicitar esclarecimentos em língua inglesa sobre o que não entendeu e o significado de palavras ou expressões desconhecidas.
• (EF06LI16) Construir repertório relativo às expressões usadas para o convívio social e o uso da língua inglesa em sala de aula.
• (EF07LI01) Interagir em situações de intercâmbio oral para realizar as atividades em sala de aula, de forma respeitosa e colaborativa, trocando ideias e engajando-se em brincadeiras e jogos.
• (EF07LI18) Utilizar o passado simples e o passado contínuo para produzir textos orais e escritos, mostrando relações de sequência e causalidade.
• (EF06CI12) Identificar diferentes tipos de rocha, relacionando a formação de fósseis a rochas sedimentares em diferentes períodos geológicos.
PROCEDURES
1. Divide the class into three or four groups. Have each group make a line facing the board and as far away from it as possible. Stick cards with a number from 1 to 8 on the board.
2. Give out Worksheet 1. There are eight numbered pictures of the dinosaurs students have done their research on. Tell them you will read the description or some characteristics of each dinosaur. As they hear the description, the first student in line from each group mustrun to the board and get the card with the number that corresponds to the picture they have identified as being that dinosaur. Give one point for each correct answer. Here are the descriptions you will read.
• It was the opposite of most dinosaurs because its front legs were longer than the back legs. (brachiosaurus)
• It was small and had five fingers on its hand. It had dozens of small, sharp teeth. (eoraptor)
• It had a parrot-like beak and three horns. (triceratops)
• It walked on two legs. The second toe on each foot had a very long claw. (megaraptor)
• It had a conical spike on each thumb. (iguanodon)
• It had a very long neck. (apatosaurus / brontosaurus)
• It had tiny arms and walked on its toes. (tyrannosaurus rex)
• It had three fingers with a claw on each finger and four toes with a claw on each toe. (velociraptor)
3. When the game is over, allow students a few minutes to match the description with the picture on Worksheet 1. Correct it by asking students to read their answers aloud. Work on their pronunciation.
4. Write on the board: as, ate, did, divided, live, lived, moved, walk, walked, was, were, weighed.
5. Divide the class into groups of two or three students. Tell them you are going to give each group a slip of paper and they will have to fill in the blank(s) with one of the words from the list on the board.
6. Give the groups Slip 1 from Table 1 on Appendix 1. The first group to show you the correct answer wins a point. Give them one point per blank.
7. The same procedure applies to Table 2, but when they finish Slip 7, ask them what dinosaur those questions and answers are about (Tyrannosaurus rex). Give two points to the group that answers first.
8. Game. Part ll. Tell students they are going to work with the slips that have questions and answers about Tyrannosaurus rex. Ask students if they have seen the movie Jurassic Park. Elicit from them what dinosaurs they remember from the movie. Ask them if it took place long ago or in present day. Have them get Slip 1 on Appendix 1 completed from previousactivity. Ask them if those sentencesare in the past or present tense (past). Tell them they are going to pretend that there is in fact a Jurassic Park and they will have to change the sentences to the simple present. The first group to complete Slip 1 correctly, gets two points. Repeat the procedure for the other slips.
9. Repeat the procedure for Worksheet 2, Page 1. The last paragraph of the text about dinosaurs explains the unique anatomy of dinosaur legs. Have students complete both drawings to show the difference between dinosaur legs and other reptile legs.
10. If time does not allow, assign Worksheet 2, Page 2 for homework.
ANSWER KEY
LESSON 19
Topic: Math – Discounts – L1
Lesson Type: Regular
PRIOR KNOWLEDGE: None.
KEY VOCABULARY: Clothes, accessories, t-shirt, pants, tennis shoes, socks, skirt, tie, jacket, hat, rain coat, suit, top, jeans, shorts, dress, glasses, watch, cap, bikini, umbrella, sandals.
MATERIALS
• Worksheet 1 – Math – Discounts – L1;
• Appendix 1 – Math – Discounts – L1;
• Calculators;
• One shirt.
PREPARATION IN ADVANCE
• Copy and cut out the slips from Appendix 1 (2 copies).
OBJECTIVES
TEACHER OBJECTIVES
• To enable students to calculate discounts
• To enable students to use percentage
• To prepare a pictionary
• To show how to calculate real prices and discounts
STUDENT OUTCOMES
• Calculate discounts
• Comprehend real prices and discounts
• Practice percentage
• Use a calculator
• Play a pictionary game
HABILIDADES:
• (EF06LI03) Solicitar esclarecimentos em língua inglesa sobre o que não entendeu e o significado de palavras ou expressões desconhecidas.
• (EF06LI16) Construir repertório relativo às expressões usadas para o convívio social e o uso da língua inglesa em sala de aula.
• (EF07LI01) Interagir em situações de intercâmbio oral para realizar as atividades em sala de aula, de forma respeitosa e colaborativa, trocando ideias e engajando-se em brincadeiras e jogos.
• (EF08MA04) Resolver e elaborar problemas, envolvendo cálculo de porcentagens, incluindo o uso de tecnologias digitais.
• (EF05MA08) Resolver e elaborar problemas de multiplicação e divisão com números naturais e com números racionais cuja representação decimal é finita (com
multiplicador natural e divisor natural e diferente de zero), utilizando estratégias diversas, como cálculo por estimativa, cálculo mental e algoritmos.
PROCEDURES
1. Take a shirt or another piece of clothing to the classroom. Stick a tag with two prices on it: the real price and a discounted price. Practice how to calculate: the discount in dollars (real price – price after discount) and the discount in percentage (discount in dollars ÷ real price x 100). Give out Worksheet 1 and help them with the first three prices. Allow some time for them to complete the rest of the table. Correct the worksheet with the students.
2. Give students a few minutes to fill in the blanks below the pictures on the worksheet. Correct it by asking: “HOW MUCH IS/ARE THE ______”?
3. Picture Game. Divide the class into two groups. Set up a time (one minute, for example). Give a marker to one student from the first group. Give the student one card (from Appendix 1) with a clothes/accessory item written on it. She has to draw it on the board for the group to guess. If the student doesn’t know the meaning, you can help him/her. The group has to guess as many words as they can in the set time. They can “pass” if they can’t find out what the drawing is or if they don’t know how to say it in English. The group scores a point for each word guessed correctly. Repeat the same procedure for the second group.
ANSWER KEY
LESSON 20
Topic: Math – Discounts – L2
Lesson Type: Computer Lab
PRIOR KNOWLEDGE: None.
KEY VOCABULARY: Clothes, accessories.
MATERIALS
• Worksheet 1, Pages 1 and 2 – Math – Discounts – L2;
• Calculators;
• Pencils.
PREPARATION IN ADVANCE: None.
OBJECTIVES
TEACHER OBJECTIVES
• To enable students to calculate discounts
• To teach how to use percentage
STUDENT OUTCOMES
• Use the calculator
• Collect some data
• Analyse prices
• Calculate discounts
• Practice percentage
• Complete a chart with the results
HABILIDADES:
• (EF06LI03) Solicitar esclarecimentos em língua inglesa sobre o que não entendeu e o significado de palavras ou expressões desconhecidas.
• (EF06LI16) Construir repertório relativo às expressões usadas para o convívio social e o uso da língua inglesa em sala de aula.
• (EF07LI01) Interagir em situações de intercâmbio oral para realizar as atividades em sala de aula, de forma respeitosa e colaborativa, trocando ideias e engajando-se em brincadeiras e jogos.
• (EF06LI11) Explorar ambientes virtuais e/ou aplicativos para construir repertório lexical na língua inglesa.
• (EF08MA04) Resolver e elaborar problemas, envolvendo cálculo de porcentagens, incluindo o uso de tecnologias digitais.
• (EF05MA08) Resolver e elaborar problemas de multiplicação e divisão com números naturais e com números racionais cuja representação decimal é finita (com multiplicador natural e divisor natural e diferente de zero), utilizando estratégias diversas, como cálculo por estimativa, cálculo mental e algoritmos.
PROCEDURES
1. Explain the steps on Worksheet 1, Pages 1 and 2, and make sure students understand the task before going to the lab.
2. Take the students to the lab with calculators and pencils. Form pairs or groups of three. Ask them to get on the websites listed on the worksheet to buy clothes.
3. Tell students to collect the data first (items, shop, real price, price after discount) and then calculate the discount in dollars, discount in percentage.
4. Students must follow the instructions on the worksheet to complete the chart and answer the questions according to their chart.
5. Suggestion: In case Internet is not working, spread out on the floor some flashcards of clothes/accessories with the names of a shop and two different prices tagged on them. Use the same worksheet to collect the data following procedures number 3 and 4.
ANSWER KEY
LESSON 21
Topic: Math – Discounts – L3
Lesson Type: Field Trip
PRIOR KNOWLEDGE: Multiplication/division/addition/subtraction.
KEY VOCABULARY: Food items, margarine, rice, sugar, coffe, condensed milk, chocolate, eggs, apples, kilogram.
MATERIALS
• Worksheet 1, Pages 1 and 2 – Math – Discounts – L3;
• Pencils;
PREPARATION IN ADVANCE
• Authorization Form (parents must allow students to go to the field trip and also pay for the transportation).
OBJECTIVES
TEACHER OBJECTIVES
• To have students practice calculating discounts/percentage
• To have students compare prices between two shops/supermarkets
• To prepare an Authorization Form
STUDENT OUTCOMES
• Visit supermarkets
• Collect some data
• Analyse and compare prices
• Practice percentage
• Complete a chart with brands and prices
• Develop social skills
HABILIDADES:
• (EF06LI03) Solicitar esclarecimentos em língua inglesa sobre o que não entendeu e o significado de palavras ou expressões desconhecidas.
• (EF06LI16) Construir repertório relativo às expressões usadas para o convívio social e o uso da língua inglesa em sala de aula.
• (EF07LI01) Interagir em situações de intercâmbio oral para realizar as atividades em sala de aula, de forma respeitosa e colaborativa, trocando ideias e engajando-se em brincadeiras e jogos.
• (EF06MA33) Planejar e coletar dados de pesquisa referente a práticas sociais escolhidas pelos alunos e fazer uso de planilhas eletrônicas para registro, representação e interpretação das informações, em tabelas, vários tipos de gráficos e texto.
PROCEDURES
1. In class, explain to students that they are going to visit two supermarkets to compare the prices of ten different items. In each supermarket they must choose a popular brand for each item so that they can find the same brand in the other supermarket. Comparing different brands would not be effective. The purpose of the activity is to find out the best price for each item.
2. Give out Worksheet 1, Pages 1 and 2, and take the students to the supermarkets. They must complete the table with the brands and prices for each item.
3. Collect the worksheets. Tell them to bring a calculator for the following class.
ANSWER KEY
LESSON 22
Topic: Math – Discounts – L4
Lesson Type: Regular
PRIOR KNOWLEDGE: Previous lessons.
KEY VOCABULARY: Food items, margarine, rice, sugar, coffe, condensed milk, chocolate, eggs, apples, kilogram.
MATERIALS
• Worksheet 1, Pages 1 and 2 – Math – Discounts – L3;
• Worksheet 1 – Math – Discounts – L4;
PREPARATION IN ADVANCE: None.
OBJECTIVES
TEACHER OBJECTIVES
• To have students practice calculating discounts/percentage
• To have students compare prices between two shops/supermarkets
• To raise critical thinking
• To assist the students while they do the worksheet
STUDENT OUTCOMES
• Analyse the collected data
• Compare brands and prices
• Practice percentage
• Use the simple past
• Calculate prices
HABILIDADES:
• (EF06LI03) Solicitar esclarecimentos em língua inglesa sobre o que não entendeu e o significado de palavras ou expressões desconhecidas.
• (EF06LI16) Construir repertório relativo às expressões usadas para o convívio social e o uso da língua inglesa em sala de aula.
• (EF07LI01) Interagir em situações de intercâmbio oral para realizar as atividades em sala de aula, de forma respeitosa e colaborativa, trocando ideias e engajando-se em brincadeiras e jogos.
• (EF07LI18) Utilizar o passado simples e o passado contínuo para produzir textos orais e escritos, mostrando relações de sequência e causalidade.
• (EF06MA33) Planejar e coletar dados de pesquisa referente a práticas sociais escolhidas pelos alunos e fazer uso de planilhas eletrônicas para registro, representação e interpretação das informações, em tabelas, vários tipos de gráficos e texto.
• (EF08MA04) Resolver e elaborar problemas, envolvendo cálculo de porcentagens, incluindo o uso de tecnologias digitais.
• (EF05MA08) Resolver e elaborar problemas de multiplicação e divisão com números naturais e com números racionais cuja representação decimal é finita (com multiplicador natural e divisor natural e diferente de zero), utilizando estratégias diversas, como cálculo por estimativa, cálculo mental e algoritmos.
PROCEDURES
1. Ask them if they enjoyed the field trip and which supermarket they think is cheaper.
2. Give out Worksheet 1. Read the questions and allow time for the students to answer them. (They will need to check the information from Worksheet 1, Pages 1 and 2 – L3.) This is not an easy exercise. Assist your students especially with vocabulary.
3. If time allows, play a memory game using food items. Students make a circle. The first one (you can choose him/her) says:
– I went to the supermarket and I bought some ________ (any food item).
The second one says the first sentence and adds another item. Each student in the sequence says the previous sentence and adds another item. They can use the list of items from the worksheet or any other item that they can remember. The ones who cannot remember all the items or add a new one are out. As a follow-up, when the game is over, you can ask them to tell you all the items that came up during the game and you write them on the board. Ask them to read the words and help them with the pronunciation. Erase the board; give them one minute to write on a piece of paper as many items as they can remember. The student who writes more items wins the game. If you prefer, there can be two winners, the one who writes more items, regardless of the spelling, and the one who writes more items correctly.
ANSWER KEY
LESSON 23
Topic: Science – Dinosaurs – L3
Lesson Type: Assessment
PRIOR KNOWLEDGE: Previous lessons.
KEY VOCABULARY: Same as the previous classes.
MATERIALS
• Copies of the letter to parents with the evaluation criteria for the module, one for each student;
• Copies of the Written Task sheet, one for each student;
• Copies of the Written Assessment criteria sheet, one for each student;
• Copies of the Oral Assessment criteria sheet, one for each student;
• Copies of the Self-Assessment sheet, one for each student.
PREPARATION IN ADVANCE
• Send a dated letter to parents/guardians before or upon completion of the module. It is advisable that parents sign and return the bottom part of the letter to acknowledge receipt.
OBJECTIVES
TEACHER OBJECTIVES
• To assess students’ oral and written production about Dinosaurs
• To have students research information about dinosaurs
• To inform the families previously
• To explain the presentation structure
• To revise the students’ written productions
• To guide the students during preparation
• To elicit from students information about dinosaurs
• To discuss self-assessment individually
• To show how to improve it
• To prepare activities that can help students improving skills
STUDENT OUTCOMES
• Write sentences about dinosaurs
• Use simple present and comparative
• Research on the topic using internet or encyclopedias
• Prepare an oral presentation
• Develop social skills
• Improve pronunciation
HABILIDADES:
• (EF06LI03) Solicitar esclarecimentos em língua inglesa sobre o que não entendeu e o significado de palavras ou expressões desconhecidas.
• (EF06LI16) Construir repertório relativo às expressões usadas para o convívio social e o uso da língua inglesa em sala de aula.
• (EF07LI01) Interagir em situações de intercâmbio oral para realizar as atividades em sala de aula, de forma respeitosa e colaborativa, trocando ideias e engajando-se em brincadeiras e jogos.
• (EF08LI15) Utilizar, de modo inteligível, as formas comparativas e superlativas de adjetivos para comparar qualidades e quantidades.
• (EF06LI19) Utilizar o presente do indicativo para identificar pessoas (verbo to be) e descrever rotinas diárias.
• (EF07LI10) Escolher, em ambientes virtuais, textos em língua inglesa, de fontes confiáveis, para estudos/pesquisas escolares.
• (EF07LI12) Planejar a escrita de textos em função do contexto (público, finalidade, layout e suporte).
• (EF69LP38) Organizar os dados e informações pesquisados em painéis ou slides de apresentação, levando em conta o contexto de produção, o tempo disponível, as características do gênero apresentação oral, a multissemiose, as mídias e tecnologias que serão utilizadas, ensaiar a apresentação, considerando também elementos paralinguísticos e cinésicos e proceder à exposição oral de resultados de estudos e pesquisas, no tempo determinado, a partir do planejamento e da definição de diferentes formas de uso da fala – memorizada, com apoio da leitura ou fala espontânea.
• (EF06CI12) Identificar diferentes tipos de rocha, relacionando a formação de fósseis a rochas sedimentares em diferentes períodos geológicos.
PROCEDURES
1. Tell students they are going to gather information about an extinct animal and report about it in their oral and written evaluations.
2. Give out the letter addressed to parents/guardians and read it in class. Clarify any questions students might have about how they are going to be assessed. Do not forget to date the letter and remind everyone that parents/guardians must acknowledge that they received it.
3. Students may do some research on the Internet and/or use the information from their worksheets. Encyclopedias or other books may also be used. Emphasize that they cannot use any translator browser, only references with content already in English. The idea is for them to use only authentic material for two reasons: it is a reliable source of information and it will keep learners from making bad translations from L1 into English. They must find at least three websites about the animal and gather as much information as possible.
4. Part I – students have to write at least ten sentences, mainly in the Simple Past. Write the following questions on the board. Then, explain to the class that those questions are just a helpful guide to help them write their sentences. It is not necessary to answer all the questions, but they still have to write at least ten sentences using the Simple Past.
(?) “WHERE DID THE ANIMAL LIVE?”
(?) “WHEN DID IT BECOME EXTINCT?”
(?) “WHAT KIND OF ANIMAL WAS IT, A MAMMAL, A REPTILE, A BIRD, A FISH, OR AN AMPHIBIAN?”
(?) “WHAT WAS THE SIZE OF THE ANIMAL?”
(?) “HOW MUCH DID IT WEIGH?”
(?) “WHAT DID IT EAT?”
(?) “WAS IT A CARNIVORE, HERBIVORE, OR OMNIVORE?”
(?) “HOW DID IT MOVE?”
(?) “WHAT OTHER CHARACTERISTICS OF THE ANIMAL WERE INTERESTING/UNUSUAL?”
Note: ask students to use at least 6 different verbs.
5. Suggest that students start with the following introductory sentence:
– I have chosen the _______________ to talk/write about.
This introduction is not to be considered one of the ten sentences they have to write.
6. Revise the students’ work. First, mark the mistakes and give them a chance to edit their work themselves. Then, do a final revision.
Note: check Appendix 1 for further explanation about how to proceed at this moment.
7. Encourage students to illustrate their oral presentation with pictures that may be displayed on a poster or a presentation. This step may be done at home.
8. Students are not allowed to read during their oral presentation, so there must be no written texts on their posters or presentations. These aids are only meant to guide and enhance.
9. Help students prepare for their presentations by asking them open-ended questions or encouraging them to look up lesser-known facts. Here are some suggestions:
– Tell me something else about …
– Repeat what you said about…, please.
– Compare ______ to ______.
– What are the main differences between _______ and _______?
– What piece of information did you enjoy learning? Why?
Note: check Appendix 2 for further information aboutopen-ended/backup questions and samples.
10. Part II – the written assessment: tell students thatthe written task will consist of three parts:
1. In the first part, they will write sentences about the extinct animal they have researched about. Once again, theymust write at least ten sentences in the Simple Past.
2. In the second part, they will have to fill in the blanks with one of the given alternatives.
3. In the third part, they will complete questions and answers about the Tyrannosaurus Rex. In column 1, the questions are in the Simple Past tense. In column 2, they are in the Simple Present tense.
11. On the day of the written evaluation, give out the attached Written Task sheet.
12. Upon completion of this activity, students must fill in the attached Self-Assessment sheet.
13. If time allows, discuss students’ self-assessment individually. Remind them that the two main objectives of this activity are to inform them about what they have and have not learned, and to discuss how they can improve. Upon the end of the assessment, collect all the worksheets and hand them in to the coordinators. Please make sure that all papers have students’ names, the date, the teacher’s name, and the group code (if there is one).
14. When reading and revising the written assignments, make a list of students’ sentences that contain the most common or basic mistakes. Without mentioning who wrote each sentence, prepare a presentation, a poster, or an activity to be used in class.
15. Project the selected sentences and go over them together in class. This procedure can be done as a game.
16. Prepare a written exercise with the same sentences. Have students work on it individually and turn it in. Check their work and how much progress they have made since the written task.
17. Discuss the students’ progress with the coordinator and what can be done to improve their performance.
LESSON 24
Topic: History – Ancient Rome – L1
Lesson Type: Regular
PRIOR KNOWLEDGE: None.
KEY VOCABULARY: Empire, rise, B.C., A.D., BCE, CE, meat, fish, fruit, vegetables, cheese, olives, raisins, bread, olive oil, water, honey.
MATERIALS
• Worksheet 1 – History – Ancient Rome – L1;
• Worksheet 2 – History – Ancient Rome – L1;
• Presentation – History – Ancient Rome – L1.
PREPARATION IN ADVANCE: None.
OBJECTIVES
TEACHER OBJECTIVES
• To give students an idea of the extent of the Roman Empire
• To show the meaning of AD and BC in History
• To review the simple past
• To talk about Roman’s eating habits in the past
Student Outcomes
• Understand the Roman Empire
• Comprehend AD and BC
• Identify Roman Empire in a map
• Use simple past
• Talk about Roman’s eating habits ins the past
HABILIDADES:
• (EF06LI03) Solicitar esclarecimentos em língua inglesa sobre o que não entendeu e o significado de palavras ou expressões desconhecidas.
• (EF06LI16) Construir repertório relativo às expressões usadas para o convívio social e o uso da língua inglesa em sala de aula.
• (EF07LI01) Interagir em situações de intercâmbio oral para realizar as atividades em sala de aula, de forma respeitosa e colaborativa, trocando ideias e engajando-se em brincadeiras e jogos.
• (EF07LI18) Utilizar o passado simples e o passado contínuo para produzir textos orais e escritos, mostrando relações de sequência e causalidade.
• (EF06HI11) Caracterizar o processo de formação da Roma Antiga e suas configurações sociais e políticas nos períodos monárquico e republicano.
PROCEDURES
1. Write “Ancient Rome” in the center of a circle on the board. Ask students what comes to their minds when they see this. Write their responses on lines radiating out of the circle.
2. Tell students that Roman History is divided into three main periods: before the rise of Rome, the Roman Republic, and the Roman Empire. Write the periods in a column on the board.
3. Write “from Prehistory to ________” beside “before the rise of Rome” and ask students when they think that period ended and the Roman Republic period began (500 B.C. – if necessary explain that B.C. means Before Christ). Write it in the blank and tell students the Roman Republic period lasted 470 years. Ask them in which year it ended (30 B.C.).
4. Write “from 500 B.C. to 30 B.C.” beside “Roman Republic” on the board. Ask students how long they think the Roman Empire lasted (506 years). Ask for a volunteer to write the last piece of information on the board, so the complete information will be: before the rise of Rome from Prehistory to 500 B.C.
Roman Republic from 500 B.C. to 30 B.C.
Roman Empire from 30 B.C. to 476 A.D.
5. Ask students what “A.D.” stands for (Anno Domini – it is Latin for “the year of the Lord”). Explain that “B.C.” and “A.D.” are slowly being replaced by “B.C.E.” and “C.E.” Tell them “B.C.E.” stands for “Before the Common Era” and “C.E.” for “Common Era.” Ask them why they think this is happening – because not everyone in the world is Christian, so it would be more polite and considerate to use the new abbreviations.
6. Ask students where on the world map they think the Roman Empire was. Have them say the main continent where the Roman Empire was located (Europe). Ask them in which other continents the Roman Empire had territories (Africa and Asia).
7. Project the Presentation, Page 1. Students will see the map of Europe, Africa, and Asia and a yellow area that corresponds to the domains of the Roman Empire in the first century. Explain it to them. Call on a volunteer to point to Europe on the map, then Africa and Asia.
8. Ask students if they have an idea of the countries that are now located in the territory that once belonged to the Roman Empire.
9. Divide the class into two groups.
10. Project Map Presentation, Page 2, over Map Presentation, Page 1. Explain that it shows today’s political division. Point to Number 1 and ask Group 1 what country it is. If they do not know, ask Group 2. If they do not know, Group 1 can try again and so on. The first Group to say the correct answer wins a point. When you ask what country Number 2 is, start from Group 2 and repeat the procedure. Do the same for countries 3 to 10.
11. Give out Worksheet 1 and allow students a few minutes to complete it. Correct it by asking them to read the answers aloud. Work on pronunciation.
12. Ask students what they usually have for breakfast. Have some of the students, or all of them, if possible, make complete sentences about their breakfast. Have them say:
– I usually have ________ for breakfast.
Have them practice negative sentences by asking them to say what they do not have for breakfast.
13. Divide the class into groups of three or four students. Ask them what they think Ancient Romans had for breakfast. Have them make a list of those foods and drinks. Give each group five points or five pieces of candy. Have the first group say one item from their list. If it is correct, give them a point or a piece of candy. If it is wrong, take a point or get a piece of candy back. Repeat the procedure with each group five times. Here are the items you may accept as correct answers: meat, fish, fruit, vegetables, cheese, olives, raisins, bread, olive oil, water.
14. Challenge. Ask students what Romans used to sweeten food and give two points to the group that gives the correct answer: they used honey.
15. Ask students:
(?) “DO YOU THINK POOR ROMANS HAD THIS KIND OF BREAKFAST?” (NO.)
Ask them what kind of food they think poor Romans had (only bread and water).
16. Have students make complete sentences about Ancient Romans’ breakfast using the structure:
– They had ________ for breakfast.
Have them say what Ancient Romans did not have for breakfast using the structure:
– They didn’t have ________ for breakfast.
You may introduce the use of “any” in the negative sentences.
17. Give out Worksheet 2. Allow students a few minutes to complete it. Check each student’s worksheet.
ANSWER KEY
LESSON 25
Topic: History – Ancient Rome – L2
Lesson Type: Regular
PRIOR KNOWLEDGE: Previous lesson.
KEY VOCABULARY: Couches, courses, custard, desserts, dinner, dining room, fingers, food, meal, sunset, rich, stimulant, main, eat (ate), comprise(d), consist(ed), join(ed), recline(d), sit (sat). Triclinium and tiropatinam are Latin words. The first one is the name Ancient Romans gave to their dining room and the second one was a famous Roman dessert.
MATERIALS
• Worksheet 1, Pages 1, 2 and 3 – History – Ancient Rome – L2;
• Appendix 1 – History – Ancient Rome – L2;
• Blank sheets of paper.
PREPARATION IN ADVANCE
• Make three or four copies of Appendix 1 and stick them on different walls around the school, not far from your classroom.
• Get the sheets of paper and cut them into slips (11 slips per group – See Procedure 2).
OBJECTIVES
TEACHER OBJECTIVES
• To teach about daily life in Ancient Rome - dinner
• To have students practice the Simple Past tense
• To give students an idea of the extent of the Roman Empire
• To guide the students into a reading activity
STUDENT OUTCOMES
• Understand the Roman Empire
• Develop reading skills
• Formulate simple past sentences
• Practice writing
• Rephrase sentences changing the verbal tense
• Talk about Roman’s Dinner
HABILIDADES:
• (EF06LI03) Solicitar esclarecimentos em língua inglesa sobre o que não entendeu e o significado de palavras ou expressões desconhecidas.
• (EF06LI16) Construir repertório relativo às expressões usadas para o convívio social e o uso da língua inglesa em sala de aula.
• (EF07LI01) Interagir em situações de intercâmbio oral para realizar as atividades em sala de aula, de forma respeitosa e colaborativa, trocando ideias e engajando-se em brincadeiras e jogos.
• (EF07LI18) Utilizar o passado simples e o passado contínuo para produzir textos orais e escritos, mostrando relações de sequência e causalidade.
• (EF07LI08) Relacionar as partes de um texto (parágrafos) para construir seu sentido global.
• (EF07LI14) Produzir textos diversos sobre fatos, acontecimentos e personalidades do passado (linha do tempo/timelines, biografias, verbetes de enciclopédias, blogues, entre outros).
• (EF06HI11) Caracterizar o processo de formação da Roma Antiga e suas configurações sociais e políticas nos períodos monárquico e republicano.
PROCEDURES
1. Write “dinner in ancient rome” on the board. Ask students what they know about it.
2. Divide the class into groups of two or three students. Give each group eleven slips of paper. Tell them you have stuck a text about the Ancient Roman’s dinner outside the classroom. Explain that you are going to write a question on the board, they have to write it on a slip of paper, run to the place(s) where the text is, find the answer, write it down, and bring it back for you to check. The first group to bring back the right answer, wins a point.
3. Here are the questions you will write on the board:
A. Which word from the text means “the time when the sun goes down”? (Sunset.)
B. Which word from the text means “people who are not free and do not get any money for their work”? (Slaves.)
C. Which word from the text means “a kind of sofa”? (Couch.)
D. Where did the Romans have dinner? (They had dinner in the triclinium/dining room.)
E. How many couches were there in the triclinium? (There were three couches.)
F. How many people could recline on the couches? (Nine people could recline on the couches.)
G. Where did the children sit? (The children/They sat on stools.)
H. Instead of forks and knives, what did the Romans eat with? (They ate with their fingers.)
I. How many courses did dinner generally comprise? (Dinner/It generally comprised three courses.)
J. What did the Romans eat for their main course? (They ate meat or fish.)
K. What famous French dessert is similar to an Ancient Roman popular dessert? (Crème Brulée is similar to an Ancient Roman popular dessert.)
4. For questions D-K, tell students they can win an extra point if they write a complete, correct answer. Give the extra point to the first group to do it.
5. Give out Worksheet 1, Page 1. Play a reading game to work on pronunciation. Here are the rules for the game. Everybody will be given 10 points (or some money) and the student who volunteers to read will be given 15 points. While he reads, the others will tell him to stop when they notice any mistake. If it is really wrong, the student who asked to stop will pronounce the word. If he pronounces it correctly, the student who was reading gives him one of his points. If he pronounces it incorrectly, he gives one of his points to the reader. If the reader was right, the student who stopped him gives him one point.
Any student can ask to read at any time. He just has to ask: “Can I read now?” The present reader stops for the new reader to continue. The new volunteer is given 5 extra points. If the readers make mistakes and no one asks them to stop, you correct the mistake (do it after the student finishes each sentence) and everybody gives you one point, except the reader.
6. Give out Worksheet 1, Page 2. Allow students a few minutes to complete it and correct it, by asking students to read their answers aloud.
7. Give out Worksheet 1, Page 3. When students finish it, it would be a good idea to collect Pages 2 and 3 and correct both of them to make sure students will have a reliable source to study for tests.
ANSWER KEY
LESSON 26
Topic: History – Ancient Rome – Leite Creme – L3
Lesson Type: Cooking
PRIOR KNOWLEDGE: Previous lesson.
KEY VOCABULARY: Yolk, cornstarch, saucepan, wooden spoon, thick, pour(ed), bring (brought), allow(ed), beat, add(ed), cook(ed), stir(red), sprinkle(d), heat(ed), put.
MATERIALS
• Worksheet 1, Pages 1 and 2 – History – Ancient Rome – Leite Creme – L3.
Ingredients:
• 500 ml of milk;
• 2 eggs;
• 2 tablespoons of sugar;
• 2 tablespoons of cornstarch;
• Additional sugar to sprinkle on the dessert;
• 1 tablespoon per small serving.
Note: the amounts listed serve six small portions. If you have more students, increase the amounts so that all students can have a taste of the dessert.
Utensils:
• A saucepan;
• A wooden spoon;
• A fork;
• A soup bowl;
• Tablespoons or metal spatulas;
• Plastic plates and spoons to serve the dessert.
PREPARATION IN ADVANCE
• Buy the ingredients.
• Provide the kitchen utensils and a table.
• Check if it is possible to take students to the kitchen.
• Send a note to parents asking about allergies
OBJECTIVES
TEACHER OBJECTIVES
• To have students taste ancient Roman food
• To have students practice the Simple Past tense
• To introduce Future tense with “going to”
• To prepare a Roman recipe
• To show some action verbs
STUDENT OUTCOMES
• Practice simple past
• Comprehend and use future with going to
• Try ancient Roman food
• Review names of kitchen utensils
• Practice action verbs
• Develop writing skills
HABILIDADES:
• (EF06LI03) Solicitar esclarecimentos em língua inglesa sobre o que não entendeu e o significado de palavras ou expressões desconhecidas.
• (EF06LI16) Construir repertório relativo às expressões usadas para o convívio social e o uso da língua inglesa em sala de aula.
• (EF07LI01) Interagir em situações de intercâmbio oral para realizar as atividades em sala de aula, de forma respeitosa e colaborativa, trocando ideias e engajando-se em brincadeiras e jogos.
• (EF07LI18) Utilizar o passado simples e o passado contínuo para produzir textos orais e escritos, mostrando relações de sequência e causalidade.
• (EF08LI14) Utilizar formas verbais do futuro para descrever planos e expectativas e fazer previsões.
• (EF06LI21) Reconhecer o uso do imperativo em enunciados de atividades, comandos e instruções.
• (EF03LP11) Ler e compreender, com autonomia, textos injuntivos instrucionais (receitas, instruções de montagem etc.), com a estrutura própria desses textos (verbos imperativos, indicação de passos a ser seguidos) e mesclando palavras, imagens e recursos gráficovisuais, considerando a situação comunicativa e o tema/assunto do texto.
• (EF06HI11) Caracterizar o processo de formação da Roma Antiga e suas configurações sociais e políticas nos períodos monárquico e republicano.
PROCEDURES
1. Display the utensils and the ingredients on a table in the classroom.
2. Tell students they are going to make an Ancient Roman recipe.
3. Ask them what utensils they are going to use. Help them with vocabulary. Have them say complete sentences, “We are going to use a saucepan.” Have different volunteers say different utensils and ingredients. Write all of them on the board.
4. Ask students:
(?) “DID ANCIENT ROMANS USE SUGAR?” (No, they didn’t.)
(?) “WHAT DID THEY USE?” (They used honey.)
Explain that they are going to use sugar in their recipe instead of honey to have a tastier dessert.
5. Give out Worksheet 1, Page 1. Have students complete it. Correct it.
6. Have students mime some verbs from the recipe – pour, beat, stir, sprinkle, add – to practice the vocabulary they will need during the cooking activity itself.
7. Take students to the kitchen. Have them make the recipe. Ask different students to do different things.
8. When they are ready to caramelize the sugar, be very careful! The metal spoon will get very hot. To avoid burns, wrap up the handle with a cloth.
9. After everyone has eaten, if time allows, go back to the classroom, give out Worksheet 1, Page 2, and allow students a few minutes to complete it.
RECIPE
Directions:
• Pour 500 ml of the milk in a saucepan.
• Bring it to a boil.
• Allow it to stand for a few minutes to get a little colder.
• Beat 2 yolks with 2 tablespoons of sugar and 2 tablespoons of cornstarch.
• Add the mixture to the milk and cook it on low to medium heat so it does not boil.
• Stir it continuously until it gets thick.
• Pour the mixture into small plates.
• Sprinkle some sugar on the dessert.
• Heat a metal tablespoon and put it on the sprinkled sugar to caramelize the top of the dessert.
ANSWER KEY
LESSON 27
Topic: History – Ancient Rome – L4
Lesson Type: Regular
PRIOR KNOWLEDGE: Previous lessons.
KEY VOCABULARY: Board game, closed, counterclockwise, dice, free, occupied, move, opponent, piece, removed, re-enter, rule, space, stuck, roll, may, must, cannot, would.
MATERIALS
• Worksheet 1, Pages 1, 2 and 3 – History – Ancient Rome – L4;
• Poster board;
• Dice;
• Scissors;
• Markers;
• Rulers;
• Coins;
• Paper for dictation.
PREPARATION IN ADVANCE
• Cut the poster board for each student. (See poster board under Materials.)
OBJECTIVES
TEACHER OBJECTIVES
• To teach how to play an ancient Roman board game
• To introduce the use of “may/must/can/cannot”
• To introduce the use of “would”
• To demonstrate how to play the game
• To review Roman numbers
STUDENT OUTCOMES
• Play a Roman board game
• Practice some modal verbs “may, must, can, cannot”
• Comprehend would
• Recognize Roman numbers
• Learn how to play Tabula
HABILIDADES:
• (EF06LI03) Solicitar esclarecimentos em língua inglesa sobre o que não entendeu e o significado de palavras ou expressões desconhecidas.
• (EF06LI16) Construir repertório relativo às expressões usadas para o convívio social e o uso da língua inglesa em sala de aula.
• (EF07LI01) Interagir em situações de intercâmbio oral para realizar as atividades em sala de aula, de forma respeitosa e colaborativa, trocando ideias e engajando-se em brincadeiras e jogos.
• (EF07LI20) Empregar, de forma inteligível, o verbo modal can para descrever habilidades (no presente e no passado).
• (EF12EF01) Experimentar, fruir e recriar diferentes brincadeiras e jogos da cultura popular presentes no contexto comunitário e regional, reconhecendo e respeitando as diferenças individuais de desempenho dos colegas.
• (EF06MA02) Reconhecer o sistema de numeração decimal, como o que prevaleceu no mundo ocidental, e destacar semelhanças e diferenças com outros sistemas, de modo a sistematizar suas principais características (base, valor posicional e função do zero), utilizando, inclusive, a composição e decomposição de números naturais e números racionais em sua representação decimal.
• (EF06HI11) Caracterizar o processo de formação da Roma Antiga e suas configurações sociais e políticas nos períodos monárquico e republicano.
PROCEDURES
1. Write “tabula” on the board. Have students predict what they think it is.
2. Explain that it is an Ancient Roman board game, the “ancestor” of the modern gammon. Elicit from students the rules of the game.
3. Tell them they are going to make their boards and pieces. Each pair makes a board using half a white poster board sheet and 15 pieces of two different colors of poster board. They may be the size of a coin (a quarter).
4. The board must be divided into 24 spaces as shown in the picture below. The spaces must be numbered using Roman numbers.
5. You may play a game to practice Roman numbers. Divide the class into pairs. Give each pair a piece of paper. Tell them you are going to write a series of Roman numbers from 1 to 24 on the board. They have to write that number in words. When they finish, they have to exchange their answers with another group who is going to check the answers as you correct them on the board. The group with the most correct answers is the winner. Collect the sheets and give out blank ones. Do the dictation the opposite way – you write the numbers in words on the board; students write the equivalent Roman numbers.
6. Get one of the boards and two players. Have them sit in the middle of the classroom. The other students should sit around them so everybody can follow their moves.
7. Tell them you are going to explain the rules of the game and the players must show them in action. Here are the rules and what students/you are supposed to do (in parentheses).
8. Give students time to practice the game using the boards and pieces they made. Give each pair three dice. Assist them with the rules.
9. As they play, try to have them use the language from the rules, “You can’t/cannot, you may, you must.”
10. Give out Worksheet 1, Page 1 and 2. As you read the rules, students try to complete the sentences. After completing each sentence, have students read them to practice pronunciation.
11. Give out Worksheet 1, Page 3. Answer Situation 1 together with students. Then, give them a few minutes to solve Situation 2. Correct it on the board.
ANSWER KEY
LESSON 28
Topic: History – Ancient Rome – L5
Lesson Type: Regular
PRIOR KNOWLEDGE: Previous lessons.
KEY VOCABULARY: Twins, she-wolf, feed(fed).
MATERIALS
• Worksheet 1, Pages 1 and 2 – History – Ancient Rome – L5;
• Flashcards – History – Ancient Rome – L5;
• Presentation – History – Ancient Rome – L5;
• Cuisenaire rods or puppets.
PREPARATION IN ADVANCE
• Practice telling the story using the objects.
• Provide Cuisenaire rods or puppets to represent the characters of the legend. Small building blocks can be used or objects such as cans or bottles, as long as they have different colors, shapes, and/or sizes.
OBJECTIVES
TEACHER OBJECTIVES
• To teach about the legend of the founding of Rome
• To have students practice the Simple Past tense
• To have students practice question words
• To tell Romulus and Remus legend
STUDENT OUTCOMES
• Practice the simple past
• Know Romulo and Remus legend
• Comprehend the questions words
• Practice new vocabulary
• Fulfill a text with the right words
• Retell a story
HABILIDADES:
• (EF06LI03) Solicitar esclarecimentos em língua inglesa sobre o que não entendeu e o significado de palavras ou expressões desconhecidas.
• (EF06LI16) Construir repertório relativo às expressões usadas para o convívio social e o uso da língua inglesa em sala de aula.
• (EF07LI01) Interagir em situações de intercâmbio oral para realizar as atividades em sala de aula, de forma respeitosa e colaborativa, trocando ideias e engajando-se em brincadeiras e jogos.
• (EF07LI05) Compor, em língua inglesa, narrativas orais sobre fatos, acontecimentos e personalidades marcantes do passado.
• (EF07LI08) Relacionar as partes de um texto (parágrafos) para construir seu sentido global.
• (EF06HI11) Caracterizar o processo de formação da Roma Antiga e suas configurações sociais e políticas nos períodos monárquico e republicano.
PROCEDURES
1. Write the word “legend” on the board and ask students to give an example of a legend. If they do not know, give your own examples.
Suggestions: the legend of King Arthur from the UK, the legend of Saci Pererê from the Brazilian folklore, the legend of Bigfoot from the USA. According to yourdictionary.com, a legend is “an unverified story handed down from earlier times, especially one popularly believed to be historical.”
2. Tell students that according to the legend, Romulus founded Rome. Write “Romulus” on the board and ask students to mention other people who founded places or companies. Ask them if they know who founded their school, city, the biggest company in town. Give your own examples.
3. Tell students you are going to tell them The Legend of Romulus and Remus, which is the legend of the founding of Rome.
4. Since Romulus and Remus were twins, get two rods of the same size and color to represent them, preferably small ones. Get the biggest rod to represent Mars, the god of war. Get smaller ones to represent King Amulius, Numitor, Rhea Silvia, the wolf, Faustulus, and his wife.
5. Introduce the characters by showing the rods and saying who they will represent. Show the flashcard of the she-wolf.
6. Start the story and use the rods as puppets to act it out. Use gestures as well.
7. Repeat the story and stop in the middle of some sentences to have students complete them.
8. Repeat Procedure 6 until students are able to tell the whole story by themselves.
9. Project the Presentation. Read the text and stop at the blanks to have students complete the sentences. You can do this as a game. Just divide the class into small groups or pairs and have the first group say the first missing word. If they say it right, give them a point and ask the second group to say the next word. If they say it wrong, ask the second group to try the same word. Go through the rest of the text following the same procedure with the other groups.
10. Give outWorksheet1,Page 1. Give students a few minutes to complete it and correct it by asking students to read the text aloud. Work on pronunciation.
Note: if students find it too difficult to complete the text, write the present form of the verbs on the board. Here they are.
11. Give out Worksheet 1, Page 2, and have students do it in class. Correct it
ANSWER KEY
LESSON 29
Topic: History – Ancient Rome – L6
Lesson Type: Regular
PRIOR KNOWLEDGE: Previous lessons.
KEY VOCABULARY: Calendar; months: January, February, March, April, May, June, July, August, September, October, November, December; legend, founder, revolve(d), length, ruled, seasons, even number, luck, odd number, lack, nowadays, Leap Year, honor.
MATERIALS
• Worksheet 1, Pages 1-4 – History – Ancient Rome – L6;
• Presentation – History – Ancient Rome – L6.
PREPARATION IN ADVANCE
• Draw the T Chart on the board.
OBJECTIVES
TEACHER OBJECTIVES
• To teach about the ancient Roman calendar
• To have students practice the Simple Past tense
• To have students practice questions
• To review the Months
• To demonstrate how to know how many days a month has
STUDENT OUTCOMES
• Understand Roman Calendar
• Practice the simple past
• Make use of question words
• Review months
• Use hands to check how many days a month has
• Comprehend the calendar history
HABILIDADES:
• (EF06LI03) Solicitar esclarecimentos em língua inglesa sobre o que não entendeu e o significado de palavras ou expressões desconhecidas.
• (EF06LI16) Construir repertório relativo às expressões usadas para o convívio social e o uso da língua inglesa em sala de aula.
• (EF07LI01) Interagir em situações de intercâmbio oral para realizar as atividades em sala de aula, de forma respeitosa e colaborativa, trocando ideias e engajando-se em brincadeiras e jogos.
• (EF07LI05) Compor, em língua inglesa, narrativas orais sobre fatos, acontecimentos e personalidades marcantes do passado.
• (EF07LI08) Relacionar as partes de um texto (parágrafos) para construir seu sentido global.
• (EF01CI05) Identificar e nomear diferentes escalas de tempo: os períodos diários (manhã, tarde, noite) e a sucessão de dias, semanas, meses e anos.
• (EF06HI11) Caracterizar o processo de formação da Roma Antiga e suas configurações sociais e políticas nos períodos monárquico e republicano.
PROCEDURES
1. Draw a T Chart on the board with Roman Calendar in one column and Our Calendar in the other. Make divisions on the left as follows:
(?) “HOW MANY MONTHS?”
(?) “HOW MANY DAYS?”
(?) “WHEN CREATED?”
(?) “WHO CREATED?”
(?) “WHAT CELESTIAL BODY?”
Elicit from students what they know about our modern-day calendar. If they do not give the following information, ask them: “HOW MANY DAYS ARE THERE?” (THERE ARE 365 DAYS.) “HOW MANY MONTHS ARE THERE?” (THERE ARE 12 MONTHS.)
They probably won’t know the answers to the following questions so have them guess, and then lead them to the correct answer.
(?) “WHEN WAS IT CREATED?” (It was created in 1582 but the last country to join the rest of the world in using it only accepted it in 1923.)
(?) “WHO CREATED IT?” (It was named for Pope Gregory XIII who asked a team of German mathematicians led by Christopher Clavius to invent it.)
(?) “WHAT CELESTIAL BODY HELPS TO GUIDE THE CALENDAR?” (The sun determined the length of the year.)
2. Next, have them guess the answers to the Roman calendar questions and fill in the chart.
1. When was the Roman calendar created? (The Roman calendar was created around 750 B.C.)
2. Who created it? (Romulus invented it.)
3. What celestial body did they use to guide them in their calendar? (They used the moon. It was called the lunar calendar.)
4. How many months did it have? (It had 10 months.)
5. How many days did it have? (It had 304 days.)
3. Ask students to look carefully at the information on the chart and make observations about the differences between the two calendars.
– What are the differences between the ancient Roman calendar and the one we use nowadays?
1. Our calendar has two more months than the Roman calendar.
2. Our calendar has 61 more days than the Roman calendar.
3. Our calendar is a solar calendar and the Roman one is a lunar calendar.
4. The Roman calendar was said to be created by a legendary person and the modern calendar was created by mathematicians.
5. The Roman calendar was created over 700 years before Christ (B.C.) and our calendar is only a little over 400 years old. (You can have them do exact calculations with the created date and the date when every country in the world was using it.)
Students may come up with other observations.
4. Ask students the names of the months in our calendar. Write them on the board. Ask them the date of their birthday. Teach them how to say it (March twenty-fifth).
5. Elicit from students what they know about Romulus. Ask them questions about Romulus using what, where, how, when etc.
6. Show students the Presentation. Show students the table. Ask them to read the first column. Elicit from them what the first name means, Martius (March). Ask a student to come to the board and write the name of the month in English. You may do this activity as a game. Give one point to the group if the student writes the name of the month correctly.
7. Show students the third column. Ask them if they know the origin of the name March. Give them some clues. Tell them the name March comes from a name of a Roman god. Repeat this procedure with all the names. From July to December they used ordinal numbers.
8. Tell students you are going to teach them a new way to know how many days there are in each month. Close your hand into a fist (see picture below). Ask students to do the same. Show them your knuckles (The joint that connects the finger to the hand.) Between the knuckles there is a space. The knuckle from the index finger or pointer represents January with 31 days. Then, they go to the space between the middle finger and the index finger that represents February with 28 days (29 in a Leap Year). Then, they must go to the middle finger knuckle that represents March; it has 31 days. They should notice the joint represents the months with 31 days and the spaces between the joints represents the months with 30 or 28 days. When they get to the pinky, or little finger, it represents two months, July and August because you need to go back for the rest of the months. Make sure they use the names of the months in English while they are practicing. Ask students questions about each month, such as:
(?) “HOW MANY DAYS DOES FEBRUARY HAVE?”
(?) “AND IN A LEAP YEAR?”
9. Show students the last column in the table. Ask them to complete the number of days in each month. Elicit from them the name of the months that are missing - January and February. Tell them that only during the period that Numa Pompilius ruled Rome, from 715 to 673 B.C., did he introduce two extra months. He also introduced 51 more days to the old calendar. Ask students how many days there were after he introduced 51 more days (355 days). Tell them the Romans were very superstitious. Ask students if they know what this word means. Explain it to them. Ask them about things that bring good luck (a four-leaf clover, a rabbit’s foot, a horseshoe, etc.) and bad luck (black cat, breaking a mirror, number 13, walking under a ladder, put hat on the bed, etc.). Romans believed even numbers brought bad luck, so in their calendar all months ended with odd numbers. Only one month had an even number and it was considered a bad luck month. Elicit from them the name of the month (February). Because of this superstition they took one day from each 30-day month, so the year was divided into eleven months with odd numbers and one with an even number as seen below.
• 31 days – March, May, July, October
• 29 days – January, April, June, August, September, November, December
• 28 days – February
10. Show students the second part of the Presentation. Divide the class into two or three groups. Ask for a volunteer to read the first paragraph. Do not show the whole text. Ask them questions about it.Make sure students use complete answers, if not, give the group only one point. If the answers are complete, give them two points.
(?) “WHO FOUNDED ROME?” (Romulus was the founder.)
(?) “WHEN WAS THE ROMAN CALENDAR CREATED?” (It was created around 750 b.c.)
(?) “WHY DID THEY USE A LUNAR CALENDAR?” (Because they thought Earth was the center of the universe.)
(?) “HOW MANY DAYS DID THE FIRST CALENDAR HAVE?” (It had 304 days.)
(?) “HOW MANY MONTHS DID IT HAVE?” (It had 10 months.)
(?) “HOW MANY MONTHS HAD 30 DAYS AND HOW MANY HAD 31?” (Six of them had 30 days and four of them had 31 days.)
11. Show students the second paragraph. Ask a student to read it out loud. Now, the same group must try to make questions for the other group. Each group must make three questions. Ask them to hand the questions to you. Choose one or two questions for each group. The group that creates the best questions gets two points. Make sure students use when, where, how, what, and which.
12. In the third paragraph,there are some blanks. Each group must try to figure out which words are missing.
13. Hand out Worksheet 1, Page 1, 2, 3, and 4. Allow students a few minutes to answer the questions. Correct it out loud.
ANSWER KEY
LESSON 30
Topic: Social Studies – France – L1
Lesson Type: Regular
PRIOR KNOWLEDGE: None.
KEY VOCABULARY: Not specific. Please, read Worksheet 1 and be ready to explain, demonstrate, give examples, make gestures, show flashcards related to any vocabulary from the text. Note on the pronunciation of French words: LOIRE would be read [luarre] in Portuguese.
MATERIALS
• Worksheet 1, Pages 1 and 2 – Social Studies – France – L1;
• Appendix 1, Pages 1 and 2 – Social Studies – France – L1;
• Presentation – Social Studies – France – L1;
• Sets of cards with the letters a, b, c;
• Five pieces of blank paper per group;
• A data projector;
• Some candy.
PREPARATION IN ADVANCE
• Provide a data projector.
• Make one copy of Appendix 1, pages 1 and 2, and cut out the slips.
OBJECTIVES
TEACHER OBJECTIVES
• To give students practice in reading in English
• To raise interest about France
• To give students some information about France
• To focus on form: open questions
Student Outcomes
• Develop reading skills
• Familiarize with France
• Practice writing
• Build questions about a text
• Answer a quiz
HABILIDADES:
• (EF06LI03) Solicitar esclarecimentos em língua inglesa sobre o que não entendeu e o significado de palavras ou expressões desconhecidas.
• (EF06LI16) Construir repertório relativo às expressões usadas para o convívio social e o uso da língua inglesa em sala de aula.
• (EF07LI01) Interagir em situações de intercâmbio oral para realizar as atividades em sala de aula, de forma respeitosa e colaborativa, trocando ideias e engajando-se em brincadeiras e jogos.
• (EF07LI05) Compor, em língua inglesa, narrativas orais sobre fatos, acontecimentos e personalidades marcantes do passado.
• (EF07LI08) Relacionar as partes de um texto (parágrafos) para construir seu sentido global.
• (EF07LI14) Produzir textos diversos sobre fatos, acontecimentos e personalidades do passado (linha do tempo/timelines, biografias, verbetes de enciclopédias, blogues, entre outros).
• (EF04GE01) Selecionar, em seus lugares de vivência e em suas histórias familiares e/ou da comunidade, elementos de distintas culturas (indígenas, afro-brasileiras, de outras regiões do país, latino-americanas, europeias, asiáticas etc.), valorizando o que é próprio em cada uma delas e sua contribuiçãopara a formação da cultura local, regional e brasileira.
PROCEDURES
1. Begin by asking students what they know about France. If you want, write their answers on the board.
2. Tell them that they are going to play a game about France. If they do not know the answer for the questions in the game they may guess. Divide the class in groups of three or four students. Give each group a set of cards with the letters for the answers. Explain that you are going to show a Presentation with questions about France. Each question has three options. You are going to show and read the questions and the choices. The groups have 30 seconds to discuss and choose one answer. They must pick the card with their answer and when you say:
– Please, show your answers.
They must show their cards so that everyone can see it. The groups with the correct card get one point.
Note: answer key at the end of this lesson plan.
After questions 2, 4, 6, 7, and 8 the groups will have to answer open questions with no choices.Give outtheblank piecesof paper andexplain that they must write theiranswers and only show them when you say:
– Please, show your answers.
The groups will win one point for each correct answer and lose one point for each wrong answer. Here are the open questions and the answer key:
1. After question 2: Name the countries that border France. (They will win one point for each correct country and lose one for each wrong country). Belgium, Luxembourg, Germany, Switzerland, Italy, and Spain.
2. After question 4: In which countries do the Danube, the Thames, the Arno and the Volga Rivers flow? (Explain that the Danube flows through ten countries but they only have to say one of them). The Danube: Austria, Bulgaria, Croatia, Germany, Hungary,Moldova,Slovakia,Romania, Ukraine, Serbiaand Montenegro; Thames: England/Great Britain/United Kingdom (any of them can be accepted); the Arno: Italy; the Volga: Russia. (Give one point for each correct answer)
3. After question 6: Where are the Andes (continent)? In South America.
4. After question 7: Where are Mount Everest and Mount Fuji (continent)? Asia.
5. After question 8: Name one of the first three car manufactures. Japan, USA, and Germany.
3. Write the words what, where, which, how, who, when, how many, how much, and name on the board (one below the other). Tell students to ask questions about anything they would like to know about France. Their questions must start with one of the words from the list you have written on the board. This is the time to “Focus on Form”. As students say their questions, write them on the board.
4. Give out Worksheet 1, read the text about France, and ask students to underline the words they do not know. When you finish reading, work on the new words, paragraph by paragraph. As students say the words they do not know, write them on the board and check if there is any student that knows the meaning of each word. While working on vocabulary, remember to use different techniques: give examples, demonstrate, rephrase, give synonyms, explain, ask students to say a new sentence using that particular word or expression. Always involve students as much as possible.
5. Tell them that they are going to play the Question Game. In their original groups they are going to create 5 open questions about the text and then ask another group. Their questions can start with: what, where, which, how, who, when, how many, how much, and name. Allow them some time to create their questions and help them with grammar.
6. When all groups have their questions ready, write the names or numbers of the groups on small pieces of paper (one name per piece of paper). Choose one group to ask. They read their question and then you draw one piece of paper to say which group will answer the question.Students cannot read their texts at thispoint. If the group knows theanswer, they win one point. If they do not know the answer, the group that asked the question wins the point.
7. Blank Game. Place the slips from Appendix 1, Pages 1 and 2, (face down) on a chair or table in the middle of the classroom. Each group picks one slip and tries to fill in the blank. If they know the answer, they must fill in the blank, write their name on the slip and give it back to the teacher. If they do not know the answer, they can put the slip back in the pile (with no name) and get another one. When there are no more slips in the pile, the teacher will read the sentences and give one point for each correct answer.
ANSWER KEY
LESSON 31
Topic: Social Studies – France – L2
Lesson Type: Regular
PRIOR KNOWLEDGE: Previous lesson.
KEY VOCABULARY: Starter, entree, main course, dessert, check, credit card. Please, check the vocabulary on Worksheet 1, Page 1 (menu).
MATERIALS
• Worksheet 1, Pages 1 and 2 – Social Studies – France – L2;
• Table and chairs;
• Flashcards of different dishes of meals.
PREPARATION IN ADVANCE: None.
OBJECTIVES
TEACHER OBJECTIVES
• To give students practice in ordering in a restaurant
• To raise interest about French cuisine
• To teach about French cuisine
• To guide the students in a role play
• To show a menu
STUDENT OUTCOMES
• Practice ordering in a restaurant
• Familiarize with French cuisine
• Dramatize a dialogue in a restaurant
• Recognize a Menu
HABILIDADES:
• (EF06LI03) Solicitar esclarecimentos em língua inglesa sobre o que não entendeu e o significado de palavras ou expressões desconhecidas.
• (EF06LI16) Construir repertório relativo às expressões usadas para o convívio social e o uso da língua inglesa em sala de aula.
• (EF07LI01) Interagir em situações de intercâmbio oral para realizar as atividades em sala de aula, de forma respeitosa e colaborativa, trocando ideias e engajandose em brincadeiras e jogos.
• (EF07LI13) Organizar texto em unidades de sentido, dividindo-o em parágrafos ou tópicos e subtópicos, explorando as possibilidades de organização gráfica, de suporte e de formato do texto.
• (EF07LI05) Compor, em língua inglesa, narrativas orais sobre fatos, acontecimentos e personalidades marcantes do passado.
• (EF07LI08) Relacionar as partes de um texto (parágrafos) para construir seu sentido global.
• (EF15AR18) Reconhecer e apreciar formas distintas de manifestações do teatro presentes em diferentes contextos, aprendendo a ver e a ouvir histórias dramatizadas e cultivando a percepção, o imaginário, a capacidade de simbolizar e o repertório ficcional.
PROCEDURES
1. Ask them:
(?) “HOW OFTEN DO YOU GO OUT FOR DINNER/LUNCH?”
(?) “HAVE YOU EVER BEEN TO A FRENCH RESTAURANT?”
(?) “CAN YOU NAME LOCAL FRENCH RESTAURANTS?”
(?) “HAVE YOU BEEN TO ANY OF THEM?”
(?) “WHAT ARE EXAMPLES OF TYPICAL FRENCH BREAD?” (Croissant, baguette.)
2. Tell students that hors d’oeuvre (pronounce [orrdêvre]) means starter and ask them to give examples of starters (salads, soups, cocktails and other small dishes just to start the meal). Ask them if they know what an “entrée” or “main course” is. If they do not know, tell them that it is the main dish of the meal. Ask for examples (beef, chicken, fish, pork, seafood). Ask them what comes after the main course (the dessert). Ask them what their favorite dessert is. Ask them if they know any French desserts (petit gateau [petigatô] – a small hot chocolate cake served with vanilla ice cream and chocolate topping, mousse, creme brulée – milk custard with caramelized sugar).
3. Set up the situation: In a French Restaurant. Hand out Worksheet 1, Page 1, and tell them that it is the menu. They are to imagine that they are in front of a French restaurant where they will have dinner/lunch and before entering they have to decide what they will eat.
4. Ask for two-four volunteers to play the role of customers and you will play the role of the waiter/waitress.
5. Pay attention to the dialogue with blanks that will be on Worksheet 1, Page 2. It will only be given to the students after the role play. Feel free to use the same lines or create new ones.
6. After the role play give out Worksheet 1, Page 2, and ask students to work in pairs to complete the dialogue. They must refer to the menu on Page 1. Help students while they are completing their dialogues.
7. Ask students to act out their dialogues. You can play the role of the waiter or ask a student from a different group to do it.
8. Tell them that next class will be a cooking class. You will make a typical French dish: Crêpe. They must bring the ingredients. Write the list on the board and students decide what each one is going to bring. The filling is individual.
Ingredients:
• 150 g of plain flour
• 1/4 teaspoon of salt
• 2 eggs
• 300 ml (1/2 pint) of milk
• 1 tablespoon of oil
• oil, for cooking
• filling: each student must bring his favorite one: cheese, soft cheese, ham, mushroom, chocolate, banana, jam.
This recipe serves about 8 crêpes.
ANSWER KEY
LESSON 32
Topic: Social Studies Integrated with Cooking – France – French Crêpes – L3
Lesson Type: Cooking
PRIOR KNOWLEDGE: None.
KEY VOCABULARY: Flour, milk, salt, vegetable oil, blender, tablespoon, teaspoon, spatula, flat frying pan, add, blend, thin coating, pour in, thick, smooth batter, base of the pan, tip, spread, bubbles, appear, surface, re-oil, heat, reheat.
MATERIALS
• Worksheet 1, Pages 1 and 2 – Social Studies Integrated with Cooking – France –French Crêpes – L3.
Ingredients to make about 14 crêpes (brought by the students):
• 300 g of plain flour;
• 4 eggs;
• 600 ml of milk;
• 2 tablespoons of oil;
• Oil for cooking;
• 1/2 teaspoon of salt.
Kitchen Utensils:
• A tablespoon;
• A flat frying pan;
• A spatula;
• Some plastic plates;
• Fillings (each student brings his own):
• Cheese;
• Ham;
• Mushroom;
• Chocolate;
• Condensed milk;
• Guava jam.
PREPARATION IN ADVANCE
• One or two classes before, ask students to bring the ingredients.
• Check if it is possible to take students to the kitchen.
• Send a note to parents asking about allergies.
OBJECTIVES
TEACHER OBJECTIVES
• To have students practice the vocabulary for making crêpes
• To enable students to follow a recipe to make crêpes
• To guide the students in a cooking class
STUDENT OUTCOMES
• Practice kitchen vocabulary
• Follow a recipe
• Try a French dish
• Use the simple past to describe their action
HABILIDADES:
• (EF06LI03) Solicitar esclarecimentos em língua inglesa sobre o que não entendeu e o significado de palavras ou expressões desconhecidas.
• (EF06LI16) Construir repertório relativo às expressões usadas para o convívio social e o uso da língua inglesa em sala de aula.
• (EF06LI21) Reconhecer o uso do imperativo em enunciados de atividades, comandos e instruções.
• (EF07LI01) Interagir em situações de intercâmbio oral para realizar as atividades em sala de aula, de forma respeitosa e colaborativa, trocando ideias e engajando-se em brincadeiras e jogos.
• (EF07LI18) Utilizar o passado simples e o passado contínuo para produzir textos orais e escritos, mostrando relações de sequência e causalidade.
• (EF03LP11) Ler e compreender, com autonomia, textos injuntivos instrucionais (receitas, instruções de montagem etc.), com a estrutura própria desses textos (verbos imperativos, indicação de passos a ser seguidos) e mesclando palavras, imagens e recursos gráficovisuais, considerando a situação comunicativa e o tema/assunto do texto.
PROCEDURES
1. Introduce the objects and ingredients you are going to use to make the crêpes: plain flour, eggs, milk, salt, a bowl, a big spoon, flat frying pan, spatula, and some plastic plates. The fillings they have brought (chocolate, cheese, condensed milk, ham, guava jam).
2. Ask students who brought which ingredient. They should say: – I have brought the...
As they say it, they should place the ingredients on the table or on the place where you are going to prepare the crêpes.
3. Give out a sheet of paper and ask students to complete the recipe with the quantity of each ingredient while you read it aloud. Tell them that with this recipe they can make about 14 or more crêpes.
4. As you follow the recipe, ask different students to do different things:
• break the eggs and put them into the blender
• add the milk
• add the oil
• add the flour and salt
• blend the ingredients
• heat a little oil in a frying pan
• pour in just enough batter to cover the base of the pan thinly in the frying pan (Each student can make his/her own crêpe(s).)
• tip the pan from side to side to make sure the batter is spread evenly
5. Tell students that when bubbles appear on the surface, and the underside is nicely browned, they must turn the crêpe over with a spatula or a spoon and cook the other side for one or two minutes. When the crêpe is ready, put it on the plastic plate.
6. Students make their own crêpes in the same way, re-oiling the pan and reheating it again for each one.
7. Students fill their crêpes the way they wish and close them by folding the crêpes the way they wish.
8. Students may now eat their crêpes and make another one if they want.
9. Give out Worksheet 1, Pages 1 and 2. After giving it out, explain what students have to do. Tell them that they will have to remember how they prepared the crêpe. There is a list of verbs, which will be matched with the pictures. The questions are in the past. Answer the first one for them to use as a model.
RECIPE
Directions:
• Break 4 eggs. Put them into the blender.
• Add 600 ml of milk.
• Add 2 tablespoons of oil.
• Add 300 g of flour and 1/2 teaspoon of salt.
• Blend the ingredients.
• Heat a little oil in a frying pan.
• Pour in just enough batter to cover the base of the pan thinly in the frying pan (Each student can make their own crêpes.)
• Tip the pan from side to side to make sure the batter is spread evenly.
• When bubbles appear on the surface, and the underside is nicely browned, turn the crêpe over with a spatula or a spoon and cook the other side for one or two minutes.
• When the crêpe is ready put it on a plate.
• Fill the crêpe the way you wish and close it by folding the crêpe.
ANSWER KEY
LESSON 33
Topic: History – Ancient Rome/Social Studies – Countries
Lesson Type: Assessment
PRIOR KNOWLEDGE: Previous lessons.
KEY VOCABULARY: Same as the previous classes and any extra vocabulary students may find in their research.
MATERIALS
• Copies of the letter to parents/guardians with the evaluation criteria for the module, one for each student;
• Copies of the Written Task sheet, one for each student;
• Copies of the Written Assessment criteria sheet, one for each student;
• Copies of the Oral Assessment criteria sheet, one for each student;
• Copies of the Self-Assessment sheet, one for each student;
• An authentic restaurant menu (for the oral interaction) – If you do not have one at your school, search the Internet; google “restaurant menu”, choose one from the several options and print it;
• Two different credit cards (for the oral interaction) – You may use real or fake ones as long as they are different (a Visa® and a Mastercard®, for example).
PREPARATION IN ADVANCE
• Send a dated letter to parents/guardians before or upon completion of the module. It is advisable that parents sign and return the bottom part of the letter to acknowledge receipt.
OBJECTIVES
TEACHER OBJECTIVES
• To assess students’ oral and written production with focus on the Simple Past tense, modals (must, may, and cannot), facts about Ancient Rome, and a dialogue in a restaurant (France)
• To have students research information about Ancient Rome and France
• To inform the families previously
• To explain the presentation structure
• To revise the students’ written productions
• To guide the students during preparation
• To elicit from students informations about Ancient Rome and France
• To discuss self-assessment individually
• To show how to improve it
• To prepare activities that can help students improving skills
STUDENT OUTCOMES
• Write sentences about Ancient Rome and France
• Research on the topic using internet or encyclopedias
• Prepare an oral presentation
• Develop social skills
• Improve pronunciation
HABILIDADES:
• (EF06LI03) Solicitar esclarecimentos em língua inglesa sobre o que não entendeu e o significado de palavras ou expressões desconhecidas.
• (EF06LI16) Construir repertório relativo às expressões usadas para o convívio social e o uso da língua inglesa em sala de aula.
• (EF07LI01) Interagir em situações de intercâmbio oral para realizar as atividades em sala de aula, de forma respeitosa e colaborativa, trocando ideias e engajando-se em brincadeiras e jogos.
• (EF08LI15) Utilizar, de modo inteligível, as formas comparativas e superlativas de adjetivos para comparar qualidades e quantidades.
• (EF06LI19) Utilizar o presente do indicativo para identificar pessoas (verbo to be) e descrever rotinas diárias.
• (EF07LI10) Escolher, em ambientes virtuais, textos em língua inglesa, de fontes confiáveis, para estudos/pesquisas escolares.
• (EF07LI12) Planejar a escrita de textos em função do contexto (público, finalidade, layout e suporte).
• (EF69LP38) Organizar os dados e informações pesquisados em painéis ou slides de apresentação, levando em conta o contexto de produção, o tempo disponível, as características do gênero apresentação oral, a multissemiose, as mídias e tecnologias que serão utilizadas, ensaiar a apresentação, considerando também elementos paralinguísticos e cinésicos e proceder à exposição oral de resultados de estudos e pesquisas, no tempo determinado, a partir do planejamento e da definição de diferentes formas de uso da fala – memorizada, com apoio da leitura ou fala espontânea.
• (EF03GE03) Reconhecer os diferentes modos de vida de povos e comunidades tradicionais em distintos lugares.
• (EF01GE09) Elaborar e utilizar mapas simples para localizar elementos do local de vivência, considerando referenciais espaciais (frente e atrás, esquerda e direita, em cima e embaixo, dentro e fora) e tendo o corpo como referência.
PROCEDURES
1. Tell students that their oral evaluation will be divided into two parts: a presentation about the daily life in Ancient Rome and a dialogue in a restaurant.
2. Give out the letter addressed to parents/guardians and read it in class. Clarify any questions students might have about how they are going to be assessed. Do not forget to date the letter and remind everyone that parents/guardians must acknowledge that they received it.
3. Students must write at least 16 sentences. They need to include at least four sentences in the NEGATIVE form in the Simple PRESENT tense and four sentences in the NEGATIVE form in the Simple PAST tense. Give them the following contrasting examples: In Ancient Rome people used honey to sweeten food. They didn’t use sugar. We use sugar to sweeten food. We don’t use honey.
4. Students may do some research on the Internet and/or use the information from their worksheets. Encyclopedias or other books may also be used. Emphasize that they cannot use any translator browser, only references with content already in English. The idea is for them to use only authentic material for two reasons: it is a reliable source of information and it will keep learners from making bad translations from L1 into English. They are expected to compare the habits of the Ancient Romans to their own and describe the differences.
5. Students should write sentences using the verbs to be (is/are/was/were), to have (have/has/had), to eat (eat/eats/ate), there to be (there is/there are/there was/there were), to sit (sit/sits/sat), and three other verbs.
6. Encourage students to illustrate their oral presentation with pictures that may be displayed on a poster or a presentation. This step may be done at home.
7. Students are not allowed to read during their oral presentation, so there must be no written texts on their posters or presentations. These aids are only meant to guide and enhance.
Note: explain the criteria you will use to grade their written work and oral presentation (see the attached information).
8. Revise students’ written production. First, mark the mistakes and give them a chance to edit their work themselves. Then, do a final revision to make sure they have the corrected reference to study from.
Note: check Appendix 1 for further explanation about how to proceed at this moment.
9. Have students give their presentation in the classroom. Since the theme is the same for everyone, it is advisable that students do not see each other’s presentation in advance.
10. The second part of the oral evaluation is a dialogue in a restaurant in which the teacher plays the waiter’s/waitress' role and the student plays the customer’s role.
11. Follow the script below, which was adapted from the one in the second lesson about France. Two new lines (surprise elements) have been added to check the student’s comprehension and ability to interact.
12. In preparation for their oral presentation, advise students to study the sentences they wrote, the legend of Romulus and Remus, the rules for “tabula”, and the questions in the Simple Past for the written evaluation.
13. On the day of the written evaluation, give out the attached Written Task sheet.
14. Upon completion of their written production, students must fill in the attached SelfAssessment sheet.
15. If time allows, discuss students’ self-assessment individually. Remind students that the two main objectives of this activity are to inform them about what they have and have not learned, and to discuss how they can improve. Upon the end of the assessment, collect all the worksheets and hand them in to the coordinators. Please, make sure that all papers have students’ names, the date, the teacher’s name, and the group code (if there is one).
16. When reading and revising the written assignments, make a list of students’ sentences that contain the most common or basic mistakes. Without mentioning who wrote each sentence, prepare a presentation, a poster, or an activity to be used in class.
17. Project the selected sentences and go over them together in class. This procedure can be done as a game.
18. Prepare a written exercise with those same sentences. Have students work on it individually and turn it in. Check their work and how much progress they have made since the written task.
19. Discuss the students’ progress with the coordinator and what can be done to improve their performance.
ANSWER KEY
Written Task
Part I
Students’ Sentences
Part II
Fill in the blanks to complete the Legend of Romulus and Remus.
Once upon a time there was* a very bad king who ruled a kingdom called Alba Longa. His name was Amulius. He had a brother named Numitor who had a beautiful daughter named Rhea Silvia. One day King Amulius decided to send Numitor to exile and told his daughter that she would never get married* or have children.
Mars, the god of war, fell in love with Rhea Silvia and had two boys with her. The boys were twins. When King Amulius heard the news, he ordered his soldiers to put the twins in a basket and throw it in River Tiber.
A she-wolf found them and fed them. Then, a shepherd named Faustulus took the boys home and asked his wife to take care of them. They named them Romulus and Remus.
When they were adults, they decided to found a city. Romulus wanted to build the city on top of a hill and Remus wanted to build it on another hill. They fought, Romulus killed Remus and founded the city in 753 BC. It was named Rome in honor of Romulus.
* Consider the two words as only one answer.
Part III
Use the SIMPLE PAST Tense to fill in the blanks of the questions and answers below.
Where did the Romans have dinner? They had dinner in the triclinium.
How many couches were there in the triclinium? There were three couches.
Where did the children sit? They sat on stools.
What did the Romans eat for their main course? They ate meat or fish.
When was the Roman calendar created? It was created around 750 B.C.
How many days did the first calendar have? It had 304 days.
Part IV
Complete the rules for Tabula. Use MUST, MAY, or CANNOT.
1. Each player has 15 pieces.
2. All pieces enter from Space I and move counterclockwise.
3. The player rolls three dice. The three numbers determine the moves. The player may choose to move one, two, or three pieces. For example, the three dice show 1/4/6. The player may move one piece 11 spaces (1+4+6); one piece five spaces (1+4) and the other piece six spaces; one piece one space and the other piece ten spaces (4+6); one piece one space, one piece four spaces, and one piece six spaces. IMPORTANT NOTE: If the player with the white pieces decides to move only one piece 11 spaces (1+4+6), the two spaces that correspond to the landing of the piece along the way to the eleventh space must be free.
4. A player must use the whole value of the roll. If any part of a roll cannot be used because a space is already occupied by the opponent's pieces and there is no other possible move, the player loses his turn.
5. If a player lands a piece on a space with only one opponent's piece, the opponent's piece is removed from the board and has to re-enter the game on the next roll.
6. If a player has two or more pieces on a space, that position is closed to the opponent and those pieces cannot be removed.
7. No player may enter the second half of the board until all pieces have entered the board.
8. No pieces may exit the board until all his pieces have entered the last quarter. This means that if a single piece is removed, the remaining pieces are stuck in the last quarter until the removed piece re-enters and catches up with the remaining ones again