

































































FIREPLACE MAINTENANCE TILE LIKE A PRO












s the temperature drops and the light shifts, our homes begin to speak more clearly. A creaking gate, a weathered deck, a draught under the door, a neglected fireplace or a garden that needs one last tidy before winter settles in – these are the quiet reminders that seasonal change is also maintenance season.
Winter has a way of revealing what summer lets us ignore. Timber swells and contracts, outdoor spaces show signs of wear, and every room asks for a little more warmth, order and comfort. That is why this issue is dedicated to one of the most satisfying and practical DIY themes of all: working with wood, caring for what you have, and preparing your home for the colder months ahead.
We begin with The essential woodworking toolkit on page 4, a practical guide to the must-have tools that make every cut cleaner, every join stronger and every project easier. If you’ve ever wanted to start woodworking, this is where confidence begins.
For those wanting quick seasonal wins, Winter-ready maintenance on pages 7 and 18 focuses on practical checks and simple tasks that can improve comfort, safety and efficiency – from fireplaces to the everyday details that matter once temperatures drop.


We continue that theme with Last-minute winter-proofing (page 8), showing how a few timely autumn checks can help prevent damp, rust, cracks and expensive repairs later.
This issue also embraces the beauty of design and lifestyle. In The art of cultural fusion (page 15), we explore how global influences and South African character can be layered into interiors through surfaces, finishes and thoughtful decor choices.
Outdoors, on page 21, Autumn garden hacks helps you prepare your landscape for the dormant season ahead, while indoors we return to timber with two rewarding builds starting on page 23: Build a timber room divider, perfect for defining open-plan spaces with natural style, and Step up in style on page 26, where a sleek wooden bathroom mat adds spa-inspired comfort to your daily routine.

For homeowners looking to revive rather than replace, read how to use tile spacers for easy DIY tiling on page 24, and then our DIY 101: working with wood feature on page 27 presents the Weekend deck fix – a smart two-day refresh for tired timber decking that has endured the harsh South African climate.
This month’s issue is a reminder that maintenance is not merely about repairs. It is about pride, preparation and creating spaces that work better for the way we live now.
Happy DIY-ing.
RainaJulies Editor
Whether you’re assembling at-pack furniture, building a custom shelf or tackling a full weekend renovation, woodworking is one of the most rewarding DIY skills to master. However, the difference between a frustrating project and a professional-looking nish almost always comes down to having the right tools. By Raina Julies
CORDLESS DRILL AND IMPACT DRIVER SPIRIT LEVEL AND MEASURING SQUARE
A cordless drill/driver is the backbone of any DIY toolkit. It handles drilling holes and driving screws, while an impact driver delivers extra torque for tougher jobs like long screws into hardwood or timber framing.
Where to get yours:
•Bosch GSB 18V-50 Cordless Drill Driver – widely available and reliable for home and semi-pro use
Stockists: Builders (www.builders.co.za), Takealot (www.takealot.com)


•DeWalt DCF887 Impact Driver – compact, powerful and popular with professionals Stockists: Power Tools Repairs (https://powertoolrepairs.co.za/)
CIRCULAR SAW OR JIGSAW (FOR CUTTING WOOD)
Precision is everything in woodworking. A spirit level ensures surfaces are perfectly horizontal or vertical, while a measuring square guarantees accurate 90-degree angles.
Recommended options:
•Ross Spirit Level 1 000mm
Stockists: Leroy Merlin South Africa (www.leroymerlin.co.za)

•Ross Combination Square 300mm Stockists: Builders (www.builders.co.za)

A circular saw is ideal for long, straight cuts in boards and plywood, while a jigsaw is better for curves, cut-outs and detailed shapes.
Try these options:
•Makita HS7601 Circular Saw –smooth, accurate cutting for timber and sheet material
Stockists: Toolcraft (www.toolcraft.co.za), New World (https://newworld.co.za)

•Black+Decker KS501 Jigsaw –budget-friendly option for light DIY cutting Stockists: New World (https://newworld.co.za), Tools4 (https://tools4.co.za)


STUD FINDER (FOR MOUNTING AND FRAMING)
A stud finder is essential when mounting shelves, cabinets or TVs. It helps you locate timber studs behind a drywall so your fixings are secure.
We recommend •Bosch Digital Stud Finder GMS 120
Stockists: Builders (www.builders.co.za), Takealot (www.takealot.com), Makro (www.makro.co.za)



CLAMPS (FOR STABILITY & PRECISION)
Clamps hold wood in place while you cut, glue or drill – critical for clean joins and safe working.
Try:
•MAC Afric Ratcheting Bar Clamp 600mm
Stockists: Adendorff Machinery Mart (www.adendorff.co.za)


FIXINGS AND CONSUMABLES
No woodworking project is complete without the small but essential materials.
Must-haves:
• Wood screws (various lengths).
• Wall plugs for masonry mounting.
• Wood glue (PVA or carpenter’s glue).
• Wood filler for repairs and finishing.
Where to buy these:
• Builders (www.builders.co.za)
• Bolt & Nut Centres (www.boltandnut.co.za)
• Leroy Merlin (https://leroymerlin.co.za)
FINISHING PRODUCTS
Finishing products protect your work and elevate the final look.
Essential products:
• Wood sealants (for moisture protection).
• Varnishes (interior and exterior finishes).
• Wood stains (for colour enhancement).
• Exterior treatments (UV and weather protection).
Stockists:
• Plascon Woodcare range (www.plascon.com)
• Dulux Woodcare (www.dulux.co.za)
• Woodoc (premium wood finishes) – (www.woodoc.com)
Available at Builders (www.builders.co.za) and Leroy Merlin (https://leroymerlin.co.za)
NON-NEGOTIABLE SAFETY GEAR
Even small DIY projects require proper protection.
Essentials:
• Safety goggles.
• Work gloves.
• Dust mask or respirator.
Where to buy:
• Safety Direct (www.safetydirect.co.za)
• Builders (www.builders.co.za)
• Takealot (www.takealot.com)
A clean replace doesn’t just look better; it burns more ef ciently, produces less smoke and keeps your home safer. One hour of DIY prep now can save you from mid-winter headaches later. By
Raina Julies

s winter approaches, your fireplace becomes one of the most used features in the home – and one of the most overlooked when it comes to maintenance. A quick pre-winter clean-up not only improves efficiency, but also reduces smoke build-up, fire hazards and indoor air pollution.
HERE’S A SIMPLE DIY GUIDE TO GETTING YOUR FIREPLACE WINTER-READY.
Start with a full clean-out

• Before anything else, make sure the fireplace is completely cool.
• Remove old ash using a metal scoop or ash vacuum.
• Dispose of ash in a metal container (never plastic or paper).
• Check for leftover burnt wood or debris in corners.
A thin layer of ash (about 1cm) can be left if you plan to use the fireplace soon – it helps insulate heat.
Check the chimney (this is essential)
A blocked or dirty chimney is a major fire risk.
• Look up the chimney using a torch.
• Check for soot build-up or blockages (birds’ nests are common in unused fireplaces).
• If there’s heavy soot, call a professional chimney sweep.
If you can’t clearly see daylight at the top, it needs servicing.
Clean the firebox
The firebox takes the most damage during winter use.
• Scrub interior bricks with a stiff brush.
• Use warm water and mild dish soap for soot stains.

• Avoid harsh chemicals on brick or stone surfaces.
Optional: A paste of baking soda and water works well for stubborn marks.
Inspect the damper
The damper controls airflow – and often gets stuck.
• Open and close it to test movement.
• Remove ash or rust build-up.
• Apply a small amount of heat-resistant lubricant if needed.
Check for cracks or damage
Small issues can become big problems in winter. Look for:
• Cracked bricks.
• Loose mortar joints.
• Rusted metal components.
DIY fix: Minor surface cracks can be sealed with fireplace mortar, but structural damage needs a professional.
Clean the glass (if you have a closed fireplace or insert)
• Use a damp cloth dipped in ash (yes, ash works as a gentle abrasive).
• Wipe in circular motions.
• Finish with a dry microfibre cloth for shine.
Safety check before first fire
Before lighting the first winter fire:
• Ensure good ventilation.
• Keep flammable items away.
• Stock up on dry, seasoned wood.
• Check that smoke exits properly.
Simple checks during autumn help prevent damp, cracks, rust and costly winter home repairs. Plascon shares a practical last-minute checklist to safeguard your home before the cold or rain arrives
IF YOU’RE HEADING INTO A WET WINTER
When rain becomes persistent, moisture control is critical. Preventative maintenance now can help avoid damp, structural damage and long-term deterioration.

Look out for:
Blistering walls and bubbling paint
Blistering or peeling paint is often the first sign that moisture has penetrated a surface. Summer heat weakens paint films, and winter rain exploits even the smallest cracks.
• Hairline cracks or flaking paint.
• Bubbling or peeling surfaces.
• Dark, damp patches around windows, doors and corners.
Early intervention is essential. Proper surface preparation, crack repair and sealing will help restore protection before water ingress worsens. Plascon offers a wide range of decorative paints and professional coating systems suitable for both DIY repairs and larger-scale applications.
For quick fixes, Polycell Polyfilla Ready Mixed Crack Filler is ideal for interior hairline cracks, while Polycell Polyfilla Exterior is designed for more exposed outdoor repairs in damp conditions.
Interior damp and waterproofing zones
Winter rainfall often exposes weaknesses in waterproofing systems, particularly on ceilings, lower walls and corners.
Check for:
• Water stains or peeling paint.
• Musty or damp odours.
• Signs of rising damp or leaks.
For exterior and roof protection, Plascon AllSeal Waterproofing with Membrane creates a durable barrier against moisture. Professional Aquarista enhances waterproofing on plastered surfaces, while Plascon Dampseal is formulated to block interior damp by reacting with surface moisture to form a protective layer.
Don’t forget the gutters
Blocked or damaged gutters are one of the most common causes of winter water damage.
Inspect for:
• Leaves, debris and blockages.
• Rust, cracks or sagging sections.
• Water overflow near walls or foundations. After cleaning, repainting metal components adds long-term protection. Plascon Water-Based Super Gloss Enamel provides a durable, moisture-resistant finish with a high-gloss appearance.
IF YOU’RE HEADING INTO A DRY WINTER (POST-SUMMER RAINFALL REGIONS)
In areas where summer brings heavy rain, winter is often about recovery and reinforcement. Moisture absorbed during summer storms can weaken surfaces, while dry winter air can worsen existing cracks and fading.
Blistering walls and surface fatigue
After cycles of heavy rain and strong sun, paintwork may begin to blister, crack or peel. Even in dry months, these weaknesses can expand and lead to future water ingress. Repair cracks early and reseal exposed areas, using a durable coating system such as the Plascon Professional Paint Range, designed for long-term protection and resilience.
Exposed metal and early formation
Metal surfaces are especially vulnerable after summer rainfall, and rust will continue to spread if left untreated.
Check for:
• Rust spots or discolouration.
• Exposed bare metal where paint has worn away.
• Joints and edges where water collects.


Plascon End Rust Anti-Rust Primer offers a 3-in-1 solution – acting as a primer, topcoat and waterproofing. Suitable for interior and exterior use, it provides strong adhesion and corrosion resistance on steel, galvanised iron and aluminium surfaces.
Weathered exterior wood
Timber expands and contracts through seasonal changes, leading to cracking, fading and surface breakdown.
Look out for:
• Dry or greyed timber.
• Cracked doors, frames or fencing.
• Faded exterior finishes.
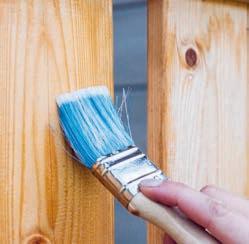
Plascon Woodcare Wood Preservative penetrates deeply to protect against moisture and fungal damage while enhancing the natural appearance of wood. For exterior masonry finishes, Plascon Brick Seal Exterior and Plascon Brick & Slasto Dressing help protect porous surfaces while maintaining a natural look.
PREPARE NOW, SEASON-PROOF YOUR HOME
A few targeted maintenance steps before winter can prevent costly repairs later. With the right preparation – and trusted protective solutions – South African homeowners can move into the colder months with confidence, knowing their homes are sealed, strengthened and ready for the season ahead.



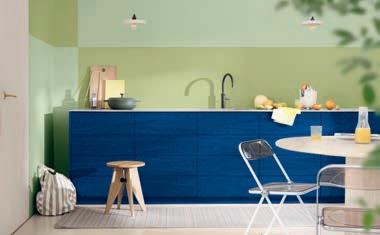
Strategic use of bold blue tones, layered textures and smart placement transforms compact homes into spacious, expressive and personal interiors.
By Dulux
e often assume that white or neutral walls make smaller homes feel larger, but this is not always the case. Small spaces don’t necessarily need neutral walls. Bold colours work just as well – they can create visual interest, emotional depth and can surprisingly make a room look and feel bigger.
Compact homes don’t require compromise. Bold colours can become your secret weapon – creating spaces that feel intentional, deeply personal and surprisingly spacious.
HERE’S HOW TO MAKE BLUE WORK IN SMALLER SPACES.
Choose your blue strategically


Light indigo (Mellow Flow™) works brilliantly on walls in smaller rooms, creating an airy, expansive feel without feeling cold. Vibrant indigo (Free Groove™) shines as a feature wall or accent – think of a single wall in a bedroom nook or a painted vanity cupboard.
Your chosen blue also shapes the room’s emotional vibe. Mellow Flow™ creates a calm sanctuary, while Free Groove™ sparks creativity and playfulness. With the right blue, your small space becomes a true reflection of who you are, not just a limitation.
Go bold on cabinetry and storage
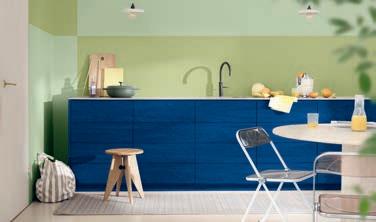
Paint kitchen cabinets, bathroom vanities or built-in storage in bold indigo instead of safe beige. This creates a strong focal point, makes a big visual statement and maximises your compact space. Whether it’s kitchen cabinetry, bathroom vanities, undersink storage or bedroom built-ins, bold colour instantly transforms these functional pieces into design features.
Your eye is drawn to the colour, which creates interest and makes the room feel intentionally designed rather than cramped. Pair with neutral walls or lighter blues to let the cabinetry shine. Bold cabinets turn cramped spaces into rooms that feel designed with purpose and personality. Best of all, it’s inexpensive but creates impressive results.
For more tips, colour inspiration and ideas on how to add pride, imagination and creativity to your home or workspace, visit the Dulux social media pages Facebook, Twitter, Instagram or Pinterest
Use paint placement to expand space


Strategic colour placement creates the illusion of spaciousness. Paint ceilings in Mellow Flow™ to draw the eye upward, creating height and openness. Paint the wall opposite a window in Free Groove™ to bounce natural light around the room, making bold colour feel energising rather than cave-like.
Extend colour vertically by painting trim, doors and shelving in your chosen blue to create visual continuity, causing the eye to travel up and around, making tight quarters feel intentionally designed.
Layer textures to add dimension

Bold colour is your starting point. Now layer in natural textures to keep the room from looking boring or one-dimensional. Think woven baskets, timber accessories, soft linens, cushions and plants. These natural elements add warmth and visual interest, break up the solid colour and make the room feel cosy and lived-in, not stark or sterile.

The combination of bold colour plus natural materials is the perfect balance: your blue gets the spotlight, while textures and natural materials add comfort and character around it. This layering trick works in any space where bold colour might otherwise feel too intense.




From breaking defensive lines for the Sharks to xing shelves and ttings at home, André Esterhuizen shows that strength isn’t just for the rugby eld.
By Itumeleng Mogaki
his feature explores the Springbok centre’s DIY side and partnership with STECO’s hybrid 20V system, built for practical, everyday makers.
André Esterhuizen is best known for doing one thing exceptionally well, running over people on a rugby field. As a powerful inside centre and captain for the Sharks rugby team, and a seasoned international for the South African national rugby union team, he has built a career on strength, timing and straight-line impact.
With multiple international caps and involvement in the 2023 Rugby World Cup-winning squad, he has become a familiar name in elite rugby circles.
However, away from stadium lights and tackle stats, Esterhuizen’s world looks a lot more grounded, with spanners, wood offcuts,
half-finished projects and the occasional “I think I can fix this myself” moment.
This is probably why his partnership with STECO makes perfect sense and is a natural fit for Esterhuizen’s way of thinking. As a brand ambassador for STECO hybrid power tools, he’s aligned with a system designed around flexibility, particularly the STECO 20V battery platform.
A DIFFERENT KIND OF TRAINING GROUND
Esterhuizen’s interest in DIY didn’t begin as a marketing move or lifestyle shift. It began, like many people, out of necessity.
“I’ve always liked figuring things out. If something breaks at home, my first thought is usually, let me try before I call someone. Sometimes it works … sometimes I make it worse, but I learn either way,” says Esterhuizen.

That mindset – problem-solving under pressure – isn’t too different from rugby. “On the field, split-second decisions matter. Off the field, it’s more about patience, measuring twice and hoping the drill bit is the right size,” adds Esterhuizen.
Over time, small fixes turned into more ambitious builds. Repairing fittings, assembling furniture, working on outdoor spaces and gradually becoming more confident with tools.


WHAT “HYBRID CRAFTSMAN” MEANS TO ESTERHUIZEN
The phrase “hybrid craftsman” might sound technical, but in Esterhuizen’s case, it’s simple. A hybrid craftsman is someone who mixes strength with adaptability and doesn’t mind learning as he goes.
Esterhuizen puts it simply: “I’m not a professional tradesman, but I enjoy working with my hands because it clears my head. Rugby is structured, with game plans and constant analysis, but DIY is more personal. When something breaks, my first instinct is to try to fix it myself or at least give it a ‘TRY’.”
STECO 20V POWER FOR MULTIPLE POSSIBILITIES
A standout feature of STECO’s hybrid 20V system is its compatibility with RYOBI tools, enabling users to switch between tools without the need for multiple battery systems. For Esterhuizen, that level of simplicity makes a meaningful difference.
“In DIY, the frustration is usually not the job, it’s the setup,” he says. “Different batteries, different chargers, different tools. If you can simplify that, you actually enjoy the work more.”
That perspective is shared by STECO CEO John Stevens, who says the partnership was built on a shared philosophy.
“André represents a new kind of performance mindset. He’s adaptable, disciplined and delivers under pressure, which aligns with how we see hybrid craftsmanship. It’s about versatility in a real, practical sense,” says Stevens.

BUILT FOR REAL-LIFE DIY
At the centre of STECO’s hybrid 20V system is interoperability, something Stevens believes addresses one of the biggest frustrations in DIY.
“Our 20V battery system is designed to work seamlessly across a range of tools. This removes one of the biggest frustrations in DIY – being locked into multiple battery ecosystems. It’s a smarter, more flexible approach to tool ownership,” says Stevens. For everyday users, that translates into straightforward, tangible benefits:
•Less clutter: fewer batteries and chargers to manage.
•Lower costs: no need to buy duplicate battery systems.
•More flexibility: one battery powering different tools.
• Smoother workflow: less time switching, more time doing.
“The biggest advantages are convenience, efficiency and value. It’s about simplifying the experience so people can focus on the project itself,” adds Stevens.

ESTERHUIZEN’S DIY APPROACH
Esterhuizen’s personal approach to home projects is refreshingly unglamorous. He doesn’t claim expertise, just experience, trial and error and a willingness to get stuck in. His unofficial “rules” for tackling DIY at home sum up that mindset:
•Measure properly, then measure again –most mistakes happen before the drill even comes out.
•Don’t rush the setup; a messy workspace usually leads to messy work.
•Use the right tool for the job because forcing it often means you’re doing it wrong.
•Start small before going big. Fix one thing properly before tackling the whole room.
•Accept that mistakes are part of the process because if nothing goes wrong, you probably didn’t push yourself enough. Whether it’s powering through defenders on the rugby field or working through a weekend DIY project, Esterhuizen’s approach is consistent: stay practical, stay focused and keep improving.

John Stevens
There’s no attempt to position him as a DIY expert, and that’s exactly what makes him relatable. He represents a growing group of hands-on homeowners who value tools that are efficient, adaptable and easy to use. In that space, the idea of a hybrid system, one battery, multiple possibilities, fits naturally.

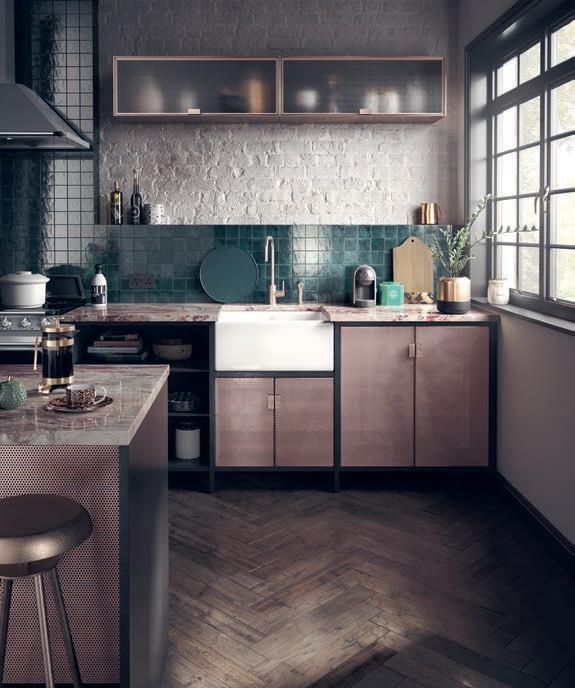
Cultural fusion transforms South African interiors into layered global stories, blending textures, heritage and design in uences through curated surfaces and decor. By
Nicole Russel, marketing manager,
home without borders begins with a single story. You walk into a space where surfaces, textures and objects from across the world sit together in quiet harmony. A Moroccan lantern casts patterned light across a Zulu ukhamba. An Indochine-inspired side table holds its own beside a Carrara-style marble floor. Woven rugs, carved wood, hand-thrown ceramics and layered textiles all coexist – different origins, one language. The room doesn’t just look designed. It feels narrated. This is cultural fusion: interiors shaped by global influence, local identity and personal meaning. And, it is increasingly defining South African homes.
Italtile
South African design is stepping into a more expressive era – warm, textured and unapologetically layered. It reflects who we are: a mix of cultures, histories and lived experiences shaped into something distinctly local, yet globally connected.
Traditional design rules might call it too eclectic, too mixed, too much. However, in practice, it works because South African homes have never been about uniformity; they have always been about story.
From inherited objects to travel finds, from handmade local craft to global design references, interiors are becoming personal archives. Not curated perfection, but lived-in expression. A kind of Afro-wabi-sabi: imperfect, emotional and authentic.

WHAT CULTURAL FUSION MEANS IN INTERIOR DESIGN
Cultural fusion is the intentional blending of global design influences to create interiors that feel layered, expressive and deeply personal. It draws from contrast – ornate and minimal, traditional and modern, raw and refined – to create balance rather than uniformity. It is not about decoration. It is about narrative.
A Scandinavian-style living room might be softened with Moroccan lighting. A contemporary kitchen may carry African textiles. Japanese simplicity can sit alongside bold Latin American patterning. The result is not clutter, but cohesion through contrast.
THE VISUAL LANGUAGE OF CULTURAL FUSION

Earthy, grounded palettes: terracotta, indigo, ochre and muted greens echo global landscapes – from African deserts and Mediterranean coastlines to alpine stone and ocean blues.
Layered materials and craftsmanship: natural textures define the look – carved wood, woven fibres, handmade ceramics and aged metals. These are often paired with refined contemporary finishes, creating tension and balance.
Contrasting design origins: furniture and decor frequently mix eras and geographies – a modern sofa upholstered in textured natural fabric or a minimalist chair paired with handwoven textiles. Lighting and decor often draw inspiration from Moroccan, Turkish, Indian and African craft traditions.
Intentional layering: despite its richness, cultural fusion is not random. It relies on restraint and curation – fewer, more meaningful objects that carry personal or cultural significance.
HOW TO BRING CULTURAL FUSION INTO YOUR HOME
Rich, earthy palettes: think terracotta red, deep indigo, warm ochres and natural blue-greens that evoke global landscapes. Desert sands ... from the Kgalagadi to the Gobi. Stone-clad mountains ... from the Drakensberg to the Dolomites. Sea blues and greens ... from the Med’s turquoise ripples, to the wild surf that pounds our West Coast.

Contrasting materials pay a starring role: sustainable handcrafted items like reclaimed Zanzibar doors, driftwood sculptures from South East Asia, woven rattan from the Pacific Islands, brightly coloured rafiawork from Madagascar. Hammered metals from the Middle East. Furniture often mixes eras and origins, like a mid-century modern sofa upholstered in Peruvian alpaca wool or a worn linen British armchair with a Ndebele-patterned throw. Lighting takes inspiration from Turkish mosaic lamps, Moroccan lanterns, antique stained-glass Tiffany lamps.
Thoughtful integration rather than random clutter: the overall effect is layered and maximalist, colourful yet completely purposeful. Avoid clutter by focusing on a few meaningful pieces that reflect your travels, mixed heritage or gathered curiosities. The result is a beautiful, meaningful environment that tells your story, but also resonates with a wide audience. Embracing this theme enhances creativity and promotes a sense of community and shared appreciation for the world’s rich tapestry of traditions.
HOW TO BLEND GLOBAL STORIES INTO YOUR SOUTH AFRICAN HOME
Cultural fusion is on the rise and spreading its inclusive arms, enabling us to lean into warmer, more personality-driven interiors. With the current emphasis on lived-in luxury, textured layering, earthy tones and a celebration of heritage (think Afrohemian vibes, blending local craftsmanship with global influences).
Begin with:
Flooring and tiles
Start your cultural fusion journey of dreamy destinations with Moroccan-inspired patterns, Spanish designs, English countryside vibes and contemporary Italian styles. In no particular order, some starting ideas:

Frightfully British: the Sant’Agostino Jardin 08 is a maximalist botanical wallpaper print tile; an unapologetically feminine evocation of an English country meadow, with duck egg blues and warm caramels. The Yorkwood range of time-worn oak looks brings the essence of stately home slow living into your space. Well-bred Brit looks, made in Italy.
Moroccan Riad vibes: Casablanca Patchwork Mosaic with its vibrant geometric patterns and abstract florals speak of the old city’s mansions with their inward-facing courtyards, where intricately tiled ponds and fountains cool the desert air.
Island style: plant tropical forest fronds and orchid blooms in your kitchen or bathroom with Caribbean Forest Recycled Glass Inkjet Mosaics
Alpinism: Sant’Agostino’s Bergstone, majestic in size and presence, evokes the breathtaking experience of summiting in the Alps, where rocky peaks meet swirling cloud banks.
Spanish flair: Dafne Warm Pullido Rectified Glazed Polished Porcelain Slab 1200x2800 – imposing, outsize, awesome and oozing 100% Spanish flair.
Mix and match: create the chapters of your story by mixing and matching to build layers of cultural dialogue. For example, pair a bold patterned tile with a foundation of neutral tiles to create an unforgettable visual contrast.
Then, add dimension:
Choose statement furniture
Global inspirations: look for furniture that reflects different cultures, such as handcrafted wooden pieces from Africa or minimalist Scandinavian designs. Of course, even better if your chosen pieces reflect your travels or heritage.

Artisan collaborations: at Italtile, we often collaborate with local artisans to provide exclusive pieces that embody cultural craftsmanship. We often have the privilege of sharing limited-edition craftsmanship from other countries. A beautiful example is our exclusive Shaws of Darwen Sinks, handcrafted in England, each sink bearing the insignia of the artisan, along with a date stamp. Made for life.
LAYER TEXTILES AND PATTERNS
Textile selection: incorporate textiles from various cultures. Indian block prints, Turkish kilims, Lesotho blankets, Mallorcan Ikat and Madagascan raffia work. Instant warmth. Instant texture. Forever joy. Pattern mixing: don’t be afraid to mix it up. Pattern on pattern will sing with emotion (just think of our national anthem). Use cushions, throws and rugs featuring different designs to create a vibrant and eclectic atmosphere.
ART AND DECOR ACCENTS
Cultural artefacts: decorate your space with art pieces that tell a story, such as handmade pottery, woven wall hangings, tribal masks, beadwork, baskets and sculptures from different cultures.
Wall art: consider murals or prints that reflect global influences, creating a focal point that sparks conversation.
PERSONAL TOUCHES
Travel mementoes: display souvenirs from your travels as decor items. These personal touches not only enhance the design, but also evoke cherished memories.
DIY projects: how about a DIY project that reflects cultural influences? Try your hand at creating a gallery wall with family photos in unique frames from various cultures (look in antique stores and thrift pop-ups).
Browse the aisles in a showroom near you and speak to a design-certified sales consultant for guidance. Or hop online and explore our webstore. Discover Italian, Spanish, French, British, Thai and local style, all exclusive to Italtile. Find your faves by experimenting with our free online Visualiser tool. Try out as many looks as you like. Select the pieces that resonate with your journey through life, then bring them home and let them tell the story of you.

Practical advice on creating healthier, warmer, energy-ef cient homes.
By Bianca Leonard, marketing manager at Solenco
inter is often associated with low temperatures, but moisture is frequently the real issue behind uncomfortable space. Common signs of excess indoor moisture include:
• Clothes that take days to dry.
• Damp or stale smells in cupboards and bedrooms.
• Condensation on windows.
• Mould growth on walls and ceilings.
• Rooms that feel cold despite being heated. These issues don’t only affect comfort; they can also impact sleep quality, aggravate allergies and damage furniture, walls and finishes over time.
A SMARTER APPROACH TO WINTER LIVING
Modern air treatment technology is changing how people experience winter at home. Rather than simply heating a room, newer lifestyle appliances are designed to create healthier indoor environments by balancing temperature and moisture levels. One example is the growing use of dehumidifiers in South African homes.
Why? Because dehumidifiers can:
• Reduce excess moisture in the air.
• Speed up laundry drying times.
• Eliminate musty odours.
• Improve indoor air quality.
• Make rooms feel warmer and more comfortable.

A dehumidifier doesn’t just dry the air; it tackles the root cause of winter discomfort, transforming how your entire home feels.
DESIGN-CONSCIOUS HEATING ON THE RISE
Heating technology is also evolving beyond bulky, intrusive appliances. Benefits of newer heating solutions include:
• Cleaner, more modern aesthetics.
• Intelligent temperature controls.
• Improved energy efficiency.
• More even heat distribution. For homeowners, the shift is no longer only about staying warm; it is about creating homes that feel healthier, more functional and more comfortable.



Prune, shape and tidy now for healthier plants and an easier winter garden, writes Charles Henderson, business development manager (tree professional) at Husqvarna South Africa
ost of us love the idea of a beautiful garden. In reality, life gets busy. One week of rain becomes three. The hedges get a little wild, the shrubs start spilling over, and suddenly the garden feels like something you need to catch up on.
Now is the ideal time to take back control of your garden, and it all starts with pruning. Whether you do it yourself or bring in a professional, what you tackle now can make the colder months ahead cleaner, easier and far more manageable.
Do not wait until winter to start pruning. Acting now can prevent plants from becoming dense, tangled and difficult to manage as the seasons change.
After a full summer of fast growth, plants can quickly become dense and tangled. If pruning is left too late, airflow and sunlight struggle to reach the inner growth, small jobs become much bigger ones, and overcrowded branches create the ideal conditions for pests and disease as the cooler months approach.
WHERE TO START
If you are ready to act, these are the pruning tasks worth focusing on this season.
• Tidy hedges and boundary plants: lightly trim hedges to keep them neat, shaped and easier to manage through winter.
•Remove dead, damaged or crossing branches: clearing weak or broken growth improves airflow, light and overall plant health.
• Cut back overgrown climbers and creepers: a controlled autumn trim keeps fast growers from taking over walls, fences and nearby plants.
• Prune lightly after harvest for certain fruit trees: post-harvest pruning helps maintain shape now and sets trees up for stronger winter pruning later.


• Clear invasive or unwanted growth: removing invasive shoots and overgrowth now saves work later and protects healthier plants around them.
COMMON PRUNING MISTAKES TO AVOID
Even well-intentioned pruning can cause problems if done incorrectly. These are some of the five most common mistakes
homeowners make:
1. Cutting too aggressively
Taking off too much at once can stress the plant and trigger weak regrowth.
2. Using blunt or inappropriate tools
Blunt or unsuitable tools damage branches and leave plants vulnerable to disease.
3. Pruning the wrong plants at the wrong time Not every plant should be pruned in autumn, so mistimed cutting can reduce flowering or weaken growth.

5. Ignoring safety on larger trees Bigger pruning jobs can quickly become dangerous without the right tools, skills or support.
REGIONAL TIPS
South Africa’s climate is varied, so pruning timing can look a little different depending on where you are.
Western Cape: autumn is a good time to lightly prune deciduous trees and shrubs before the wetter months set in. Just be careful not to prune frost-sensitive plants too late in the season.
Gauteng: warm weather can linger into autumn, so focus on light pruning, shaping and removing deadwood. It is also a good time to keep fruit trees tidy and under control.
KwaZulu-Natal: growth continues for longer in subtropical conditions, so autumn is a good time to cut back overgrowth and improve airflow before humidity creates bigger problems.
GETTING AHEAD
Pruning in autumn is not just about tidying up. It is about getting ahead. Done well, it can mean healthier plants, less maintenance and a garden that is easier to manage as the seasons shift. Leave it too late, and small jobs have a way of becoming much bigger ones. Autumn may be brief, but when it comes to your garden, it is a window worth using well.

Create a stylish wooden room divider using Swartland pine slats – a simple DIY build that adds structure, privacy and natural warmth. By Swartland
oom dividers are an easy way to redefine open-plan spaces without permanent construction. This step-by-step DIY project, using quality pine slats from Swartland, shows you how to build a clean, modern partition that brings both function and warmth into your home. With basic tools and careful measuring, you can create a custom piece that enhances privacy while allowing light and flow between spaces.
WHAT YOU’LL NEED
• Saw of your choice: mitre saw, circular saw, jigsaw or handsaw.
• Orbital sander with 100-grit sandpaper discs.
• Power drill.
• Tape measure and pencil.
• 4mm wood drill bit.
• Medium spreader clamps.
• Speed square.
• TP 22mm x 44mm x 2.4m PAR.
• Stain, clear sealer and paintbrush.
• Wood glue.
• Wood filler and scraper.
• +/– 48 x 5mm x 60mm wood screws.
• Scrap wood spacer +/– 100mm in width.
STEP-BY-STEP GUIDE

Measure space
Determine the width and height of your room divider and mark the measurements on your pine slats. This project is 1.7m wide and 2.35m high to fit the space.

Cut
Using a handsaw or a power tool, such as a jigsaw, circular saw or mitre saw, cut each pine bar and slat to size, according to the markings.

Sand
Roughly sand down the wood pieces until the edges and surfaces are smooth, then wipe off excess sawdust. The project can be sanded again once assembled for the perfect finish.

Measure, mark, place and drill
Measure and mark the positioning of the slats on the room divider’s top and bottom bars. The slat placement on the top bar will be identical to the bottom bar. The marks also act as guidelines for drilling the pilot holes. Drill two pilot holes next to each other for each slat, then use a countersink drill bit on each of the drilled pilot holes to “sink” the screw head into the wood surface.

Secure
At your work station, secure each pine slat to the base with wood screws, then clamp together and to the work station. Work from one edge to the other. Apply wood glue to each joint, clamp into final position and drive in two wood screws into the previously made pilot holes. Continue along the length of the base, then do the same at the other ends of the pine slats, on the top bar.
Fill and sand
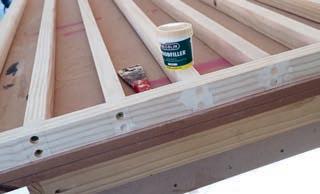
Apply wood filler to the holes with an embedded wood screw, and allow to dry. Sand the dried filler until smooth, then sand down all the other surfaces again.

Paint/stain
Use a wood stain/paint in your choice of colour and decorate the room divider or leave in its natural state by applying a clear sealer to all surfaces.
Achieve cleaner grout lines, smoother nishes and professional-looking results with the right tile spacers and levelling systems for DIY tiling. By TAL

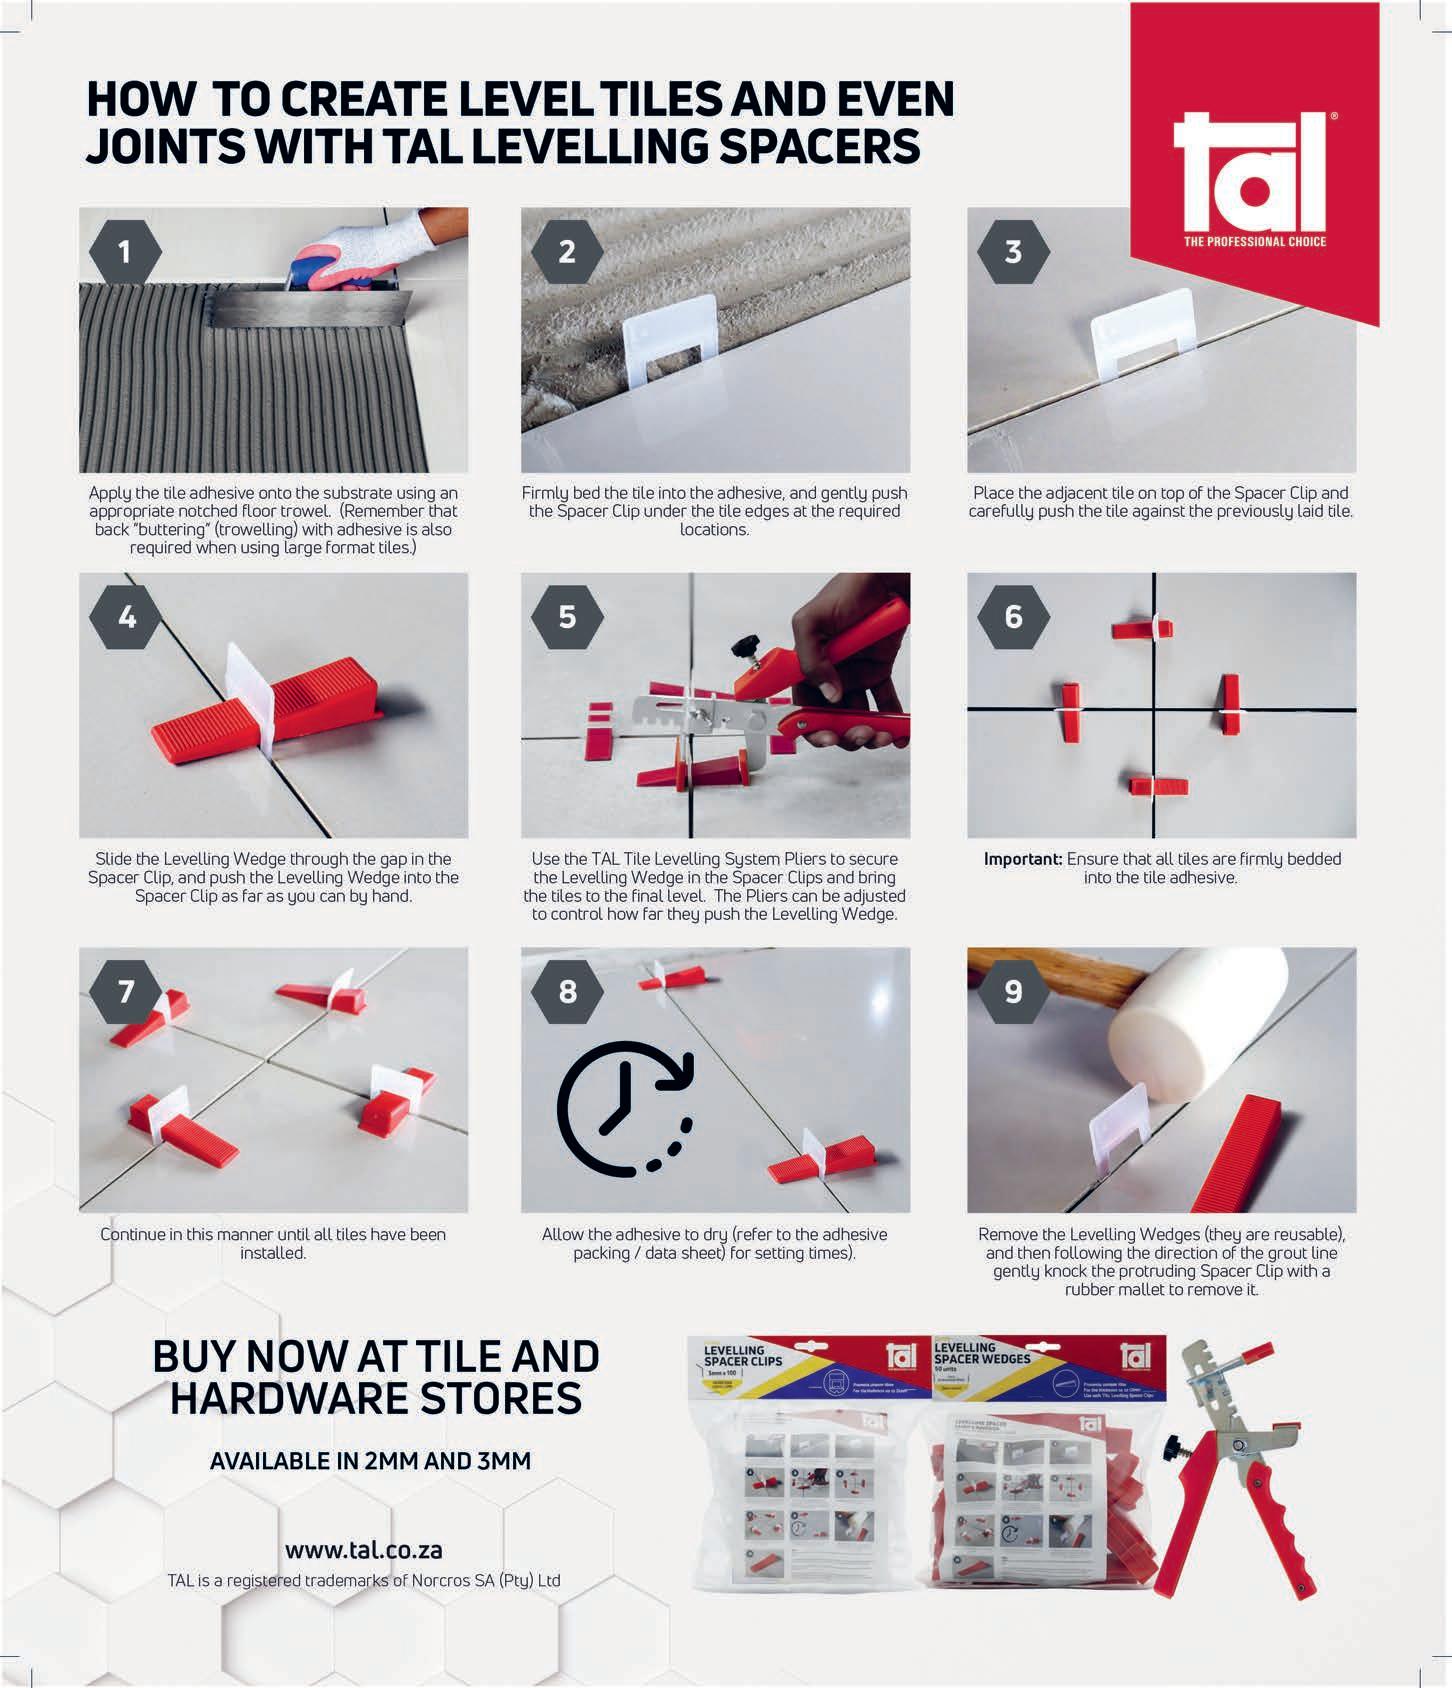
beautifully tiled wall or floor can transform a space – adding polish, value and durability to your home. While tile choice often gets all the attention, seasoned DIYers know that the real secret to a professional finish lies in precision. That’s where tile spacers come in. Often overlooked, tile spacers are one of the simplest yet most effective tools in a tiler’s kit. These small plastic pieces sit between tiles during installation, ensuring consistent spacing and clean, even grout lines. The result? A surface that looks balanced, aligned and professionally installed.
WHAT EXACTLY DO TILE SPACERS DO?
In addition to creating uniform gaps, tile spacers keep tiles aligned and help prevent shifting or “creeping” during installation. This reduces the risk of uneven grout lines, which can significantly affect the overall appearance of the finished tiled surface.
Tile spacers come in various sizes, typically ranging from 1.5mm to 10mm. Smaller spacers create tighter, more modern grout lines, while larger ones can suit rustic or traditional designs. Choosing the right size often depends on tile type and size, layout and personal style preference.
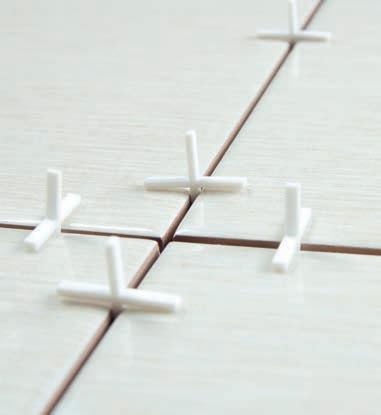
Standard tile spacers – small plastic crosses everyone knows are an essential part of any tiler’s toolkit.
WHEN STANDARD SPACERS AREN’T ENOUGH

Tile levelling spacers help prevent uneven tiles, creating a level, safe surface – especially at tile corners where alignment is critical.


Designed for large-format tiles, the wedge-and-clip spacer system ensures a flat, even finish across the surface.
As large-format tiles grow in popularity, DIY installers are facing new challenges. Bigger tiles – generally 600 × 600mm and larger – are less forgiving than smaller formats. Slight differences in adhesive thickness or minor surface irregularities can cause tiles to sit unevenly, creating a problem known as lippage, where tile edges are not flush.
This is where levelling wedge-and-clip spacer systems come into play. These systems combine spacers with clips and wedges that lock tiles into position, helping maintain an even surface across the entire installation.
WHY LEVELLING SYSTEMS ARE WORTH CONSIDERING THE FINISHING TOUCH


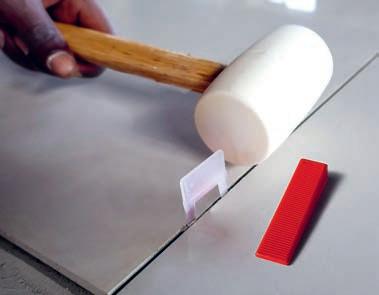
Once the adhesive has cured, the wedges are removed and can be reused. The clips are easily tapped out with a rubber mallet before grouting.
Once the adhesive has set sufficiently, the spacers must be removed. The grout then brings everything together – highlighting the precision achieved during installation. Clean, consistent lines are often what separate a DIY job from a professional-looking finish.
Levelling spacers don’t just improve the final look; they can also make the installation process smoother and more efficient. By holding tiles firmly in place, they reduce the need for constant adjustments and help prevent tiles from slipping or settling unevenly as the adhesive dries.
For DIYers, this added stability can make a noticeable difference, especially on walls or large floor areas. The reusable wedges also make them a more cost-effective option over time.
PRACTICAL TIPS FOR BETTER RESULTS
Even the best tools need the right technique. If you’re new to tiling, take time to practise laying tiles without adhesive (“dry-laying”) to get comfortable with spacing and alignment before committing.
Be careful not to overtighten levelling wedges – too much pressure can damage the clips or shift tiles out of position. Remember: levelling systems are designed to fine-tune alignment, not fix uneven substrates. Proper surface preparation is still essential for a successful installation.
Tile spacers may be small, but their impact is significant. Whether you’re working on a full floor renovation or a kitchen splashback, investing in the right spacing system can elevate your results and give your project that sought-after polished look.
Need tiling installation advice? Contact the TAL Technical Advisory Service on 0860 000 825 or visit www.tal.co.za for expert guidance and more information.
Connect with TAL on social media to receive the company’s latest news: Facebook
TAL South Africa|LinkedIn talsouthafrica

Tighten wedges gently with levelling pliers to avoid over-tightening.
Build a sleek wooden bathroom mat that keeps feet dry and gives your space spa-inspired charm. By Raina Julies

wooden bathroom mat is a practical and attractive alternative to a fabric bath mat. It dries quickly, helps make floors less slippery and adds a spa-like touch to your bathroom. Best of all, it is a simple weekend DIY project that can be customised to suit your space.
WHAT YOU’LL NEED
• Pine, cedar or any moisture-resistant timber slats.
• Measuring tape.
• Pencil.
• Saw.
• Sandpaper or electric sander.
• Drill and screws.
• Wood glue (optional).
• Exterior wood sealer or varnish.
• Paintbrush.
• Rubber feet or anti-slip pads.
STEP-BY-STEP GUIDE
Measure your space
Measure the area where the mat will sit, such as in front of the shower, bath or basin. A standard size is around 60cm x 40cm, but you can adjust this to fit your bathroom.

Cut the timber
Cut your timber into evenly sized slats for the top surface. Then cut two support pieces that will sit underneath and hold the slats together. Example: 6–8 top slats 60cm long, 2 support slats 35cm long.

Sand everything smooth
Sand all timber thoroughly, paying attention to corners and edges. This prevents splinters and gives the mat a smooth, finished look.
Assemble the mat
Lay the top slats side by side with small gaps between each one for drainage. Position the support slats underneath near each end. Secure using screws from underneath or wood glue plus screws for extra strength.
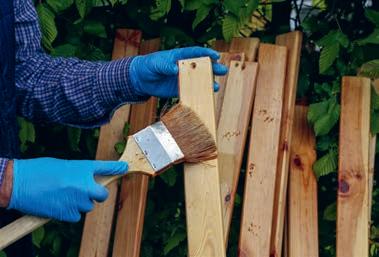
Seal the wood
Apply two to three coats of waterproof wood sealer or exterior varnish. Let each coat dry fully before applying the next. This protects the timber from moisture and extends the mat’s lifespan.
Add anti-slip protection
Attach rubber feet or anti-slip pads underneath the mat to prevent movement on tiled floors.
Styling tip: Choose a dark stain for a modern look, whitewash for coastal style or natural timber for a spa-inspired finish.
Bonus tip: Lift the mat regularly to dry underneath and keep the bathroom floor clean. This helps prevent mould and moisture build-up.
A timber deck is one of the hardest-working features in a South African home – perfect for braais, entertaining and outdoor living. However, constant sun, seasonal rain and coastal humidity can leave decking tired, faded and weathered. The good news? Most decks don’t need replacing. With the right tools, a little planning and one productive weekend, you can clean, repair, sand and reseal your deck for a fresh new look. By
Raina Julies

WHAT YOU’LL NEED
Power tools
• Orbital sander (or belt sander for larger decks).
• Cordless drill/driver.
• Circular saw (for plank replacement if needed).
Hand tools
• Scraper or paint remover.
• Hammer and pry bar.
• Measuring tape.
• Spirit level.
Cleaning and finishing materials
• Deck cleaner or mild detergent.
• Wood sealant or exterior decking oil.
• Wood screws (stainless steel recommended).
• Replacement deck boards (treated pine or hardwood).
• Sandpaper (medium and fine grit).
• Paintbrushes or rollers.
Safety gear
• Gloves.
• Dust mask.
• Safety goggles.
PROJECT OVERVIEW
• PROJECT TYPE: DIY timber deck restoration
• TIME REQUIRED: 1–2 days (weekend project)
• SKILL LEVEL: Beginner to intermediate
• ESTIMATED COST: R1 500–R6 000 (depending on size and condition) retailers nationwide.
STEP-BY-STEP GUIDE
Clear and clean the deck (2–3 hours) Start by removing all furniture, pots and loose items. Sweep thoroughly to remove dirt and leaves. Then:
• Wash the deck using a deck cleaner or mild soap solution.
• Use a stiff brush to remove algae, mould and built-up grime.
• Rinse thoroughly and allow the wood to dry completely (at least 6–12 hours, ideally overnight).
TOP TIP
In humid coastal areas, add a small amount of vinegar to help remove mould growth.
Inspect for damage (1 hour) Once dry, carefully inspect:
• Loose or lifted boards.
• Cracked or split planks.
• Soft areas (possible rot).
• Rusted or protruding screws. Mark damaged areas with chalk or tape.
Replace damaged planks (2–4 hours)
If boards are beyond repair:
• Use a pry bar to remove damaged planks.
• Cut replacement boards to size using a circular saw.
• Treat cut ends with wood preservative.
• Secure new planks using galvanised or stainless-steel screws. Ensure new boards are level with existing decking.
note: treated pine decking boards typically
Sanding the surface (2–5 hours)
Sanding restores smoothness and prepares the surface for sealing.
• Start with medium-grit sandpaper to remove the old finish.
• Finish with fine-grit for a smooth surface.
• Always sand in the direction of the wood grain.
• Pay attention to high-traffic areas and edges. For larger decks, renting an orbital floor sander from Builders or similar retailers can save time.
Final clean and dry (1–2 hours) After sanding:
• Remove all dust using a broom or blower.
• Wipe down with a damp cloth.
• Allow the deck to fully dry before sealing. This step is critical – moisture trapped under sealant will reduce durability.
Seal or oil the deck (3–6 hours) Apply a high-quality wood sealant, stain, or decking oil.
• Use a brush or roller for even coverage.
• Apply along the grain of the wood.
• Allow the first coat to dry fully before applying a second coat (if required).
Recommended products in South Africa:
• Woodoc Deck Sealer (widely used locally)
• Plascon Woodcare Exterior Range
• Dulux Trade Timbercare .