User’s Guide to Cleaning and Maintaining Natural Gas Foodservice Equipment
SoCalGas® Food Service Equipment Center (FSEC) created this guide to help keep restaurant equipment clean and energy-efficient.
Important
This guide provides an overview to assist you in cleaning and maintaining your natural gas equipment for informational purposes only. It is not guaranteed or warranted to provide solutions to any specific situation.
Although SoCalGas has used reasonable effort to assure the accuracy of the information at the time of its inclusion, no express or implied representation is made that it is free from error or suitable for any particular use or purpose. SoCalGas assumes no responsibility for any use thereof by you.
Individual equipment manufacturers provide specific cleaning and maintenance recommendations; this guide does not replace manufacturer instructions. Where any conflict exists, always follow the manufacturer’s recommendation. Consult a qualified professional if you are unsure about any procedure.
How to Use This Guide:
This guide is organized by equipment type. Each section follows the same structure: a brief overview of the equipment, essential maintenance supplies, required regular maintenance tasks listed by frequency, cleaning tips, and energy efficiency recommendations. Three callout types appear throughout:
» Safety Warnings flag hazards and precautions that must be followed when maintaining, operating, or cleaning equipment. Read these before starting any task.
» Essential Maintenance Supplies list the minimum tools and products needed to clean and maintain each equipment type. Have these on hand before you begin.
» Required Regular Maintenance lists the minimum recommended tasks by frequency (daily, weekly, monthly, etc.). Maintenance needs vary by operation, cooking volume, and hours of use, so your schedule may differ.
Tasks marked with the wrench icon should be performed by a qualified professional. For these items, contact your equipment manufacturer or a local authorized service agent.
Use the Equipment Maintenance Worksheet on page 36 to build a customized maintenance plan for your three most critical pieces of equipment.
Introduction
Maintenance: keeping equipment working, preventing breakdowns, and maximizing performance over time.
There is never a convenient time for your primary equipment to fail. Today’s commercial kitchens have little redundancy. If your core menu item is flame-broiled burgers and your broiler fails, you risk temporary closure, your reputation, your profits, and an unplanned service bill.
Equipment failure typically occurs during peak production, when repair rates can be double that of scheduled service. A preventative maintenance program is one of the most costeffective investments a kitchen can make.
Before moving forward, take a moment to identify the three pieces of equipment your kitchen relies on most. Which equipment is essential to your core menu items? What would happen to your operation if one of them failed tonight? Keep those answers in mind as you work through this guide, and use the worksheet on page 38 to build a maintenance plan around them.
Real-World Example*
A restaurant’s water boiler doesn’t meet the manufacturer’s warranty requirements yet decides not to spend $50 on descale chemicals and has no preventative maintenance program in place. Soon, cooking cycles run longer than usual and target food temperatures are not being reached on time. No problem; just increase the cook time. Speed of service takes only a small hit. Two weeks later, the steamer stops producing steam entirely. It is Friday night and there are no vegetables or rice for dinner service. Scale buildup has caused the boiler elements to fail. A service professional arrives (on overtime) with one option: complete boiler tank replacement. Cost: over $5,000 in repairs on a $10,000 unit, plus 1 to 2 weeks out of commission. The manufacturer warranty is void because maintenance and water quality requirements were not met. Routine preventative maintenance and $50 could have prevented the failure, downtime, and significant expense.
A sound maintenance program also promotes safer working conditions. Commercial kitchen equipment can be dangerous if not properly maintained, and effective programs must account for cleaning protocols that protect your staff.
The goal of this guide is to prevent costly unplanned downtime and maintain maximum life expectancy from your foodservice equipment.
*All cost estimates are based on typical industry research from leading commercial foodservice equipment, supplies retailers and repair/service groups. Actual costs may vary.
Equipment

General
General Advice
At no cost to you, SoCalGas offers equipment services, maintenance advice, and low-cost parts for all types of natural gas commercial equipment.
Call 1-800-GAS-2000 to schedule an appointment with a commercial service professional.
Simple routine maintenance and cleaning of your commercial natural gas equipment is straightforward and could save downtime and money spent on service calls. Most problems associated with commercial foodservice equipment can be attributed to two fundamental causes:
CAUSE PREVENTION
Natural wear and tear
Ineffective staff training
A comprehensive, equipmentspecific maintenance schedule keeps equipment performing through the rigors of daily use.
A thorough staff training and re-training program focused on proper operations and regular maintenance prolongs equipment life.
Natural Gas Supply
Although the natural gas supply is not usually a maintenance issue, keep the following in mind:
If additional natural gas equipment is added to a supply source, verify that adequate natural gas supply exists when all equipment is on high-fire simultaneously.
Ensure the external equipment regulator (if equipped) is located away from excessive heat. Heat can damage the regulator diaphragm and affect burner pressure.
Keep the regulator vent area clean and open at all times.
Equipment Installation & Start Up
Preventative maintenance starts at installation. Follow these steps whenever new equipment is installed or moved.
Gas Connection
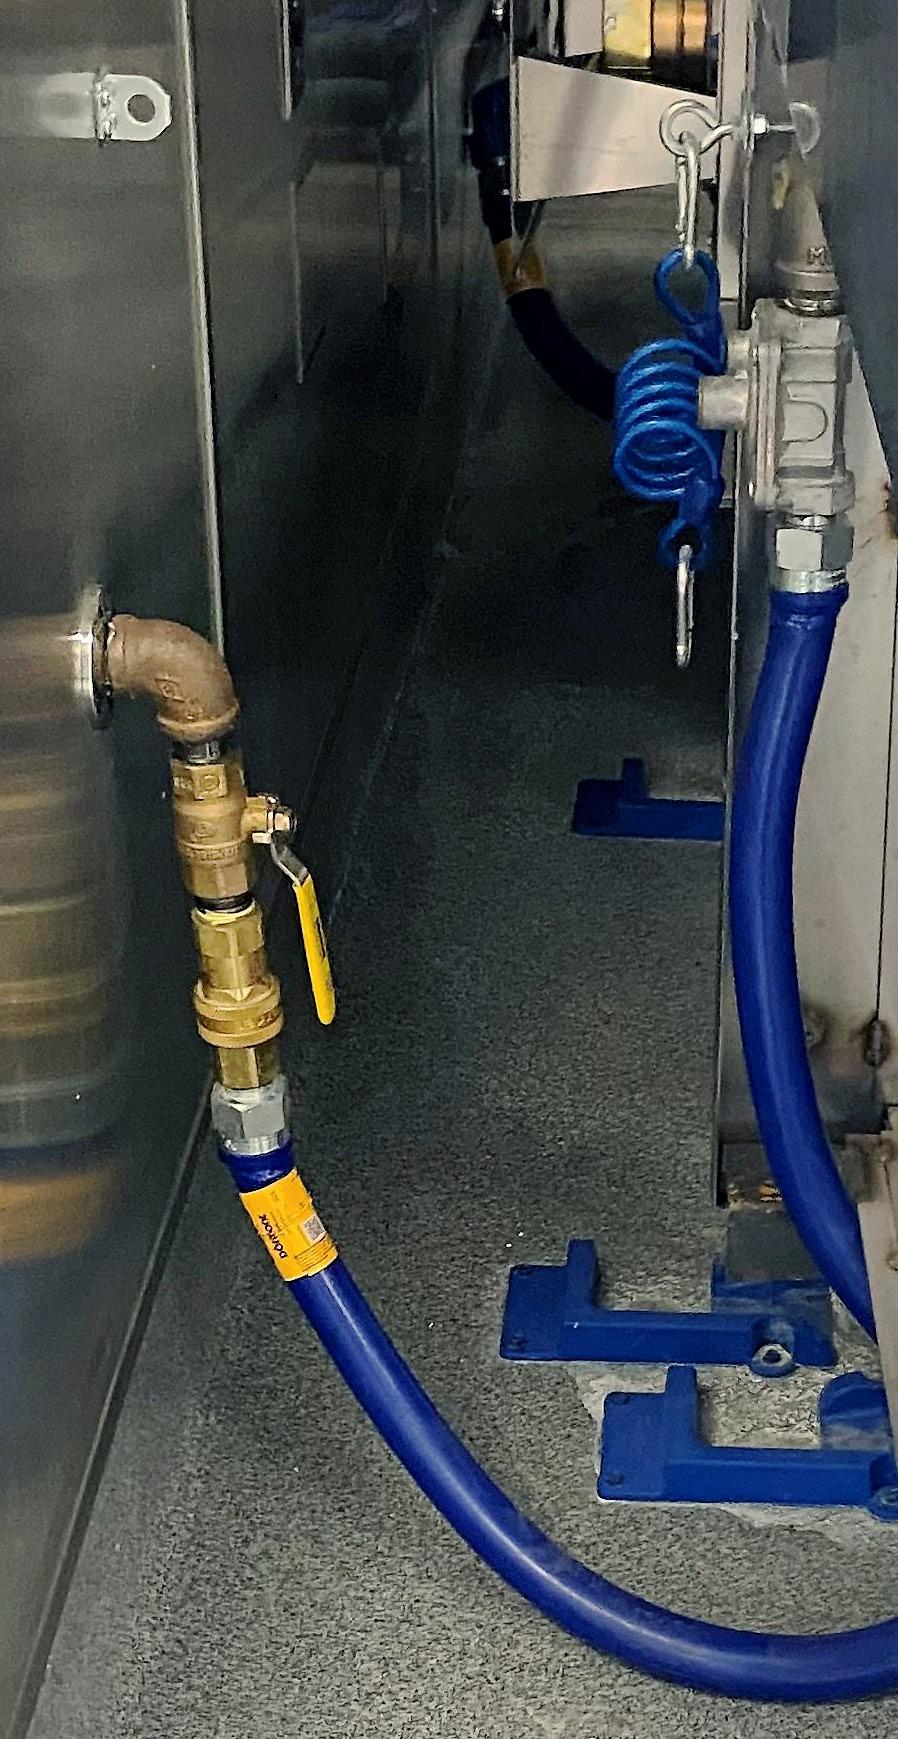
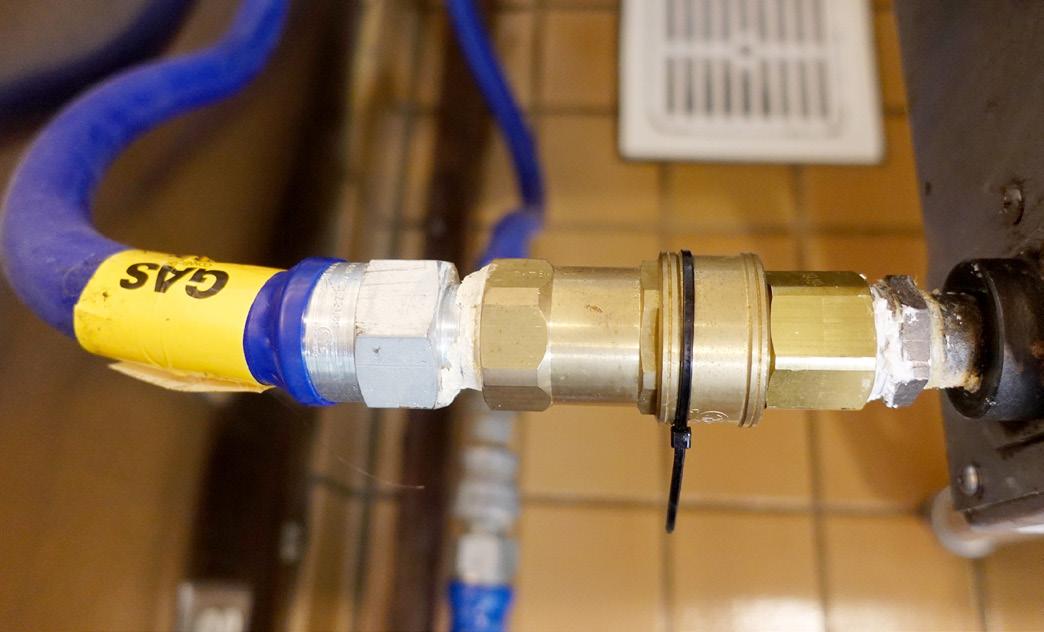
» Install equipment on a natural gas line with a dedicated shut-off valve and properly installed quick disconnect device (not hard plumbed).
» Train staff to correctly shut off and disconnect the natural gas line, as this enables regular cleaning and grease removal in areas behind and between equipment.
» Equipment on casters also aids cleaning and maintenance access.
SAFETY WARNING:
It is required by the California Building Standards Code to install a restraining device no longer than the natural gas connector on all equipment with casters and or a quick disconnect device. Consult manufacturerspecific recommendations based on equipment type.
Gas Leak Awareness
After installation or relocation, pay close attention to any natural gas odors that may indicate a leak. Immediately call a qualified professional or SoCalGas. Ensure all staff can recognize and report gas odors during day-to-day operations.
Leveling
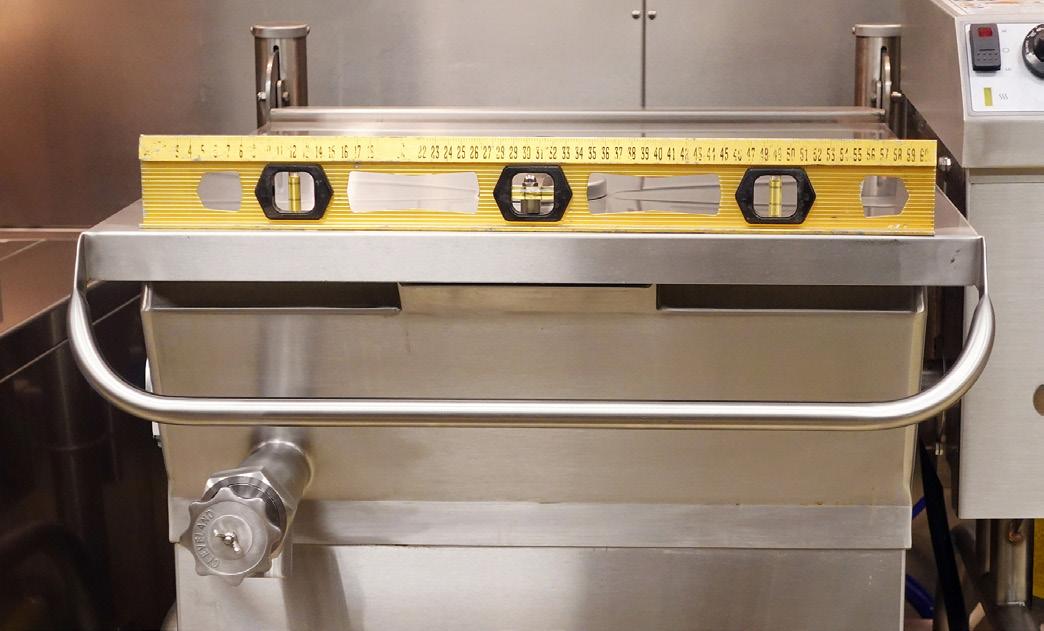
Level all equipment front-to-back and side-to-side before first use or after relocation. Adjust leveling feet using a level placed on the equipment surface. Proper leveling is especially important for griddles, braising pans, steamers, and ovens. Unlevel equipment causes uneven cooking and residue buildup.
General Maintenance
The following guidelines apply to every piece of equipment in your kitchen. Use these as the foundation of your preventative maintenance program.
Read the operation manual. Complete warranty and registration on new equipment.
Train staff on proper equipment operation and maintenance.
Inspect equipment regularly.
Communicate potential problems as soon as possible.
Replace broken or worn-out parts immediately.
Be cautious of DIY fixes. Call a qualified professional for service.
Clean and sanitize equipment regularly.
Follow cleaning procedures and chemical recommendations from the manufacturer.
Use water filtration systems when recommended.
Use the proper cleaning tools and materials for the job.
For each equipment maintenance task to follow, this guide offers frequency suggestions (daily, weekly, etc.), as a basis for building a generic maintenance schedule. However, your operation may require more or less frequent adherence to these schedules depending on your hours of operation, cooking volume, menu items and other factors specific to your operation.
Daily Operational Checklist
TASK
Do not set thermostats higher than food requires
Turn on equipment just before cooking
Turn controls down or off during off-peak hours
Clean spills immediately
Wipe fronts, sides, and controls with a damp cloth
Keep workstations clear of clutter and grease
Use lids on food where applicable
Natural Gas Burner Basics
WHY IT MATTERS
Excess heat wastes energy and shortens equipment life
Most equipment preheats in 10-15 minutes
Reduces energy consumption and wear
Prevents burning-on, bacteria growth, and fire hazard
Prevents buildup and keeps controls functioning
Reduces fire and injury risk
Maintains temperature, increases yield, saves energy
The stability of the burner flame is critical to safe and efficient equipment operation. Several factors affect flame stability: primary fresh air, burning speed, port size, and port depth. Flames stabilize where the natural gas flow rate equals the burning speed.
TERM
Air-to-Gas Ratio
Air Shutter
Atmospheric Burner
Burner Port
Orifice
Pilot
Power Burner
Primary Air
Pressure Regulator
Secondary Air
DEFINITION
Ratio of air supply flow rate to natural gas supply
Adjustable shutter on the primary air opening; controls air introduced into the burner body
Mixes natural gas with air for controlled ignition and combustion
Any opening in a burner head through which the air-gas mixture is discharged
Opening that allows natural gas to discharge into the burner
Small flame used to ignite a burner
Uses a mechanical blower to mix forced air with greater amounts of natural gas
Air introduced into a burner that mixes with natural gas before reaching the port
Device for controlling and maintaining uniform natural gas pressure
Externally supplied air to a burner flame at the point of combustion
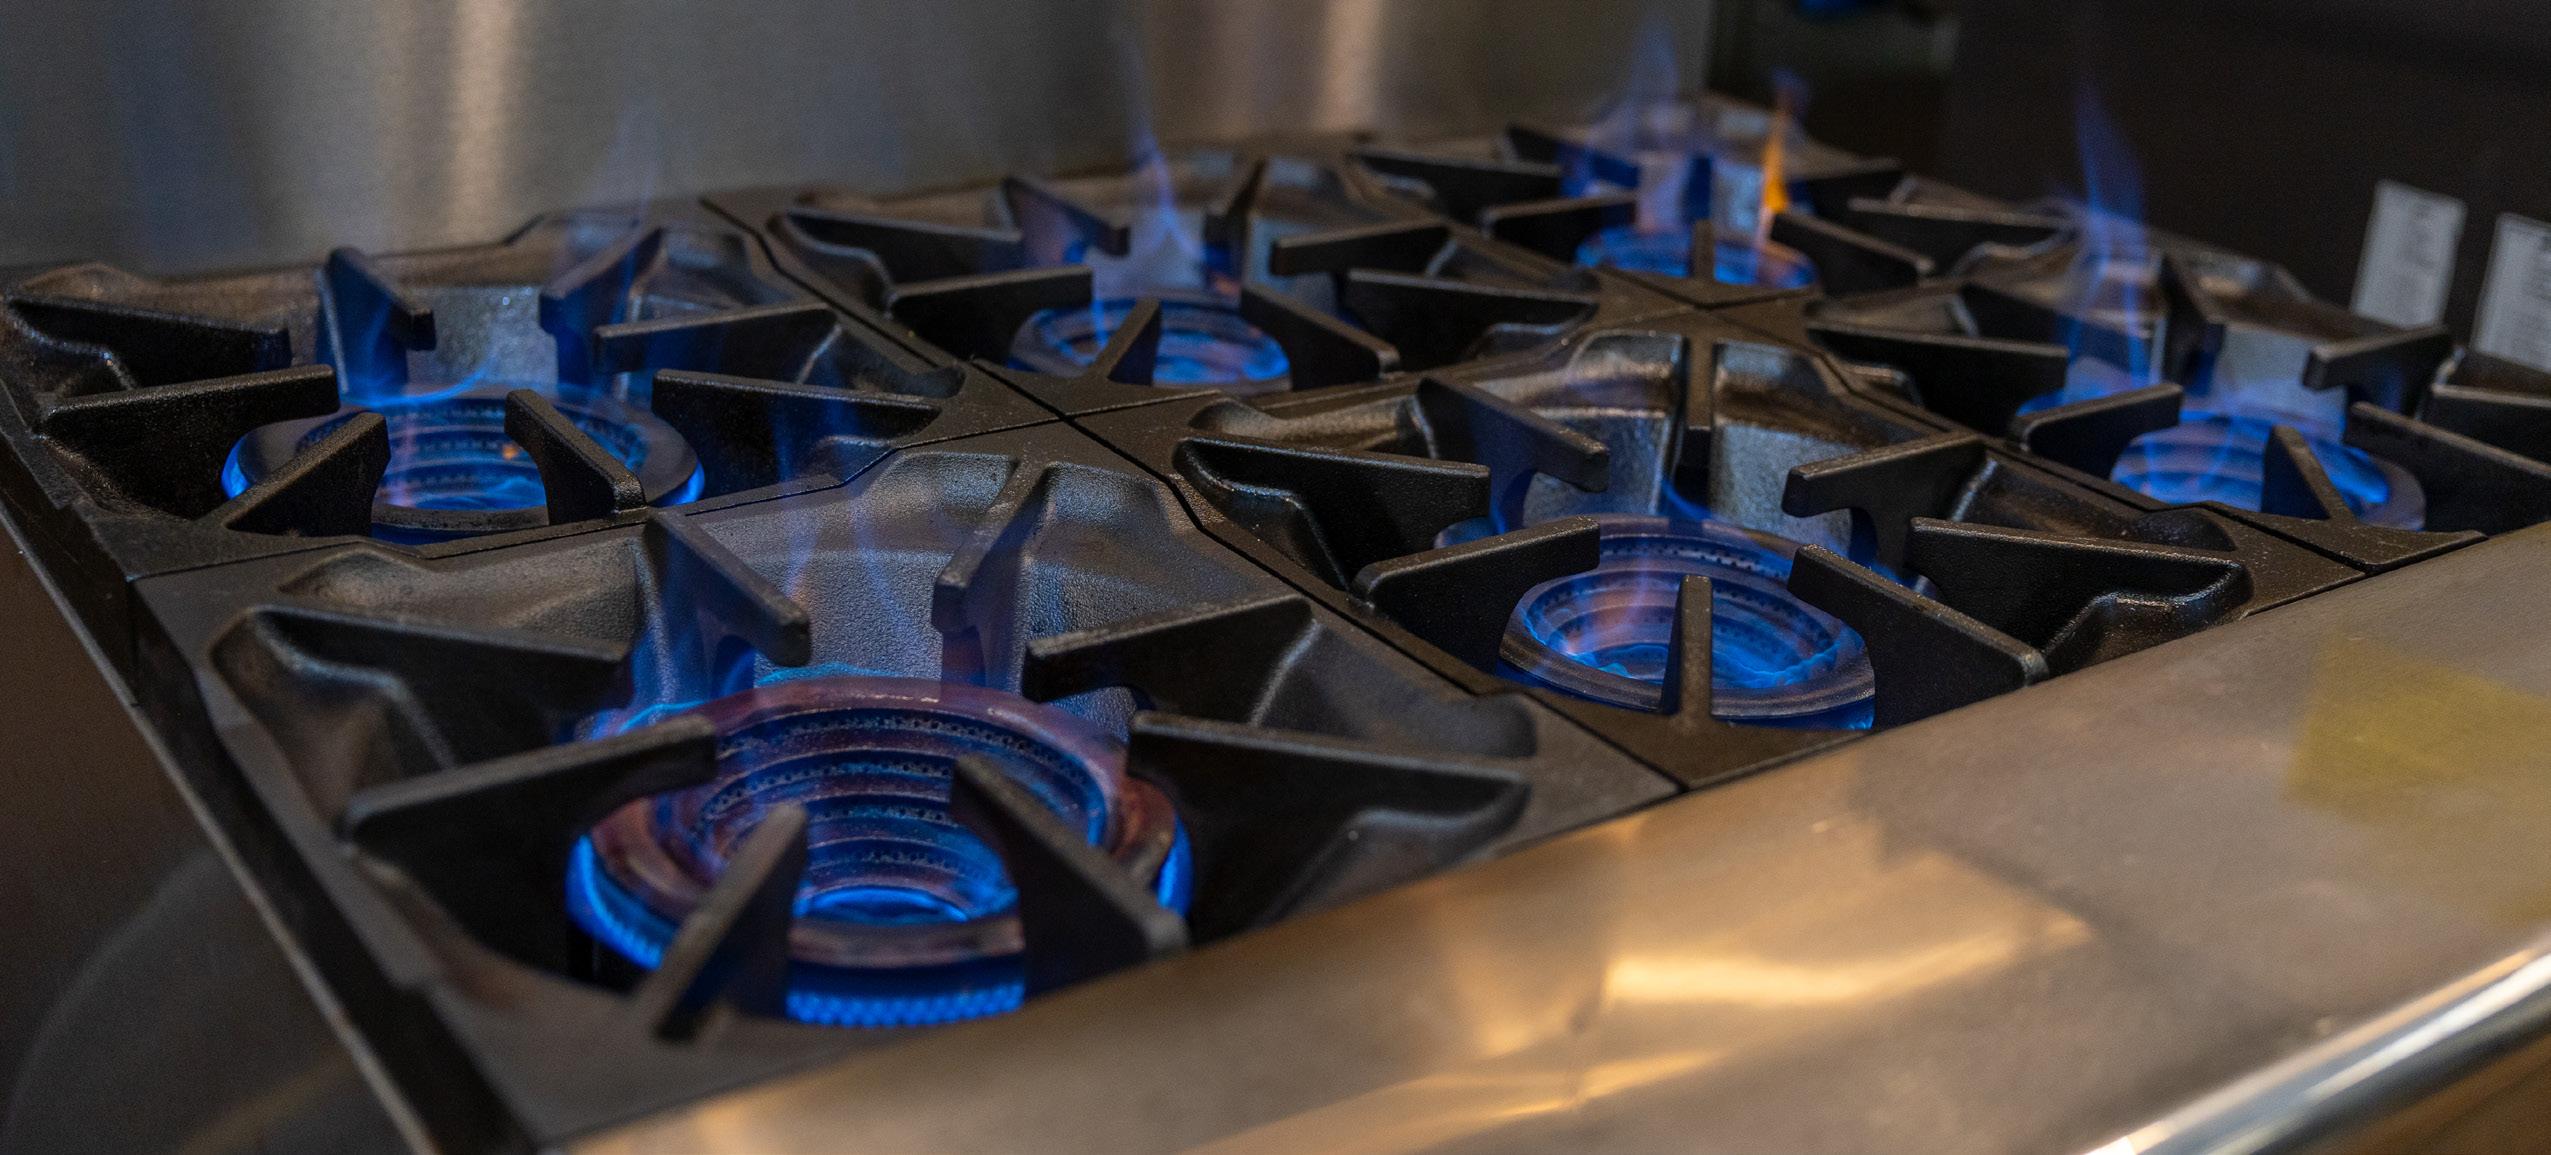
Burner Flame Inspection: Monthly
Check the natural gas flame pattern in all burners and pilot systems at least once a month. An ideal flame is completely blue, with distinct individual patterns and uniform heights.
SAFETY WARNING:
If you notice any of the following flame patterns upon inspection, contact a qualified professional as soon as possible.
1
2
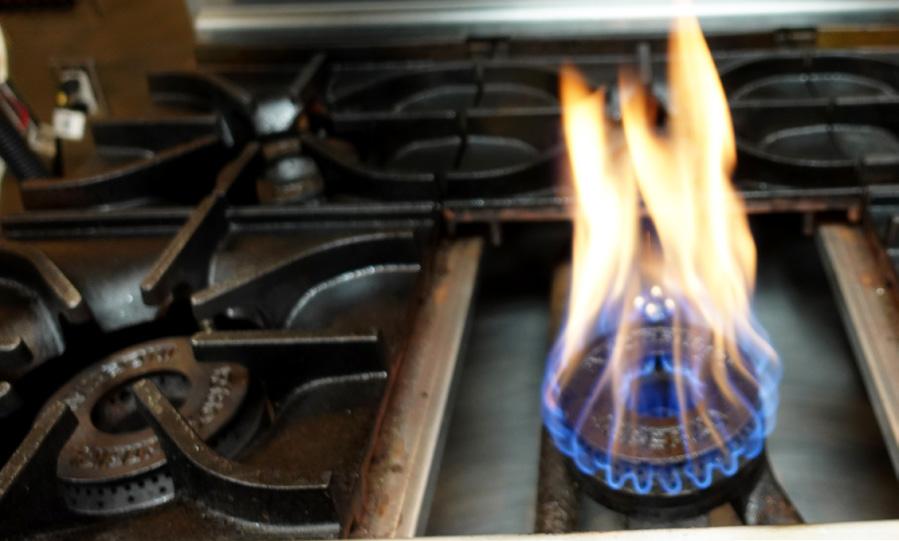
YELLOW FLAME
Yellow tips indicate incomplete combustion and soot production. Distinguish these from red or orange streaks, which are caused by dust or impurities and do not require adjustment. On open burners, soot accumulates on cookware and is hard to clean. On hot tops, soot insulates the surface, slows heat transfer, and eventually blocks the natural venting process.
BLOWING OR LIFTING FLAME
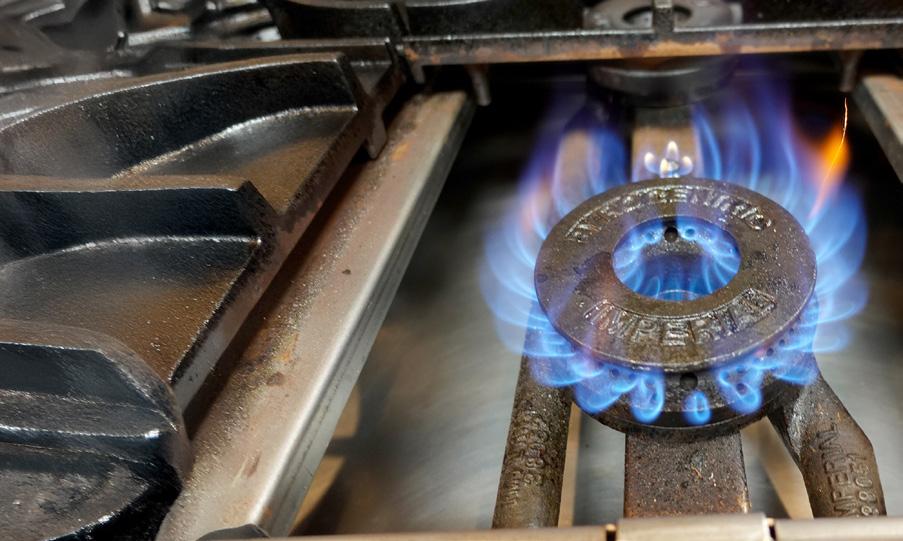
Part of the flame lifts or “dances” on the burner port, on some or all ports. The flame cannot stabilize as in normal operation. If flames lift from several ports, they may create a distinct blowing noise. A distortion of the flame pattern will lead to incomplete combustion.
FLASHBACK
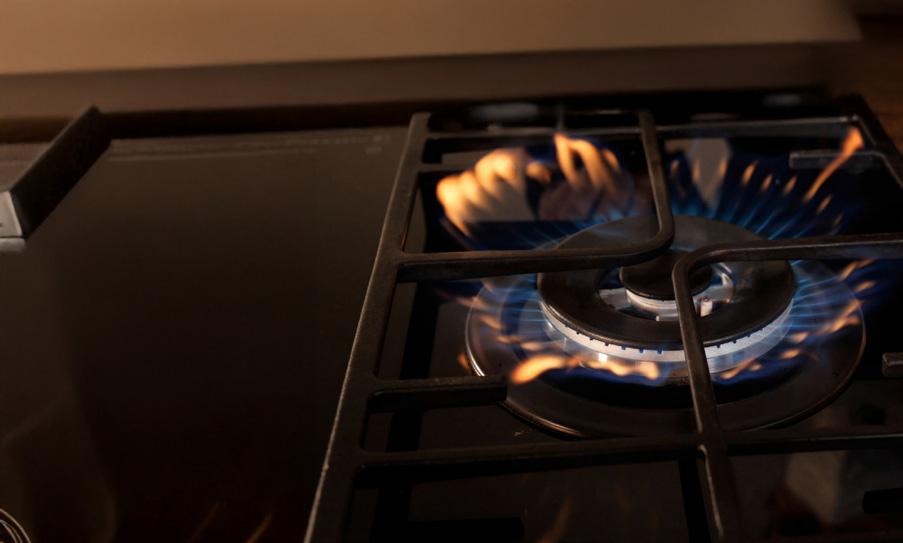
The air and natural gas mixture ignites inside the burner near the orifice, producing a roaring, blowtorch-like noise. Combustion is incomplete, creating odors and soot that clog the burner interior. On range tops, grease or debris buildup inside the burner is a common cause. Flashback is dangerous and requires immediate attention from a qualified professional.
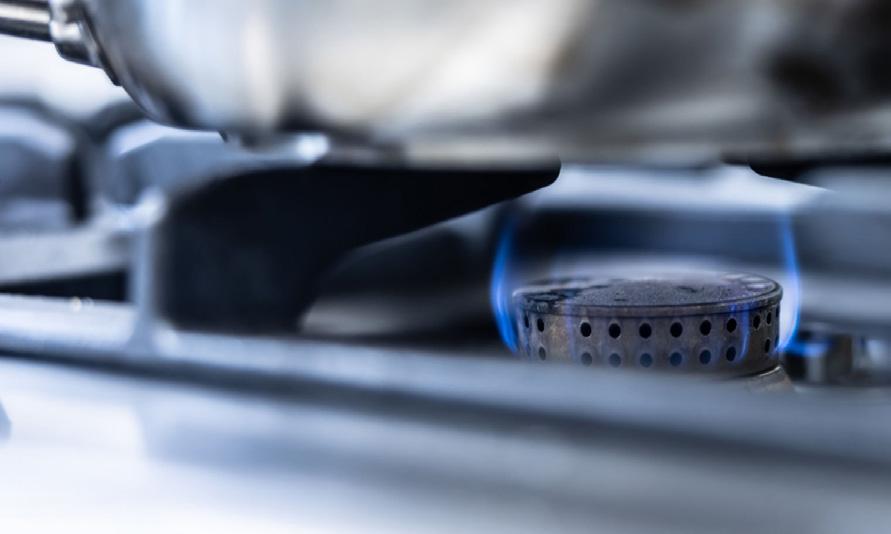
5 6 3 4
FLUCTUATING FLAMES
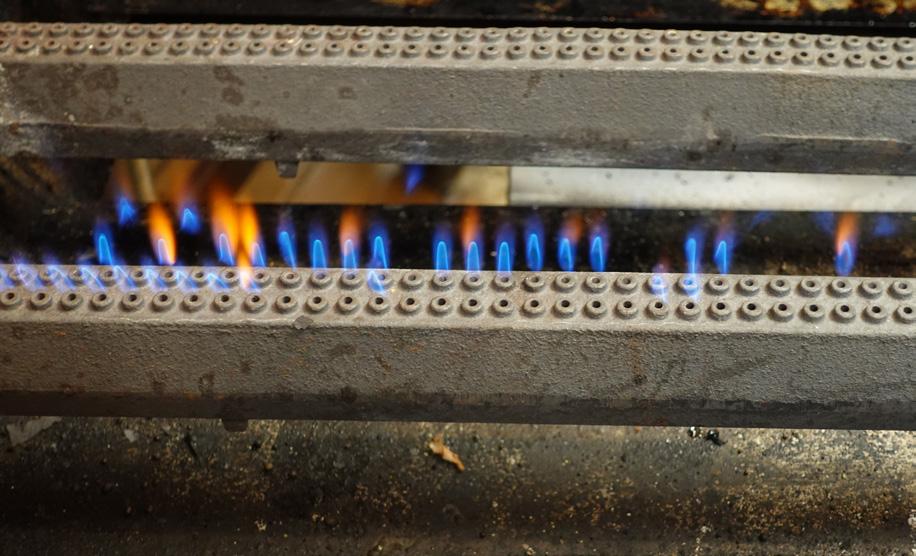
Fluctuating burner flames typically indicate inconsistent natural gas pressure, causing the flame length to vary without adjustment. This condition may also be accompanied by flame lifting. While it does not usually create immediate issues such as incomplete combustion, problems can occur if the flame contacts a cooler surface. This condition should be evaluated and corrected.
SMOTHERING FLAMES
Smothering flames most often occur in enclosed areas, such as oven burner compartments or under hot tops. These flames appear “lazy,” lacking well-defined cones and seeming to reach for air. They burn quietly and may roll around within the combustion chamber, sometimes lifting completely off the burner ports.
It is important to distinguish smothering flames from lifting or blowing flames. Lifting or blowing flames are well-defined and may produce a noticeable blowing noise, whereas smothering flames indicate incomplete combustion. This is a hazardous condition and requires prompt attention from a qualified service technician or SoCalGas.
FLAME ROLLOUT OR DELAYED IGNITION
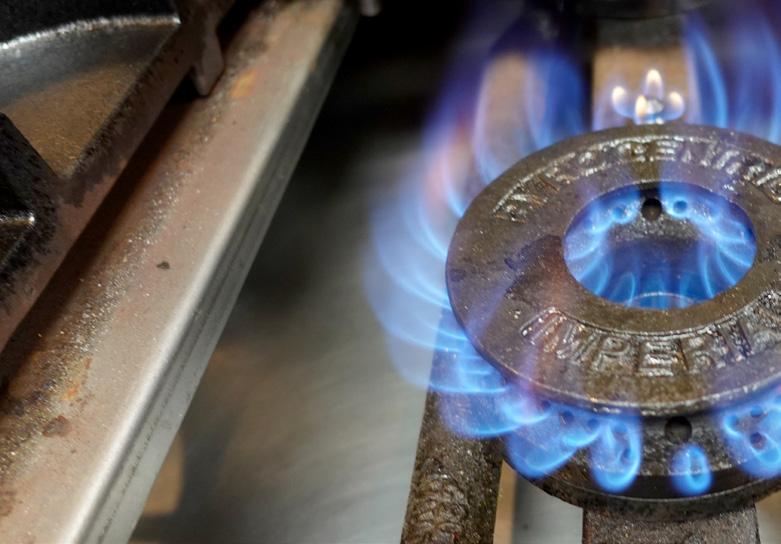
Flame rolls out of the combustion chamber when the burner is turned on. This creates a fire hazard and will scorch equipment finishes, burn wiring, and damage controls. The natural gas in the burner mixer may also ignite, producing flashback.
Controls
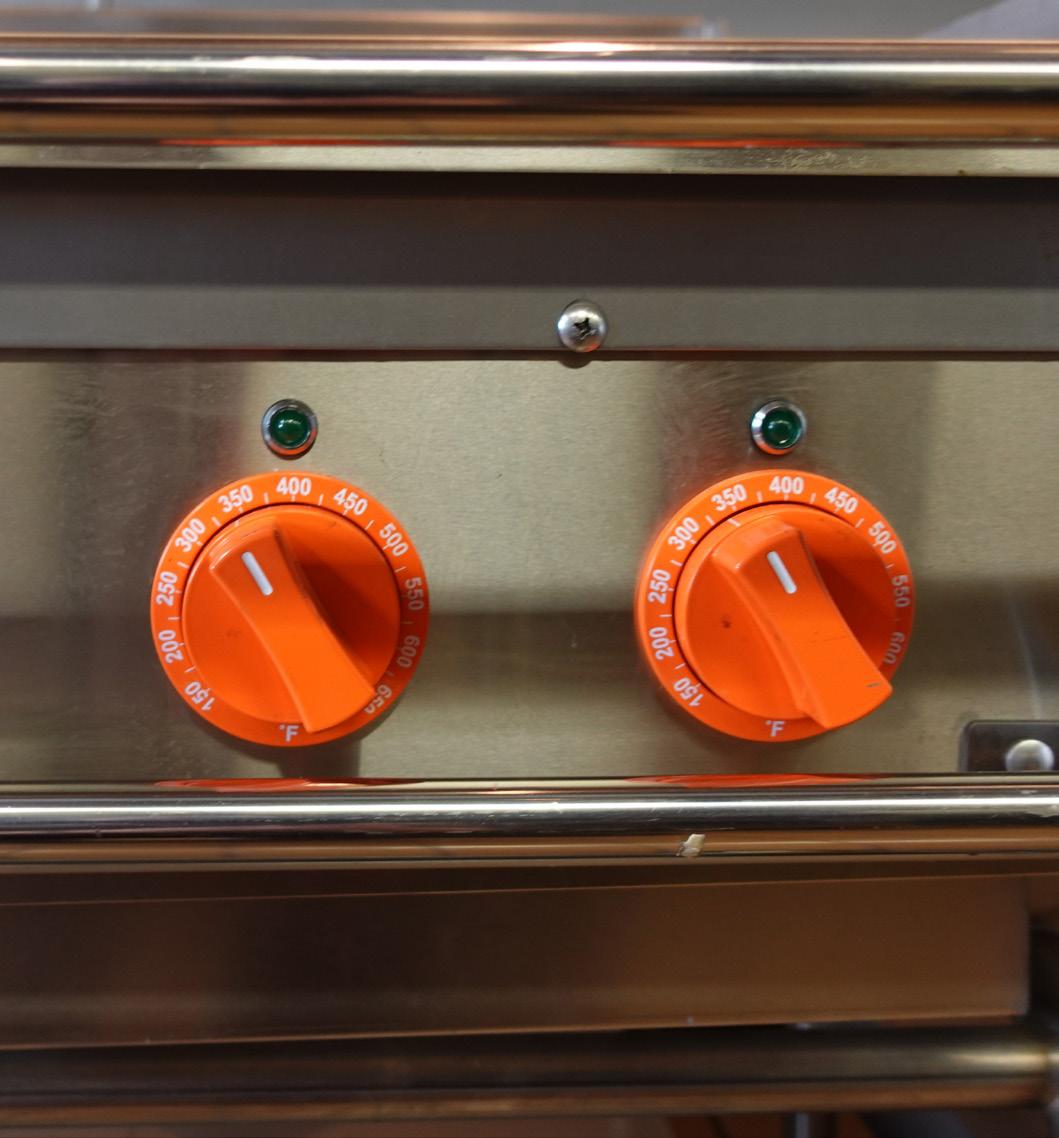
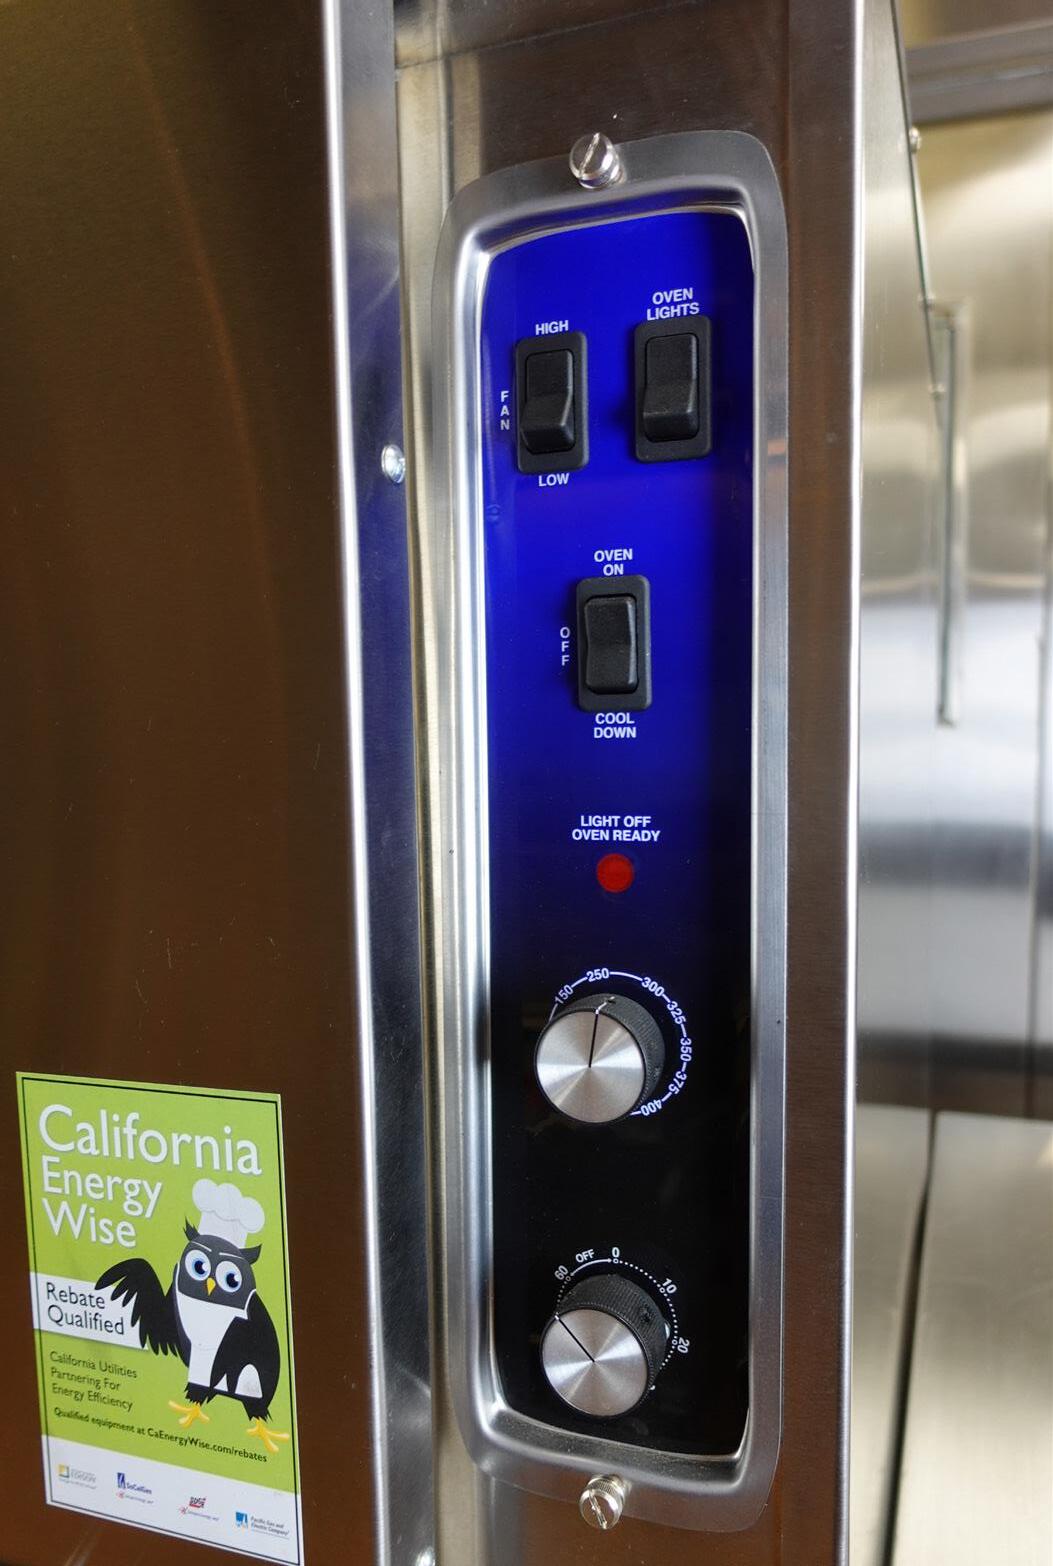
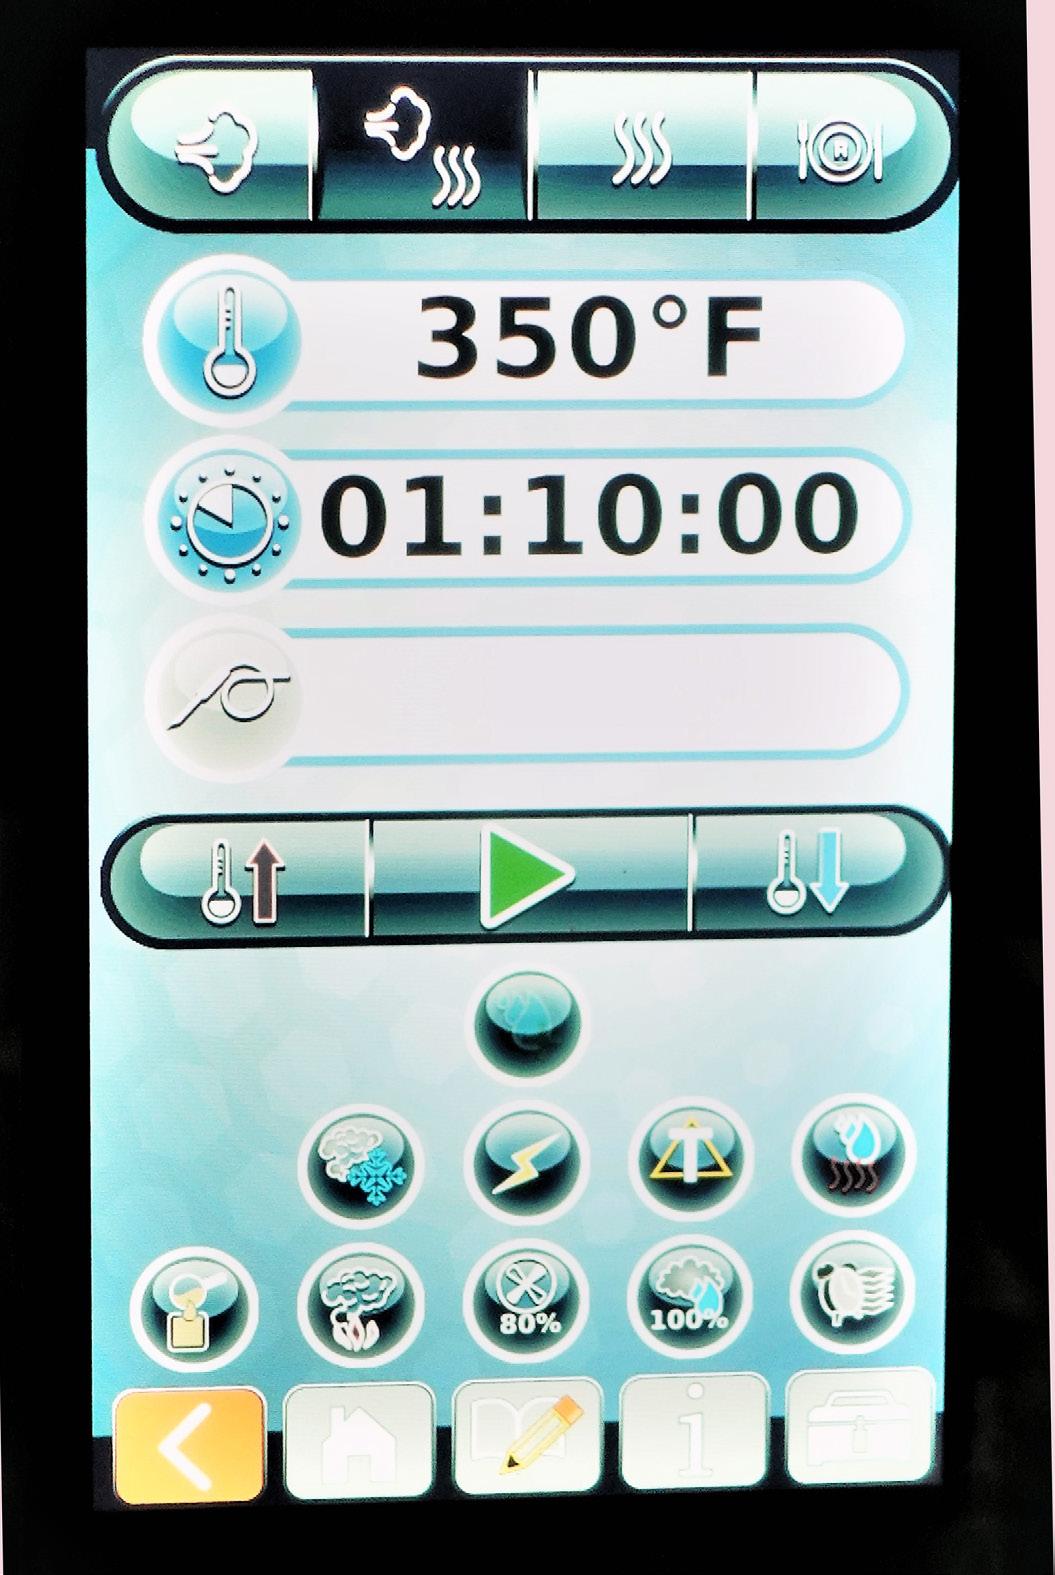
Train staff to recognize and report malfunctioning, broken, or melted control knobs promptly. For equipment with smart controls, ensure staff are trained on proper use and can recognize software update needs or faults. Avoid getting water, grease, or cleaning solutions on controls and electrical components.
» If control valves become difficult to turn (broilers, ranges), consult a qualified professional to lubricate or replace them.
» For equipment with accessible control panels (e.g., fryers), routinely check for damaged wiring (particularly where the insulation has broken) and repair/replace if necessary. Unplug before performing any wiring work. Tighten loose terminals and clean corrosion from electrical connections.
External Air Openings, Fans & Motors
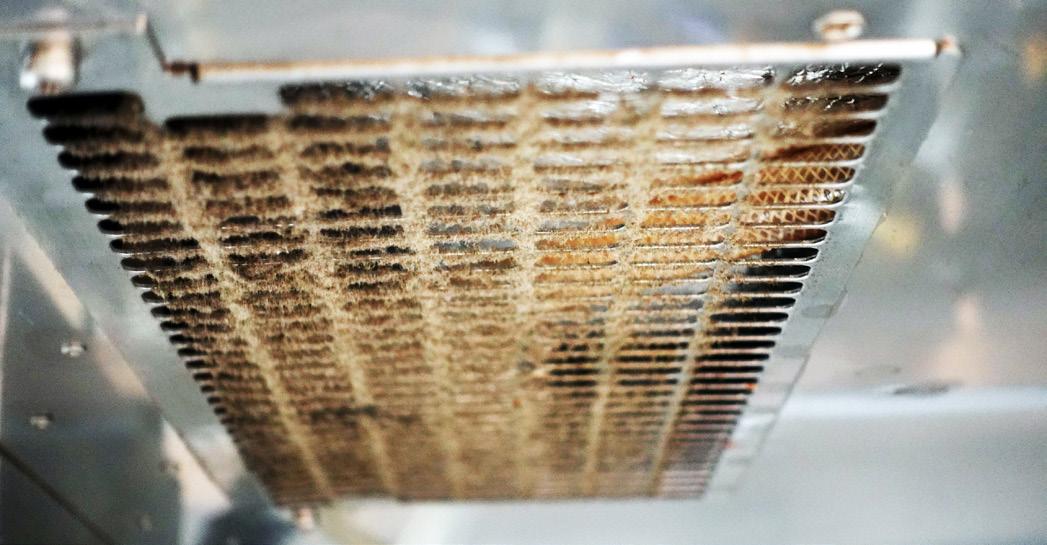
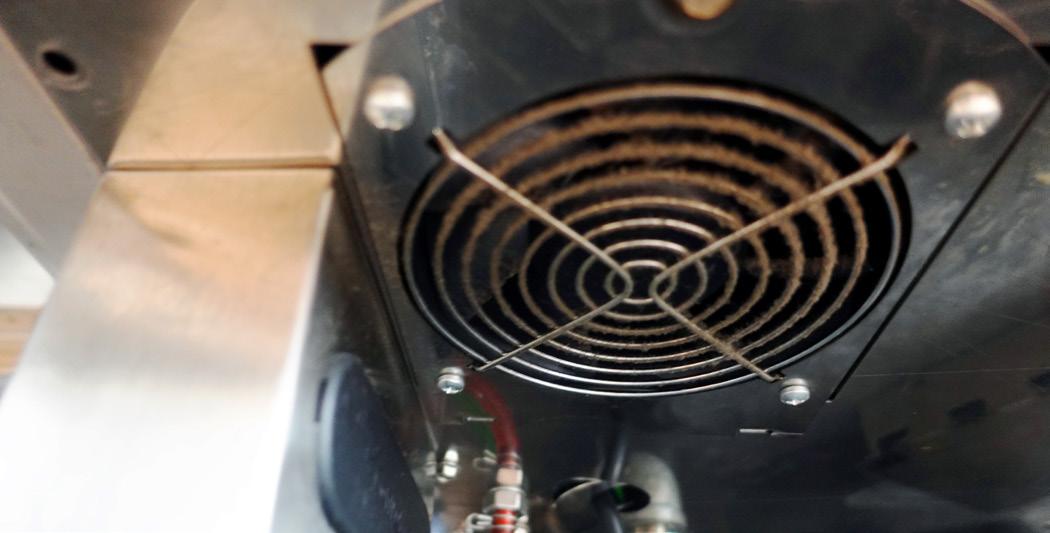
Air inlets (louvers, cutouts, etc.) on ovens, broilers, and other equipment must be checked and cleaned periodically to remove dust and particles that obstruct airflow, negatively impacting performance. Some equipment with air vents located in the back may need casters to help ease regular maintenance and access to open panels.
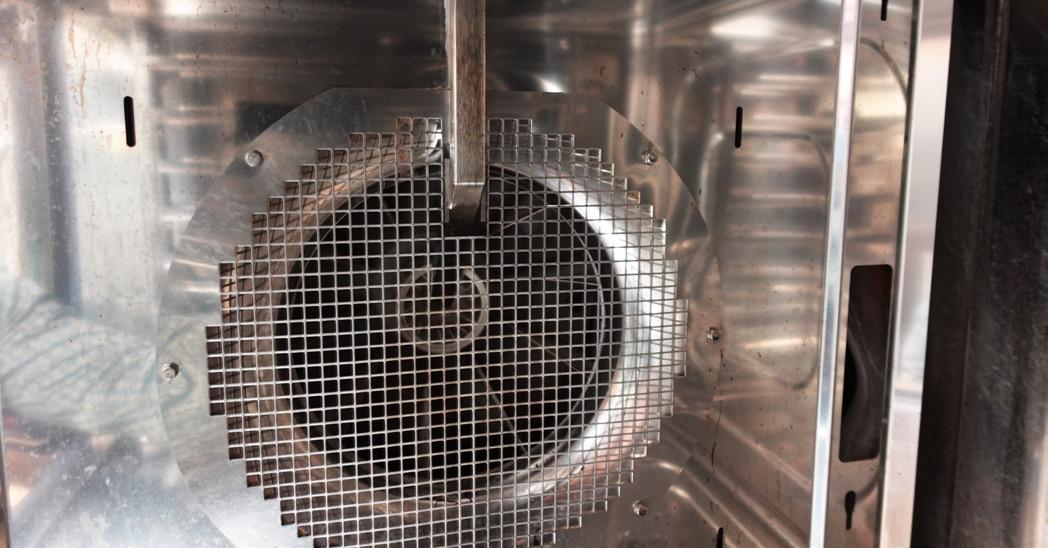
Fan wheels on foodservice equipment (e.g., convection ovens, equipment with power burner systems, etc.) must be inspected and cleaned regularly. Bakeries should clean fan wheels and air openings more frequently due to flour buildup.
» Motor air openings must remain clear at all times. Blocked airflow causes motors to overheat and fail prematurely.
» Check motor mounting hardware periodically, as loosening causes misalignment. Many motors have sealed bearings requiring no additional maintenance.
Water Quality
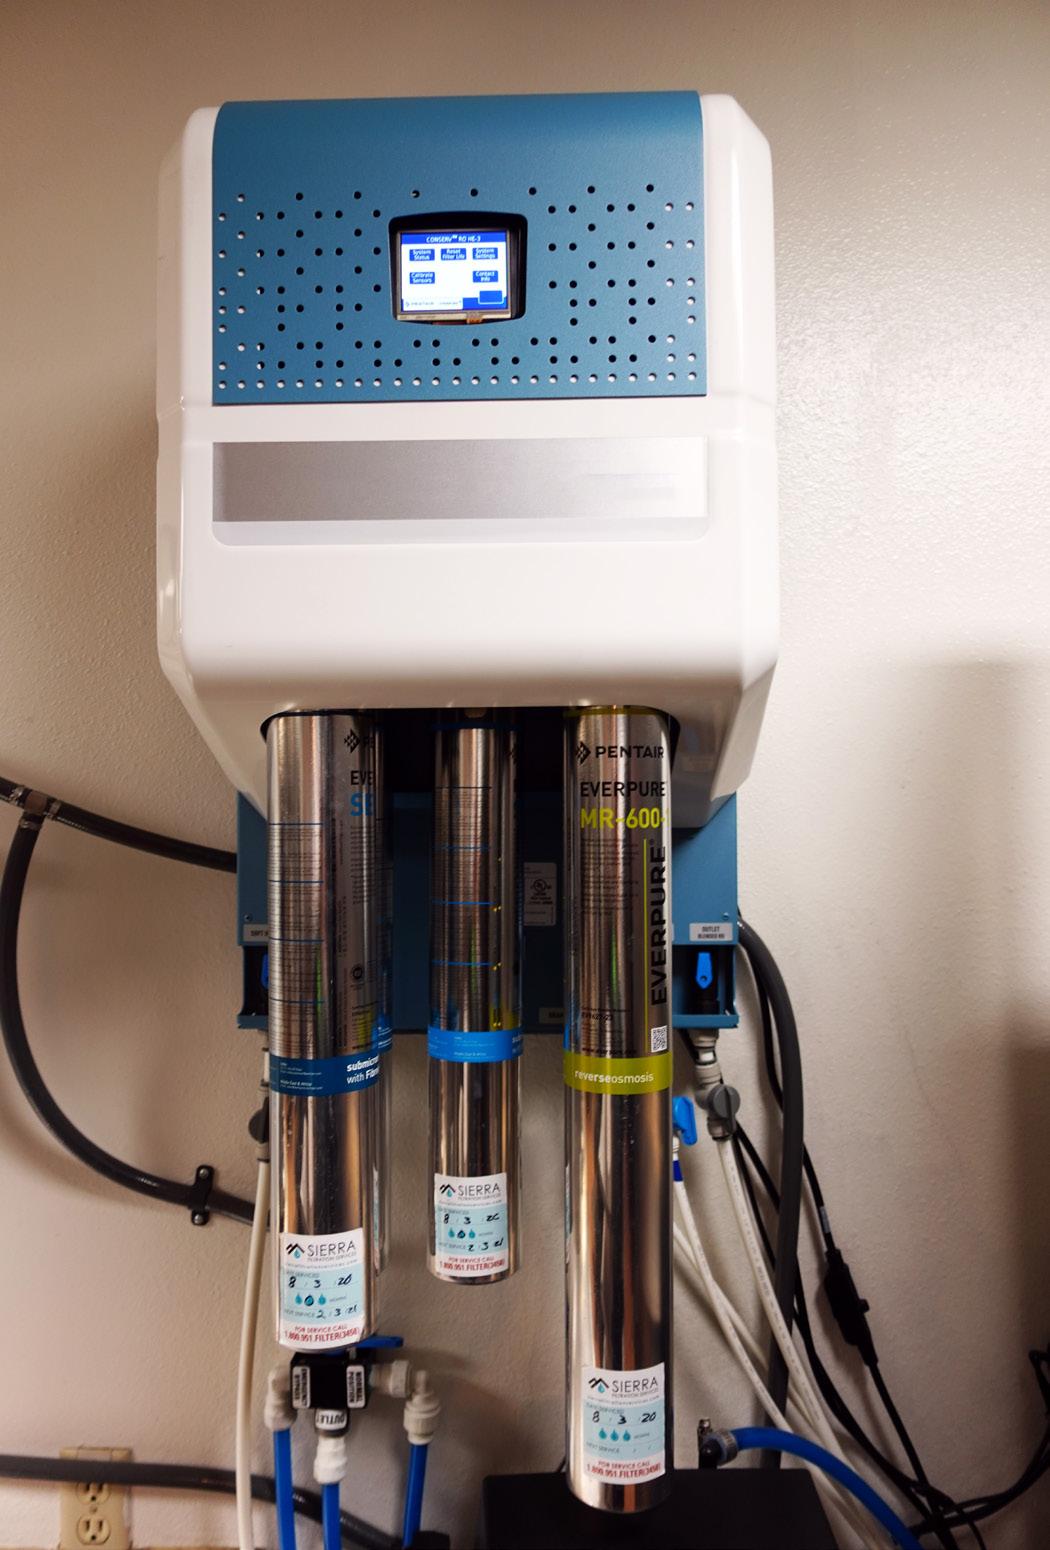
Water quality directly affects the longevity of steamers, combination ovens, dishwashing machines, and water heaters. When water converts to steam, dissolved solids remain in the equipment as mineral deposits, referred to as limescale, which insulate boiler tubes, foul controls, and clog pipes and valves.
Recommendations: Send a water sample to a lab or have a water quality expert analyze your local supply. Results will indicate whether filtration or water softening is needed to increase the operation and life of your equipment.
Treated or conditioned water (e.g., reverse osmosis) is highly recommended for steam-using equipment and in many cases required by manufacturer warranty. Check your owner’s manual for water supply specifications and plan to descale water-using equipment regularly, as frequency varies by use and water hardness. Heavy scale buildup should be professionally descaled.
Griddles
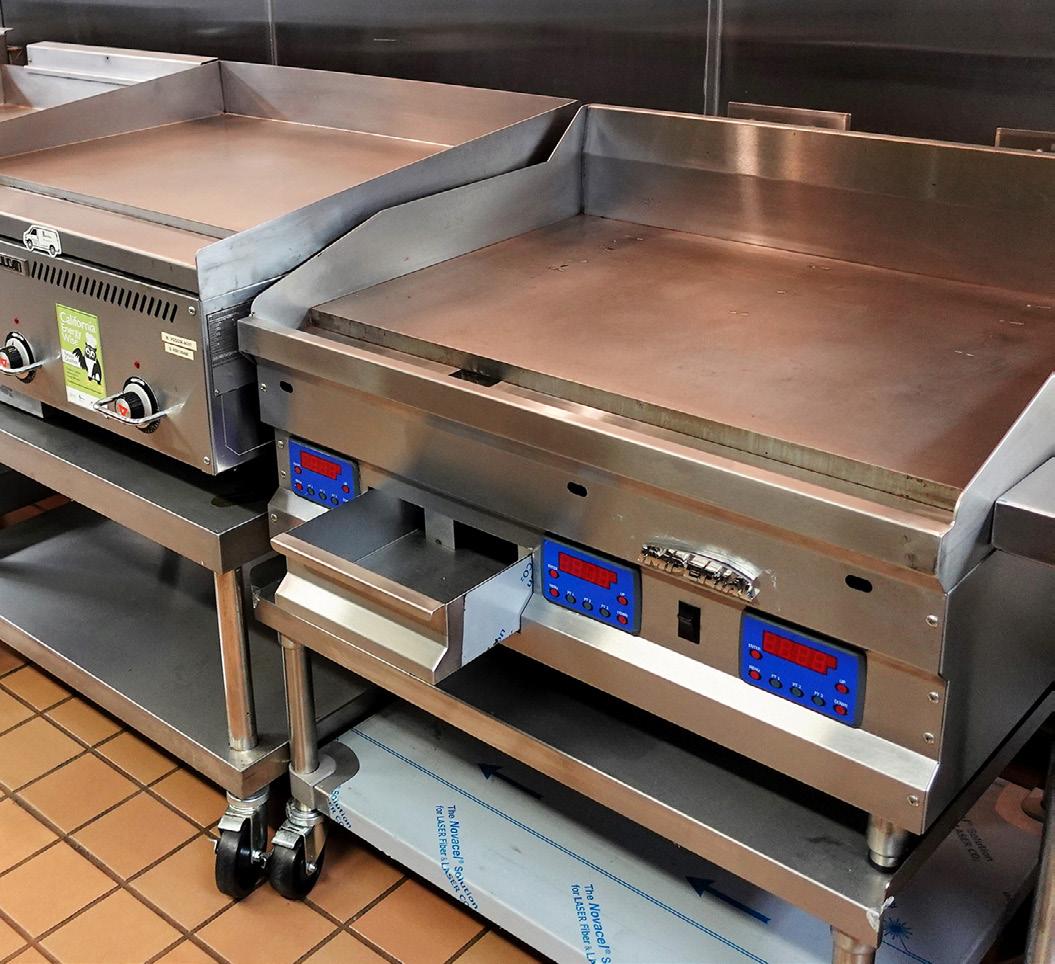
Griddles are comprised of a large, smooth or grooved plate heated by burners underneath. Primary maintenance focuses on the cooking surface, grease pan, knobs/controls, and burners.
Essential Maintenance Supplies
» Scraper(s), spatula(s), high-temp squeegee(s)
» Sponge and cloth
» Small bottle brush (for burner cleaning)
» Manufacturer-recommended cleaning agents
Required Regular Maintenance
» DAILY: Scrape cooking surface between food items
» DAILY: Thoroughly clean the grease pan
» MONTHLY: Check cooking surface for cracks
» MONTHLY: Check splashguards for seam separations
» MONTHLY: Inspect and clean burners and pilots
Cleaning Tips
Clean the griddle surface while warm (at manufacturerrecommended temperature) using a spatula, griddle scraper, or high-temperature squeegee. Rinse and wipe residue with hot water and an approved cleaning agent.
After cleaning, season the griddle plate:
» Preheat to 400°F.
» Coat surface with a light, even layer of cooking oil or pan spray.
» Let oil sit for approximately two minutes.
» Carefully wipe off excess oil with a dry cloth.
» Repeat as needed to attain a shiny surface. Wipe off all excess oil and turn off.
SAFETY WARNING:
Never use cold water or ice on a hot griddle.
Burner Inspection
During monthly burner compartment inspection clean built-up dust and lint with a soft bottlebrush; check burners for warping and verify a blue flame. Look for amber or dark brown hanging residue resembling icicles — this may further indicate a surface crack or seam separation.
SAFETY WARNING:
Solidified grease residue is a fire hazard. Contact a qualified professional to remove and correct the source problem immediately.
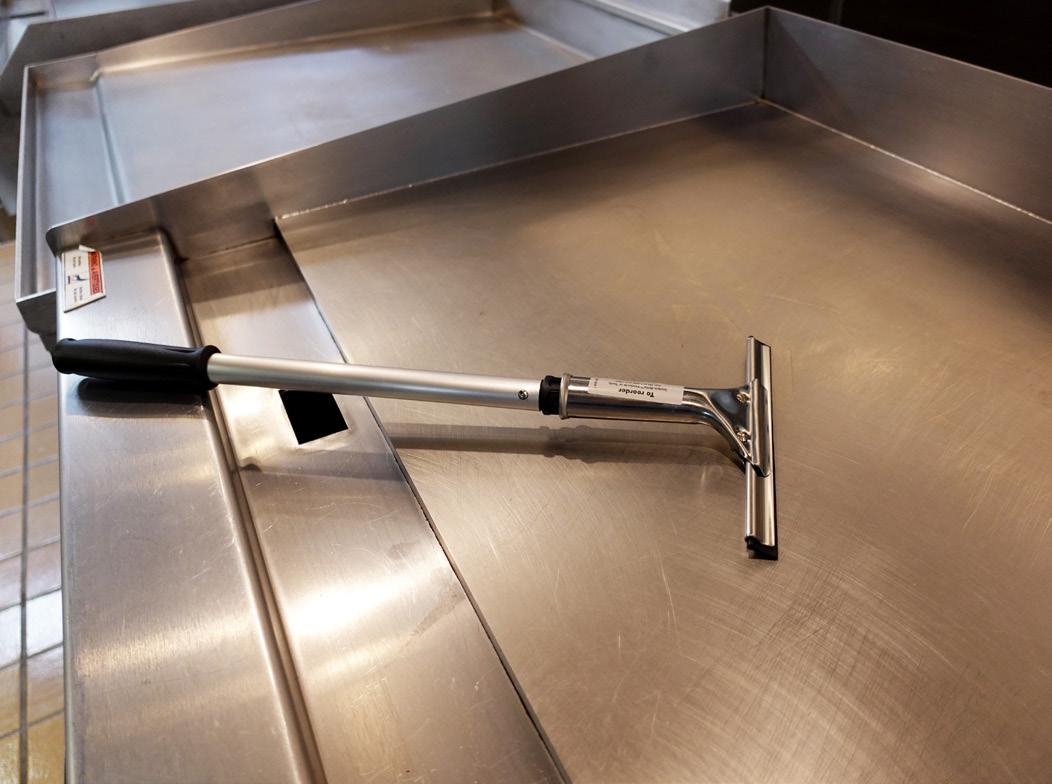
Scratches and nicks cause carbon buildup on an idle griddle and make food stick. Check spatulas and scrapers for sharp edges and replace as needed. Avoid griddle stones, steel wool, wire brushes, and heavy metal scrubbers on any polished cooking surface.
ENERGY EFFICIENCY TIP:
Idle energy consumption is substantial for griddles. Turn off unused sections during offpeak periods. Lower double-sided griddle tops to improve heat retention when idle.
Tilted Braising Pans
Tilted braising pans (“tilt skillets”) are high-capacity pans with a tilting mechanism for distributing large quantities of cooked food and separating liquids. Many griddle maintenance practices apply here, with the addition of the tilting mechanism.
SAFETY WARNING:
Do not use a braising pan to deep fry products.
Essential Maintenance Supplies
» Non-metal brush, sponge, plastic spatula / rubber scraper
» Commercial-grade soap cleaning agent
» Foodservice equipment descaling solution
Required Regular Maintenance
» WEEKLY: Thoroughly clean the pan
» MONTHLY: Check for lime and scale; descale if needed
» MONTHLY: Inspect and clean burners and pilots
» AS NEEDED: Grease the tilting mechanism
Cleaning Tips
» Regularly clean and rinse the pan’s pouring lips and under the pan cover. If food is stuck, soak and apply a little heat to loosen. Spray cooking surface with pan coating after cleaning.
» Take care when sanitizing with chlorine products. Do not allow chlorine contact with stainless steel for more than 10 minutes, as this causes corrosion.
» Avoid heavy metal scrubbers, wire brushes, steel wool and be careful when using spatulas and other utensils with sharp edges.
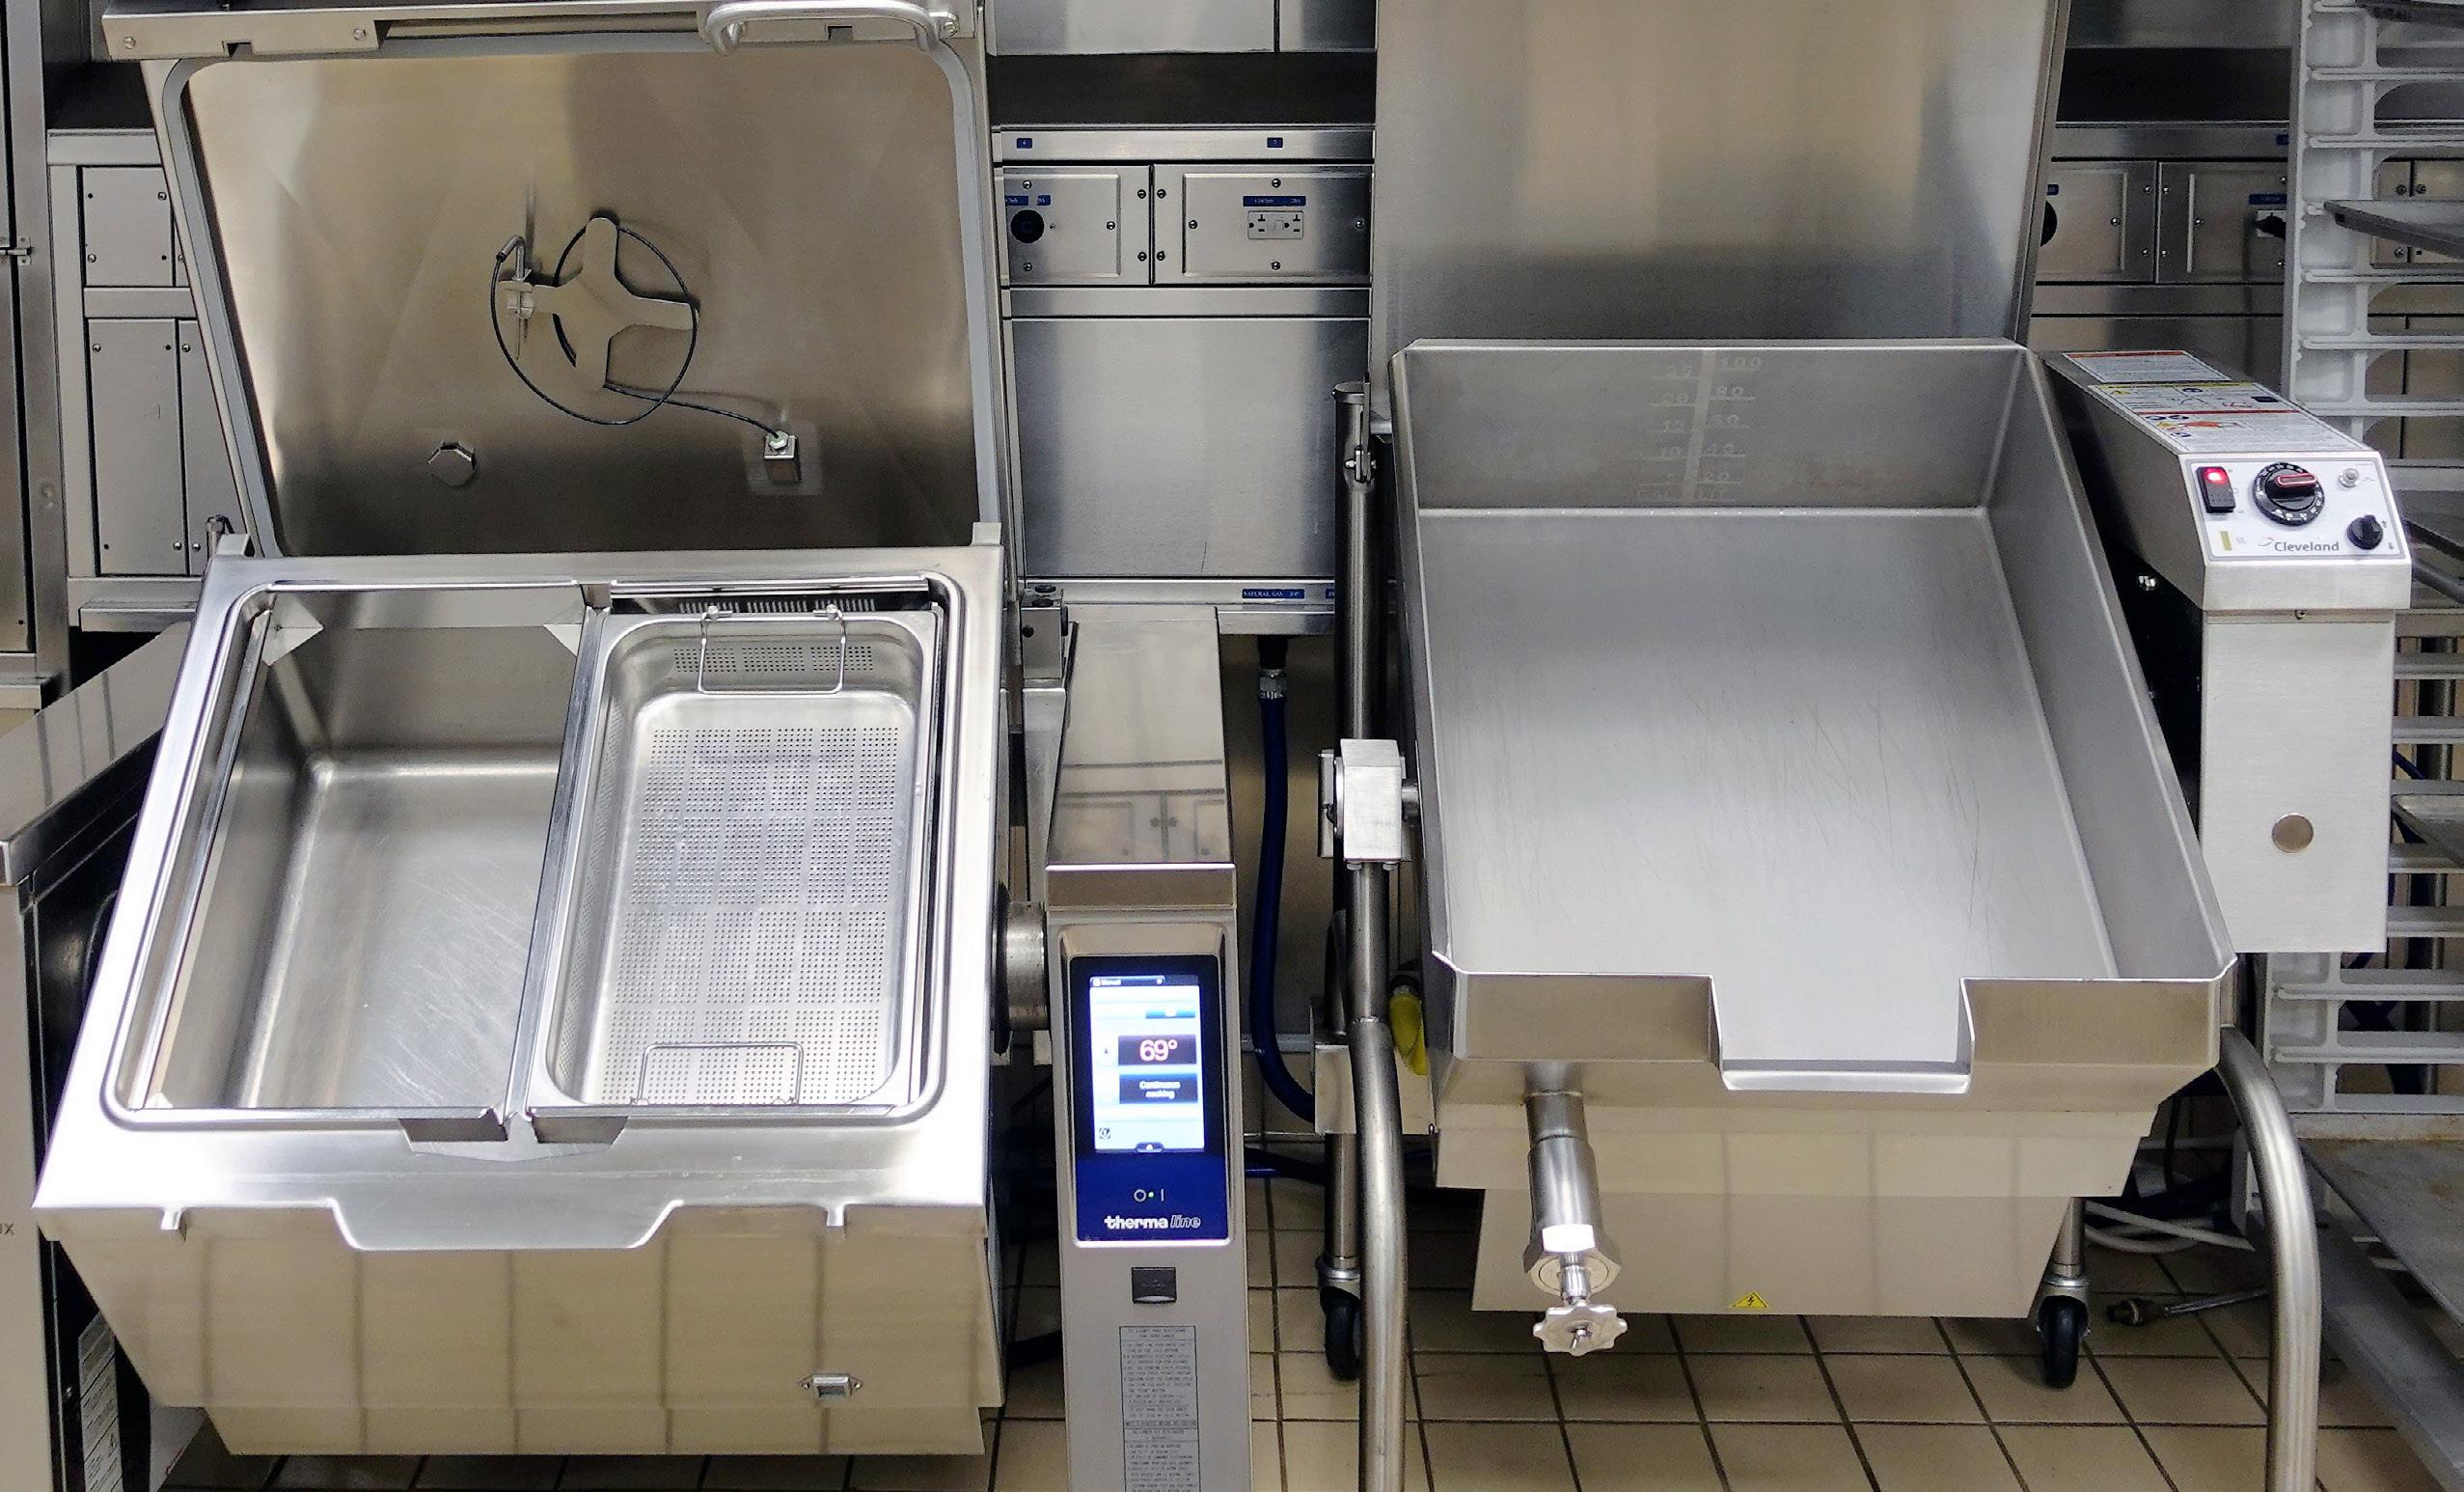
ENERGY EFFICIENCY TIP: Close the braising pan lid whenever possible to improve heat retention. Turn off the equipment during off-peak periods when used primarily as a skillet.
Fryers
Deep-fat fryers are among the most grease-laden and potentially dangerous equipment in your kitchen, posing substantial fire and injury (slips, burns) risks. Maintenance must be a daily scheduled task.
SAFETY WARNING:
Keep the fryer workstation clean and free of combustible materials or debris that could fall into the vat or ignite inside the cabinet. Additional key maintenance areas include the oil, burners and pilots, and the fryer vat.
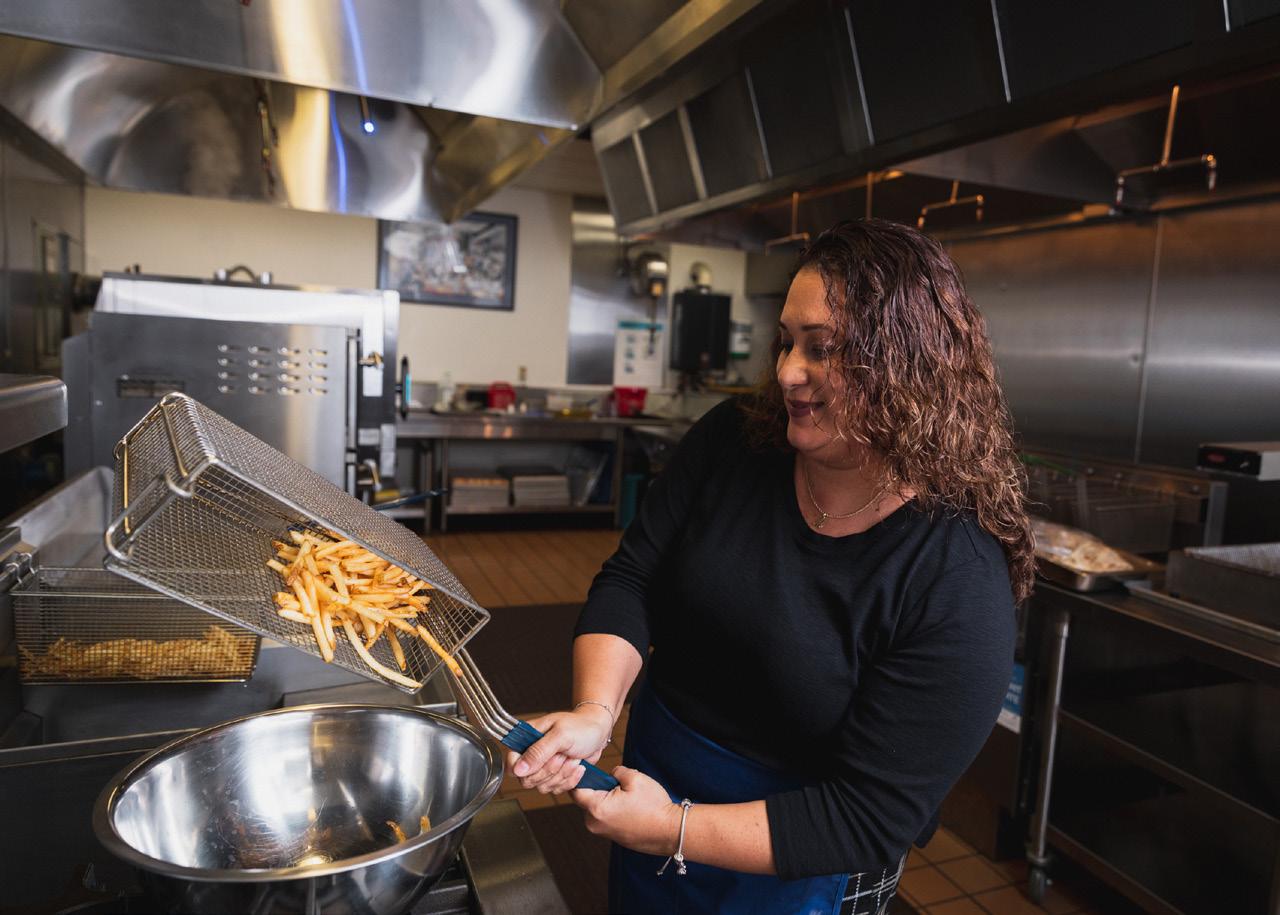
Oil Management
Sediment and food particles in cooking oil degrade fryer performance and affect food taste and texture while increasing energy consumption. Filter oil daily to extend its life and save on costs.
» Shut down the fryer completely and allow oil to cool before draining and filtering.
SAFETY WARNING:
Serious injury can result from contact with hot surfaces and/or oil. Always wear manufacturer-recommended protective gear: apron, heat-resistant gloves, and goggles when filtering or cleaning a fryer.
Essential Maintenance Supplies
» Long-handled, soft-bristled brush & small bottle brush
» Metal skimming tool
» Fryer lid
» Mechanical filter paper, filter pot, or built-in filtration system
» Manufacturer-recommended cleaning agent, degreaser, and chemical carbon cleaner
Required Regular Maintenance
» DAILY: Remove grease accumulation on/ around fryer
» DAILY: Drain and filter oil
» WEEKLY: Change oil
» MONTHLY: Boil out fryer vat
» MONTHLY: Inspect and clean burners, pilots, and gas valve
» SEMI-ANNUALLY: Check high limit switch
» Consider fryers with built-in filtration systems to filter while oil is hot, reducing injury risk and cleaning required.
» Train staff to skim sediment with a metal skimming tool throughout service to extend oils’ life.
» Avoid exposing oil to salt, water, excessive heat, and chemicals, as all of these accelerate oil breakdown.
SAFETY WARNING:
After filtering or cleaning, ensure all drain valves are completely closed before refilling the fryer with oil.
ENERGY EFFICIENCY TIPS:
» Cover the fryer vat with a lid when not in use to extend oil life and improve energy performance.
» Limit a fryer’s preheat time to 10 or 15 minutes and never longer than necessary
» Avoid frying at temperatures higher than necessary, most foods can be fried at 325350°F.
» Turn the fryer down or off between meal services.
Burner Maintenance
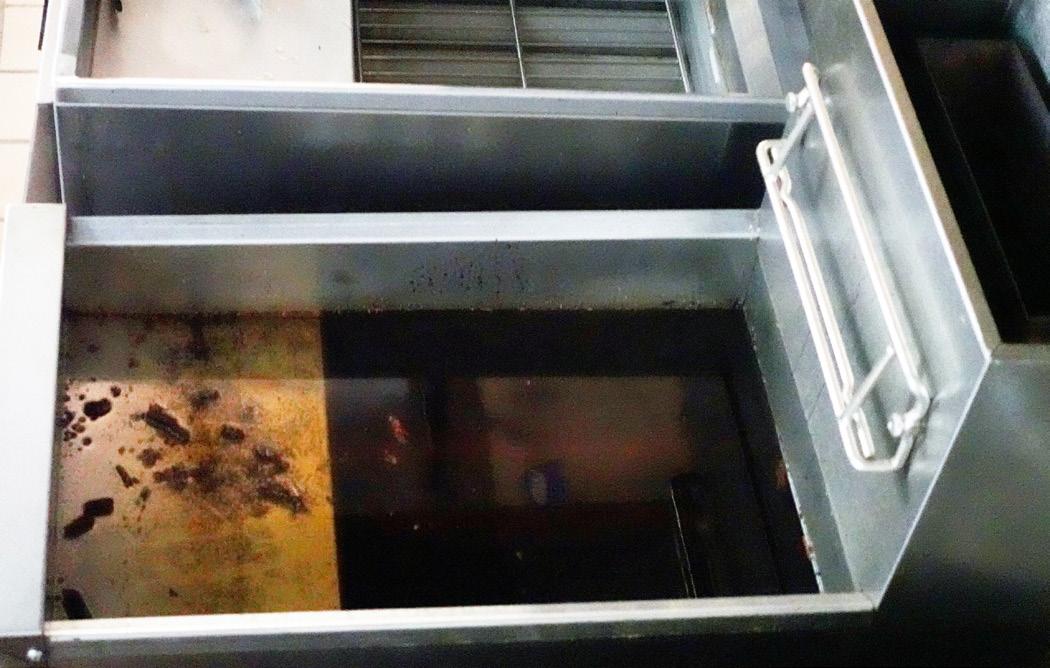
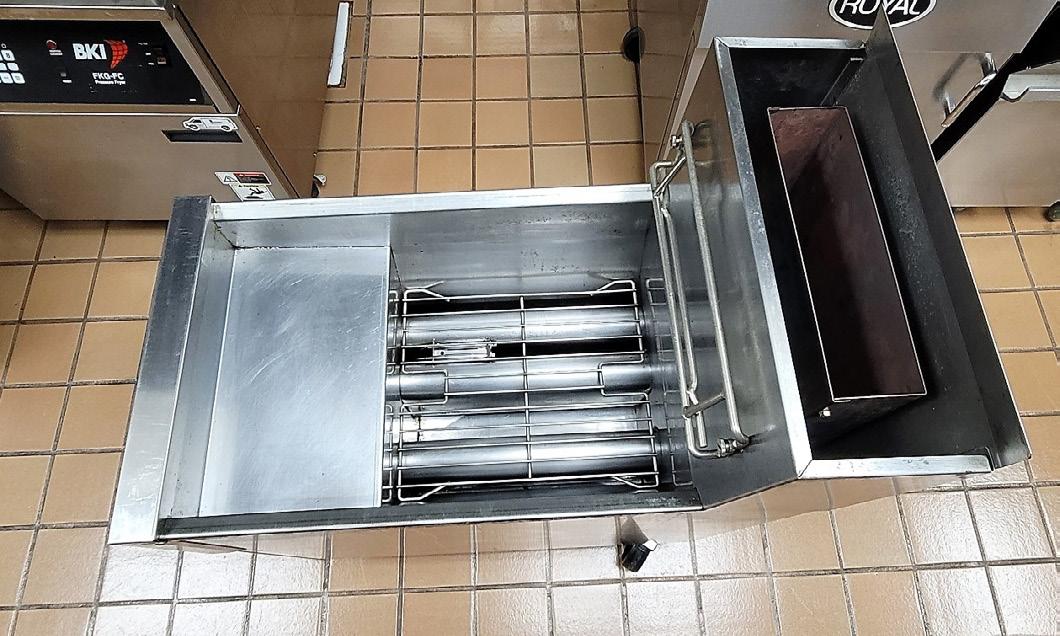
» Atmospheric port-type burners: Inspect and clean primary air openings monthly with a soft bottlebrush to remove lint and particle buildup monthly.
» Power burner systems: Clean and replace paper air filters regularly. For filterless systems, brushclean the screened blower inlet.
» Fryers with immersion tubes: Inspect baffles/ radiants by looking down burner tubes when burner is on. Radiants should be concentric and evenly heated (reddish-orange uniformly distributed). Call a service professional if radiants appear deformed or deteriorated.
» Clean the vent area on the gas valve pressure regulator with a dry cloth monthly. Remove and clean the vent plug button or replace , if needed.
» Have a professional service or replace the control valve if the knob breaks or cannot be turned by hand.
» Have a qualified professional check the high limit switch every six months or as needed to ensure that it is operational.
SAFETY WARNING:
Keep a Class K fire extinguisher readily available near your fryer workstation.
Cleaning Tips:
Vat Boil-Out Method
Turn off fryer and let cool. Oil must be no warmer than 170°F before draining.
Empty oil from tank into a storage container.
Remove loose debris from vat and drain with skimmer and brush.
Fill vat with water, add fryer boil-out solution, and bring to a boil for one hour while hardbrushing surfaces to loosen carbon.
Let water cool and drain.
Rinse vat to clear loose debris and residual cleaning agent.
Allow vat to dry completely before adding new cooking oil.
» Clean the fryer vat weekly, monthly, or as needed (depending on volume and type of food products).
» Take care not to damage sensing elements when cleaning. If the thermostat or high-limit control operates erratically, sensing elements may be damaged and need replacement.
» Wash fry baskets and utensils in a dishmachine or sink and allow to dry completely before returning to the vat. Alternatively, scrub debris off baskets and include them in the boil-out process.
» Ensure any leftover moisture and chemicals from cleaning is removed before re-adding oil.
SAFETY WARNING:
Do not fire burners with an empty vat; this can cause the seam welds to fail.
SAFETY WARNING:
Never add wet items to hot oil.
Steam Jacketed Kettles
Steam kettles use a “jacket” of hot, pressurized steam around the outside of the vessel to quickly and evenly heat large quantities of chilis, soups, sauces, and other food products. Primary maintenance focuses on water quality, pressure components, and vessel walls.
Essential Maintenance Supplies
» Manufacturer’s recommended water treatment product and pH strips
» Spare pressure relief valve
» Foodservice equipment descaling solution
FEATURE
Steam source
Daily water check required?
Air bleed required?
Quarterly inspection items
Key maintenance concern
Required Regular Maintenance
» DAILY: Check proper water level inside the jacket
» AS NEEDED: Bleed air from the kettle jacket
» MONTHLY: Test the pressure relief safety valve
DIRECT-FIRED (SELF-CONTAINED)
Built-in boiler
Yes — check sight glass gauge daily
Yes — bleed when pressure reads above zero while cold
Pressure gauge and safety valve
Water pH, jacket water level, air bleeding
Self-contained, Direct-fired Kettle: Air Bleeding Procedure
The kettle functions efficiently only when the jacket is fully saturated with steam. Air that leaks into the jacket must be bled off to ensure proper operation.
» When cold, the pressure gauge should read below zero (negative pressure/vacuum). A reading at or above zero, or a safety valve discharge during heat-up, indicates air in the jacket.
» To bleed air: heat the kettle with water or liquid in the vessel. When the gauge shows 3-5 psi, open the safety valve for 1-2 seconds, then release to snap shut. Repeat until only steam discharges.
» Point the discharge opening of the safety valve away from the valve.
INDIRECT-FIRED (CENTRAL STEAM)
Remote boiler or central steam system
No jacket water maintenance needed
No
Pressure-reducing valve, steam piping, condensate piping, valves, traps
Leaks, corrosion, and obstructions in steam delivery components
SAFETY WARNING:
Steam is invisible and causes serious burns. Wear safety goggles and protect exposed skin when opening the safety valve. Consider a kettle jacket shield for additional protection.
ENERGY EFFICIENCY TIP:
Covering cookware during heating and cooking improves overall efficiency, leading to lower energy use, shorter cooking times, and higher productivity. For steam kettles connected directly to a boiler, regular cleaning and maintenance help minimize energy loss.
Indirect-Fired Kettle Maintenance
Indirect-fired kettles are supplied by a remote boiler or central steam system and do not require routine air bleeding or jacket water maintenance. However, central steam systems require quarterly inspection of delivery components.
Inspect the steam pressure-reducing valve, steam piping, and condensate piping every quarter. Check valves, traps, and piping for leaks, corrosion, and obstructions. Repair as needed.
Jacket Water Maintenance
Water may occasionally need to be added to the jacket due to steam losses from air bleed-off or safety valve checks.
» Check the sight glass gauge daily before turning the kettle on. Level must be between minimum and maximum markers.
» Jacket water is treated during manufacturing to protect metal and prevent scale. Each manufacturer specifies a treatment product for replacement water.
» Test replacement water pH per the operation manual before adding. Follow manufacturer instructions to add water without introducing air. If unsure, call a qualified professional.
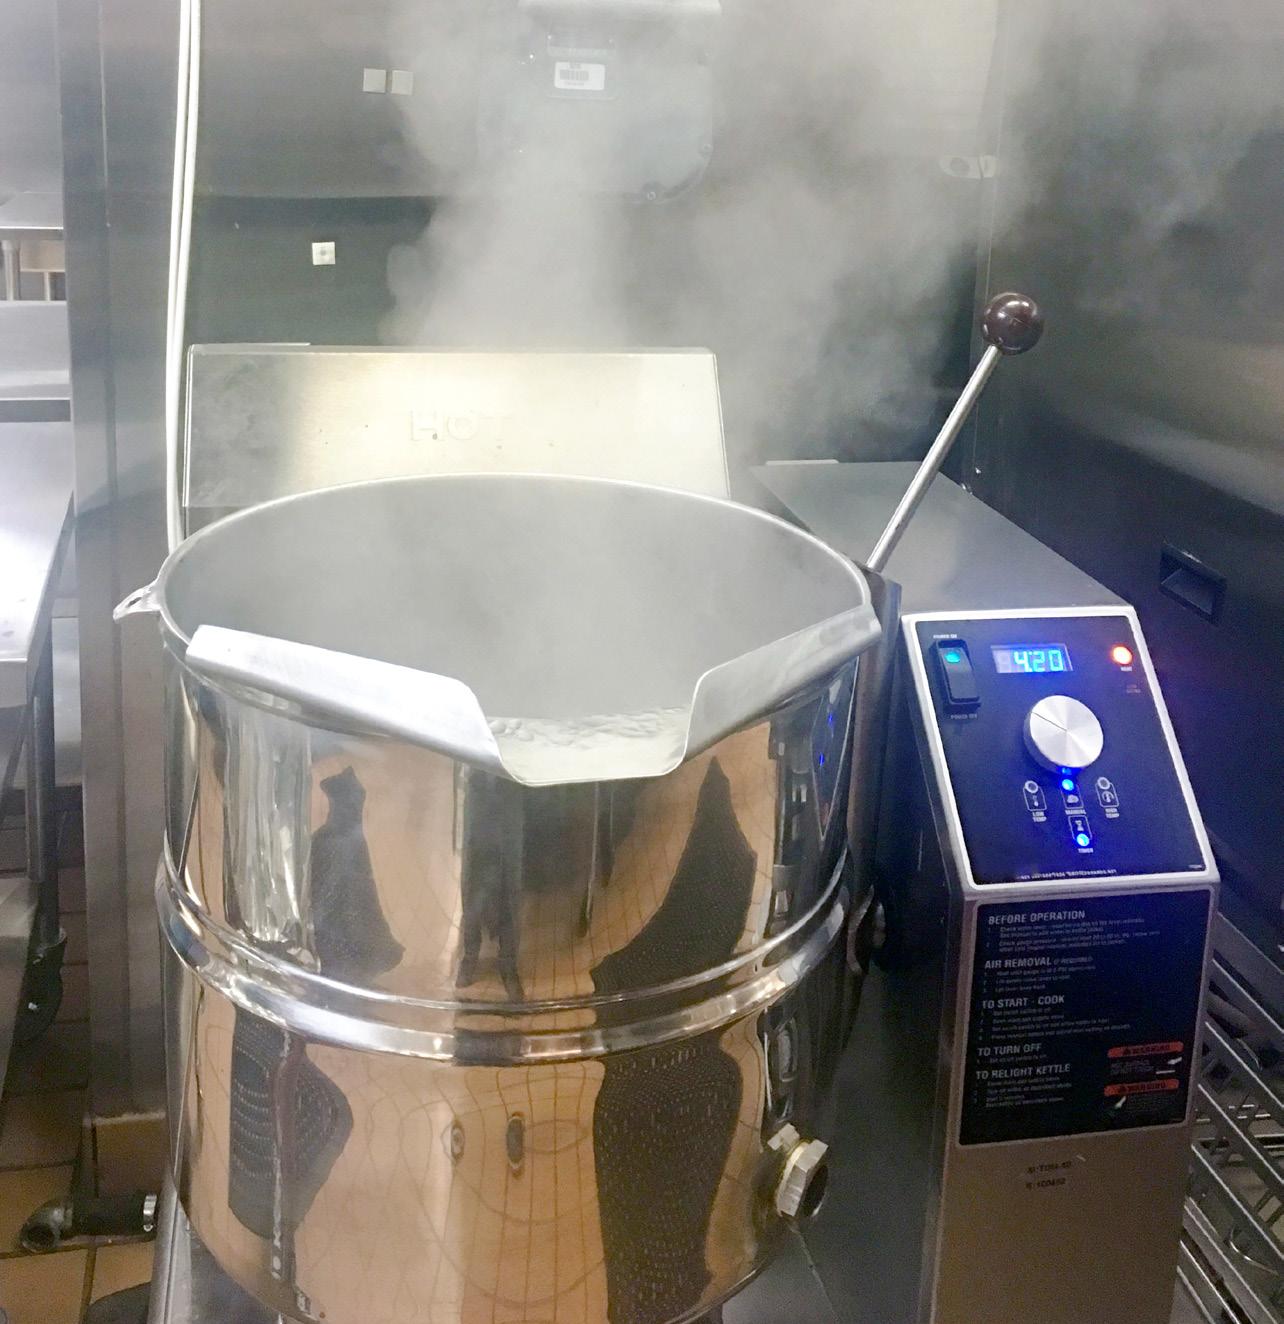
SAFETY WARNING:
Make sure the kettle is fully cooled and shows a negative pressure on the pressure gauge (pg. 18, bottom left) before opening the valve to add water.
Pressure Gauge & Safety Valve
These are the two most critical components on any steam jacketed kettle. Failure of either can lead to serious equipment damage and potential injury.
» Check the pressure gauge daily to verify safe range and proper function. If sticking, corroded, or reading above the kettle’s rating, shut down immediately and call a qualified professional.
» Test the safety valve monthly: open for 1-2 seconds at operating temperature, then release to snap shut. If it leaks, sticks, shows corrosion, has debris, or fails to snap back, shut down and replace promptly.
» If the kettle is a core production item, keep a spare safety valve on hand.
Cleaning Tips
Because food is in direct contact with the kettle walls, clean and sanitize the vessel before and after every use.
» Always use a sponge, cloth, or plastic brush. Never use metal spatulas, heavy metal scrubbers, wire brushes, or steel wool, to protect the vessel walls and avoid scratches or dents.
» After cleaning, allow the kettle to air dry. Wipe visible water spots with a soft cloth and cleaning vinegar.
» Use a cooking equipment-suitable descaling solution.
SAFETY WARNING:
A descaling solution not suited for cooking equipment could etch the surface and render the kettle unusable. Use only manufacturerapproved products..
Steamers
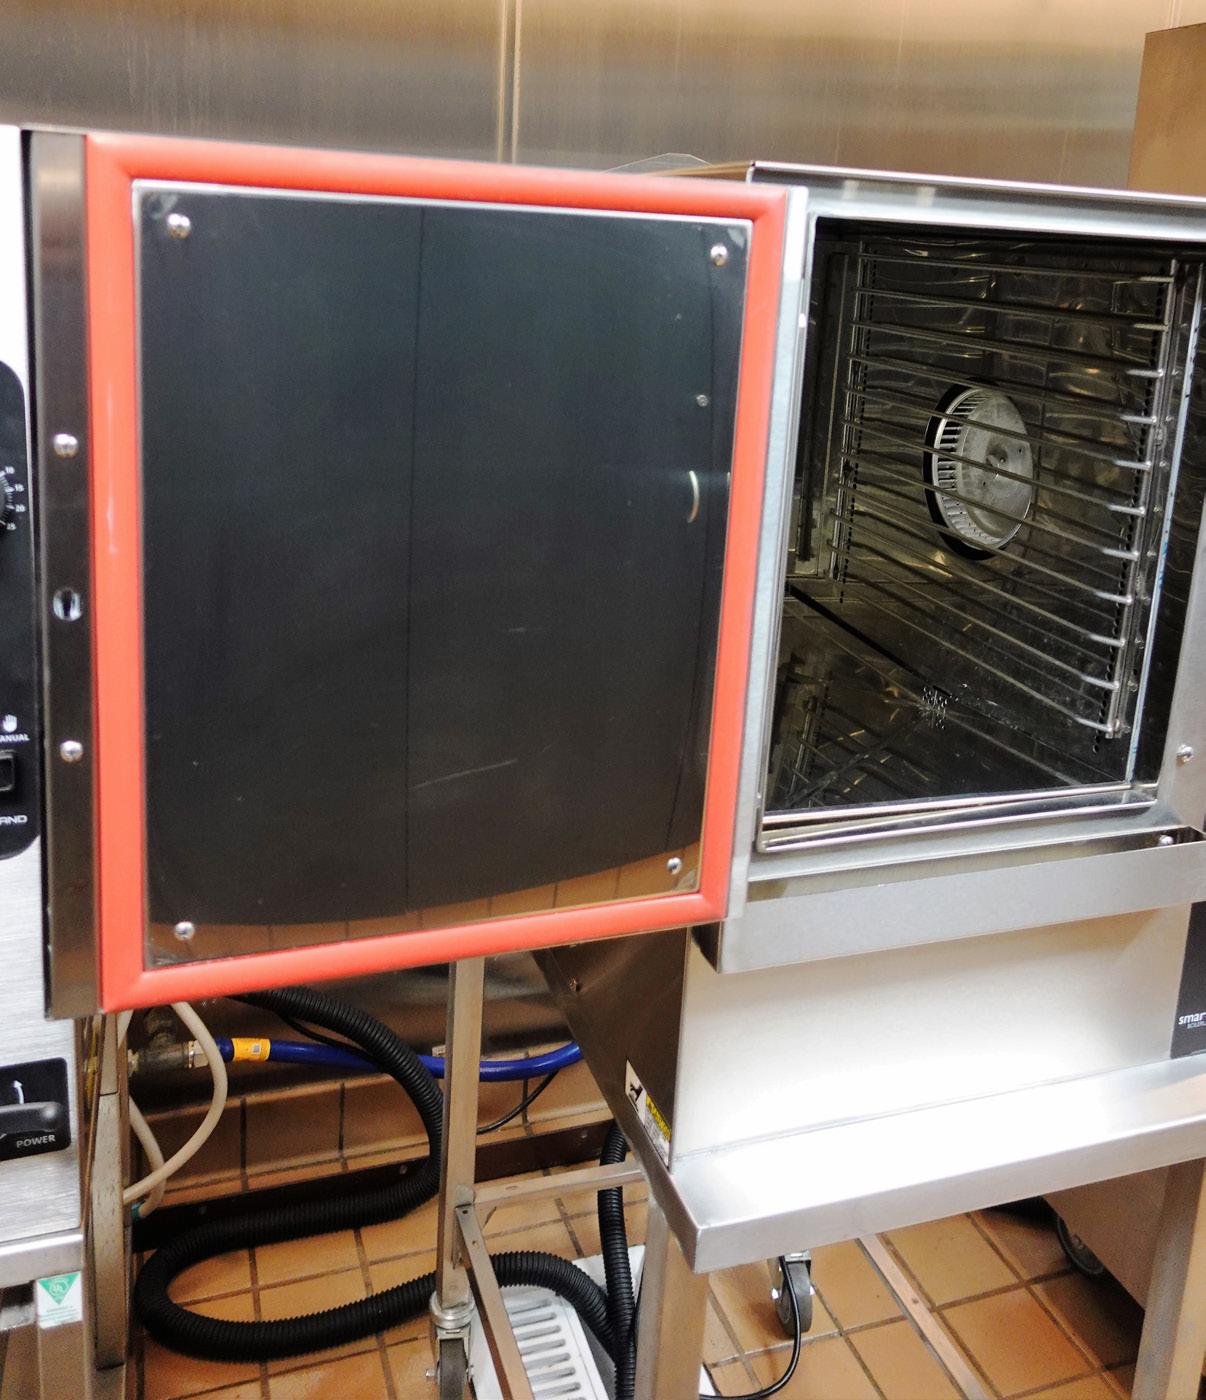
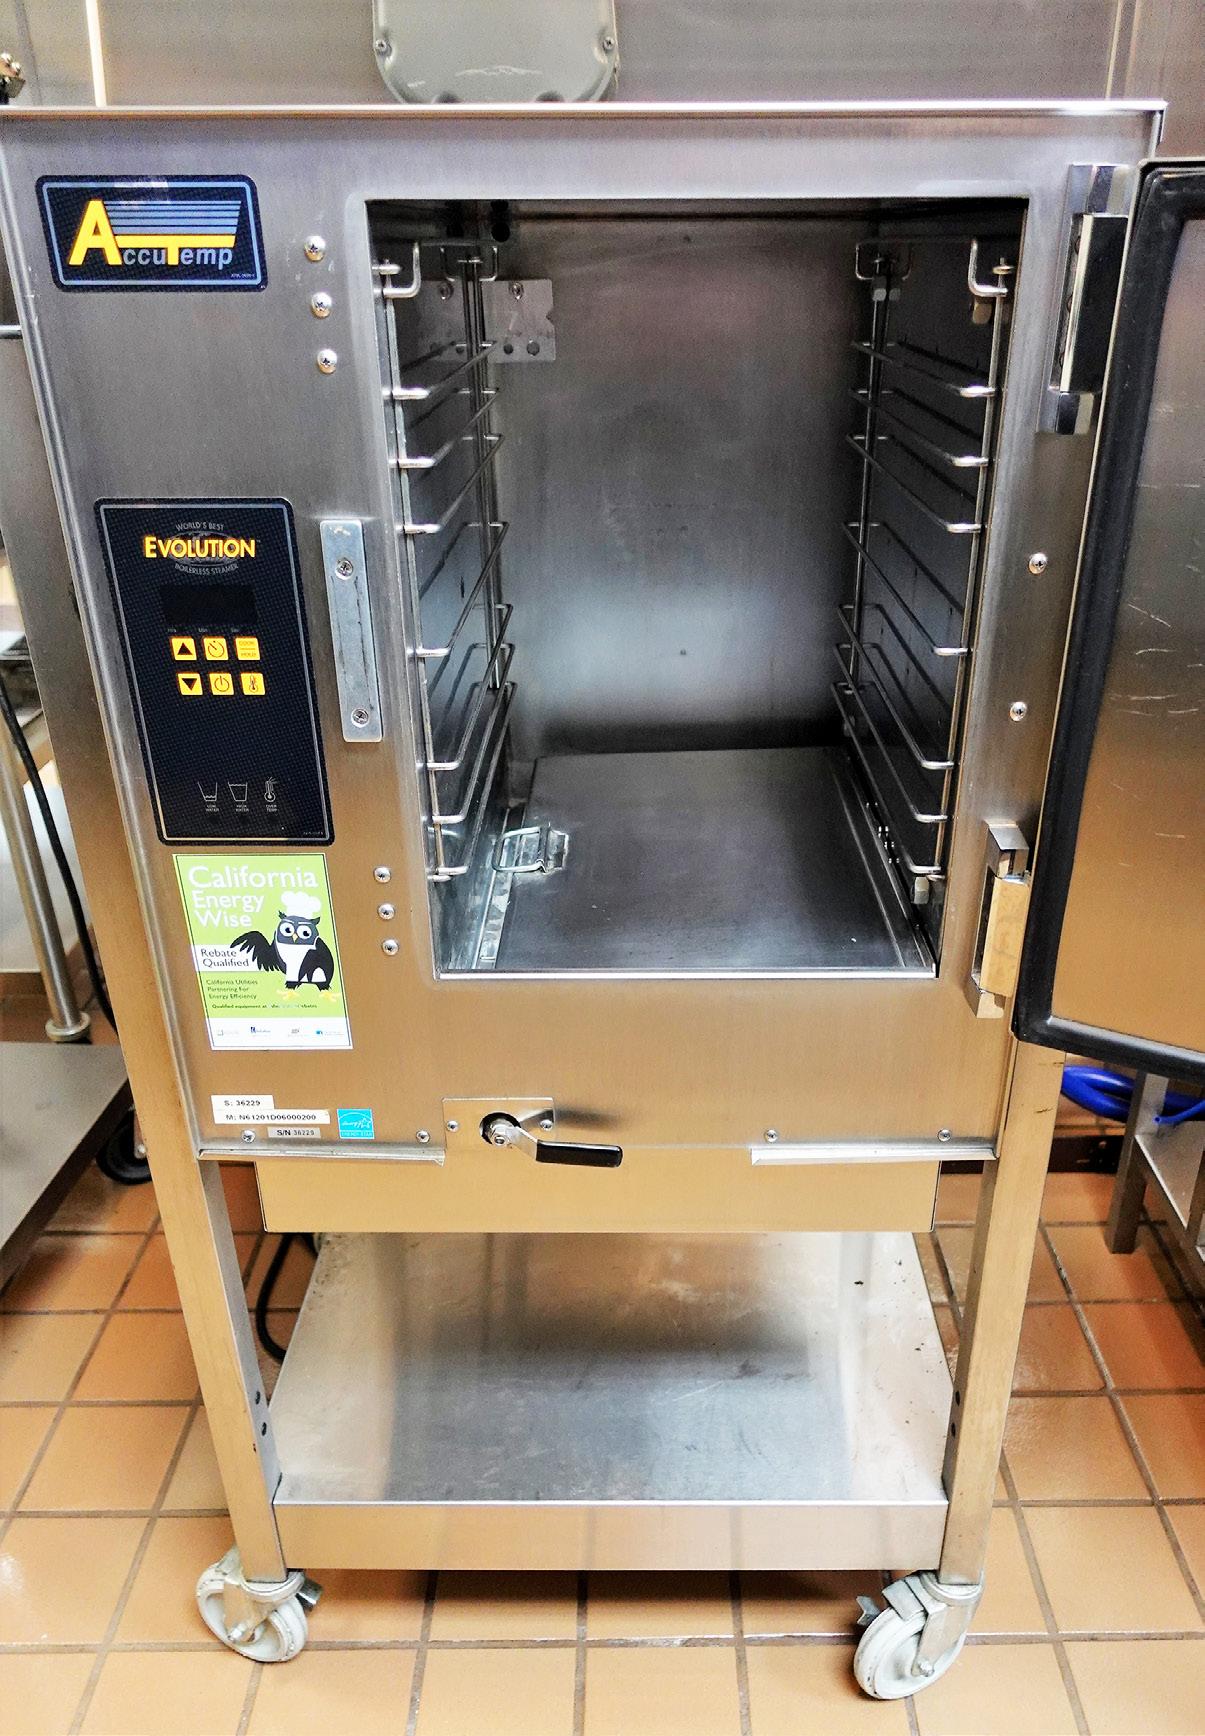
Steamers use steam heat in a closed compartment to cook food products. Commercial steamers vary by steam generation method — boiler-based, connectionless (boilerless), or direct steam (remotesupplied). Primary maintenance concerns are door gaskets and water quality.
SAFETY WARNING:
Open the steamer door slowly to let hot steam safely escape into the ventilation hood and avoid burns.
Essential Maintenance Supplies
» Non-metal sponge, cloth, or plastic brush
» Replacement door gasket
» Replacement hand-hole cover gasket (boilerbased steamers)
» Foodservice equipment descaling solution
Required Regular Maintenance
» DAILY: Wipe down steamer compartment
» WEEKLY: Descale compartment drain
» WEEKLY: Check door gasket; reverse or replace if worn
» MONTHLY: Inspect boiler orifices for scale buildup
» MONTHLY: Inspect and clean burners/pilots
» QUARTERLY or SEMI-ANNUALLY: Descale boiler (if applicable)
Steamer Type Maintenance Comparison
FEATURE
Steam source
Descaling frequency
BOILER-BASED
Built in dedicated boiler
Quarterly to semi-annually; inspect every 3-6 months
Water quality
sensitivity
Key inspection items
Notes
High
Boiler scale (1/100” = business card thickness = descale needed); door gasket
Inspections and descaling by qualified professional. After descaling, run several cycles to remove residue. New handhole gasket required after each service.
SAFETY WARNING:
Do not mix descaling agents (acid) with degreasing agents (alkali) anywhere in the steamer unit.
Cleaning Tips
» Open the steamer door and allow the compartment to cool. Scrape or wipe out food residue using a sponge, cloth, or plastic brush.
» Ensure compartment drain holes are clear of debris.
» Clean the front and sides with a damp cloth. Never hose or steam-clean any part of the steamer.
» Leave door(s) open and resting on latches when steamer is not in use.
» Use only mild detergents. Do not use abrasive or chlorine-based cleaners. Do not use steel wool or metal implements inside the compartment — these scratch surfaces and promote bacteria growth.
CONNECTIONLESS (BOILERLESS)
Heated reservoir at bottom of compartment
Not a primary concern; descale compartment drain weekly
Low
Compartment drain; door gasket
Requires only weekly cleaning with mild detergent
REMOTE STEAM
Central steam system
No boiler; inspect piping every 2 months
Medium
Draw-off faucets, valves, piping, steam pressurereducing valve, traps
Repairs should be done immediately when dealing with pressurized steam
ENERGY EFFICIENCY TIP:
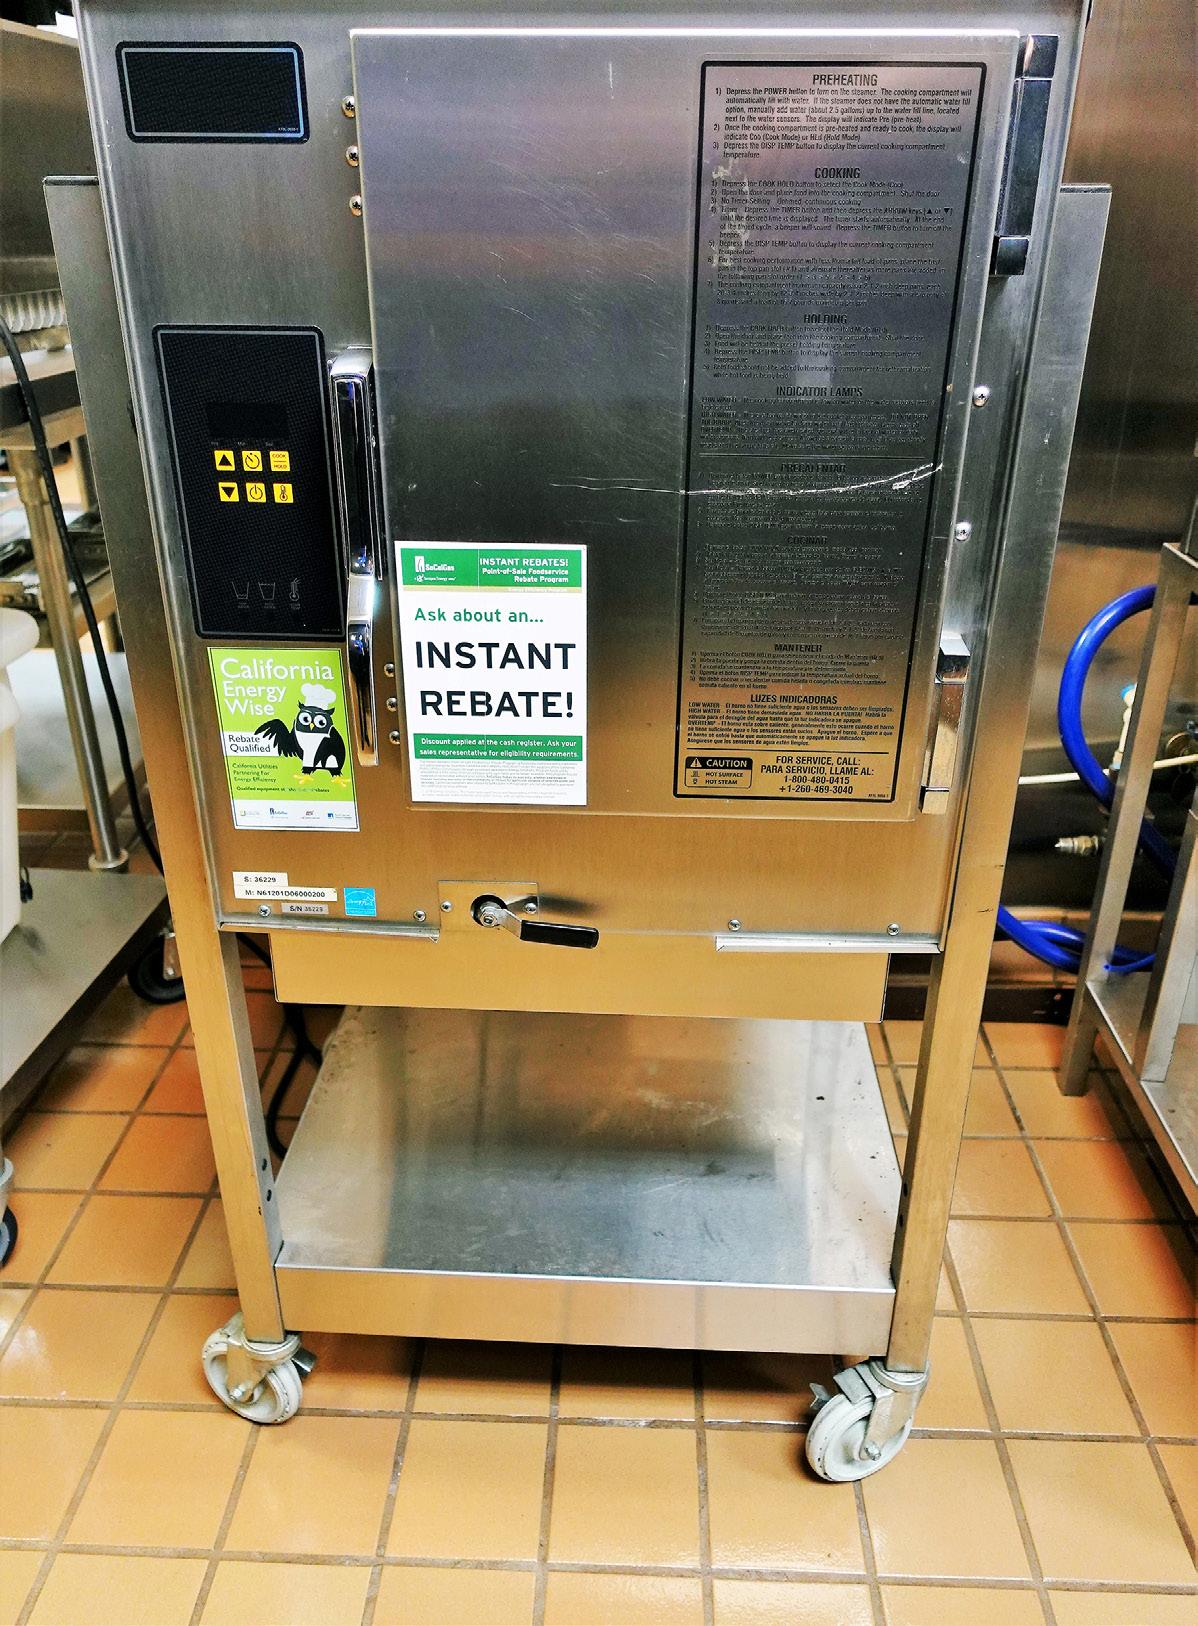
Routinely check steamers for steam or water leaks, as even small leaks can increase energy and water costs. For low-to -moderate use, ENERGY STAR® –certified connectionless steamers offer an efficient option. In high-volume, all- day operations, ENERGY STAR® –rated boiler-based steamers provide greater water and energy savings and require less frequent descaling. Installing a water treatment system is strongly recommended to help reduce scale buildup and maintain efficiency.
Ovens
Ovens are available in many designs based on operation type and food product. This section covers general maintenance applicable to all ovens, followed by specific requirements for specialized types.
Oven Types at a Glance
OVEN TYPE
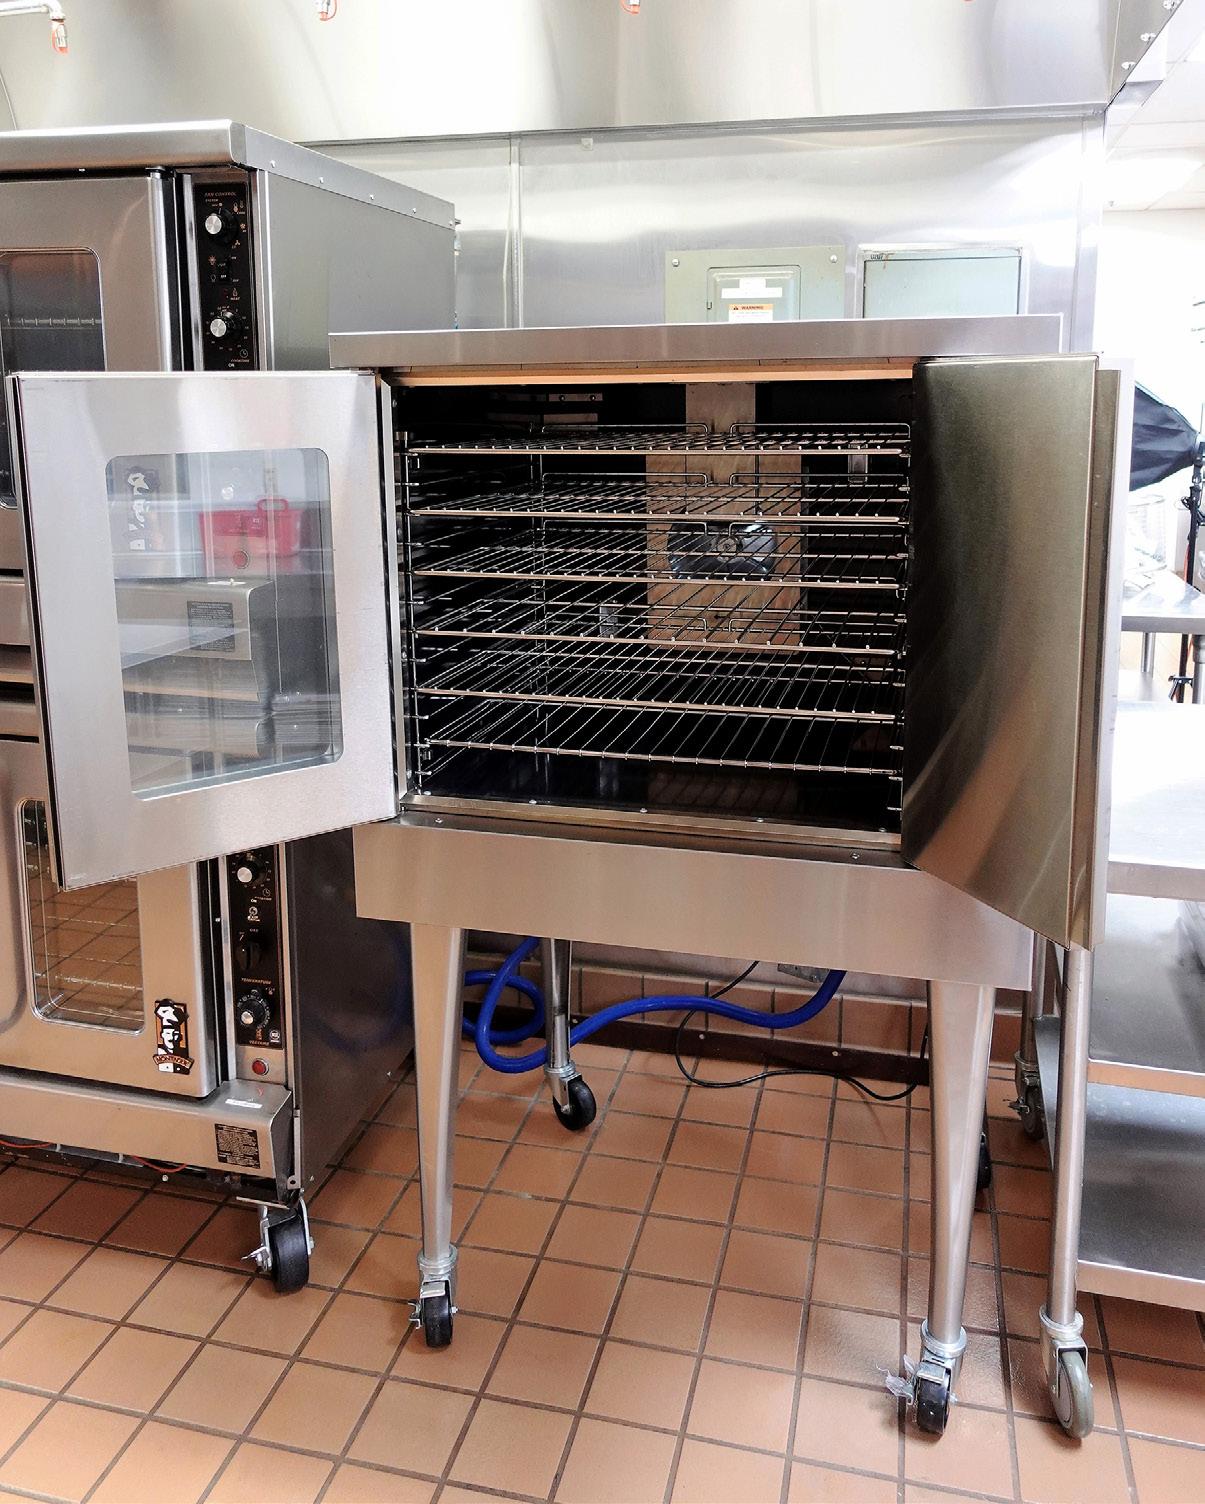
Conventional / Range Oven
HOW IT WORKS
Fan(s) circulate hot air inside the cavity for faster, more even heating and browning
Convection (Standalone)
Deck Oven
Conveyor Oven
Rack Oven
Food placed on ceramic stone or firebrick deck
Belt moves food through cavity; impingement (high-velocity air)
Rotating rack inside cavity; convection + steam injection
Combines convection dry heat and steam; power burners; tight-seal cavity
SAFETY WARNING:
Always use hot pads or mitts when removing hot food pans or oven racks.
KEY MAINTENANCE ADDITIONS
None beyond general maintenance
Fan baffle plate cleaning (weekly/monthly)
Daily deck cleaning; no water or liquids on stone
Belt inspection; belt tension; air finger cleaning
Steam system/nozzle inspection; flour buildup prevention
Water filtration; boiler descaling; drain line; auto-clean mode
Essential Maintenance Supplies (All Ovens)
» Sponge, cloth, plastic brush, non-abrasive nylon cleaning mesh
» Commercial-grade oven cleaning solution
» Replacement door gaskets
» Water filter components (where applicable)
» Manufacturer equipment-specific cleaner (combis)
Required Regular Maintenance (General)
» DAILY: Check door seals — tighten hinges or replace gaskets if air escapes
» DAILY: Wipe out food debris from cooking cavity and clean racks
» WEEKLY or MONTHLY: Remove fan baffle plate; clean blades with stiff brush
» MONTHLY: Verify timer and thermostat accuracy; call professional if out of calibration
» MONTHLY: Inspect and clean burners/pilots
ENERGY EFFICIENCY TIP:
Keep oven doors shut during cooking and minimize frequent openings. Fill the oven to capacity but do not overload it, as overfilling causes uneven baking.
General Oven —
Clean the oven cavity regularly.
Turn off oven and let cool completely.
SAFETY WARNING:
Do not use water or other liquids to clean a stone deck. Liquid on a hot stone can cause it to crack.
Remove oven racks and rack supports — chrome finishes can be ruined by oven cleaning solutions. Avoid getting cleaning agents on the temperature sensor/thermostat inside the chamber.
Wipe inside the oven and crevices around the door with water and an approved cleaning agent.
Rinse with a damp cloth. Use non-abrasive nylon mesh for stubborn spills.
Porcelain Enamel interiors (most common): avoid abrasive materials that scratch or chip the coating, leaving exposed metal susceptible to rust and bacteria.
Stainless Steel interiors: remove spills immediately (not non-stick). Clean corners frequently — these harbor food and bacteria.
Clean interior light(s) with a damp cloth.
Occasionally remove fan baffle plate and use a stiff brush on each blade. Replace when finished.
Wipe down oven racks and replace.
ENERGY EFFICIENCY TIP:
Turn up the heat to carbonize stubborn stains during your weekly cleaning rather than using chemical cleaners. Let the oven do the work, then sweep out the residue once cool. This keeps the deck surface clean without chemicals and without extra energy spent on separate cleaning cycles.
Deck Ovens — Additional Maintenance
Deck ovens are cooking chambers where food is placed in direct contact with the oven floor or “deck”. The oven deck is typically composed of ceramic stone or composite firebrick materials that provide even heat distribution. In addition to the general oven maintenance items, deck oven maintenance should focus on keeping the oven deck free of food debris.
FREQUENCY
TASK
Clean all spills immediately
SAFETY WARNING:
Do not use oven cleaner or degreaser on stone decks; cleaning agents can be transferred to foods that are cooked on the deck.
When stone deck is cool, sweep out crumbs with a cloth or deck brush
Thorough deck cleaning: turn up heat to carbonize stubborn clumps and stains, let cool, remove with a brush
Conveyor Ovens — Additional Maintenance
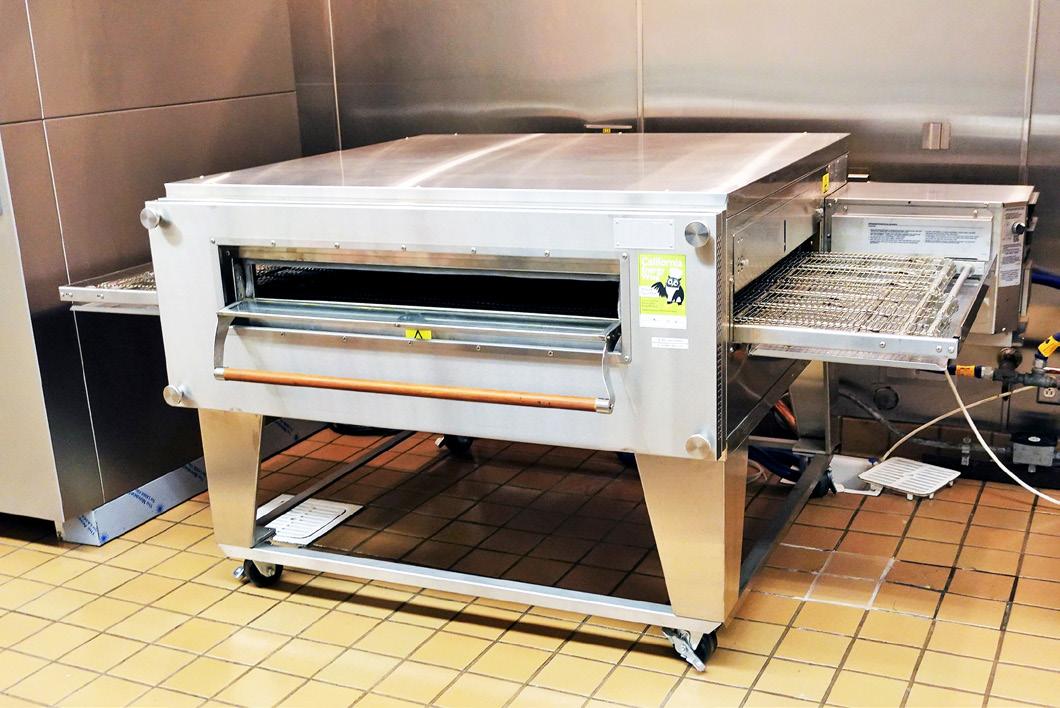
Conveyor ovens feature a conveyor belt that moves food through a cooking cavity from one open end (loading) to the other (exiting). Unlike other ovens, conveyor ovens use high-velocity heated air for cooking (referred to as “impingement”), generated by a power burner.
The large volume of hot air is forced through “air fingers”; rectangular tubes with ports facing the conveyor belt. A few conveyor oven models feature a batch or “indexing” mode in which doors on each end of the cavity close and the belt turns off during cooking; doors then re-open and the belt re-engages for the next batch of food products. This feature is designed to prevent further heat loss through the cavity openings.
Conveyor ovens contain many removable parts that need to be cleaned on a daily or weekly basis. These parts include the conveyor belt, crumb trays, draft diverters, and the air fingers, among others. Check your manufacturer’s literature for cleaning instructions specific to your model.
Rack Ovens —
Additional Maintenance
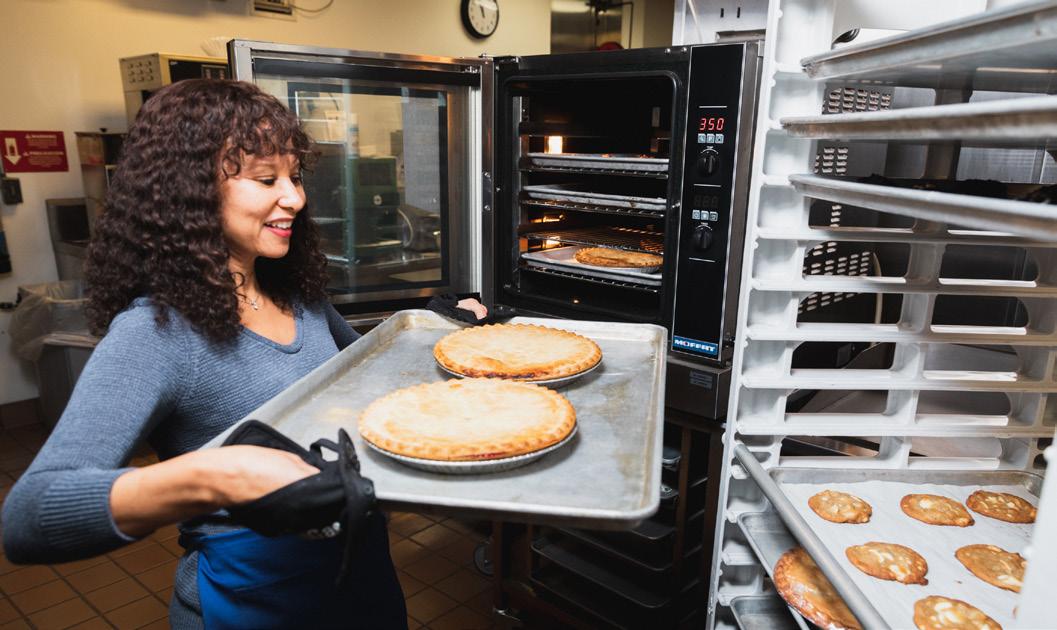
Rack ovens use a mechanism inside the cooking cavity to rotate a rack of pans for even heat distribution over food products.
Rack ovens use a combination of dry convection heat and steam injection. Maintenance for rack ovens is similar to convection ovens with the added items of the rotating rack mechanism and water inlet/drain. Bakeries should take extra care to ensure flour does not build up in motor air openings, burner/pilot systems, and fans.
Rack ovens come equipped with a steam injection system where inlet water is instantaneously converted to steam upon contact with superheated heavy metal; the resulting steam is then injected into the cavity. The design of these systems decreases the chance of failure due to scale buildup. However, it is recommended to inspect the steam system, spray nozzles, and drain pan quarterly and descale if necessary, as scale can act as insulation and reduce steam performance.
FREQUENCY
Inspect conveyor belts for bent belt wire
Inspect and clean power burner blower fan wheel
Adjust conveyor belt drive and gears for proper tension — belts stretch over time
Inspect and lubricate bearings per manufacturer guidelines
Clean flour/dust from top of oven and circulation blower motor
Check water connection for leaks; ensure drain line is properly placed
Clean built-in hood filters with water and approved cleaning agent
Tighten hardware on rack lifting/ rotating mechanism
Inspect and clean power burner fans
Inspect and descale steam system trough, spray nozzles, and drain pan
Combination Ovens — Additional Maintenance
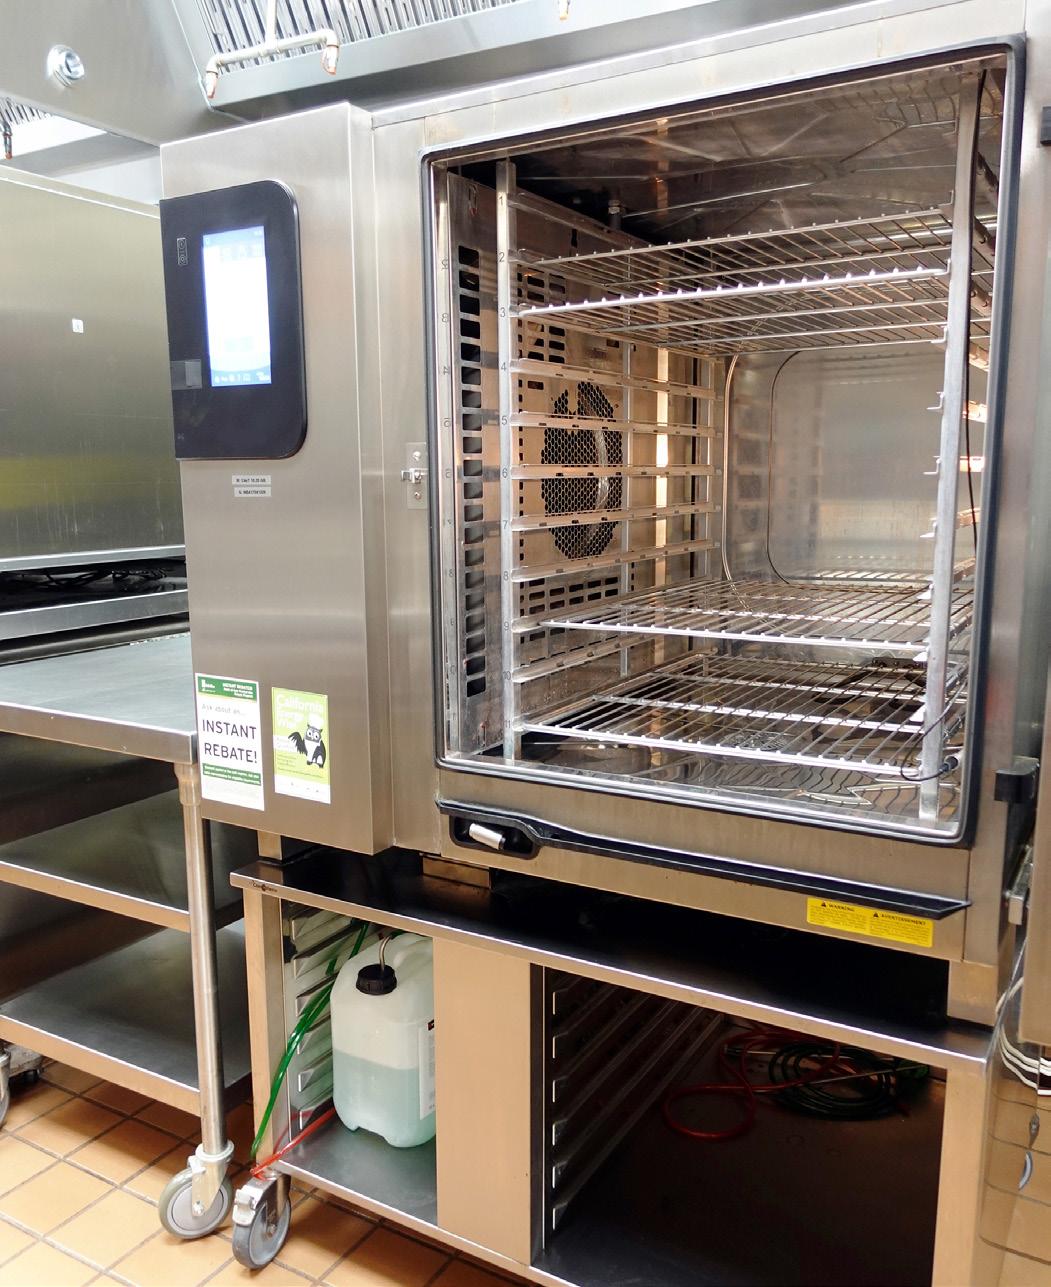
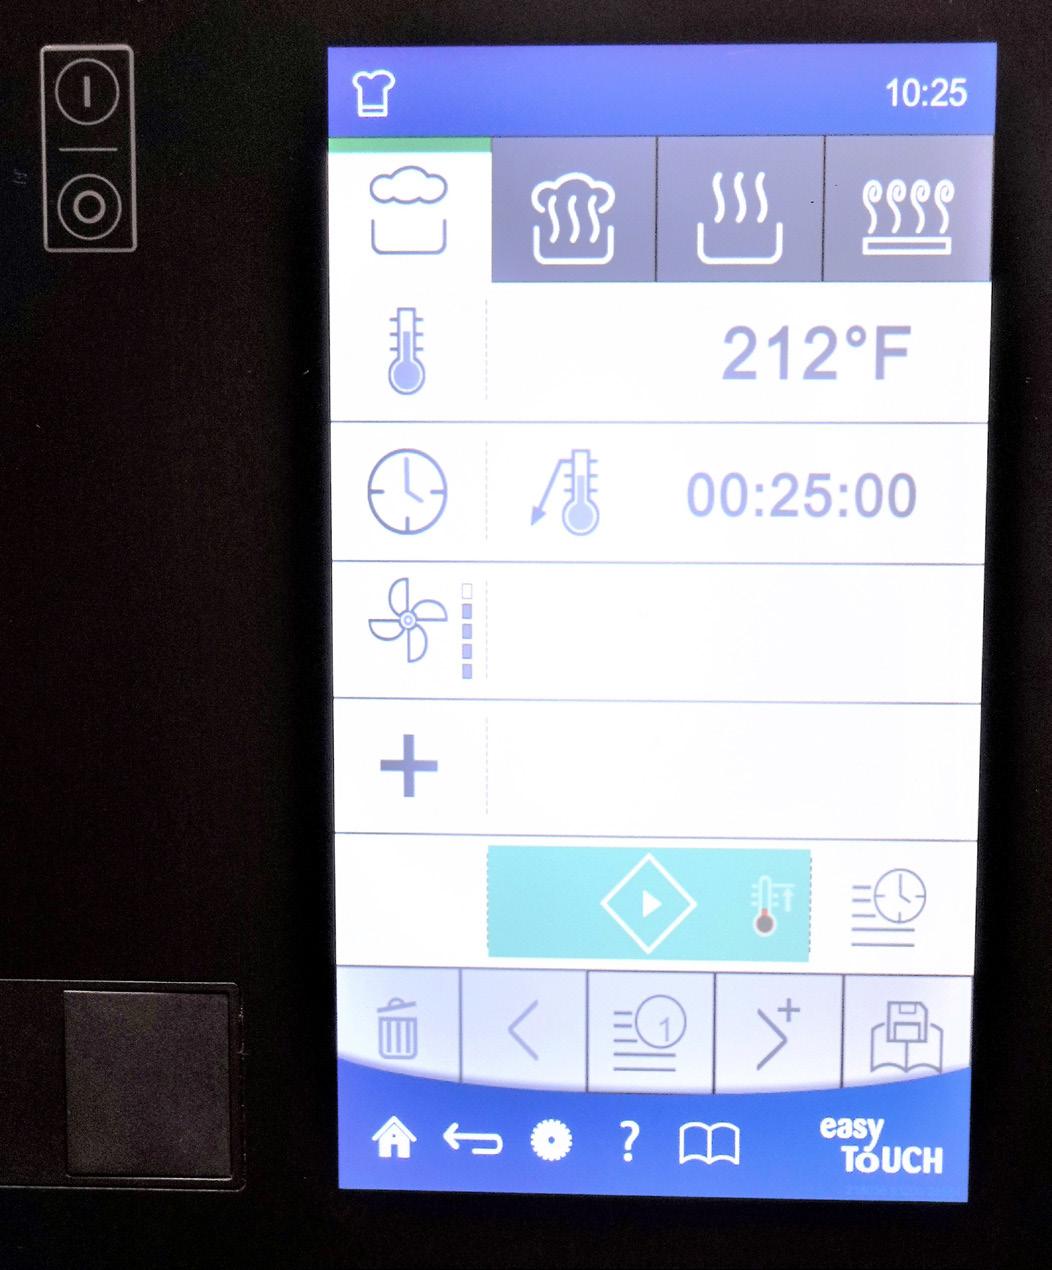
Commonly referred to as “combis,” these ovens combine convective dry heat and steam cooking technologies. They are valued for their versatility, allowing operators to perform multiple cooking methods—such as roasting, steaming, braising, baking, poaching, and rethermalizing—in a single unit.
Combi ovens use high-efficiency power burners to maintain precise temperatures with fully adjustable humidity control, and their tightly sealed cavities are designed to withstand the pressure created by steam cooking.
Boiler-based combis include a separate steamgenerating boiler that requires regular descaling based on cooking volume and water quality. Many manufacturers also require a dedicated water filtration system—refer to manufacturer specifications for exact requirements. Boilerless combis use a steam injection system, where water is instantly vaporized on contact with hot elements and introduced into the cavity.
Most combi ovens feature advanced smart controls for time and temperature monitoring, programmable cooking processes, and in some cases, cloud connectivity. Many models also include an automatic cleaning mode using manufacturer-specified chemicals, which staff should be trained to run as recommended, typically after hours.
FREQUENCY Daily
TASK
Wipe down glass door and gaskets
Check door gasket; replace if worn
Inspect water filters; replace as necessary
Inspect drain line for buildup or blockage
Inspect water orifices for scale buildup
Descale boiler (if applicable)
Ranges: Open Top & Hot Top
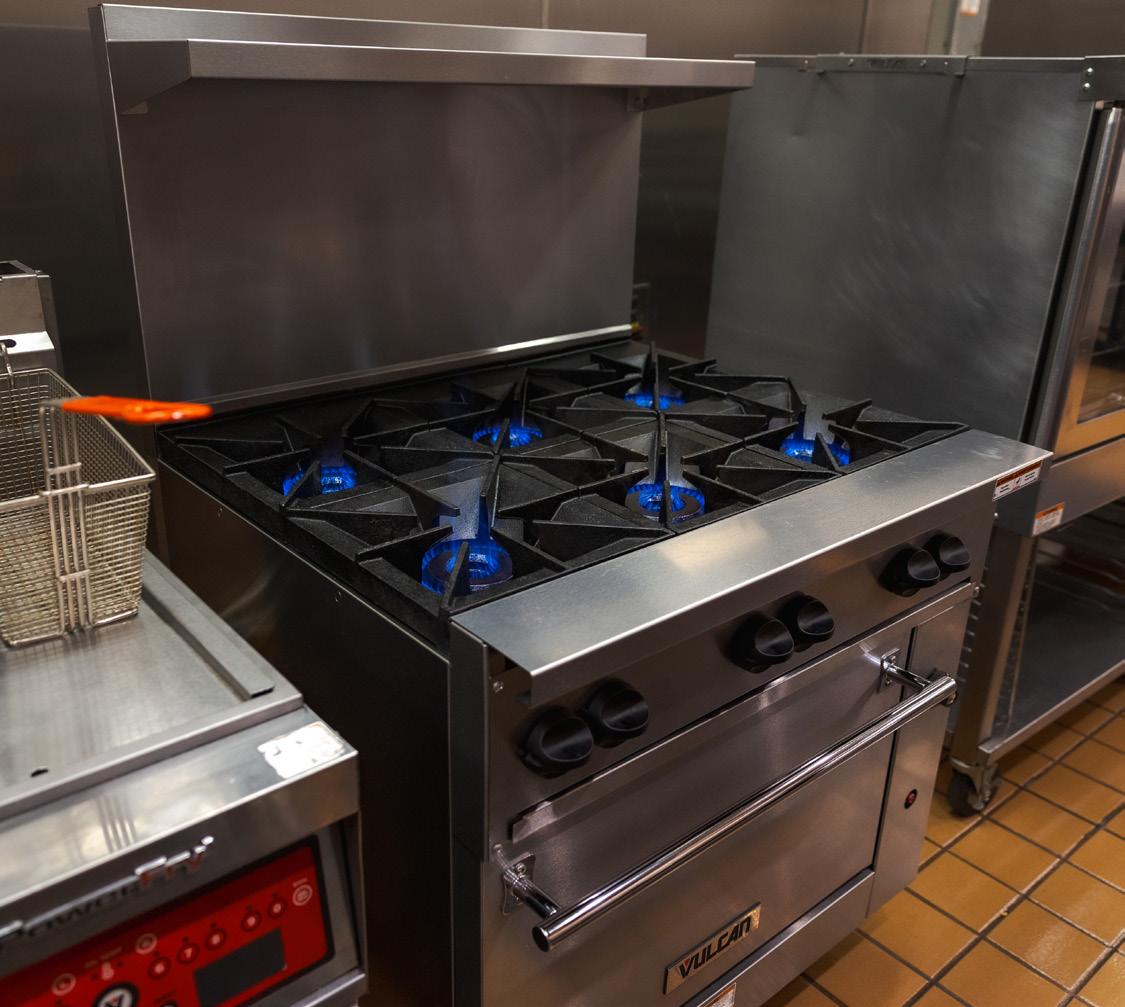
Natural gas range burners are the workhorses of most commercial kitchens. Unlike other equipment, range tops require daily cleaning for continued safe operation. Primary maintenance targets are natural gas flames and residue buildup.
Refer to the General Maintenance section of this guide for more information on common problems related to burner flames.
Essential Maintenance Supplies
» Absorbent cloth
» Scraper and spatula
» Wire brush
» Commercial-grade cleaning agent
» Spare knobs
Required Regular Maintenance (General)
» HOURLY or DAILY: Remove all crumbs, grease, and spills. Pay special attention to acidic foods
» DAILY: Verify blue flame not lifting/blowing from burner ports. Burner flame tips should barely touch the bottom of the pans for open top burners
» DAILY: Empty, clean, and replace grease/crumb tray
» DAILY: Remove, clean, and replace all rings, plates, grates, burners
» DAILY: Clean burner ports with brush or stiff wire when needed
» DAILY: Check for broken/missing knobs; replace with spares
ENERGY EFFICIENCY TIP: Use appropriately sized cookware for each burner. For open top burners, finbottomed pots and pans improve heat transfer, heat up faster and are equipped with a heat sink at their base, which could save on energy costs. For hot tops, flat-bottomed pots and pans maximize surface contact and efficiency.
SAFETY WARNING:
Ensure all pilot lights are working and properly adjusted. Missing or non-functional pilots can allow bulk natural gas to escape without ignition — a serious hazard.
Do not use caustic or abrasive cleaners, steel wool, or scouring pads. Replace broken or missing knobs promptly so staff can effectively control flames.
After cleaning hot top rings/plates, rub unpainted parts with a cloth dampened with cooking oil. While the surface is slightly warm, clean gently with a wire brush.
SAFETY WARNING:
Use caution when setting items near a range — paper and cloth items can ignite. Flammable sleeves and aprons must not contact hot areas.

Broilers
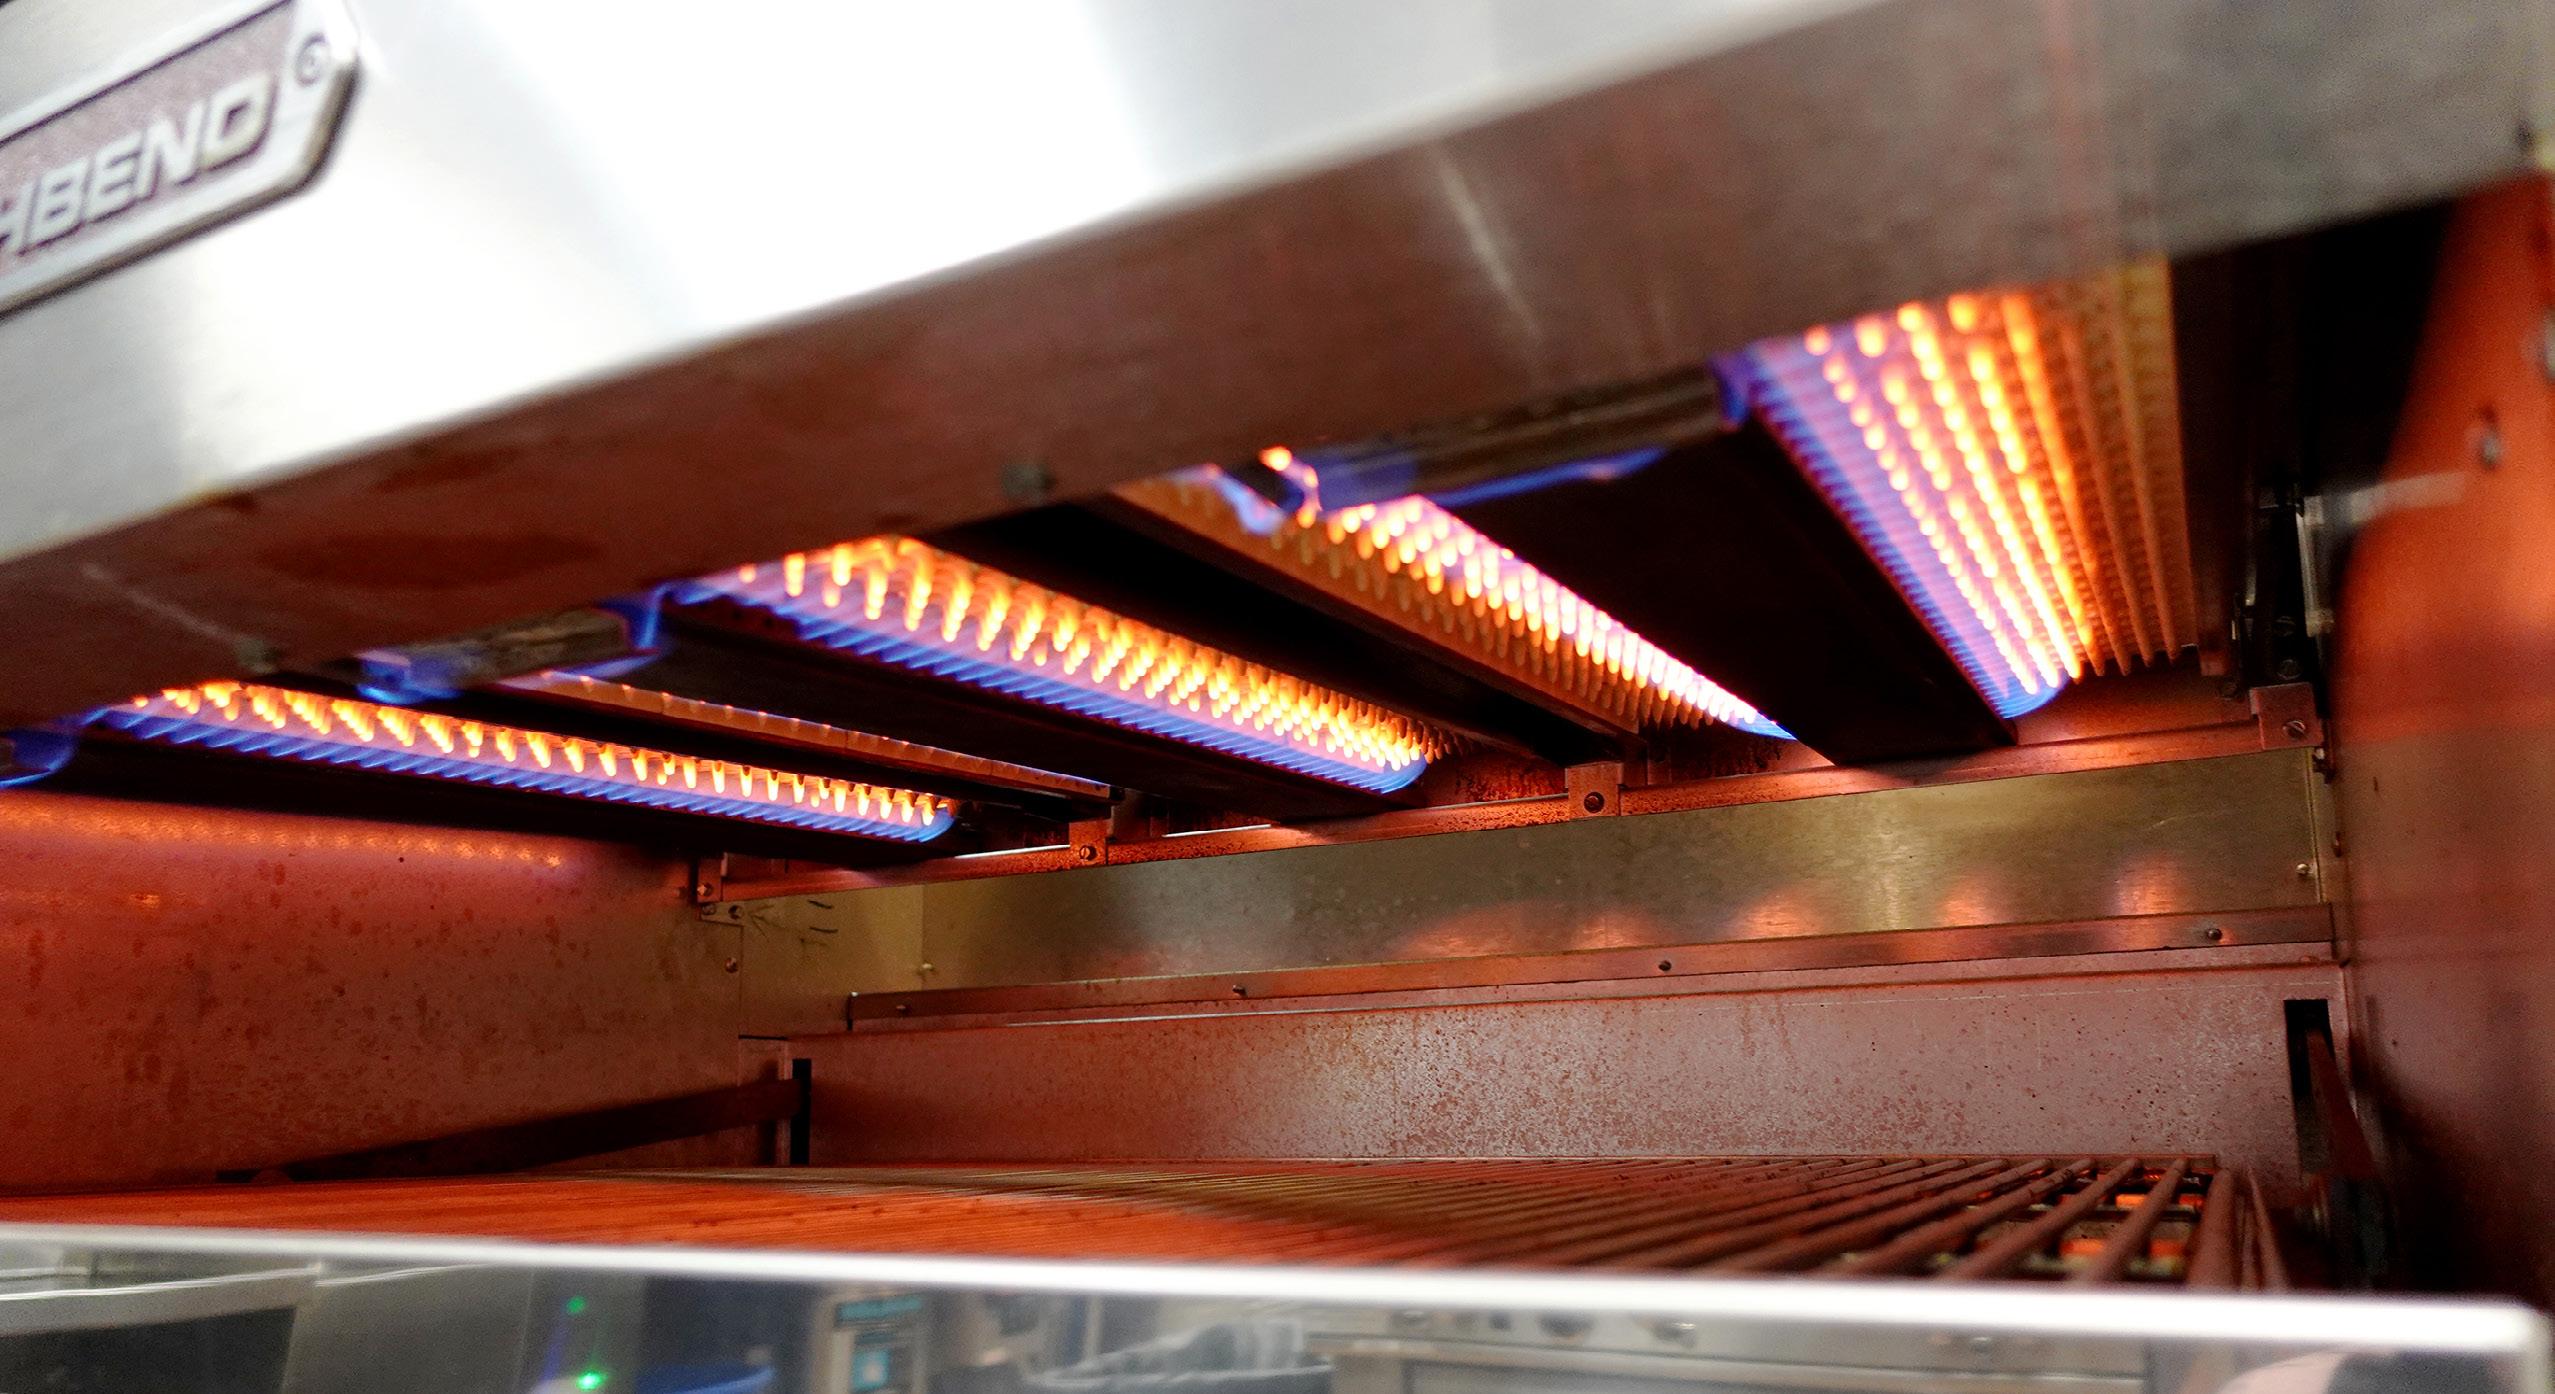
Broilers are grills that impart smoky, char-grilled flavor and grill marks on proteins and vegetables. This section covers three broiler types: Underfired, Overfired, and Conveyor.
Broiler Type Overview
TYPE
Underfired (Char-Broiler)
Overfired Conveyor
HOW IT WORKS
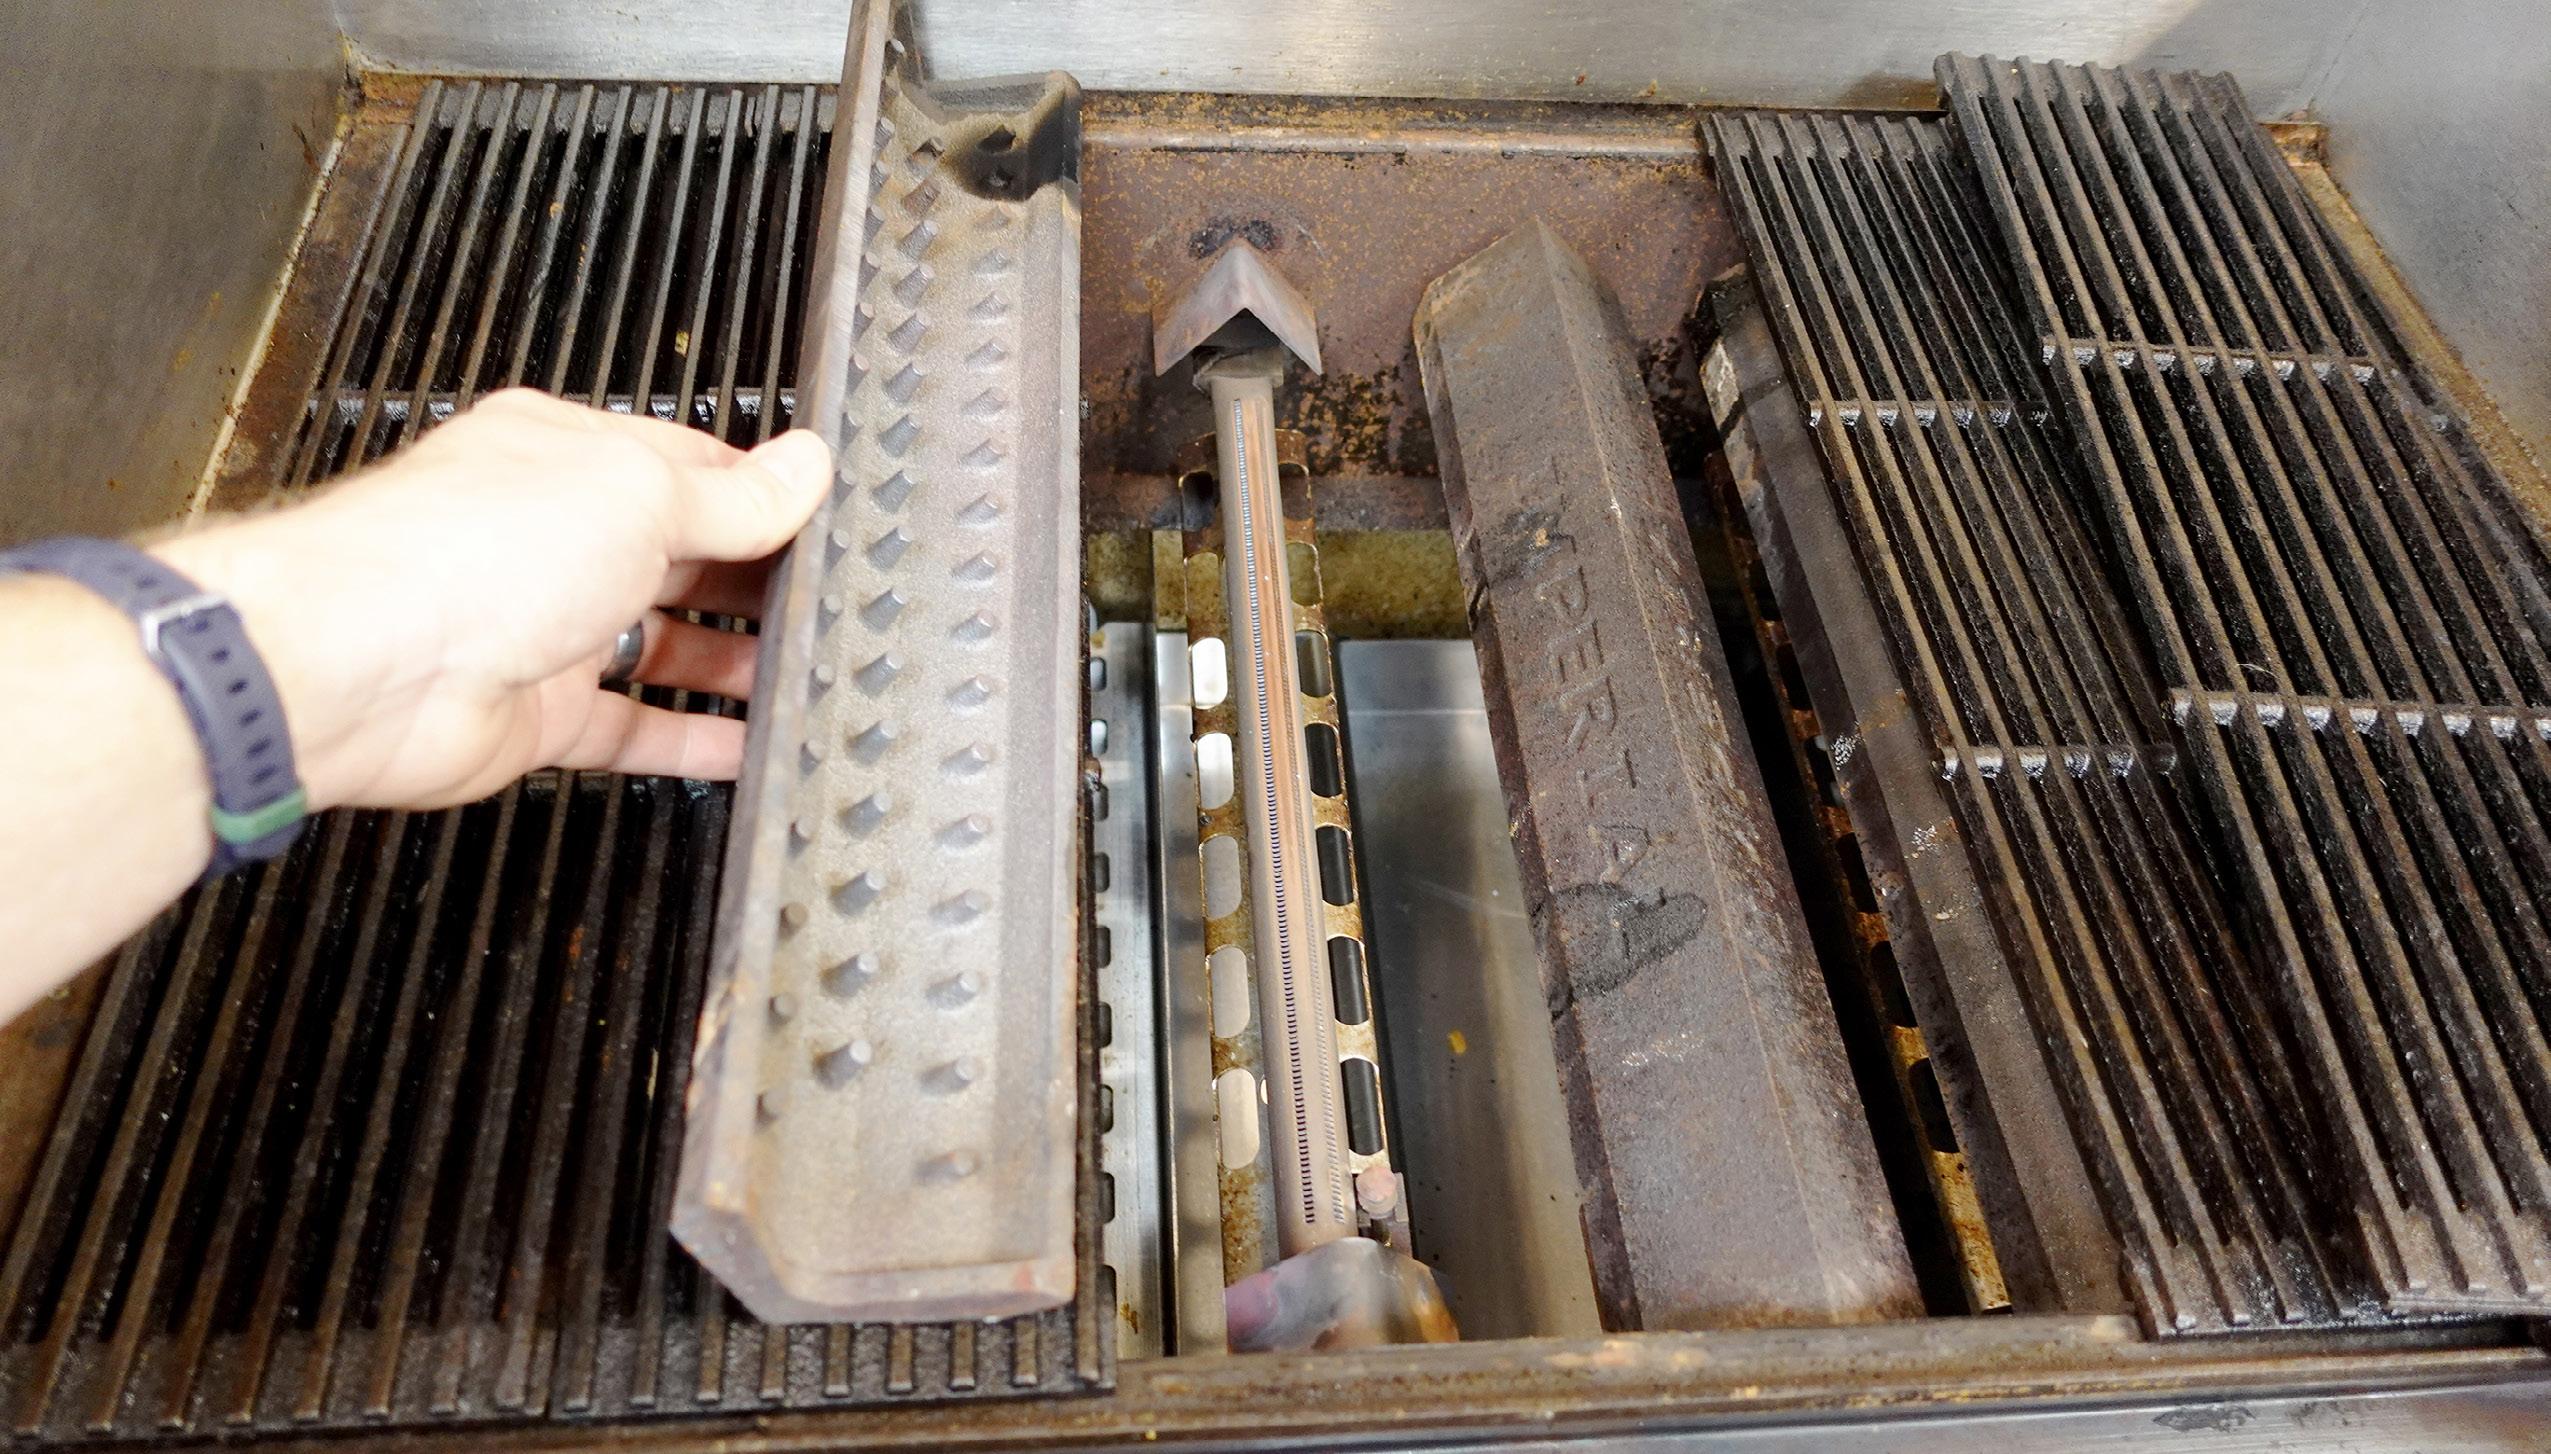
Heat radiates upward from briquettes/ lava rocks or ceramic/cast iron/steel radiants located over burner tubes
Heat radiates downward toward adjustable cooking grates; most are equipped with Infrared (IR) burners
Food moves through a chamber on a conveyor belt; upper IR burners provide high-intensity heat (>700°F) for surface browning
PRIMARY MAINTENANCE FOCUS
Cooking grates, radiants, and burners
Cooking grates, radiants, and IR burners
Conveyor belt and chains, IR burners, catalysts
Underfired & Overfired Boilers
Essential Maintenance Supplies
» Long-handled wire brush
» Manufacturer-recommended cleaning agent
» Spare radiants, briquettes, lava rocks (if applicable)
» Spare infrared (IR) burners
Required Regular Maintenance (General)
» DAILY: Remove and clean grease pan
» DAILY: Clean drip shields, baffles, sides with damp cloth
» DAILY: Scrape food buildup off grates and radiants
» DAILY: Check burner flame — blue; adjust air shutters as needed
» DAILY: Inspect and clean burners
» WEEKLY: Check and turn briquettes or lava rocks (if applicable)
» WEEKLY: Inspect and replace warped, broken, or deteriorating radiants
» SEMI-ANNUALLY: Replace briquettes or lava rocks (if applicable)
» SEMI-ANNUALLY: Replace infrared plates (if applicable)
Cleaning Tips
SAFETY WARNING:
Wear heat-resistant gloves when operating a broiler.
» Turn the broiler off and allow ample time to cool.
» Avoid water spray contacting any ceramic burner face — never soak ceramic burners.
» Clean both sides of the grates and the rack frequently with a wire brush while warm to reduce smoking and flare-ups.
» Clear buildup in the troughs on either side of the grate rib to allow fat and drippings to run off.
SAFETY WARNING:
Keep grease trap clean to prevent grease fire or flare-ups from excess fat.
ENERGY EFFICIENCY TIP: Underfired broilers are among the highest energy-using pieces of commercial kitchen equipment. To limit energy waste, turn off unused broiler sections, reduce preheat and idle time, and shut units down during slow or non-production periods. When upgrading or replacing equipment, consider energy- efficient broiler designs with infrared burners, infrared plates, or a lid, which are designed to operate more efficiently than standard models.
Conveyor Broilers
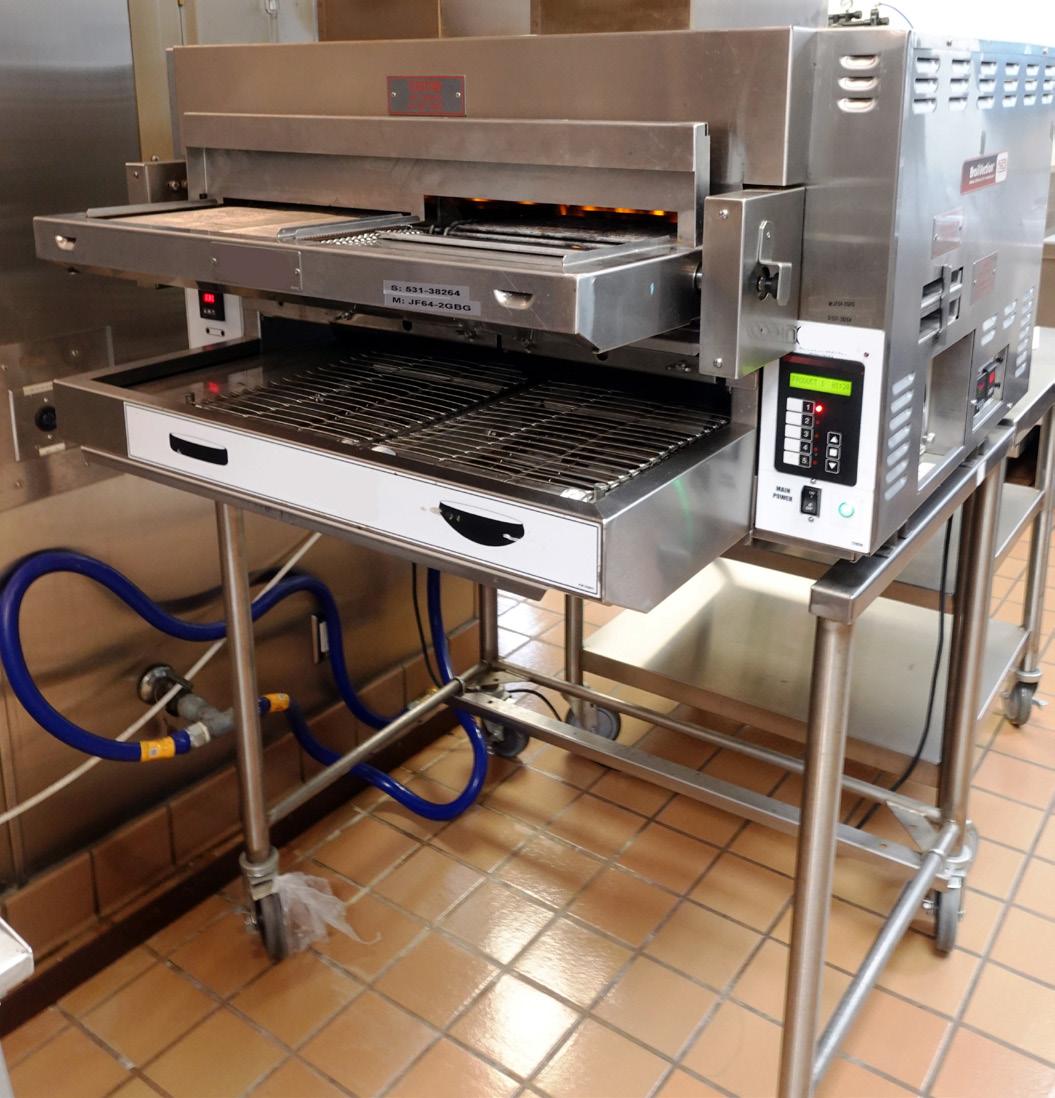
Conveyor broilers have cooking chambers with conveyor belts to broil food under high temperatures. These broilers have infrared (IR) burners as the source of heating. The upper IR burners provide high-intensity heat (> 700°F) to accelerate surface browning during cooking and are mostly used to cook burger patties. The tiles or screens of the IR burner face radiate heat down toward the food product. It is not uncommon for the lower burners to also have an IR design, but these burners must be shielded from fat drippings to keep the burner face from failing.
Some conveyor broilers use open flame tube burners under the conveyor belt to avoid food product drippings from deteriorating the burner face. Due to their high temperatures and grease generation, conveyor broilers require daily maintenance and cleaning for proper operation. The primary maintenance items for conveyor broilers include the conveyor belt (pg. 28, bottom), IR burners, and the catalysts (pg. 28, top).
Essential Maintenance Supplies
» Soft bristle brush, scrub, and/or sponge
» Small and large orifice brushes
» Manufacturer-recommended cleaning agent
» Spare IR burners
» Drive chain lubricant
Required Regular Maintenance (General)
» HOURLY or DAILY: Remove, clean, replace meat guides and feeder covers
» DAILY: Remove, clean, replace grease trough, grease box, crumb tray
» DAILY: Remove, clean, replace heat/pan shields, lower burner catalyst
» WEEKLY: Clean upper burners and air boxes; inspect for cracks or hot spots
» MONTHLY: Inspect and clean burner orifices and pilot burners
» MONTHLY: Clean pilot orifices and flame sensors
» QUARTERLY: Inspect belt and chains for tension; adjust as needed
» SEMI-ANNUALLY: Lubricate conveyor drive chain
SAFETY WARNING:
Due to high operating temperatures (>700°F), keep the workstation clean and free of all combustible materials including food wrap and aerosol spray cans.
ENERGY EFFICIENCY TIP:
Conveyor broilers are generally more energy- efficient than underfired broilers. When planning equipment replacement, consider upgrading to a conveyor broiler to reduce overall energy use.
At 700°F, the chain-link belt easily releases cooked products. If meat begins sticking as it exits the chamber, this signals temperature loss and a potential burner problem. Dirty or blocked orifices also affect burner performance. Inspect burners for cracks or hot spots and call a service professional if needed.
The conveyor belt and chains expand with continued operation. Belt expansion affects the drive system and requires periodic adjustment. For broilers with a power burner fan, keep the fan wheel clean — any change in air volume affects IR burner performance and can extend cooking times.
SAFETY WARNING:
Wear heat-resistant gloves when handling burners, catalysts, and other hot metal parts. Burner must be completely dry before reassembling.
Cleaning Tips
» Conveyor broilers require daily cleaning.
» Allow at least 30 minutes to cool before cleaning and disassembly.
» Leave ventilation running during the cooling period.
» The tile faces of IR burners are sensitive to moisture — do not clean with water, which shortens burner life. With many removable parts that can differ — consult the owner’s manual for specific cleaning instructions.
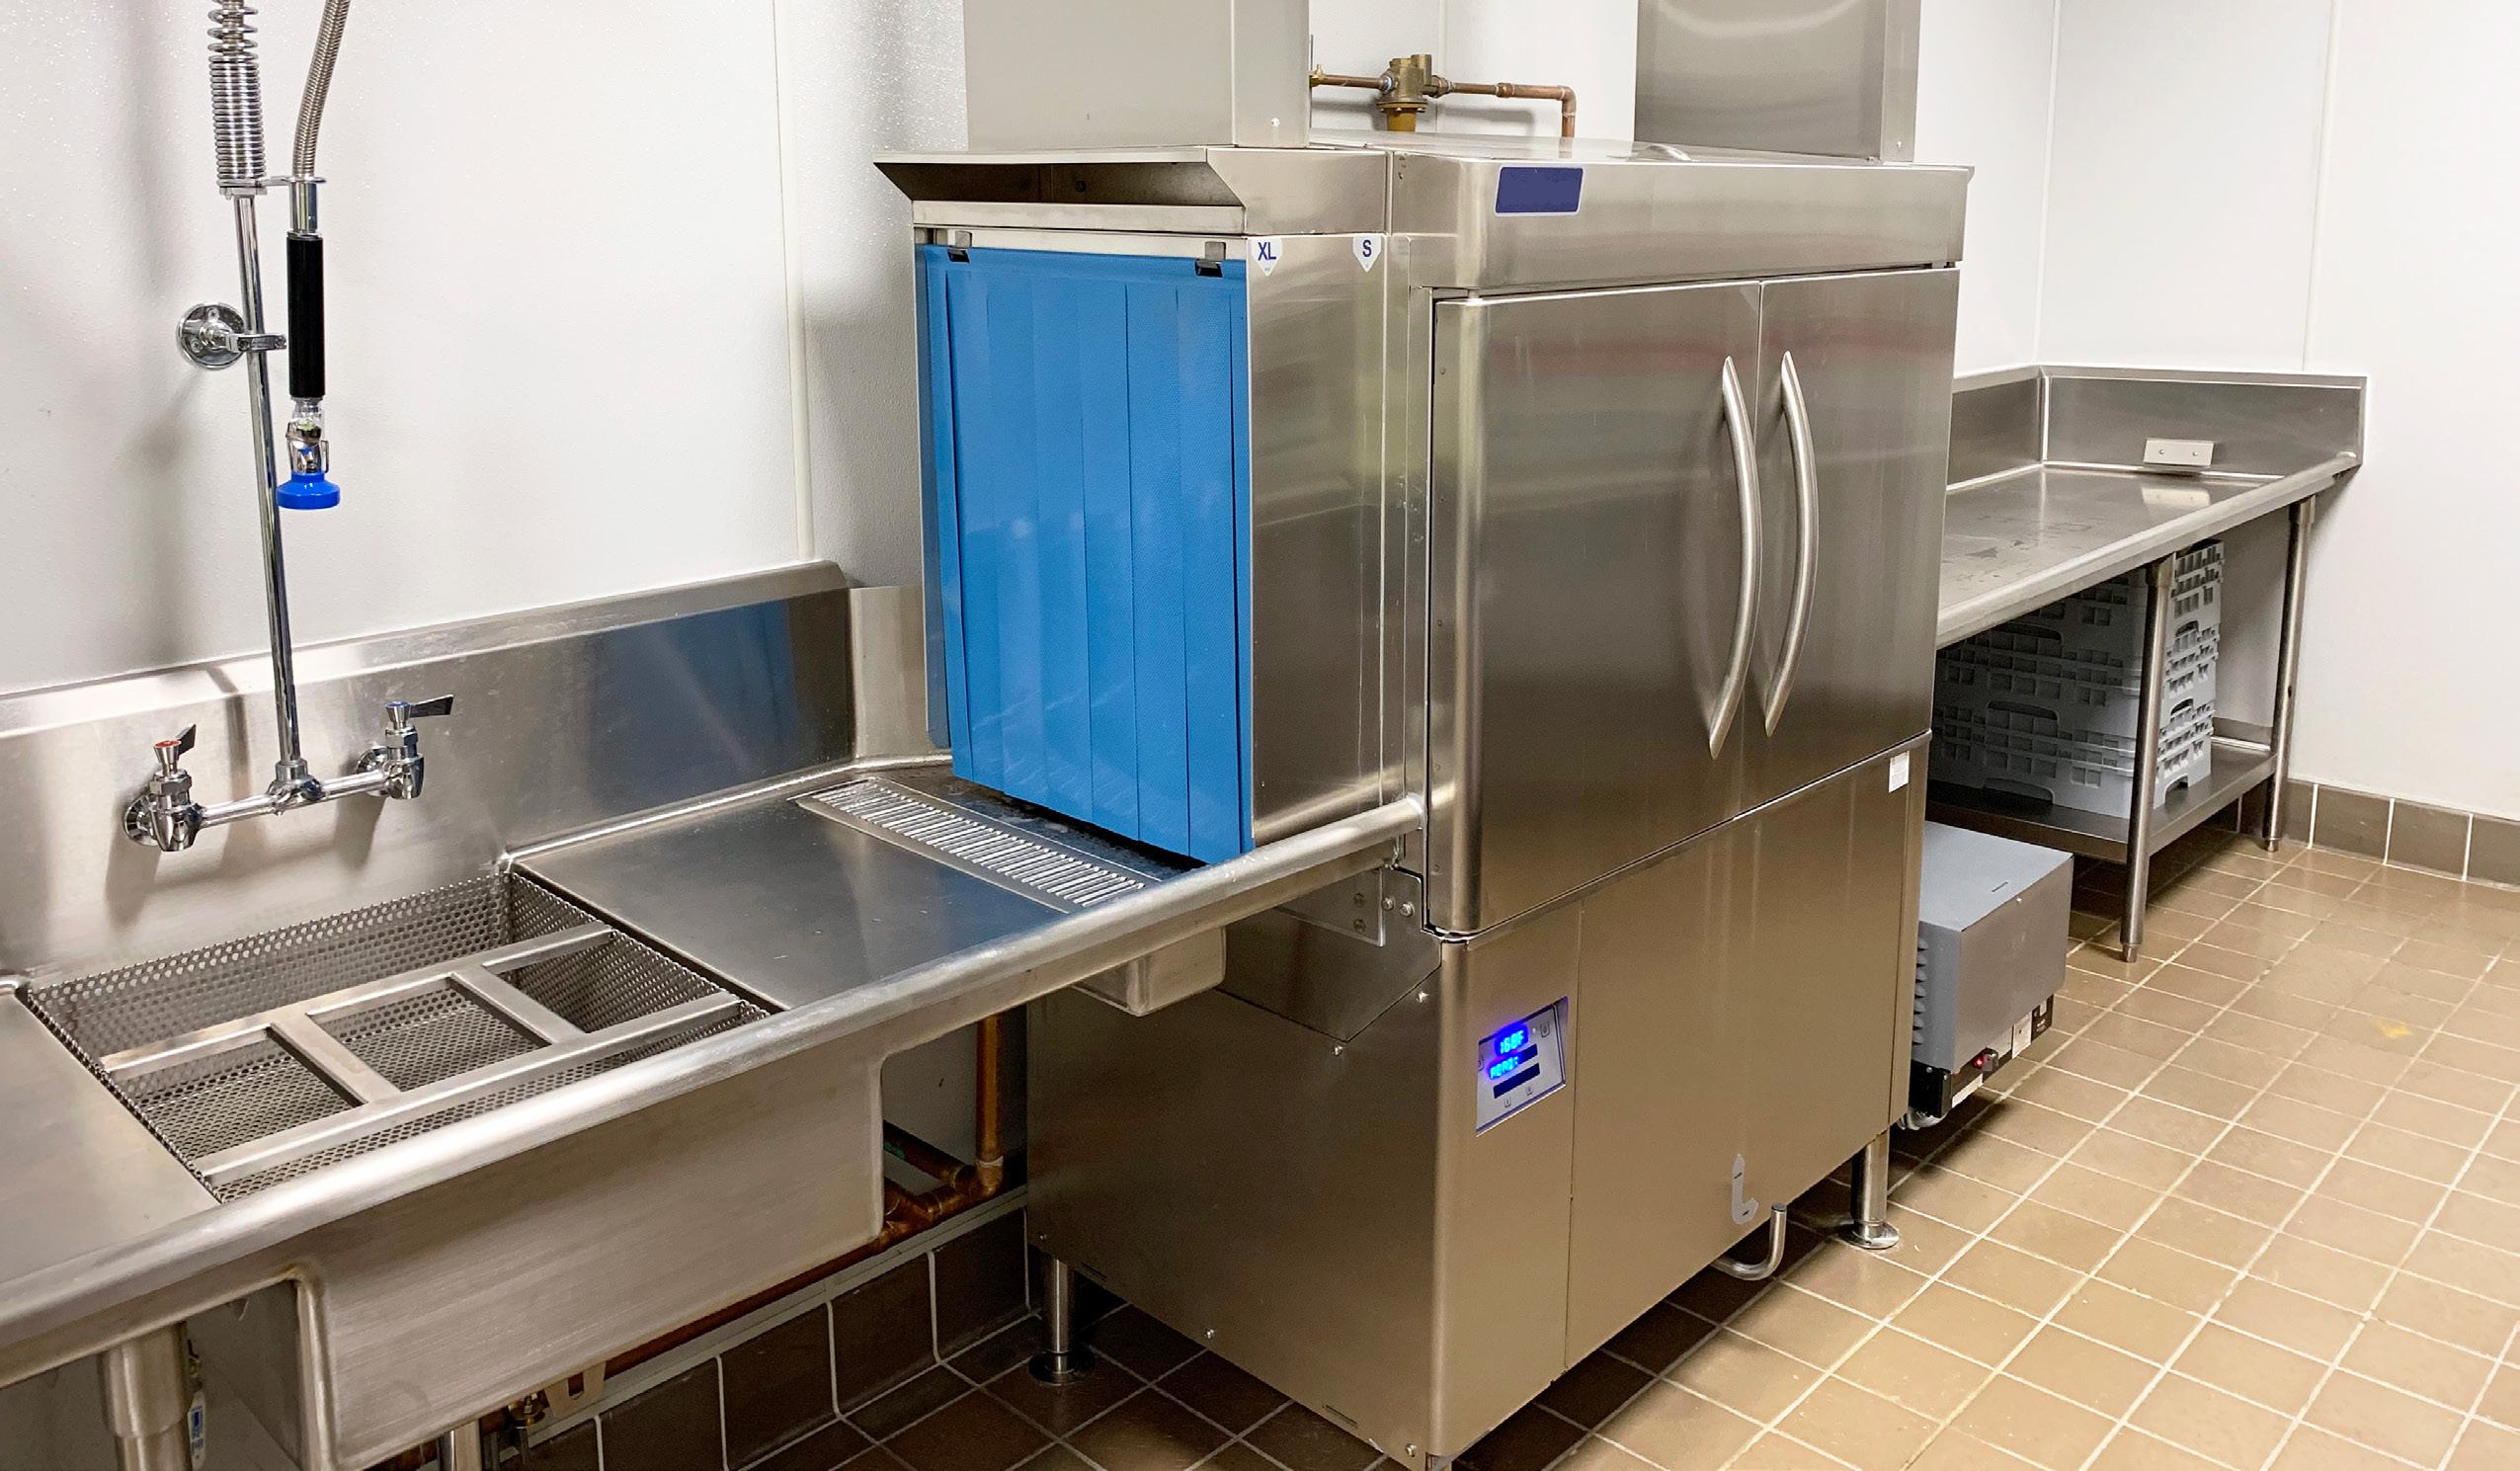
Dishwashing Machines
The dishwashing machine is the primary sanitation equipment in a commercial kitchen and subject to inspection by your local health department. Proper maintenance is critical to avoid unexpected shutdowns and ensure code compliance.
Dishwashing Machine Type Comparison
Dishwashing machines come in a variety of types including undercounter, door-type, rack conveyor, and flighttype machines with two types of sanitation methods.
FEATURE
Rinse temperature
Wash / sanitize temps
Sanitation method
Key chemical to monitor
Primary maintenance concern
LOW-TEMP (CHEMICAL SANITIZING)
140°F
140°F with chemical sanitizing agents
Chemical sanitizing agents added to rinse
Detergent, sanitizer, and rinse aid levels daily
Chemical levels and rinse temperature
HIGH-TEMP (HOT WATER SANITIZING)
180°F (final rinse)
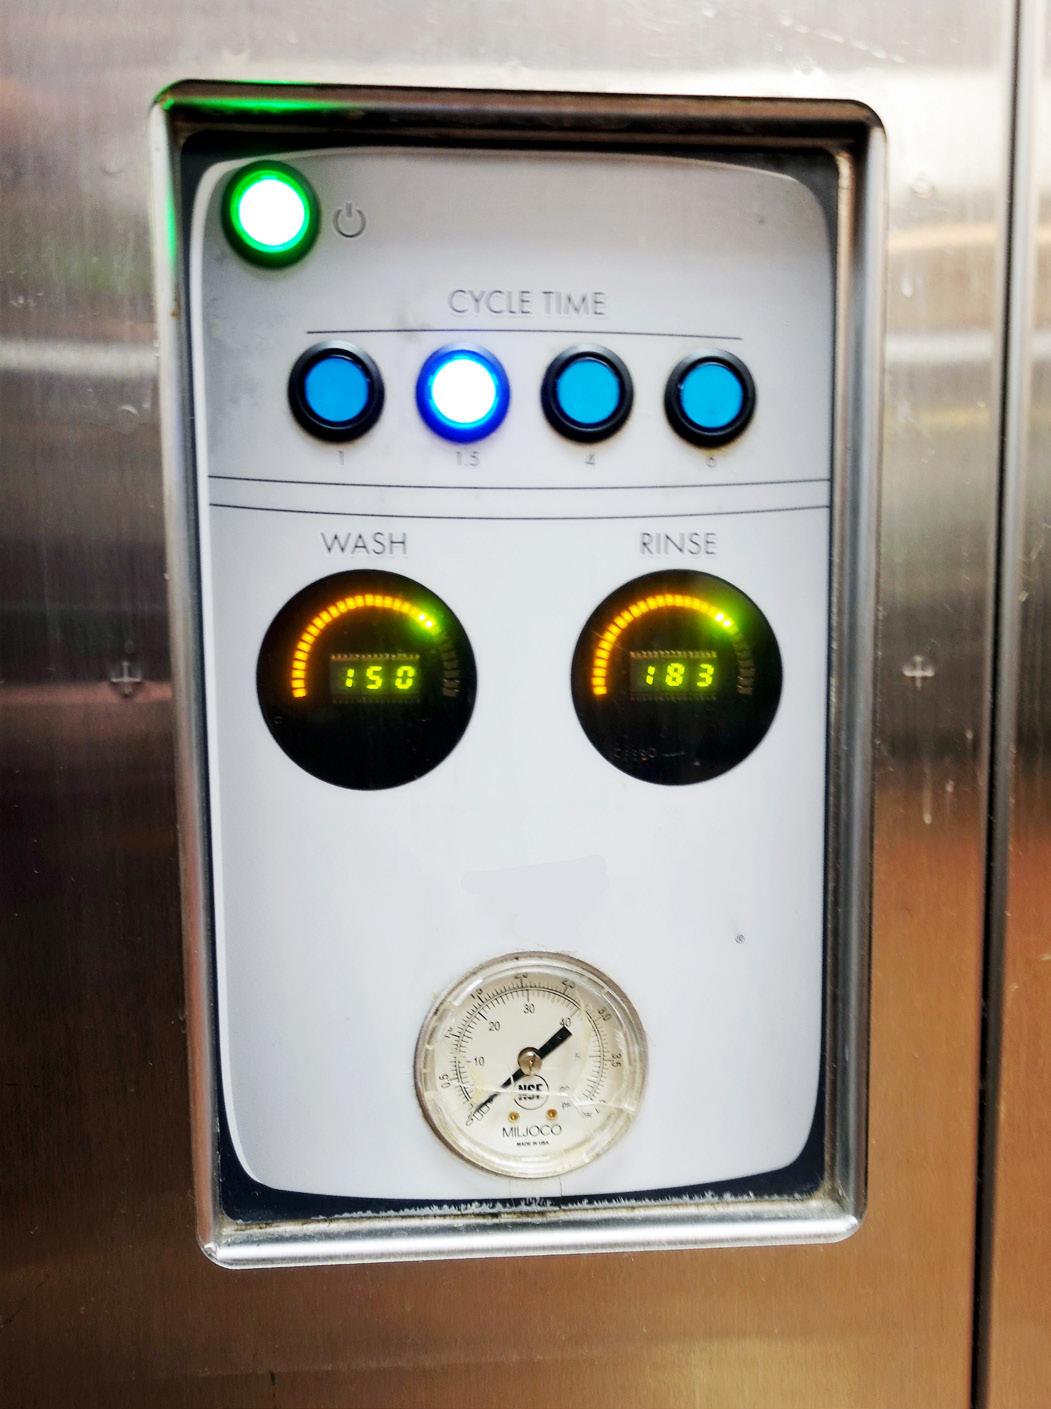
150-160°F wash; 180°F sanitizing rinse
Heat alone — no chemicals needed
Detergent and rinse aid levels daily
Rinse temperature and pressure
Essential Maintenance Supplies
» Manufacturer-recommended wash agent
» Replacement curtains and nozzles
» Manufacturer-recommended descaling solution
Required Regular Maintenance
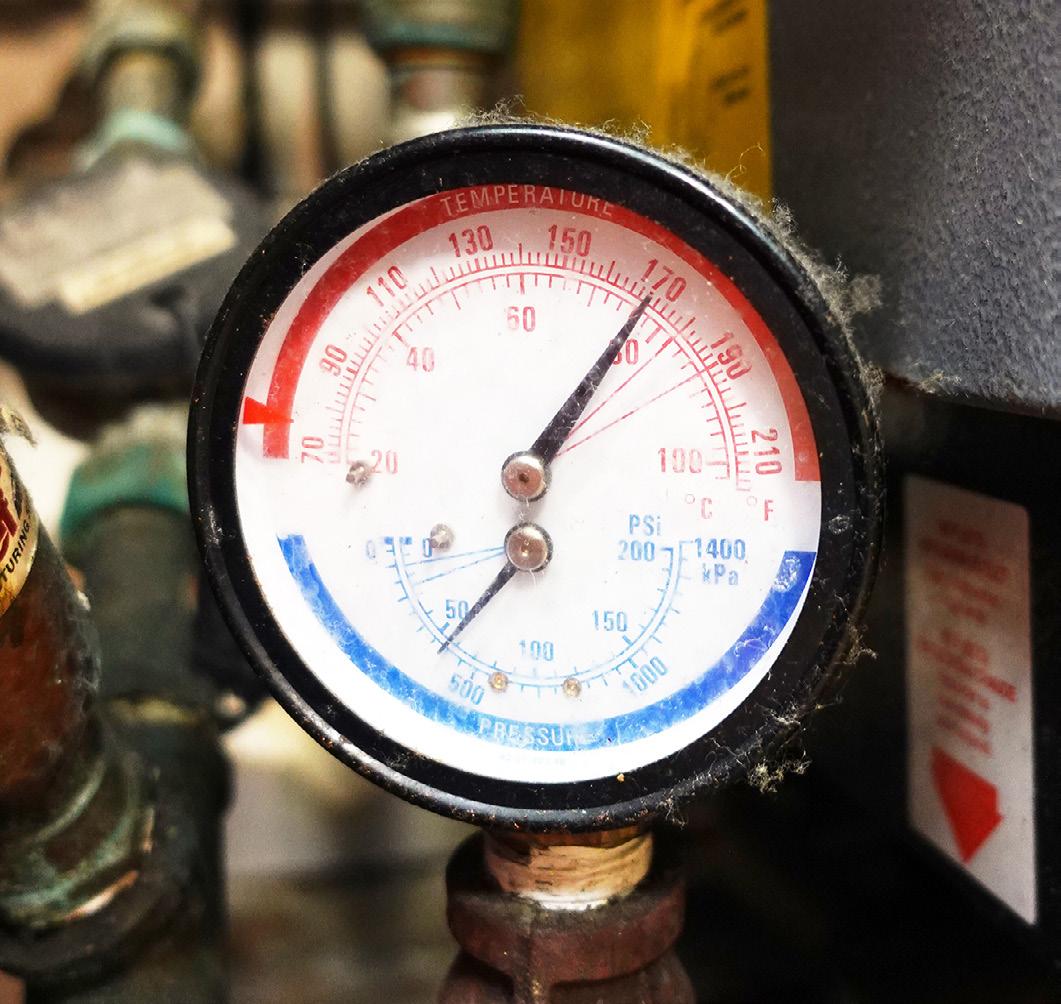
» DAILY: Note rinse temp/pressure and tank temp — if out of spec, service needed
» DAILY: Check detergent, sanitizer, and rinse aid levels
» DAILY: Comprehensive water leak check
» DAILY: Check for malfunctioning drain valves
» DAILY: Clean scrap trays and filters
» DAILY: Inspect/replace worn plate sensors (flighttype machines)
» DAILY: Verify doors function correctly; leave ajar after hours
» WEEKLY: Check for damaged or worn curtains; replace as needed
» WEEKLY: Check for worn rinse nozzles; replace as needed
» MONTHLY or QUARTERLY: Descale your dishmachine
» ANNUALLY: Professional inspection
The primary maintenance items for dishmachines are rinse temperature and pressure, water leaks, and descaling.
If scale build-up is left untreated in your dishmachine, it can cause premature failure of heating elements, affect the accuracy of electrical sensors, affect rinse and wash performance, and may result in increased bacteria growth.
For more on water quality and descaling, refer to the General Maintenance section of this guide.
Cleaning Tips
» Train staff to scrape and pre-rinse wares thoroughly before loading — this optimizes performance and prevents clogs.
» Frequently inspect wash and rinse arms or rotors for clogs from limescale, food solids, and debris. To clear: remove the arms, unclog nozzles with thin wire, rinse under running water, and replace.
» Never use chlorine-based cleaning agents on dishmachines.
» Leave doors open after cleaning and when not in use to allow air drying and prevent bacteria buildup.
ENERGY EFFICIENCY TIP:
A common setup mistake: rinse pressure set too high could increase overall water and energy use. Refer to the user manual for optimal PSI settings. Check rinse pressure often. For flight-type machines, inspect and tighten plate sensors regularly — loose or damaged sensors can trigger wash mode continuously, wasting water and energy.
Water Heaters & Booster Heaters
Water Heater Type Comparison
TYPE
Tank — Standard (80 gal typical)
Tank — Condensing (80 gal typical)
KEY FEATURES
Flue exits top; vented outside; air gap at top
PRIMARY MAINTENANCE
Monthly: thermostat (140°F), water leaks, flue ducting, flue insulation, pilot flame
Tankless (1-3 gal)
Booster
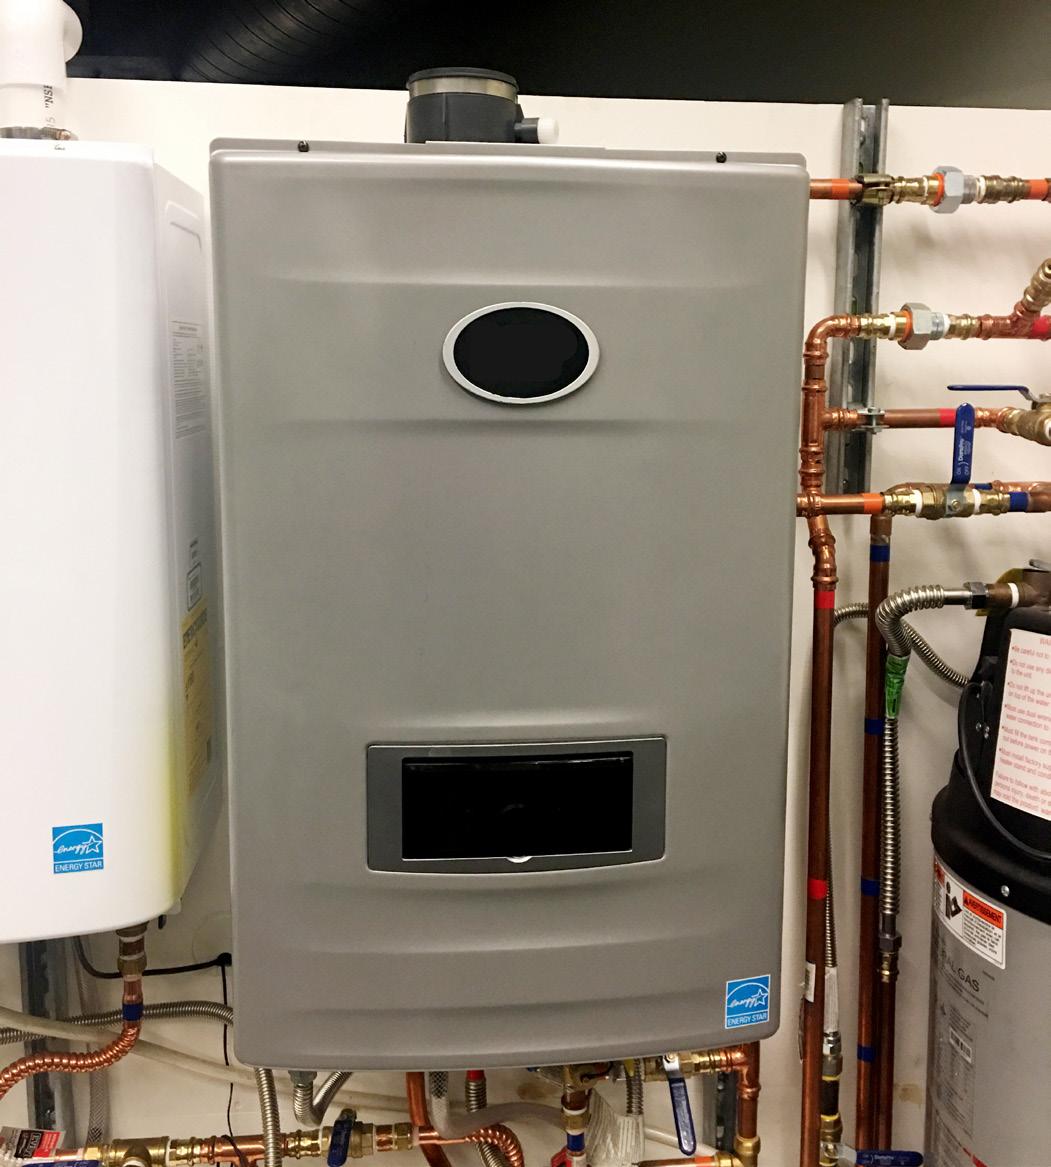
Routes flue gases through heat exchanger to maximize the amount of heat absorbed by the water; require drain access or drain pump if the drain is too far; require electrical connection to run fans & controls
Heats water continuously as it passes through heat exchanger; complex controls with flow switches; requires electrical connection; multiple units can run in series/parallel; 1-3 gallon holding capacity.
Raises domestic hot water from 120-140°F to 180-190°F for dishmachine rinse cycles; installed next to dishmachine; requires T&P relief valve; flue routed outside or into dishmachine exhaust hood
Monthly: all standard items plus condensate drain and condensate pipe slope
Monthly: same as tank; more complex controls require professional attention
T&P relief valve inspection; flue routing maintenance
Essential Maintenance Supplies
» Pilot light thermocouple
» Mechanical thermostat
» Temperature & pressure relief valve (booster heaters)
» Ignition module
Required Regular Maintenance
» DAILY: Keep pathways to water heater clear
» MONTHLY: Verify thermostat is set correctly (usually 140°F)
» MONTHLY: Check for water leaks at inlet/outlet
» MONTHLY: Inspect flue ducting for corrosion or holes
» MONTHLY: Inspect flue insulation; replace if worn
» MONTHLY: Inspect pilot for proper flame characteristics
» MONTHLY: Verify condensate drain is not clogged (condensing)
» MONTHLY: Verify condensate pipe slopes to drain (condensing)
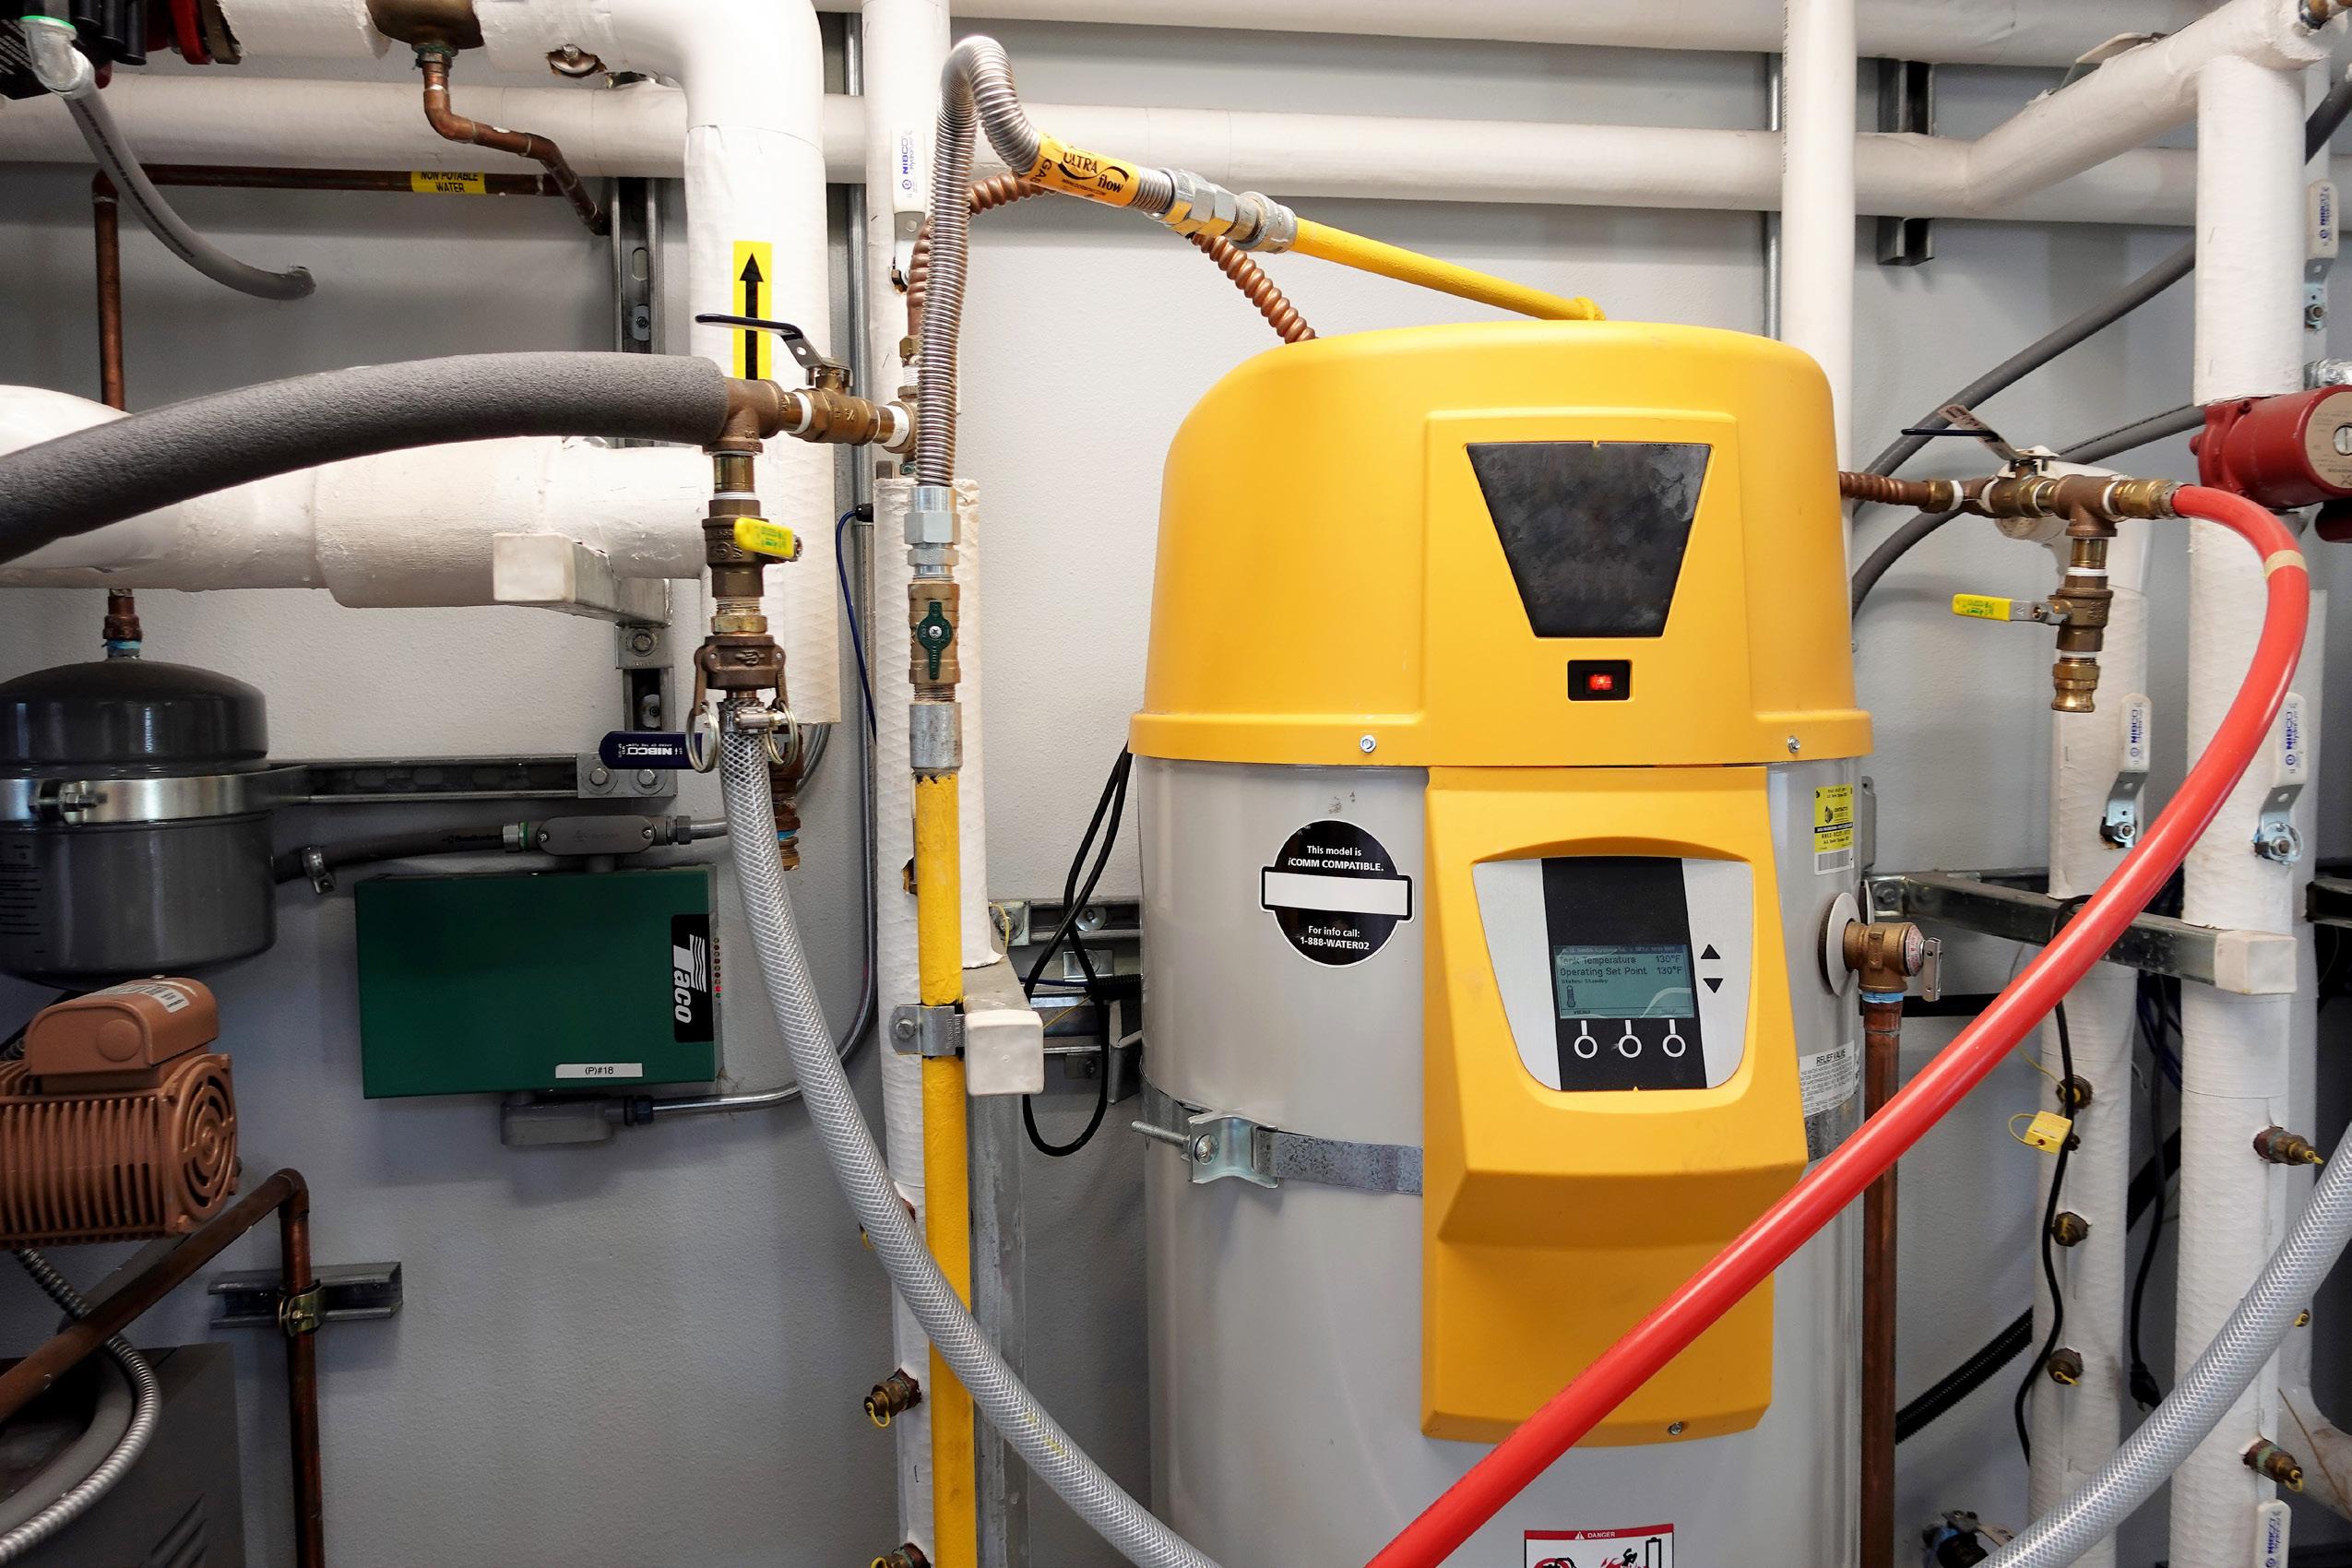
Water heaters are generally low maintenance items and do not require frequent maintenance. However, it is recommended to inspect your water heater at least once a month.
Most common water heater failures involve electrical components that can be easily replaced. Keep a few backup parts on hand for your specific model so a qualified professional can swap them out quickly. Display the contact information of the qualified professional who installed the water heater directly on the unit for fast access during a failure.
Water heater longevity depends on demand. Burner cycling causes thermal expansion and contraction, reducing component life. Keep the path to the water heater clear at all times — a clean access path saves significantly on installation costs during replacement.
Water filtration may increase heater life by preventing scale from hard water. However, filtration systems may not be cost-effective for primary water heaters with large demand. A water supply analysis will clarify whether filtration is warranted.
ENERGY EFFICIENCY
TIP: Add a demand recirculation controller on any hot water recirculation loop. This reduces burner cycling when the facility is closed, extending water heater life and reducing energy use. When replacing, consider condensing water heaters — thermal efficiency of ~95% vs. ~80% for standard models.
Ventilation
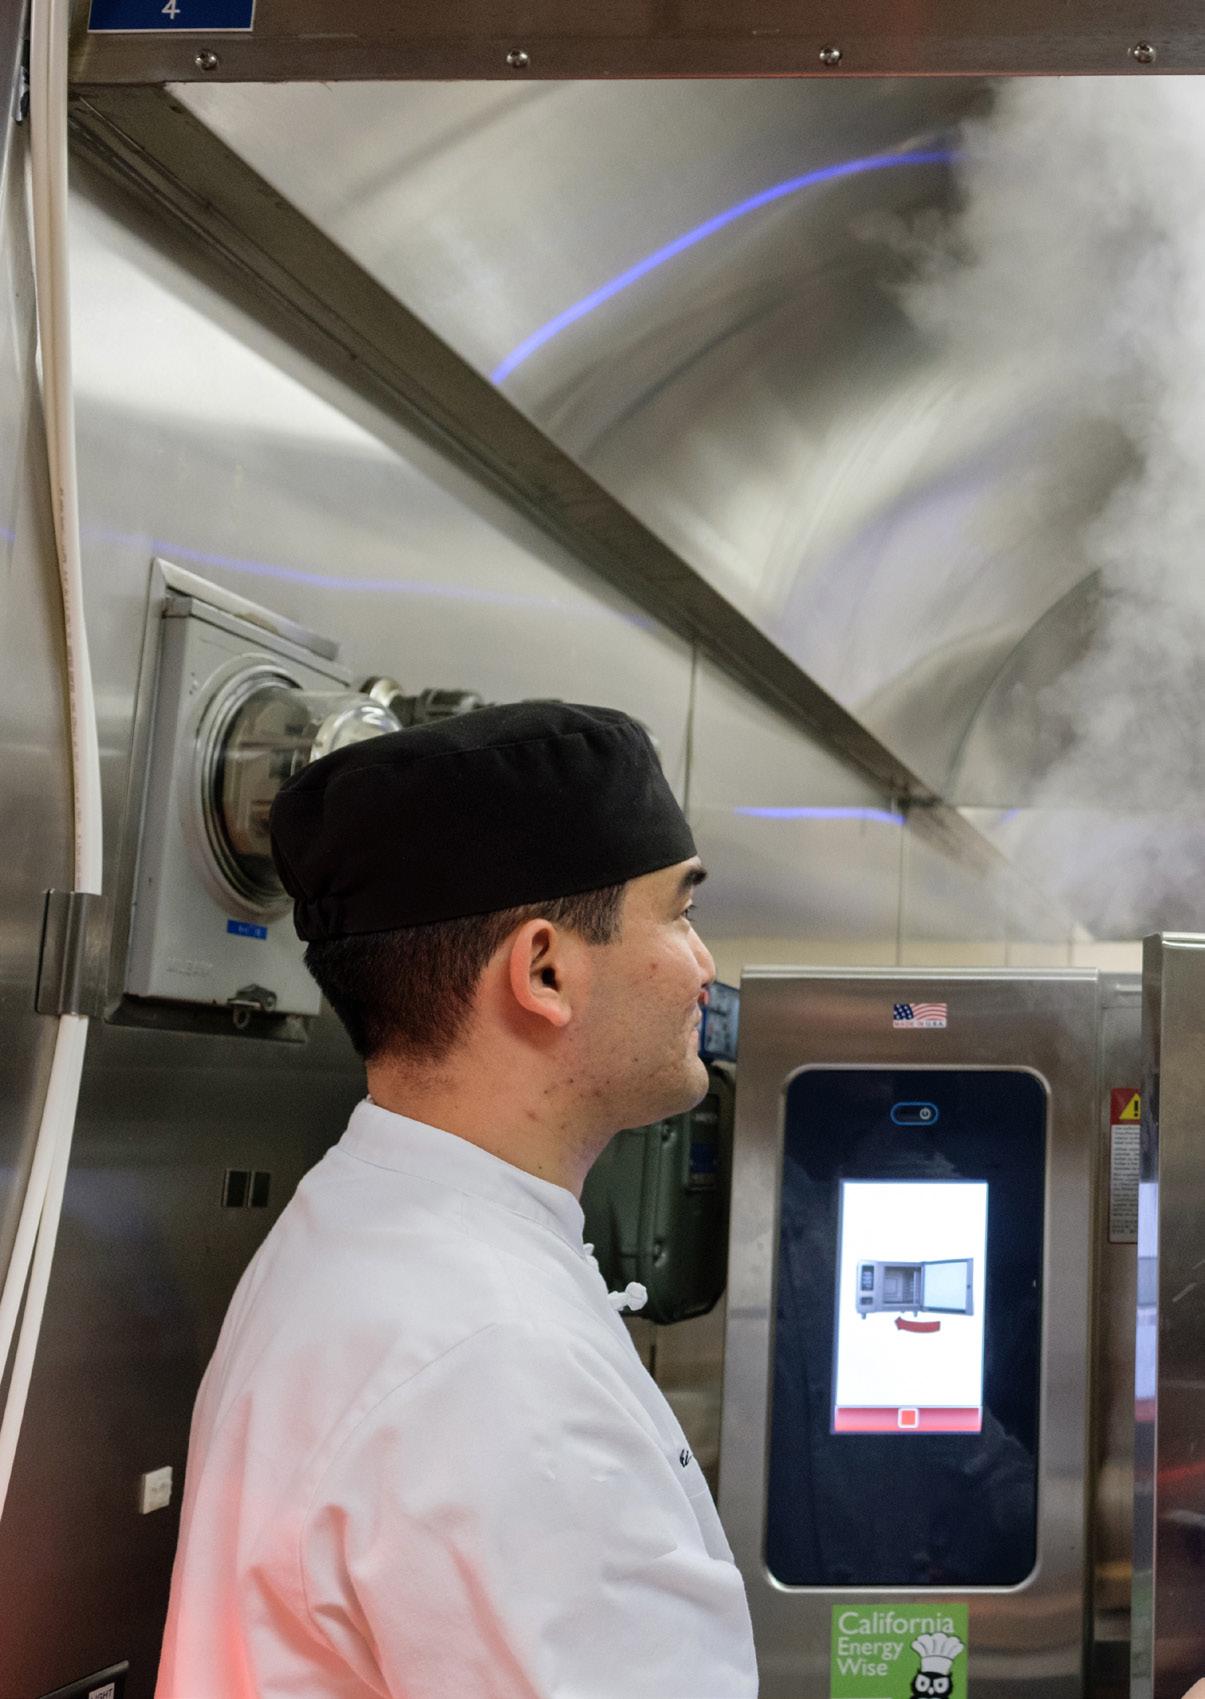
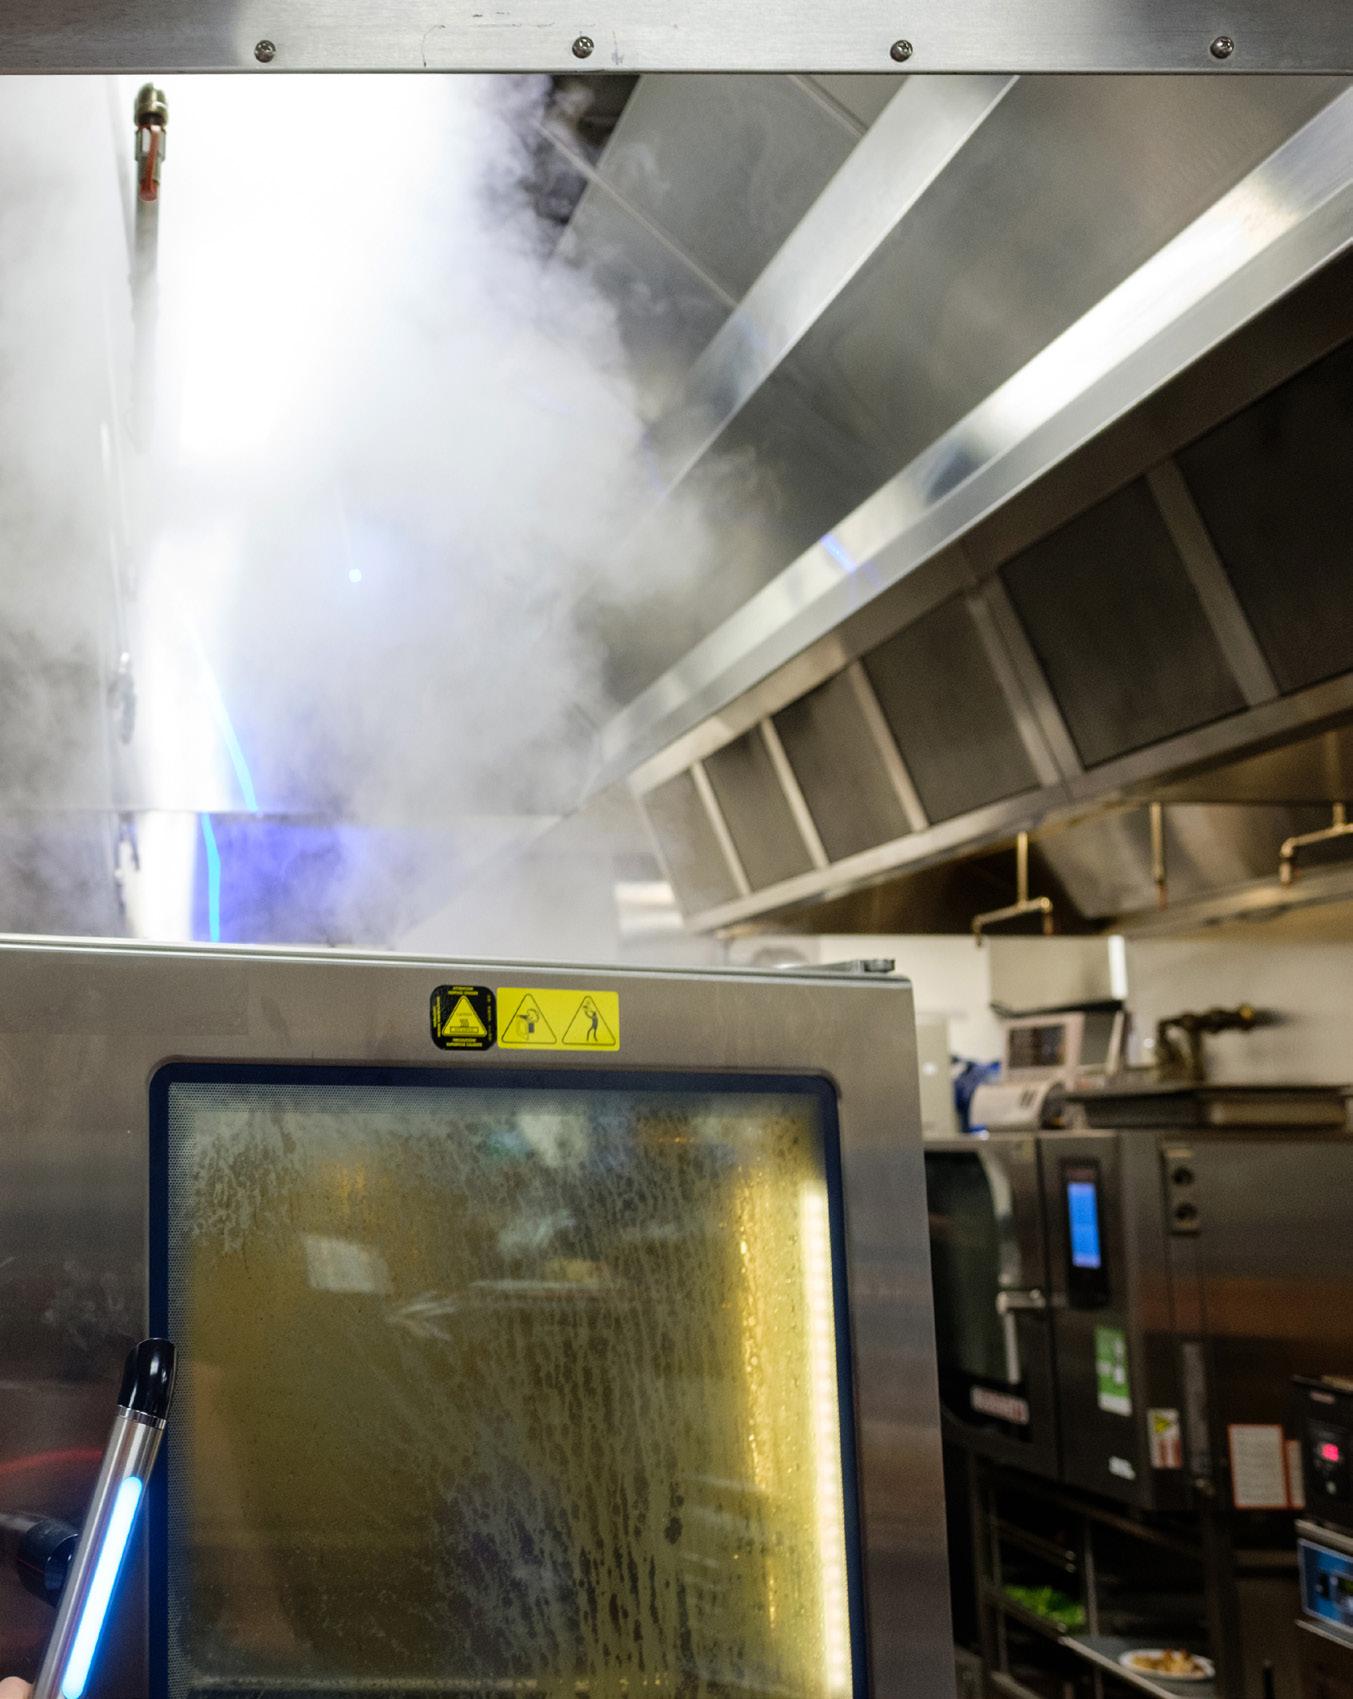
Proper kitchen ventilation removes cooking plumes (vaporized grease, smoke, and heat) and combustion products, replacing them with fresh air. A “balanced” system means exhausted air equals the replacement (makeup) air supplied to the space.
Proper balance in a commercial kitchen ventilation system is critical to indoor air quality and ambient comfort for kitchen staff as well as improving the overall efficiencies of your equipment lineup and the ventilation system itself.
An unbalanced ventilation system causes operational problems and can make equipment appear faulty. For detailed guidance, consult the Optimizing Commercial Kitchen Ventilation design guide series: caenergywise.com/design-guides
Underrated Exhaust
» Smoke, pollutants, and heat spill into the kitchen
» Equipment panels and controls overheat — burn hazard and premature failure
Overrated Exhaust
» Pulls heat from equipment too quickly, reducing temperature
» Lengthens cook times; produces less desirable food product
» Gas equipment flame characteristics may be adversely affected
Action Steps
If the exhaust hood draws too much or too little air, engage an air-balance professional to rebalance the system.
Even slight changes in front-to-back or side-to-side equipment positioning can have a substantial impact on your ventilation system’s effectiveness in capturing and containing cooking plumes, and if you rearrange, move, or acquire new equipment for your operation, plan on re-tuning your ventilation system through a qualified professional to account for the changes.
Keep all equipment flues completely clear. Even partial blockage causes operational problems and incomplete combustion from burners not venting properly.
Fryer flue openings must not be located near an intake or exhaust fan. Maintain adequate clearance from the flue top to the lower edge of the ventilation filter, as restricted airflow can cause incomplete combustion and equipment performance issues.
Be mindful of drafts from open doors or windows, as these interfere with combustion and ventilation performance.
Cleaning & Inspection Schedule
KEY FEATURES
Ventilation can account for over 60% of total utility costs.
Consider a Demand-Controlled Kitchen Ventilation (DCKV) system, which modulates exhaust rate based on actual cooking load using temperature and optical/infrared sensors, instead of always running the exhaust fan regardless of cooking load, so that DCKV systems can modulate the amount of air exhausted in response to a full-load, partial-load, or no-load cooking scenario.
Inspect hood filters for damage or wear; replace if necessary
Clean out grease drain and grease collection cups/traps
Note any odd noises or potentially failing parts from the exhaust fan; call a professional if needed
Clean hood filters by soaking overnight or washing in the dishmachine
Wipe down hood surfaces with a damp cloth and water-detergent solution; dry with a cloth
If hood has temperature, optic, and/or infrared sensors, keep them clear and clean; check DCKV control panel for operator overrides or system faults
Professional inspection and cleaning (required by code). High-volume kitchens (24-hour cooking, char-broiling): quarterly. Solid fuel cooking: monthly.
Fire Suppression Systems
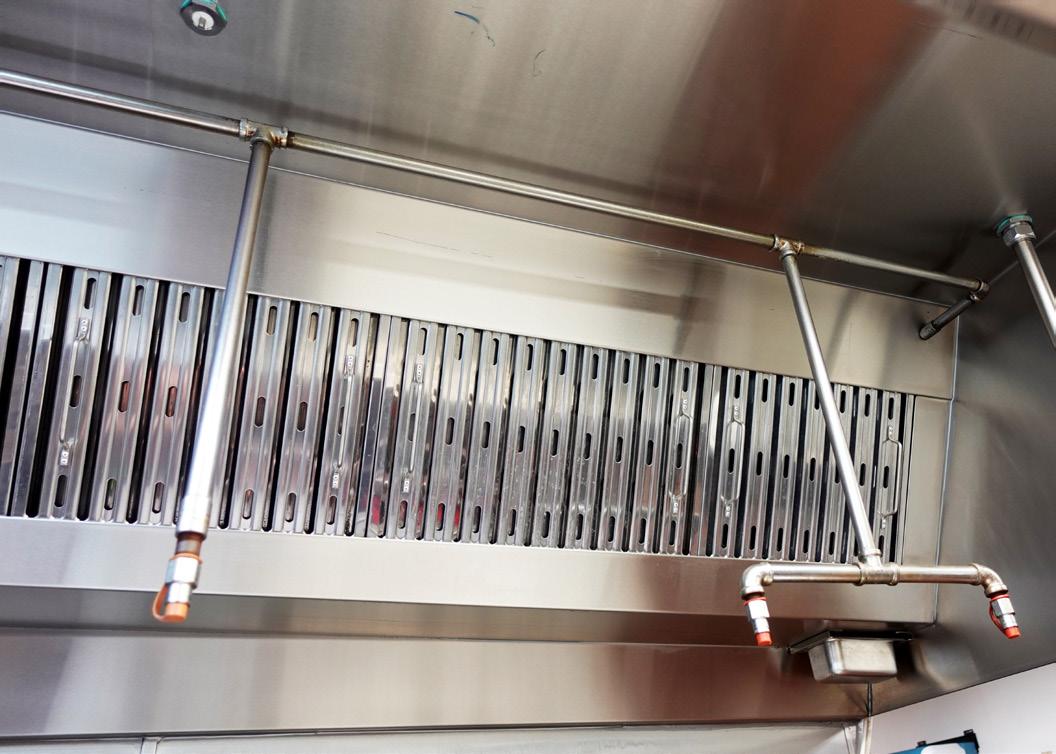
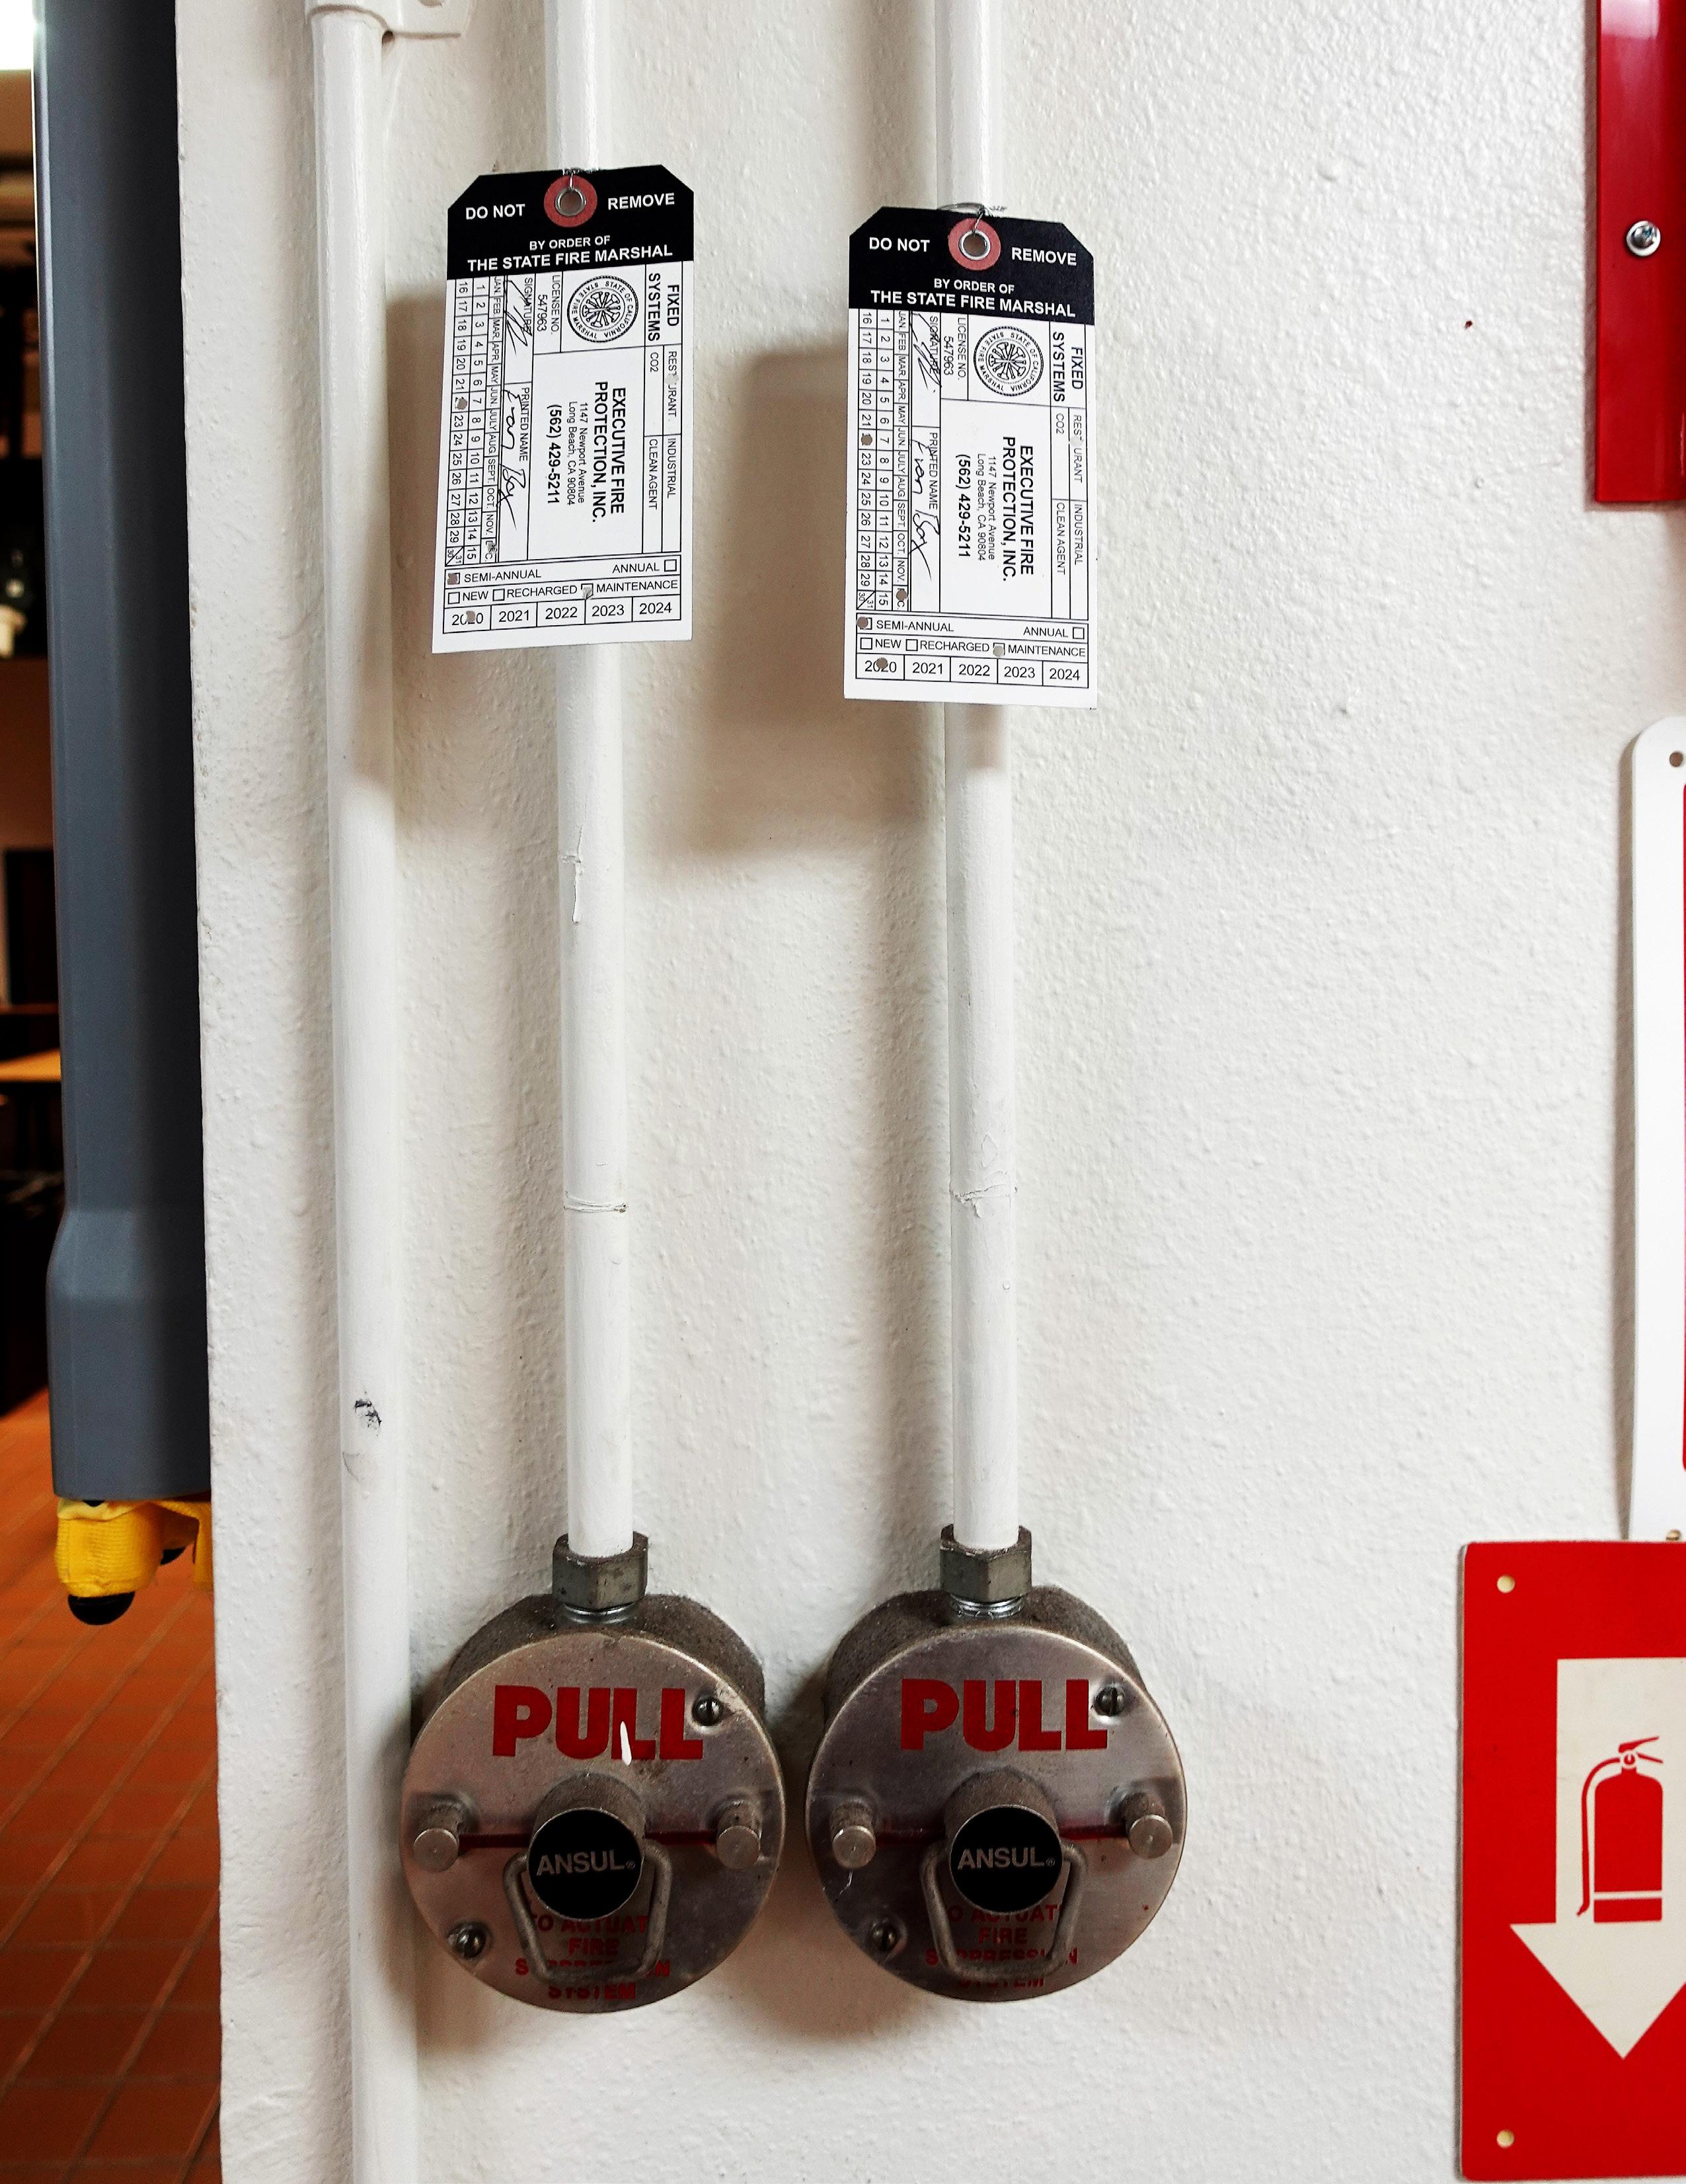
Fire codes require inspection of your fire suppression system by a qualified professional at least semi-annually. In addition, operators must perform a monthly visual inspection. These inspections will confirm that the system is functioning correctly, prevent unwanted/untimely discharges, and ensure that the system will pass an unannounced code enforcement inspection or insurance audit.
Monthly Visual Inspection Checklist
ITEM
Suppression nozzles
Nozzle caps
Hood and duct condition
Fire protection gauges
Pull station
Inspection sticker
Hood cleaning sticker
Portable fire extinguishers
Extinguisher type
WHAT TO CHECK
All nozzles in the hood are pointed directly at the appropriate equipment
Nozzles are capped to prevent grease buildup from blocking discharge
Check for buildup of grease in the hood and ducts
All gauges are “in the green” and in operable range
Easily accessible and not blocked
Clearly visible on the system; verify date of last professional inspection
Clearly visible on the hood; verify date of last professional cleaning
Easily accessible, not blocked, and fully charged (gauges “in the green”)
Extinguishers are appropriate for commercial kitchen use (Class K for cooking oil fires)
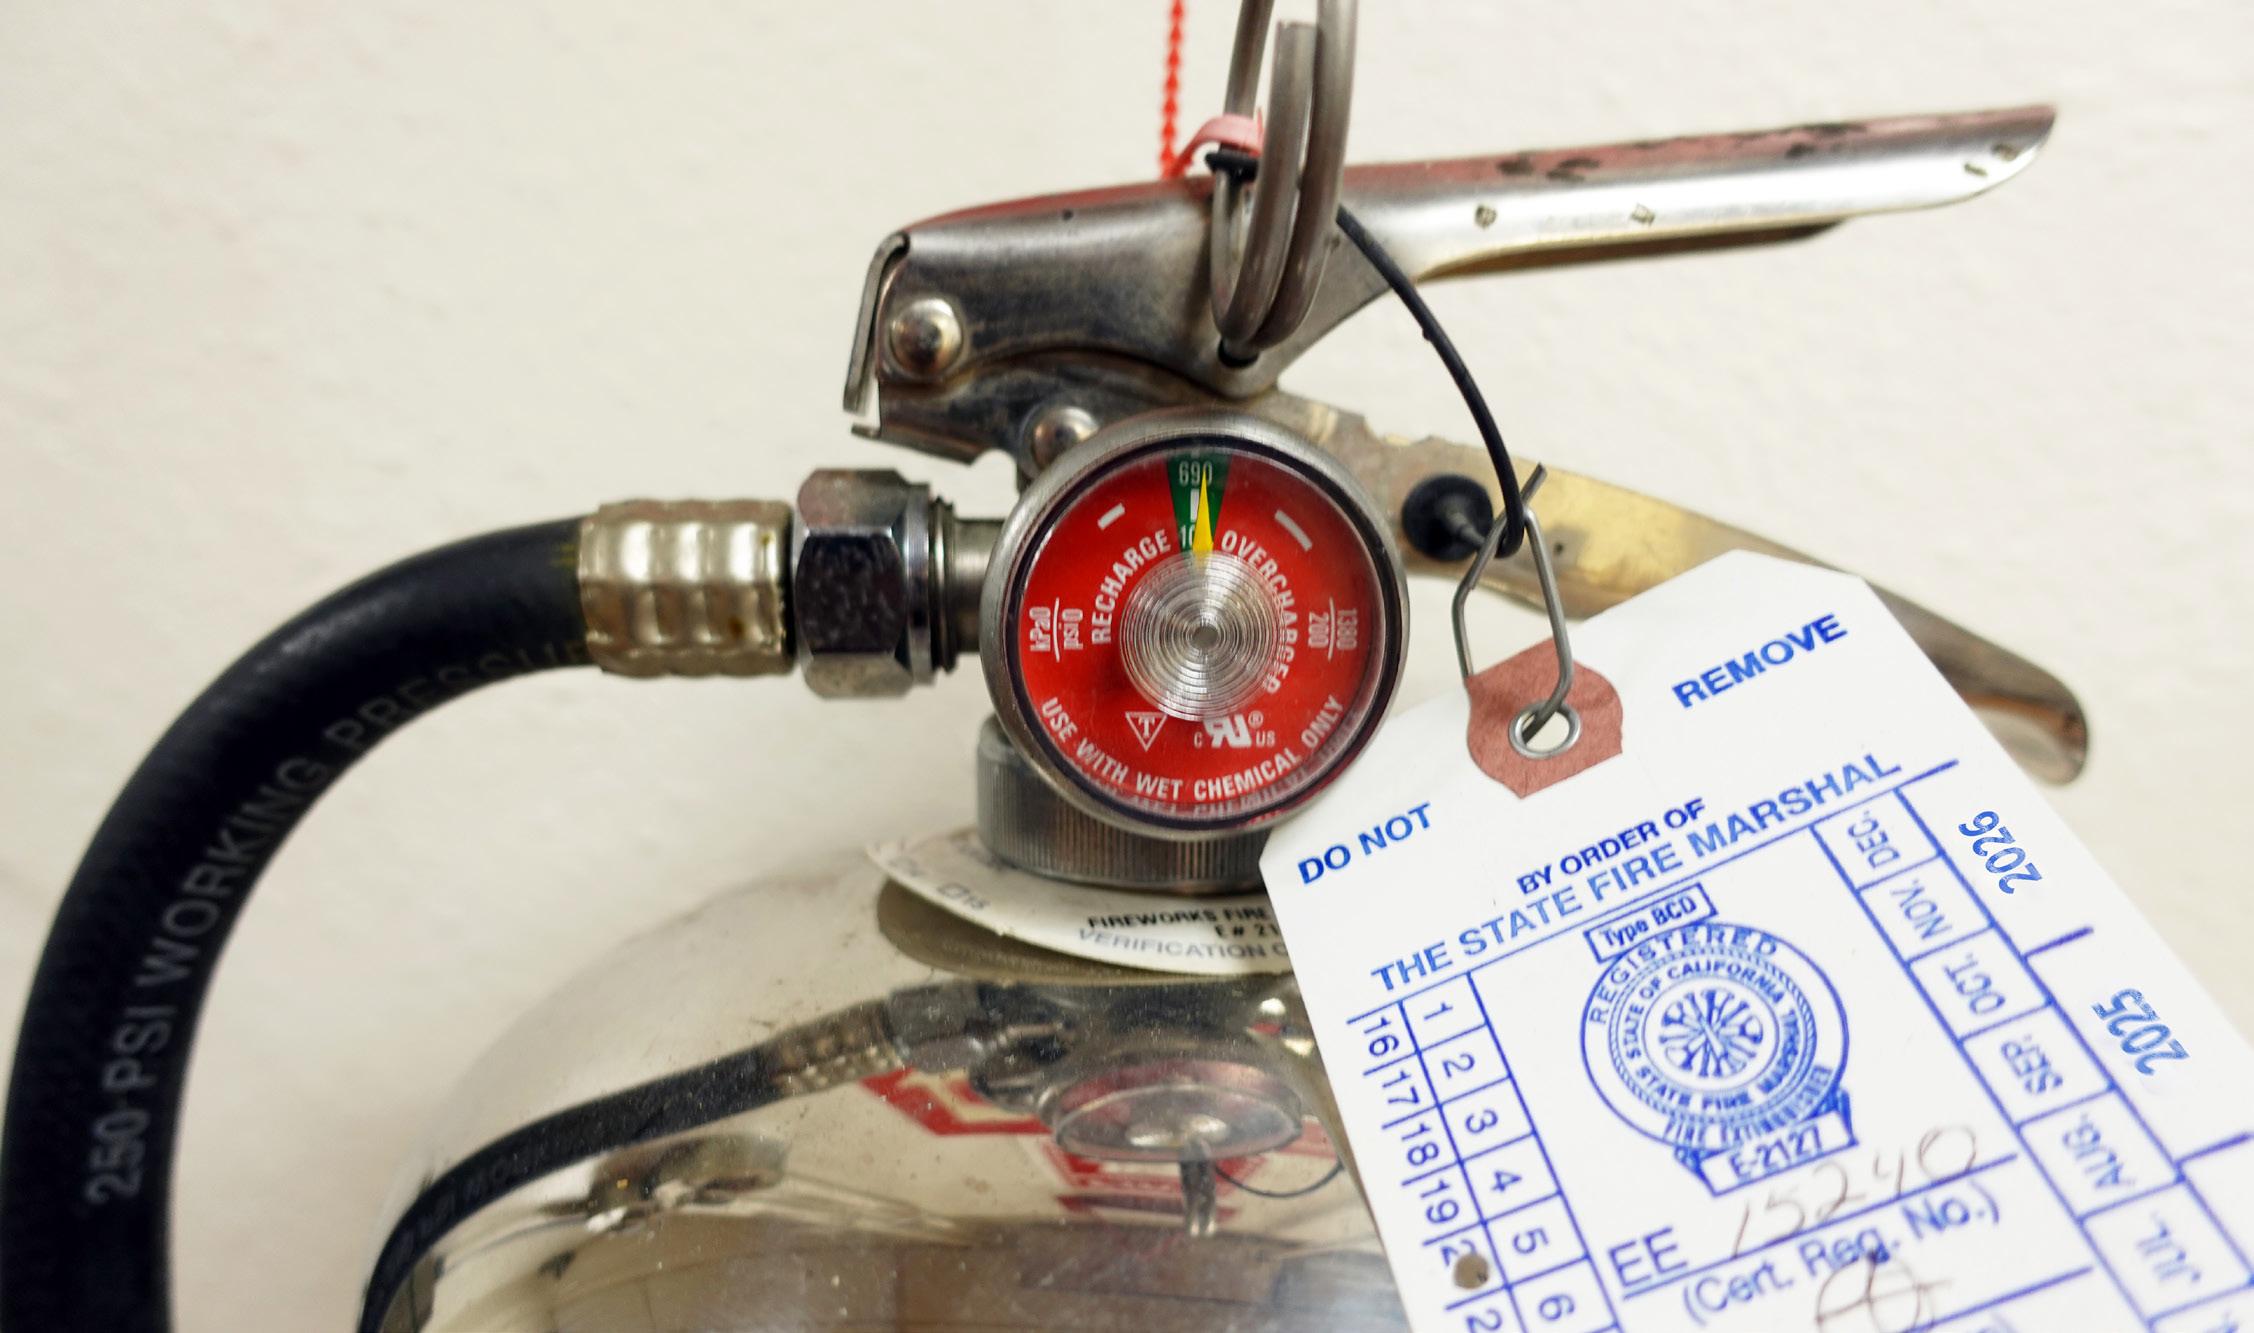
Semi-annual professional inspections are required by fire code. These confirm system function, prevent unwanted discharges, and ensure the system passes unannounced code enforcement inspections and insurance audits.
Master Maintenance Frequency Reference
Use the table below for a quick overview of required maintenance tasks across all equipment types. Adjust frequency based on your hours of operation, cooking volume, and menu items.
FREQUENCY
EQUIPMENT
All equipment
Ranges (open top & hot top)
Griddles
Fryers
Broilers (all types)
Conveyor Broilers
Dishwashing Machines
Steamers
Ventilation
Water Heaters
Griddles
Braising Pans
Fryers
Steamers
Ovens (all types)
Deck Ovens
Conveyor Broilers
Dishwashing Machines
Ventilation
All gas equipment
Griddles
Braising Pans
Fryers
Steam Jacketed Kettles
TASK
Wipe surfaces, clean spills, check flames
Empty grease/crumb tray; clean all rings, grates, burner ports; check knobs
Scrape cooking surface; clean grease pan
Remove grease accumulation; drain and filter oil
Remove/clean grease pan; scrape grates and radiants; inspect burner flame
Clean meat guides, feeder covers, grease trough, crumb tray, heat shields
Check temps and pressure; check chemical levels; water leak check; clean scrap trays and filters
Wipe down compartment
Inspect hood filters; clean grease drain and collection cups
Keep pathways clear of obstructions
Inspect and clean burners/pilots
Thoroughly clean the pan
Change oil
Descale compartment drain; check and reverse or replace door gasket
Remove fan baffle and clean blades; check door gaskets
Thorough oven deck cleaning
Clean upper burners and air boxes
Check/replace worn curtains; check rinse nozzles
Wipe hood surfaces; check sensors and DCKV panel
Inspect burner flame pattern in all burners and pilots
Check cooking surface for cracks; check splashguards
Check for lime/scale; inspect and clean burners
Boil out vat; inspect burners, pilots, and gas valve
Test pressure relief safety valve
EQUIPMENT
Ovens (general)
Combination Ovens
Rack Ovens
Conveyor Broilers
Broilers (all types)
Conveyor Broilers
Dishwashing Machines
Water Heaters
Fire Suppression
Rack Ovens
Combination Ovens
Conveyor Ovens
Conveyor Broilers
Indirect-fired Steam Kettles
Fryers
Broilers
Conveyor Broilers
Ventilation
Fire Suppression
Dishwashing Machines
Verify timer/thermostat accuracy; inspect and clean burners
Inspect water filters, drain line, and water orifices
Clean built-in hood filters; tighten rack mechanism hardware
Inspect and clean burner orifices and pilot burners; clean flame sensors
Remove/clean grease pan; scrape grates and radiants; inspect burner flame
Clean meat guides, feeder covers, grease trough, crumb tray, heat shields
Begin descale cycle (or quarterly depending on water hardness)
Check thermostat, leaks, flue, insulation, pilot, condensate drain
Visual inspection (see Fire Suppression section for full checklist)
Inspect and clean power burner fans; inspect/descale steam trough and drain pan
Descale boiler (if applicable, or semi-annually)
Adjust belt drive/gears; inspect and lubricate bearings
Inspect belt and chains for tension
Inspect steam pressure-reducing valve, piping, and condensate piping
Check high limit switch (qualified professional)
Replace briquettes/lava rocks (if applicable); replace infrared plates (if applicable
Lubricate conveyor drive chain
Professional inspection and cleaning
Professional inspection (required by fire code)
Professional inspection
Equipment Maintenance Worksheet
How to Use This Worksheet
Every kitchen runs on a handful of critical pieces of equipment. Use this worksheet to build a maintenance plan specific to your operation. Start by identifying the three pieces of equipment your kitchen cannot run without, then locate each one in this guide and transfer the relevant supplies and tasks into the columns below. Adjust frequency based on your hours of operation, cooking volume, and menu items.
Semi-Annual / Annual Tasks EQUIPMENT
Equipment Name / Type
Essential Supplies
Daily Tasks
Weekly Tasks
Monthly Tasks
Quarterly Tasks
Working With SoCalGas
For Operators and Designers
Operators and designers can work with the SoCalGas team to get advice on the right type of equipment for any facility’s menu. They can also test equipment at the Energy Resource Center (ERC) as part of the Try Before You Buy program. This customized, hands-on approach to specification and purchasing lowers risk and ensures operators are matched to the most energy-effective equipment.
For Manufacturers, Dealers, and Representatives
Manufacturers, dealers, and equipment representatives use the ERC to showcase their best equipment. Manufacturers also work with the SoCalGas engineering team to have high-efficiency equipment tested for inclusion on the California Energy Wise Instant Rebates Qualifying Products List.
Beyond testing, manufacturers have collaborated with the SoCalGas team to develop and test new equipment designs that increase performance and energy effectiveness. Manufacturers are encouraged to participate in the creation of ASTM standardized test methods by attending ASTM meetings.
The SoCalGas ERC team is dedicated to helping manufacturers create and sell the most energy-effective gas cooking equipment, which benefits customers and is good for business.
Free Equipment Services
SoCalGas offers equipment services, maintenance advice, and low-cost parts for all types of natural gas commercial equipment at no additional charge. Call 1-800-GAS-2000 to schedule an appointment with a commercial service professional.
Food Service Equipment Center
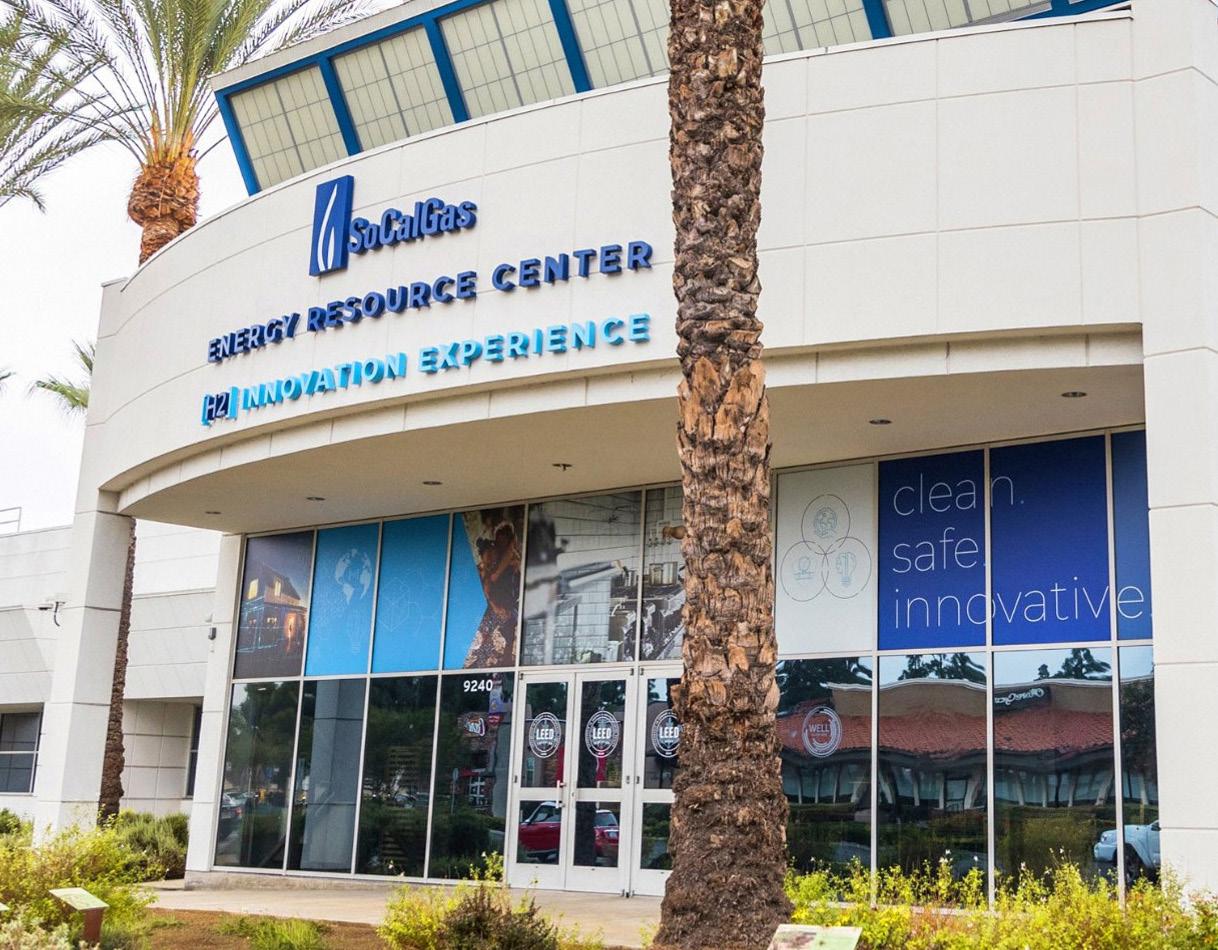
SoCalGas Energy Resource Center 9240 Firestone Blvd, Downey CA, 90241
As a brand-neutral facility, the Food Service Equipment Center is the largest test kitchen for natural gas equipment in the country. Test and compare more than 150 pieces of equipment from over 50 manufacturers.
Learn more at: socalgas.com/Foodservice
Try Before You Buy
Bring your own recipes and ingredients to our state-ofthe-art Commercial Kitchen or Ventilation and Bake Lab. Assess cooking quality, production, ease of operation, and maintenance before you purchase.
Educational Seminars and Webinars
Attend no-cost seminars and webinars on food safety, kitchen ventilation, industry trends, equipment maintenance, kitchen remodels, sustainability for foodservice, and more.
Learn more and register at: seminars.socalgas.com
Equipment Rebates
SoCalGas offers rebates on qualifying natural gas foodservice equipment that can help offset purchase costs, and your operation may benefit from continued savings through lower operating costs year after year.
Learn more at: socalgas.com/Business
To make an appointment: Call: (562) 803-7323 Email: ercfoodsvc@socalgas.com
This program is funded by California utility customers and administered by Southern California Gas Company (SoCalGas) under the auspices of the California Public Utilities Commission. Program funds, including any funds utilized for rebates or incentives, will be allocated on a first-come, first-served basis until such funds are no longer available. This program may be modified or terminated without prior notice. The selection, purchase and ownership of goods and/or services are the sole responsibility of the customer. Customers who choose to participate in this program are not obligated to purchase any additional goods or services offered by manufacturer, vendor, service provider, or any other third party. SoCalGas makes no warranty, whether expressed or implied, including warranty of merchantability or fitness for any particular purpose, use or application of selected goods and/ or services selected by customer. SoCalGas does not endorse, qualify, or guarantee the work of any third party. Eligibility requirements apply; see the program conditions for details.