SOUND ON SOUND THE WORLD’S BEST RECORDING TECHNOLOGY MAGAZINE
THE WORLD’S BEST RECORDING TECHNOLOGY MAGAZINE
CELEBRATING 40+ YEARS 1985 — 2026 TM
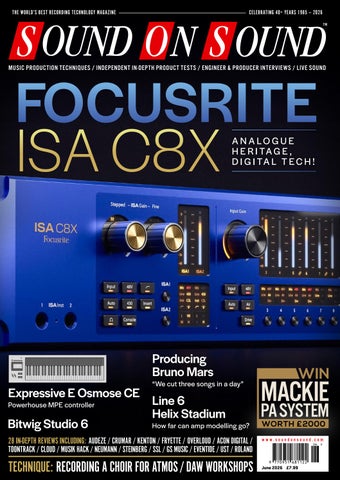
FOCUSRITE
MUSIC PRODUCTION TECHNIQUES / INDEPENDENT IN-DEPTH PRODUCT TESTS / ENGINEER & PRODUCER INTERVIEWS / LIVE SOUND
ISA C8X
A N A LO G U E H E R I TA G E , D I G I TA L T E C H !
JUNE 2026
www.soundonsound.com
Producing Bruno Mars Expressive E Osmose CE Powerhouse MPE controller
VOLUME 41 • ISSUE 8
Bitwig Studio 6
“We cut three songs in a day”
Line 6 Helix Stadium
How far can amp modelling go?
28 IN-DEPTH REVIEWS INCLUDING: AUDEZE / CRUMAR / KENTON / FRYETTE / OVERLOUD / ACON DIGITAL / TOONTRACK / CLOUD / MUSIK HACK / NEUMANN / STEINBERG / SSL / GS MUSIC / EVENTIDE / UST / ROLAND
TECHNIQUE: RECORDING A CHOIR FOR ATMOS / DAW WORKSHOPS
WIN
MACKIE
PA SYSTEM WORTH £ 2000 www.soundonsound.com
June 2026 £7.99
BANDBOX TRIO
BANDBOX SOLO
JBL BANDBOX SOLO and TRIO are portable practice amps with real-time AI that separates vocals and instruments, provides powerful JBL sound, and comes loaded with built-in guitar effects. No band? No problem.
FEATURING: Real-time AI stem separation
Built-in amp tones and pedal effects
Bold JBL sound
Portable with built-in battery
4-channel mixer* * TRIO only
JBL BandBox is exclusively distributed in the UK and ROI by Sound Technology. For more information please call 020 8962 5080 or visit soundtech.co.uk
LE ADER
THE DRIVING FORCE W
hat do the worlds of music tech, veterinary medicine and funeral planning have in common? The answer is that they’ve all become hot property with venture capital and private equity firms. This is partly a generational phenomenon: the musos who turned their attention to building mixers in 1975 are now understandably ready to cash out. It’s partly because Wall Street and the City of London have a nose for an underexploited opportunity. And it’s partly because capital investment is actually necessary for development and growth. Such investment naturally comes with high expectations, and there have already been some high-profile cases where music tech firms haven’t been able to deliver the results expected by their backers. It also tends to lead to a change of company culture. The eccentrics and mavericks who populated the trade show floors of the ’80s and ’90s are fading from the scene. The larger a music tech business grows, and the more the purse strings are held by people with backgrounds outside the industry, the less room there is for genuine individuality. But whatever changes are taking place at the top, it remains true that the people who design and build the equipment are passionate about their jobs. It’s easy to picture the industry as being divided into mad geniuses soldering by hand in their garden sheds, and soulless corporate
ALLIA BUSINESS CENTRE KING’S HEDGES ROAD CAMBRIDGE CB4 2HY T +44 (0)1223 851658 sos@soundonsound.com www.soundonsound.com
entities whose creative impulses are only focused on cutting costs. In reality, successful ‘boutique’ companies tend to have a very strong business vision to match their design chops. And behind even the largest and blandest of mass-market manufacturers will be a team of extremely clever, highly dedicated designers. No-one goes into building musical equipment for the money. Someone with the skill set to code interface drivers, optimise PCB layouts or squeeze an extra dB of dynamic range out of an A-D chip could almost certainly earn more doing something else. But, luckily for us, these people choose to make music gear. Perhaps they fall into it by accident. Perhaps they’re attracted by the reflected glory of making equipment that gets used by famous people. Probably they enjoy working in a small field where everyone knows everyone else, and rivalries are usually friendly rather than deadly. And, most likely, they’re musicians and engineers themselves. They want to build a better mousetrap because they have their own mice to catch. Focusrite, for example, are a publicly listed company with several hundred employees. But you have only to talk to their design team to realise how significant this month’s cover product is to them. The investment that has gone into the development of the ISA C8X isn’t just financial. It’s personal — and it shows.
ADV ER T ISIN G
admin@soundonsound.com
sos.feedback@soundonsound.com
adsales@soundonsound.com
Managing Director/Chairman Ian Gilby
Editorial Director Dave Lockwood
UK Media Sales Manager Chris Cope
Editorial Director Dave Lockwood
Executive Editor Paul White
Marketing Director Paul Gilby
Editor In Chief Sam Inglis
Finance Manager Keith Werthmann
Technical Editor Hugh Robjohns Reviews Editor David Glasper Reviews Editor Matt Houghton
P R ODUC T I ON
Production Editor Chris Korff
graphics@soundonsound.com
News Editor Luke Wood
Nick Humbert
Printing Warners Midlands plc Newstrade Distribution Warners Group Distribution Ltd, The Maltings, Manor Lane, Bourne, Lincolnshire PE10 9PH, UK.
support@soundonsound.com
ISSN 0951‑6816
Digital Media Director Paul Gilby
A Member of the SOS Publications Group
www.soundonsound.com/subscribe Circulation Manager Luci Harper
June 2026 / www.soundonsound.com
International Business Development
Designer Andy Baldwin
subscribe@soundonsound.com
4
marketing@soundonsound.com
O N LIN E
S UB S CR I P T I ON S
NORTH AMERICA
M AR K E T IN G
Designer Mick Reilly
Design Andy Baldwin
UK/WORLD
“Behind even the largest and blandest of mass-market manufacturers will be a team of extremely clever, highly dedicated designers.”
EDI T O R I AL
Production Manager Michael Groves
WOR LDW I D E E D I T I O NS
Editor In Chief
A DM I N I S T R AT I O N
Reviews Editor Chris Korff
WWW.SOUNDONSOUND.COM/SUBSCRIBE
Sam Inglis
Administrator Nathalie Balzano
Web Content Editor Callum Hall Web Editor Adam Bull Digital Media Manager Atheen Spencer www.soundonsound.com twitter.com/soundonsoundmag facebook.com/soundonsoundmag instagram.com/soundonsoundmag
The contents of this publication are subject to worldwide copyright protection and reproduction in whole or part, whether mechanical or electronic, is expressly forbidden without the prior written consent of the Publisher. Great care is taken to ensure accuracy in the preparation of this publication but neither Sound On Sound Limited nor the Editor can be held responsible for its contents. The views expressed are those of the contributors and not necessarily those of the Publisher or Editor. The Publisher accepts no responsibility for the return of unsolicited manuscripts, photographs, or artwork. © Copyright 2026 Sound On Sound Limited. Incorporating Music Software magazine, Recording Musician magazine, Sound On Stage magazine, SPL magazine, Sound Pro magazine and Performing Musician magazine. All rights reserved. All prices include VAT unless otherwise stated. SOS recognises all trademarks.
Unlock Your Best Mixes If you can’t trust what you’re hearing, you can’t trust your mix. The truth is your room is likely holding you back. Introducing ORIA Mini, the room correction powerhouse that sits between your audio interface and speakers. Powered by Sonarworks, ORIA Mini is a dedicated hardware solution that analyses and corrects your room’s acoustic imperfections in minutes, transforming your studio monitoring.
Powered by
98 INSIDE TRACK
IN THIS ISSUE
www.soundonsound.com
June 2026 / issue 8 / volume 41
FEATURES 28 Talkback Cellist, producer and singer Yamila explains why studios need windows and books.
44 Alva Noto: A Minimal Approach At the forefront of electronic music for more than three decades, Carsten Nicolai has proved that less can indeed be more — and that also extends to the tools he uses.
56 Recording A Choir For An Atmos Mix
WIN
Would your mic techniques change if you knew your location recordings were destined for a Dolby Atmos release? That’s a question our Technical Editor recently had to ponder...
MACKIE PA SYSTEM
74 How I Got That Sound Producer and engineer Warren Huart’s approach to recording the guitar on the Fray’s ‘Never Say Never’ is a masterclass in studio miking.
98 Inside Track:
WORTH £2500 PAGE 88
D’Mile & Anthony Masino
Producer and songwriter D’Mile helped develop Bruno Mars’ nostalgic soul sound — and Anthony Masino’s work at retro studio Penrose Recorders played a key role in capturing it.
116 Spotlight: Orchestral Sample Libraries There’s never been a better time to be working with orchestral sample libraries, but the choice can be overwhelming. We round up some of the best in the business.
6
June 2026 / www.soundonsound.com
136 Q&A Your studio and recording questions answered.
138 Why I Love... Demo Vocals Jay Moussa-Mann explains why studio productions often can’t touch the purity of demo vocals.
52 SOLID STATE LOGIC ORIGIN EVO
ON TEST
16 Fryette Amplification
Valvulator GPDI/IR
Valve Guitar Amp For Direct Recording
24 Acon Digital Extract:Dialogue 2 Audio Restoration Plug-in
66 GS Music Bree6 Keyboard
112 Applied Acoustic Systems
Objeq Delay 2 Delay Plug-in
8
Audeze LCD-5s
Polyphonic Analogue Synthesizer
113 iZotope Tonal Balance Control 3 Mix Referencing Plug-in
14
Open-back Headphones
36 Bitwig Studio 6
MIDI Interface
76
Multi-effect Pedal
22 Cloud Microphones
Cloudlifter Mini CL-25 In-line Microphone Preamplifier
12
Crumar Burn
120 MNTRA Nagual Sample Library
26 Musik Hack SweetEQ Saturating EQ Plug-in
121 Native Instruments Moments:
Vocal Clouds
Rotary Speaker Emulator Pedal
68 Eventide Music Mouse Composition Software
90 Expressive E Osmose CE C OV E R
Controller Keyboard
30 Focusrite ISA C8X USB Audio Interface
Line 6 Helix Stadium XL Guitar Amp & Effects Modelling System
Music Production Software
112 Boss PX-1
Kenton USB Solo Mk2
Sample Library
40 Neumann KH 810 II Active Subwoofer
18
Overloud Gem 160 Compressor Plug-in
106 Roland TD516 Electronic Drum Kit
121 Sample Science Ethereal Echoes Sample Library
94 Slate+Ash Ruins Sample Library
52 Solid State Logic Origin Evo Analogue Mixing Console
48
Steinberg Absolute 7 Virtual Instrument Collection
20 Toontrack Drumopolis SDX Superior Drummer Expansion
114 T‑Rex RoomMate D’Luxe Reverb Pedal
72 United Studio Technologies
UT Vintage87
Capacitor Microphone
120 WilTone Productions
Music Row Piano Sample Library
WORKSHOPS 122 SOS For Artists 124 Studio Pro 128 Live 130 Pro Tools 132 Cubase 134 Logic
www.soundonsound.com / June 2026
7
ON TE ST
Audeze say that the no-compromise LCD-5s is the best headphone they’ve ever made. Does its quality justify its cost? SAM INGLIS
W
hen a high-end brand introduces a new flagship product, high expectations are the order of the day. And when said product is a pair of headphones costing four figures, those expectations need to be fulfilled. Audeze have done so in the past; I was greatly impressed by their original LCD-X when I reviewed them back in 2015. Since then, the flag has been passed successively to the LCD-2, LCD-3, LCD-4, LCD-5 and now the LCD-5s. However, with each step forward, the price bar has been raised, to the point where the latest model nudges the £4000 mark. To say that you could get a pretty nice pair of monitor speakers for that is an understatement. So does the LCD-5s deliver value for money as a studio tool, or is it an expensive luxury? Like all of the abovementioned models, the LCD-5s is a passive design based around the latest iteration of Audeze’s signature planar magnetic technology. That means it incorporates such impressive-sounding features as “Updated Fazor Waveguides, Parallel Uniforce Voicecoil and Fluxor Magnets” in a bid to set “a new standard for accuracy”. It’s also the first flagship model to use Audeze’s SLAM (Symmetric Linear Acoustic Modulator) technology, which equalises the resistance faced by the diaphragm when moving inwards and outwards.
Light Work Historically, planar headphones have had their own strengths and weaknesses. The former include low distortion, good low-frequency response and accurate representation of transients; chief among the latter are low sensitivity and limited high-frequency extension. These flaws have largely been overcome in recent years, thanks to the availability of high-powered rare-earth magnets and to design innovations by Audeze and other manufacturers. Even so, the LCD-5s is less sensitive than most moving-coil models, generating a fairly modest 90dB SPL from a 1mW input. But with a nominal impedance of 14Ω, it remains fairly easy to drive; and,
8
June 2026 / www.soundonsound.com
Audeze LCD-5s Open-back Headphones
let’s face it, if you’re going to spend this much on a pair of headphones, you’ve probably got a half decent amp with which to drive them. The LCD-5s ships in a tankproof, lockable hardcase, and is the first review item that has ever arrived at SOS Towers with a pair of white cotton gloves for handling [not quite; Lauten Audio were first — Ed.]. It comes with a tough braided ‘Y’ cable that attaches to the base of each earcup with a mini-XLR. At the other end, this terminates in a four-pin XLR for ‘balanced’
operation, with a short adaptor cable catering to those of us in the cheap seats with quarter-inch jacks. The original LCD-X was a pretty large and heavy design. I personally found it comfortable enough, but it’s understandable that Audeze have tried to reduce bulk and weight in more recent models. At 475g (about 17oz), the LCD-5s is a good 25 percent lighter than the LCD-X, albeit a little heavier than the LCD-5. Although still chunky, it’s no larger than many moving-coil designs. Audeze’s signature circular earcups and asymmetric cushions are retained, and a touch of visual class is added by the use of tortoiseshell plastic and ‘rose gold’ metal finish. The design gives the earcups plenty of freedom to rotate in all three planes, and a notched metal pole on either side allows the effective length of the headband to be varied to fit your skull. As a result, I found the LCD-5s pleasant and comfortable
U T O P I A M A I N | STUDIO MONITORS OF EXCELLENCE The Utopia Mains range employs the full breadth of Focal’s technical expertise and professional audio industry knowledge to deliver an unparalleled recording, mixing or mastering experience. Comprising a 3-way Main 112 and 3.5-way Main 212 model, each Utopia Main monitor features newly patented drivers paired with Class-H Current Mode amplifiers for ultimate power and sonic precision.
The apex of monitoring
Exclusive Distribution: Sound Service UK | www.soundservice.uk
ON TE ST
AUDEZE LCD-5S
An exploded view of an LCD-5s earcup, showing the diaphragm with embedded metal strips (blue, centre) that is pushed backwards and forwards by the magnet structure to generate sound.
to wear for long periods. Which is fortunate, because I rarely wanted to take it off.
New Lows The very best monitoring systems have a quality of connecting you directly with the music, in such a way that you set out with good intentions to listen to the system, and 20 minutes later catch yourself marvelling at previously unheard details in favourite recordings. The LCD-5s simply makes music listening more rewarding, not through flattery or subtle enhancement, but by offering a more complete window onto the recording. It allows you to zoom in on those small details, but it also lets you pull the focus back and consider a track or mix as a coherent whole. I was interested to see how the LCD-5s would compare with HEDD Audio’s HEDDphone 2, which until now has probably been my benchmark. They have many of the same strengths; in particular, both have the ability to put across musical dynamics in a way that you’d normally get only on speakers. There’s a noticeable difference in the frequency response of the two models, with the HEDDphone having more presence in the upper midrange. Mixes that sounded just right
10
on the HEDDphone 2 occasionally sounded woolly or boxy when switching to the LCD-5s, and conversely, the HEDDphone sometimes framed as slightly harsh mixes that worked perfectly on the LCD-5s. Of the two, the HEDDphone frequency response was probably closer to that of my Genelec speaker system, but we aren’t talking about right or wrong here, just different flavours of great. And if the HEDDphone has a marginally more neutral tonality overall, the LCD-5s is superior in two significant respects. There’s a natural, relaxed quality to the treble on Audeze’s high-end models that I don’t think I have heard from other headphones. On some of their designs, that comes at the cost of a slightly subdued high-frequency response, but here it just sounds glorious. The LCD-5s makes you aware of problems like excessive sibilance or over-bright hand percussion, but doesn’t make it a painful discovery. It’s super smooth, without being dark or muffled. But the LCD-5s’s greatest strength is at the other end of the frequency spectrum. The bass on the HEDDphones is excellent. The bass on these headphones is jaw-dropping. It’s extended, it’s fast, it’s punchy, it’s clear and it’s thrilling to listen to, yet it’s not bloated or flabby as is the case with some moving-coil models. I lost count of the number of foot taps, vocal plosives, underground trains and other low-frequency noises the LCD-5s let me pick out of recordings where I’d never head them before. And when it comes to balancing bass guitars against bass drums, equalising synths, or fitting together jigsaw puzzles involving floor toms, snares and vocals, the LCD-5s is like no other headphone I’ve ever tried (except the LCD-X, obviously). If you’ve ever had the experience of adding a perfectly integrated subwoofer to an already good speaker system, you’ll have some idea of what switching to the LCD-5s feels like.
High Standards In short, then, my high expectations have been amply fulfilled. But have they been fulfilled to the extent that I’d pay several thousand pounds for a pair of headphones? I’ve always had a strong preference
June 2026 / www.soundonsound.com
for mixing on speakers where possible, and as I said at the outset, you can get a very nice pair of speakers for this sort of money. However, the difference between expensive speakers and expensive headphones is that expensive speakers require an expensive room. And that’s especially true at the low end, which is where the LCD-5s shines the brightest. If you want this sort of low-end presentation from speakers, you don’t only have to budget for the speakers. You also need to put a lot of time and effort into treating the monitoring environment — and by the time you’ve finished, you’re likely to have spent a lot more than the cost of the LCD-5s. And that’s assuming you have a monitoring environment that can be treated, which isn’t always the case. If, like many engineers and producers, you’re working in hotel rooms, Airbnbs and tour busses, high-quality speaker monitoring just isn’t an option. The LCD-5s isn’t a pair of speakers, but it has many of the same strengths; and whereas speakers are at the mercy of their surroundings, the LCD-5s will excel wherever you are. From yurt to yacht, this is a monitoring system of the highest quality.
summary Though naturally not cheap, the LCD-5s represents the state of the art in planar magnetic headphone design, and sounds simply wonderful.
£ £3999 including VAT. W www.audeze.co.uk
RME PREMIUM USB AUDIO INTERFACES RME interfaces for studio and live recording offer a comprehensive feature set with sonic excellence and intuitive control for Mac and Windows, including TotalMix FX for flexible routing and mixing. Unrivalled ultra-low latency operation combined with the legendary RME driver stability and maintenance for users who don’t want to make compromises.
Worldwide Distribution: Audio AG, +49 8133 9181-0, www.audioag.com • UK Distribution: Synthax UK, +44 1727 821870, www.synthax.co.uk www.rme-audio.com
ON TE ST
Crumar Burn
Rotary Speaker Emulator Pedal We take the Italian manufacturer’s first dedicated effects box out for a spin... PAUL WHITE
A
lthough there are literally dozens — and in some cases hundreds — of pedal options out there for each of the more common types of effects, there’s a much shorter menu when it comes to rotary speaker emulators. Possibly the best-known models are produced by Strymon, Neo, Roland and Leslie. Add in the Nux, Tech 21 and Fender models and you’d still be pushed to get the count of capable pedals up to 10. Crumar’s Burn pedal brings us another choice. Originally bundled with the Mojo Sorrento organ, it’s their take on the classic Leslie sound, and emulates a two-rotor configuration, each rotor having its own ramping characteristics when changing speeds. Unlike some of the alternatives, it doesn’t model the Leslie’s amp distortion, but it does have a built-in reverb, with a choice of spring or more generic digital algorithm, and the reverb remains active when the rotary effect is bypassed so the tails aren’t chopped off.
Connectivity & Operation Fitted with a mono input and a stereo output, the pedal operates on a standard 9V pedal supply, and one is included in the price. It’s aimed at both guitarists and keyboard players generally, but for those using compatible Crumar keyboards it also features Crumar’s One‑Cord port. This carries power from the keyboard as well as both the audio input and a control line for speed switching; plugging into the mono
input jack overrides this port. Additionally, there’s a TRS jack on the side of the case for connection to Crumar’s HMS-20-BK ‘half moon’ speed switch. There’s no dedicated mono output option, but the effect does sound fine to me in mono, when taken from either output. On the left side of the case is a USB-C service port, plus a recessed gain switch that sets the pedal for instrument or line-level signals. A stereo headphone output on a 3.5mm jack is found on the back panel. In fact, all the audio connections are on the rear panel, and that helps conserve space if used on a pedalboard, and to minimise cable mess if perched on a desktop or atop a keyboard. The pedal includes both a noise gate and a speaker emulator, but these can (independently) be disabled. The status LEDs change colour to indicate the status of these options, which can be set via a power‑up routine. A Ramp control allows users to adjust how quickly the sound transitions from the slow chorale to the fast tremolo effect, and there’s a separate Memphis switch that stops the bass rotor entirely and just leaves the horns spinning. Balance sets the horn/ drum balance and there are further controls for mic Distance and Angle, Speed and Reverb level. Distance and Angle simulate microphone placement. Dual footswitches allow for bypass (with status LED) and for speed change, the latter also including a Stop function and a status LED that flashes at the rotation speed. Front Stop simulates All the I/O are on the rear, and as well as supporting other instruments in the conventional way, there’s a dedicated port for use with Crumar’s keyboards.
12
June 2026 / www.soundonsound.com
stationary rotors both facing forward when stopping the rotary effect by holding down the speed change footswitch.
Feel The Burn? Sonically, the Burn delivers a very convincing rotary effect at both the slow and fast speeds, and while you can use one output for mono as described above, it sounds more expansive in stereo, as you’d expect. Some lesser rotary-speaker emulation pedals sound to me more like modified flangers than actual rotary speakers, but this one is impressively convincing. I did rather miss having an onboard drive emulation for adding the famous Leslie ‘growl’, but if you want that you can always place a dedicated overdrive pedal before the Burn (adding distortion after the pedal doesn’t produce the same effect). Guitar players will almost certainly have a suitable drive pedal already, though for keyboard players it could perhaps be an additional expense. On the plus side you also get two very usable reverb flavours, and that Memphis option delivers a lovely effect that some guitar players like to use as an alternative to the ‘both rotors running’ mode. Overall, it’s a well thought-out pedal with a good balance of controllability and simplicity of operation.
summary A convincing Leslie speaker emulation, the Burn has plenty to commend it for organs and guitars alike, though you might want to pair it with an overdrive.
£ £229 including VAT. T Sound Technology +44 (0)20 8962 5080 E sales@soundtech.co.uk W www.soundtech.co.uk W www.crumar.it
ON TE ST
Kenton USB Solo Mk2 MIDI Interface
Kenton’s latest interface makes it easier than ever for digital to talk to analogue. RORY DOW
M
IDI-to-CV converters are one of those unglamorous studio essentials. Nobody buys one because it’s exciting. You buy one because your Minimoog doesn’t have USB, your DAW doesn’t have CV outputs, and the gap between the two needs bridging. Kenton Electronics have been filling that gap for over 30 years, and the USB Solo Mk2 is their latest attempt to make the analogue-digital love affair as painless as possible.
Overview The USB Solo Mk2 is a small, single-channel MIDI-to-CV converter housed in a compact metal desktop box measuring 140 x 87 x 45mm and weighing a svelte 210g. The rear panel is where all the action happens. On the left is a single USB-C socket, which provides 5V power and USB MIDI data from a computer. To its right sit five 3.5mm mini-jack sockets for CV, gate and the three aux outputs. Finally, a pair of five-pin DIN sockets handle traditional MIDI. The MIDI thru output can double up as a DIN sync connector. The front panel is minimal: a three-digit LCD alongside three buttons. Parameters are selected with Select and their values adjusted with Dec/Inc. It’s an old-school approach that works well enough. The most common parameter numbers are
14
June 2026 / www.soundonsound.com
printed on the case, but others will require the manual to be close by. If you prefer, there’s a free configuration app available from Kenton’s website that gives you everything on one screen. Up to 32 complete parameter sets can be stored and recalled as presets — either from the front panel or via MIDI Program Change — and all settings live in non-volatile EEPROM, so there’s no backup battery to worry about. Kenton have pre-loaded the unit with presets for popular vintage synths, like the SH-101, SH-09, Prodigy, Minimoog, MS-10 and MS-20, CS-10, ARP 2600, and the like. The USB Solo Mk2 has two modes of operation. In Standard mode it accepts MIDI from USB and DIN simultaneously (merging them together) and converts to CV. In Interface mode it does the same, but additionally behaves as a USB MIDI interface, relaying MIDI between your computer and the five-pin DIN MIDI thru. Handy if you’ve run out of USB ports on your computer, though you lose the option of using MIDI thru as a DIN sync output, since that socket is now tied up. Inside the box you’ll find more than just a pitch and gate converter. There are three assignable aux outputs, a dedicated ADSR envelope generator, an LFO, two independent clock dividers, drum and note triggers, and even a built-in MIDI analyser (the built-in display isn’t really up to this task, but it can be useful when you’re trying
to work out why something isn’t talking to something else).
What’s New Compared to the DIN-only Pro Solo Mk3, the headline differences are USB connectivity and the dual-mode design that lets it double as a USB MIDI interface. Against its direct predecessor — the original USB Solo — the Mk2 adds five-pin DIN MIDI input (the original accepted USB only), aux 2 and aux 3 are now continuously variable rather than fixed-function, and there’s a new ADSR envelope generator routable to any aux output. The USB
Kenton USB Solo Mk2 £200 pros • USB and 5-pin DIN MIDI input simultaneously. • Bus-powered via USB-C. • Built-in ADSR and LFO. • Pre-loaded presets for popular vintage synths. • Doubles as a USB MIDI interface.
cons • None that I can think of.
summary The Kenton USB Solo Mk2 is a continuation of everything Kenton is good at. The USB Solo Mk2 is a perfect utility box for single-channel MIDI-to-CV duties.
socket has also moved from the old USB-B to USB-C, bringing the unit in line with most modern computers.
CV & Gate The main CV output supports Hz/V, and anything from 0.92 to 1.62 V/oct scaling, which covers just about every unusual pitch configuration you might come across. The gate output is configurable from 5V to 15V V-trig, with S-trig options. Fine‑tuning and scale adjustment parameters let you dial in precise tracking for those vintage oscillators that refuse to behave. Pitch-bend range is adjustable up to ±48 semitones, and there’s a five-note buffer for polyphonic note memory, so trills and quick legato passages behave as they should. Portamento is catered for too. The USB Solo has its own built-in glide, with a choice of fixed-rate or fixed-time behaviour. It can be switched on permanently, left off, triggered automatically by legato playing, or assigned to any CC. There’s also a dedicated Auto Portamento mode that engages Roland’s own portamento circuit on MC-202s or TB-303s fitted with Kenton’s 5-socket kits — useful if you want the original’s character rather than the USB Solo’s glide. A connected sustain pedal will hold both the gate open and the ADSR at its sustain level in the usual way.
Auxiliary Outputs The three aux outputs are where the real flexibility lives. Each can be independently assigned to respond to MIDI CCs, velocity, aftertouch, pitch-bend, clock dividers, note triggers, drum triggers or the ADSR envelope. Aux 1 and 2 run at 12-bit resolution with a voltage range of approximately -2.7V to +10V. Aux 3 is 10-bit, 0V to +10V. Each output has independent minimum, maximum and reset values, meaning you can scale or invert the response however you like.
The USB Solo Mk2 is conveniently small, measuring 140 x 87 x 45mm and weighing just 210g.
Each aux output also has its own slew rate parameter, which can be used to smooth out stepped CC values. The built-in LFO can modulate both the CV and aux 1 outputs independently, with nine waveshapes, MIDI Clock sync, and key-on reset. Rates run from around 0.1Hz up to 100Hz, and the amount can be controlled via any MIDI message, with CC1 the sensible default for a mod‑wheel vibrato. The onboard ADSR envelope is new to the Mk2 and can be routed to any aux output. Each of the four stages can be assigned to a MIDI CC for real-time control, the envelope can be inverted, and a Reset to Zero option lets you choose whether new notes restart the envelope from zero (digital envelope behaviour) or continue from its current level (analogue behaviour). The latter is much more musical when playing quick legato passages.
Clocking & Sync The MIDI thru socket doubles as a Sync24 output for DIN sync drum machines, with
At the back we find a USB‑C port, 3.5mm sockets for CV, gate and the three auxes, and two five-pin DIN sockets for MIDI and DIN sync.
the two internal clock dividers available as source options. That means you can clock a TR-808, TB-303, or MC-202 at their native 24ppqn, or 48ppqn for Linn and Oberheim machines. The same clock dividers can be routed to any aux output, turning the USB Solo into a handy little clock generator for modular sequencers and arpeggiators. MIDI Start/Stop is also available as an aux source, which is useful for getting an external sequencer to start and stop along with the DAW.
Conclusion The USB Solo Mk2 is a doddle to use. The three-digit LCD display might not convey much info, but it’s good enough and you can edit everything from the front panel using just three buttons. Most people I know who use these boxes have them dedicated to a single synthesizer, so setup is often a once‑only, set-and-forget affair. If you want to make use of the extra modulation sources like the LFO and ADSR, it will feel a bit fiddly compared to your average synthesizer, but these functions can add a lot of functionality to a vintage synth that is perhaps lacking in these simple modulation sources. The USB Solo Mk2 is exactly what you expect from Kenton. Another robust utility box that speaks perfect synth. Whether you’re integrating a vintage synthesizer, or a modern Eurorack modular, or indeed anything with CV capabilities, Kenton have you well covered. £ £199.80 including VAT. W www.kentonuk.com
www.soundonsound.com / June 2026
15
ON TE ST
Why emulate a valve amp for recording when you can use a real one? PAUL WHITE
F
ryette Amplification’s Valvulator GPDI/IR takes a notably different approach to guitar recording, side-stepping conventional amp modelling in favour of a purpose-designed, low-power analogue valve amplifier that’s paired with digital speaker emulation. The result is a compact, studio-oriented valve amp that’s been designed specifically for direct recording and re‑amping duties — though it’s also capable of driving a loudspeaker.
Design & Construction Fryette have a long-established reputation for high-performance valve designs, including their Deliverance and Pittbull series. The GPDI/IR builds on this heritage, combining a four-valve (three 12AX7s/ ECC83s and one 12DW7/ ECC832), low-wattage amp with integrated cabinet simulation and flexible DI facilities. The designer states that the underlying premise is that the most critical element of recorded guitar tone lies not in the preamp alone, but in the interaction between the power amp and the speaker load. In this product, the valve power stage feeds an internal reactive load, which is then followed by selectable impulse response (IR) cabinet emulations, so that interaction is preserved even when there’s no physical loudspeaker connected. There are 16 IR speaker emulation slots, which offer a variety of cabinet types, but users can also load their own IRs via the rear-panel USB port. The unit is housed in a robust metal chassis that’s
16
Fryette Amplification Valvulator GPDI/IR Valve Guitar Amp For Direct Recording compact enough for pedalboard use, even if visibility of the controls may be less convenient at floor level. The front panel is more densely populated than that of a typical amp because of the inclusion of speaker emulation controls, but the layout remains logical. Large, well-spaced knobs are complemented by toggle switches for voicing and gain structure selection. Operationally, then, the unit remains reassuringly amp-like: there are no menus or complex navigation systems, and most controls will be immediately recognisable to anyone used to traditional valve amps. That said, the densely equipped rear panel offers considerable routing flexibility and warrants closer inspection — more on that below. Importantly, all voicing changes are achieved through analogue circuit variations, ensuring that the unit always behaves and responds like a traditional amplifier rather than a digital model. Two cascaded gain stages provide a wide range of drive textures, from clean, high-headroom tones through to mild break-up and on to saturated distortion. A conventional three-band EQ is augmented by a Tight/Deep switch, extending the low-frequency voicing options. The speaker emulation section offers both convolution-based IR processing and Fryette’s own analogue cabinet simulation. The latter offers a zero-latency alternative, or can be blended with the IR-based emulation. The front-panel analogue cab emulation controls comprise Lo, Mid and Emphasis EQ, along with an Air/Bite voicing switch and an In/Out control. The Saturation section incorporates a three-position voicing switch, derived from established Fryette amps, labelled Clean, Deliv(erance) and Pittbull. Two gain controls — the second designated Saturation — allow
June 2026 / www.soundonsound.com
further shaping of the drive structure, while a More switch introduces additional gain when required. The global level is set via a rotary control with LED clip indication, while a push/turn encoder provides access to the onboard IR selections. Master Volume and Dynamics controls sit to the right, the latter accompanied by an LED to indicate dynamics processing activity. A Normal/External Amp switch determines the overall routing configuration: the GPDI/IR can function variously as a complete DI solution, a standalone preamp, a compact power amp, or a re-amping device. The rear-panel speaker output can also be used to drive a speaker cabinet loudly enough for recording.
Rear Panel I/O The rear‑panel features are arranged across two rows and reflect the flexible routing capabilities. Balanced XLR and unbalanced jack outputs are provided for both the IR-processed signal and the analogue cabinet simulation path, so the two simulated signals can be mixed, processed and panned separately when they reach the DAW, an approach that offers a lot more creative potential than a simple blend control could. A dedicated XLR DI output of the clean input signal offers a convenient feed for front-of-house or recording interfaces.
The re‑amp input, a combi XLR/jack connector, accepts line-level signals from an audio interface or recorder, enabling previously recorded tracks to be processed through the GPDI/IR’s valve stage and speaker emulation. This is particularly useful in studio workflows where decisions on the tonal nuances might be put off until mixdown. An output labelled To Amp allows the unit to feed the input of a conventional guitar amp, facilitating hybrid setups. Two independent effects loops are provided. The primary effects send/return accommodates external processors, with switchable high and low levels to support both instrument- and line-level devices. A secondary amp effects loop offers similar
of amp models or onboard effects. Instead, it focuses on delivering the core characteristics of a real valve amp, with three distinct Fryette amp voicing options, in a format optimised for direct recording. In use, it delivers convincingly in both areas that matter to players: feel and sound. Because the signal passes through a real valve power stage (meaning that the unit runs quite hot, so should be placed where airflow is not restricted), which then interacts with a reactive load, the dynamic response is notably more natural than that of many purely digital DI solutions. Notes exhibit a realistic sense of bloom and compression, and the unit responds in a natural way to variations in picking dynamics and guitar volume changes.
“The GPDI/IR can function variously as a complete DI solution, a standalone preamp, a compact power amp, or a re-amping device.” functionality at a different point in the signal path, which means it’s possible to position effects before or after the power-amp stage — a degree of flexibility that’s particularly useful, since time-based effects are typically best placed post-preamp, while overdrives, compressors, wah pedals and (occasionally) phasers are generally placed before the preamp. Footswitch connectivity is also included for remote bypass functions, while the USB port allows the loading and management of IR files (there’s no USB computer audio interfacing, by the way). Mains AC power is received through a standard IEC inlet, and the internal supply automatically accommodates voltages from 100-240.
Performance Despite its ability to cover a lot of tonal bases, the Valvulator GPDI/IR does not attempt to offer a wide catalogue
Clean tones are articulate and well balanced, avoiding excessive brightness while retaining clarity, while a wide range of tonal variation is available via different cabinet simulations, voicing options and EQ settings. The cab emulations span warm-sounding speakers and brighter offerings, enabling the amp to cover both US‑ and UK‑style overdrive sounds, while the cleans can also cover most of the tonal bases from country twang to pop rhythm guitar. The three amp voicings are also noticeably different, with Pittbull seemingly having the most cutting tonality. There’s also the option of loading different speaker IRs via the USB‑C port to further refine your tone. Edge-of-breakup sounds are particularly satisfying, responding musically to playing nuance and control adjustments, and the balance of the two drive controls has a significant effect on the drive character.
At higher gain settings, this unit produces a controlled and focused overdrive reminiscent of Fryette’s established amplifier designs. Low frequencies remain tight, midrange detail is well defined, and the overall sound retains a sense of focus even under heavy saturation. You can also back off the drive and use your own overdrive pedal, just to give you yet more tonal variety. The analogue speaker sim produces a perfectly workable sound and, as both the IR and analogue sim sections have separate outputs, it can be rewarding to experiment with pseudo-stereo cab miking setups, possibly with different effects on each, and then panning the two away from each other. As with most direct-recorded guitar signals that are devoid of effects, the raw output can sound somewhat dry in isolation, but this is easily addressed in a DAW environment using reverb, delay and modulation effects. Alternatively, external processors or pedals can be integrated via the onboard effects loops, so it’s straightforward to build a fully-produced guitar sound around this box.
Verdict By combining valve circuity and a reactive load with both convolution-based and analogue cabinet simulation, Fryette have created a tool that offers convincing feel, practical versatility and a usefully broad tonal range. It may not be a budget option, but it’s priced to compete with high-end modellers and is built to last. For players seeking a more natural‑feeling alternative to conventional amp modelling in a recording, re-amping or DI performance context, the GPDI/IR is a thoughtful and well-executed solution that works right across the clean-to-dirty guitar amp spectrum: just add your own effects and you’re good to go.
summary While not offering specific emulations of third-party amplifiers, the Valvulator GPDI/IR manages to cover a lot of tonal ground with a natural-playing feel that responds in the same way as a well-designed valve amplifier — as that is essentially what the Valvulator GPDI/IR is. It doesn’t have onboard reverb so some added ambience is needed to produce that ‘amp in a room’ sound.
The rear panel hosts an array of analogue I/O, including insert sends and returns from/to more than one point in the signal path.
£ £1049.99 including VAT. T Peach Guitars +44 (0)1206 765 777 E info@peachguitars.com W www.peachguitars.com W www.fryette.com
www.soundonsound.com / June 2026
17
ON TE ST
Cloud Microphones Cloudlifter Mini CL-25 In-line Preamp
Cloud have teamed up with Neutrik to make their acclaimed Cloudlifter technology smaller than ever. NEIL ROGERS
W
hen low-sensitivity microphones are used on quieter sources, they deliver a low output level. In such situations, we’re forced to push most mic preamps into the upper reaches of their gain range, where it’s more likely that noise will be introduced, or that controls exhibit ‘gain bunching’, making it trickier to set the optimum level. It’s now over 15 years since Cloud had the bright idea of putting the active circuitry employed in their ribbon mics into a standalone box, so that the gain stage might be used with any passive mic, thus allowing any mic preamp to be used in its optimum range. The result was the Cloudlifter CL-1, which, along with various more recent stablemates, has generally been shortened to just ‘Cloudlifter’ — and so popular have these been that many engineers now use that word to describe any device designed to boost a passive mic’s signal before the main mic preamplifier. There’s some variation in Cloud’s products but typically, including in this case, they provide 25dB of fixed gain and are really intended for use with passive ribbon mics and low-output moving-coil dynamic microphones. The Cloudlifters need 48V phantom power to work, but don’t pass this on to the mic, thus eliminating the risk of damaging vintage mics that don’t adhere to today’s wiring conventions, or when mics are used with faulty cables. Using a patented Class-A discrete signal path, noise-cancelling JFET chips are directly coupled to both microphone and preamp, so it’s about as close to offering the mythical ‘wire with gain’ as is possible.
Mini Me! The latest addition to the Cloudlifter range is the Mini CL-25 ‘mic activator’, which offers the same award-winning circuitry and performance as the patented CL-1. The result of an engineering collaboration with
22
June 2026 / www.soundonsound.com
legendary connector manufacturers Neutrik, it might not offer anything new sonically, but it’s vanishingly small — it’s genuinely difficult to imagine how it might have been made any smaller without losing the XLR sockets altogether! — so potentially offers greater convenience. The idea is that it can be used anywhere in the chain between microphone and preamp — between cables, directly inserted into stageboxes or a desk’s mic input, or even left attached to the mic itself (at the start of the signal chain which, in theory, is the best place to boost). It’s also designed to be rugged enough to survive thousands of insertion cycles.
In Use The Royer SF-12 is a passive stereo ribbon mic that inherently delivers a low output. Mine sees a lot of action in my studio, but occasionally I find that I’m unable to use it on quieter sources, due to the noise that can be introduced even by good-quality preamps. With the pair of CL-25s I was sent to review, this mic asked a lot less of my preamps. It felt good not to have to crank the gain all the way up on quiet sources, and I also had no issue using them on louder sources like drums or close‑miked piano. I’m not sure I can clearly report that such sources sounded ‘better’, but the CL-25 certainly made the signal louder and took absolutely nothing away as it did so: every time I used my SF-12 it sounded both quiet, and as good as it ever has. I also have in my locker a couple of dynamic mics that are commonly associated with dialogue recording and podcasting — the Electro‑Voice RE-20 and Shure SM7 — and it worked well with both. Though the latter is a great mic, many users have discovered that the SM7 has as a particularly low output, and I’ve used a CL-2 Cloudlifter with it for a few years; as well as solving the level issue, it seems to make a positive difference to how this mic sounds. The Mini CL-25 did exactly the same.
But the most impressive thing about the Mini CL-25 is just how tiny it is: allowing for the XLR plug aspects of the design, Cloud really have fitted everything you need into the very smallest space possible, and that makes it their most convenient option yet. I’ve now used these handy tools with a variety of dynamic and ribbon mics over a number of sessions, and I often leave them plugged into my stagebox, or keep them handy in my pocket for when I’m ‘in the trenches’ setting up for a busy session. Whether you need a Cloudlifter-style device depends very much on your own mics, preamps and the sources you’re recording. But for regular users of SM7s or passive ribbon mics, they’re definitely a worthwhile investment. For studio owners like me who have a wide variety of time-sensitive recording jobs to tackle, this would be a great addition to your box of problem-solving tools.
summary The CL-25 packs Neutrik connectors and Cloud’s well-regarded ‘mic activator’ circuitry into an impressively small package.
£ £139 including VAT. T Cloud Microphones +1 520 829 4164 E support@cloudmicrophones.com W www.cloudmicrophones.com
ON TE ST
M AT T H O U G H TO N
A
con have long been pioneers in the field of machine-learning-based audio processing, and I’ve been a user of various of their plug-ins for almost as long. They might not always be the first tools I reach for, but sometimes they are, and they’ve often dug me out of a hole when nothing else seemed able to. One tool that I use frequently, and which has rescued more than one podcast project for me, is their Extract:Dialogue plug-in. So, on discovering that this had been treated to a significant update, I was particularly keen to check it out.
New Features Even a cursory look at the drag-to-resize GUI tells you that lots has chanced since v1. Not only does it look much more slick and modern generally, but there are also many more controls. Notably, the left of the GUI now hosts controls for three separate ‘channels’, where there were previously just a couple of global controls. Each channel has a +10 to -40 dB gain fader and numeric readout/direct-entry box, along with solo and mute buttons, and each is dedicated to a different signal type: Voice, Reverb or Noise. (No prizes for guessing
24
June 2026 / www.soundonsound.com
Acon Digital Extract:Dialogue 2 Audio Restoration Plug-in
Need to clean up a dialogue recording without too much hassle? Then Acon’s latest tool might be worth checking out... that their content is identified behind the scenes using neural networks!) This sort of three-fader interface seems to be becoming ubiquitous for such tools: it’s similar to the arrangement used in iZotope RX’s Dialogue Isolate plug-in and Accentize’s recently launched dxSplit, for example. That’s hardly surprising, since it’s super-intuitive: essentially, you just drag the faders up/down for more or less voice, reverb (room tone) or noise (non-voice sounds) in the recombined signal that comes out of the plug-in. To the right of all this, that same ‘cursory look’ suggests a similar three-band frequency-sensitivity display as in version 1, but actually it offers significantly enhanced functionality and options. Each of the
three ‘channels’ is given its own tabbed window on the main sensitivity display, selectable either by clicking on the logo above that channel’s fader, or a button below the display. The plot defaults to showing sensitivity for the currently selected ‘channel’, and you can enable low shelf, mid bell or high shelf bands that can be adjusted by dragging the node to make the algorithm more or less sensitive on that channel in that part of the spectrum. This is similar to how the voice was separated in v1, then, but there are significant differences. First, you can also click and drag the curve to adjust the overall sensitivity. Before you’ve added any nodes, this acts in similar fashion to v1’s
global sensitivity slider, then, but once your nodes are present, they remain anchored in position as you drag the line — an action that therefore affects the overall curve. Of course, in v2, you get to apply the same principles to reverb and noise too, not just the dialogue extraction. Second, there’s an unassuming ‘EQ’ button: hit this, and the display changes to reveal a three-band equaliser (high and low shelves, and a parametric mid) that allows you to shape the selected channel. You can, for example, decide to tailor the frequency of the reverb sound, rather than simply to turn it up or down. With only three nodes to work with, you can’t do radical things here, but with independent control of the gain, frequency and bandwidth, it’s more than enough to massage the tone of the separated signals, for example to nix harsh consonants and esses, or broadly match mic or room tones on different recordings. You also have the ability, at the cost of more CPU cycles, of having all the processing performed separately for the Mid and Sides components of a stereo signal, though at the time of writing you can’t adjust the EQ or sensitivity independently for those two channels. Finally, as on v1, there’s a handy headphones button to preview the delta signal — hit this and you’ll hear in solo everything the plug-in is removing from the original audio.
In Use I used Extract:Dialogue 2 on several commercial dialogue post-production projects, as well as on some material I’ve
used to evaluate similar tools in the past. But before I dive into that experience, I should start with a couple of caveats. First, as with all such machine-learning‑based tools, this one is designed specifically to identify and separate specific sounds: its utility is confined to separating dialogue, reverb (‘room tone’) and noise (the rest), so if you were to expect it to reduce the reverb on, say, a piano or an acoustic guitar, you’d be disappointed! That said, I had some success using it on sung parts, even if there are better tools out there for processing vocals. Second, the latency in Reaper measured 6408, which is a shade over 66 milliseconds when working at 96kHz (more for lower sample rates). Naturally, this is automatically compensated for by your DAW, but there will be other delays in the signal chain too, so this isn’t a tool I’d look to for live-sound applications or for monitoring while recording. Download and installation on my M1 MacBook Pro was quick, as was authorisation, which is via the simple copy-and-paste of a licence code (a very long code, though — you really don’t want to be typing it out manually!). AAX, AU and VST2 versions are available, but I did the majority of my testing in Reaper v6 with the VST3 version, where I used it both as a regular channel insert effect, and occasionally to treat short clips, allowing me to render that section. For my tests, I used it on a range of voices, including on three different podcast projects. These included male and female voices, English and American speakers
with different accents, as well as a Chinese gentleman speaking English with a strong accent. I also made some recordings of my own voice where there was significant ambient noise and reverberation. Generally, Extract:Dialogue 2 worked very well indeed, and I was able to find a use for it on all parts I tried it on. With suitably well‑recorded material, it was effective at drying the dialogue. Like all tools I’ve used to date, it struggles a little to treat strong first reflections, but that’s best tackled when recording anyway. I used it to reduce the traffic noise on some outdoor recordings captured to a camera (outright removal would have sounded odd alongside the visuals), and to remove sounds like the dehumidifier and air-con units that I used to contrive some noisy indoor recordings for my tests. The EQ was useful in taming the high end of the reverb, to enhance intelligibility without erasing the sense of space. With more problematic material (online podcasts, where the guest was in an office and clearly didn’t have a handle on their audio setup or acoustics), I first used a number of my usual tools to improve the intelligibility, but Acon’s latest release still came in handy. For more radical processing, I often use different tools to work in multiple passes, and after doing some offline work in iZotope RX 11 I first used Extract:Dialogue 2 to tighten things up before setting up Accentize’s dxRevive to do the heavy lifting. This worked really well: Acon’s plug-in enabled dxRevive to deliver a better result. In summary, then, Acon Digital’s Extract:Dialogue 2 is a significant improvement on the previous version, and it does a good job of taming room sound and everyday noise from dialogue recordings. It’s not the only such tool out there, but it’s one of the better ones, and used alongside other restoration tools as part of a processing chain, it can make it possible to rescue sub-par recordings that you’d normally have to bin. It’s also really intuitive to use. If you work with dialogue recordings often, I’d say it’s certainly worth auditioning using the free demo.
summary
A significant update to Acon’s dialogue extraction tool, this plug-in now offers separate control over the voice and its reverb, and other noises in a recording, and they’ve done well to pack in so much without crowding the GUI.
Acon managed to pack a lot into a simple interface: note the pink button at the bottom of this screen, which tells you the Reverb channel is in view, and the orange EQ button that tells you the display is for the EQ, rather than the sensitivity.
£ £79 (discounted to £59 when going to press). Prices include VAT.
W https://acondigital.com
www.soundonsound.com / June 2026
25
ON TE ST
USB Audio Interface
Focusrite ISA C8X SAM INGLIS
R
upert Neve’s Input Signal Amplifier circuit has been a constant throughout Focusrite’s 41-year history. Developed to meet the exacting requirements of Sir George Martin, it formed the front end of the Forté and Studio consoles, and the heart of numerous standalone preamps and channel strips. During the same period, the company have become a household name for their computer audio interfaces, thanks to ranges like the Saffires, Claretts and Scarletts. Until now, though, the two strands of Focusrite’s business have never crossed. Most current ISA products have digital connectivity, but it’s a secondary feature, and in some cases a cost option. The fourth-generation Scarletts have some features derived from the ISA line. However, there has never previously been an audio interface with Focusrite’s premium preamp circuit built in. The new ISA C8X is thus a significant product for the British manufacturer, and one into which they’ve poured a huge amount of development resources.
True Blue Like the ISA 828 and 428 rackmounting preamps, the C8X is a 2U box, providing double the front-panel space of the Scarlett or Clarett interfaces. The ISA range’s royal
30
June 2026 / www.soundonsound.com
For the first time, Focusrite have married their analogue heritage and their digital audio expertise in a single product. blue colour scheme is enhanced here with a subtle fine-grained sparkle and chunky contoured face plate. The other dominant colour on display is gold, which is used for most of the indicator LEDs, while the meters light up in a paler blue colour. There are lots of further nice visual touches, too, such as the illuminated ff logo that is echoed in the perforated side panels. This really is a very attractive device indeed — and the C8X doesn’t only look good. It also feels good, thanks to the beautifully weighted encoders with LED halos. With six encoders, 10 meters and no fewer than 30 buttons, it’s a busy front panel, but not crowded or confusing. The bulk of this panel space is taken up by controls relating to the inputs, which are divided into two groups. The ISA C8X has eight analogue inputs, all of which have mic preamps. But whereas the preamps for inputs 3-8 are similar to those in the Scarletts, the first pair implement Focusrite’s ISA design in its full glory. Its fullest glory yet, in fact, since the complement of features on offer here is greater than on any other ISA preamp to date. Compared with previous ISA units, there are two really big developments: complete digital control, with an auto gain-setting function, and an entirely new feature called Console
Mode. These complement numerous existing sound-shaping features, including variable input impedance, high-pass filters, an ‘Air’ option, and switchable, balanced insert points. The left-hand side of the front panel presents meters for both ISA channels, plus a complete set of controls for one, with buttons that let you select which you’re adjusting. Pressing both together links the channels. Like many of Rupert Neve’s preamp designs, the analogue ISA units have a main gain knob that is stepped, augmented by a continuous trim control. That paradigm is carried over to the C8X, but instead of rotary switches, the coarse and fine gain controls are now stepped encoders. This delivers a clear ergonomic improvement over the analogue versions: there’s no need for an additional button to switch between high and low gain ranges, and because the encoders are endless, you can set gain using only the fine control if you want. A similar control paradigm is employed for the other six input channels, whereby you choose which preamp(s) you want to adjust and then use a single set of controls to make changes. The options here include switchable Air mode and variable Harmonic
encoders for the main volume and both headphone outputs. There are dim, mute and mono buttons, plus a talkback toggle that works like that of the Scarlett 18i20. Unlike those of the Scarlett, the headphone outputs have individual mute buttons as well as dedicated volume controls. It’s also possible to assign up to two pairs of alternate main monitors, with buttons available for switching.
Round The Back
Drive. To adjust the amount of drive, you hold the button until its LED turns blue, then turn the gain encoder. Again, each of the six ‘standard’ preamp channels has its own input level meter. The rightmost third of the front panel is given over to monitor control, with endless
The ISA C8X’s digital backbone is similar to that of the Scarlett 18i20. It connects to the host computer over USB, and in addition to its eight analogue inputs it sports 12 analogue outputs, stereo S/PDIF I/O and two pairs of ADAT optical sockets. The second pair of ADAT sockets can’t be used at the same time as the S/PDIF I/O, so the total I/O count is 26 on the input side and 28 on the output side at base sample rates. What is rather different from the Scarlett 18i20 is the way in which all this I/O is arranged. The only front-panel sockets are two pairs of quarter-inch jacks. Those at the left offer high-impedance inputs for direct injection of electric guitars, and the pair to the right are headphone sockets. All the other sockets are on the rear panel, and the C8X’s more professional orientation is apparent from the complete absence of combi sockets. The eight analogue inputs all have separate XLRs and balanced jacks,
Focusrite ISA C8X £1900 pros • Focusrite’s ISA preamp gets full digital control for the first time. • Console Mode and the 430 circuit provide a broad palette of great-sounding tone-shaping options. • I/O configuration designed for permanent installation and use with a patchbay. • Slick and easy-to-use software front end with remote control. • Built-in talkback, speaker switching and monitor control.
cons • The choice of USB for connection and ADAT for expansion helps keep the C8X affordable, but limits I/O count.
summary It’s taken a long time for Focusrite to bring to market an audio interface with their ISA preamps built in, but the wait was very much worth it.
as does the first output pair, the remaining outputs forming another bank of 10 jacks. The point of having dual sockets for all the inputs is to allow the ISA C8X to live in a rack and meet the outside world through a patchbay. For obvious reasons, you don’t want to be plugging and unplugging cables around the back of the interface every time you switch between mic and line sources, and the separate XLR and jack
The C8X is the first Focusrite product to feature digitally controlled ISA preamps.
www.soundonsound.com / June 2026
31
ON TE ST
FOCUSRITE ISA C8X
All eight of the C8X’s analogue inputs feature separate XLR and jack inputs, equipping it for easy use with a patchbay.
sockets allow both types to be permanently connected. The C8X design also routes the line inputs direct to the A-D converters without passing through the mic preamps, so the gain setting does not affect them. Compared with the largest Scarlett interface, the C8X has an extra pair of analogue outputs, and it also has additional options as to what to do with them. You can specify two pairs of alternate speakers rather than just one, and multiple outputs can be ganged under the control of the main volume encoder for basic surround monitoring. However, there’s no provision for speaker calibration, so the delays and EQ necessary for immersive audio will need to be handled elsewhere in the chain. The complement of rear-panel I/O is completed by BNC word clock in and out, MIDI in and out on five-pin DIN, a single USB Type‑C socket, and an IEC mains inlet. The ISA C8X’s comprehensive digital control means that almost every parameter is both editable and recallable from software, as well as from the front panel. Software editing is done from the same Focusrite Control 2 app that partners the Scarletts, and which supports remote editing from a tablet on the same WiFi network as the host computer. This is also where up to six low-latency monitoring mixes can be set up, and where features such as alternate speaker switching and loopback routing are configured. Focusrite Control 2 is by now a very slick and mature piece of software, and if it’s less powerful than something like RME’s TotalMix FX, it is also much less intimidating.
Air Conditioning When the ISA circuit was introduced in the mid-’80s, it marked a step forward compared with previous console preamp designs. It was cleaner, lower in noise, and less prone to distortion. At the time, that seemed like progress! Today, we have easy access to transformerless preamps that offer an even closer approximation
32
June 2026 / www.soundonsound.com
to ‘straight wire with gain’, and perversely, much of the appeal of the ISA design now stems from the ways in which it doesn’t quite achieve this ideal. In the C8X, Focusrite have added some creative new ways to extend and exploit that character. The principal source of distortion in the ISA circuit is the Lundahl LL1538 input transformer. Originally chosen by Rupert Neve as being the most sonically transparent option, it nevertheless exhibits some non-linearity, especially at low
subjective signal level constant. Console Mode is available for all three input types, not only microphones. It should also be noted that instrument signals also pass through the input transformer in this implementation of the ISA circuit, which is not the case on the ISA 828 for example. The ISA C8X input path offers the same choice of four impedance settings found on the 828. Recent Scarlett models, and the ‘clean’ preamp channels on the ISA C8X, additionally feature an option
“The C8X can lay good claim to featuring the most comprehensive implementation of the ISA preamp design yet.” frequencies. Since the transformer is the first thing that your mic ‘sees’, its contribution is independent of the gain setting. Turning up the gain doesn’t give you more transformer saturation: it just makes the output hotter, and eventually drives the op-amps into clipping, which probably isn’t the kind of coloration you want. So, although existing ISA products offer a form of tone‑shaping courtesy of their variable input impedance, they don’t allow the amount of saturation to be varied. Whatever reaction your signal provokes from the input transformer is pretty much what you get; and in my experience as a long-term owner of an ISA 828, that tends to be very subtle. With the C8X, Focusrite have introduced a new way of exploiting the character of the ISA circuit. Console Mode, as the name suggests, is intended to mimic the cumulative saturation effects that stack up as a signal passes through multiple transformers and amplification stages in a large-format mixer. That coloration is emulated here using an additional circuit that adds harmonic distortion, with a drive setting that varies gain on the way in and attenuation on the way out to keep the
labelled Air, intended to recreate the ‘mic air’ option from Focusrite’s classic ISA 430 MkII channel strip. The C8X’s two ISA channels have a button labelled 430, which introduces a similar 10kHz boost — but here it’s achieved in the same (expensive!) way as on the original 430 MkII, using an inductor.
Weights & Measures The extent to which the ISA design pushes the limits of what’s possible in a transformer-based circuit is apparent from the C8X’s specifications. The two ISA channels even marginally outperform the other six in terms of dynamic range (117dB and 116dB respectively, A-weighted) and equivalent input noise (-128dBu and -127dBu respectively, again A-weighted). THD is significantly greater on the ISA channels, even with Console Mode switched off, but then THD is part of the reason you’re buying an ISA device anyway. The ISA channels offer a 79dB gain range, while the others span 69dB, in both cases configurable in 1dB steps. In terms of conversion and line-level circuitry, the C8X offers exemplary measurements. The line outs deliver
“ They’re trustworthy. They’re accurate. When I turn them on, they’re there every time. Greg Penny knows what sounds good. He should do: he’s been producing, mixing and mastering award-winning albums for decades. That’s why he trusts Dynaudio speakers to help him do his job. He might be mixing in stereo, or he might be creating an immersive world with 18 speakers pointing at his head... if he’s sitting in front of a Core set-up, he knows it’ll sound great wherever it’s played back. And so will you.
Core series Discover the full range at www.dynaudio.com/core
ON TE ST
FOCUSRITE ISA C8X
The Focusrite Control 2 software is very slick and mature, and boasts the useful capability of being remotely controlled from a tablet on the same Wi‑Fi network as the host computer.
a whopping 125dB dynamic range, with THD+Noise barely measurable at -113dB or 0.00023%, and the line inputs are no slouches, measuring 120dB and -105dB respectively. If, like me, you think that A-D and D-A conversion is basically a solved problem and has been for a while now, the ISA C8X certainly won’t change your mind! Unlike the Scarletts, the C8X operates at a professional +24dBu line-up level, with the exception of the insert points on the two ISA channels, which are aligned such that 0dBFS=16dBu. This is the same as the maximum input level on the mic inputs, but may mean you need to dial in lower threshold values than you’d expect when patching in a compressor. One possible issue that might arise in a unit featuring two different input types is unwanted variation between them. You wouldn’t want or expect the ISA channels to sound exactly the same as the other six — otherwise what would be the point? — but equally, you wouldn’t want other discrepancies creeping in. My tests revealed no timing or phase offsets between the two different input types, and Oblique Audio’s RTL Utility reported identical round-trip latency figures through both. On recent Apple Silicon machines, it should be practical to achieve round-trip latency of around 4ms; on my older Intel Mac, I got 6ms at 44.1kHz with a 32-sample buffer size. Typically, when identical gain settings are used, a mic signal captured through the
34
June 2026 / www.soundonsound.com
ISA input is 3 or 4 dB hotter than the same signal captured through the other inputs, but this is consistent throughout the gain range and depends on the impedance setting for the ISA channel. Focusrite’s Auto Gain algorithm also works flawlessly on both input types, regardless of Console Mode settings (although they haven’t implemented the Clip Safe element on the C8X). You wouldn’t want to mix and match the two input types across a stereo pair, but otherwise, it’s all good. And, most importantly, it sounds good. I have other preamps with variable saturation built in, but in practice, I rarely use it. Turning it up to the point where it makes an audible difference usually leaves me worrying that I might have pushed it too far and broken my recordings in a way that I’ll later regret. And whilst the Air option on Scarletts is undeniably appealing, it often strikes me as just a little too much. By contrast, Console Mode and the 430 option on the C8X’s ISA channels are spot on. It’s not that you can’t push them too far, although they rightly tend to the subtle. I just somehow felt confident about dialling in the right settings, and knew instantly whether they were working for a given source. At one end of the scale, Console Mode is practically imperceptible. At the other, it adds a welcome thickness and forward quality to miked signals, and begins to get a little bit hairy on sources with lots of low-frequency content, but you never
run into that situation where the setting that sounds right on quiet bits starts to clip audibly on loud transients. And 430 mode has a glorious sweetness that I don’t think the Air option quite captures. It’s not appropriate for everything, but on the right vocal, it’s magical. All in all, thanks to the development of digital control and Console Mode, plus the inclusion of the 430 option, insert points and variable input impedance, the C8X can lay good claim to featuring the most comprehensive implementation of the ISA preamp design yet. The only obvious omission is the polarity button found on the 828 and other all-analogue designs.
The Great Divide When I reviewed SSL’s 18 last year, I noted that there’s a fault line in the market for audio interfaces. On one side, we have the ‘prosumer’ or serious home studio market, which is dominated by USB interfaces. These are typically expandable using ADAT, but only up to a point, and can’t usually be cascaded. On the other side, Thunderbolt and Ethernet interfaces such as Focusrite’s own RedNet range cater for huge channel counts, and to users who are serious about immersive monitoring. Given the pro heritage of the ISA preamp design, some might be surprised that Focusrite have positioned the C8X on the former side of the divide. It has the usual upper limits on I/O count common to
interfaces using the XMOS platform, which are no problem in most home and project studio scenarios, but which mean it won’t be a suitable choice for a pro studio running a large console. But in practice I think this makes sense. Pro studios typically don’t want their mic preamps built into their interfaces, and if you’re working in one, you’ll have no trouble integrating an ISA 828 or similar. The serious home studio market is much bigger, and the C8X ticks pretty much all the boxes. The two ISA channels rival any ‘boutique’ mic preamp on the market, the other inputs are superbly specified too, and unless you’re working in Atmos, it has all the monitor control and cue mixing functionality you’re likely to need in such an environment. It also supports standalone operation, so you can use it as an ADAT expander too; and on macOS, multiple Focusrite USB interfaces can be aggregated using Core Audio. The only criticisms I can muster are very minor. Some would prefer the insert points to operate at the same +24dBu line-up level as the rest of the I/O, and the meters and halos on the encoders
ALTERNATIVES Audio interfaces with ‘boutique’ mic preamps built in include Heritage Audio’s i73 Pro Edge, Neve’s 88M and 1073 SPX-D, and the Icon/ Harrison 32Ci, but all are very different from the C8X. Perhaps the most obvious rival is Universal Audio’s Apollo x6, which features two of UA’s Unison modelling preamps in a 1U multi-channel interface, albeit connecting via Thunderbolt rather than USB.
pursue a stylish ‘looking a bit like plasma meters’ aesthetic at the expense of being rather vague. Personally I’d rather have plain multi-segment LEDs, but this is hardly a deal-breaker. And considering what’s on offer, I think the C8X represents very fair value for money. You could assemble a cheaper rig with similar channel count and two ISA inputs by pairing the Scarlett 18i20 with Focusrite’s ISA Two preamp, but in practice, it really wouldn’t be the same. On the preamp side, you’d miss out on Console Mode, digital preamp control and the 430 option, and as an
interface, the C8X betters the Scarlett in numerous ways. When I first heard about the C8X, I wondered whether it would turn out to be a generic USB interface with a couple of ISA preamps bolted on. It absolutely isn’t. Both from my own testing and from conversations with Focusrite’s engineers, what really stands out is the attention to detail that has gone into its creation. From the weighting of the encoders to the bevelling of the front panel to the implementation of the converters, everything has been thought through with immense care. It’s almost as though the designers have felt a responsibility to go the extra mile on a product that brings together the two strands of Focusrite’s heritage after four decades. The ISA C8X proves that it’s not only small boutique manufacturers that can design hardware with passion, imagination — and love. £ £1899.99 including VAT. T Focusrite +44 (0)1494 462246 E customer.service@focusrite.com W www.focusrite.com
www.soundonsound.com / June 2026
35
ON TE ST
Bitwig Studio 6
Bitwig Studio 6 £339 pros • Visual design refresh which improves clarity when editing data. • Key signature support in editing views and MIDI processing devices. • Clip aliasing to share pattern material between clips. • Much enhanced clip-based automation support.
cons • Some minor restrictions when launching automation clips from MIDI controllers.
summary Bitwig Studio 6 comes with a visual redesign, support for key signatures in editing and MIDI processing, and clip aliasing to share clips across a project. The improvements to automation support and editing turn automation into a feature for creative exploration, making Bitwig Studio even more versatile and expressive.
36
June 2026 / www.soundonsound.com
Music Production Software
Bitwig 6 brings a host of updates, but the big news is how automation has been reconfigured into a creative tool. NICK ROTHWELL
B
itwig Studio has reached another major revision, with a visual redesign and a revamp of some fundamental features, such as how musical information can be shared across a project, and how automation is encapsulated and edited. The changes to the automation system very much bring it to the foreground as a compositional tool, and we’ll spend some time looking at this in detail.
First Impressions Bitwig Studio 6 (Bitwig 6 for short) has had a fairly comprehensive visual update, and definitely looks a bit sharper than version 5. Backgrounds are a darker grey, and a few visual features like clip loops and automation curves have acquired gradient colour fills, adding a touch of depth. In designer parlance, it ‘pops’ a bit
more. Otherwise, everything feels pretty familiar, apart primarily from the controls for accessing automation lanes, which now work differently as we’ll see.
Alias Clips Repetition is not exactly a new concept in music production. We have had loops for as long as we’ve had sequencers (and samplers and delay lines). In Bitwig’s Launcher, a looped clip runs indefinitely until some action causes it to stop. In the Arranger, the loop is unrolled in the time dimension, so a clip loops until its overall duration is up. By default, each clip is unique, even though multiple clips may contain copies of the same musical information. This presents a problem if you want the same clip in several scenes, or to break a loop in the timeline and then come back to it — the clips are distinct, even if they
The Launcher with aliased clips.
actually contain the same material, and edits to one clip won’t take effect in any of the copies, leading to some rather tedious effort if you want to keep the copies in sync. Bitwig 6 introduces a mechanism called clip aliasing. Whenever you’re in a situation where you want to create a break by copying a clip and pasting it somewhere else on the timeline, or into a different scene, you have the option to ‘paste as alias’. The result is the same clip featured in two different places, where any edits made in one occurrence immediately take effect in the other. Well, mostly: some clip properties are individual to the particular instance in the Launcher or Arranger, whilst others are shared between all aliases. Note and audio events are shared (which is the point), as are clip colours and names (so a colour or name change in a clip will affect all aliases). Individual properties include loop position — so each alias can loop in a different way — and playback cue marker (ie. start point). Clips which are aliased are labelled with a tiny paperclip icon. When an aliased clip is selected the paperclip turns white on that instance and on all of its aliases. The paperclip looks awfully small, and could be made a bit more noticeable. The concept of aliasing content between sections of music is not unknown in DAWs — I seem to recall a similar feature when I was using a precursor to FL Studio more than 20 years ago. A distinguishing feature of Bitwig’s aliases is that they are all equal citizens: there is no master clip of which all the others are read-only references. Instead, there is a single piece of shared content (which Bitwig refers to as the ‘event pattern’) and any number of aliased clips which refer to this, as well as carrying their own settings for name, colour, looping and so on. The Clip Inspector Panel has a drop-down menu which lets you select which pattern you want the clip to refer to — this would give you an easy way to switch between versions or takes for MIDI clips (or audio clips, although they already have their own dedicated comping features). If no clip
refers to a pattern, though, the pattern becomes inaccessible. You can make an aliased clip unique, which copies its pattern content and ‘de-aliases’ it. There’s also a feature for going in the other direction: turning identical clips into a set of aliases, useful to add pattern sharing in material from older projects. To help keep track, newly created clip patterns are now initially named according to the Launcher scene they are created in, or the timeline bar in the Arranger. Clips can be aliased between Launcher and Arranger, which makes perfect sense and certainly makes it easier to develop ideas for live performance and for linear recording with the option to share material between the two workflows. I did attempt to create aliased clips across multiple tracks but this isn’t supported — it’s single track only.
Automation Clips Automation has had an overhaul in Bitwig 6, primarily in the way it is accessed in the Clip Launcher. Unlike the Arranger, where a linear timeline incorporating automation is a container for multiple clips, everything in the Launcher resides inside the clips themselves, and there is no overall automation over time. This clip-based
Selecting alternate patterns for clips.
automation can be regarded as a kind of internal modulation, possibly looping in sync with the clip, possibly with its own loop settings. In Bitwig 5, each available device or mixer parameter could be clip-automated in three distinct ways, potentially at the same time: a traditional ‘absolute’ setting, an ‘additive’ (offset) control, and a ‘multiplicative’ scaled attenuation. This could lead to potentially complicated behaviour, especially since the different automation types could be looped at different rates. I don’t know how popular this three-way automation system was — I may have used it once or twice in the last decade — but the additive and multiplicative automation machinery has been deprecated. (It is still active and can be edited for existing clips, but cannot be accessed for new content.) I don’t see it as a great loss, since Bitwig’s modulation features can be pressed into service to achieve many of the same aims. This simplification clears the decks for a complete overhaul of clip automation handling. Automation data that used to live inside note and audio clips now resides in its own clips, one per automation type. In the Launcher Panel (if displayed in the Arrange View where scenes are represented in columns), these automation clips are now shown stacked underneath the parent note or audio clip. Layout-wise this is not so different to Bitwig 5, but now the automation is a first-class citizen, and the Launcher can be regarded as having proper automation lanes, similarly to the Arranger. These automation clips are linked to the main ‘parent’ clip: cut, copy or paste the parent and the automation clips follow. But they also have a partial life of their own: automation clips can be copied and pasted between Launcher scenes, or between different automation lanes — the success of that depends on the types and resolutions of the parameters concerned — or between Launcher and Arranger. Pasting aliases for automation clips is a feature that is broken in the release I’m testing, but Bitwig are aware and have promised a fix soon, most likely by the time you read this. Automation clips can have their own cue (start) points and loops, unrelated to the parent. They can also be launched independently of their parent clips, so a track might end up playing content from one scene alongside clip automation from another, or it might mix automation from the Launcher and the Arranger. Automation clips also have their own follow actions,
www.soundonsound.com / June 2026
37
ON TE ST
Brain meets brawn in Neumann’s powerful new smart subwoofer. PHIL WARD
I
’ve always been a subwoofer sceptic. The purist in me bridles a little at the bass‑managed 2.1 concept, and I’ve rarely heard a 2.1 system that I am entirely comfortable with. However, the contemporary audio environment is not the same as it was. Back when subwoofers were first imagined, their role was to enable ‘satellite’ speakers to be made more compact and lounge‑friendly by taking over the responsibility for playing anything below, say 80Hz. And if the satellite speakers were really small, the subwoofer might actually be asked to reach perhaps another octave higher, which for me was a recipe for a decidedly unsatisfactory listening experience. Beginning with the arrival in the early 1990s of 5.1 ‘home cinema’ (and now gaining new momentum with Dolby Atmos and other immersive formats), the subwoofer found a new role: low‑frequency effects (or LFE for short). No longer was the subwoofer simply a crutch for bandwidth‑limited satellites: it was a standalone channel of its own, fed by a discrete signal. Subwoofers have become an inherently important element of the music production landscape. It’s also a matter of SOS record that my recent experience of Neumann monitors has been very positive. So, when offered the chance to hear how my Neumann KH 150s would perform when combined with one of Neumann’s new subwoofers, it seemed too good an opportunity to miss.
Specs Appeal The KH 810 II sits in the middle of Neumann’s new subwoofer range. This model comprises a nominally 10‑inch (250mm) driver mounted in an approximately 55L reflex‑loaded enclosure and driven by an amplifier rated at 180W. The enclosure is wood and finished in Neumann’s usual anthracite grey textured paint. The driver is located in one end of the enclosure, protected by a sturdy perforated metal grille, and the connection panel is located in the opposite end. Twin triangular and generously flared reflex ports exit alongside the driver. Being almost twice as deep as it is high and wide (64.5 x
40
June 2026 / www.soundonsound.com
Neumann KH 810 II Active Subwoofer
33 x 36.8cm), the enclosure is of somewhat idiosyncratic and slightly awkward dimensions. I’ll explain why a little later. Neumann’s bandwidth and maximum level specifications for the KH 810 II are respectively 18Hz at -3dB and 112dB at 1m (subwoofer located on the floor adjacent to a wall). These are impressive specifications and, in contrast to the majority of monitor and subwoofer specifications I read, are believable. Neumann are very unusual in doing the published monitor specification job extremely well. Only Genelec, to my mind, do this equally well. The KH 810 II is not short of interesting electro-acoustic technicalities. Starting with the driver, while its paper diaphragm is conventional, Neumann say its motor system is particularly engineered for linearity, generous diaphragm excursion and, consequently, low distortion. It incorporates Neumann’s “Extremely Linear Force Factor (ELFF) technology and intelligent protection limiters”. Driver‑borne distortion is a significant parameter in subwoofers because the low‑pass
filtering necessary for integration with the monitors occurs before the driver in the signal chain, so any driver distortion products appearing at higher frequencies are radiated without attenuation and can begin to become apparent in the upper bass and even low midrange. Subwoofer distortion really needs to be minimised at source. “Intelligent protection limiters”
Neumann KH 810 II £3600 pros • Fabulous bass. • Brings enhanced performance above the subwoofer band. • Versatile connectivity. • Integration with MA 1 monitor alignment.
cons • Slightly awkward dimensions.
summary The KH 810 II brings subwoofer tech into the modern age with notably high‑performance electro-acoustics and versatile Atmos-compatible connectivity. A seriously impressive example of low‑frequency engineering.
refers to a technique that employs driver excursion control within the subwoofer DSP. This means that the traditional driver engineering technique of building conservative mechanical excursion limiting into the suspension (the surround and/or suspension are engineered to ‘tighten’ before the driver can damage itself by moving too far) is less necessary. That again results in better linearity and lower distortion over the normal excursion range.
Loading... In addition to my subwoofer scepticism, I’ve always been doubtful of reflex‑loaded subwoofers. My scepticism is provoked not only by the sub‑optimal time‑domain characteristics inherent to reflex loading, but also by the fact that reflex ports tuned to very low frequencies (which, by the nature of subwoofers, they have to be) are difficult to accommodate in any reasonably sized enclosure if they are to have adequate maximum linear airflow. Reflex ports become non-linear, and often audibly noisy, when the air velocity passing through them reaches a particular level (generally considered to be around 20 metres per second, depending on the specific geometry of the port). You can reduce the airflow velocity by increasing the cross-sectional area of the reflex port, but then you have to make the port tube longer to hit the same tuning frequency. In the case of subwoofers, it can be that the port length and diameter required to achieve both the tuning frequency and airflow capacity is impractical. Perhaps you can now guess why the KH 810 II is 64.5cm deep: it’s because the reflex ports inside are 47cm long. I’ve been involved in the design of countless speakers over the last four decades or so, but few have had a reflex port even half that long. Another concern with reflex‑loaded subwoofers relates to EQ. With a closed-box subwoofer, if adequate amplifier power and driver excursion are available, it’s theoretically possible to extend the subwoofer’s bandwidth almost endlessly downwards simply with EQ boost. There’s even a standard mathematically derived EQ technique for this called a Linkwitz Transform. However, with a reflex‑loaded subwoofer, the effective bandwidth can practically extend no lower than the reflex port frequency, because below that frequency, the driver excursion simply pumps air in and out of the reflex port without generating significant acoustic output (this is because
the driver and the port go acoustically out of phase below port resonance). Between tuning frequency, airflow and port dimensions, you can perhaps see that designing an effective reflex‑loaded subwoofer is tricky.
In Tune So, what have Neumann done to assuage my concerns? I’ve already described how the bass driver was very specifically engineered for linearity (and consequently low distortion) over generous excursion levels, but, of course, one of the great advantages of reflex over closed-box loading is that it significantly reduces driver excursion around the port tuning frequency. The result is, again, reduced distortion. Secondly, as suggested by the unusually long reflex port tubes, the port tuning frequency is very low, at 22Hz. Not only does this help with driver excursion just where it would otherwise be getting out of hand, it means the potential
time‑domain issue of reflex loading (higher group delay) is kept out of the band where it might impact the dynamics and timing of low‑frequency elements such as bass guitars and kick drums. In fact, Neumann claim that the KH 810 II matches the group‑delay characteristics of their previous closed‑box subs. That’s quite an achievement. A further very significant bit of new engineering is the use of DSP to manage the crossover to the monitors, and in its integration with their proprietary MA 1 monitor alignment software. Before I describe all that, a little about the KH 810 II connectivity and system integration.
Digitally Enhanced The KH 810 II is very much a subwoofer for the Atmos age, and that’s emphasised by its comprehensive rear‑panel connection facilities. For conventional 2.1 systems, it offers balanced stereo XLR analogue inputs and outputs.
In addition to the stereo XLR ins and outs, D-Sub connectors allow for integration into Atmos systems up to 7.1.4 speakers, with the KH 810 II handling both low-frequency extension for the 11 connected speakers, as well as the discrete LFE channel.
www.soundonsound.com / June 2026
41
FE ATURE
Alva Noto
ROBIN RIMBAUD
T
he work of the German artist and musician Carsten Nicolai occupies a distinctive position at the intersection of sound art, experimental electronic music, natural sciences and visual culture. He emerged in the 1990s as part of a new wave of experimental electronic musicians investigating the sonic residue of digital technology and software, and has been working under the musical alias of Alva Noto since 2000. Ranging from austere electronic compositions to large-scale audiovisual installations, he has developed an artistic language that is rooted in sonic and visual minimalism, scientific curiosity, and the exploration of perception itself.
Minimal In an era where studios can resemble aircraft cockpits, bristling with plug-ins, multiple screens, a modular synth setup and endless options (guilty as charged), Nicolai’s studio it built around the premise that less is more. His work is proof that a reduced setup can transform the act of music making into something immediate, intimate and focused. “I think, for me, the biggest and most radical thing was basically the introduction of what you are capable of in the nomadic life as an electronic musician. I was always very interested in technology that allows me to travel and to work in the same time. So, I was very interested to minimise and to maximise at the same time. When I started, I had two
44
June 2026 / www.soundonsound.com
Carsten Nicolai — A Minimal Approach At the forefront of electronic music for more than three decades, Carsten Nicolai has proved that less can indeed be more — and that also extends to the tools he uses. laptops all the time, because I needed two laptops, because they were not capable of doing everything at the same time. “This was for me, and still is, where I kept that goal, that I tried to keep everything super light. When you look into my studio, you see basically four speakers, a table. There’s a little device, a soundcard, and that’s it. So, boom!” Minimal setups also dissolve the boundary between studio and world. Music can be composed on a train, in a hotel room, or while walking through a city with a portable recorder, and for many electronic musicians even the environment becomes part of the instrument. Hardware and software continue to fascinate him with equal interest, but recent developments in software have made him pause for thought. “I was always very interested in these tools, in experimental tools, and in the period when I started, with both weird hardware stuff and weird software stuff, but now what I see in the moment is a little bit that everything became more and more ‘conditioned,’ if this is the right word. “So‚ I’m missing really little experimental tools, because now everything seems to be so prepared. It offers you this ‘instant
success’ feeling. When you have so many presets it can be so overwhelming, but also very tempting, of course. I think in the time when I started producing music, there’d been some big software, DAWs, digital workstations around like Logic and Cubase. And in this time, other software appeared like Fruity Loops, Native Instruments and Ableton — super tiny little companies. But I found that when I look into updates in Logic and Ableton now that I couldn’t find the menus anymore. I am concerned that the software would fail for me because the young, fresh, new design will take over. If you look into Ableton and Logic today there feels like thousands of menus, under menus, and so on. “I also noticed how incredibly unified people produce music in these days, leading to a kind of monoculture where we’re all using the same tools and so produce, of course, something where the music sounds more and more similar. It’s really difficult to have a very radical approach of having completely different sound aesthetics. “When Ableton came out the biggest appeal was that you could throw a loop inside, and it perfectly synchronised.
Mutek Japan 2025/photo by Shigeo Gomi
something, but how can we achieve this? So, mostly the software I develop can only do one thing. Reaktor can use just one module and it’s fantastic. It’s relatively cheap compared to when you buy analogue gear too. Of course, it’s still very easy to get lost, as usual, but ultimately, it’s great.”
Xerrox The five-volume Alva Noto Xerrox series (2007-2025) introduced a more cinematic widescreen aesthetic, taking his music into more vaporous and spacious territory, with an emphasis on emotion. “I mean, Xerrox was, in the beginning, a completely different aesthetic. I remember when, I think, the first album came out and I played in London at Tate Modern, with Ryoji Ikeda and Monolake as part of a triple bill. And I played Xerrox for the first time there, out of the blue. Nobody knew the work, especially since people expected more of this transformative minimal material with sine waves and very clean sound, and then I suddenly played all this very grainy, noisy more cinematic sound. I was thinking it was important for me to not fall into a certain kind of pattern. “It really, really went from maybe something where I was really simply interested in transforming existing melodic stuff into actually writing melodic stuff. And the shift took place with Xerrox 3 [2015], when I really basically composed the
things before I started to erode them or to manipulate them. That’s the reason why the album took much, much longer, most of the time, because I needed more time to write this kind of stuff. “They all have a very, very emotional backbone, and I could not always work on that. There’s a lot of memories, a lot of, very... I mean, they’re all very... let’s say... incredibly personal... and I gave up on performing this actually because it always took me emotionally to a state where I didn’t want to be when I played live. “At first, I built all these tools, where I basically manipulated sounds, working a lot with the same principle, that we used in Cyclo [2001] with Japanese digital artist Ryoji Ikeda, the collaboration where we basically transformed existing material into different resolutions. “And every software we developed added different kinds of interpolations, adding noise or whatever, and I used these kinds of very grainy, noisy interpolations as a creative tool. Basically, it’s a kind of bit-crusher. I reduced a little bit of the graininess and incorporated singular sounds of this kind of grainy stuff, rather than manipulating the whole thing, and concentrated more on writing than on the manipulation itself. But it was still software-based. “For live, I transferred this approach into some analogue machines such as the OTO Photo: Uwe Walter
But what it did was, basically, was force everybody to be in the grid. And when I listen back to my recordings, I didn’t have this opportunity to synchronise completely very well, compared to how people shuffled things on top of each other and looped, whatever. But this is such a beauty now, as it’s kind of flipped around for me, so unsynchronised stuff has much more attraction now than synchronised stuff.” However, software rather than hardware continues to offer a sense of freedom and possibilities for Nicolai, where sound can be sculpted, stretched, fragmented and rebuilt in ways that were unimaginable a generation ago. Indeed, the iPad with a suite of software tools is now essential to his sonic palette. “I have this feeling now, for instance when working with the iPad. There’s software which costs really not much money, in a way, when you compare it to hardware. There are such weird, little things that can do only one thing. I don’t use it so much for recording, but more for playing live, or reacting in live performance. “I have this fantastic granular synthesis software called Borderlands which is really amazing. I don’t use it so much for recording, because I’m always thinking it’s not ‘me,’ but maybe sometimes I pull it out and record something. I know when I need this kind of grainy, loopy surface here behind something, but this is beautiful. I don’t know another tool that can do that so easily and so intuitively. And as playful as this one. “There is still a belief that you need just this or that software to make a track. More and more I go back and focus on my strong imagination to create what kind of sound I want to achieve. Then I try to memorise this, so as not to lose completely the point, so once you open the software it’s not so very, very overwhelming. I also sometimes make notes or make little photographs, so it reminds me what I wanted to achieve with this kind of feeling, and not drift away.” Coding software such as Native Instruments’ Reaktor and, to a lesser extent, MaxMSP remain tools that Nicolai uses to create his works, which frequently explore his almost mathematically pure music, focusing on sine waves and sharp rhythmic pulses. “I used Reakor a lot. And I still use it a lot, because I think it’s very capable. Not so much MaxMSP, but sometimes for instruments or live performance I work with my assistant Nibo who is a very skilled MaxMSP programmer. Sometimes I’m designing software where I’ve thought, listen, I would love to have this do
Minimal by nature: Carsten Nicolai’s studio is focused on the computer — ‘focused’ being the operative word.
www.soundonsound.com / June 2026
45
ON TE ST
JOHN WALDEN
T
he concept of an all-in-one virtual instrument bundle from a single manufacturer is a familiar one. And, whether purchased as a perpetual licence or accessed via a subscription model, it’s also one with some obvious attractions to potential end users: you get to cover a huge span of your virtual instrument needs in a single, well-integrated, suite and, quite often, at a considerable discount compared to buying similar items on an individual basis. So, if the idea of potentially filling a whole swathe of your virtual instrument needs with a single purchase is something that might appeal, what does the nearly 200GB of Absolute’s content have to offer and what’s new in version 7?
Steinberg Absolute 7 Virtual Instrument Collection
Updated and improved, Steinberg’s virtual instrument collection offers more of, well, just about everything.
Core Content Absolute 7’s content consists of two main elements. The first element is supplied by a core collection of virtual instruments — HALion, Groove Agent, Retrologue, Padshop, The Grand 3 and Backbone — and each of these is supplied with their own ‘factory’ sound libraries. These instruments are then supplemented by the second element which consists of a broad selection of sound expansions that expand the source sounds and presets available for each of the core instruments. HALion 7 is Steinberg’s flagship sampler instrument and, like NI’s Kontakt or EastWest’s Opus, provides a sophisticated multitimbral sound engine that, with suitable sonic source material, can offer an endless variety of virtual sound options. Both Retrologue 2 and Padshop 2 provide synthesis options, and between them their contrasting synthesis engines span a lot of sonic ground. The Grand 3 provides a deeply sampled suite of piano options but there are, of course, also extensive piano options available via HALion. Groove Agent is Steinberg’s flagship drum and percussion tool, with its multiple ‘agents’ — Acoustic, Beat and Percussion — providing options for all the obvious categories of sounds. As Groove Agent itself has just received a substantial upgrade to v6, this is one of the obvious highlights of the new Absolute release. Backbone is also drum focused but the engine itself — which lets you blend multiple sample layers for DIY sound design — is also cable of generating some melodic instruments including bass sounds.
48
June 2026 / www.soundonsound.com
Groove Agent 6 now offers sample layering options within the Acoustic Agent.
Of course, many of these core instruments have been explored before within the pages of SOS (for example, HALion 7 in the May 2023 issue). I’ll therefore focus here on the highlight new additions and improvements that arrive with Absolute 7.
Six For Seven Groove Agent has always been a powerful virtual drum and percussion instrument and Steinberg have added to those capabilities in this latest release. However, for me at least, just as significant are the improvements made to the instrument’s usability. There are UI improvements all round, the most obvious being that the UI is now both resizable and scalable. There have always been places where GA’s powerful control set can get pretty dense; resizing and rescaling makes interacting with the UI considerably easier. The mixer has also undergone refinements, and for an even easier editing experience, it can now be undocked from the main UI if required for additional flexibility. The ability to see various subsets of your GA mixer channels alongside an effects editor section makes for a much slicker workflow.
GA6 gets new technical capabilities also including improved pre-listening within the browser, allowing you to audition new sounds in situ as your project plays before loading them, improved time and pitch adjustments thanks to a new spectral Warp
Steinberg Absolute 7 £414 pros • Powerful sound creation possibilities throughout. • Groove Agent 6 includes impressive new options. • VST3, AU and AAX support for all mainstream DAWs. • Highlight new expansions including Carrier8 and Axe Machina. • Extensive collection of drum, piano, guitar and synth sounds provided.
cons • Deep sound‑design feature set brings an obvious learning curve. • Perhaps not the most obvious choice for purely orchestral sound sources.
summary With VST3, AU and AAX support, Steinberg’s Absolute 7 is an impressive virtual instrument bundle combining an extensive preset collection and endless possibilities for sound design.
Mode, and a pitch detection option for sample tuning. However, the two standout additions are the new integrated Pattern Editor (based upon that introduced into Cubase 14) and a very slick toolset for layering multiple samples within an Acoustic Agent kit. The former is brilliantly creative in terms of beat/pattern creation, while the latter takes GA’s DIY drum sound design up a significant notch. The ability to, for example, blend multiple kicks or snares (for example, reinforcing an acoustic kick with an electric one) into your own DIY Acoustic Agent kit is very cool. Within Absolute 7, that sound‑design process is further enabled by the new Kit Pieces sound expansion, giving you a collection of additional kicks, snares and toms to explore. You also get the new Punch Kit (great for more aggressive styles) for Acoustic Agent and the Color Punch Kit for Beat Agent. Both of these bring new sounds and performance pattern options but, of course, the underlying sounds can also be accessed for your own sound‑design use. Groove Agent 6 is something of a beast. Whether it’s acoustic drums, electronic
GA6’s Beat Agent now offers a very creative Pattern Editor environment.
drums or percussion sounds, it can get you started with presets and performance patterns to suit almost any musical genre but, equally, lets you customise and control both those sounds and performances in an infinite number of ways should you wish.
Back To The Bone Given elements of GA6’s expanded feature set, it might be easy to overlook Backbone’s role in Absolute’s line-up. It remains a great tool, though, and, for dedicated DIY
designers of drum (and other) sounds, it’s a toolset well worth exploiting. It’s great for general sample-based sound design of drums or percussion and provides powerful way to blend sample layers to create your own sounds. It can do more than just drums, though; it can also provide some interesting options for melodic/harmonic sounds and risers, stings and transitions. In Absolute 7, those more experimental options are supplemented by the new
www.soundonsound.com / June 2026
49
ON TE ST
Solid State Logic Origin Evo M AT T H O U G H TO N
S
SL’s portfolio of products now includes preamps, processors, channel strips, digital control surfaces, audio interfaces and DAW plug-ins. But to me, they’ll always be the company who make massive studio consoles! Their best-known range, historically, is the 4000 series (4k for short) and it featured EQ and VCA dynamics processing on the input channels, as well as the famous ‘glue’ compressor on the stereo bus and a semi-automatic recall system. But the enduring popularity of these in-line consoles probably owes just as much to the workflows they make possible as to their impressive sonic performance. Add a decent reverb or two, and you have pretty much all you need to mix a record, mapped out in front of you, within an arm’s reach, and with knob-per-function immediacy.
Evolution SSL continue to develop mixers, and today offer at least 14 models that can be filed into five broad categories: digital live-sound consoles, such as the SSL Live L650; immersive-audio mixing systems; small project-studio mixers like the BiG SiX; digitally controlled analogue consoles — currently only the Oracle (https://sosm.ag/ ssl-oracle) but I’m sure more will follow; and traditional, analogue, large-format studio consoles. Clearly, the new Origin Evo sits
52
June 2026 / www.soundonsound.com
Analogue Mixing Console The Origin has evolved, with both classic 4000-series features and some new ones being added. in that last category, and some might ask if there’s really a market for such a thing. The success of the original Origin suggests there is, and the fact that vintage 4k and 9k models still command high prices lends further credence to that view. Those vintage consoles hold obvious appeal to many but, since the oldest has reached the ripe old age of 50, they come with service and maintenance challenges that are largely side-stepped when purchasing a new console. That’s precisely where the Origin Evo fits in: it’s about the closest modern equivalent there is to an SSK 4k. With a control layout based on SSL’s Duality, it should feel familiar to anyone who’s used a big SSL before and, with 16- and 32-channel options, it can be small enough to be viable in a modern hybrid studio setup, or big enough to track pretty large sessions. It should also sit neatly alongside furniture built to match older SSLs — something that might increase its appeal to a studio planning to retire a vintage desk. They might also be interested to learn that the Origin Evo consumes less than a third of the power of an equivalent 4k, and an order of magnitude less in its low-power sleep
mode. It can also be powered on/off without issue (no need to leave it on all day). All of which adds up to a significant running-cost saving over the lifetime of a console. There’s a lot of electronics packed inside, though, and the top surface gets warm; you’ll still want to factor in the cost of air-con! Finally, this being a modular design, you can keep spare channels to sub in, or swap channel positions on the console, should faults arise. Also, the new channel strips are interchangeable with those of the original Origin, meaning it’s possible to upgrade without having to plumb in a new mixer.
New Features The original Origin has ticked several of those boxes for six years now, but the Evo kicks things up a notch, most notably with a channel dynamics section comprising both compression and gating/expansion. Importantly, there’s one on every channel, so for anyone wanting to replace a 4k, or who likes to compress, not just EQ, while recording and building cue mixes, it should be a far more attractive proposition. It’s based on the 4000E consoles’ channel dynamics, of course — but that
The new channel dynamics section, with both a compressor/limiter and gate/expander.
could mean rather different things to different people! When those consoles first came out, the dynamics processor was designed around Aphex VCAs whose production ceased not long after. SSL initially chose the dbx 2151 VCA as a drop-in replacement, with no circuit adaptations, and this practice continued for a time. But in later E-series mixers there were tweaks to optimise the circuit, changing the sound again. A fair few years later, SSL redesigned it again for their 500-series dynamics modules, this time around a custom discrete VCA based on the specs of the original Aphex VCA. So there’ve been at least four different variants of the 4000E channel dynamics processor! SSL chose to use that last one in the Origin Evo, since the 500-series module version has proved incredibly popular. Another new feature available on the console control surface is a full filter section. As on any analogue console worth its salt, the original Origin channels include a high-pass filter but the Origin Evo adds a low-pass filter. By default, these 18dB/ oct filters are in series with the main EQ section, but not only can they be used in Harrison-esque fashion to bracket-filter a sound or to tame the effect of high and low EQ shelving boosts, they can also be deployed in the side-chain control circuitry of the dynamics processor. I’ll discuss the channel strip in more detail, but first let me draw your attention to the centre section (it’s central in the 32-channel review model but on the right of the 16-channel version), which has been
revised in a no-nonsense way I approve of. SSL Origin Evo Essentially, there are two modules sitting From £38,160 in a 19-inch rack, with space to spare. The main master section and assignable pros bus controls populate one module, and • At heart, the classic SSL sound. the subgroup channel controls sit in • Preamps with >70dB of gain. • ‘Black knob’ 242 EQ with LP/HP filters. another (a system that I’ll cover below). • Space to accommodate SSL’s DAW The remainder remains empty by default, control surfaces. so can be populated with whatever you • Channel strips can be retrofitted to want: 19-inch rackmount gear, a 500-series older Origins. chassis, a flat surface on which to sit cons a laptop, tablet, score or notepad... Or, as on • Stereo channel option might be nice. the review model, SSL’s UF8 control surface, summary to give you hands-on control of your DAW The Origin Evo’s heritage lies in one of session alongside your console controls. the world’s most cherished analogue You can put any of this in any order too. recording consoles, but it adds a host of You might, for instance, have a 500-series features that mean it can remain relevant chassis at the top, and place the console’s in today’s commercial studios. own modules lower down. Or move them higher up, and place a control surface at routing and master section facilities. I’ll then the front. (Being where it is, the front area in conclude with my lasting impression of what particular is inherently a shallow space, so this console is like to use in practice. not all 19-inch hardware will fit there.) Channel Strip Some changes are a little less immediately obvious to the end user, Each channel has three inputs: an XLR and most notable of these is the channel mic input, a line input on a DB25, and control layout. The overall dimensions a ‘monitor’ DAW return (also DB25). The of the channel had to be kept the same, PureDrive mic/line preamp is an evolution partly to ensure compatibility with existing SSL’s VHD design and is used in other Origin consoles, and partly because of products. It’s a beautifully clean, low-noise ergonomics: a person can only reach so far design capable of >70dB of gain. A Drive without having to stand. To accommodate switch brings more character into play — it’s the new features I’ve described above, predominantly second‑harmonic distortion without losing any or giving controls dual at first, but with a greater third-harmonic purposes, that means a denser control contribution at higher gains up to the layout or smaller controls. SSL’s designer clipping point (about +27dBu). There’s Niall Feldman opted for the latter, but you switchable 48V phantom power input, of wouldn’t know it: 10mm knobs are used course, as well as a polarity inverter, and instead of the original’s 11mm ones. It’s such this preamp stage can be switched to feed a small difference to the person using the the long- or short-fader path. So too can the mixer, but those many individual millimetres monitor input, whose generous ±20dB trim add up, and I’m told they were absolutely critical in fitting everything in. Fine margins, perfectly judged. Many features remain as on the original Origin, but since not everyone will be familiar with that model and because we didn’t review it, I thought it would be worth quickly running through the main channel-strip features before Also new: a dedicated high- and low-pass filter section that can be placed in discussing the either fader path, or inserted in the dynamics section’s side-chain.
www.soundonsound.com / June 2026
53
TECHNIQUE
Recording A Choir For An Atmos Mix Would your mic techniques change if you knew your location recordings were destined for a Dolby Atmos release? That’s a question our technical editor recently had to ponder...
HUGH ROBJOHNS
B
ack in August last year, the film, TV and games music composer and producer Hilgrove Kenrick — who is a good friend — invited me to record a choir performing a dozen new compositions that he planned to release as four themed EPs in late 2025 and early 2026. Although I’ve written in SOS about choir recording sessions in various locations over the years, this one, which took place in early October 2025, was a little different — I knew in advance that the project would be released in the Dolby Atmos immersive format. That posed some interesting questions, and I thought it would be worth sharing how we went about answering them.
The Project The performances would be by the 12-strong SATB (Soprano, Alto, Tenor and Bass) choir, Ǣfendrēama, which was founded by Hilgrove and his wife Chloe (herself a composer and choral director), with a backbone of choristers from the Three Counties’ Cathedrals (Worcester, Hereford
56
June 2026 / www.soundonsound.com
and Gloucester) augmented by friends and colleagues from the wider choral fraternity. The project was to feature several commissions that had been performed but not yet recorded, along with several brand‑new compositions that were ‘ready to go’, many of which crossed over in the Christian calendar and liturgy, notably Remembrance, Christmas and Easter. It made sense to record all of these pieces in one place on the same day, so as to make the most of our setting up time and facilitate a whole series of future releases. The scores for the day were prepared for the majority to view on iPads, by Andrea Possee — she also produced paper copies for a few Luddites, including me!
Location Hilgrove has worked with various forms of surround sound for film and games over the years, but most commonly in 5.1. In 2024, though, he moved premises and, since the Atmos format is increasingly required on commissions, elected to install a 7.1.4 PMC speaker system in his new studio. Having already worked on several Dolby Atmos
releases since then, it was only natural that he’d want a live location recording such as this to capture the acoustic space in such a way that it would translate into spatial audio for an Atmos mix. One significant benefit of working in Atmos, of course, is the ability to scale to different speaker arrays: mixing in 7.1.4 would allow for playback in bigger 9.1.6 rooms, down to binaural on platforms such as Apple Music, and anywhere in between. After brainstorming some recording ideas over a pub lunch, we visited a few potential venues within a 50‑mile radius, and eventually decided to record in the Leominster Priory Church of St Peter and St Paul. With a vast Norman nave and a history that can be traced back to the seventh century, it’s an impressive building all round. But for us, its key strengths were a lovely acoustic, a location well away from any major roads and other environmental urban noise sources, and the ability to drive right up to the door for loading/ unloading. There was also the fact that the church administrators were very flexible in accommodating the needs of the day —
principally in closing the place to the public for the entire day, apart from an hour at lunchtime! The Priory also had a recently restored Nicholson pipe organ, with the added bonus that the company’s head organ voicer happened to be one of the choir’s tenors. On the day, he arrived for the recording, tool bag in hand, just in case of any last-minute pipe tweaking requirements!
Load‑in & Rigging
Photos: James Greenoff
With a venue and recording date secured, all that remained was to plan the load-in and mic rigging, factoring in enough time for two three-hour recording sessions, with breaks for the performers. We also had to sequence the musical pieces in a way that would give sections or soloists a rest between particularly challenging passages. The entire session would have to be rigged, optimised, recorded and derigged in a single 12‑hour day. Oh, and there’d be a photographer wandering around snapping promotional pics throughout, with the last 90 minutes of the day allocated to shooting videos of several pieces, too! I like recording choirs, and not least because it can usually be done with minimal equipment. An eight-channel recorder, along with a pair of headphones, and a few mics, stands and cables, is usually more than enough — that means only one trip from the car, which is my kind of load-in these days! But of course, Hilgrove’s desire to record for an Atmos mix escalated the requirements considerably. While I’ve made plenty of surround-sound recordings over the years too, using both Ambisonic mics and discrete 5.1 mic arrays, I’ve never recorded anything specifically with Atmos in mind. But how hard could it be? Our outline plan was to arrive and be ready to start the load-in at 08:00, and have the system rigged and ready for fine-tuning by 09:30. The choir was scheduled to record from 10:00 to 13:00 and 14:00 to 17:00. The video shoot at the end wouldn’t need sound from me, so we could derig while that was happening, with the aim of being out of the door by 20:00, at the latest. Inevitably, those timings slipped a little on the day, and we recorded later into the evening than originally planned, but it all worked out well.
of the sound of this recording was the building’s large-scale acoustics, so lots of ambient miking (included dedicated height channels) would be required to create a diffuse and decorrelated ambient soundscape to spread across the multitude of Atmos speakers. It soon became clear that, although I have a lot of recording equipment, I’d be hard-pushed to provide everything we’d need. So I asked another friend, classical recording engineer Steve Swinden, for help, and he lent me several high-end mics, specialist stands, and other equipment, as well as scrounging more mics from a friend. He also volunteered to assist throughout the whole day — which was incredibly helpful! Most of the pieces were to be performed with an organ accompaniment, and the building’s Nicholson organ (NPOR N09762, restored 2016) is located at the East end
of the South aisle, about 25 metres away from where the choir would be on the day, in front of the altar at the East end of the North aisle. Obviously, the organ sound would be picked up on all the mics to some extent, but I decided that close-miking the organ would provide additional options in the mix, affording plenty of detail and focus, with nice stereo spreads of the pipework. The organ includes 32ft pipes in the pedal department, and the casework is open on both the North and West sides so, assuming the two sides of the organ might have noticeably different tonalities (depending on the registrations and departments in use), I decided that the option of spreading these different organ sounds anywhere within the Atmos mix could be useful — for example, as stereo spreads down both sides, or across the front and back, or even overhead!
Mic Selection & Placement As the recording deadline loomed, I worked out a technical plan for the microphone selection and placement and the associated gear we’d need for this substantial location recording session. Obviously, a big part
Hugh’s diagram of the performer positions and planned mic placement for this recording session.
www.soundonsound.com / June 2026
57
TECHNIQUE
R ECOR DING A C HOIR FOR A N ATMOS MIX
Here, you can see the close-mic pairs for each of the choir’s SATB sections.
Given the potential for very low frequencies and a desire to capture the organ within the nice Priory acoustic, I selected two pairs of Sennheiser MKH 20 omni mics, each pair being spaced around 66cm apart, and placed about 6m away from their respective sides of the organ. Manfrotto 154B mic bars supported the mics atop tall Manfrotto 269HDBU tripod stands, raised to be roughly level with the middle of the facing pipes. I wouldn’t normally choose to close‑mic a choir, but I was concerned that diction might be lost given the great distances and large number of other mics involved, so
I decided to rig eight mics in a line a couple of metres in front of the 12 choir members, using near-spaced pairs to cover each of the three-member SATB sections. The idea was that these could be used in the mix either as four stereo pairs, or as pan-able mono mics, and could be balanced as needed — but this was conceived more as an insurance policy than to provide primary sound sources, and I don’t think they were used in the final mixes. These ‘accent’ mics were rigged on K&M 21021 stands with K&M 23550 stereo bars, and I used a variety of large-diaphragm mics because most of my small diaphragm mics were allocated
When soloists needed to be recorded, they were positioned well away from the choir, to improve separation and give greater flexibility during the mix.
58
June 2026 / www.soundonsound.com
elsewhere in the rig! Hilgrove supplied a pair of Neumann TLM103 large-diaphragm capacitor mics, which we used on the basses, with Audio‑Technica AT4050s and AT4040s on the tenors and altos, respectively. A pair of AKG C414B-ULS mics covered the sopranos. The only other ‘close mics’ were a pair of Neumann TLM170Rs to cover two soloists on a couple of pieces, and these were rigged about three quarters of the way down the North aisle so that the soloists could see the choir and conductor, but were far enough away to create some usable acoustic separation. The close mics totalled 14 in all. In a normal stereo choir recording, the bulk of the final sound would typically come from a single, well-placed stereo mic array, and I did that here too, as a kind of cosy security blanket and emergency backup! For this role I configured another delicious pair of Neumann TLM170Rs, borrowed from Steve as an ORTF array, suspended from another Manfrotto 154B stereo bar raised on a Manfrotto 1004BAC master stand to around 3m high and roughly 5.5m in front of the choir. As usual, I attached a couple of heavy sandbags to the base of the lightweight stand, to improve stability. Since a simple stereo pair wouldn’t really suffice as the core of an Atmos mix, we also rigged my SoundField ST450 MkII Ambisonic mic 1.5m (almost 5 feet) further back, recording its (FuMa) B-format outputs. My assumption was that, because the
MixCubes™: The #1 selling square mixer-fixer in the world.
Centralize your MIDI studio.
Introducing the MIDI Eight. With the Black Lion Audio MIDI Eight, your entire MIDI rig will be ready to go at a moment’s notice, and you won’t lose time re-connecting all of your MIDI gear if you want to use a different workflow — just choose the desired mode from the front panel and get to making music.
traffic. It’s also got a powered 5-port USB hub built-in for connecting modern USB MIDI devices, mobile devices, or computer peripherals. A Panic button quickly mutes any stuck notes. Visit www.blacklionaudio.com to learn more.
Control your entire collection of synthesizers, controllers, sequencers, and drum machines from a single device: you get eight MIDI input and output ports; three practical standalone routing modes; and bold activity indicators for instant visibility on your MIDI
TECHNIQUE
R ECOR DING A C HOIR FOR A N ATMOS MIX
bell tower. These were spaced about 35cm apart and raised around five metres high on another Manfrotto 1004BAC with an extension pole. Finally, to provide even more decorrelated spatial options, we rigged four Neumann KM184s, which can be thought of as ‘room mics’, positioned close to the walls on each side of the North aisle. The front pair was placed
a little behind the SoundField mic, and the rear pair was a couple of metres behind the Hamasaki Square. I imagined Hilgrove would use these mics to add a sense of air and space at the cardinal points of the Atmos mix, if required. With all the ambient and space mics in place, the total mic count reached 30 channels: eight close choir mics, two soloist mics, four close organ mics, a stereo main
Noises & Tuning
The church housed a good organ, and it was used for accompaniment on these performances. Naturally, though, these instruments issue more noise than might sometimes be wanted when you’re mixing, so some processing of the recordings was required for the best result. I’ve discussed Hilgrove’s approach to mixing this project in the main text. But every location recording session comes with noise challenges, and although the venue was tucked away from any major roads, and so was unusually free of typical urban noise through most of the day, that didn’t stop the local teenagers from milling around noisily in the churchyard at the end of the school day — and occasionally they rattled the doors during a couple of takes! We also had unwanted noises from some awkward page turns (for those still on paper scores), a constant hiss from the organ blower, and the occasional issue with registration changes. So, inevitably, a little tidying of the audio was required before mixing. This is always tedious, especially with so many channels to cover. To complicate matters further, the SoundField files had to be converted to mono for individual processing before being decoded to 7.1.4. Thankfully, the powerful noise‑reduction facilities in SpectraLayers Pro are available as an ARA plug-in, so could be used directly within the Nuendo project window, and Hilgrove was able to carve off the unwanted noises, slice by slice, until he achieved the ideal balance between just enough air and life, but less grain. Hilgrove found that the SoundField mic’s bright character emphasised the hiss from the organ, and both pairs on the organ needed quite a bit of attention too (due to the proximity of blower noise), but overall there was nothing too technically challenging. Likewise, the worst of the clanks from the organ registration changes, or teenagers hauling on the massive West doors, could be damped or removed entirely. After that it was just a case of running each channel through Celemony’s Melodyne software, not to produce something immaculate, but simply to tidy up. One issue with this kind of recording setup is that if a singer is slightly out of tune, it’s out of tune on every mic channel — tweaking the close choir mics won’t fix a problem that’s present in all the space mics! Internal choir balance issues can’t be fixed easily for the same reason: once the sound is out in the Priory’s acoustic, every mic captures the existing balance. It’s therefore incredibly important to ensure each choir performance is as good as it can be on every take; trying to fix balance and tuning issues in the mix later is really not an option. Hilgrove’s approach is one I commend highly: in finding a balance between ‘perfect’ and ‘real’, he always errs toward the latter. In modern music production, we’re so used to tuning and timing being absolutely bang on, but it’s not a real representation of a living, breathing choir, organ or, indeed, building. In our age of encroaching AI, Hilgrove would rather have a few extraneous noises and notes that don’t quite make it, just to keep the essence of the human performance.
62
June 2026 / www.soundonsound.com
pair, four channels of Ambisonics, four more height channels from the Hamasaki Square, four room mics, and a stereo spaced array at the most distant point of the nave.
The Atmos Mixes Hilgrove has used Steinberg’s Nuendo for many years, finding it the best match for his particular blend of classical, film, TV, games and producing work. The same company’s Dorico takes care of his score prep, and he uses their SpectraLayers Pro for noise reduction and spectral editing, with WaveLab for mastering. So it’s a comfortable and very familiar ecosystem for him to work in. Of particular relevance here are Nuendo’s in-depth Ambisonics and multi‑channel capabilities, which are ahead of most of the competition and integrate seamlessly into his workflow. Also, the powerful up- and downmix capabilities built into its panners are a godsend when working with multi‑channel material. I transferred the audio WAV files (which had all been named for the mic/role, with take numbers) to an external hard drive, from which Hilgrove could upload everything into his Mac-based system. Although he was to do all the mixing work, I wanted to at least ensure the recordings had the potential to work as intended, so once everything was loaded into a project, our first step was to decode the SoundField tracks. There are several Ambisonic formats, starting with the A-format produced by many simple first-order ambisonic mics, through to the traditional B-format (now renamed FuMa) provided by most SoundField mics, and the newer Ambix format that supports higher-order Ambisonics. I generally use Rode’s Ambisonic decoder, but as it doesn’t yet run on Apple Silicon we used the AudioBrewers abDecoder to convert the FuMA output to 7.1.4. All the other mic signals were either stereo pairs or mono sources. Listening back to the raw audio, the sheer range of options we’d given ourselves quickly became apparent, but so too did the astonishing results! Obviously, the close-miked pairs sounded lovely and clear, and the ever-increasing distance of the pairs running down the aisle into the tower gave lots of ‘washy’ options. But the efficacy of the SoundField mic and Hamasaki Square combination came as a complete shock! We realised that, if pushed for time (or tech) on another occasion, this alone would give about 95 percent of everything we needed, especially if using the abDecoder to focus the SoundField toward the choir.
ON TE ST
The new version of GS Music’s Bree6 has gained more than just a keyboard... WILLIAM STOKES
W
hen I reviewed the original GS Music Bree6 back in September of 2025, I concluded that the compact desktop synth was lovingly designed, excellently made and sounded great; but also that, given its consequent price tag, it might struggle to break into an increasingly competitive market for small-footprint hardware synths. This was in small part due to it having no keyboard to speak of, an absence that might not matter to some, but could inadvertently give comparative — and cheaper — keyboarded units such as the Sequential Fourm and the Moog Messenger the edge. It seems that GS Music, the Buenos Aires-based company founded by Guido Salaya (whose e7 is slated as the first analogue polyphonic synth to be designed and assembled in Argentina), have cottoned on to this, delivering a freshly keyboard-endowed Bree6 model. This edition of the synth is essentially still simply named the Bree6, with the manual cover showing images of both versions, though it is referred to within as the Bree6 Keyboard. With a clutch of performance-related mod cons beyond the simple addition of keys, this iteration of the Bree6 promises an all-in-one, bigger-but-still-portable
66
June 2026 / www.soundonsound.com
GS Music Bree6 Keyboard Polyphonic Analogue Synthesizer
package that in many ways serves to justify the existence of its desktop sibling. In fact, it occurs to me that most of the time two such iterations of synthesizers actually appear in the opposite order, with desktop versions tending to be released after their keyboard counterparts. While we’re on the subject, I’ll say that one notable exception is Elektron’s Digitone Keys, which is a good example of just how much difference to the perception of unit a keyboard can make; what with Elektron’s transport-based playability occupying the limelight for its products most of the time.
What’s What A recap on the original Bree6’s architecture, which, in case it wasn’t clear, is present and unabridged in the Keyboard version. A six-voice polyphonic synth, it comprises a stripped‑back set of features to pack a real punch. The desktop version measures a diminutive 360mm in length, 126mm across and just under 70mm deep, and — as previously noted — its build quality is a standout feature; with firm, solidly mounted knobs and buttons, a sharp OLED screen and rugged metal chassis coming together to weigh a reassuring 1.5kg. With a fully analogue signal path, each voice offers a single oscillator with sawtooth or square waveforms and a per-voice
square‑wave sub‑oscillator. Its four-pole low-pass ladder filter of course takes its cues from Moog, and there’s a solitary LFO and two ADSR envelopes. So far so solid, and I have to say — as I did before — that despite a modest feature set that hardly sets out to reinvent synthesis as we know it, at what it’s attempting the Bree6’s core architecture can’t really be faulted. It’s a stripped-down ‘mini-Minimoog’ of sorts, that does a good job of outsourcing all manner of other features to provide a no-nonsense piece of hardware that I have no doubt will stand the test of time in any studio or portable setup. As far as its more distinguishable attributes go, the Bree6 also hosts an onboard OLED screen. As GS Music are rightly proud to proclaim, there is little to no menu-diving here, and it does a good job of presenting clear and handy graphics whenever a parameter is changed; be it simple, bold number values, envelope shapes or the filter cutoff. The Bree6 offers a pair of lush-sounding onboard digital effects in the form of chorus and delay. These are remarkably good, and blend into the sound-sculpting workflow of the thing brilliantly, with the delay reaching short enough times to emulate pinging, ring-mod-reminiscent sounds, and the chorus playing nicely
GS Music Bree6 Keyboard £1467 pros • Once again, excellent build quality overall, and the keyboard is no exception. • Well‑deployed new performance functions, including chord sequencing. • Clear and classic workflow, with several mod cons to boot. • Good value for money.
cons • Some might find just a single oscillator per voice and two possible waveshapes limiting. • Some other instruments in this size and price range offer more varied functionality.
summary This unit feels like the final form of the Moog-referencing Bree6, with a quality keyboard and new performance controls contributing to a top‑notch, highly playable analogue synth.
in tandem with the oscillator Detune parameter. There’s generous space for 512 presets and a decent package of I/O, with both USB and DIN MIDI (in, out and thru) supported, discrete left and right outputs and a TRS headphones output. Finally, at least for the headline features (head back to my review of the original Bree6 for a more in-depth rundown), there’s support for MPE control across both iterations of the Bree6, with menu-configurable relationships between a controller’s pressure and Y axis and the synth’s VCA and VCF.
What’s New Fair to say that having set such a precedent, it would be incongruous of this edition of the Bree6 to start cutting corners. This time its physical size doesn’t so much belie its hefty sound as connote it, measuring 550mm in length, just under 300mm across and just
under 120mm deep, bringing its overall weight to a relatively beefy 6.25kg. The build quality is equally good here — better, in fact, with rather lovely wooden cheeks complementing a bright blue chassis and of course the black and white keys to give the thing a classic, veritably gorgeous colour palette. Should that palette be too much, though, I should point out that the Bree6 Keyboard is also available in black. Happily, the keyboard’s 37 full‑size keys offer a very pleasant action and a great-feeling keybed. It’s velocity-sensitive and has aftertouch, which — and this is not a given, even with expensive synths — is smooth and even in its action. The modulation and pitch wheels are laid out above the keyboard as opposed to beside it, which I personally tend to prefer since it feels like a better use of overall space. Once again these are firm and solid to the touch, and usefully the modulation wheel can have its relationships with the oscillator modulation and filter cutoff adjusted in the quick-to-access Control menu. It’s also worth giving an honourable mention to the additional I/O here, namely an expression pedal input and momentary footswitch (that is, usually a sustain pedal) input. All this, along with the Bree6’s MPE support, comes together to provide more or less the complete performance feature set, and I’m glad to see it done so well.
What’s More I mentioned earlier that this edition of the Bree6 adds more than just a keyboard to the desktop version. Indeed, a new section has appeared on the panel offering controls for an arpeggiator and sequencer. As with many of the Bree6’s features, these aren’t showstoppers on their own but make worthy contributions to a very effective and cohesive piece of synth design. The relationship between such functions
and the Bree6’s well-deployed delay effect can be used to create syncopated patterns that feel like far, far more than the sum of their parts, and are more or less faultless in their capacity to get the job done. The arpeggiator offers up, down, up/down or random orders, along with a wide tempo range of 40 to 240 bpm and divisions of 1/4, 1/8, 1/16 or 1/32 notes. If there was one notable function here it’s the Double and Triple modes button, which groups multiple consecutive notes in twos or threes within each arpeggiator step to ostensibly provide a different, more complex musical behaviour when shifting between chord shapes. The sequencer is even more quick and intuitive — and lengthy if desired, with up to 400 notes allowed: just hit Record, play a succession of notes (including rests, with a dedicated button) and then hit Play. The screen displays a useful MIDI piano‑roll-like graphic when inputting note data, and it’s polyphonic, so chords can be sequenced as well. For the cherry on top, you can save and recall sequences, which is mighty useful for live performance.
Conclusion I went into this review thinking that the addition of a keyboard would be of relatively little consequence for the Bree6. On the contrary, it feels like this edition of the synth is in fact the essential one, opening up its functionality in more powerful ways than ever and cementing the Bree6’s standing as a top‑notch instrument — as well as its designer’s as a developer to be reckoned with. The original’s price tag of just under £1000 felt steep, this edition’s relatively modest increase, to £1467, contrastingly delivers what is really excellent value for money. A very good move from Guido Salaya and co.
£ £1467 including VAT. In addition to the USB‑B port, MIDI in, out and thru sockets, and quarter-inch audio and headphone outputs found W www.kmraudio.com W www.gsmusic.com on the desktop Bree6, the Keyboard version has gained quarter-inch inputs for a footswitch and expression pedal.
www.soundonsound.com / June 2026
67
ON TE ST
A typical playing scenario in Music Mouse, using its built in sound generator. The four brightly coloured lines tally up with four MIDI pitches. All aspects of harmony, voicing, articulation and more are set to the left, and can be controlled in real time. The various bitmap graphics and the tips from ‘LS’ that appear at lower left are a nice, cute touch.
Eventide Music Mouse
Composition Software
Can a piece of music software that’s almost as old as this magazine still inspire in 2026? ROBIN BIGWOOD
O
nly fellow ‘mature’ types like me will remember the particular thrill that was encountering and using a computer with a mouse for the first time, probably some time around the mid‑1980s, when all you’d known up to that point was Acorns, Sinclairs and Commodores with chunky command line interfaces and tape cassette storage. That really was a pivotal moment for personal computers, seeing the introduction of mice alongside the first widely available graphical operating systems. (Actually, the history of the mouse and graphical/object-based interfaces stretches surprisingly further back, but only to experimental or mega-money business-oriented machines. Sorry, I digress...)
68
June 2026 / www.soundonsound.com
It was into this brave new world of convention-busting computing concepts that Music Mouse was originally released, in January 1986. It was written by Laurie Spiegel, who’d spent much of the 1970s at Bell Labs, developing algorithmic and logic-based musical performance systems. (Also there, incidentally, was Max Mathews, who went on to be one of the founders of IRCAM in Paris and had the ‘Max’ bit of Max/MSP named after him. And if you don’t know Laurie Spiegel’s album The Expanding Universe, which used the computer-controlled modular synth she and Mathews had worked on, you should: a track from it is on the ‘golden record’ of the Voyager spacecraft. More digression...) Anyway, to get to the point, Music Mouse ran on the first Apple Macintosh computers, and was later available (for
a time at least) for the more affordable Atari ST and Commodore Amiga. It was in fact maintained for some years afterwards by Laurie Spiegel, and now it’s back for today’s computers running macOS 10.14 (or later) and Windows 11 (or later), developed in collaboration with Eventide. The fundamental concepts and mode of operation haven’t changed, so what is it about this 40‑year‑old software that warrants bringing it back to life?
Mouse House Essentially, Music Mouse is a pointer-driven MIDI note generator. Move your mouse over its unusual chequerboard of musical pitches and it’ll spit out anything between one and four notes. It runs only as a standalone application, not as a plug-in: it has a simple built-in sound generator but
it also acts as a virtual MIDI source for any instrument you like running in your DAW or other virtual instrument host. Or indeed you can use it to play a hardware synth connected via USB or DIN MIDI. On the note grid, the X axis keyboard has pitches running low to high, left to right. Six octaves and a fourth, F to B flat. On the Y axis low notes are at the bottom and high notes higher up, with the same pitch range, but this time from A to D. Mouse over it and your pointer will always be at the intersection of two pitches, the note data for which Music Mouse will readily generate
All these parameters can be painstakingly set up in advance of playing, but they all have keyboard shortcuts for manipulation in real time, and this is how you properly play Music Mouse. An ‘All’ tab in the user interface includes visual reminders for all shortcuts, while an alternative ‘Perform’ view hides them, for when you’ve committed them to memory. Shortcuts toggle voices on and off, transpose your chords by selectable intervals, switch patterns and articulations, change velocity, and more. At first the musical potential for all this can be rather difficult to grasp, but with
“At a mere $29 it’s a bargain: a way to explore an entirely different music-generation mindset, and a homage to one of the great music tech pioneers.” (audibly, or via MIDI). But there’s more to it than that, and that’s where we very much enter the Spiegel logic-based, algorithmic wheelhouse. In a panel next to the grid are a range of controls to refine and control the note generation process. Pitches can be restricted to various pre-configured musical scales so everything needn’t be a chromatic cat-on-the-keys mish-mash. Note length and timing relationships between notes can be set, and interestingly Music Mouse always imposes a rhythmic order of some kind, generating notes only at rhythmic intervals, according to two user-defined tempos, or incoming MIDI Clock. Then you can choose to have the four notes/voices played simultaneously, strummed, played once per beat, or with randomised order and timing. There are 10 preset patterns too, which impose various cycling and ‘walking’ arpeggiator-like sequences, retriggering all notes on each step.
time Music Mouse can feel responsive, though in a rather different way to a traditional musical instrument. An easily-located 1987 episode of the US TV show Midnight Muse on YouTube shows Laurie Spiegel herself demo’ing Music Mouse on an early Mac, driving a Yamaha TX816, and talking about it at length: that leaves no doubt as to its potential. It’s notable on that video that she uses (and states a preference for) a trackball rather than a mouse, and has it positioned to the left of her QWERTY keyboard. There’s certainly different ways of interacting with the system, but there’s no doubt Music Mouse of 2026 can be equally fruitful, musically, and works identically: ideally, with one hand on the keyboard, and the other on the mouse.
Mouse-topia Reviewing Music Mouse is a strange proposition, because in some ways I’m decades too late: then again, pre-Internet reviews of the original are hard to
Eventide Music Mouse $29 pros • Very easy to use, but with enough complexity to reward deeper exploration. • Frequently conjures up harmonic shapes and notes patterns that you might not achieve on keyboard or guitar. • Useful for controlling DAW-based and hardware MIDI instruments alike.
cons • Real-time control through computer key-presses alone feels very limiting. • The relatively small selection of harmonic systems, voicing options and patterns often leave you craving even more. • Onboard sounds are uninspiring.
summary A MIDI note generator app that you play with your mouse and computer keyboard. Steeped in robust theory concepts, and delighting in shapes and symmetry, it’s great for breaking creative ruts and generally expanding your musical universe.
locate. And all the while I’m conscious of Laurie Spiegel’s original claims for the system, which were tempered with modesty: ‘This simple program hopes to provide an introduction to the vast and still-barely-explored realm of musical intelligence in software... a small beginning, written to some extent as a pointer.’ (Nice pun.) To reference that phrase often associated with modular synths, Music Mouse is a fine generator of happy accidents, albeit entirely in the harmonic rather than timbral realm. After a whole lot of chaotic bleeps and boops at first, I quickly and repeatedly got chord shapes and progressions that I’d never have come up with noodling at a conventional keyboard, and which warranted recording
Harmony A core feature of Music Mouse is its harmony generation. Your mouse pointer, at best, only selects two notes on the intersecting grid. But Music Mouse can generate two additional ones at different pitches, that follow various algorithmic rules with a view to staying musically useful. For example, in Diatonic mode the mouse pointer voices give you white notes only, while (in one setting) pitches are generated a sixth above the first note, and a fifth above the second. It becomes almost impossible to produce an ugly chord, but they needn’t all be simplistic major triads, because independent horizontal or vertical mouse movements often combine to produce complex suspended harmonies. Other key-centres are only a key-tap away, via the Transposition parameter. Then, switch the harmony
to Middle Eastern and you suddenly have a more characterful scale and subset of harmony notes to play with, while something like Quartal switches all mouse pitch intervals and harmony notes to perfect fourths. Vastly different harmonic sound worlds. Even more scope for control of harmony and texture comes from a Voicing parameter: it’ll either generate two voices from each mouse axis (which is what I described above) or just one note for the Y and three for the X. The result will be something like a bass line plus chords, or chords plus a single-line melody, depending on where you’re pointing. Finally, to really break the bounds of predictability you can engage a mode where harmony notes move in mirror image to your mouse pointer, which is wild.
www.soundonsound.com / June 2026
69
ON TE ST
EVENTIDE MUSIC MOUSE
A preferences panel gives options for setting up Music Mouse with external audio and MIDI hardware (here it’s playing my Nord piano) and incoming MIDI Clock. For DAW use though, no special configuration is required. Sadly that MIDI ‘source’ field chooses an external clock source only: it’s not possible to attach any real-time controllers.
into my DAW for further exploration. Less (mouse movement) is generally more (musically coherent), I discovered: unfocused sweeps around the pitch grid generally don’t yield much of value. It’s fun to explore the different harmony and pattern options, and if you’re not a keyboard player Music Mouse could be a useful platform in general for interacting with synths and sample libraries. At the same time, limitations await you at every turn, which can be either creatively fruitful or just frustrating. Adjusting velocity, mod wheel and other real-time controllers with keyboard shortcuts is painfully slow: there’s no way to attach any hardware controllers, and thus Music Mouse often feels as distant as those
70
June 2026 / www.soundonsound.com
Voyager probes from being ‘expressive’. Being able to generate notes only on a strict non-adjustable rhythmic division, or as you release your mouse button, also feels bizarrely restrictive to me: I’d have given anything to have a simple ‘trigger’ shortcut available. Or, heck, to be able to use a key or drum pad on a conventional MIDI controller to play and control the length of chords, and add velocity and aftertouch as well, independent of a rhythmic grid. As it stands, Music Mouse is intensely channelling: different users will get different things out of it, but it imposes a rather constructional, angular aesthetic that’s hard to escape. As I say, fertile as well as (sometimes) infuriating. The onboard 32‑preset sound generator is handy for learning the
app in standalone mode, and probably not much else. They’re supposedly 6-operator Yamaha FM patches but I don’t believe that: they are boringly basic. Happily though, MIDI connectivity seems reliable, with options to channelise the output of the four voices and drive multiple instruments at once. You can also have Music Mouse receive MIDI Clock from a DAW, to synchronise its onboard tempo and pattern schemes. This works reliably, except that I found the pitch grid became entirely unresponsive when my DAW transport was not running. There needs to be a kind of clocking ‘freewheel’ between times. There are fables about elephants and mice, and I suppose the elephant in the room here is that if you were designing a responsive X/Y pitch grid system from scratch in 2026, with additional control inputs alongside, you’d choose a tablet or other touchscreen. However, Music Mouse is as much a living slice of computing and music tech history as it is a practical tool, and has its own intrinsic qualities and value. It comes from a pre-Internet, largely pre-digital era where music production was more laborious but also in some ways delightfully weirder, and the peculiar limitations imposed by mouse and computer keys is straight out of those mists of time. At a mere $29 it’s a bargain: a way to explore an entirely different music-generation mindset, and a homage to one of the great music tech pioneers. £ $29 including VAT. W www.eventideaudio.com
When set to MIDI mode the internal sound generator is disabled and some options appear for directing the different voices to separate channels.
FINALLY
A PLUGIN THAT SHIFTS MIDI CLOCK PER OUTPUT CLOCK SHIFT. ICONIC SWING PATTERNS. NO SYNC BOX Precision Sync Meets Legendary Hardware DNA 0.25ms Resolution (MIDI mappable clock shift) Iconic Shuffle Profiles (9×9, M60, EM-12BIT & more) Total Recall & Routing Freedom (USB, MIDI DIN, Virtual) Universal Compatibility: Supports VST3, AU, and AAX hosts.
Your hardware has a soul. Now your DAW does too.
SCAN TO HEAR IT LOCK
Introductory Price: €49 (Regular €69)
Available now at: rapidflow.shop
Disclaimer: Any reference to hardware or brand inspirations is for identification purposes only and does not imply endorsement or affiliation.
ON TE ST
United Studio Technologies UT Vintage87 Capacitor Microphone
72
June 2026 / www.soundonsound.com
UST claim to have replicated one of the world’s most famous mics, at a fraction of the cost of the original. How does their UT Vintage87 hold up? NEIL ROGERS
T
his review will be my third look at a United Studio Technologies microphone. First and second times around, I was impressed with how their mics performed, and especially at how they compared with mics costing at least three times the price. UST have now attempted to push that quality:price ratio even further, with a stripped-down version of their U87‑style mic that focuses on just the basic features needed for most studio tasks. UST released their Twin87 in 2022 (www.soundonsound.com/reviews/ united-studio-technologies-ut-twin87). That model cleverly offered users the sound of both old and new versions of the classic German studio workhorse. Their latest release focuses on just the ‘vintage’ variant, and employs UST’s K87-style dual-diaphragm capsule, along with a large-core, custom-wound, US-made output transformer. The new version has the same 10dB pad and high-pass filter options as the original, and removing the bottom bell allows a 15kHz RF filter to be engaged using DIP switches. However, the Vintage87 is cardioid-only, which offers some technical advantages as well as simplifying manufacture. As a result, it is very accessibly priced — which will be great news if it sounds as good as UST’s previous releases. The mic follows the same aesthetic as their other models, feeling solid and well made, and includes a similarly solid suspension cradle. The published specs for the UT Vintage87 suggest that it is like the original U87 in offering relatively little headroom, with a maximum SPL of 117dB, or 127dB with the pad switched in. It does, however, have better self-noise performance (10dBA). Because of the custom transformer, nominal output impedance is listed as a surprisingly low 27Ω (the U87 presents 200Ω).
In Use Most of what I record in my studio is typical band line-ups, with vocals, guitar and drums forming 95 percent of my work. I’m a fan of figure-8 and omni polar patterns in certain settings, but I can
happily use cardioid-only mics for most of what I do. I have a 1971 Neumann U87 at my disposal and I know it very well indeed, so, with the caveat that mics of this age won’t all sound alike, it seemed like a good idea to try and put the UT Vintage87 up against my 55-year-old mic as often as I could during the review period. My first opportunity arose with a female vocalist, and the thing that immediately stuck me when I pulled the faders up in the control room was that the UT Vintage87 had a touch more ‘air’ than my U87. That worked really nicely with this singer, and when it came time to do some quick working mixes at the end of the session, I was more than happy to use the considerably cheaper option.
“I was more than happy to use the considerably cheaper option.” On the back of that initial session, I was confident to use the UST mic on its own on a couple of vocal recording sessions. Whether paired with the onboard preamps on my Audient console, or more boutique options, I never once felt the need to rush in and swap the mic out for any of my tried and tested stalwarts.
Vive La Difference With a few hours of downtime on my hands, I recorded some audio examples of the UT Vintage87 in action, comparing it directly against my own vintage U87. You can hear those files at https://sosm. ag/ust-ut87. In a more clinical context, with no clients around, it was interesting to observe and analyse the differences on a few typical studio tasks. I managed to record examples of a female folk singer, a spoken word voiceover, acoustic guitar, drum overhead and upright piano. Despite my best efforts at getting the two capsules to be as close to each other as possible, two mics of this size will never be perfectly coincident, but even so, it proved a very useful and interesting exercise. The UT mic was clearly a tad brighter than my Neumann,
United Studio Technologies UT Vintage87 £399 pros • A good-sounding all-round vocal and instrument mic. • Solid, well-built feel. • Excellent value.
cons • None.
summary United Audio have successfully stripped back their U87-style mic to offer a simple, more budget-friendly take on this vintage staple.
but I often found myself liking that, as it added a nice sense of clarity to an instrument or ‘air’ to female vocals — although I didn’t like it so much above a drum kit. On all the sources, the older mic had a pleasing low-midrange fullness to it that, whilst subtle on some sources, always seemed audible to me. It was worth noting, however, that my musician friend who was in the studio with me was struggling to hear any difference between the mics on most of the sources!
Summing Up When I looked up the price of the UT Vintage87, I was pleasantly surprised, and would happily throw this new release straight into the ring with some of the very best budget-friendly mics that I’ve tried. If you’re primarily looking for a vocal mic, or are unlikely to be limited by not having multiple polar patterns, this is an excellent option at the price. I often think there is a widespread misunderstanding about U87‑style mics. Contrary to popular belief, the 87 isn’t known for elevating a source or providing a ‘wow’ factor. Rather, these are workhorse mics that get most studio jobs done well and can be relied upon in professional recording sessions. If you want a taste of that in your studio, without destroying your credit card, then this mic should be on your shortlist. £ £399 including VAT. T Sound Service UK +44 (0) 330 122 2500 E sales@soundservice.uk W www.soundservice.uk W unitedstudiotech.com
www.soundonsound.com / June 2026
73
FE ATURE
Hear The Sound W https://open.spotify.com/
track/57uX2vR9j9DNiANDYfXw1i
W www.youtube.com/
watch?v=Aihu16RyYp8
Slade’s vocal. From the start, we wanted the guitar to stand alongside the vocal, not sit behind it, a true duet between voice and instrument.”
Room To Breathe
Warren Huart • The Fray ‘Never Say Never’ J O E M AT E R A
E
nglish-born producer and engineer Warren Huart’s credits range from Aerosmith, Disturbed and Korn to James Blunt, Ace Frehley and Daniel Powter, and he also hosts the popular You Tube channel Produce Like A Pro. Asked to select a favourite sound from his back catalogue, he opts for the guitar tone from the Fray’s ‘Never Say Never’. “There is this particular section of the song, the guitar melody at 2:46, where we knew it had to feel powerful and emotional, not just supportive. The part itself actually came first. Dave Welsh, the Fray’s guitarist, wrote that guitar line before the chorus lyric or melody existed. It was so strong that it eventually became the foundation for the chorus melody, intertwining perfectly with Isaac
74
June 2026 / www.soundonsound.com
“The sessions took place at the Record Plant in Sausalito, California, with the Fray becoming the last band ever to record there before its closure in 2008. To record the sound, we used two amplifiers, a ’65 Fender Deluxe and a Vox AC30, running in stereo. Dave played a Fender Telecaster Deluxe with humbuckers, switched to the bridge pickup for that biting yet warm tone. Both amps were placed in the stone live room to the right-hand side of the control room, with the door left open so the sound blasted into the main live room, where all of the drum room mics were already set up. That allowed the guitar to bleed beautifully into the ambient mics, giving it a natural sense of width and energy. Each amp was miked front and back with [Shure] SM57s, with the rear mic flipped out of phase to capture warmth and body without losing clarity. The AC30 ran through an Electro-Harmonix Holy Grail reverb, while we cranked the Deluxe’s spring reverb for extra depth. “Of course, Dave’s super-fast right‑hand picking technique added a sharp, rhythmic aggression that
made the searing, beautiful melody cut straight through the mix. It is one of those performances where the emotion is in the attack, and the way he plays gives the line its urgency and power. To give the sound its size and sense of air, I also miked both the slate room and the main room. That combination provided an incredible spread; you can hear the articulation and space all at once. A touch of DI was added to bring in the pick attack, just enough to cut through. What makes the sound so special is how all these elements, the different rooms, mics and slight delays, interact naturally, creating a huge stereo image from a single guitar performance. “For ambience, I used Gefell CMV563s on the parquet floor, and placed a pair of early ’70s Neumann U87s high up in the room for overall atmosphere. The slate room, on the other hand, was extremely bright, so I used a Coles 4038 ribbon mic there to tame the top end. With the bridge pickup and all that reverb, there was already more than enough brightness to work with. “Because Dave’s guitar line mirrors Isaac’s melody, the part carries the emotional heart of the song, even when the vocal steps back. You walk away humming both at once, which is why this remains one of my favourite guitar sounds I have ever recorded.”
This BEAST is still the
“This interface is easily the best bang for the buck in the market. Not only the preamps are the real deal and sound excellent, it comes with all their plugins for free, and they’re no doubt the best emulations in their class. Plugins alone are worth the price.”
“This is by far the best desktop audio interface I've used in more than 20 years of music recording. Nothing comes close to the i73 PRO. Great preamps (not just good, GREAT) and a refreshingly good selection of plugins. I absolutely recommend it!”
BEST
“After thoroughly tested the renowned preamps and the converters with all kinds of people and musical styles in the studio, in my humble opinion, everything has been outstanding. Not only from my own subjective perspective, but also according to everyone who came through.”
“The sound impressed me immediately. Everything feels a bit more “glued together and warmer,”. If you’re looking for a high-quality interface at the upper end of the market and you appreciate analog sound, feel, and workflow, then you should definitely try this interface.“
Free for all owners
CONSOLE CHANNEL STRIP
DSP & Native TRY THEM FOR
FREE TODAY
ON TE ST
Line 6 Helix Stadium XL Guitar Amp & Effects Modelling System
Line 6’s flagship amp and effects modeller redefines what we can expect of a floor-based guitar processor!
DAV E LO C K WO O D
W
hen Line 6 launched the Helix, just over a decade ago, guitar-amp modelling had already passed the point where it was seen solely as a compromise for situations in which real amps were impractical or inconvenient. Kemper’s and Fractal Audio’s digital hardware was evident on plenty of professional and touring stages, and both were widely regarded as having moved the sonic benchmark well beyond merely ‘acceptable’. The
76
June 2026 / www.soundonsound.com
Helix raised Line 6’s amp and speaker modelling to a new level: a highly capable, versatile live performance and studio tool, with extensive routing and I/O, its user interface invites you to do serious editing directly on the hardware, despite having a good software editor. It has also benefited greatly from significant firmware updates (notably with more and better amp models and a seriously improved cab engine in Helix 3.5) that add up to a significantly better-sounding Helix, and many would argue that a fully updated
Line 6 Helix Stadium XL £1980 pros • Agoura amp modelling is excellent. • Intuitive touchscreen interface. • Integrated Showcase multi-channel playback. • Multitrack audio interface capability. • Easy ‘re-amp track’ recording. • Extensive customisation. • Snapshots aren’t new, but they’re still great! • Cloud-based Proxy amp capture.
cons • Relatively expensive. • System backup only to microSD. • Agoura modelling not yet available without ‘the other stuff’.
summary The Helix Stadium positions itself as a premium all-in-one guitar platform, pairing impressive Agoura amp modelling and Proxy amp capture with a streamlined touchscreen workflow, multi‑channel playback, re-amping and deep customisation. The XL model’s pricing reflects the achievement and ambition, but many will be hoping that a stripped-down Agoura-focused model arrives before long.
original Helix still deserves a place at today’s top-table of modellers. So the Helix Stadium, launched at the very end of 2025 in both XL and Floor variants, surely had to be more than just ‘a better Helix’. It needed to compete for the ‘flagship modeller’ crown that’s hotly disputed by the likes of Fractal Audio’s ecosystem, Neural DSP’s Quad Cortex, Kemper’s updated Profiler platform and Mk2 hardware, IK Multimedia’s Tonex captures, Fender’s Tone Master Pro modelling and Universal Audio’s UAFX amp pedals, not to mention a long tail of increasingly competent budget and clone devices. Some of the big-name players already benefit from both a touchscreen interface and various forms of profiling and capture technologies, and the Headrush Prime even has an integral playback facility. With Line 6’s new Agoura modelling and Proxy cloud-based capture/profiling facilities, to say nothing of newer, more
Test Spec When the Helix Stadium XL went on sale in December 2025, it wasn’t really ‘complete’, since its Showcase and Proxy modules hadn’t been implemented — so we delayed our in-depth review until a more ‘finished’ system was available. Testing for this review was completed using firmware v1.3.1.
capable hardware, I’d say the Stadium certainly is ‘a better Helix’. But it’s also the realisation of a much broader concept, with a more ambitious integration of elements of show control, as well as a practically infinite array of customisable and programmable control options.
Hardware For Feet & Fingers The most obvious physical upgrade from the original Helix is the eight-inch, high-resolution touchscreen. A less visible change is that the connection between the hardware and the Mac/Windows Helix Stadium editor app is now via Wi-Fi, rather
Multi-channel USB Audio Interfacing As a USB-C audio interface, the Helix Stadium presents eight discrete input and output streams to a DAW. There are four primary signal paths, but you can get that up to eight by employing the effects returns as line inputs. Helpfully for recording guitarists, USB recording is configured by default to allow simultaneous capture of a stereo processed signal and an unprocessed DI, so you can record a full amp-and-effects chain and a clean feed for later re-amping simultaneously, without splitting the signal in the analogue domain. You can then play back the dedicated, ‘clean DI re-amping’ track from the DAW into the Stadium and experiment at leisure with different amps, cabs and effects chains. You can also record different amps to separate tracks simultaneously, whilst still retaining a ‘safety DI’ for re-amping experimentation. As with most good modellers today, the internal processing latency is negligible in practice (I measured circa 2.3ms). Other than when employing a block where extensive pitch processing is employed, it’s also consistent, regardless of the number of blocks used. Utilising the effects loops incurs another D-A conversion and back again, and adds another millisecond or so, but that’s still easily manageable if the core latency is low. Still, it pays to be aware of external factors like digital wireless systems being used for input, or in-ear monitors, and any connected digital PA or monitoring system, because all latency is cumulative. As a recording interface, the round-trip latency depends largely on the selected buffer size and driver performance, but the Stadium itself is the source of any audio being recorded and supports latency-free direct monitoring, without the guitar or mic signal passing to/from the computer. Playback of previously recorded material via the USB return is balanced in the DAW software and mixed internally with the live sources, so the performer can hear both without monitoring through the DAW’s mixer.
As with the earlier Helix models, the rear panel is packed with all manner of analogue and digital I/O, including a mic preamp, but the Nexus RJ45 port is new: this caters for an optional Expand D10 digital I/O unit that adds VDI for Variax, L6 LINK for Powercab integration, and perhaps more peripherals in the future.
www.soundonsound.com / June 2026
77
ON TE ST
LIN E 6 H E LIX S TA DI U M X L
The main Edit screen, showing the familiar blocks-based signal path above, and details about the selected block beneath.
than USB. Assuming both are on the same Wi-Fi network, launching the app and logging into/setting up a Line 6 account allows the app to automatically detect and connect to the hardware. (And in case it doesn’t work, you can enter the Stadium’s IP address manually in the app). There are both USB-C and USB-A ports on the back panel of the Stadium, but unlike on the original, the USB-A is really for an
Ethernet adaptor or a wireless dongle, while the USB-C caters for multichannel audio interfacing and, if you’re unable to connect via Wi-Fi, firmware updates. Maybe I’m missing something, but I can’t see any advantage in being obliged to use a Wi-Fi connection when a wired one would suffice. Why not include both options? I’m sure this will be addressed in a subsequent update...
Effects: The Same... But Better? The Helix Stadium’s effects are currently the same as in a fully updated original Helix, but many have benefited greatly from firmware upgrades over the years. I’ve always considered the delays, reverbs and modulation effects to be perfectly decent, and the extra ‘DSP headroom’ of the Stadium lets you run more complex chains. I’m sure we can expect updated and/or entirely new effects at some point. The delays include a decent tape emulation and plenty of modulation options. They’re perhaps not as deeply tweakable as some, but sonically they’re top-tier. For reverbs, I wouldn’t dissent from the general consensus that Fractal offer more realistic room simulations, whilst Line 6 boast more usable subtle ambiences. Dynamic Plate and Dynamic Hall just do what you want straight out of the box, unless you are seeking something beyond supportive ambience. The modulation effects are generally lush-sounding, musical and easy to dial in. Other units may go deeper and allow more experimentation, but l find the Helix pretty much delivers up what I want without much messing about. The pitch effects aren’t quite at Eventide level, but they too have improved significantly with later Helix updates; in particular, I now consider the DSP-intensive polyphonic pitch change of Poly Capo to be usable in many different contexts, not just drop-tune chug. The drive and distortion pedal emulations were my least favourite part of the original Helix. Curiously, they seem to work better in the Stadium — they haven’t changed, so I suspect that the new Agoura amps handle virtual pedals better, resulting in a combined behaviour of amp and pedal that feels far more familiar. The only exception is fuzz, as usual. Making the most of a fuzz pedal, utilising both the clean-up and the chaos, requires a direct connection to the guitar, and that cannot be replicated here because there’s always the analogue buffer for the D-A converter in between. For traditional fuzz behaviour, putting the real thing in front of the Helix Stadium works fine with the appropriate amp choice. One area where the Helix Stadium scores heavily is in the routing flexibility. It’s really easy to create parallel effects chains, wet/dry splits and all manner of other complex signal paths that make the unit as a whole extremely powerful in practice.
78
June 2026 / www.soundonsound.com
The touchscreen is, naturally, the primary tactile interface for editing and setup, but the familiar physical rotary controls remain — eight, compared to the original Helix’s six, in fact — with a stepped, double bank of footswitches below, illuminated in the XL model with Line 6’s excellent OLED ‘scribble strip’ displays. The anti-glare screen works well in all but very strong sunlight and, given the heat considerations of any digital device, you’d surely never choose to use it on a hot, sunlit stage without some form of shading. With discreet venting on the front and rear edges, the unit doesn’t get particularly hot in normal use, so there’s no need for an internal fan. The combination of touchscreen plus knobs works well, even if this means there’s sometimes more than one way of doing things. The fundamental dual-path (1A and B, and 2A and B) working of the Helix world is retained in the Stadium, with each path having a dedicated DSP allocation. Theoretically, up to 48 functional ‘blocks’ can be added to the signal path(s) in any position and combination, at least until you run out of DSP, which used to happen quite a bit on the original Helix. It’s harder to reach that point with the Stadium, but still perfectly possible because the new Agoura-modelled amps are more processor intensive, and having the pool of DSP resources split across two separate paths always gives you strategies for creating more DSP-intensive presets,
RECORDING & MUSIC TECHNOLOGY SHOW
Saturday 27th June 2026
TIC ON SKETS ALE
NOW
Over 60 popular pro-audio brands Come and get hands-on with Microphones, Monitors, Recorders, Synths, Audio Interfaces, Mixing Consoles, Outboard, Software and much more. Extinct Audio FabFilter Focal Funky Junk Gainlab Audio Genelec HEDD Audio IK Multimedia Imersiv Iso Acoustics Audio IsoTek Systems Kali Audio Klanghabitat
AMS Neve API Audio Arturia Audient Barefoot Sound Bitwig Black Box Analog Designs Buso Audio Cranborne Audio DPA Microphones Drawmer Dynaudio EVE Audio
KMR Lauten Audio Make Noise Milab MOTU Nektar Neumann NORD Nordic Audio Labs Overstayer Pearl Microphones Pope Audio Pulse Techniques (Pultec)
RME Room Sonics Rupert Neve Designs Schoeps Sound On Sound Source Elements Soyuz Microphones Synthax Tantrum Audio Teenage Engineering Telegrapher Loudspeakers Trinnov Zoom
University of Westminster Harrow Campus, London. 20 minutes out of central London between Wembley & Harrow on the Metropolitan tube line.
www.gearexpouk.com A
EVENT
ON TE ST
Expressive E Osmose CE Controller Keyboard
ROBIN BIGWOOD
The Osmose made quite a stir when it launched in 2023, not least in these pages. Can a controller version with the same super-expressive keyboard cause the same impact? Expressive E Osmose CE From €999 pros • Key vibrato, poly aftertouch and more, all intuitively accessible for most players. • Companion soft synth Ctrl-e has impressive range and sounds fabulous. • High‑quality construction: hardware and software already feels mature and well-rounded.
cons • Offers fewer pots and faders for generic MIDI control than even some budget-level conventional controllers. • Full DAW control is limited to just four DAWs at launch.
summary A controller-only version of the Osmose in a pairing with a multi-engine software synth, offering a sensational playing experience that’s unlike very much else.
90
June 2026 / www.soundonsound.com
T
he Osmose CE is the latest product from French company Expressive E. CE stands for ‘Controller Edition’ and, yes, it’s a version of their now three-year old Osmose synth, without the onboard synth. Two models are available, with 49- and 61-note keyboards. The unique, enticing Osmose keyboard action supports left-right key wobble vibrato, fluid polyphonic aftertouch, and can be exquisitely sensitive to the lightest of touches. Per-note expressivity is achieved with standard MIDI message types, not any sort of arcane proprietary protocol, which is reassuring. And it seems to be the more familiar moving, mechanical nature of the keys that has allowed the Osmose to carve a deeper market niche than some MPE controllers that came before. With the CE (as I’ll refer to it from now on) having no sounds of its own, computer integration features mean a lot. Consequently, Expressive E supply it with a new software synth called Ctrl-e as part of the purchase cost. This is an unusual multi-engine instrument that’s intended as the main software ‘voice’ of the CE, running on your Mac or Windows PC. You’re not absolutely bound to use it — the CE has broad scope as a MIDI controller separately from it — but it provides a premium experience with hundreds of sounds designed for the CE key action with
no extra effort required on the part of the user. Presets are sortable, selectable and tweakable from the CE hardware controls, and potentially deeper editing is possible working with the computer. The CE is cheaper than its equivalent original-model Osmose counterpart, but a good deal of its value is bound up with Ctrl-e, literally and figuratively. Oh, and there are some general DAW control capabilities too, which is a jolly nice bonus.
Day & Night As if to proudly announce its different design and use basis from the original black-coloured Osmose, the CE is white! Well, mostly. A single coated‑aluminium sheet forms the upper, rear and front panels of the casework, with a tough textured plastic material for the remaining sides. Casework looks and feels to be of really good quality, and the unit is a little shallower in height than the original Osmose. The CE’s hi-res IPS LCD screen offers crispness, contrast and readability from all angles. It’s surrounded by four soft buttons above, another five elsewhere, six clickable encoders, and pitch and mod wheels that
look and feel more like faders. There’s a lone volume knob, which seems to be reserved for DAW control duties. What about that keyboard? In both the 49- and 61-key CE versions there’s a standard, piano-like 165mm octave width, and white keys a spacious 154mm playable surface length before merging with a rear section reaching back to a pivot. I had a four‑octave Osmose alongside during the review and its keys seemed to offer a bit less resistance than the CE’s, but it’s hard to know whether that’s more to do with the natural loosening that happens after three years of regular use, or Expressive E’s move last year to in-house manufacturing in Poland, or some other design or component change. Both felt equally good actually, just marginally different. The playing sensation is plushly sprung rather than ‘weighted’. There’s an initial key travel of 9 to 10 mm to a bed of slight resistance. But keys can go down another 10mm or so, much deeper than any normal synth or piano action: a sinking feeling, but not unpleasant! All the while white keys can float about 3mm left or right, and black keys about the same, with more of a rocking motion. From these axes and phases of travel, for MPE-style playing, the CE generates MIDI pressure, CC74 and pitch-bend messages, respectively. Along with Note On/Off, they’re allocated to discrete MIDI channels behind the scenes, ultimately allowing you to swell or vibrate one pitch without affecting others.
Ctrl-e, here shown running as a VST3 plug-in, is the Osmose CE’s primary software voice and sound bank. It offers as standard a lavish line-up of interesting synths by some respected developers, can be controlled from the CE hardware controls, and is a key part of the package.
In some playing scenarios it’s possible to create the odd creak or clack from the CE keys, and to end up inadvertently bending deeply-pressed notes, but a bit of adaptation of touch and awareness quickly improves this. If you have even a modicum of keyboard technique then all the main, musically useful Osmose gestures are very easily achieved. Other real-time control sources include the wheels/faders (generating global-channel pitch-bend and MIDI CC 1) plus two pedal inputs (defaulting to MIDI CC64 and CC1), which can be easily calibrated for all sorts of pedal types. In fact all these can be programmed to generate other message types. That’s true for the keys too, in fact. Powering happens via USB‑C. A good‑quality braided 2m USB-C cable is included, and when connected to a computer directly will power the CE and handle USB MIDI data at the same time. An additional USB socket is there though for when you need to power the unit separately, and a cheap mobile
Feel The pressure I’ll refer you to the ‘Additional Expressive Control’ box of my original Osmose review at www.soundonsound.com/reviews/ expressive-e-osmose for a lengthier discussion, but the CE offers two somewhat hidden but interesting and rewarding playing modes: Pressure Glide and an arpeggiator. Pressure Glide does finely controllable see-saw pitch swoops between held pairs of notes, at pitch intervals that can be set by the user: it works for MPE instruments only. The onboard arpeggiator is highly configurable for note patterns, rate, gate, ratchets and more, and two parameters can be mapped to keyboard gestures, wheels or pedals. It really feels alive.
phone charger worked well for me. For that matter, the CE was also happy running off a single USB‑A to C cable from a powered USB 3 hub, so it does not seem especially fussy about power spec or USB port exclusivity. I was pleased to see the CE retains the Osmose’s DIN MIDI in and out sockets, so you’re not hidebound to USB. These can
On the back panel are full-size MIDI out and in sockets, twin USB‑C ports and two quarter-inch pedal inputs.
www.soundonsound.com / June 2026
91
ON TE ST
With the Link button turned on, values for parameters like direction, cycle, tuning, and retriggering can be unified across the loops.
Slate + Ash RUINS £249 pros • Inspiring collection of core samples including percussive phrases, textural soundscapes, harmonic sweeps, melodic chords, and microtonal experiments. • Extensive tools for manipulation of samples. • Vast library of non-traditional impulse responses. • Samples can also be used outside of the instrument.
cons • No manual.
summary With RUINS, Slate + Ash have put the spotlight on the textures and tones that can originate from pushing the limits of creative expression on an electric guitar. Packed with customisable modulation at every step; an extensive IR library that draws from acoustic spaces, physical objects and instrument articulation; detailed looping and layering; and multiple mic perspectives, the possibilities within the instrument are endless. Guardrails like built-in limiters to prevent reverb chaos, and quantising to keep loop timing consistent prevent things from spinning out of control. RUINS is, at heart, very much a study in sound.
94
June 2026 / www.soundonsound.com
Slate + Ash RUINS Sample Library
Slate + Ash take the guitar to places it’s never been before... S O N A L D ’S I LVA
B
ristol-based Slate + Ash bring their signature sound‑design treatment to the electric guitar in their Kontakt library RUINS, with a little help from their friends: experimental guitar luminaries Stephen O’Malley, Oren Ambarchi, David Torn, Bill Horist, Ben Greenberg and Arjan Miranda, whose performances for the library were recorded at Circular Ruin Studios in New York by producer Randall Dunn. The loops, textures and resonances captured in those sessions were then put through the RUINS playback engine with the aim of deconstructing “guitar textures into raw sonic material”. The result is more than just a set of samples to play around with. Transformation is at the heart of RUINS and what you have are five playgrounds in which to manipulate the sound: Collage, inspired by the tape-splicing techniques of musique concrète; Spatial, with four distinct mic
perspectives and a chain of convolution reverbs; Effects, featuring six DSP effects; Modulation via LFO, a step sequencer, and MIDI CC control; and, finally, Layers, where the dual-layer architecture of the instrument allows two independent sounds to be processed simultaneously.
Layers & Loops Beneath the minimalist design of the interface lies a labyrinthine rabbit hole of controls for every type of sonic manipulation imaginable. With no manual to guide you on your way, your first experience with RUINS can feel daunting, especially if you’re not familiar with its playback engine Collage, which was first introduced in their 2023 library SPECTRES. What appears to be a straightforward polyphonic sampler actually unlocks the complete creative transformation of a sample using looping, granular manipulation, effects chains, spatial processing and other spectral morphing tools.
Samples can be loaded into two independent layers — A/B — from a menu categorised by player and tonality (Tonal, Harmonic, Dissonant). Each sample is then ready to be chopped up into smaller loopable segments, with up to five loops possible per sample. Click and drag to move the loop around or change length. Adjustable parameters for each individual loop include direction, start and end points, cycles, fine and coarse tuning, retriggering and scatter/jitter for timing and volume variation. The Shape menu contains volume and filter envelopes, and the Random controls add variation to volume, pan, tuning, attack, release and filter values for each loop iteration. A drop-down menu on the top right allows selection of key and scale, while Quantise on the bottom left keeps things in rhythm by aligning all loops to a time‑ or position-based value of your choice.
Modulation & Mic Perspectives Every continuous parameter in the instrument can be modulated using one of three sources: LFO, sequencer and MIDI CC control. Since modulation is one of the
Adjust the Bleed parameter to fine-tune the blend between perspectives.
pillars on which RUINS is built, the offerings are generous: LFO controls have a menu of 22 waveshapes ranging from Basic (including sine, triangle), to Rhythmic (pluck, rise, flutter), and Complex (Bounce, Pump, Throb, Dip and more). The step sequencer is customisable by drawing patterns
manually, adjusting direction, number of steps, step rate, and smoothness to control the transition between steps. MIDI CC control, like in most libraries, is a ‘right click and learn’ affair. Selecting ‘M’ from the menu on the main page brings you to the dedicated
YOUNG CHENCS, Producer/Songwriter
Nothing but the truth. Sennheiser HD 480 PRO A perfect balance of accuracy, comfort, and versatility, the HD 480 PRO studio headphones empower you to create with focus and confidence in the studio and on the move. The closed-back design and remarkable Vibration Attenuation System preserve the integrity of your audio signal and ensure you hear nothing but the truth. Learn more: sennheiser.com/HD-480-PRO
www.soundonsound.com / June 2026
95
ON TE ST
S L AT E + A S H RUINS
There’s something rather meta about routing a signal so that it takes on the resonant behaviour of another articulation from the same library, and the two working together to create something entirely new. For all those hours spent fixing masking problems in your mixes, this is your chance to run wild and embrace overlap and smearing in the name of sonic transformation. Coming back to the reverb chain, it can be set up to process the dry signal and the four convolution layers sequentially via Serial routing, or concurrently, through the Parallel routing option. There’s a built-in limiter on hand to ensure that things don’t get too messy as all those frequencies collide. Adjusting pre-delay settings, low and high EQ bands, and reverse mode are Continuous parameters for all effects can be modulated using one of three options from the X/Y pad on the right. some other tools located here to enable more elaborate tonal shaping. Modulation tab featuring the mix area, mic the sample come alive as it makes its way perspectives, and spatial controls. RUINS through the convolution reverb chain. Effects offers four mic perspectives: a dry DI signal, The spaces and resonant objects in an array of tube amps, spring reverb, and the IR library are creative and include Making your way through the Spatial a re-amped signal recorded in Berlin’s some much-loved names like EMT plate section and arriving at the Effects page iconic Funkhaus sound chamber. An X/Y reverbs, Buchla, Hansa and the Holy Grail feels like going from a cavernous castle pad allows movement between the spatial pedal, but the standout for me was the into a cosy cottage; the tools are just as perspectives and can be automated in three Instrument category, which also contains useful, only much more contained. We’ve different ways using the controls under every single articulation from the library, already established that RUINS is not the pad. Mov (Movement mode) simulates available to be used as an IR. To be honest, a traditional guitar library, but the six effects physical forces like speed, bounce, inertia, I didn’t quite get how it worked at first, on offer are arranged in an order that feels and magnetism; Mod (Modulation mode) but the results sounded good so I went familiar, starting with filter effects on top, brings up the previously-mentioned digging and found this explanation on moving to gain and modulation (Tape, modulation settings; and Rec (Record their website: “[it] can route its patch signal Mod, Amp), and ending with time-based mode), as the name suggests, lets you draw effects (Delay, Reverb). An elegant display into another articulation or a different and record custom motion trails across of coloured dots next to each effect serves instrument’s waveform as a convolution. the pad. The last one is particularly fun to as a slider to adjust effect intensity (or This creates a signal chain that resonates experiment with, especially because it’s so LP cutoff in the case of Filter), as well as with shared frequencies between the easy to draw and redraw paths and hear indicating the level of the effect in the mix source articulation and the selected impulse how randomness affects the sample tone once it has been set. response. The result is a fusion of unique and stereo imaging. timbral clashes, producing countless Design combinations of spatial trails, alongside Spatial Recognition a blending of phrasing from both the source The overall design of RUINS must be articulation and the chosen IR.” mentioned not only because it is very, very The release notes make it clear that the makers were committed to exploring both the tonal possibilities of the electric guitar, as well as the sonic environment in which these tones can live, or as they put it: RUINS is a “raw interplay between space and performance”. Towards that end, the instrument goes all out with the tools it offers to shape the sound environment. Four convolution reverb slots draw from a staggering library of impulse responses that you can browse by type (Instrument, Object and Space), and tonality (Tonal, Harmonic, Dissonant, Non-Tonal). I spent a lot of time with the spatial tools because of the sheer variety of spectral character to be discovered and the dynamic way in which the IRs interact with the samples. At Browse the vast library of sounds by Player or Tonality for each of the two independent layers. the risk of sounding dramatic, you can feel
96
June 2026 / www.soundonsound.com
W E N good but also because it affects how you create sounds with the library. Minimal with a strong graphic design element, it influences both the appearance of the layout and how you make adjustments to parameters. The language of RUINS is one of clicking and dragging circles to increase intensity, moving horizontal lines upwards or downwards to adjust sustain or tuning, changing angles on lines for harder or softer attack and quick or gentle release; playback direction is indicated by arrows, and loops by colour. Moving away from the usual faders/numbers/knobs type of interface towards one where the visual elements underscore the action they control adds to the experience in a way that might be difficult to quantify but is certainly felt. Things mostly work beautifully, which is why small deviations stand out more. For example, clicking on the IR menu brings up the entire list of available options on screen, which is great for quick selection; same when selecting the length of the IR, start direction of a sample and LFO source. On the Effects page, however, clicking on Reverb Type cycles through Hall, Plate and Smear, and Modulation Type cycles through its options as well, so if you want to go back to the first one, you have to go through the cycle again. It’s hardly a major inconvenience, but in an instrument that is otherwise about the small details, it broke the spell.
USB Solo mk2 from
Conclusion When you step into the world of RUINS, it helps to leave reality behind. Here, the guitar is not a guitar, the impulse responses are ethereal, modulation is everywhere, instability is to be exaggerated, every loop is a step away from becoming a groove and sounds are constantly evolving. It’s breathtaking in its detail and if you’re easily overwhelmed, it can make you question your creative process. If you embrace the openness though, there’s freedom to be found in the transformation of the raw material. A good place to start is one of the 250+ sound design presets. Never mind what the parameters are actually meant to control, just begin tweaking them one by one and listen to how it transforms the sound. There are no traditional rules of the guitar world to be followed so you can’t be wrong. I should note that I experienced several instances of the instrument freezing, solved by a DAW restart. It could be that my system isn’t robust enough, but the CPU meter didn’t indicate overload before the crash so perhaps that’s a glitch to be worked out. It did, however, function without trouble in the standalone Kontakt 8 player. Despite having over 4500 raw WAV files to play with in the library (that you can also use in your own sampler or DAW as you like), some folks are so taken by the instrument’s playback engine that they’ve been asking if they can drop their own samples into it for manipulation (simple answer: you can’t). For the rest of us, we’ll take our time getting to really know the core sounds in RUINS and the many possibilities for sonic manipulation hidden within.
High spec MIDI to CV converter with both USB and 5 pin DIN MIDI V/Oct & Hz/V – Gate & S-trig – 3 aux outputs – clock & DIN Sync Can be used as a USB MIDI Interface (while still converting to CV) All of the features of the Pro Solo mk3 but with the addition of USB See website for full information
SPLIT, MERGE, EXTEND OR CONVERT All the MIDI you need, right where you need it
Thru-5, 12 & 25
Merge-4 & 8
Split a single MIDI source into 5, 12 or 25 identical copies
Combine the data from 4 or 8 MIDI sources into a single output
LNDX & LNDR
MIDI USB Host mk3
Extend MIDI up to 1000 metres LNDX (shown) has etherCON connector
MIDI IN & OUT on DIN for your USB-only keyboards, controllers & synths – without using a computer
£ £249 including VAT. W www.slateandash.com
WE MAKE MIDI WORK FOR YOU Contact the MIDI Specialists www.soundonsound.com / June 2026
kenton.co.uk
97
INSIDE TRACK
D’Mile & Anthony Masino: Bruno Mars The Romantic Producer and songwriter D’Mile helped develop Bruno Mars’ nostalgic soul sound — and Anthony Masino’s work at retro studio Penrose Recorders played a key role in capturing it. PAUL TINGEN
W
ith 16 Grammy Award nominations and six Grammy wins since 2017, Dernst Emile II, aka D’Mile, is one of the most successful American songwriters and producers of the past decade. His credits include Rihanna, Mary J Blige, Janet Jackson, the Carters, HER, Lucky Daye, Silk Sonic and Bruno Mars. Most recently, D’Mile co-wrote and co-produced Mars’ collaboration with Lady Gaga, ‘Die With A Smile’, which was the second-biggest song of 2025, as well as
98
June 2026 / www.soundonsound.com
Mars’ fourth solo album, The Romantic, released in February of this year to worldwide success.
Magic Moments D’Mile and Mars almost always work together at the latter’s Shampoo Press & Curl studio in Los Angeles. It’s named after the songwriting and production trio Bruno Mars formed with Philip Lawrence and Brody Brown, which delivered Mars’ wildly successful third solo album 24K Magic (2016). The studio is full of rare and vintage analogue gear, complemented
by the modern tech needed to make sure recordings can hold their own today. “The way we tend to work is that he comes in with an idea, he’ll get on the piano or guitar, and he’ll ask me what I think of it,” says D’Mile. “He always looks for a yay or nay from me. Very rarely will I come in with an idea. Then we spend a lot of time trying to see what we can turn the idea into. And then we will change our minds, or he’ll say, ‘No, this isn’t right. We need to approach it a different way.’ Over the span of three years we worked on The Romantic, that was happening a lot!
Producer and songwriter D’Mile worked with Bruno Mars and Anderson .Paak on the Silk Sonic project, and has now co-produced Mars’ hit album The Romantic.
of time arranging and rearranging every song, so we ended up with huge amounts of versions of each song. Versions could be completely different, or we’d only change one element, like the bass, or the drums. We tried different tempos, different feel, anything. There might be a ’90s version, and then we’d do an ’80s version, or we’d try a completely different musical genre, or change the chord structure, the arrangement, and so on. Sometimes versions were so different that you’d think they were different songs. This process is unique to Bruno. I don’t really have that process with anybody else. It was the case both when working on the Silk Sonic album and on The Romantic. “At my own studio, GCR, which also has a lot of analogue gear, I’ll start new ideas in Ableton, but I barely used my laptop with Bruno, because we’re performing things live. Sometimes I’d program some fake strings or horns or did some edits in Ableton. Towards the end when we knew what the arrangements were going to be, we had a trumpet player come in and Bruno and I would come up with his parts on the spot. But mostly, Bruno and I just went in and jammed, and Charles recorded. With all those different versions,
and feeding off each other, we each know what roles to play. Most of the time he’s more directive, and I’m more like a sounding board.”
Romantic References The Romantic has a strong retro element, to the point where some listeners have suggested specific ’70s tracks as inspirations for individual songs. According to D’Mile, that doesn’t really reflect the actual writing process. “Bruno wanted the album to be very Chicano soul, but there wasn’t any specific artist
D’Mile: “There might be a ’90s version, and then we’d do an ’80s version, or we’d try a completely different musical genre... Sometimes versions were so different that you’d think they were different songs.” “A lot of the time is also spent working on sounds, trying to see which mics and mic placement work best. Bruno’s incredible engineer, Charles Moniz, is always very helpful when we do this. A regular day in the studio would have seen Bruno, Charles, his assistant Alex Resoagli, and I. Sometimes Brody [Brown], James Fauntleroy and/or Phil Lawrence came in to write or jam. Bruno has all his instruments set up and ready. We go back and forth to see which instrument or drum kit sounds better for which song. I’ll pick up a bass, he’ll pick up a guitar or he’ll hop on the drums, and then we might switch. We could be on any instrument.” During the three-year gestation period, “The songs themselves were often changed and rewritten, and we spent a lot
a lot of credit goes to Charles for being really organised, and knowing where to find everything. Bruno also has a very good memory, and left with a CD or some files every night, so he could listen to what we had done. “At the time, I didn’t get to leave with anything. I think Bruno didn’t want to run the risk of anything leaking, but also, I don’t want to hear the songs finished until they are close to completion. I just want to forget what happened, so when I come back to the studio, I have a fresher perspective. I like to maintain some objectivity. Especially when I also play many of the instruments, like I did on the Silk Sonic record, it helps that I co-produce with Bruno. He’s such a great producer. And when working together
or record we were trying to sound like. Bruno just loves the music from that era. We were listening to all types of things, mainly for the sonics, as in, ‘How did they get that snare sound?’ or ‘How did they get the horns to sound like that?’ Sometimes there was something in what we listened to that Bruno wanted to capture, even if that song didn’t sound at all like what we ended up doing. I can’t remember exactly what we listened to. It’s all a blur. But I do remember hearing ‘Low Rider’ [1975] by War, and a song that had a major impact on the album was ‘Can I Call You Rose’ by Thee Sacred Souls. It’s very recent, from 2020, and recorded by [Daptone Records co-founder] Gabriel Roth. The song sounds like it’s from the ’60s, and Bruno loves it, and how it
www.soundonsound.com / June 2026
99
INSIDE TRACK
BRUNO MARS: THE ROMANTIC
The D’Mile Story Now aged 41, D’Mile grew up in Brooklyn, New York. His mother, Yanick Étienne, performed and recorded as a backing singer with Bryan Ferry and Roxy Music, while his father, Dernst Emile, is a producer and music teacher. “Many different instruments were present in our house, and all I needed to do was just grab any of them. When I started playing piano at age three, I was as serious as one can be at that age! There also were an eight-track mixer and an eight-track tape recorder, so I was also used to recordings being made. When I was five or six, my parents went into a major recording studio, with an SSL board and a 24-track tape recorder, and tons of outboard. Seeing all that gear made a big impression on me. I thought these reverbs gave the coolest sound I’d ever heard. At midnight my parents would still be working, and they’d have me sleep behind the SSL board because it was so warm.” Over time, D’Mile learned numerous instruments, and today he plays bass, guitar, drums and keys on most of the tracks he produces. As a teenager, he also became proficient with Cubase. His skills, hard work and family connections combined to deliver his first big break at the age of 20. “My dad was giving lessons to someone who took an interest in my music, and he and someone else took on the roles of my manager. We started getting into business together and doing the daily grind of getting my name out there and trying to get meetings and so on. One day we were able to meet with Full Force, a production team from Brooklyn, who had a lot of hits in the ’90s and ’80s. They were working on a project with a new artist called Rihanna, and heard a track of mine that they loved. They thought it was perfect for Rihanna, so they wrote to it and it appeared on her first album.”
This photo taken during the Silk Sonic sessions shows, left to right, Anderson .Paak, Brody Brown, Bruno Mars and D’Mile.
‘That La, La, La’ featured on Rihanna’s Music Of The Sun, and led to D’Mile also co-writing and co-producing the song ‘Gonna Breakthrough’ on Mary J Blige’s The Breakthrough, and signing to mega‑producer Rodney ‘Darkchild’ Jerkins’ publishing company. “I met Rodney in 2005, and he signed me as a producer. I basically lived at his studio in New Jersey for two years until he and his entire crew moved to LA in 2007. We spoke the same language in a lot of ways. Just seeing his process and how he produces was a blessing, and of course I picked up on a lot of new things. At that time, I was still on Cubase, but when I joined him I got into using the Akai MPC 3000 and switched to Pro Tools, and also Logic.” Having worked with Jerkins on Janet Jackson’s album Discipline (2008) and several other prominent projects, D’Mile went independent in 2009, and continued a career that by most standards would be judged very successful. Despite this, he was contemplating giving up. “I was starting to feel stagnant. Maybe
sounds. So we went to see Gabriel to pick his brain on how he recorded it.” Mars & Co ended up re-recording with a band at Roth’s studio, Penrose Recorders in Riverside, near Los Angeles. “There are versions of the songs in the vaults with me playing bass or drums or whatever, but for this album, Bruno in the end decided to do something different and incorporate his band, which I was all for. I almost wish we’d
100
June 2026 / www.soundonsound.com
there were times when money was a factor, but mainly I felt like I was not progressing. Even though I worked with all those big artists, most of what I had were album cuts and not singles. Before streaming it was respectable to have album cuts, but by that stage the industry tended to only care if you’re in the top 10 or had the biggest record of the week. So I felt like I needed to rethink and level up in some way. I also was trying to get more in the pop world, because everybody was always calling me for R&B music, and I can get bored doing the same thing.” Ironically, it was actually a project with R&B singer Lucky Daye that got D’Mile back on track. “Lucky also was at a place in his life where he felt like it was going to be his last chance. So we were like, ‘Let’s just work together and have fun.’ At the time, he wasn’t signed yet. We were happy just creating music. Then he got signed and the album actually came out, and the reactions were the beginning of a shift in my trajectory.” The opening track of Daye’s debut solo album Painted was nominated
done that with Silk Sonic as well, but because it was recorded during the pandemic, we couldn’t. For me the best part of working on The Romantic was seeing the band play the songs together in one room, like it used to be done back in the day. I always love working with live instrumentation because that’s where I come from. “Towards the end of the process, maybe August-September 2025, after
for a Grammy Award for Best R&B song, as was HER’s ‘Could Have Been’, also co-written and produced by D’Mile. A year later, D’Mile won his first Grammy Song Of The Year for HER’s ‘I Can’t Breathe’. Two years later he received three Grammy Awards (Record Of The Year, Best R&B Song, Song Of The Year) for Silk Sonic’s ‘Leave The Door Open’, which was co-written and produced by Bruno Mars and D’Mile. “I first met Bruno in August 2019. He contacted me via James Fauntleroy, a mutual friend, and Brody Brown [both part of production team 1500 or Nothin’]. One day James texted me, saying that Bruno wanted me to come by his studio. I went over and he’s held me hostage ever since! Our first releases were a Charlie Wilson song ‘Forever Valentine’ [2020], which was something that he had already started with the Stereotypes, and I helped finish it, and the Arashi song ‘Whenever You Call’ [2020], which the two of us did when we were working on the Silk Sonic album and needed a break.”
three years of us writing and producing the songs, we got the band in. Bruno did rehearsals with them for two or three weeks, using the stems from our recordings. I came by a few times, and they were killing it. They sounded great. They included a guitarist friend of mine, Chris Payton, who had already replaced many of Bruno’s and my guitar parts in our original recordings, and I was able to get my drummer friend, Carlin White,
prehensive
mics an
uide PLUS d
The Sou
Guide nd On Sound
tical A clear, prac eo r guide to ste the recording in real world! LEARN HOW
ary
EE
o e r e t S g n i k i M
etailed gloss
FR
Includes com
s buyers g d accessorie
Includ es comp re h e n sive mics a nd access ories buyer s guid e P LU S d e ta i l e d glos sar y
TO...
g s and recordin X Choose mic ith confidence techniques w e, in any space. rc — for any sou ble stereo able, controlla rror. st ve ie ch A X ut trial and e images witho ys really w stereo arra ation. o h d n ta rs e d lis X Un depth and loca create width, hone and h both headp . X Record wit ack in mind speaker playb plan. s don’t go to g in th if t o o X Troublesh
This FREE fully illustrated, 80-page eBook demystifies the physical and psychoacoustic principles behind stereo audio capture, busting longstanding myths and replacing guesswork with clear, measurable concepts. X It explains why different stereo microphone techniques behave the way they do — and how to choose and use them with confidence in real recording situations.
X Every concept is supported with real-world examples, combining clear explanations, detailed diagrams and audio demonstrations, to make complex ideas immediately usable.
X Designed for recording engineers, music-technology students, and technically minded musicians, this guide gives readers the tools to make deliberate, repeatable stereo recording decisions, leading to successful, predictable results.
Available FREE from sosm.ag/stereo-miking-ebook
INSIDE TRACK
BRUNO MARS: THE ROMANTIC
to play on a couple of songs as well. The band was playing to Bruno’s vocals, which he had recorded with Charles, I think mostly using an old Neumann U87.”
Eight-track Paradise Penrose Recorders is even more old-school than Mars’ or D’Mile’s studios. “The studio was like a time capsule!” recalls D’Mile, “The band was bass, drums, guitar and organ and they did six, seven takes of each song. Gabe [Roth] and lead engineer Anthony Masimo recorded everything to a one-inch, eight-track tape recorder, so we had to work with very few mics. It’s a nice-sounding room. Again, we paid a lot of attention to the placement of the mics. And the Penrose recordings were quick. In one case we cut three songs in a day! We spent about 10 days recording nine songs in total at Penrose. “We transferred these eight-track recordings to Pro Tools, so we could cut and paste between songs and parts. Do we use this or that bass or guitar part, or the verse of this take or that take? A click
was used because the band was playing to Bruno’s vocals, and to make it easier to line things up. I put all tracks in Ableton to make sure everything was tight, and to clean things up and so on. Depending on the songs, we ended up mixing and matching between the band versions and the original versions that Bruno and I had done. ‘Dance With Me’, ‘Risk It All’, ‘Nothing Left’, ‘God Was Showing Off’ were all completely done at Penrose, the other songs were either the original versions we’d done at Bruno’s studio, or a mix of both. “Once the band was done, we overdubbed horns. The strings were arranged by Larry Gold and recorded at Milkboy Studios in Philadelphia. We used a lot of outboard during recording, and all recordings touched tape, but we did not use any of that during post. We actually tried to do the mixes old school, on analogue equipment, but Bruno quickly realised how long this process would take. No recalls! Bruno wasn’t used to that, so he said, ‘We need to go back to Pro
Tools so we can fix and edit and finalise things.’ He wants to be old school, but he definitely relies on today’s technology when it comes to A/B’ing and recalls and mixing. So we pivoted and got Serban [Ghenea] to mix the album, also to give it a more modern sound. “Charles had done really rough mixes at Bruno’s studio, that gave Serban a ballpark idea of what Bruno was used to hearing. Many artists don’t want to stray too far from what they have been listening to. It was Serban’s job to match the recordings at Bruno’s place and at Penrose and to make sure everything can stand up to what’s out there today. He did a great job of making everything sound cohesive. Bruno and Serban were in constant communication about exactly what he was going for. We spent a lot of time going back and forth with Serban to get it right.”
Recording The Romantic
Photo: Jo Anna Edmison
Anthony Masino was lead engineer on the recordings made at Penrose Recorders.
102
June 2026 / www.soundonsound.com
Songwriter, multi-instrumentalist, engineer and producer Anthony Masino is the right-hand man of Daptone co-founder Gabriel Roth, working at the latter’s Penrose Recorders studio. “I continue to enjoy working with tape because you need to commit early, and, with just eight tracks, pay attention to only putting into a song what needs to be there. It’s more practical to arrange the song with the people in the room before you start recording. I really like that process. It’s lost in the digital world, because the endless options can make you lose sight of what the song really needs. “Gabe taught me a lot about how to work with analogue, including splicing tape, how to punch, and maintaining the tape recorders, so all frequencies are flat and aligned. At Penrose we have two Ampex 440 recorders, an eight-track one-inch and a two-track quarter-inch. We’ve A/B-tested them with digital many times, and there’s something that tape does to sound that helps you. Tape has a natural roll‑off of highs and lows and adds some compression that all happen to really make many things sound better. It means there’s one less EQ or compressor that you need to shape the sound. We do use Pro Tools sometimes at Penrose, and it can be practical for certain purposes, and some things do sound better on it. So the main thing is to use your ears. “The thing about the Daptone approach to engineering is that it’s about making things sound good in the room even before you put up a microphone. We
Little AlterBoy More Choices for Your Voices
Unlock a new realm of audio exploration and discover a palette of effects for expressive tonal control that go way beyond pitch-shifting. Little AlterBoy also includes a powerful combination of formant-shifting and tube saturation (and more!) to dramatically alter the texture and character of your vocals and instruments.
“If anything is just too pure and not exciting enough, reach for Little AlterBoy ASAP.” – Andrew Sarlo (Big Thief, Nick Hakim, Bon Iver)
Free 30-Day Trial at www.soundtoys.com
ON TE ST
Roland TD516
Electronic Drum Kit Is Roland’s TD516 the perfect electronic drum kit for the studio? MARK GORDON
R
oland have long been at the forefront of electronic drum design, and a steady stream of new V-Drums releases that continue to push the technology forward at pace. At the heart of this latest line-up is a new and deliberately consistent design approach, centred on three control modules — the V31, V51 and flagship V71 — that all share the same core architecture, sound engine and trigger-handling technology. The different models in the range are no longer defined by sound quality alone, but primarily by interface connectivity and workflow. This marks a notable shift from Roland’s previous approach, where the flagship control modules such as the TD-50X offered more hands-on control, as well as a larger sound library and more in-depth editing than the units beneath them, such as the TD-27. The model under review here is the midrange Roland TD516, which centres around the V51 module and sits at a particularly interesting point in the line-up. It is the most affordable kit in the range to include the company’s trio of digital pads — the 14-inch digital snare, 14-inch digital hi-hats and 18-inch digital ride — bringing
106
June 2026 / www.soundonsound.com
flagship-level pad technology into a more accessible package. Alongside the TD516, I also spent time with its acoustic-style sibling, the VAD516. While both kits share identical electronics and sound generation, the VAD version packages the technology within full-depth shells and conventional hardware, adds larger cymbals and introduces an updated digital snare design. The result is a kit aimed squarely at players seeking a traditional look and stage presence.
Get Your Kit On The TD516 is a pad-based kit centred around the new MDS-STD3 four-post rack, an upgraded version of the MDS-STD2 rack that shipped with the TD-27. Although very similar in appearance, the new rack claims to offer enhanced stability, making it more suited to the larger, heavier components included with the V-Drums 5 Series. It also adds additional clamps for greater versatility when positioning drums, with the three boom cymbal arms having the option of mounting on the crossbar or slotting into the vertical posts. The TD516 does not include a hi-hat stand, snare stand or bass drum pedal. While this has long been standard practice, the omission feels more noticeable
now that Roland own DW (Drum Workshop), particularly given that the VAD kits are supplied with Roland’s tripod hardware. The tom pads are entirely new designs. Two 10-inch PD-10P rack toms and a 12-inch PD-12P floor tom offer dual-zone triggering and feature several structural changes. Externally, the pads now use die-cast chrome hoops with a low-profile rubber protector fitted inside the rim, rather than wrapped over it. This gives the pads a more acoustic appearance, while also making rimshots feel more natural under the stick. Internally, Roland have replaced the single central trigger cone used in earlier pads with a three-cone trigger system. This not only helps eliminate hot-spotting but also introduces positional sensing across the head, along with improved detection of shallow and full rimshots. The KD-12 kick pad is another new presence. It is physically larger than the KD-10 used with the TD-27 and visually resembles the earlier KD-140 design. Rather than using a full mesh drumhead, however, the playing surface consists of a mesh-covered foam trigger pad. This produces a slightly firmer and more controlled feel than a full-depth mesh kick drum but remains extremely consistent.
The substantial spurs keep the pad firmly in place even during aggressive double-pedal playing, and Roland include a protective patch designed to prevent premature wear of the mesh surface. Two crash cymbals are included: the 12-inch CY-12C-T and the 14-inch CY-14R-T. Both have been around for a few years and are part of a ‘thin’ series of cymbals that offer a more natural feel and swinging motion. Technically a ride cymbal, in the TD516 configuration the CY-14R-T functions as the second crash rather than a ride, meaning that its bell zone is unused. One of the defining aspects of the TD516 is the inclusion of Roland’s trio of digital pads: the PD-140DS 14-inch digital snare, the VH‑14D 14-inch digital hi‑hats and the CY-18DR 18-inch digital ride cymbal. These components have been present in Roland’s higher-end kits for several years, but their appearance in the mid-tier TD516 significantly elevates its feel and realism. For readers who haven’t encountered them in my earlier reviews, here’s an overview. The PD-140DS 14-inch digital snare makes a significant contribution to the TD516’s acoustic-like feel, with its full-sized metal shell and substantial weight making it look and, more importantly, behave like
a real acoustic snare drum. All three digital components connect to the V51 module via USB, which not only powers their onboard processing but also allows them to transmit far more detailed performance data than a conventional analogue connection. Internally, the PD-140S utilises four cone triggers to supply dynamic and positional information to the module, which not only includes centre to edge position but now also left/right and top/bottom strikes. Cross-stick handling is one of its standout features: place your hand on the head (which responds to the static electricity in your hand), and the pad instantly switches to a cross-stick articulation. There’s no button, no ‘rim-only zone’. It behaves exactly like an acoustic snare drum should. Brush performance is supported, too — struck brush notes are convincing, and it feels as though support for continuous sweeping has been improved, although this still represents the one area where the technology can show its limits with slightly inconsistent results. Roland’s VH‑14D digital hi-hat set the benchmark for e-drum realism. The two-piece design mounts to a conventional hi-hat stand, giving it the movement, mass and physical inertia of acoustic cymbals,
Roland TD516 £2999 pros • Digital snare, hi-hat and ride remain among the most realistic electronic pads available. • New V-series sound engine offers deep, organic-sounding kits. • Mac and PC editor included. • Large colour LCD improves navigation and editing workflow. • Roland Cloud support allows the sound library to grow over time.
cons • Hi-hat still lacks a dedicated bell zone. • Snare stand, hi-hat stand and kick pedal not included with kits. • No positional sensing on VAD516 tom pads.
summary Electronic drumming has rarely felt this refined at this level. The TD516 combines flagship pad technology with a modern, expandable sound platform that makes it an exceptionally powerful studio instrument, while the VAD516 brings the same capability to a more performance-focused format.
with its 14-inch diameter mirroring that of a typical acoustic hi-hat, albeit with a little more substance.
Cloudbusting One of the more forward-looking aspects of the V51 module is its integration with Roland Cloud, Roland’s online ecosystem for sound libraries, instruments and expansion content. While the module already ships with an extensive collection of acoustic and electronic kits, Roland Cloud opens the door to a growing catalogue of additional sounds designed specifically for the current V-Drums platform. Because all the V-series modules share the same internal architecture, any expansion kits remain fully compatible across the entire range, regardless of whether you’re using the V31, V51 or V71. After creating a Roland Cloud account on a computer or mobile device, you can browse expansion packs through the Roland Cloud Manager application. Registering a Roland product grants six months of complimentary access to the available content, after which packs can be obtained either via subscription or purchased as lifetime licences. Once downloaded, expansion packs can be transferred to the
module in two ways. The first is the traditional method: copying the files to an SD card formatted by the module and importing them via the V51’s data-management menu. The process is straightforward, with the module installing the kits and associated samples directly into its internal library. A more streamlined alternative is provided by the Roland Connect app available for iOS and Android. The app communicates with the module and guides you through linking the V51 to your Wi-Fi network. Once configured, expansion packs selected in the app can be downloaded directly to the module, without the need for a computer or SD card. Expansions are stored in the module’s Rack, a storage area capable of holding up to 100 kit and instrument expansions. From there, kits can be loaded into one of six active slots, allowing them to be assigned to user kit locations within the module. Think of the rack as a library shelf and the slots like books you currently have on your desk. In practice, this can seem a slightly clunky process. However, with the
v2.0 firmware update it becomes less of a hands-on hassle because of the ‘Auto Slot Load’ feature that automatically loads the required Expansion/Kit Pack into a slot when you switch to a kit that uses it. The distinction between rack and slot still exists under the hood, but you no longer have to manually manage that relationship. Although the current selection of expansions isn’t huge, the available packs include some excellent DW drum and cymbal collections, each providing several preset kits that integrate seamlessly with the module’s factory sounds. Once installed, these kits behave exactly like the internal presets — they can be edited, combined with user samples and adjusted using the full range of tuning, muffling, ambience and effects parameters. In practical terms, this means that the V51’s sonic palette isn’t fixed at the point of purchase. Instead, the module becomes a platform that can evolve over time as Roland release additional sounds through the Cloud service.
The Roland Cloud app integrates seamlessly with the V51, making it easy to download and install expansion packs directly to the module.
www.soundonsound.com / June 2026
107
ON TE ST
R O L A N D T D 516
Because the control module receives far more detailed positional data via USB, transitions between open, semi-open and closed states are exceptionally smooth and realistic. Foot splashes are crisp, partial openings sound realistic, and fully squeezing the pedal tightens the pitch naturally, just as an acoustic pair would. Bow and edge articulations trigger cleanly but, unfortunately, there is no dedicated bell sensor. This is something I noted in my previous review. Although playing towards the inner bow produces a darker tone that could pass as a functional substitute, considering the cost and technical excellence of the hi-hats I’m still surprised by this omission. Using the same static-electricity technology as the PD-14
snare, surface-muting of the top cymbal with the hand is supported. The final piece of the digital trio is the CY-18DR digital ride, an 18-inch cymbal with a physical presence so close to that of many acoustic counterparts that it genuinely changes the way you play, with its size encouraging natural stick angles and authentic movement. Multiple bow sensors, a dedicated bell sensor and an edge sensor combine to deliver smooth positional changes and consistent articulation from bell to edge, providing an incredibly realistic playing experience. The ride distinguishes shoulder versus tip strokes on the bell convincingly and includes the same touch-to-mute feature found on the VH‑14D hi-hat, which adds
Softly Does It
The V51 Editor offers a structured, software-based view of the module’s sound engine, allowing detailed editing with greater visual clarity. Although the V51 module itself now incorporates a generous colour LCD screen and a far more modern user interface than previous drum brains, Roland also provide a dedicated V51 Editor application for Mac and Windows. Connected via the USB-C port, the software offers a graphical editing environment that mirrors much of the module’s internal structure and allows detailed kit editing to be carried out from a computer screen. The software provides access to most of the day-to-day editing tasks you would expect when building or refining a kit. Instruments can be selected and layered, tuning and envelope parameters adjusted, and effects applied, without the need to scroll through pages on the hardware module. The various mixer views present the entire kit as a set of channel strips, allowing level, pan and send levels to be adjusted quickly, in a format that will feel instantly familiar to anyone accustomed to working in a DAW. The editor does stop just short of being a complete mirror of the module’s internal architecture. Some settings, such as the click configuration and trigger setup, remain accessible only from the module itself, but in practice this is unlikely to be an issue. The only omission I found surprising was the inability to assign instruments to individual outputs. Even so, the ability to view an entire kit’s structure at once and make rapid adjustments on a large screen is extremely welcome, and something I found invaluable when using the SPD-SX Pro. For anyone accustomed to working with software instruments, it makes shaping sounds on the V51 feel far closer to editing a virtual drum instrument than programming a traditional hardware module. One final feature, which adds nothing in terms of functionality but is surprisingly satisfying, is the ability to drag and drop your own image file (JPEG, PNG or GIF) on to the Kit screen to use as a custom kit image within the module.
108
June 2026 / www.soundonsound.com
another level of realism. For players accustomed to riding on large acoustic cymbals, the CY-18DR gets unusually close to the experience.
It’s All Under Control As previously mentioned, the V51 control module is based around the same internal architecture as the V31 and V71, but its physical attributes place it squarely at the centre of the new range. Its commanding presence sports a simple, uncluttered front panel featuring dedicated knobs for many often-used parameters and controls. Kick, Snare, Toms, Hi-hat Cymbals and Ambience have their own individual volume faders, along with buttons to instantly access instrument selection, muffling and tuning. The 4.3-inch colour LCD is a clear step up from previous modules, although Roland’s use of colour within the edit pages is more restrained than you might expect, but this keeps the interface clear and avoids an overly garish appearance. Along with the page up and down buttons, the four-way cursor buttons and large data-entry knob are also used to navigate the display and change parameters. Two large +/- buttons can be used to increment through the preset kits or for data entry, and a fully velocity-sensitive Preview button auditions sounds. Should you get lost in a menu somewhere, a large white Kit button takes you back to the main kit screen and illuminates to confirm its status. The front panel also includes dedicated controls for the master outputs and headphones, alongside a Backing knob that adjusts the level of external audio sources connected to the Mix input, such as a sample pad or MP3 player. This control also governs the click level — a dual role that proved slightly frustrating in practice, as I often use the Mix input of a module for an in-ear monitor feed and would prefer independent control of the click. Bluetooth support is also included, providing a convenient wireless option for playing along with backing tracks. Three USB ports are provided on the rear of the unit for connection to the digital pads, while the analogue pads connect via a 25-pin D-Sub connector on the underside of the module using the supplied loom. Four separate jack trigger inputs are also included for connection to additional auxiliary pads, triggers and cymbals, one of which is used for the second crash cymbal in this configuration. The left and right main outputs are augmented by a second pair of direct outputs, offering a degree of
flexibility in sending individual signals to a front-of-house desk for live performances. The side panel features MIDI in and out sockets, a USB-C socket for connection to a computer or tablet, and a somewhat retro SDHC card slot to import user samples and new expansion packs, and for saving backups. The V51 also features two headphone sockets — quarter-inch and 3.5mm — which is a welcome feature for teaching or rehearsal situations.
Sound Crowd In previous reviews of Roland modules, I have dutifully charted the exact number of kicks, snares and percussion samples, excited when each generation managed to double the tally. With the V51, Roland dispense with the details and simply state: “Instruments — more than 1000”. Which is a quiet acknowledgement of just how far the range has evolved. The number of instruments on the V51 is, indeed, vast and, more importantly, expandable via the Roland Cloud (see box). The Prismatic Sound Modeling technology that was at the heart of the previous generation of modules has been replaced by a new library of high-resolution, multi-layer samples, created in collaboration with Drum Workshop (DW), which Roland now own. These samples are deeply multi-layered, with extensive round-robin randomisation, multiple articulations and behavioural modelling, giving them an organic feel that has much more in common with a modern sample-based virtual instrument than a drum module.
The V51 module sits at the centre of Roland’s new line‑up, combining a streamlined front panel with dedicated faders and a 4.3-inch colour display for clear, hands-on control.
The V51 does retain Roland’s familiar V-Edit parameters — tuning, shell depth, head type, muffling and so on — but they’re now subtly less dramatic than they were under the Prismatic engine, because the raw material is already so deeply sampled and pre-engineered. One other notable change is the move from two user layers per instrument on the previous modules to three on the V51. In the older Prismatic engine, you had a main instrument and a sub-layer, primarily used for layering a second sound, enhancing transients and
Venos Stereo Bus Compressor
adding textures. Since the V51 engine is built around multi-layer sampling, all three layers are discrete, assignable and editable, which allows for more detailed multi-mic combinations, parallel transient layers, additional samples to be added (including user samples) or velocity-dependent switching between timbres. The effects engine has also seen a significant upgrade, where every individual instrument has access to its own multi-stage processing chain, rather than being limited to a single insert effect
NEW!
Adding size, depth and impact to a stereo signal has never been easier. With SPL 120V technology this sound is crowned to king of dynamics.
www.soundonsound.com / June 2026
109
ON TE ST
Applied Acoustic Systems Objeq Delay 2 Delay Plug-in The original Objeq Delay is one of my favourite creative plug-ins, so I was intrigued to see what the designers could add to it — and it seems the answer is ‘more of everything’. But let’s back up a bit, for the benefit of those who have never encountered the original. The most notable feature of Objeq Delay, which supports AU, VST, and AAX plug-in hosts on Mac and Windows, is its ability to generate delays that can be coloured using resonators that are based on physical objects, such as membranes, strings or metal bars. A flexible modulation section is then used to add real-time variation to the effect, which can be set up to enhance just about any source from vocals to percussion. Real-time control over any parameter via MIDI is supported, as is host automation. In version 2, the GUI layout has been reorganised into six distinct sections that include an I/O module with level and wet/ dry balance controls in addition to metering, and each section has a bypass button. Objeq Delay 2 now has two modulator sections, each of which can be assigned to a wide choice of parameter destinations, such as filter frequency, material or formant, with a choice of six sources: envelope follower, sine, square or pulse LFO waveforms, or a monophonic pitch follower. The modulation can be positive, negative or bipolar, with a variable amount. If an envelope follower is selected as the source, Attack and Release controls appear. In LFO mode there are sync options as well as controls for rate and pulse width, and for Phase and Chaos, for adding irregularity. The delay section, which includes high‑ and low-pass filters, has also been revamped to include One-tap, Two-tap, Four-tap and Split modes, covering everything from basic echoes to rhythmic
Boss PX-1 Multi-effect Pedal Boss’ PX-1 represents the company’s entry into the one-effect-at-a-time compact multi-effects pedal world, but its ability to replicate a host of classic Boss pedals will make it a particularly attractive proposition for some. For example, effects include the long-extinct Slow Gear, originals of which now cost an astronomical amount. The
112
June 2026 / www.soundonsound.com
delays. In Four-tap mode there are buttons to engage each tap in the feedback path, a fader for spacing the taps, and separate pan controls for each tap. The delay includes filtering and sync options to different note values. At the bottom of the delay section is a switch for Gain or Psycho, but the latter has nothing to do with knives and showers! It actually introduces a form of psychoacoustic panning that exploits arrival times and spectral cues to position sounds in the stereo field. In Split mode, one knob sets the delay time for the first stage (essentially pre-delay), then the Echoes knob sets the delay time for the second stage, controlling the spacing between repeats. Each of the four taps has a button to switch it on or off. The Objeq section is where tonal colour is added to the delays using physical modelling, with adjustable frequency, decay time, material and formant, with a choice of five resonator types and either positive or negative polarity. It’s also possible to morph between adjacent resonator types. Here, pianos can be twisted into metallic vibes, toms into wah-wah darbukas, bass guitars into ethereal drones and so on. There’s also enough scope to create unusual pseudo-reverbs or smooth modulation effects. This is where the expressive sound-shaping happens, turning familiar instruments into entirely new sounds. A separate Filter module provides adjustable low- and high-cut filtering, with variable Q, a choice of one-, two- or four-pole slopes, and adjustable resonance. What else could they add? Perhaps pitch
interface is non-threatening, with just three knobs, a footswitch and a small display screen, and the controls generally behave as expected for the effects that have been loaded. I gather that Boss are also planning to add further effect options as app and cloud-based model expansions.
quantisation of the resonator frequencies would be useful when modulating them, but as it stands there’s already plenty here with which to experiment, and to give you an idea of what’s possible, there are over 100 presets arranged by category. The beauty of Objeq Delay 2 is that it can be used to add very subtle variations to traditional delay treatments when needed or add movement and interest to otherwise static material. However, the resonator sounds seem to have a softer focus than on the original version so I wasn’t able to directly replicate any of my favourite effects from the original version; in an ideal world you’d still want access to both versions. As with the original, Objeq Delay 2 can completely change the sound and feel of rhythmic loops in musically interesting ways, and in this updated version there’s more scope for crafting unique treatments to suit any sound source, albeit with seemingly less of an in-your-face sonic signature. All this comes wrapped up in a non-threatening interface, and you can try Objeq Delay 2 free for 15 days so take it for a spin and prepare to be intrigued. And of course, those who already have version 1 can update at a preferential price. Paul White £ $99 (discounted to $79 when going to press).
W www.applied-acoustics.com
Compared with larger or more complex units, the PX-1 targets players who want no-fuss immediacy, and in that respect it draws parallels with TC Electronic’s singe-slot Plethora X1, the smaller sibling of their five-slot model, and Line 6’s HX-1. These one-at-a-time pedals are really useful for adding what I call wildcard effects to a pedalboard —
things that you might only use for one or two songs, so find it hard to justify a purchase or to find space for it on your pedalboard. For example, you could team the PX-1 with your own drive pedal and maybe a separate delay pedal, to add chorus on some songs, phasing on others, fuzz when needed... and so on. You can construct a very flexible pedalboard that way, using relatively few pedals. While the PX-1 leans into the appeal of specific vintage pedals, remember that some of the effects are derived from analogue pedals, and what you get are digital emulations. But Boss’ modelling captures the feel and behaviour convincingly to my ears, and in use it’s difficult to distinguish them from the originals. Digital effects such as delay and pitch-shifting behave exactly as you’d expect if you’ve used their standalone counterparts, of course. And if you’re planning to combine the pedal with other discrete pedals and don’t trust digital drive boxes, you can always choose your own favourite analogue overdrive to go in front of the PX-1. The PX-1 also incorporates MIDI sync, alongside stereo
iZotope Tonal Balance Control 3 Mix Referencing Plug-in With a healthy appreciation of the limitations of both my own recording/mix space and my ears, iZotope’s Tonal Balance Control (TBC) has been a regular on my DAW’s stereo output since it was first released almost 10 years ago. The principle underlying TBC is simple but very effective. Placed as an insert on your DAW’s stereo output, it superimposes the real-time frequency spectrum of your own mix (shown as a solid line) upon another frequency spectrum plot, either one of iZotope’s supplied genre-based Target presets or a user Target preset, created by importing an audio file (or folder of files) from your own favourite reference tracks. The visual comparison is a powerful tool in its own right. But if you happen to also be using one of iZotope’s EQ plug-ins in your project, TBC2 also offered the ability to control that EQ’s settings from within TBC itself, letting you nudge the tonal balance of your own track closer to that of the reference. TBC3 expands on this concept in genuinely useful ways, including the ability to capture the frequency spectrum (and other data; more on this in a minute) of any
I hinted above, in a real‑world situation I would expect the PX-1 to be used for adding wild card effects to a pedalboard that already includes an overdrive pedal. For me, in fact, it would have made more sense to have had the overdrive effects as part of the optional download offerings rather than included in the factory presets (which can’t be overwritten). That way there would be more free slots to add the effects you actually need. Hopefully not all the effects that Boss plan to add will be ‘paid for’ downloads, as the existing repertoire misses a few staples such as fuzz and graphic EQ. In summary, then, the PX-1’s concept works well enough, but it makes particular sense for players who only need certain effects occasionally. If, for example, a flanger, phaser or perhaps a Slow Gear is required for just a song or two, having access to those sounds without adding dedicated pedals for each effect is very practical. The PX-1 is also useful in studio situations, providing quick access to different classic Boss effects. Paul White
I/O, expression pedal or external switch support, and tap tempo. When you first fire up the PX-1 you’ll find a curated package drawn from Boss’ historic compact pedals. Out of the box, the pedal includes eight core effects, with eight more that can be chosen using the Boss Effect Loader app. Amongst the available effects you’ll find overdrives like OD-1 and SD-1, DS-1 distortion, the CS-1 Compression Sustainer, plus various flavours of classic Boss modulation and stereo effects such as the CE-2 chorus, BF-2 flanger, PH-1 phaser, VB-2 vibrato, PN-2 tremolo/pan, and some of the more experimental effects. For example, there’s the SP-1, the aforementioned SG-1 Slow Gear, the OC-2 Octave, a PS-2 Pitch Shifter/Delay, the DD-2 Digital Delay, and the quirky DF-2 Super Feedbacker/Distortion. The CE-2 chorus and PH-1 phaser sound every bit as rich their dedicated pedal counterparts, while the Slow Gear adds a bowing attack to single notes every bit as well as its coveted analogue counterpart. The overdrives also capture the analogue pedal vibe, though as
£ £219 including VAT. W www.boss.info
audio playing within your DAW, to create a new user Target preset. You also now get TBC3 as a standalone desktop app, and it can perform the capture process for any audio playing back on your desktop, for example from YouTube or Spotify. And, while the audio itself isn’t captured within this process, the frequency distribution, vocal level, dynamics and stereo width data are. All of these data are then present within TBC3’s Target presets. TBC3 also includes a much larger collection of genre (and sub-genre) based Target presets, you can import user Targets created with earlier versions of TBC, mark specific Target presets as favourites for easy recall, and create a new Target preset by blending together user-defined percentages of two existing presets. As well as retaining the ability to ‘drive’ an external iZotope EQ, TBC3 now also has
its own built-in EQ processing — a multiband affair, it has an impressive collection of filter types and each band can work dynamically too. What’s more, the EQ controls and curve are now displayed directly on top of the main display, making adjustments that bit more intuitive. You also get an interesting new display mode called Leveled view (as shown in the screenshot), which makes it easier to judge the differences between your mix and the Target reference while making any EQ adjustments. It’s all very neat. A the bottom left of the GUI, the Extra Meters button pops open three additional metering options, providing targets and
www.soundonsound.com / June 2026
113
ON TE ST
real-time feedback for your mix’s Vocal Balance (using real-time stem separation on your mix), Dynamics and Stereo Width. The reference data for these parameters are held within the Target presets (including user-created Targets). Again, these new meters can provide very helpful feedback as you work on your mix. Usefully, Targets in TBC3 can be shared with iZotope’s Ozone, so that Ozone’s Mastering Assistant can then suggest suitable moves to adjust the EQ, vocal level, dynamics control and stereo width (amongst other things) to nudge your mix closer to
T‑Rex RoomMate D’Luxe Reverb Pedal
Reverb pedals for guitarists are in no short supply, but in this third generation of their RoomMate reverb series, Danish company T-Rex promise analogue warmth courtesy of a dual triode valve placed in the audio path before the digital reverb engine, to offer a more organic-sounding reverb than you’d typically get from a conventional digital reverb pedal. Physically, the unit is built into a folded-steel chassis that sports five rotary controls and one footswitch. A small window shows the valve glowing away inside the case. Apparently the circuit runs the valve at a full 250 Volts, which allows it to work in its optimum design range. This pedal can accept mono or stereo inputs and also has stereo output capability, for those who need it, so there are definite studio applications in addition to a place on live pedalboards. An expression pedal jack is also fitted. Valve circuitry demands more in the way of power than solid-state analogue circuitry,
the chosen reference. This integration of the two apps is very slick and, for less experienced mix engineers, or simply those needing some suggestions in double-quick time, it has bags of potential. TBC3 provides a big step forward in workflow and features. The closest competition is probably from Sonible’s true:balance. They share a core purpose, and while Sonible’s offering is less expensive, I think iZotope have nudged TBC3 ahead in terms the range of options provided. This is particularly the case for existing Ozone users.
of course, and in this instance it uses a 12V, 600mA supply, which is included in the price. It ran fine from the 12V output of my Strymon Zuma PSU, though, and that’s rated at 500mA. A Reverb control governs the wet/ dry balance, while Decay determines the length of the reverb tail. A dedicated output Volume control allows for level matching or use as a boost pedal, plus there’s an Input Gain control for adding a little drive to the reverb engine. Tone adjusts the reverb tail from warm to bright without affecting the dry sound. Mode selection is handled via an eight-way rotary switch. When changing algorithms or making large parameter adjustments it takes a few seconds before you hear the changes. A further knob, labelled Option, adjusts different parameters depending on which algorithm is selected. In modes 1 and 2 it adjusts low-frequency damping, while in modes 3 to 7 it adjusts pre-delay. No guitar reverb would be complete without a good spring algorithm, and here you can choose short or long variants. These capture the familiar splash and slightly twangy character of the real thing, but seem to me to have a slightly softer response to transients — which I actually find very musical. Next is a plate setting, delivering a smooth, dense, studio-type reverb that’s well suited to those minor blues songs, where the guitar needs an extra helping of reverb. Both the room and hall algorithms mimic natural spaces of progressively larger sizes, and the reverb time control offers plenty of variation on each. As expected the hall reverbs can sound huge, with the longer decay times suiting cinematic or ambient styles.
“The circuit runs the valve at a full 250 Volts, which allows it to work in its optimum design range.” 114
June 2026 / www.soundonsound.com
Tonal Balance Control 3, then, is a genuinely useful utility plug-in for those who need a little reassurance that mixes or masters made in their own room/monitoring environment have their best shot at translating well to other playback systems. It’s not a trivial purchase, but iZotope offer a 10-day trial period, so you can try before you buy. It’s well worth exploring. John Walden £ £119 including VAT
(upgrade discounts available).
W www.izotope.com
Many reverb pedals now include a shimmer mode, and that’s what mode 8 offers, adding an octave-up component to the reverb tail. Every designer’s take on shimmer reverb sounds a little different, and this one benefits from rolling back the tone slightly to help it sit smoothly in the mix (the pitch‑shifting used to create shimmer adds a lot of extra high‑frequency harmonics). The effect provides a pleasingly musical, ambient atmosphere, especially at longer decay settings, and for real-time control the intensity of the shimmer effect can be varied using a standard low-impedance expression pedal connected to the control jack. Importantly, the reverbs all integrate with the dry sound in a very cohesive and natural-sounding way, rather than sounding like a separate layer, and the valve circuitry definitely imparts a subtle warmth to the sound. In summary, then, this isn’t one of those pedals that offers programmability and dozens of adjustable parameters. Rather, it’s an easy-to-use, hands-on pedal that offers all the main reverb food groups (not counting reverse!), with adjustment over tone, decay time and a further mode-specific parameter. The RoomMate D’luxe manages to sound truly musical, and its stereo capability means it isn’t limited to guitar. So if high‑quality reverb matters to you, then you really should get to hear it. Paul White £ £249 including VAT. W www.t-rex-effects.com
Discover SOS For Artists : A Complete Platform for Modern Music Creators
Your end-to-end music production suite Designed to support independent artists, producers, and collaborators at every stage of the music-making journey, SOS For Artists brings together all the tools needed to take your music from idea to release.
Create 1. Sample Selection Made Simple Over 3 million royalty-free samples growing monthly. 2. Instruments & Synths Includes a curated collection of high-quality plug-in instruments from brands like Spitfire, UJAM, Arturia, GForce, Sonuscore, and more. 3. Stem Extraction with AudioShake An integrated stem-splitting plug-in allows you to isolate vocals, drums, bass, or instrumental parts. 4. Starter DAWs Included For newcomers, the subscription includes lite versions of Steinberg Cubase and Ableton Live.
Produce 1. Mix & Effects Tools The effects collection includes EQs, Compressors, Reverbs, Delays and Saturators from trusted names. Including Eventide, Arturia, Baby Audio, IK Multimedia, and Synchro Arts. 2. Mastering — Fast, Intelligent SOS For Artists includes access to the advanced AI mastering engine from LANDR.
Distribute 1. Global Digital Distribution Distribute your music to over 150 platforms including Spotify, Apple Music, Tidal, Amazon, and Deezer. Or, if you use these platforms transfer all tracks to SOS For Artists without losing data. 2. Monetization & Royalty Splits Retain 100% of your royalties or use the Royalty Split feature and divide the earnings with your collaborators.
FREE PLAN
ESSENTIALS
ign up and explore S the features Kickstart your creativity with 7,800 samples Preview the LANDR Mastering tool Preview Distribution
or £12.99** per year per month £ 1,000 worth of Tools inc 18 Plug-ins 1200 Sample Credits U nlimited MP3 + up to 36 WAV masters U nlimited Distribution
ONLY
99*
£
* Prices exclude VAT. Taxes will be applied at the UK / EU Country rate at checkout. ** Monthly price does not offer same number of Plug-ins or Sample Credits *** Also available in most countries worldwide in your local currency.
3. YouTube Integration Link your official YouTube artist channel to keep distributed content and subscriber base in one place. 4. Promotion & Reporting Promotion tools include Linktree-style landing pages and content creation tips to help boost visibility. Detailed royalty reporting shows trends, top countries, and top-performing platforms.
PRO
199*
£
or £19.99** per year per month £2,000 worth of Tools inc 64 Plug-ins 2400 Sample Credits Unlimited MP3, WAV + HD WAV masters Unlimited Distribution
ONLY
www.sosforartists.com
SPOTLIGHT
VSL Synchron Duality Strings
LUKE WOOD
O
rchestral sample libraries have come a long way in recent years, and the sort of quality and configurability that was once reserved for custom, one-off creations shared amongst the pros is now readily available to all, and usually at a significantly lower cost, too. With so many different products now available, it can be hard to know exactly which ones are likely to suit your particular use case. There’s a lot of variance in terms of sound and features. Some are based on smaller ensembles and focus on subtle, intimate scoring work, others sample huge symphony orchestras and capture the hard-hitting sound that defines modern TV, film and game soundtracks — some do a bit of both! Another consideration is how much control you need over each instrument: if you’re looking to add some ‘ear candy’ to a track then pre-defined ensembles will probably do the trick, but if you want to create a full-on orchestral arrangement, then you’ll need to look at libraries that offer per-section patches. So, let’s take a look at some of the leading orchestral
116
June 2026 / www.soundonsound.com
Orchestral Sample Libraries
There’s never been a better time to be working with orchestral sample libraries, but the choice can be overwhelming. We round up some of the best in the business. library bundles, and more specifically, those that offer full control over each of the core instrument sections that make up a contemporary orchestra.
8dio Century Orchestra
8dio’s flagship bundle brings together every release in their Century Orchestra series, covering all of the key string, woodwind, brass and percussion instruments along with a pair of concert harps. Both the Normale and Sordino string offerings are included, each of which feature a chamber-sized ensemble (6/4/5/4/3), cover a wide variety of articulations that remain consistent across each instrument, and boast a polyphonic legato function that allows for multiple simultaneous legato transitions. Moving on to brass, the collection includes three components: Solo Brass, Artisan Brass
and Ostinato Brass, delivering a mixture of freely programmable solo and ensemble sections and a selection of repeating rhythmic phrases. Ostinato Vol 1: Flutes & Clarinets and Vol 2: Oboes & Bassoons then offer an array of rhythmic woodwind patterns, while Ostinato Strings I and II extend that courtesy to the string section; it’s worth noting that the Century range doesn’t currently include ‘standard’ solo or ensemble woodwind libraries. Century Harps then captures a pair of contrasting concert harps, with one offering a bright, shimmering sound, and the other delivering a more mellow, rounded tone. All of the included offerings run in Native Instruments’ Kontakt, and require the full paid-for version rather than the free Player variant. £ $399. W www.8dio.com
Cinematic Studio Series
Created specifically to meet the needs of modern TV, film and video game composers, Cinematic Studio Series’ collection of orchestral libraries deliver a Hollywood-style sound captured at Trackdown, Australia’s premier scoring stage. Cinematic Studio Strings kicks things off with a 35-piece section (10/7/7/6/5) delivering a sound that sits somewhere between chamber and fully fledged symphonic ensembles. A wealth of short and long articulations are present, and the library promises “stunningly realistic” true legato transitions, with yet more authenticity provided by a collection of rebow samples. Solo Strings then complements the full section with solo violin, viola and cello instruments. Cinematic Studio Brass then includes trumpets, French horns and trombones (both solo and ensemble) along with solo bass trombone and tuba, capturing a wide dynamic range that pushes into the hard-hitting territory of modern scores. As for woodwinds, the series includes flute, oboe, clarinet and bassoon (solo and ensemble), as well as solo piccolo, cor anglais, alto flute, bass clarinet and contrabassoon. All instruments across the series have been captured from multiple mic positions, with each library offering a choice of Close, Main and Room signals (Century Woodwinds also includes a fourth Overhead position) along with a stereo Mix option. Helpfully, the signals can be mixed within the library itself, or routed out to different DAW tracks. Everything runs in Native Instruments’ Kontakt, and will play nicely with both the paid-for and free versions. The collection doesn’t currently extend to percussion, although there is a section for it listed on their website, and the company have stated that a Cinematic Studio Percussion library is in the works. £ $399 per section, Piano $69. W www.cinematicstudioseries.com
Cinesamples CineSymphony Complete / Core Cinesamples’ offerings come in the form of their CineSymphony series, which brings together an entire orchestra captured on the MGM Scoring Stage at Sony Pictures Studios in Los Angeles, and is available in two tiers: Core and Complete. Opting for Core gets you the
company’s CineStrings Core, CineWinds Core, CineBrass Core and CinePerc libraries, which contain all of the mainstay instruments that grace modern orchestral scores. CineStrings includes some unique features which are said to set it apart from the competition, including the Hairpin Creator, a built-in tool for creating natural-sounding crescendos and decrescendos that are linked to DAW tempo. Complete, as its name suggests, gives you access to the company’s entire CineSymphony line-up. Pro versions of the string, woodwind and brass libraries equip each section with a wider range of playing articulations, while CineStrings Runs and Solo deliver pre-recorded string phrases and solo instruments, respectively. The flagship collection also increases the number of instruments included, with an array of additional woodwind and brass expansions joined by CinePiano and CineHarps libraries. If it’s an entry point into orchestral scoring you’re looking for, then CineSymphony Lite delivers a packed-down collection that includes a set of essential instrument sections at a greatly reduced cost. All of Cinesamples’ libraries run in Native Instruments Kontakt, or the free Kontakt Player. £ CineSymphony Core $1499, Complete $3499.
W www.cinesamples.com
EastWest Hollywood Orchestra Opus Edition Said to be “the best-selling and most awarded orchestral virtual instrument ever created”, Hollywood Orchestra Opus Edition delivers an in-depth orchestral collection captured at EastWest’s own studios — a facility that regularly records top-tier artists and film scores, and has played host to everybody from Frank Sinatra to the Rolling Stones. Hollywood Strings captures a symphony string section comprising 57 players (16/14/10/10/7), delivering the large, expansive sound associated with modern blockbusters, and is complemented by Solo
Violin and Cello instalments — there’s also a solo harp included. Hollywood Brass includes a set of ensemble patches for the likes of French horns, trombones and trumpets, along with solo cimbasso, French horn, trombone, trumpet and tuba — its timbral range covers everything from fanfares and romantic melodies to full-on, monstrous low brass. Orchestral Woodwinds takes a similar approach, with ensemble bassoon, clarinet and flute patches joined by an assortment of solo instruments, including bass clarinet and flute, contrabassoon, oboe and piccolo. Orchestral Percussion then rounds off the collection with an array of tuned and untuned instruments available in individual and combo patches. A standout feature is the Hollywood Orchestrator, a built-in sequencer-style tool designed to make quick work of creating orchestral arrangements. Over 600 customisable Ensembles, Ostinatos and Scores presets are included, allowing the tool to carry out everything from simply dividing a chord’s notes between different instrument sections to generating entire arrangements based on the chords being played. Each library includes five mic signals: Close, Mid, Main, Surround and Vintage, which make it possible to tailor the overall sound of each section to suit the task at hand. The collection is also included in EastWest’s mammoth ComposerCloud+ bundle, which provides access to every single sample library and virtual instrument in their current line-up for a modest monthly or annual fee. £ Hollywood Orchestra $599, ComposerCloud+ $179/year.
W www.soundsonline.com
EastWest Hollywood Orchestra Opus Edition
www.soundonsound.com / June 2026
117
SPOTLIGHT
ORCHESTRAL SAMPLE LIBRARIES
Native Instruments Symphony Series Native Instruments’ Symphony Series comprises six libraries that capture all of the key orchestral sections, along with a set of solo brass and woodwind instruments. String Ensemble provides a 60-piece section recorded at Studio 22 in Budapest, and takes the unusual approach of separately capturing A and B divisi groups for each instrument section; an Auto Divisi function then automatically divides notes in a chord between the two, helping to deliver a more natural sound and avoid ‘sample stacking’. Brass Ensemble then delivers a 30-piece section recorded at St Paul’s Church in San Francisco, and comprises four eight-player sections: trumpets, horns, trombones and tubas. A Brass Solo instalment includes solo trumpet, horn 1, horn 2, trombone and tuba patches. Woodwind Ensemble and Solo take the same approach as the brass, offering both a 36-player group (flutes, oboes, clarinets, bassoons, tenor saxophones and bass winds) and solo flute, oboe, clarinet, bassoon, tenor saxophone and contrabassoon, all recorded at Montclair Presbyterian Church in Oakland. Features exclusive to the woodwinds include an Arpeggio Module designed to generate everything from phrases and runs to trills and chords, and an Expression Release function designed to automatically create natural-sounding decays. Returning to Studio 22, Percussion includes 55 tuned and untuned percussion instruments with up to seven articulations each. All of the instalments in the series include Close, Medium, Far and Spot mic signals. The series also comes in an Essentials version that includes fewer articulations and single mic mix, and comes in at a reduced cost. Both variants can also be accessed via Native Instruments’ Komplete bundle, with Essentials included in the Standard tier and the full versions making up part of the Ultimate tier. As you’d expect, all of the Symphony Series offerings are provided as Kontakt libraries. £ Symphony Series £899, Essentials £359. Prices include VAT.
W www.native-instruments.com
118
June 2026 / www.soundonsound.com
Orchestral Tools Berlin Series
Orchestral Tools Berlin Series All of the instalments in Orchestral Tools’ flagship range have been captured at Teldex Scoring Stage in Berlin in traditional seating positions, offering a comprehensive and cohesive bundle that’s available in three tiers: Full, Pro and Max. Opting for Full gets you Berlin Symphonic Strings, a large 68-player section that spans from pianissimo to triple forté and includes three legato modes; Berlin Brass, which offers solo and ensemble horns, trumpets and trombones along with a tuba; Berlin Woodwinds, a collection of core instruments such as flutes, piccolo, oboes, English horn, clarinets and bassoon; Berlin Percussion, which includes over 100 tuned and untuned instruments; Berlin Strings First Chairs, a set of solo string patches; and Woodwinds additional instruments, which adds a bass clarinet, Eb clarinet, contrabassoon and contrabass clarinet. Pro then augments the core content with Berlin Strings (a smaller 8/6/5/5/4 string section) and some additional brass and woodwind offerings, while Max includes every Berlin Series instalment, including extra soloists, a whole host of additional string, brass and woodwind articulations and some harps, grand pianos and harpsichords. Everything is hosted in Orchestral Tools’ own Sine Player software, although the original Kontakt versions of some components are still available. If you only need a small selection of orchestral goodies, or are just looking to try out something new, Berlin Free Orchestra includes
a basic selection of instruments for free. There’s also Berlin Orchestra, a bundle developed alongside Berklee College of Music that offers a more comprehensive scoring collection created from the same samples used for the Berlin Series, but at less than half the cost of the cheapest Berlin bundle. Unusually, Orchestral Tools also allow users to purchase individual instruments from each collection. £ Full €799, Pro €1399, Max €2499. W www.orchestraltools.com
Sonuscore The Orchestra Complete 4 Sonuscore’s approach to product design focuses on reducing complexity, and all of the libraries in their range have been created with the aim of offering an intuitive experience that puts playing first and programming second. Their full orchestral offering comes in the form of the aptly named The Orchestra Complete. Now in its fourth iteration, the collection captures a full 80-piece ensemble, and offers individually playable string, brass woodwind and percussion sections, along
Sonuscore The Orchestra Complete 4
Spitfire Audio BBC Symphony Orchestra
with a whole host of extras including harp, grand piano, church organ, choir and more. Along with the core content, the library also includes a selection of expansions — Forces Of Fury, Woods Of The Wild, Horns Of Hell and Strings Of Winter — that bolster the main sections’ content with a wealth of additional instruments and articulations. Thanks to the company’s focus on playability, the collection is kitted out with an array of performance features designed to help players create new parts quickly and easily. The library is based around Sonuscore’s Ensemble Engine, a feature that’s capable of creating everything from rhythmic patterns to full arrangements from chord inputs — everything is generated in real time based on the user’s playing, with no pre-recorded loops or phrases involved. Users are able to control which instruments play which notes using a voicing section (over 100 preset options are provided, too) and set up comprehensive keyswitches to quickly transition between different ideas or sections of a cue, while Sequence Designer, Arpeggiator and Velocity Envelope provide familiar interfaces for carrying out more in-depth programming and tweaking. £ £355 including VAT. W www.sonuscore.com
Spitfire Audio BBCSO / Spitfire Symphony Orchestra BBC Symphony Orchestra has proven to be a hugely popular member of Spitfire Audio’s range, capturing the British Broadcasting Corporation’s orchestra performing at their then home at London’s Maida Vale Studios. String, woodwind, brass and percussion sections are present, with the latter offering a comprehensive collection of tuned and untuned instruments. Two versions of the library
are available, Core and Professional, both of which provide largely the same set of instruments — Pro introduces solo leaders for each string instrument section, and gains a few less common offerings such as a bass flute and clarinets, cor anglais, contrabassoon and contrabass tuba, trombone and clarinet. The big difference is the number of mic positions provided: Core includes a single pre-mixed signal, while Pro comes loaded with a mammoth 20 mic signals for each section. The recently re-released Spitfire Symphony Orchestra then offers a contrasting sound captured in AIR Studios’ Lyndhurst Hall. Along with the original content — which spans all key orchestral sections along with harp and piano — the library has recently been treated to new solo string patches and Motif Brass, an expansion that adds new trumpet, horn and trombone ensembles. As for software, BBCSO is hosted in Spitfire’s own sample player, while SSO requires Kontakt Player. Spitfire have kindly created free Discover versions of both the BBCSO and SSO libraries, allowing news users to try their hand at orchestral programming without needing to part with any cash. More recently, the company have set about creating an all-new collection in another of the world’s most famous facilities: Abbey Road Studio One. The line-up currently covers a range of string, woodwind and percussion sections, with new instalments still in the works. £ BBCSO from £399, SSO from £499. Prices include VAT.
W www.spitfireaudio.com
VSL Synchron Series
VSL (Vienna Symphonic Library) are renowned for their orchestral sampling prowess, and the current flagship range comes in the form of the Synchron Series.
It’s a sizeable collection that includes comprehensive orchestral sections along with choirs, pianos, harp and organs, all of which have been captured at the company’s own Synchron Stage Vienna — a fully fledged scoring stage that’s regularly used to record for film, TV and game scores. The bulk of the libraries have been created in the studio’s spacious Stage A room, while some have been recorded in the drier, more intimate-sounding Stage B — the Duality Strings instalments even feature small and large ensembles playing simultaneously in Stage A and Stage B, and allow users to blend seamlessly between the two rooms. Breaking down the libraries on offer could easily take up this entire article, but it’s safe to say that whatever orchestral instrument your piece requires, you’ll almost certainly find it in the Synchron Series! The company pride themselves on attention to detail, and go to painstaking lengths to ensure that the series delivers a natural, lifelike sound, while still providing plenty of in-depth programming capabilities. Each library can be purchased in Standard and Full versions, with the former offering the same set of articulations and core samples but with fewer mic signals — those looking to work in surround and immersive formats will be pleased to see dedicated surround and 3D positions in the Full versions. Everything runs in the company’s own Synchron Player, and offers tight integration with VSL’s MIR Pro convolution reverb and Vienna Ensemble Pro LAN hosting software. The detail-oriented approach and sheer scale of the series means that the full bundles are a serious investment, although it’s possible to purchase just the libraries you require individually. £ Synchron Series Package From €7999. W www.vsl.co.at
www.soundonsound.com / June 2026
119
ON TE ST
MNTRA Nagual
Plug-in Instrument
HHHH Built for MNTRA’s free MNDALA 2 platform and weighing in at just 1.41GB, Nagual is a polyphonic instrument comprised of what MNTRA describe as rare pre-Hispanic Mexican ceremonial sources. The recordings were captured in collaboration with Ramiro Ramírez, an expert in performing with these historic instruments, to encompass clay flutes, conch trumpets, wooden drums, ocarinas and ritual whistles. However, this library doesn’t only offer straight recreations of these ancient sounds but also includes processed, morphed timbres in which monophonic instruments become polyphonic, touch-sensitive patches, often moving far away from the original voice. XYZ faders allow the user to interact with the patches, either directly from the plug-in window (either as faders or by dragging shapes) or by MIDI control and recorded as automation. The instrument offers 134 presets categorised as Elements (Wind and Percussion), a range of Atelier categories and CNDSD (Ambiental Experimental, Percussion and Sequence). The patches respond to velocity but to my ears there’s no apparent velocity switching. Apparently the original instruments were used for “shifting consciousness through ceremony”, and Ramírez’s expertise with these instruments (which he has played on the scores of some very high-profile movies) has provided MNTRA with authentic performances from which to forge their sound sculptures. The original recordings were made in Panoram Studio’s live room in Mexico City using MNTRA’s own wide-bandwidth multi-miking arrays with Eigenmike Ambisonics processing. Sample start modulation is used to add natural-sounding variations to note attacks. So what are these ancient instruments? Here we’re treated to warbling clay water flutes, conch shell trumpets, huehuetl and teponaztli drums, ocarinas and more. It seems these ancient people gravitated towards blown instruments and percussion. The original sounds are recorded with numerous articulations that include different note lengths, pitch slurs, trills and flutter tonguing. The use of microphones able to capture frequencies outside the human hearing range has allowed some
120
June 2026 / www.soundonsound.com
normally inaudible frequencies to be exploited when pitch‑shifting the samples; indeed the useful range of these samples is very impressive. Some of the shorter articulations, in particular the percussive sounds, make excellent musical punctuations while the wind instruments have an endearingly haunting quality. The more processed sounds still capture the organic feel of the original sources but offer more malleable alternatives, in some cases manifesting as evolving pads, often incorporating breathy sounds, and the way the sound shifts and morphs as you adjust those three real-time controllers is impressive. A few sequenced rhythms and ensembles are also available, again varying in timbre as the real-time controls are manipulated. Nagual clearly has applications in cinematic composition but it also has plenty to offer the ambient or relaxation music composer too. An impressive library for an affordable price. Paul White $59. www.mntra.io
WilTone Productions Music Row Piano Kontakt Instrument
HHHH Music Row Piano (Nashville Studio Grand) is a new and refreshingly simple piano library, designed to offer the perfect commercial piano sound right out of Kontakt. The brainchild of Nashville session player Will Houchens, Music Row Piano is sampled from a single instrument, a Yamaha C7. This is easily one of the most popular models for commercial work, benefitting from a degree of brightness in its tonal colour. European instruments might sound superb in isolation, but can sometimes sound muddy and dark in a mix, requiring extensive EQ’ing. According to Houchens, great care was taken in the selection of mics, placement and signal path assignment, arguably going further than a regular recording session. He also called upon the help and talents of local Nashville engineers to capture the perfect tone through three microphone signals, which are presented in a basic mixer format as part of the interface.
In terms of mics, a pair of AKG C414s were used for close-up detail, a single Sennheiser MD 421 for midrange punch, and a pair Peluso P-47s offer a natural and warm signal. Each of these signals have their strengths, with the appeal of avoiding EQ by being able to blend the signals. The interface itself is simple; the default view provides a nice graphic with a quick click on the settings cog revealing the mixer interface. From here, you have access to the three microphone signals, as well as independent control over mechanical and pedal noise. There is an intrinsic, satisfying playability to this library. Sitting and just exploring the microphone signals in isolation reveals its flexibility. The combination of 47s with support from 414s provides natural appeal. More commercial mixes benefit from the unleashing of the MD 421, adding punch without the need to emphasise frequency content. Of course, the success of this depends on what else you have in your mix, but Music Row Piano wears its heart on its sleeve by providing a useful solution for piano in a mostly commercial context. I did get the sense of a velocity band where sampling is less extensive, in the upper dynamic range as samples move from forté to fortissimo. This is a range that can always present pianistic challenges, both from the sampling and playing perspective, but with the ability to switch velocity curves through the interface a move to a softer curve helped to make this less obvious. The instrument is also equipped with some excellent iso-booth and large room reverberation settings, with impulse responses being curated from some of the finest studios and rooms in Nashville — although anonymity has been preserved! There may be less flexibility here compared to libraries that offer more than one model of instrument, but this could be the perfect companion for your productions if you struggle to get your pianos to sit in a mix. Dave Gale $149. www.musicrowpiano.com
Sample Science Ethereal Echoes Plug‑in Instrument
HHHHH Sample Science offer a range of low-cost musical instruments based on the same engine but loaded with different samples. All the common plug-in formats for Mac and Windows are supported (other than AAX), with downloads via Gumroad. Ethereal Echoes purports to target ambient music makers, though some of its sounds have a distinctly sinister edge, making them well suited to soundtrack composition. It has much in common with their Organic Soundscapes instruments, but offers a much broader repertoire of sounds. The instrument comes with 60 atmospheric presets, most of which could be described broadly as pad-like or drone elements. A consistent feature is that the sounds tend to evolve and some contain what I term ear candy — tinkly, organic sounds that creep in and out as the sounds below evolve and mutate. Something else I noticed is that a large number of the sounds cover quite a wide spectrum, with some lovely deep tonal elements that support but never dominate. Once a preset has been loaded, it can be reshaped using familiar synth-style controls for ADSR volume envelope, LFO modulation with a choice of waveshapes and a filter (low-pass or high-pass), with additional effects stages for distortion, delay, chorus and reverb. A keyboard graphic at the bottom of the window allows notes to be triggered directly when needed. Poly, mono and legato voice modes are available, there are amplitude range controls, variable glide and separate delay sync options for left and right. There are no hidden functions; everything is on the main screen, so after calling up a preset you either use it as it is or tweak the controls and re‑save your own version. Many of these sounds would make excellent ambient backdrops as long as your take on ambient music is not that it should always be dreamy and relaxing! I hear sci-fi backdrops that wouldn’t be out of place in an Alien reboot, otherworldly landscapes, distant waterphones, mutated choirs and more than a few ghostly elements. What makes this instrument so attractive is the way that none of the sounds are simple static pads, and where looping is used it is both seamless and
of long duration. The filter section is useful for taming some of the higher-pitched elements, or in high-pass mode for taming the lows, but the engine doesn’t include resonant filters with envelope control so the filters are really more about tonal shaping than providing another effect. Most of the flavour-changing action comes courtesy of the ADSR and the effects chain — the distortion section is perfect for recreating the sound of torrid subwoofers so beloved of movie soundtrack composers. In summary then, while Ethereal Echoes might be a fairly simple instrument in terms of its additional sound-shaping potential, it is capable of generating seriously top-tier sounds. It is probably fair to say that few of these sounds are an ideal fit for mainstream pop, but if you work in the areas of ambient, cinematic or experimental music, it offers a lot of scope for very little outlay. Paul White $30. www.samplescience.info
Native Instruments Moments: Vocal Clouds
Kontakt Instrument
HHHH The catalogue (or should that be katalogue?) of libraries currently available for NI’s Kontakt is truly staggering. It’s also very diverse and, while there are undoubtedly some blockbuster titles amongst those available, there are also some more niche offerings. Moments: Vocal Clouds — a collaboration between Soundiron and NI — is an example of the latter. As the title suggests, it is primarily built around a suite of sample-based vocal sounds but, with a four-core sound‑design engine, also offers a number of synth-based sounds that can be integrated into the preset design process. The library requires Kontakt or Kontakt Player 8.8.1 or later, is 2.39GB in size and ships with a collection of 80 presets to get you started. Each of the four sound cores offers a compact set of sound‑design options. As well as a browser for selecting the individual sound, each core also gets individual options for editing the Sound
(ADSR, pan, pitch, etc), Arpeggiator (with pitch and velocity lanes and up to 16 steps), FX (two slots with a choice from compression, delay, drive, modulation and reverb) and Color (three-band EQ and a filter). In addition, there are global processing options arranged down the right of the UI that offer Space (a further set of reverb options), Motion (offering basic modulation options for the volume, tuning and filter settings for each layer), and global Filter and Volume controls. It might have been nice to see an X/Y pad for real-time blending between the four sound layers, but you can, of course, easily automate the individual layer volumes to achieve the same end result. You can also pick a global key/scale combination (top right) and this will influence how pitch is handled within any core that has the arpeggiator active. The preset collection is divided into four categories; Aleatonic, Arps, Cinematic and Pads. The latter forego the arpeggiator while, unsurprisingly, the Arps presets heavily feature this element, albeit with some pad-like layers blended in. The Aleatonic presets often feature different step counts within the various active arpeggiators, and this does lend a certain randomness to the performances created. Finally, the Cinematic presets are more obviously sound designed. You can easily build your own presets, and the UI also includes some rather neat randomisation options if you just want to take a lucky sonic dip and see (hear) what inspires. The obviously vocal nature of the core sounds does impart a particular character to the performances created. There are plenty of options here that would work in general media composition roles but, in those sounds where the more staccato vocal sounds are present, there is a distinctly quirky character to the musical results that made me think ‘dystopian or surreal drama’. That perhaps makes this something of a niche instrument but, if you have scenes to score where you need to undermine the viewer’s sense of normality, then Moments: Vocal Clouds might be just the thing. It is fun to use, slightly odd and sensibly priced. John Walden £69. www.native-instruments.com Audio examples of this month’s libraries are available at www.soundonsound.com.
www.soundonsound.com / June 2026
121
TECHNIQUE
JOHN WALDEN
S
ynth-infused film and TV scores became prominent in the 1980s, but it’s a musical style that’s seen a big resurgence in recent years. Classic analogue synth sounds (whether real or emulated) generally sit at the heart of these soundtracks, providing pulse-like bass elements that help define the rhythm, evolving pads for texture and harmony, and lead sounds for melodic toplines. Drop in some atmospheric sound‑design elements and a few spot sound effects, and you have all the ingredients you need to start rolling your own. Naturally you can find all you need in an SOS For Artists subscription, so in this workshop we’ll give it a go, aiming for an ‘inspired by Stranger Things’ tension-style cue at around 80 bpm. I’ve put an audio example of the result up on the SOS website (https:// sosm.ag/sosfa-0626), and below I’ll take you step‑by‑step through how I created it.
Tools Of The Trade My first step was to gather the required tools together. I did this inside Cubase 15 LE (which is included in SOSFA), but any DAW would be suitable. SOSFA has a number of good virtual synths, and for my main sound source I picked KV331’s SynthMaster Player 2.9. I’ll call it SMP below. The supplied presets sound great, and while the sound editing functions are somewhat basic, the sound modulation options provided by the EZ knobs are really easy to use and automate. To sit alongside SMP, I grabbed a few samples from the SOSFA library. These included a couple of cool drones/textures from Vadi Sound Eerie Drones & Textures, a punchy kick loop from the D-fused Sounds Synthwave Fashion, impact samples from
122
SOSFA has all you need to create Stranger Things-style cues!
The finished cue within Cubase 15 LE, combining six SMP instances, a compact selection of samples from the SOSFA catalogue, and an equally compact selection of effects plug-ins for compression, EQ, saturation, reverb and delay.
CR2’s Nocturnal Realms and a couple of risers from Audiogem’s Phonk Fury. While Cubase 15 LE has options for compression, EQ, reverb and delay, I decided to augment them with instances of Klevgrand’s Korvpressor, the NoiseAsh Need 73 Console EQ (both used on individual tracks), Audiofied’s Linda Ironverb, IK Multimedia’s MixBox SE (which I used here just for an extra delay option), Eventide’s CrushStation and Tone Empire’s Model 5000 VCA compressor (placed on my stereo master bus).
EZ knob automation (using Cubase LE’s Quick Controls) injected an additional sense of movement. In the final section of the track, the bass performance included some additional notes, just to exploit the arpeggiator pattern more obviously as the cue built to a finish. Korvpressor aside, the only additional processing on the bass synth was a tiny amount of saturation using CrushStation.
Take My Pulse
Texture & SFX On Cue
To provide a rhythmic ‘pulse’ for sections of the track, Next, as shown in the first screen, I sketched I decided to blend two sounds. Using Cubase’s audio out an initial structure for the cue in Cubase, editing tools, I sliced a single kick hit out of my punchy consisting of three sections: an intro, to build kick drum loop and copied that slice to create a one-bar the initial tension; a middle section without ‘heartbeat’ pattern, whose sound I softened with a little the rhythmic pulse, to release that tension EQ from Need 73. When I browsed SMP’s bass presets for suitable bass synth sounds, I wasn’t short of options! Eventually, I settled on a preset that included a basic rhythmic arpeggiator pattern — it seemed to work well alongside my kick drum heartbeat, and you can hear the two playing together, layered with a pad, in the first section of the demo track. The part I used was a simple single sustained note and the arpeggiator did the heavy lifting, and SynthMaster Player offers several presets suitable for this kind of a little volume and SMP musical application.
June 2026 / www.soundonsound.com
Upgrading SynthMaster Player You could easily swap your own choice of virtual synth in place of SynthMaster Player, of course. But I’ve used SMP in both desktop and iOS variants for a number of years, and been really impressed. And while this ‘Player’ version doesn’t offer the comprehensive sound-design features of the full SynthMaster plug-in, the sounds are every bit as impressive, and it gives you just enough control over the generous preset collection to make the sounds your own. If you try, and find that you like the presets SOSFA’s SMP v2.9 has to offer, then it’s worth noting that you can pay to upgrade to SMP v3. This version adds lots more preset editing capabilities, including options to edit the arpeggiator or step‑sequencer patterns used by a preset. Available via KV331’s website, for existing SMP v2.9 owners, I have to say the upgrade price is a bit of a steal!
The SOSFA sample collection provided plenty of options for my risers, hits, kick and texture needs, all of which were imported into my Cubase project prior to use.
and provide contrast; and, finally, with the rhythmic pulse restored and intensified, a build to a final crescendo. I experimented with placing my various riser and impact sounds to highlight the transitions between the sections. For the risers, this required aligning them on the timeline so their peaks hit the transition correctly. In the middle section, I also layered and automated volume for two texture/drone samples, to create a somewhat unsettling soundscape. This section was around 30 seconds in length, so I simply cropped the samples and applied fades in and out to make them work. To complete this textural section, I layered in a sustained single note from a suitable SMP analogue-esque pad preset (SMP has plenty of options!) and applied some automation of the filter for further depth and interest. Then, I went hunting for a further atmospheric pad preset, to add texture in the first and third sections of my cue. The sound I eventually picked was an evolving pad that occasionally added in soft, higher-pitched elements that sounded almost like they were reversed. You can hear this in the first part of sections 1 and 3 in the audio example. It added an interesting touch of mystery while simultaneously feeling somewhat unsettling. I used a little bit of EZ knob automation, targeting various preset parameters under SMP’s hood, to create some additional movement in the sound.
By contrast, the arp in section 3 featured a 16-note arpeggio to inject a little more intensity, and to help the track build towards its end. Again, though, it’s simply a classic analogue-style lead synth sound, this time with some nice delay and a bit of EZ knob automation, and paired with a couple of layered riser samples. It brings the track to a nice conclusion.
Make An Impact The final addition was to create a ‘hit’ at the end of the track. This was done using a blend of two of the impact samples mentioned earlier. A final SMP preset was added to this and I added a little pitch‑wheel tweak to create a pitch-drop effect. This blend of sounds then had a little bit of EQ73 applied, just to soften it slightly, and some
Linda Ironverb for ambience so that this final hit in the cue faded out nicely.
Join The Cue Having routed my various sounds to instrument busses (Group Tracks in Cubase speak) for drums, effects, bass, pads and arps, I added a gentle bit of Korvpressor dynamics control and EQ73 to each bus, balanced and automated the bus faders to taste, and then popped the aforementioned Model 5000L onto my stereo output using one of its ‘mix glue’ presets to (very gently) keep the overall dynamics under control. Job done? Yes... sort of! As ever, there’s always plenty more you could do to refine and improve upon this sort of cue, or add additional ear candy. But, as a proof of concept, it demonstrates well what the SOSFA toolset has to offer for this kind of work. And, if your DAW happens to include video support (Cubase 15 LE includes a video playback window, for example), you could certainly make a start with scoring-to-picture experiments in this genre without the need for any additional tools.
Arp Master The final musical elements to add were some arpeggiated synth sounds. I used these in the second half of sections 1 and 3, just to try and raise the musical stakes and bring each section to a peak. Two different SMP presets were used. In section 1, there’s a fairly slow‑moving eighth-note arpeggiated pattern. The preset sounded very ‘Terminator soundtrack’ to my ears and, again, with some very basic modulation, a touch of CrushStation saturation, and a little extra delay and reverb via a send to MixBox and Linda Ironverb, it hit the spot nicely.
Korvpressor, Need 73 and Crushstation took care of my track-level dynamics, EQ and saturation requirements.
www.soundonsound.com / June 2026
123
Studio Pro
TECHNIQUE
We show you how to set up your MIDI controllers in Studio Pro. ROBIN VINCENT
O
nce upon a time, you could plug in a MIDI controller and control whatever you had selected. The keyboard would play the selected instrument without any trouble, and any knobs and controls would often adjust parameters on the synth. Some software instruments had MIDI Learn, allowing you to map a hardware control to a software knob with a couple of clicks. With others, or if you were routing out to a hardware MIDI synth, you’d have to dig out the MIDI implementation charts and see if you could set up your controller to output the right MIDI CC numbers. On the whole, MIDI mapping of hardware to software controls is an amazing thing that often involves a lot of faff. Fender Studio Pro would like to help, and humbly offers its Control Link system as a simpler, more robust way to manage hardware control of software devices. Control Link requires you to spend a little bit of time setting up your MIDI controllers, and while that’s exactly the sort of faff we’re trying to avoid, you only have to do it once and then it’s all gravy.
First Things First Any USB MIDI controllers attached to your computer, be they keyboards, pad controllers, knobs, sliders, or a combination, will have their own entries in the OS. Whenever you use a piece of MIDI software, such as a DAW or a standalone virtual instrument, the connected MIDI devices will appear as MIDI input options. Studio Pro initially hides these away, and requires you to create an External Device that manages your connected controller. Go to the Studio Pro / Options menu and choose External Devices from the tabs along the top. This is where you set up any MIDI ports in your system, whether they are USB ports connected to controllers, separate MIDI interfaces or ports on audio interfaces. The idea is that you create a device, connect the ports, and then tell Studio Pro what you want it to do. There are three types of device: a keyboard, an instrument, or a control surface. Studio Pro comes with ready-made templates for many well-known existing controllers. I have never had one on that list, and I’ll proceed on the assumption that you don’t either. Quick tip: If you don’t have a MIDI controller to hand, you can set up your
124
June 2026 / www.soundonsound.com
The External Devices window is where you specify which MIDI ports your hardware controllers are connected to.
QWERTY keyboard as a musical keyboard. You’ll find the option under ‘Fender’ in the template list.
New Keyboard Click on ‘Add...’ to bring up the Add Device window. New Keyboard is the most obvious, and you should select this if your MIDI controller has a keyboard. It may have lots of other knobs and controls too, which is fine. You can then add a manufacturer and device name, which will be how it is referred to in your session. You then have a few options. You can restrict it to specific MIDI channels, and most importantly, select the actual MIDI device you’re using from the Receive From drop-down menu. Next, you have some filtering options if you’d like to remove aftertouch, Program Changes, pitch‑bend or other controller data, so that none of those things are transmitted from your controller to the software instrument. You’d usually have a specific reason for doing this, so if you’re not sure, leave them unticked. The Send To drop-down menu is optional and lets you send MIDI back to your MIDI controller. This could be useful for things like sending MIDI Clock (an option you can select further down) to keep an arpeggiator in time, or if your controller has motorised controls or
encoders that show position on a ring of LEDs. Feeding MIDI information back ensures the hardware keeps up with the software if you move a mapped control with your mouse. There’s something else you have to do to make this work, which we will come to shortly. Our next option is Split Channels. This adds a MIDI channel field to the MIDI input whenever you select this controller as the input for a track. This way, you can have different tracks responding on different MIDI channels from your controller and then flip between them on your hardware. If you click Default Instrument Input, the controller will be selected automatically on the creation of a new instrument track. Enable MPE is only for if your controller generates MIDI Polyphonic Expression data, and we’ll leave that for another workshop. The other options relate to MIDI sync, for if your hardware controller has something that needs timing control. It may sound a bit complicated, but as long as you’ve named it and selected the Receive From entry for your MIDI controller, then you are more or less sorted.
Other Options The New Instrument option is for integrating external synthesizers or hardware sound generators with Studio Pro. For that, you’d
need to set the Receive From and Send To fields to the correct MIDI port. There’s a lot more you can do with external instruments, , but we’re going to focus on the MIDI control aspect and ignore this option for now. The New Control Surface option is designed for non-keyboard MIDI devices, such as knob‑ or fader-based controllers. It’s a simplified version of the Keyboard option that lets you select the MIDI ports for Receive From (to send MIDI in) and Send To (for feedback to motorised controls or encoder LEDs), and set any sync. For some reason there are no MIDI channel options for control surfaces, so if you can run output to different MIDI channels from your surface, you should set it up using the New Keyboard option instead.
Control Mapping Control Link can work on an ad hoc basis using MIDI Learn with a virtual instrument, but it’s far better to spend a little bit of time comprehensively mapping your controller. To do this, we need to open the unexpectedly difficult-to-find External Devices window. You won’t find it under any menu; instead, it’s tucked away in the Show/Hide column of the mixing console. It’s an icon that looks a little like a groovebox, just above the keyboard icon that shows the Instrument Rack. The External Devices then slide out as a list, and this is where we can get into the details. From my list of External Devices, I’m going to focus on the Midilar, a MIDI controller with 12 sliders, 12 buttons, 20 knobs, and four switches. Your device may be very different, but the concepts are the same. To open the mapping window, click the little down arrow next to your MIDI controller and select Edit. You should be treated to a nice blank page and a tempting MIDI Learn button. The functions here are a bit basic, so try to do the following methodically and in the right order, or you’ll just have to start again. Click on the MIDI Learn button and then, in the order you want them to appear, move the controls on your controller. With each turn, a knob will appear mapped to that control, and it also usefully displays the MIDI CC number. If you leave MIDI Learn enabled for the moment, you’ll be able to make some adjustments. Next to the CC number, there’s a tiny arrow in the top right. Click it, and you can change the knob to a fader or button, remove the knob, remove all knobs, and enable Transmit Value. Transmit Value is where you enable the feedback for
motorised and encoder LED displays so that they receive the value back if you change it in software. You can also rename each control to something more useful by clicking on the text. When you’re done, make sure you disable MIDI Learn. There’s no saving or preset system here, and it’s all too easy to overwrite or click on Remove All, and then you’ll have to start again.
Focus Group You may have noticed that at the top of the MIDI Learn page, it said ‘Focus: Global’. There are two types of focus at play: Global and Device, and these are key to getting the hang of Control Link. With Global Focus, your controller can control multiple instruments and plug‑ins at the same time, regardless of what track you have selected or which GUI is in focus on your screen. With Device Focus, your controller only controls the instrument or plug‑in you have currently selected and in
focus on your screen. What’s important to realise is that one control on your controller can only control one software parameter at a time. With Global control you share all your knobs and sliders across multiple plug‑ins, so the first two knobs can control the filter of one instrument, the next two are handling the depth of an effect on another plug‑in, and so on. With Device focus, you can map your controller to every control on an instrument and then remap the same controls to an entirely different instrument, and the whole mapping swaps depending on which instrument or plug‑in is in focus. The brilliant thing is that you can create Device Focus maps for every instrument and plug‑in and a Global Focus map for a handful of key parameters from all sorts of places, and then switch between them. The usefulness of each mode can also depend on your controller. Something like the Arturia KeyStep 37, with just a few knobs, is perfect for Device Focus control,
The Add Device window lists a number of presets designed to work with specific MIDI controllers. If yours isn’t on the list, don’t worry: configuring a controller manually is easy enough.
www.soundonsound.com / June 2026
125
Studio Pro
TECHNIQUE
USING MIDI CONTROLLERS
With MIDI Learn enabled, move each controller on your surface in turn to create an entry for it in Studio Pro. You can then define it as a knob, fader or switch, and give it a name.
whereas something like the Midilar controller can get its many controls into all sorts of places in Global mode.
Control Link All the mapping comes together in a slim bar that sits above the instrument or plug‑in GUI. On the right, a drop-down menu lets you select the MIDI controller you want to use for Device Focus. When you select one,
it turns yellow, indicating you are now in Device Focus mode. If you still have the External Instrument mapping editor open, you will see the title change from Focus: Global to Focus: Device, plus the name of the plug‑in. If you click the little cog icon next to the selected MIDI controller, you open the mapping bar, where we finally get to map a control to a parameter. Whether you are in Global or Device Focus, the process is exactly the same. Move a control on your controller, and you’ll see its name (the name you gave it in the mapping editor) appear in the centre of the mapping bar to the right. Move a software control and it will appear alongside on the left.
Between them is a little triangular arrow pointing right-to-left. Click the arrow, which then lights up yellow for Device or blue for Global, and the hardware control is now assigned to the software control. Whenever you move the control, the mapping appears at the top and you can easily click the arrow again to unassign it. As you make your assignments, these will spread along the mapping editor and be saved with the plug‑in. You may have noticed that all the mapping assignments also appear in the main toolbar in a Control Link panel. The panel displays what’s currently under control and also keeps track of recently used parameters which can be useful for quick mappings.
One At A Time?
At the top right of the instrument or plug-in you want to control, you’ll see a drop-down menu that lets you select your MIDI device to use in Device Focus mode. Your MIDI controller will now exclusively control that instrument or plug‑in.
126
June 2026 / www.soundonsound.com
Mapping within certain third-party instruments using their own system can often let you map multiple software controls to a single hardware one. Control Link only allows for a single hardware control to be assigned to a single software parameter. However, if you delve into the Macro Editor for any track in Studio Pro, you’ll find that you can set up a single software knob to control many parameters. Using Control Link, you can map a hardware control to that single knob, effectively giving you control over multiple parameters on a single hardware knob.
SUBSCRIBE & SAVE TABLET | WEB | REPLICA | PRINT PLUS BONUS PDF
SMARTPHONE COMPATIBLE
1 ICONIC MAGAZINE
6 GREAT WAYS TO READ IT
SCAN ME
TO SUBSCRIBE
TABLET - PHONE - WEB - PDF - REPLICA - PRINT All this for less than the price of a Coffee+Pastry each month!
www.soundonsound.com/subscribe • Go DIGITAL - get 12 monthly Tablet issues + all locked Web articles + monthly Full Issue PDF download the day the issue goes live. • Go PRINT+DIGITAL - get the best of both worlds and save over 50%.*
iOS / ANDROID
Every Digital sub includes a 5‑device licence to our App: mix and match across iOS/Android Tablet and Smartphone.
ONLY READING SOS IN PRINT?
Choose our full Print+Digital bundle for unlimited 24/7 access.
* The 50% discount offer is based on the UK retail price of the Print magazine, Tablet and Web subscription when sold separately. Subscriptions can be cancelled at any time and you will receive a pro-rata refund for all outstanding issues.
Pro Tools Live
TECHNIQUE
OLI FREKE
F
or exactly a decade, Ableton Link has enabled synchronisation between multiple Live instances over a network, offering a more robust alternative to MIDI Clock. However, users have always been tethered to audio cables to actually share sound. Until now. The Live 12.4 beta, released in February 2026, brings a variety of updates: there are refreshes to classic devices (Erosion, Delay, Chorus-Ensemble), improvements to Stem Separation, and a new Learn View. But the most architecturally significant is Link Audio, which enables users to send audio from one device to another — wirelessly. Link Audio uses Wi-Fi or a local area network (LAN) to create a wireless audio bus with automatic latency compensation. This allows computers running Live 12.4 (Mac/Windows), Push 3, Move and iOS Note devices to share
128
As Ableton expand their Link protocol to audio, is the zero-configuration wireless studio finally here? audio. Setup is simple: enable Link and Link Audio in Settings, create a new audio track on the receiving device, then set its ‘Audio From’ to the external device, select the desired channel, turn ‘Monitor’ on, and — and you’re done. (One note: ensure ‘Local Network’ is switched for Ableton in the computer’s settings — this caught me out for a short while!) Once a link is established, you could use a Move unit to generate a drum track and send its audio wirelessly into a laptop running Live. Or two performers could be running their own instances of Live, with just one acting as the ‘main mix’ environment. A Move or Note running soft synths could feed directly into a desktop session, or a standalone unit could act as an input stage. Any number of configurations are possible, depending on need. This is a distinct improvement on traditional
June 2026 / www.soundonsound.com
networked audio solutions, which typically require virtual audio drivers, additional hardware or specialist solutions. These work, but aren’t exactly frictionless. Latency must be managed manually, and routing quickly becomes an exercise in technical jiggery-pokery. Link Audio provides a simple solution, removing all that complexity.
Ecosystem Integration Within the Ableton ecosystem, all devices can send audio, but currently only Live on Mac/Windows and Push 3 can receive it. Move and iOS Note are send-only, so using them for self-contained instruments works best. This actually allows for the kind of flexibility that external devices have always had — a drum machine here,
The Link menu shows number of Link Audio devices. ‘2 Links’ means this machine and one connected peer.
The Link menu drop‑down shows the name of the Network (‘Live’) and the number of devices on the network.
a synth there — and helps us get away from the ‘everything on one screen’ mentality. Another bonus is therefore having dedicated hands-on controllers for those standalone instruments. Note that this doesn’t — yet — enable a final mix to be bounced without first recording the external audio; that’s still a necessity. Maybe something for a future update, but for now it’s best just to think of a Link Audio channel as the external audio input that it in fact is. Another advantage of all this is the ability to process the incoming audio on the receiving system. A Move pattern, for example, could be routed through Live’s updated Erosion or Delay devices in real time, on a different machine!
You can set the name of the network and monitor buffer times to identify any issues in the Link Audio settings menu.
Under The Hood Audio is transmitted over the network in multi-channel streams with packets synchronised to the shared Link timeline. Rather than attempting to stream purely linear audio, which can easily suffer drop-outs and disruption, the data is sent in a flurry of segments, each timestamped and reassembled on the receiving device. This allows timing to remain tight even over imperfect network conditions, where minor packet loss can be tolerated. While Link Audio handles internal latency automatically — delaying the host computer’s output to account for the input devices — there is an additional Latency control in Settings to allow extra compensation for the parts of the signal path the system cannot see, such as audio interface latency or other external hardware. In use, though, this setting can be left to the default unless timing issues are apparent.
Networks & Latency While Wi-Fi is supported, and will realistically be the use-case for most people, Ableton recommend Ethernet for the lowest latency and highest reliability. The reasons for this are understandable, though it might be slightly galling to replace one set of (audio) cables with another set (USB-C and/or Ethernet). But for situations where ultimate reliability is required — gigs for example — this would be worth considering. Regardless, Wi-Fi can be very reliable. If network congestion becomes an issue,
a dedicated Wi-Fi router can provide a clean connection, thus not competing with the domestic UHD TV stream in the front room and the teens live-streaming Twitch in the den! Push 3 can even act as a local hotspot, offering a self-contained wireless network for Link Audio, which is a nice touch. Before we get too carried away, it’s important to note that this is a strictly local network system (for local computers!). It does not extend to Internet-based collaboration setups. That is still very much in the realm of R&D departments and the very determined! There is one important caveat to note: whilst automatic latency compensation keeps loops and tracks in time regardless of source, real-time playing of plug-in instruments can suffer — in some cases, to the point of being unplayable. As ever, there’s a trade-off: for performers this may be noticeable (and make things unusable), while for playback and production it’s largely irrelevant.
Link Audio Vs Dante, AVB & NDI Whilst Link Audio is a new and exciting implementation, audio-over-IP is itself not a new concept. Professional systems such as Dante and AVB (Audio Video Bridging) have long provided high-quality networked audio, and The Audio Source is a connected peer (Audio From ‘Live’) and the audio channel (‘3-80s Beat 9C’).
video-orientated protocols like NDI offer similar capabilities. However, these are complex and require specialist hardware. Given that most readers are probably not networking stadium-sized concerts that require this level of sophistication (and cost), Link Audio should provide a simple, ‘good enough’ solution.
The Open Philosophy In typical Ableton style, this new feature is not limited to just Live itself. Alongside its introduction into its own ecosystem, Ableton also updated the Link SDK and iOS LinkKit for developers, enabling third-party software and hardware to integrate with the system. The big question is now: who will be first to release a Eurorack mixer module with Link Audio? More generally, these developments show Live is evolving towards an increasingly connected platform, rather than remaining a self-contained application. Continuing integration with services like Splice, along with Link Audio, suggest a system that is increasingly extending beyond a single application or computer. Equally, whilst there’s no need to retire your low-latency Thunderbolt interface just yet, there’s a whole range of interesting use-cases now made simple by the ability to route audio quickly between devices. So, when can the world at large get their Lives networked? At the time of writing, Live 12.4 remains in beta, with no confirmed release date. Based on Ableton’s typical update cycle, a full release in spring or summer 2026 seems likely. Keep an eye — and a local area network port — open for it.
www.soundonsound.com / June 2026
129
Pro Tools
TECHNIQUE
JULIAN RODGERS
P
eople judge the relative merits of different DAWs based on features and workflow: what a DAW does, and how it goes about doing it. Over the last decade or so, another question has increasingly entered the conversation: how do you pay for it? Can I buy a perpetual licence, or only a subscription? It remains a divisive topic. This month we’ll look at how the different tiers and licensing approaches to Pro Tools might suit different users at different times. A thorough understanding of the way the four tiers work might encourage those who think of Pro Tools as an expensive option to use it, while existing users may benefit from considering whether they actually need the tier they are currently using.
There are many ways to buy or subscribe to Pro Tools. Which is right for you?
Rent Or Buy? Over the years the model has changed several times, particularly regarding subscriptions and support plans. The situation today is more straightforward and more flexible than it used to be. If you prefer the traditional approach of buying a perpetual licence and keeping the software indefinitely, that option, withdrawn for a period, was reintroduced in 2023, and Pro Tools can still be purchased that way from a reseller. Updates beyond the version you own require an annual Support and Upgrade Plan, but the software itself will continue to run regardless, remaining at the version which was current when the plan expired. The cost of reinstating lapsed Support and Upgrade Plans has also been reduced in recent years, after earlier pricing proved unpopular with many users. Alongside this, Pro Tools is also available through subscription licences, offered on both monthly and annual terms. This makes it possible to maintain a licence only when you actually need it, a useful option for people who use Pro Tools only some of the time. And the software itself is now available in four tiers at different price levels. What makes this particularly interesting is that the subscription licensing system allows users to move between those tiers if their needs change. In other words, choosing a particular version of Pro Tools doesn’t necessarily have to be a permanent decision. This flexibility is helped by another important detail: all versions of Pro Tools
130
June 2026 / www.soundonsound.com
Even though it’s free, Pro Tools Intro offers essentially the same mixing environment as all the paid tiers. All versions of Pro Tools also use the same installer, so the version you open will only depend on what licence is present on your machine.
share the same underlying codebase and use the same session format. Projects can be moved between tiers, which means the practical barriers to switching versions are far lower than some might assume.
Tiers Of The Kingdom Before looking at how this flexibility can be used in practice, it’s worth briefly outlining the four tiers of Pro Tools and what distinguishes them. At the top sits Pro Tools Ultimate. Ultimate occupies much of the role once filled by HD systems, but many once HD-only features are now present in Pro Tools Studio as well. Ultimate is aimed primarily at high-end post-production environments and includes a number of specialised features, such as extensive video capabilities and very large system configurations, that are rarely required in music production. However, users who rely on DSP cards and DigiLink-connected interfaces in the style of the old HD ecosystem still need Pro Tools Ultimate in order to access that workflow, though the Carbon interface, which provides a similar zero‑latency experience, is supported with Pro Tools Studio. The principal tier aimed at music production is Pro Tools Studio. This
provides high track counts and generous simultaneous input capability, alongside with the core professional feature set: advanced automation, surround and immersive mixing, and support for a single video track. Below this sits Pro Tools Artist, which is aimed at self-producing artists and smaller production setups. Here the main differences are reduced track counts and fewer simultaneous inputs, along with the absence of surround or immersive mixing. For many songwriting and production tasks, however, these limitations are unlikely to prove restrictive. One could record and mix a live band project with Artist. Finally, Pro Tools Intro is available for free to all users. Although track counts and I/O are very limited, it remains genuinely useful for work that does not require more. For example, I recently used it to edit a long-form podcast and, for that task, noticed no practical difference compared with the higher tiers. If you don’t have a valid licence present on your computer your system will launch Intro instead of a higher tier. This illustrates the fact that there is in fact only one Pro Tools installer. The features which present themselves in the different tiers are dictated by the licence present on the machine you’re using.
There is an extremely detailed breakdown of the differences between the various tiers on the Avid website. If you search for ‘Pro Tools comparison’, you’ll find a comprehensive table listing the full feature set of each version. Rather than reproducing that entire list here, it’s useful to focus on a few headline figures that illustrate the most significant practical differences, which would affect tier choice and suitability for different types of work.
Within Limits? In my own case, working within Pro Tools Artist would make very little practical difference for many types of session. The situations where the limitations would become relevant are quite specific: working to picture, where video support becomes necessary; or mixing in surround or Dolby Atmos, both of which require Pro Tools Studio. Outside of those scenarios, the differences between the tiers are often smaller than many users assume. Looking at the comparison table and asking yourself the same questions, you might arrive at a similar conclusion. For example, if your work is largely overdub-based and centred around virtual instruments, Pro Tools Artist would likely provide all the facilities you need. The track limits and I/O restrictions become far less relevant in that kind of workflow, and the core editing and mixing environment remains essentially the same.
If the 32-audio-track limit in Pro Tools Artist looks restrictive, it’s worth putting that figure into some perspective. For many years, large-scale productions were created on far fewer tracks. ‘Bohemian Rhapsody’, for example, was recorded on a 24-track tape machine. The limitation didn’t prevent the production from becoming extraordinarily complex — it just required careful planning and a well-developed workflow.
on the side of caution and opt for Pro Tools Studio, simply to ensure that features they might need in the future are available. However, this is where the flexibility of the current licensing model becomes interesting. Because monthly subscription licences can be changed, these decisions don’t necessarily have to be permanent. To be able to switch, turn off auto-renewal for your
“The differences between the tiers are often smaller than many users assume.” It’s also worth remembering that a track count limit doesn’t mean those tracks must contain the same sources throughout an entire session. Use of automation can allow many more sources to be fitted onto a smaller number of tracks over the course of a production. None of these techniques are new — they were standard practice long before modern DAWs made large track counts common. Seen in that light, a limit of 32 audio tracks may represent less of a hard barrier than it first appears. As with many aspects of production, the real question is often less about the tools themselves and more about how effectively you choose to use them.
Switching It Up If choosing a tier were a one-time, permanent decision, it would be entirely understandable for many users to err
subscription, wait for it to expire, and then start a new, separate subscription for the new tier. It’s not without restriction but it is possible to change with a little planning. In practical terms, that might mean asking a simple question at the start a new month: do I actually need my current tier of Pro Tools right now, or will a lower tier do the job? For users whose workload varies — perhaps moving between larger recording sessions, smaller production projects, editing tasks or songwriting — that kind of flexibility can be genuinely useful. The cost difference between the tiers is significant enough that dropping down a level when you don’t need the additional capabilities can make sense (or, if the project demands it, going up a tier). I know I don’t use most of Pro Tools Studio’s features most of the time. What about you?
This table shows some of the key features and limitations of the different tiers of Pro Tools.
www.soundonsound.com / June 2026
131
Pro Tools Cubase
TECHNIQUE
Cubase’s new synth sounds and Pattern Sequencer features are great on their own — but together they’re even better! JOHN WALDEN
S
teinberg introduced the Pattern Editor for Pro and Artist users in Cubase 14. While obviously pairing well with the (also new in 14) Drum Machine track/instrument type, as we explored in the SOS May 2025 workshop, you could also use Pattern Editor for melodic applications. But in Cubase 15, Steinberg took the Pattern Editor concept further. It now offers two distinct modes: Drum and Melodic. The latter is new, and adds some very useful additional options to those I explored in the May 2025 article. So, let’s get into ‘writing mode’ and explore it, along with the new HALion/HALion Sonic Writing Room Synths expansion (also available in Artist and Pro). To do that, I’ll target some analogue synth-style sequenced bass, chord and melody ideas. And to help give you an idea of what I’m writing about, I’ve put an audio example on the SOS website (http://sosm.ag/cubase-0626).
Something Old, Something New If you select the Pattern Event option when creating a new virtual instrument track, the Lower Zone automatically opens and offers a choice between the Drum or Melodic mode within the Pattern Editor. Both of these modes share many of the core features described for the earlier iteration of the Pattern Editor,
132
The Pattern Editor now has a dedicated Melodic mode with both Mono and Poly step‑sequencing options and a Chord Lane.
providing a lane-based sequencer grid with customisable step numbers (up to 128 steps), per-lane and per-step sequencing of parameters such as velocity, velocity variance and playback probability, and the option to add additional controller lanes related to parameters within the selected virtual instrument. As I described in the SOS May 2025 workshop, patterns can be created manually on the grid in the usual way, but you also get a selection of tools for automatically populating the whole pattern, or a lane within the pattern — either in a completely controlled way, or harnessing a user-specified degree of randomisation. It’s cool, creative, and can easily be used to nudge a new idea into being. All this core functionality remains but, as in the main screenshot, Cubase 15’s new Melodic mode has additional elements that directly support this use case; I’ll focus on those below.
Melody Maker When you opt for Melodic mode, many familiar elements appear in the Lower Zone’s Pattern Editor, but there are some new and revised options to suit the melodic context. A similar grid-based pattern editing panel dominates the display, but it’s now a conventional pitch-based grid for your melodic instrument, rather than lanes corresponding to individual drums. You can adjust the step count and resolution as before, but when creating notes these can span multiple steps. What’s shown in the left side panel depends on your choice of Mono or Poly
June 2026 / www.soundonsound.com
as the sequence type; the latter offers further options. There’s plenty to explore, then, but for this column I’ll focus on the Chord Lane panel functionality, and the ability to place chord changes along the grid timeline.
Chord Control Using the Chord Lane option is a two-stage process. First, toggling on the Chord Input switch prompts you to drag-and-drop content to the Lower Zone from either the Chord Track (having selected the required Chord Events) or a MIDI clip within the Project window. Cubase will then extract the chords and add them within a narrow strip above the pattern grid. Note that the chord labels are not editable here so, if you want to change the chords, you need to repeat the drag-and-drop process. Second, with the chords in place, the Chord Lane panel lets you choose between three options: Root Notes, Chord Notes, All Notes (with ‘all’ meaning all those notes available within the chosen key/scale combination set beneath the Mono/Poly selection buttons). The choice made here influences various randomisation options elsewhere in the Pattern Editor. Combining the Mono/Poly and Root/Chord/ All Notes options, it’s easy to see starting points for creating ideas to suit bass (Mono/Root), chords (Poly/ Chord) or melody (Mono/All or Mono/Chord) parts. With a suitable combination selected — and, for my audio examples that accompany this workshop, a suitable Writing Rooms preset loaded into HALion Sonic — you are then ready to start work with the Pattern Editor’s various randomisation options.
Get Lucky As we saw in the May 2025 workshop, the Pattern Editor offers multiple points of randomisation that you can now exploit. The difference is that when you apply the options for placing notes, the pitches of the notes
The Pattern Editor left panel includes a Chord Lane and, in Poly mode, a Voices control to control the number of notes within any chords.
generated are constrained by the combination of Mono/Poly and Root/Chord/All settings you currently have selected and, along the Chord Lane, by the current chord. For the Mono options, whether for a bass line or a melody, the randomisation experience is otherwise similar to before, albeit with the added ability to confine initial note selections to the root or notes of the current chord. The Root Notes option provides a great
starting point for a bass part. Simply press the Randomize Pattern button — the dice icon above the lane list, with a drop-down to further configure elements such as note ties, repeats and pitch jumps. While the note pitches will be constrained to the chord root notes, you can keep randomising until you find a rhythmic pattern you like. As the Root Note setting only applies to the randomisation process itself, once you have a starting point, you can also create a little extra pitch interest through manual editing. Alternatively, you can perform the initial randomisation with the Chord or All Note settings, to make your initial bass line more obviously ‘melodic’. Switch to the Root Note setting and experiment with the Variation button (start with the slider set low), and this will gradually swap out the initial notes in favour of the chord root notes, so allowing you to adjust how solidly your bass line defines the chord changes. Poly mode provides yet more options. When you first randomise a pattern it starts as a monophonic line. But the Voices button (beside the Variation button in Poly mode) lets you define how many notes (up to four) you want your chords to contain. Following the chords defined within the Chord Lane, these are layered to each active step as you adjust the setting. In Poly mode, the Variation button then simply adjusts the voicings of these chords without changing their rhythmic position within the grid. Finally, the Density control lets you add/ subtract active steps from the pattern, making the performance more/less busy. You can, of course, add/subtract notes manually too. This whole ‘create me a rhythmic chord progression’ process is a lot of fun to experiment with. And, as with any of the Pattern Editor’s pattern modes, the options to add real-time variations via the Parameter Lane tools (for example, note Probability and Velocity Variance) can easily inject a little ‘human’ when an individual pattern is subsequently looped within your project’s timeline.
two for that, and then copying those patterns to other elements, and manually adapting them to develop a more coherent whole. In that vein, once you have a pattern or three that work together, you can explore some further options by converting them from Pattern Events into standard MIDI clips. This is best done by copying the Pattern Event within the project window and then, from the drop-down menu located top-left of the Event (beside the Pattern
“When you first randomise a pattern it starts as a monophonic line. But the Voices button lets you define how many notes you want your chords to contain.” name), you can choose to Convert Pattern Event To MIDI Part. The obvious upside of this option is that you can then change chord on the Project window’s Chord Track and the MIDI clip can follow those changes. You can also use the Chords panel in the Track’s Inspector display to easily adjust the chord voicings.
More Please! There’s lots to love about the direction of travel Steinberg have adopted for the Pattern Editor feature set, and I’m sure I’m not the only one who hopes this sort of development continues. Top of my ‘wouldn’t it be nice?’ options are: (a) the ability to change a chord directly in the Pattern Editor’s Chord Lane, and have the existing pattern adapt to it (or some capability to follow the Chord Track directly); and (b) the option to select a specific range of steps in a pattern, to be subjected to targeted randomisation (that is, you like bars 1, 2 and 4 but want to experiment with 3). Cubase 16 maybe? Until then, enjoy what we have because the Pattern Editor’s Melodic mode is fun to use and a great way to get a new musical idea started.
Alea Iacta Est If you wish, you can also take a totally ‘random’ approach, and build a complete drum, bass, chord and melody by chance. But the odds of creating a coherent piece of music like that (aside from the harmonic instruments all following the same chord progression) are slim! In practice, a more effective approach is to seed any new idea by applying the randomise options to one harmonic element, creating a pattern or
If you want to take your freshly created Pattern Events even further, you can easily convert them into MIDI parts within the Project window
www.soundonsound.com / June 2026
133
Logic Logic
TECHNIQUE
Logic contains everything you need to start mixing in Dolby Atmos. S I M O N PAT E R S O N
W
hen Apple refer to Spatial Audio, they aren’t pointing to a specific technology or format. Rather, it’s a broad umbrella term for an ecosystem that supports both the creation and consumption of immersive audio content. On the playback side, this includes Apple’s AirPods range, recent Mac speakers and supported home cinema systems, whilst on the production side, Apple offer a suite of tools designed to make spatial audio creation accessible. For Logic Pro users, spatial audio is primarily manifested in the form of Dolby Atmos, a 3D audio format, paired with Apple’s own rendering software, which translates spatial mixes to the listener’s monitoring setup. Once complete, these mixes can be exported in formats suitable for delivery to compatible streaming services such as Apple Music, Amazon Music and Tidal. Apple’s involvement in surround sound dates back to 2003, when Logic Pro 6 first introduced surround mixing. However, since Logic Pro 10.7, users have been able to create native spatial audio projects with Dolby Atmos deeply integrated at the project level, making it easy to place tracks into surround ‘beds’ or transform sounds into movable 3D ‘objects’. Unlike channel-based architectures such as stereo or 5.1, with a single audio channel mapped to each speaker, Dolby Atmos is fundamentally object‑based. So instead of being locked to fixed speakers, sounds are encoded with metadata describing their position and movement in 3D space. In Logic Pro, this metadata is interpreted
134
Logic includes its own Atmos Renderer plug‑in, as well as both a Surround Panner and 3D Object Panner — everything you need to start mixing in Dolby Atmos.
by Apple’s Dolby Atmos Renderer, a plug‑in which is automatically inserted on the master channel in Spatial Audio projects. This renderer translates all object positions and spatial metadata into a channel format appropriate for your current monitoring configuration and, best of all, provides a high‑quality binaural render of the 3D sound stage for headphone monitoring. Logic preserves Atmos object metadata during export, ensuring that immersive mixes translate consistently across different playback systems, from headphones and soundbars to full surround and Atmos-enabled speaker setups.
the puck. Mono tracks have a single puck, while stereo tracks have a puck within a shaded area that represents the spread of the stereo signal. Try dragging the puck in every direction, nearer or further away from the centre of your head. You can also increase or decrease the elevation with the vertical slider on the right. Although you can use the Surround Panner directly on a channel strip, double-clicking the panner opens it in a separate window, giving you finer control.
Session Setup
Object Permanence
To begin, head to Project Settings / Audio and set Spatial Audio to Dolby Atmos. Logic will configure your project for immersive mixing, replacing the conventional stereo output bus with a Master Atmos output loaded with the Dolby Atmos Renderer. It’s worth noting that Dolby Atmos operates natively at 48kHz or 96kHz. So, if your existing project is running a 44.1kHz or 88.2kHz, Logic will upsample your audio in real time. It’s a transparent process but will inevitably impact your system resources. We’re now set up for a bed-only Atmos session, and all your tracks will be routed to a 7.1.2 bed. However, a typical spatial mix will employ a combination of both surround beds and movable objects. Think of a bed as a fixed soundstage that provides a stable aural platform, and objects as fully independent sound elements that can be positioned and automated freely within the 3D space. With Logic’s Surround Panners, which are set up by default on each track, it’s straightforward to place individual tracks and busses convincingly within a 360-degree surround environment by simply moving
To create an Object track and explore more of Atmos’ capabilities, you simply change the track’s output from Surround Pan to 3D Panner, giving you precise, spherical control over sound placement. Again, you can do this directly on the channel strip or, for more resolution, double-click to open the dedicated 3D Panner window. From here, you can place sounds anywhere within the sphere, from high to low, left to right, back to front, and anywhere in between. The stereo width narrows as you bring sounds towards you, and widens when sounds move further away. However, you can override this with the Spread control, or change the overall ‘size’ of the sound, which you’ll see visually represented by the L and R circles. Open the Dolby Atmos Renderer plug‑in alongside the Object Panner, and you’ll see a helpful real-time 3D visualisation of where each sound object is placed.
June 2026 / www.soundonsound.com
While it’s tempting to wildly animate around the space, this can get tiring quickly. A more conventional and listener-friendly approach keeps elements like drums, pads and reverb returns anchored within a stable bed, whilst select elements like lead vocals, hooks, synths lines and ear candy are elevated to 3D Object Panners for creative motion and emphasis.
Virtual Instruments Logic Pro doesn’t include Atmos-specific software instruments. Instead, you choose between mono, stereo, or multi-output instances based on where you want each instrument to sit within your 3D sound stage. For example, using Studio Horns, you could place a single, mono trumpet using the Surround or 3D Object Panner. Alternatively, a multi-output instance allows you to route each individual horn from a section to individual channels for complete control over their positioning. The same process applies to, say, Drum Machine Designer, enabling you to place individual percussive elements across the sound stage from within a single plug-in.
Route Master Routing effects in Atmos works much as it does in stereo: create a send bus and place a plug‑in on the corresponding aux channel. Logic’s native effects
are available in mono and stereo configurations, allowing them to be positioned anywhere within the 3D space. However, some time‑based effects, including Space Designer, Quantec Room Simulator, and various modulation processors, are also available in Stereo > 7.1.2 configurations, whose outputs are upscaled to surround beds.
Monitor Wizard For those without multiple mounted monitors, headphone monitoring will be the primary way to work in Atmos, and Logic’s Dolby Atmos Renderer provides a convincing binaural representation of the 3D mix through any pair of headphones. AirPods Max owners get the added benefit of ultra-low‑latency lossless monitoring (at least when connected via a USB-C cable), as well custom HRTFs and head tracking, which can give you a more accurate
representation of positioning within the Atmos sound field. That said, head tracking isn’t essential, and any high‑quality pair of studio headphones should be perfectly capable of delivering reliable spatial imaging. For speaker‑based Atmos mixing, a 7.1.4 configuration is recommended to ensure accurate spatial resolution and monitor the correct positioning of signals in the immersive sound field. This setup consists of seven ear‑level speakers, one LFE (subwoofer), and four overhead speakers, driven by an audio interface with at least 12 outputs. You can map each speaker to these hardware outputs by visiting Settings / Audio / I/O Assignments. Again, Logic’s Dolby Atmos Renderer serves to combine the standard 7.1.2 bed channels with the more fluid, object-based 3D metadata of your Atmos mix, and upscales to the extra height channels.
Missing The Mix Bus? Finally, let’s explore processing, exporting and bouncing spatial audio mixes. Beyond monitoring, the Dolby Atmos Renderer serves as the final stage that converts your 3D mix (beds and objects with spatial metadata) into deliverable formats or binaural previews. Spatial mixes can’t be mastered in the same way that stereo files are, so any tonal shaping, dynamics processing and, crucially, gain management (for example, to meet the requisite -18dB LUFS target level for distribution) of the beds should be taken care of with multi-mono plug‑ins inserted before the Dolby Atmos Renderer plug‑in. (Note that objects can’t be ‘bus processed’ at all because they aren’t summed prior to entering the renderer, so can only be processed at the individual object level.) By default all the channels in a multi-mono plug‑in are linked; adjusting one parameter affects the entire bus uniformly so you can easily EQ or adjust the gain on an entire bed. Logic ignores any plug‑ins placed after the Dolby Atmos Renderer plug‑in during export, as processing the already rendered signal risks collapsing or distorting spatial cues. Nevertheless, you’d be wise to insert metering plug‑ins, such as Loudness Meter, at the end of the chain to check your final levels.
Exporting Your Mixes
The I/O Assignments menu lets you map Logic’s outputs to the physical outputs on your audio interface. If you don’t have an Atmos monitoring setup, you can still monitor in Atmos by selecting the binaural output option in the Atmos Renderer plug‑in.
Before exporting your Atmos mix, set the cycle range (via left and right locators) carefully to ensure a short period of silence before the first transient, and to allow any reverb or delay tails to fade naturally at the end. Logic happily exports in the correct format for delivery to compatible streaming services. Head to File / Export / Project as Spatial Audio or, for more options, open the Bounce window (Command+B) and click Export as Spatial Audio. From here, you can generate a Dolby Atmos ADM BWF master file, an uncompressed object-based file that contains all spatial metadata. Moreover, as of Logic Pro 12.2, you can also export compressed MP4 Dolby Atmos files, allowing you or your clients to audition realistic end‑user previews using the same encoding processes employed by major streaming platforms.
www.soundonsound.com / June 2026
135
Q
How should I approach exporting tracks for mixing?
When exporting tracks for mixing, do I export my group sections, like Ac Guitars, from the stereo bus, or should I export from the Ac Guitars group track? Also, when sending my bass, snare or kicks to their respective group tracks, should those group tracks be stereo or mono? Things I read say that the group tracks for these instruments should be in stereo. But that doesn’t make sense to my brain, when I’m also told that I have to export these as mono files! So... are they exported as mono from a stereo group track? If it makes a difference, these would mostly be MIDI/ VST instruments that I’m talking about. SOS Forum post Matt Houghton, Reviews Editor Let’s park the issue of the type of instruments you’re using for now; I’ll get back to that later. There are some general conventions you can follow to give a mix engineer what they need. That means audio files in the desired format (eg. 24-bit 48kHz WAVs), all starting at bar one, beat one to make them easy to line up, and with mono files for mono signals and stereo files for stereo ones, and each and every file clearly labelled so it’s easy for anyone to discern what the job of each file is intended to be. If mixing someone else’s recordings, I’d want access to the full multitrack recordings, including individual tracks for every virtual instrument, as well as bounces of any important aux send effects, again all clearly labelled. Even if the effects end up not being used or being replaced, this gives the engineer an understanding of your intent. I might or might not subgroup ‘stems’ to be bounced — I tend to create my own groups for my mix anyway, and probably want to process/automate the individual tracks feeding them. It’s good practice also to provide a brief note (eg. in a text file or email) detailing things like the project tempo and other useful information. You might also provide the tempo in a MIDI file, particularly if the tempo changes, and you might include in that MIDI file all the virtual instrument parts too — preferably with each part on a separate MIDI channel, so it’s easy to ‘explode’ it onto different tracks. That can be a helpful backup, in case the engineer feels the
136
June 2026 / www.soundonsound.com
need to replace sounds or layer in new ones. But like I said, these are conventions and tips, not ‘rules’. The only golden rule is to start by checking with your mix engineer what their personal preferences are, so you can deliver what they want/need. If you and they use the same DAW, it could just be a question of tidying up the session and sending it to them, making sure to ‘consolidate’ your edits, and include all the media files. That said, it’s unlikely they’ll have access to all the same plug-ins as you, so you’ll still probably need to render/bounce any instruments and processing as audio — as that’s useful for project archival, it shouldn’t be too much of a chore! Regarding your specific question about group tracks being mono or stereo, I suspect you’re overthinking this one. It’s not the end of the world if mono stuff is bounced in stereo, but it does take up more storage space and processing power when mixing, and it’s just one more job for the engineer to burn time (your money) on; there’s a reason there’s software dedicated to stripping out the extra channels! For me, the answer to that question really depends on the purpose of the groups. If I want to route several instruments to a group to give me control over all of them on a single track — the way I’d use subgroups on an analogue mixer — then I’d almost always create stereo groups. Why? Well, some sources will be stereo in any case,
If using VSTis like Kontakt or HALion Sonic (pictured), which can multiple instruments simultaneously, then unless you’re just layering sounds, it’s a good idea to route each to a separate DAW track, and render each as a separate audio file.
but even with mono sources I might want to pan them differently, or use something a like stereo ambience reverb before compressing. But I’d generally create such groups specifically for mixing — and your mix engineer will likely be happy to do the same. So it really only becomes an issue if you’re planning on bouncing and sending those groups. However, if using groups just to combining multiple tracks to create the composite mono sound of one instrument (for example, blending two mics used to capture an acoustic guitar or guitar cab), you might well choose to use a mono group, and export that rather than the individual tracks. Finally, let’s return to the matter of virtual instruments. I’ve discussed the MIDI, and the mono/ stereo aspects above. But also consider that if using single plug-ins to play multiple sounds (eg. a virtual drum kit, or a multi-instrument player like Kontakt or HALion), then consider feeding each instrument to different DAW tracks, to give the mix engineer separate control over each element. Also, assuming you’re bouncing to 16- or 24-bit audio, check that the level on each individual track doesn’t exceed 0dBFS True Peak. If, for instance, you’re using gain at the group or master busses to bring the level down, the individual tracks could still be peaking high, so will clip when you bounce them — and note that lots of VSTi presets have an unhelpfully hot output by default (to make them catch your ear when auditioning!). So, there’s lots to think about. But the bottom line is this: if exporting for someone else, ask what they prefer, make sure the files are sensibly named, and take the opportunity to create audio-only multitracks anyway, for a future-proof archive of your project!
NEXT MONTH IN
Understanding AI Music
AI music generators like Suno and Udio generate complete songs from text prompts. In July’s SOS, we explain how they work — and how to stop your own music being used to train them.
July issue on sale Thursday 18th June. Available at TG Jones, WH Smith Travel and all good newsagents.
Subscribe at www.soundonsound.com/subscribe
Digital version (no WH Smith reference)
The Advertisers Index NEXT MONTH INSound On Sound To Advertise in
please contact: chris.cope@soundonsound.com
AMS Neve
✆ 01282 457011
61
RAD Distribution
www.raddist.com
59
API Audio
www.apiaudio.com
83
Rapidflow
www.rapidflow.shop
71
Understanding AI Music Audient
✆ 01256 381944
5
Rupert Neve Designs
www.rupertneve.com
63
DPA Microphones
www.dpamicrophones.com
21
Sennheiser Germany
www.sennheiser.com
95
Dynaudio
www.dynaudio.com
33
Slate Digital
www.slatedigital.com
27
Expressive E
www.expressivee.com
51
Solid State Logic
www.solidstatelogic.com
23
Fabfilter Software Instruments
www.fabfilter.com
13
SOS For Artists
www.sosforartists.com
115
Focusrite Audio Engineering
www.focusrite.com
OBC
Sound Service UK
www.soundservice.uk
9
Gear Expo UK
www.gearexpouk.com
79
Soundtoys
www.soundtoys.com
103
Genelec
www.genelec.com
19
Sound Technology
www.soundtech.co.uk
3
GIK Acoustics Europe
www.gikacoustics.com
35
SPL
www.spl.audio
AI music generators like Suno and Udio generate complete songs from text Steinberg Media Technologies ✆ 0049 402 103 50 Heritage Audio www.heritageaudio.com 75 prompts. In July’s SOS, we explain how they work — and how to stop your Synthax Audio UK www.synthax.co.uk IMSTA London www.imsta.org 49 own music being used to train them.
109 27 11
Kenton Electronics
✆ 020 8544 9200
97
Toontrack
www.toontrack.com
IBC
LEWITT Audio
www.lewitt-audio.com
43
Warm Audio
www.warmaudio.com
IFC
w w w . s o u n d o n s o u n d . c o m / November 2016
www.soundonsound.com July issue on sale Thursday 18th June.
137
DEMO VOCALS J AY M O U S S A - M A N N
Y
ou know how they’re always like “Oh just share some behind the scenes of you recording the demo”? Well, I can’t really do that because aesthetically, to be honest, it’s horrific. Often in my dressing gown at some unearthly hour, hair facing all different directions, with squint eyes and a saggy face, I sit hunched over my little office desk, clutching my notebook, I sing those few experimental lines into my microphone. In my head I sound like I look stunning and am singing to an audience of thousands. And those vocal deliveries are almost always my favourites. I do think that modern vocal treatment incorporates a lot more of the rawness of the singer into the mix. And by all means tune the vocal, but the
desire to cut every breath and tune every note because it sounds raw instead of ‘pretty’ is disappointing. Often, a vocalist would choose better delivery over a ‘correct’ note. But a producer might clean that up because they missed the point. They ignore the vocalist’s intentional delivery of a word. Yet some of the best songs with the most memorable moments are created by not hitting the note exactly, or delivering a tone that’s a bit odd. There lies the humanity. I love Melodyne, but sometimes I want to sound like... Well, me. I came to producing through trial and error. I had no formal training. Everything I do has been picked up through a mixture of watching Mix With The Masters, bits of advice from professionals, reading as much as I can and of course, producing terrible
tracks, releasing them, dying of shame and trying again. One thing I have noticed over and over is that I tend to prefer my demo delivery on vocals. The number of times I have re-recorded an entire song, only to realise that the original demo vocal was better to begin with, has made me take stock. These days, my tracks are often a careful mix of demo vocals and comps where I’ve gone in and re-sung the sections that went wrong. My latest single, ‘Honey You Shrunk This Kid’, retained most of the original demo vocal. I was singing straight off the page of lyrics I had written a few moments before. Because I was ‘only’ demo’ing I wasn’t worried about singing a word this way or that. A mindset that can be difficult to repeat later on another take. I decided on my upcoming self‑produced album that
“The number of times I have re-recorded an entire song, only to realise that the original demo vocal was better to begin with, has made me take stock.” 138
June 2026 / www.soundonsound.com
I wanted to retain as much of my real voice as I could. Not on every track. But to stay as true as I could to the way I chose to deliver the song in the first place. Having said all this, the amount of time I spend on my vocals is ridiculous. I very often go back and spend hours trying to deliver just one word exactly the way I need to intonate it. I think about how I’m singing a phrase all the time: should it be more breathy there? Do I need to belt that part? The feeling behind that line doesn’t say it enough. Should I smile here to settle that note properly? There is an earlier version of ‘Honey You Shrunk This Kid’ on my Bandcamp where the bridge is sung quite differently to the released single version. When I released it as a single I went back in and realised I wanted to change the melody slightly. And I’m much happier with the newer version. But ultimately, I think this song works because you can hear the writer laying down her thoughts straight off the page.
THE WORLD – AT YOUR FINGERTIPS.
Legendary engineers. Iconic studios. Timeless drum sounds. Al Schmitt at Capitol. Eddie Kramer at AIR. Bob Rock at The Warehouse. Sylvia Massy at La Fabrique – to name a few. Explore our collection of SDXs for Superior Drummer 3.
WWW.TOONTRACK.COM
Introducing ISA C8X
Rooted in more than 40 years of Focusrite ISA heritage, the ISA C8X combines fully analogue, ISA preamp architecture with modern control, connectivity, and recall, in a fully integrated audio interface.
ISA’s 40-year legacy evolves with a new 2U, USB audio interface.
At its core are eight digitally-controllable microphone preamps, including two ISA transformer-based preamps featuring Lundahl LL1538 transformers with stepped and fine gain, switchable impedance, and dedicated inserts.
All-analogue Console mode adds warm saturation and low-end punch, while 430 Air mode — lifted directly from the ISA 430 MkII — adds high-end shimmer. Flagship RedNet-grade AD/DA conversion delivers uncompromising performance for tracking, mixing and monitoring, while 26 inputs and 28 outputs — including fixed +24dBu line I/O — make ISA C8X patchbayready and suited to outboard-focused studios. ISA C8X is the next evolution in the ISA lineage. Engineered for long-term reliability, system expansion, and designed to be the centre of your professional studio for years to come.
Discover ISA C8X at: focusrite.com