1 minute read
Lower Pinion


Lower Pinion
After removing the articulating shaft, the lower pinion can be removed from the mounting plate for repair. See Figure 12.
Advertisement
1. LOWER PINION SHAFT (NOTCH FORWARD) 2. LOWER PINION MOUNTING PLATE 3. LOWER PINION GEAR 4. STEER MOTOR GEAR 5. MOUNTING SCREWS 6. STEER GEAR 7. DRIVE UNIT HOUSING 8. TRACTION MOTOR 9. STEER MOTOR
Figure 12. Lower Pinion Mounting
1. Remove the capscrew, lockwasher, washer, and gear retaining washer from bottom of pinion assembly. Remove gear from shaft and recover the Woodruff key.
Remove pinion shaft and bearing from mounting bracket. Remove bearing from shaft. See Figure 13. 1. LOWER PINION MOUNTING BRACKET 2. WASHER 3. LOCKWASHER 4. CAPSCREW 5. RETAINING WASHER 6. GEAR 7. BEARING 8. WOODRUFF KEY 9. PINION SHAFT
Figure 13. Lower Pinion Assembly
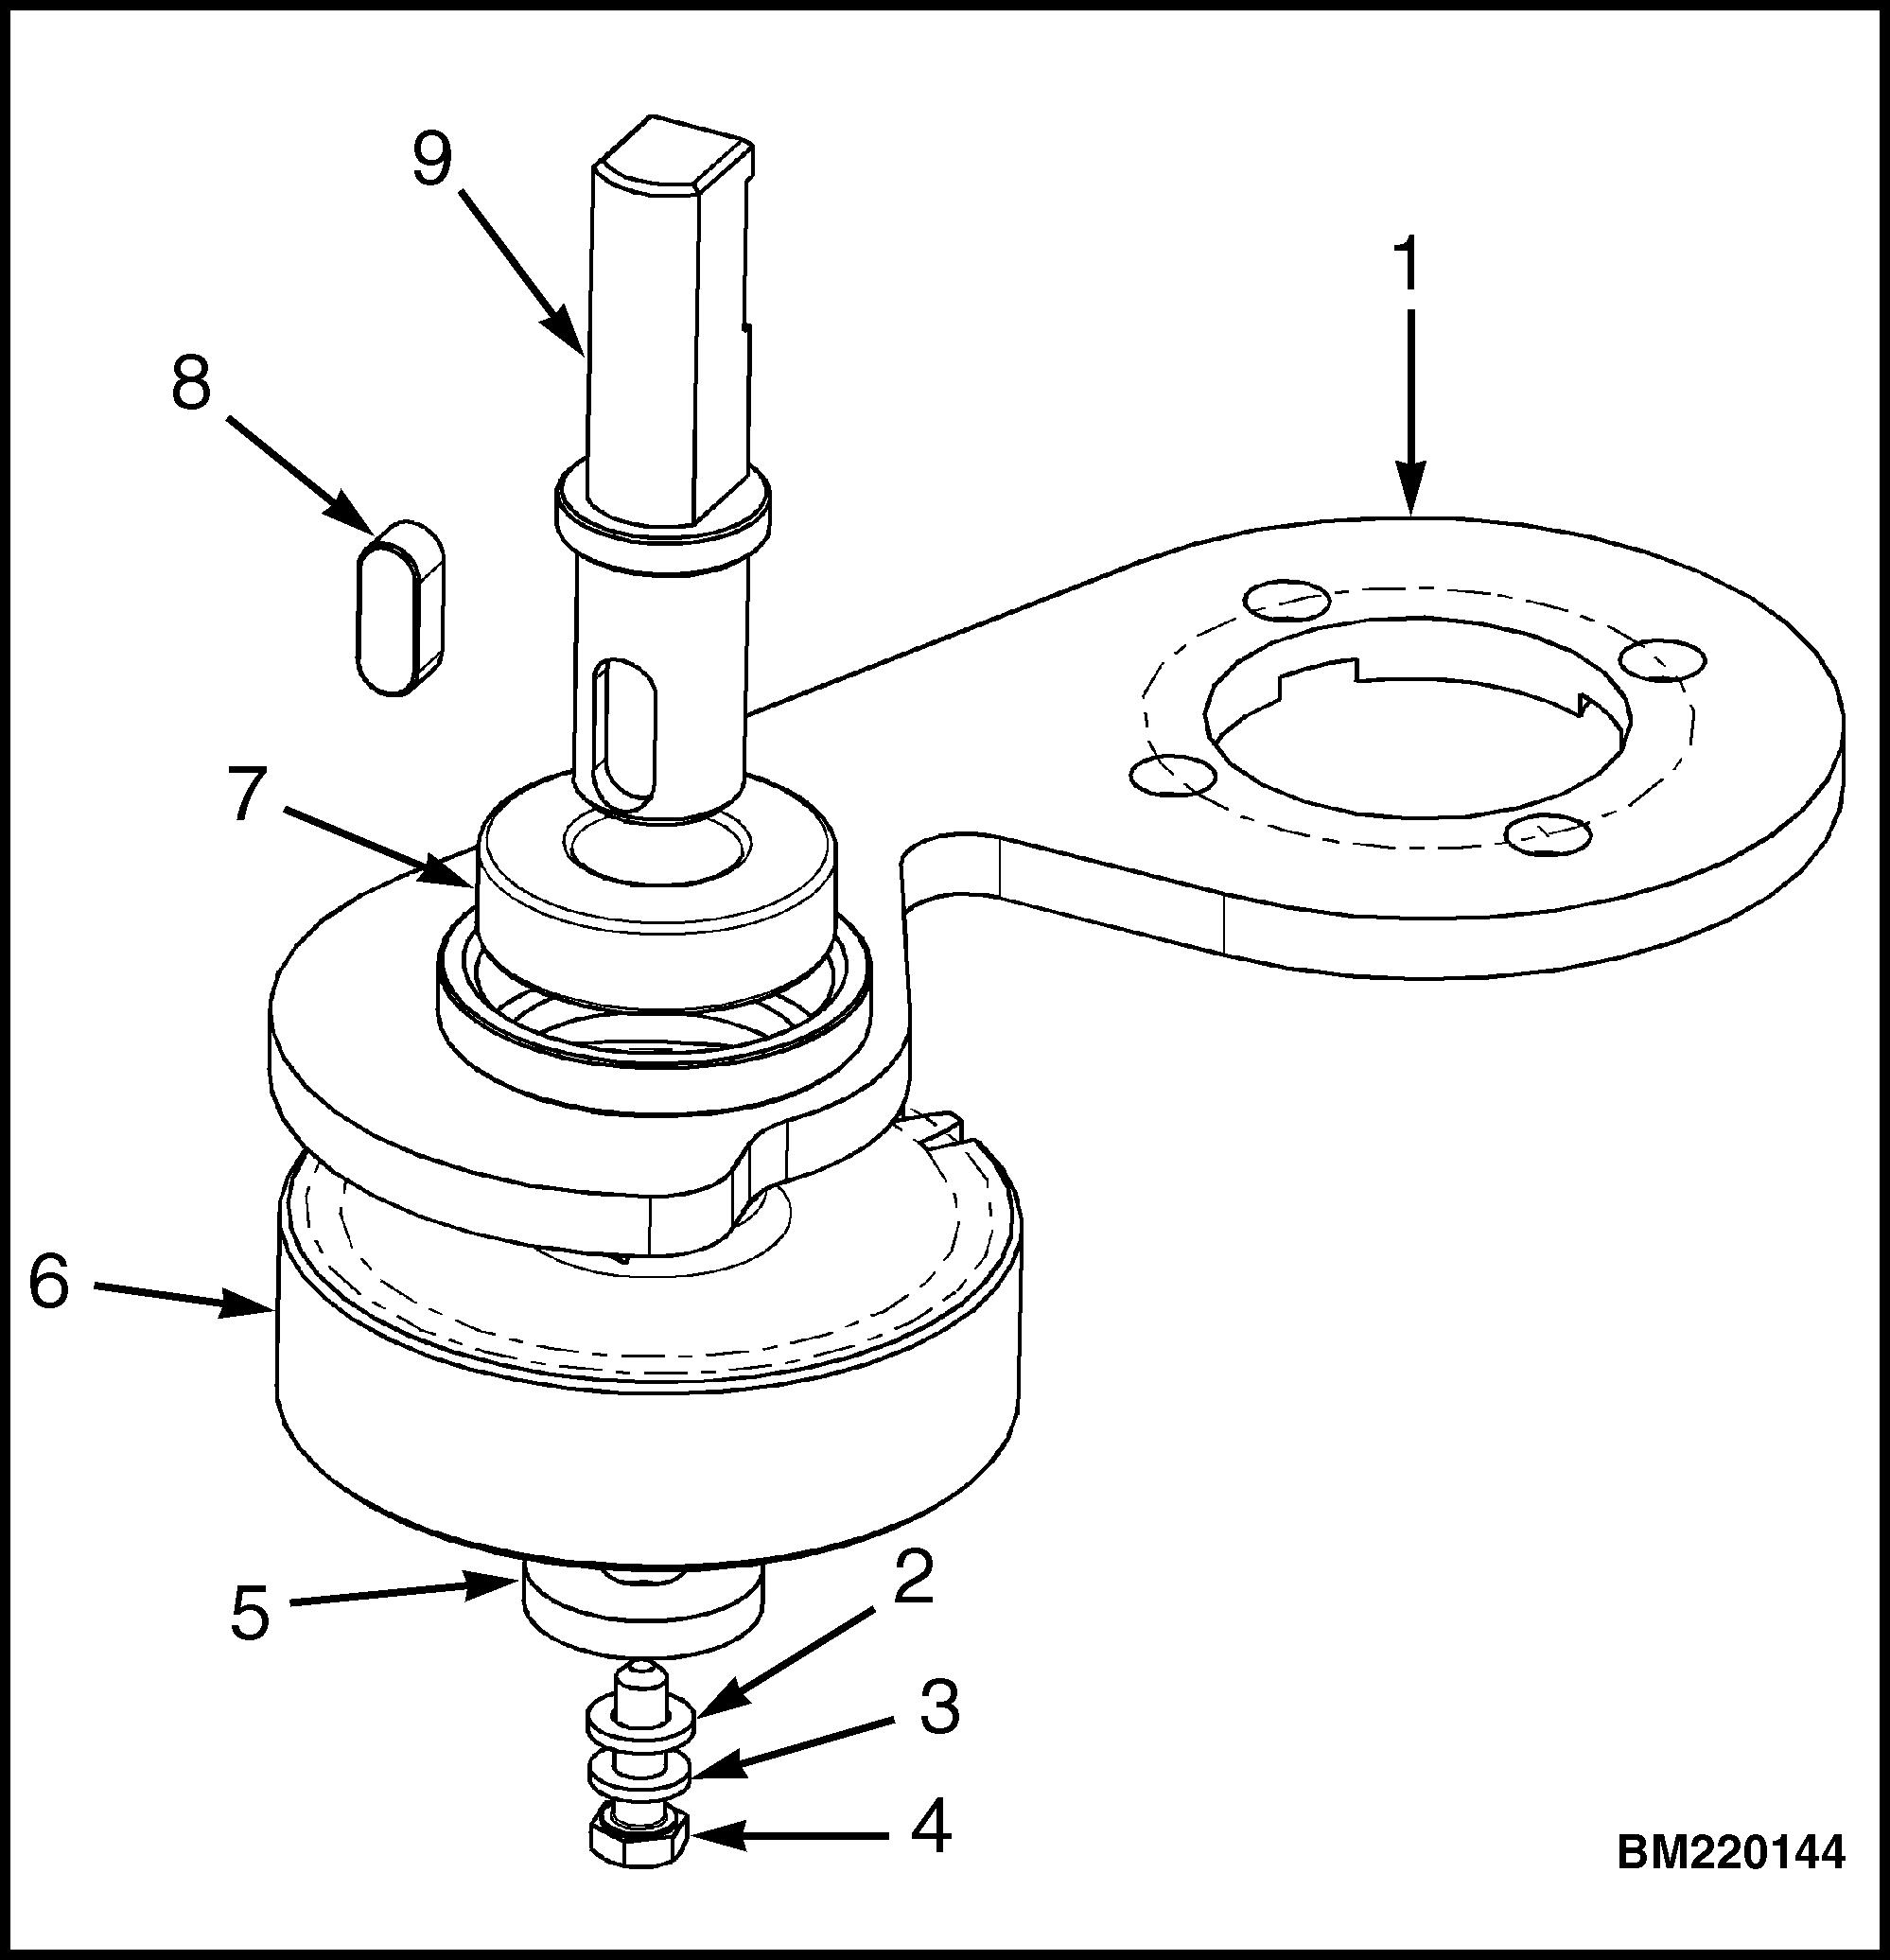
2. Install new bearing onto shaft and position into mounting bracket as removed. Install the Woodruff key into shaft. Align pinion shaft with the notch in the "straight ahead" position.
CAUTION
Steering functions will not operate properly if pinion is not installed with notch aligned properly with drive tire.
3. Slide gear onto shaft and key. Secure in place with gear retaining washer, washer, lockwasher, and capscrew as removed.