1 minute read
ZAPI™ Handset


ZAPI™ HANDSET
NOTE: The ZAPI handset will display the code: V1.07 (or a higher number) for 1 to 2 seconds every time the key switch is turned to the ON position. This code represents the EEPROM software version and DOES NOT INDICATE A FAULT CODE.
Advertisement
The ZAPI™ handset must be connected to the controller before turning on the key. The handset must have an adapter harness to connect to the controller. The handset and adapter harness are available from your Hyster dealer. Connect the handset to plug D. The handset can remain connected to the controller while running, and the parameters can be changed in real time. In this case, it is necessary to go in a standby condition (truck at rest) before switching OFF the controller in order to store the new values in the EEPROM.
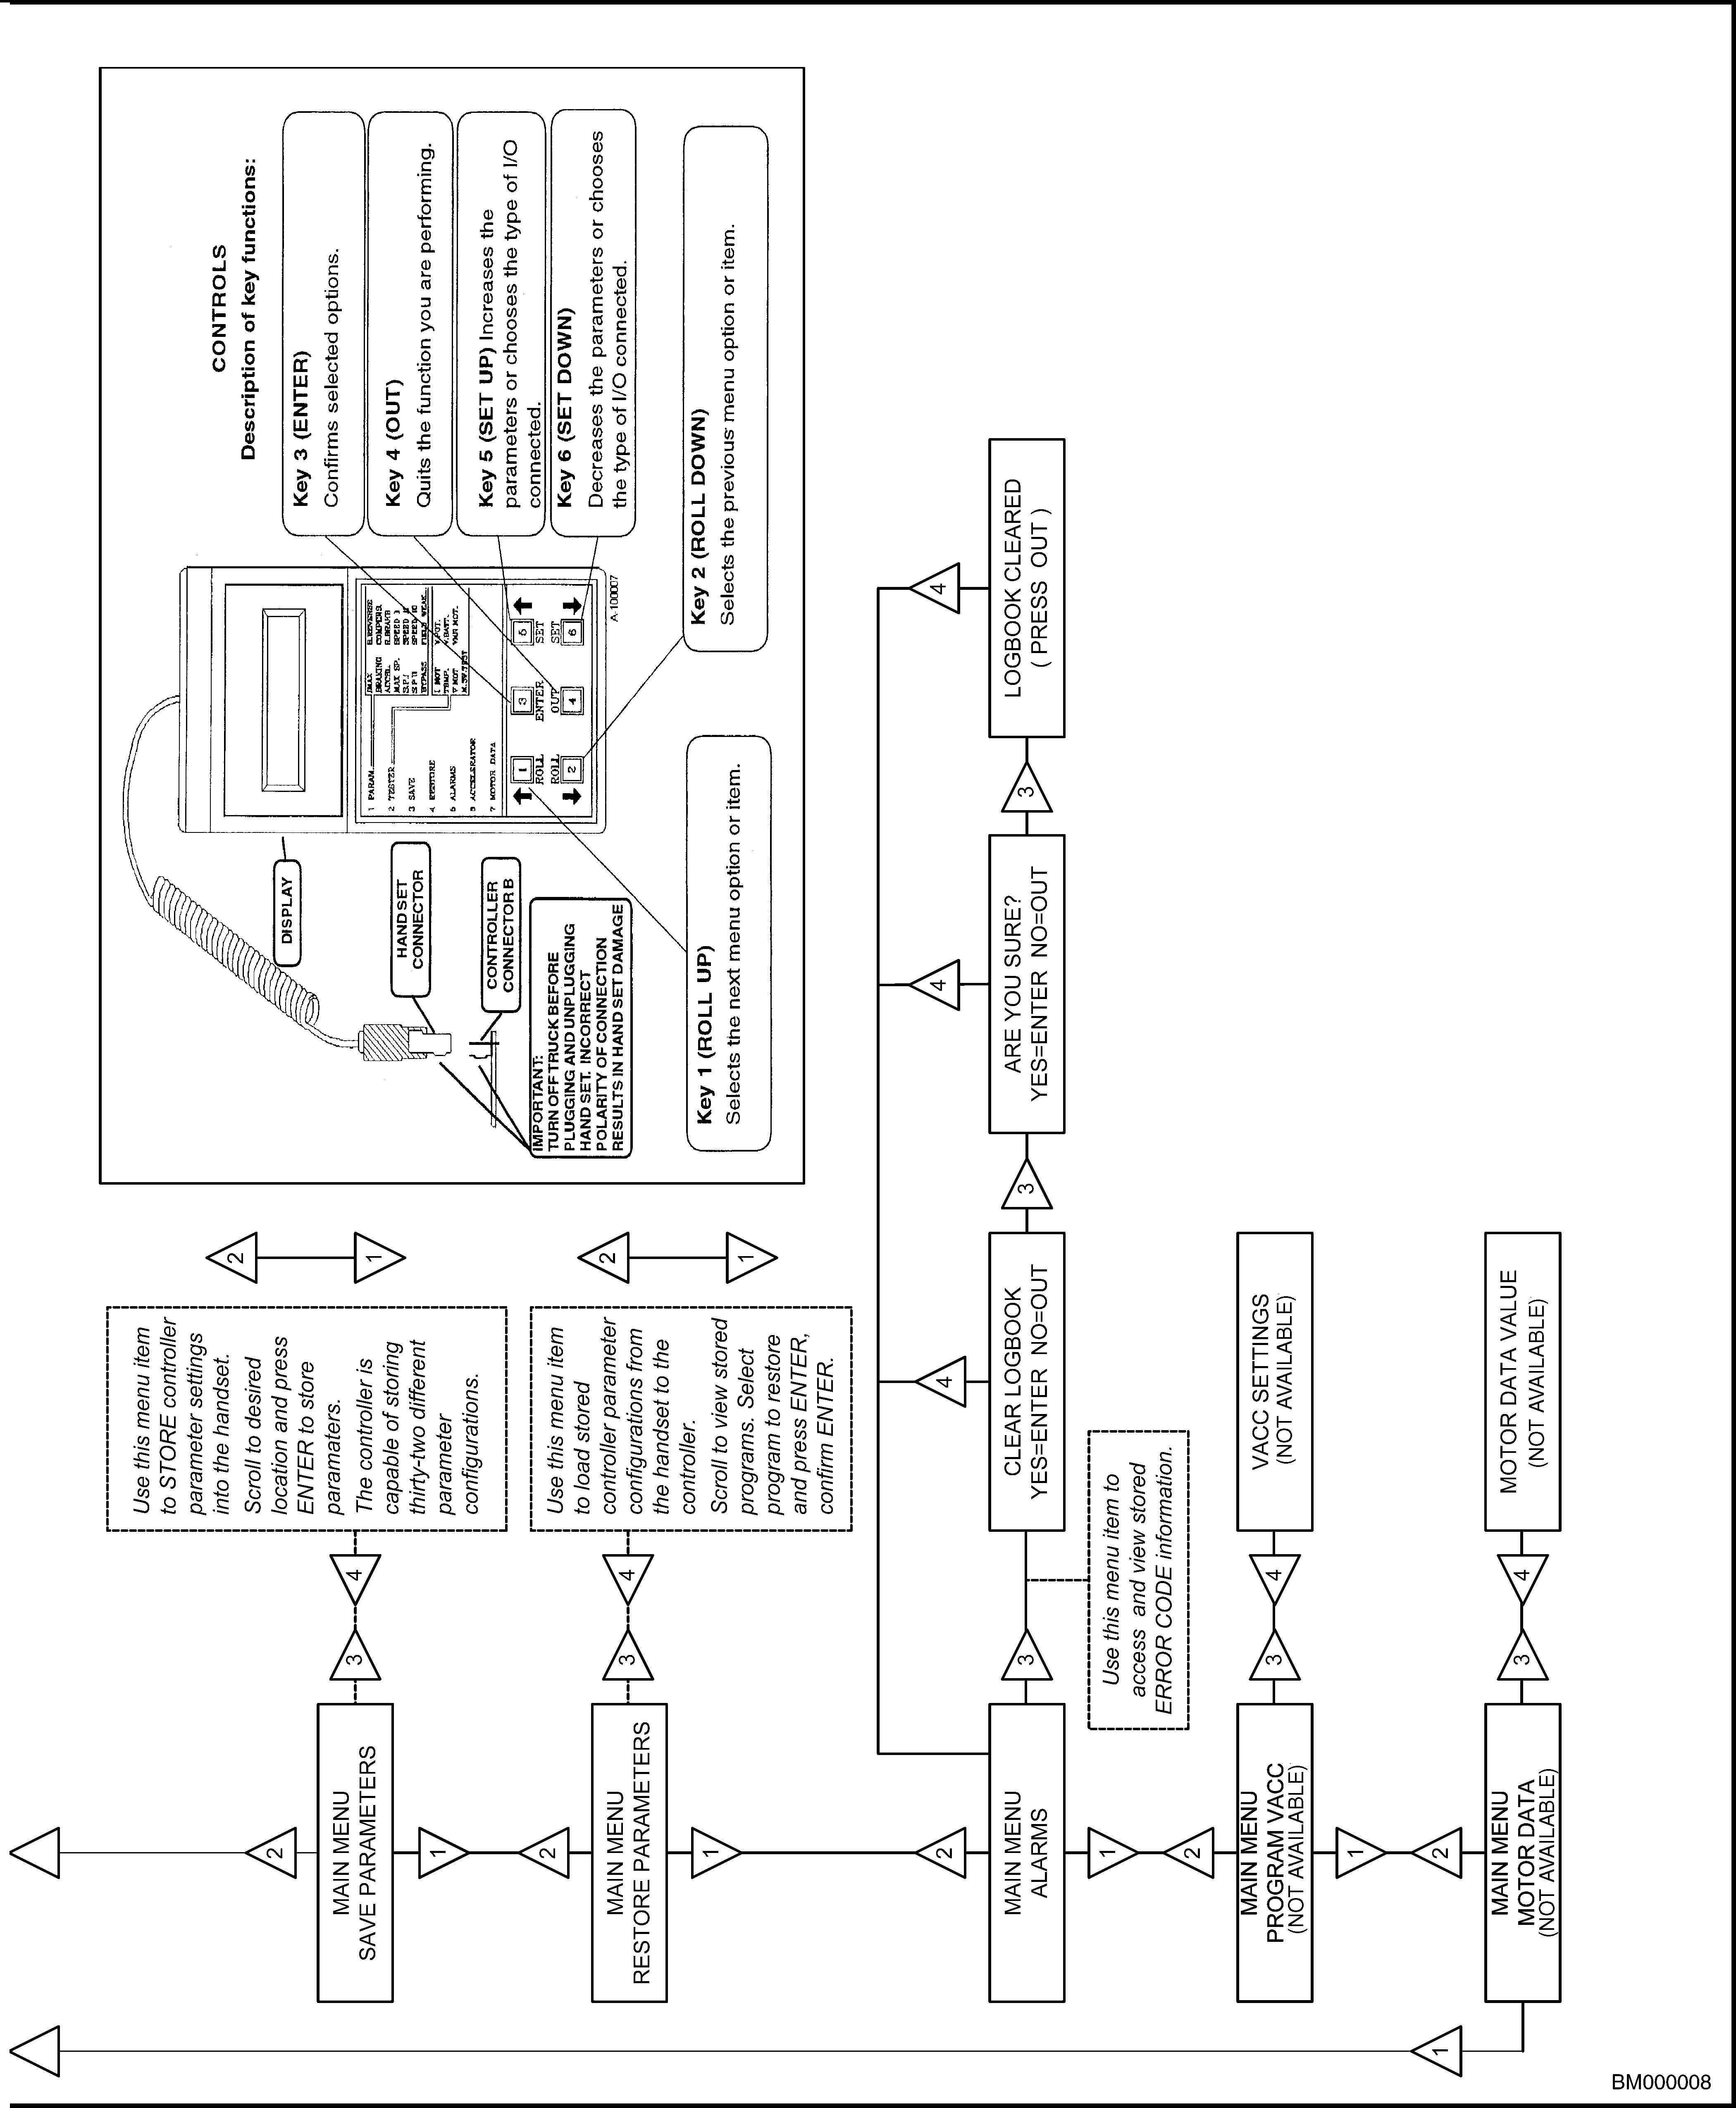
This section describes the ZAPI™ handset functions. Six buttons provide the capability of changing or reading the parameters.
NOTE: After a modification, save the new values by pushing out, then enter to confirm. (Screen prompts will guide the user.) To navigate the menu options, numbers inside the triangles in the following map correspond to the same number on the handset keyboard buttons. The orientation of the triangle indicates the way to the next function. See Figure 3.
NOTE: Connect and disconnect the handset only with the key switch in the OFF position.
For additional handset description, see Figure 4.
1 Roll-Up Push to scroll up. 2 Roll-Down Push to scroll down. 3 Enter
4 Out
Push to enter a submenu or to confirm a change. Push to exit a selected menu or to refuse a change. 5 Set-Up Push to increase a parameter value. 6 Set-Down Push to decrease a parameter value.
NOTES