11 minute read
Installation guidelines

These guidelines are based on SANS 1200MJ, the official South African specification for the installation of paving.
Important:
Advertisement
Earthworks (base layer preparation) are site-specific and fall within the scope of an engineer’s expertise. Bosun strongly advises that an engineer design any paving’s earthworks. This is imperative for commercial, public and industrial sites intended to carry heavy vehicular traffic.
Terminology:
• Sub-grade is the prepared natural earth on which paving will be installed. • Sub-base is the prepared layer beneath the paving and bedding sand. (In South Africa it is usually “natural earth”, unless otherwise specified by an engineer. In other countries it is usually a special imported material, consisting of particle sizes between 40mm and dust.) • Bedding sand is the final layer upon which the paving blocks are installed. • Jointing sand is used for grouting between pavers. • Earthworks or base preparation (beneath the bedding sand.) • The soil conditions and application will determine whether a special sub-base is required. An engineer is required to calculate the need and specification. This will involve excavation and back-filling. • For domestic driveways and paving subjected only to pedestrian traffic, good-quality natural earth might provide sufficient strength for the installation of paving. (However, if you want your paving to last a lifetime, insist on an imported sub-base.) Sandy and clay soil conditions will always require a specially designed sub-base.
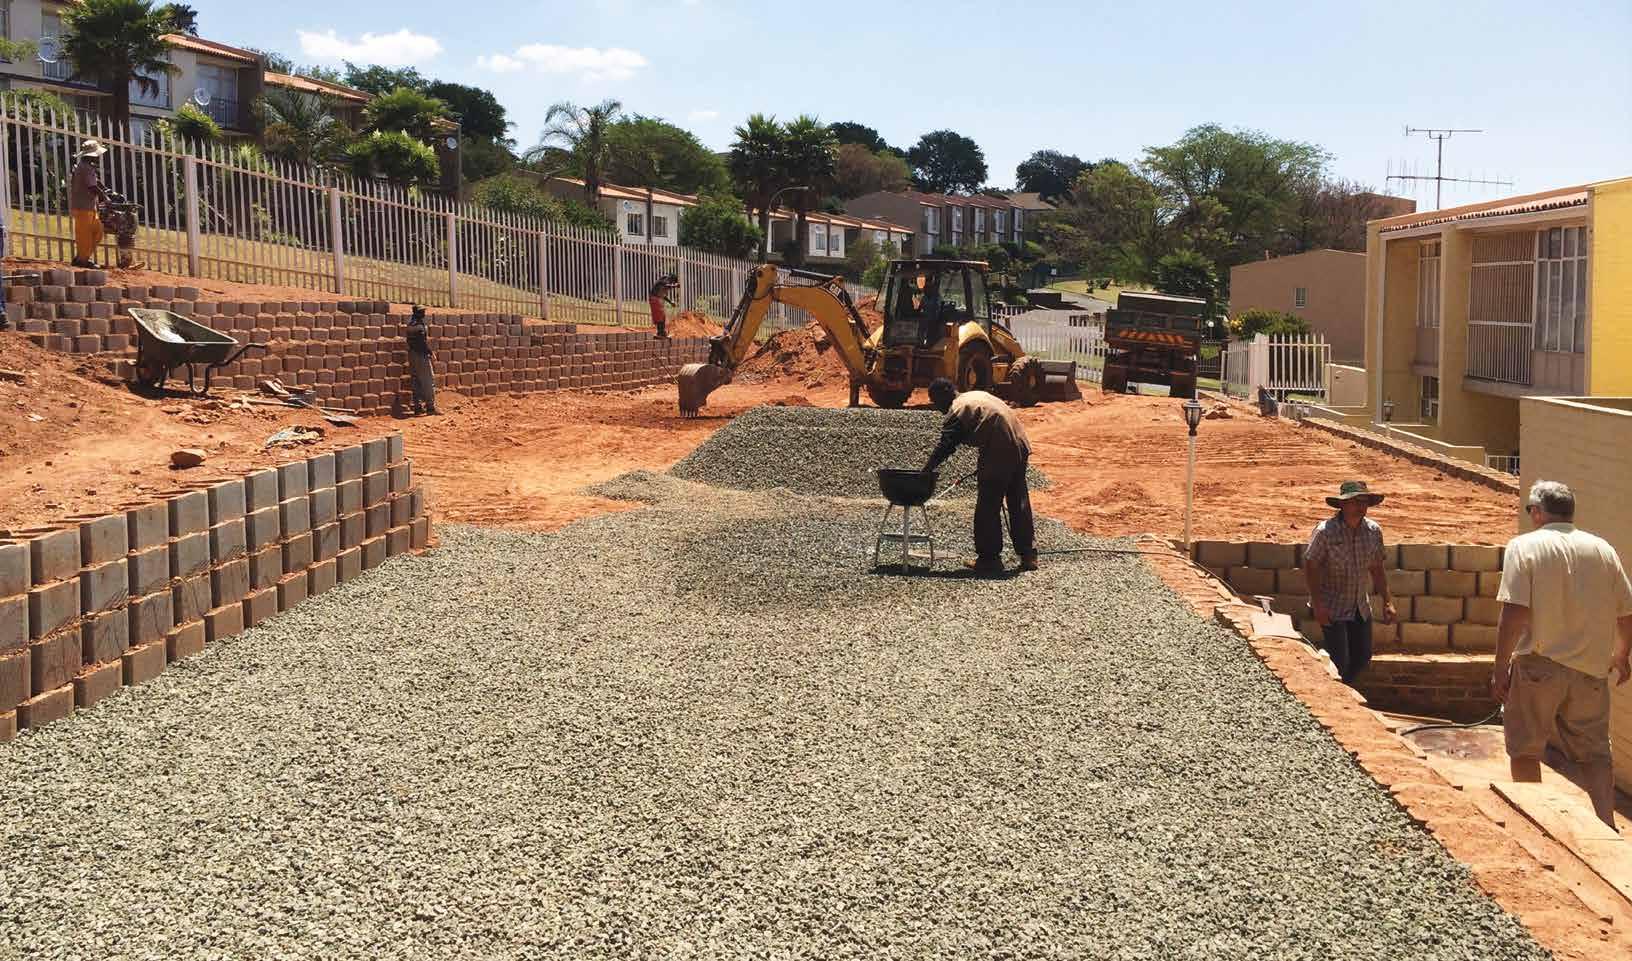
Compaction:
• Good compaction of the sub-grade and sub-base is critical for your paving installation to last, whether you use an imported sub-base or not. Good compaction means compaction in layers and not merely the compaction of the top soil. In practice, this means taking out soil, compacting, putting some soil back, compacting, etc. • Hand-stampers and small plate compactors are simply not good enough to achieve good compaction. We recommend the use of a mechanical roller.
Bear in mind that:
• Excavation is usually required on areas intended for paving. The extent of excavation is determined by the thickness of pavers to be used together with their bedding. • In most instances, excavated material will need to be removed from the site. • There might be natural depressions in the earth of the area to be paved and, depressions, special materials will be required to fill them. On residential driveways, excavated earth is generally usable. Bedding sand should not, in any circumstances, be used for this purpose. • All plant material and roots must be removed from the soil and site. • Carefully consider the roots of trees that might eventually grow under the paving. • Carefully consider underground utilities prior to excavation and digging. • After excavation, “drainage levels” must be checked and rectified.
Drainage:
• Many paving failures are due to ingress of water into the earthworks beneath the paving. In order to eliminate this problem, pay attention to drainage. • It is imperative that there are adequate longitudinal falls and no undulations to prevent ponding and infiltration of water into the layer works, particularly in the first year after installation. A minimum fall of 2% in any direction is generally required.
It is also important to ensure that the paving is laid proud of (ie 5-10mm higher than) stormwater structures or channels. • Where a high water table exists, sub-soil drainage should be installed. • Drainage channels and underground drainage pipes should be installed in certain areas, such as low points in steep driveways, around downpipes, etc. • Consider the natural land and buildings when designing a drainage plan.
Sub-base stabilisation:
Sub-base stabilisation should be done in accordance with SANS 1200MJ when specified. In simple language, this requires cement to be mixed into the sub-base.
Edge restraints:
• The earth preparation should extend to the rear face (back edge) of edge restraints. • Edge restraints consisting of kerbs or channels must be constructed on the subbase before paving is laid. In residential applications, an edge restraint might be constructed by laying the pavers on the edge in a concrete bed. (This is often called the header course.) • Experience has shown that the best edge restraints are kerbs. For residential and pedestrian applications, garden kerbs are ideal. There are many aesthetically pleasing options on the market. • On large paved areas and paving on steep slopes, additional restraints in the form of edge beams might be required. Please refer to the CMA manual for paving on steep slopes. • In-situ concrete on edges is not recommended as it usually breaks after a few months.
Bedding sand:
• The incorrect selection and application of bedding sand is a major cause of site failures. • The sieve analysis of bedding material is specified in SANS 1200 MJ (the only South African specification for the installation of concrete paving). To simplify what is said in SANS 1200MJ, good-quality, washed river sand usually falls within this sieve analysis and is therefore recommended as default bedding material. • Cheap, inferior bedding materials will cause site failure. • Do not mix cement with bedding sand, unless specified by an engineer.
Bedding sand do’s and don’ts:
• Bedding sand must be spread over the sub-base and evenly screeded in the loose condition so as to achieve an even thickness of 20-30mm. • For pavers larger than 250mm on one edge, we recommend a thickness of 40mm of bedding sand. • Do not compact bedding sand before laying pavers. • Where the sand bed is accidentally compacted before the units are laid, it must be raked and evenly re-screeded in a loose condition.
Bedding sand do’s and don’ts (continued):
• Bedding sand must be moist. (Not saturated with water – only moist.) • The sand bed must be laid slightly in advance of the placement of the units, but only to the extent that the particular area of paving can be completed on the same day. (With the sun baking down, it might be limited to a few hours at a time.)
Therefore the moisture content of bedding sand should be continuously assessed on site. • Where bedding sand dries out, it must be raked back into a heap, moistened with water and shovelled in order to obtain consistent moisture. Only then must it be levelled out and screeded again. • Do not add water to spread out bedding sand. • Dried out or too little bedding sand will cause: - Uneven paved surface. - Rocking pavers that will break in time. - Grouting failures. - Pavers with chipped edges (spalling). - Do not use plastic sheeting beneath or on top of bedding sand. It does not prevent weeds from growing and badly affects the structural integrity of the paving.
Laying of pavers:
• Where appropriate, lines must be set up at right angles to each other to control the alignment of the pavers. • Joint widths must be 2-6mm. • Nibs on pavers are generally 1-2mm in size. This is smaller than the joint widths, as specified by SANS 1200MJ. The ideal would therefore be to use nylon line as guides and leave grouting gaps larger than the paver nibs. • In other countries, it is specified that nibs be used as a guide only and that pavers be packed without touching at all. • In practice in South Africa, concrete pavers are always butt-jointed, with nibs touching adjacent pavers. Technically this is incorrect, but in reality, only paving artisans can do this and there are very few of them in South Africa. • Pavers from various packs should be mixed when installed. Installing pack by pack will result in a “patchy” finish. • Pavers should be transported in a paving cart or wheelbarrow prepared with blankets. They should not be thrown into wheelbarrows or front-end loaders and dumped, as this will damage them.
Cutting:
• Whole units must be laid first. Precisely cut pieces should then be fitted into gaps which are too small to lay complete pavers in, such as those which are close to edges and around manholes. • The best practice is to mark pavers when they are packed out and to then individually cut them with a special paver cutter or masonry saw with a diamond-tipped blade. In reality, however, pavers are in many instances packed out, marked and cut with an angle grinder on the ground. When this procedure is followed, cutting will never be as accurate or neat as required.
Levelling (first compaction of pavers):
• Compaction of pavers should be done while the bedding sand is still moist. It is a useless exercise on dry bedding sand. • All debris and sand should be cleaned off paving prior to plate compaction. • For Bosun unbevelled Large Urban Pavers, we recommend that compaction only take place after jointing sand has been swept into gaps between pavers. This will help to prevent edges chipping. In this instance, initial levelling should be done with a large rubber mallet, which is available from Bosun. • For any other pavers with bevelled edges, we recommend that at least two compaction passes with a mechanical plate compactor be made over the paving as soon as possible after laying, and before the introduction of any jointing sand. • By the end of each day, compaction must be completed to no closer than 1m from any free edge. A uniform, even surface should be obtained over the paved area. • To avoid damaging pavers, we recommend fixing conveyor belting onto the vibrating plate of the compactor.
• After compaction, lines should be checked and adjusted with a crowbar or special alignment tool. If necessary, these areas should then be re-compacted. • Temporary edge restraints should be used across the front laying edge when installations are to be continued on the next day.
Joint filling and second compaction of pavers:
• The joints should not be filled until all cut pieces of paving have been inserted, all the necessary adjustments to the line and level have been made and the pavement has been subjected to at least two passes of the compactor. • Sand that complies with sieve analysis as specified by SANS 1200MJ must be used as jointing sand. In South Africa, plaster sand is usually close to the specified sieve analysis. • Avoid the use of red plaster sand for grouting, as it will stain your paving. Always use light-coloured plaster sand for grouting. • In other countries, silica sand is used as jointing material and is definitely the better option. (However, it is more difficult to obtain and subsequently a more expensive option.) • The most important aspect of jointing sand is that it should be bone-dry. (Moist jointing sand will not fill gaps between pavers consistently and will cause “bridges” that will collapse in time.) • Jointing sand should be broomed into the joints until they are filled and sufficient passes of a plate compactor should be made to settle the joint filling. (The jointing sand should literally be “shaken” into the joints by the plate compactor.) • The procedure should be repeated until the joints remain full after compaction. • On completion of compaction, all excess sand should be broomed off and disposed of. Damage caused during compaction should be compensated for by the contractor at his own expense.
Most importantly:
• It is critical to sweep more sand into paving joints a week after the initial grouting. In many cases, grouting sand will settle and subsequently leave “groutless” gaps between pavers. It is not even necessary to use a plate compactor for this exercise. • Grouting sand should again be swept between pavers after six months of installation, or after the first heavy rains. This will fill joints and create good interlocking between pavers. If this is not done, there will be a chain reaction of grouting eroding and being washed out. This will eventually cause the pavers to be totally loose, resulting in site failure.
Cement grouting:
In our opinion and according to SANS 1200MJ, cement should not be added to jointing sand. However, in South Africa it is common practice to grout paving with a cement slurry, rather than sand. This defies the principles of segmented block paving, as a solid “slab” is created. Cement grouting minimises certain risks and effectively “hides” certain potential problems. Generally, residential paving installations are done with cement grouting and because it carries light traffic, it usually works.
Where cement should be added to sand grouting:
When paving on steep slopes. Around down-pipes. Along roof overhangs with no gutters.
Alternatives to cement grouting:
There are specialised grouting options which work out to be more expensive than cement, but offer much more in terms of reliability and longevity.
Using the paving:
Sand-grouted paving could be used by vehicles immediately after grouting. Cement grouted paving should not be used for seven to ten days after installation.
Basic installation guidelines for Bosun flagstones
• Lay Bosun flagstones on a concrete bed. Ensure the bed covers the entire surface area of the flagstone, without any hollows or voids. • Apply bonding agent to the back of every flagstone in order for it to adhere to the prepared concrete bed. • Use rigid grouting between the flagstones. Wet the grouting area before applying cement grouting and carefully work the mixture into joints. When done, immediately remove excess grouting material from the pavers with a sponge. Contact a Bosun representative or visit www.bosun.co.za for a comprehensive installation guide.
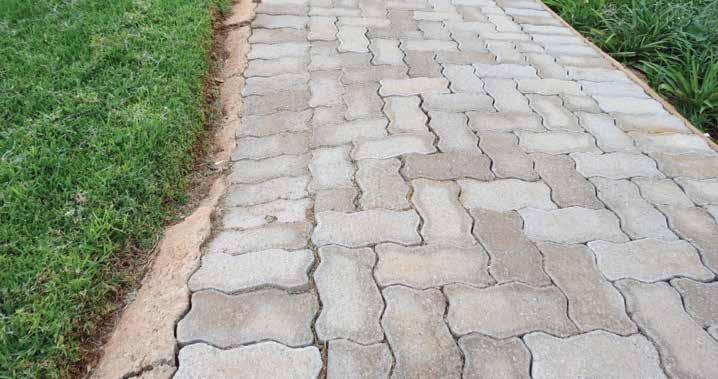
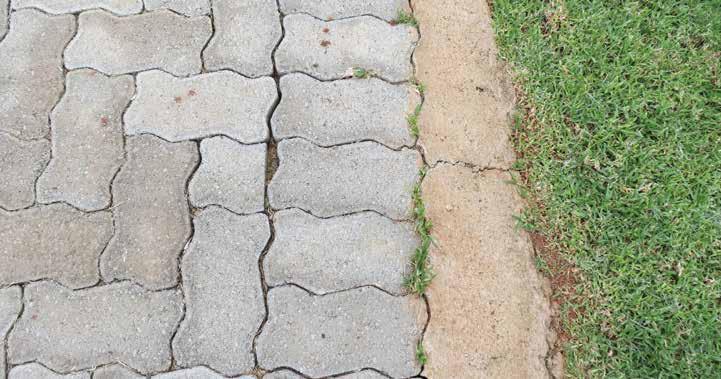
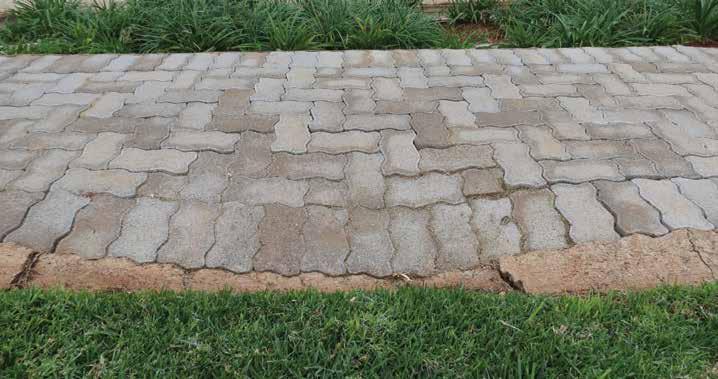
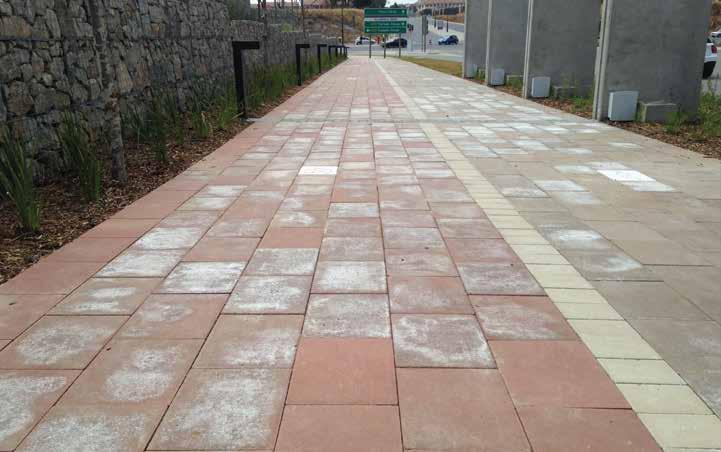
This small walkway was installed a year before these pictures were taken. • No compaction was done. • No proper edge restraints were created. • Plastic sheeting was installed under the paving. • Bricks were not from a SABS-approved supplier.
Reality check
It is more difficult and costlier to install flagstones than standard-sized pavers and interlocking shaped bricks. If your installer charges the same price that he charges for small pavers, wyou should certainly expect problems on site.
A practical example of poor installation
Although this path carries only light pedestrian traffic: • A section has started to collapse a few months after installation. • Edge restraints are breaking and paving on the edges will soon start to move apart. • Weeds are still growing. So much for the plastic sheeting!