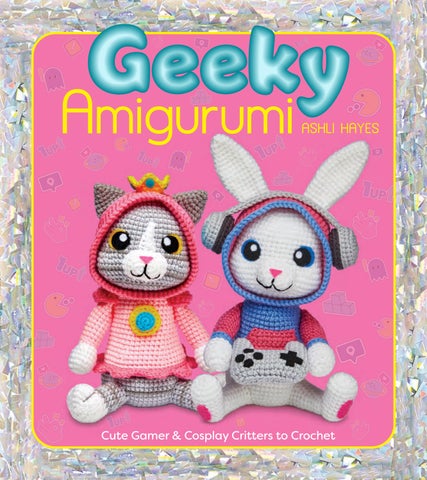
G eeky A migurumi
ASHLI HAYES
Cute Gamer & Cosplay Critters to Crochet
G eeky Amigurumi
Cute Gamer and Cosplay Critters to Crochet
Ashli Hayes Get Creative 6 NEW YORK
Get Creative 6 An imprint of Mixed Media Resources LLC 19 W. 21st St., Suite 601 New York, NY 10010 Senior Editor PAM KINGSLEY Art Director JENNIFER MARKSON Editorial/Production Coordinator JEAN O’DEA Finished project photography: Marcus Tullis How-to stitch photography: Jack Deutsch Step-by-step pattern photography: Ashli Hayes ___________________ Chief Executive Officer CAROLINE KILMER Chairman JAY STEIN Copyright © 2026 by Ashli Hayes All rights reserved. No part of this publication may be reproducedor used in any form or by any means—graphic, electronic, or mechanical, including photocopying, recording, or information storage-and-retrieval systems—without permission of the publisher. The written instructions, photographs, designs, projects, and patterns are intended for the personal, noncommercial use of the retail purchaser and are under federal copyright laws; they are not to be reproduced in any form for commercial use. Permission is granted to photocopy for the personal use of the retail purchaser. Library of Congress Cataloging-in-Publication Data is available on file. The EEA authorized representative is Authorised Rep Compliance Ltd., Ground Floor, 71 Baggot Street Lower, Dublin, D02 P593, Ireland (www.arccompliance.com). ISBN 978-1-68462-112-5
Manufactured in India 1 3 5 7 9 10 8 6 4 2 First Edition
Dedication To Steven, my player two in life and love. Thank you for your constant support and for being my biggest fan. You’re the real MVP of this journey. A heartfelt thank you to my editor, Pam, and to all the wonderful people at Mixed Media Resources who helped turn a jumble of stitches and words into this beautiful masterpiece of a book. Finally, to my two needy beans, Rory and Gus, who never fail to drag me away from my desk for fresh air, belly rubs, and snacks.
CONTENTS INTRODUCTION 6
CHAPTER 1: GEEKY ANIMALS Alex the Axolotl Beatrix the Bunny Benvolio the Bear Delphyne the Dragon Dewey the Duck Doug the Pug Flynn the Fox Herbie the Hamster Luna the Tabby Cat Melvin the Monkey Mindy the Mous e Olivia the Owl Trevor the T. rex
10 16 22 28 36 42 48 54 60 66 72 78 84
CHAPTER 2: COSPLAY OUTFITS Adventurer 94 Space Knight 97 Blue Creature 100 Princess 103 Wizard 106 Cyborg 109 Yellow Creature 112
CHAPTER 3: GAMER ACCESSORIES Headphones Messenger Bag Glasses Video Game Controller Portable Game Tablet Retro StitchBoy Game Console
116 119 122 126 128 130
STITCH & TECHNIQUE GUIDE
Slip Knot 132 Foundation Chain 133 Working into the First Row or Round 134 Single Crochet 135 Half Double Crochet 136 Double Crochet 136 Triple Crochet 137 Working in Rows 137 Slip Stitch 138 Invisible Decrease 138 Crocheting in the Round 139 Changing Colors 140 Right Side vs. Wrong Side 140 Fastening Off 141 Closing Off a Piece 141 Invisible Finish 141
VISUAL INDEX ABOUT THE AUTHOR
142 144
Introduction
Hi there! I’m Ashli! Welcome to my world of amigurumi—a craft that has allowed me to blend my love of crochet, video games, and animals into adorable creations. My journey with crochet began in 2015 when I was browsing the internet looking at video game fan arts and crafts. I stumbled across some images of handmade dolls of my favorite video game characters and learned that they were crocheted. This blew my mind! At that time, I thought crochet was just for making blankets and scarves. I had no idea that it could be used to make adorable plushies! I went straight out and bought some hooks and a few skeins of yarn. Then, through the power of the internet and free YouTube tutorials, I learned how to crochet and make amigurumi. What started as an occasional hobby quickly turned into a creative outlet that let me explore new ideas and push my boundaries. A few years in, I became comfortable enough to freehand my own amigurumi designs and soon after I started writing patterns to share with others. In 2017, I launched 1Up Crochet, a website where I could showcase my work and connect with fellow crocheters. I then began to write my own patterns and shared them for free while also offering tips and advice, hoping to inspire others to pick up a hook and dive into the world of amigurumi. I opened my Etsy shop, also called 1Up Crochet, in 2019, where I now sell my designs. Many of my projects are inspired by my lifelong love of video games, a passion that began when my parents brought home a Sega Genesis with a copy of Sonic the Hedgehog when I was just three years old. When I’m not crocheting, I’m often playing video games or tinkering with broken controllers and consoles, breathing new life into old favorites. As a military spouse, I’ve had the chance to live in many
states across the US, from snowy Alaska to sunny Florida (where I currently live), always accompanied by my husband and our two dogs. No matter where life takes me, crochet and gaming are my constants, providing endless inspiration for my designs. This book is a celebration of creativity, playfulness, the joy of making something with your own two hands, and, of course, geekiness. Whether you’re a seasoned crocheter or a curious beginner, this book is designed to guide you through the world of geeky amigurumi. Chapter 1 features patterns for thirteen adorable animals wearing cozy hoodies. Chapter 2 takes things up a notch with seven playful costumes that can be applied to any of the animals. In Chapter 3, you’ll find patterns for six fun accessories, from a retro game console to a pair of stylish glasses, to give your creations even more personalization. And in Chapter 4, you’ll find step-by-step instructions for all the stitches and techniques in the book, for reference if you’re a newbie to crochet or just need a brush-up. I hope this book inspires you to get creative and bring these nerdy, playful designs to life! Don’t forget to share your creations with me on Instagram at @1UpCrochet, where I post all my latest crochet projects and love connecting with fellow makers.
READ THIS SECTION BEFORE YOU START Please be sure to read this, as the information applies to most all the patterns in the book and can affect the results you get.
Gau g e You’ll see that I don’t specify gauge in my patterns because these are plushies and hitting an exact gauge isn’t necessary (though, if you want to know for reference, using an E/4 (3.5mm) hook and medium weight yarn, my gauge is 19 sc and 19 rows = 4"/10cm square). However, that said, one of the things I love about crocheting amigurumi is making all those nice tight lines of stitches. To do that, you want to keep firm, even tension on your yarn as you are crocheting. I also use a variant of single crochet (where you “yarn under" instead of “yarn over"; see page 135 for how to do it) that results in an even tighter stitch (if you are an experienced crocheter you’ll be able to see the difference in the photos of the projects). It’s totally optional whether you do it or not; your geeky animals will still look great if you use a regular single crochet. Consistent tension is also important in order for your animal’s hoodie to fit its head properly. If it’s not fitting the way you would like it to, the best thing to do is to crochet it again, using a different hook size to get the fit you want. If the hood is too small, crochet it with a slightly larger hook, like an F/5 (3.75mm) or G/6 (4mm). If it’s too baggy, use a slightly smaller hook, like a D/3 (3.25mm).
US Pattern Abbreviations ( ) [ ] * A, B, C, etc. approx. BLO ch(s) ch sp(s) dc dec FLO hdc rep rnd(s) RS sc sl st st(s) tog tr WS YO
work all directions in parentheses in indicated stitch or space work all directions in brackets the number of times specified repeat what follows as indicated color A, B, C, etc. approximately back loop only chain(s) chain space(s) double crochet decrease front loop only half double crochet repeat round(s) right wide single crochet slip stitch stitch(es) together triple crochet wrong side yarn over
D e c re a s e s For a smooth look in your crocheted fabric, it is key that you use an invisible decrease; see page 138 for how to do it. Now, let’s grab our hooks, pick up some yarn, and start creating!
Introduction
7
Sew the beak on the head (placeholder eyes).
Pull the hood over the head.
Pin the hood around the opening for the head.
Flip the hood inside out.
Sew the hood to the head.
Pull the hood back on; sew the head to the body.
Sew the legs and tail to the body.
Arm attached in downward position
Arm attached in forward position
Glue the eyes to the face.
Geeky Animals
41
Sew the muzzle to the head.
Sew the eye bases and ears to the head.
Pull the hood over the head.
Pin the hood around the opening on the head.
Flip the hood inside out and sew it to the head.
Pull the hood back on; sew the head to the body.
Sew the pads to the bottom of the paws.
Sew the legs and tail to the body.
Arms can be sewn on in forward (shown) or downward position.
Add toes with a yarn needle and a strand of D.
Centerline in muzzle added and cinched
Glue the eyes and nose.
Geeky Animals
47
Melvin the Monkey
Meet Melvin, a mischievous little guy who loves playing games on his portable game console. Melvin wears a hoodie in the color of his favorite fruit, bananas! His yellow hoodie features a white pocket and white detailing on the sleeves and hood.
Measurement Approx. 9" (23cm) tall
Mat e ri a l s • Red Heart Super Saver, 7oz/198g skein, each approx. 364yds/333m (acrylic) • 1 skein each in #0311 White (A), #0334 Buff (B), #0360 Café Latte (C), #0324 Bright Yellow (D) • Size E/4 (3.5mm) crochet hook • Stitch marker • Fiber-fil stuffing • Yarn needle • 1 sheet craft felt in black, blue, and white • Sewing pins • Hot glue gun
Note On pieces worked in the round, work in continuous rounds; do not join unless told otherwise; use a stitch marker to mark the end of the round.
He a d With C, make a magic ring (see page 139). Rnd 1 6 sc in ring—6 sc. Rnd 2 2 sc in each sc around—12 sc. Rnd 3 *1 sc, 2 sc in next sc; rep from * around—18 sc.
Rnd 4 *2 sc, 2 sc in next sc; rep from * around—24 sc. Rnd 5 *3 sc, 2 sc in next sc; rep from * around—30 sc. Rnd 6 *4 sc, 2 sc in next sc; rep from * around—36 sc. Rnd 7 *5 sc, 2 sc in next sc; rep from * around—42 sc. Rnd 8 *6 sc, 2 sc in next sc; rep from * around—48 sc. Rnd 9 *7 sc, 2 sc in next sc; rep from * around—54 sc. Rnds 10–16 Sc in each sc around. Note When changing colors on Rnds 17–29, cut the yarn at the end of each round and start again with a new strand of yarn the next time you need that color. See page 140 for guidance on changing colors. Rnd 17 Change color to B, 2 sc in FLO of next 3 sc, sc in FLO of next 3 sc, 2 sc in FLO of next 6 sc, sc in FLO of next 3 sc, 2 sc in FLO of next 3 sc, change color to C, 36 sc—66 sc. Rnds 18–22 Change color to B, 30 sc, change color to C, 36 sc. Rnd 23 Change color to B, [3 sc, dec] 6 times, change color to C, 36 sc—60 sc. Rnd 24 Change color to B, [8 sc, dec] 2 times, 4 sc, change color to
C, 4 sc, dec, [8 sc, dec] 3 times—54 sc. Rnd 25 Change color to B, [7 sc, dec] 2 times, 4 sc, change color to C, 3 sc, dec, [7 sc, dec] 3 times—48 sc. Rnd 26 Change color to B, [6 sc, dec] 2 times, 4 sc, change color to C, 2 sc, dec, [6 sc, dec] 3 times—42 sc. Rnd 27 Change color to B, [5 sc, dec] 2 times, 4 sc, change color to C, 1 sc, dec, [5 sc, dec] 3 times—36 sc. Rnd 28 Change color to B, [4 sc, dec] 2 times, 4 sc, change color to C, dec, [4 sc, dec] 3 times—30 sc. Rnd 29 Change color to B, [3 sc, dec] 2 times, 3 sc, dec, change color to C, [3 sc, dec] 3 times—24 sc. Fasten off and weave in the end. Stuff the head. Make sure the area worked in color B gets plenty of stuffing so that it projects forward.
E ar (m ake 2) With B, make a magic ring. Rnd 1 6 sc in magic ring—6 sc. Rnd 2 2 sc in each sc around—12 sc. Rnd 3 *1 sc, 2 sc in next sc; rep from * around—18 sc.
Geeky Animals
67
Rnd 4 *2 sc, 2 sc in next sc; rep from * around—24 sc. Rnds 5–7 Sc in each sc around. Rnd 8 *2 sc, dec; rep from * around—18 sc. Rnd 9 *1 sc, dec; rep from * around—12 sc. Sl st in next sc. Fasten off, leaving a long tail for sewing. Do not stuff the ear. Fold it flat.
Bo d y With C, make a magic ring. Rnd 1 6 sc in magic ring—6 sc. Rnd 2 2 sc in each sc around—12 sc. Rnd 3 *1 sc, 2 sc in next sc; rep from * around—18 sc. Rnd 4 *2 sc, 2 sc in next sc; rep from * around—24 sc. Rnd 5 *3 sc, 2 sc in next sc; rep from * around—30 sc. Rnd 6 *4 sc, 2 sc in next sc; rep from * around—36 sc. Rnd 7 *5 sc, 2 sc in next sc; rep from * around—42 sc. Rnd 8 *6 sc, 2 sc in next sc; rep from * around—48 sc. Rnd 9 *7 sc, 2 sc in next sc; rep from * around—54 sc. Rnd 10 *8 sc, 2 sc in next sc; rep from * around—60 sc. Rnd 11 *9 sc, 2 sc in next sc; rep from * around—66 sc. Rnds 12–15 Sc in each sc around. Rnd 16 *9 sc, dec; rep from * around—60 sc. Change color to A. Rnd 17 Sl st in FLO of each sc around. Rnd 18 Sc in BLO of each sl st around. Change color to D.
68
Geeky Amigurumi
Rnd 19 Sl st in BLO of each sc around. Rnd 20 Sc in BLO of each sl st around. Rnd 21 Sc in each sc around. Rnd 22 *8 sc, dec; rep from * around—54 sc. Rnds 23–24 Sc in each sc around. Rnd 25 *7 sc, dec; rep from * around—48 sc. Rnds 26–27 Sc in each sc around. Rnd 28 *6 sc, dec; rep from * around—42 sc. Rnd 29 Sc in each sc around. Rnd 30 *5 sc, dec; rep from * around—36 sc. Rnd 31 Sc in each sc around. Rnd 32 *4 sc, dec; rep from * around—30 sc. Sl st in next sc. Fasten off, leaving a long tail for sewing. Stuff the body.
H ood With D, make a magic ring. Rnd 1 6 sc in magic ring—6 sc. Rnd 2 2 sc in each sc around—12 sc. Rnd 3 *1 sc, 2 sc in next sc; rep from * around—18 sc. Rnd 4 *2 sc, 2 sc in next sc; rep from * around—24 sc. Rnd 5 *3 sc, 2 sc in next sc; rep from * around—30 sc. Rnd 6 *4 sc, 2 sc in next sc; rep from * around—36 sc. Rnd 7 *5 sc, 2 sc in next sc; rep from * around—42 sc. Rnd 8 *6 sc, 2 sc in next sc; rep from * around—48 sc. Rnd 9 *7 sc, 2 sc in next sc; rep from * around—54 sc.
Rnd 10 *8 sc, 2 sc in next sc; rep from * around—60 sc. Rnd 11 *9 sc, 2 sc in next sc; rep from * around—66 sc. Rnds 12–19 Sc in each sc around. Rnd 20 Ch 11, skip next 11 sc, 17 sc, ch 11, skip next 11 sc, 27 sc—44 sc, 2 ch-11 spaces, for the ear holes (see page 12). Rnds 21–23 Sc in each sc and ch around—66 sts. Change color to A. Rnd 24 Sl st in BLO of each sc around. Rnd 25 Sc in BLO of each sl st around. Fasten off with an invisible finish (see page 138).
Arm (m ake 2) With B, make a magic ring. Rnd 1 6 sc in magic ring—6 sc. Rnd 2 2 sc in each sc around—12 sc. Rnd 3 *1 sc, 2 sc in next sc; rep from * around—18 sc. Rnds 4–6 Sc in each sc around. Rnd 7 *1 sc, dec; rep from * around—12 sc. Change color to A. Rnd 8 Sl st in FLO of each sc around. Rnd 9 Sc in BLO of each sl st around. Change color to D. Rnd 10 Sl st in BLO of each sc around. Rnd 11 Sc in BLO of each sl st around. Rnds 12–19 Sc in each sc around. Stuff the arm. Fold the opening flat, ch 1, insert your hook through the sts on both sides, and make
Olivia the Owl
Olivia is a true night owl, staying up late into the night playing her favorite horror survival video games. With a passion for eerie atmospheres and heart-pounding suspense, she thrives on navigating dark, dangerous worlds. The scarier the game, the more Olivia loves it, making her a fearless partner when it comes to surviving the night’s most terrifying challenges. Mea s ure m e nt Approx. 9 ½" (24cm) tall
Mat e ri a l s • Red Heart Super Saver, 7oz/198g skeins, each approx. 364yds/333m (acrylic) • 1 skein each in #0360 Cafe Latte (A), #0334 Buff (B), #0321 Gold (C), #0776 Dark Orchid (D), #0324 Bright Yellow (E) • Size E/4 (3.5mm) crochet hook • Stitch marker • Fiber-fil stuffing • Yarn needle • 1 sheet craft felt in black and white • Sewing pins • Hot glue gun
Note On pieces worked in the round, work in continuous rounds; do not join unless told otherwise; use a stitch marker to mark the end of the round.
He a d With A, make a magic ring (see page 139). Rnd 1 6 sc in ring—6 sc.
Rnd 2 2 sc in each sc around—12 sc. Rnd 3 *1 sc, 2 sc in sc; rep from * around—18 sc. Rnd 4 *2 sc, 2 sc in sc; rep from * around—24 sc. Rnd 5 *3 sc, 2 sc in sc; rep from * around—30 sc. Rnd 6 *4 sc, 2 sc in sc; rep from * around—36 sc. Rnd 7 *5 sc, 2 sc in sc; rep from * around—42 sc. Rnd 8 *6 sc, 2 sc in sc; rep from * around—48 sc. Rnd 9 *7 sc, 2 sc in sc; rep from * around—54 sc. Rnds 10–14 Sc in each sc around. Rnd 15 *8 sc, 2 sc in next sc; rep from * around—60 sc. Rnds 16–17 Sc in each sc around. Rnd 18 *9 sc, 2 sc in next sc; rep from * around—66 sc. Rnds 19–21 Sc in each sc around. Rnd 22 *9 sc, dec; rep from * around—60 sc. Rnd 23 *8 sc, dec; rep from * around—54 sc. Rnd 24 *7 sc, dec; rep from * around—48 sc. Rnd 25 *6 sc, dec; rep from * around—42 sc. Rnd 26 *5 sc, dec; rep from *
around—36 sc. Sl st in next sc. Fasten off and weave in end. Stuff the head and leave it open.
E ye (m ake 2) With E, make a magic ring. Rnd 1 6 sc in ring—6 sc. Rnd 2 2 sc in each sc around—12 sc. Rnd 3 *1 sc, 2 sc in sc; rep from * around—18 sc. Change color to B. Rnd 4 Sl st in BLO of each sc around. Rnd 5 [Sc in BLO of next 2 sts, 2 sc in BLO of next st] 2 times, hdc in BLO of next 2 sts, 2 hdc in BLO of next st, dc in BLO of next 2 sts, 2 dc in BLO of next st, hdc in BLO of next 2 sts, 2 hdc in BLO of next st, sc in BLO of next 2 sts, 2 sc in BLO of next st—24 sts. Fasten off with an invisible finish (see page 141, leaving a long tail for sewing.
Beak With C, make a magic ring. Rnd 1 4 sc in magic ring—4 sc. Rnd 2 *1 sc, 2 sc in next sc; rep from * around—6 sc.
Geeky Animals
79
Cyborg
Turn your animal into a half-creature/half-robot battle-ready machine! With a reinforced body, robot strength, and a laser cannon arm, it’ll be prepared to protect humanity from the schemes of an evil scientist! Mat e ri a l s • Red Heart Super Saver, 7oz/198g skein, each approx. 364yds/333m (acrylic) • 1 skein each in #0319 Cherry Red (A), #0381 Light Blue (B), #0885 Delft Blue (C) • Size E/4 (3.5mm) crochet hook • Stitch marker • Yarn needle • Fiber-fil stuffing
Notes Select the gamer animal you want to make for this cosplay and follow the pattern, with these modifications: • Use color C (indicated above) to crochet the hood of the animal’s hoodie. • When making the hood, don’t make ear holes. In the round that calls for chain stitches, replace with all sc. • If your selected animal has ears or horns, skip making them for this cosplay. • Use color B for the body. • Make only one arm and crochet it with color C. • Skip making the hoodie pocket.
Cosplay Outfits
109
ACCESSORIES NO GAMER IS COMPLETE WITHOUT
their gear! This chapter focuses on crafting six accessories to complement your amigurumi animals, from a classic video game controller to stylish glasses. Add any one or multiple accessories to any of your animal creations, in any color you wish! These small yet detailed pieces add another layer of customization and personality to your animal pals, making them even more lovable and unique.
Ab o ut th e A u th o r
Ashli Hayes is a self-taught crocheter with a passion for crafting unique amigurumi designs inspired by video games and animals. Since learning to crochet in 2015 through YouTube tutorials, Ashli has honed her skills, eventually creating her own patterns and launching her 1Up Crochet on Etsy in 2019, where she sells downloadable patterns. A lifelong gamer, Ashli’s love for video games began at age three with a Sega Genesis and continues today, alongside a knack for refurbishing gaming controllers and consoles. As a military spouse, Ashli has lived in various states across the US (including Alaska and most recently Florida), sharing adventures with their husband and two beloved dogs.