
5 minute read
CREATE A ROSEMARY WREATH


BY VICTORIA ENGLISH
Wreaths have long been associated with valour and sacrifice. For most of us, the image of a person laying a wreath during a commemorative event is a familiar one. The Romans crowned their victors in wreaths woven from laurel and the ancient Greeks laid evergreen wreaths on burial sites. The wreath itself represents eternal life and the evergreen foliage, the eternal spirit. Rosemary has become a symbol of remembrance, believed to have properties that improve the memory and with special significance to Australians as it grows wild on the Gallipoli Peninsula. Happily, there is often a neighbour with a rosemary bush to hand that no amount of pruning seems to make a dent in. There are a few different ways to make a wreath. The simple ‘bunching’ technique shown here is an easy and fun project for young and old alike. it will make a wreath that’s about 40cm in diameter, but you can adjust your base size and bunches for a larger or smaller piece.
MATERIALS AND SUNDRIES
Four big bunches of rosemary cut into 30 cm lengths. In this instance a ‘bunch’ is equivalent to around the size of a bunch of kale from your greengrocer. Note here that you need more than you think so if in doubt, cut more.
One piece of wisteria vine approximately 1.5m long. You can also use 4 or 5 lengths of grapevine twisted together. This is for your wreath base. if you don’t have grapevine or wisteria a bucket filled with 10cm of water for a few hours or, if you can, overnight. You want the rosemary to be well hydrated. to hand then you can use a pre-made base from a craft store. An embroidery hoop or large metal floral ring will both work well.
Sharp scissors
String or gardeners twine cut into 50cm lengths. Cut 10 of these and keep the string handy to cut more if

CONDITION AND PREPARE
1. Place your rosemary cuttings into a bucket filled with 10cm of water for a few hours, or, if you can, overnight. You want the Rosemary to be well hydrated.
2. Once the rosemary is hydrated and leaving approximately 15–20cm of foliage, strip the lower 10cm of the stem of all leaves. You may want to wear a garden glove to do this. Prepare for a delicious smell to permeate your house.
3. Remove any leaves from your vines.
ASSEMBLE
1. First, we make the base. Take the wisteria in the middle and cross it over itself to make a circle around 30cm in diameter. Wind each end around this first circle to secure. A base that is 30cm will produce a wreath that is about 40cm in width once you’ve tied on the foliage.

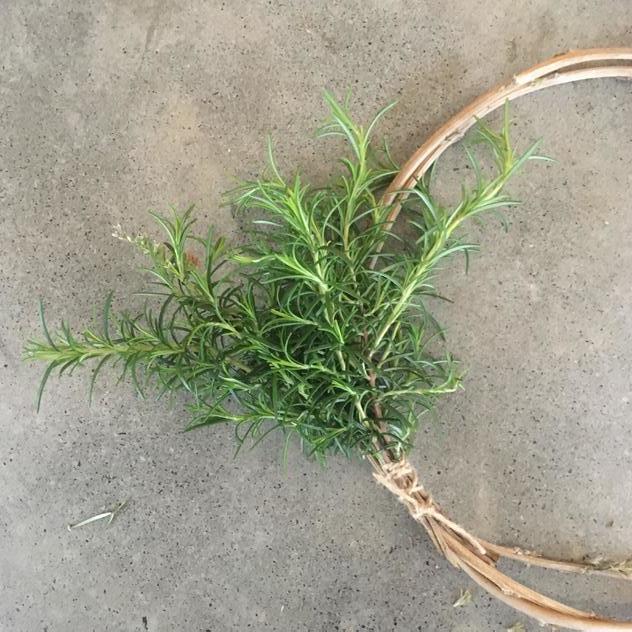
2. Next, we make the bunches. Take four or so stems of rosemary (depending on how bushy your cuttings are) and bunch together by crisscrossing the stems to create a shaggy triangle shape with the foliage. Cross the stems at the junction point; this is where the leaves end and the stripped stem begins. Wrap the twine tightly around the junction point a few times so they are secure, then finish with a knot. We want nice long lengths of string left on these bunches as we'll need them later.

3. Before tying the bunches on, lay them around the circle of your base, each one slightly on top of the other to hide the tie and stems and check you have enough bunches. Make more bunches if you need them.

4. Now we assemble the wreath. Place your first bunch onto your base. Wrap the string around the base vine and bring it around and over again across the junction point. Tie it tightly then continue to wrap the string around the vine base in a crisscross style (like a roman sandal) two or three times. You are tying some of the extra stem length down and in this way securing the bunches one at a time. Tie off with a knot on top, trim string to 2cm and the excess stems, cutting these in line with the curved base.
5. Place the next bunch on the base, laying it partially over the first to cover the tie and fanning the foliage out a little to cover each side as well as the middle.
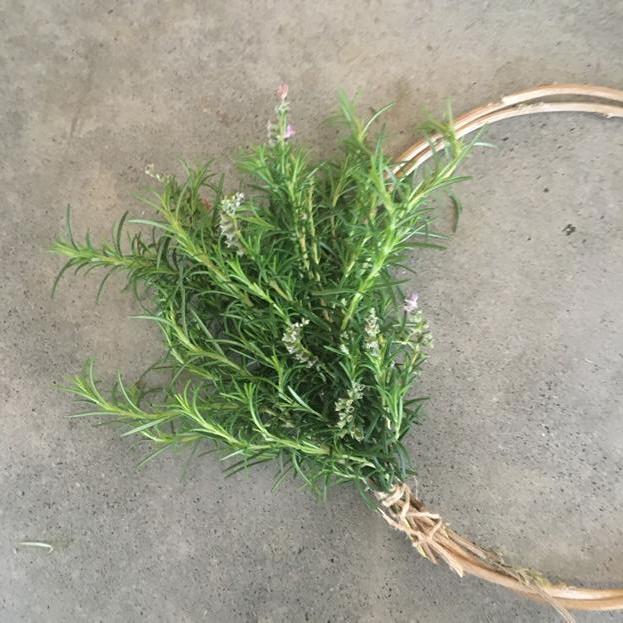
6. Keep on doing this until you get about halfway then take a break—make a cup of tea!

7. Continue until you have just enough space for one more and, tucking it under your first bunch, tie it on.
FINISHING OFF
1. Step back and check for ‘holes’. Tuck in extra pieces where there’s a gap, threading them through to the back and tucking into some string.
2. Give it a shake and make sure nothing falls out.
3. Give it a haircut around the sides if it looks a bit shaggy or leave it longer and wilder if you like that better. Place your wreath in the fridge if making it for an event the next day and spray with water periodically to keep hydrated. Or place in the bath and just ‘water’ them! Just make sure if you do this to give it time to dry off before an event.

Congratulations. You have made a beautiful, commemorative wreath to lay somewhere special.

Victoria English is the owner of Telopea Flowers and official wreath supplier to the Shrine. She is the daughter of a veteran and is passionate about sustainably honouring service and sacrifice. Her wreaths are a beautiful representation of her love of flowers and gardening.


