12 minute read
Project News


I’ve been looking forward to receiving an update on a Sling 4 TSi for some time, and then hot on the heels of Paul Hennessy's report on his creation, G-HYPE, the first UK customer built TSi to fly, Ashok Thamarakshan has sent an update on his, the second UK customer-built Sling 4 TSi to fly.
If you read the Hot Kits feature in the March issue of Light Aviation you'll know this isn't a small, cheap or simple aircraft to build, Sling’s approach to providing a kit to such a high level of preparation for the homebuilder, certainly makes it a straightforward and uncomplicated one to construct. It is a sophisticated four-seater with good performance and for two examples to be finished and flown in less than two years, with others soon to follow seems to support that view. Clearly four-seat aircraft types are not that numerous in our world and the TSi is most likely to be compared with the RV-10. The biggest difference I can see between the two is empty weight and engine type, the Sling is about 500lb lighter and consequently makes use of 141hp as opposed 260hp for a similar but lower set of performance figures.
This in turn translates to nearly a halving of fuel burn and a simpler one lever aircraft to fly as opposed to three levers. Dare I mention rivets? For the Sling builder they are all pulled as opposed to solid in the RV.
Ashok’s is a story of a low hours rental pilot building his first aircraft while looking ahead and dreaming big.
To get in touch with Project News, and tell your story, report a milestone or just to send a picture, please email: projectnews@ laa-archive.org.uk. Please share your story!
G-DIYA (LAA 400A-15689) Sling 4 TSi
By Ashok Thamarakshan
II began my flight training in 2018 and gained my PPL in the summer of the following year in a Cessna 172. Since then I’ve been flying a Pipistrel Virus SW 121 for about 20hr. So I’m a very new pilot and have only gained about 80 hours total flying experience.
Licence in hand, I started to consider where my flying was going, access to a four-seater would allow me to go touring with my wife and two young daughters. but I didn’t fancy flying with my family in the tired old aircraft that were available for rent. I quickly realised that to stay proficient enough to fly with passengers I needed to be flying a lot more hours in the same aircraft and that was not going to be viable in hourly rentals. I liked flying the Pipistrel because of its modern avionics and Rotax engine, but unfortunately it’s only a two-seater. I briefly looked at a new Tecnam P2006T which was available at my local airfield, but at nearly £350 per hour, it wasn’t really viable.
So it seemed to me that owning my own aircraft would be nice – and obviously that would need to be a fourseater. I quickly concluded that the best option was to build or buy a permit aircraft. My type shortlist came down to the Jabiru J430, the Van’s RV-10 or the Sling 4 TSi.
Van’s RV-10s are amazing aircraft but very rarely come up for sale, Slings were relatively new and the J430s that were available were quite old. Also I didn’t quite have the money to buy an aircraft outright and thought it would be better to save up and buy each stage kit as it was needed and spread the cost. So, it was going to be a build and it was to be the Sling – YouTube helped make that decision. It was on Youtube where I first heard about the Sling TSi thanks to video makers Mojo Grip and Evan Brunye.
The long-term plan is to share the aircraft with two or three like-minded pilots to lower the overall financial burden of the project and yearly operating costs. I see the Sling as my aeroplane for the next 10 years for week-long family holidays and weekend recreational flights. Having flown the aircraft now, I’m glad I chose the Sling and I’m really looking forward to the adventures that lay ahead.
We flew to South Africa in January 2020 to visit Sling’s factory and test fly the Sling 4 TSi. At the time there weren’t any finished TSi’s in Europe. It was pre-covid, when it was actually possible to travel somewhere as far as Johannesburg just over a weekend. Flying the demonstrator with a density altitude of over 8,000 ft, three people and a fair amount of fuel we were still seeing better than 1,000 ft/min climb rate. Suitably impressed, we ordered the empennage kit, deferring the wings and fuselage to later.
The next challenge was finding a local LAA Inspector. Inspectors are able to oversee certain types of airframe, wood, composite, metal, gyro but four seats is also a category. It transpired there were no four-seat inspectors nearby. Fortunately, Peter Richbell was local and happy to upgrade to this new airframe type. Fortunately, Pete only had to go through a small administrative exercise to add 4SA to his list of approvals as he was already a very experienced engineer in the certified world.
As a build location, I settled upon a 3m x 5m metal shed/single garage in the back garden. On the upside there was no travel time, but it was a little cramped. While waiting for the first kit stage to arrive, all effort went into building the shed and kitting it out with benches and any specialist tools that may be needed. The builders’ forums were a great help in identifying what was required.
Building commenced in April 2020 and it was my intention to have others help but the first covid lockdown obviously changed that plan. I haven’t any experience with other kits, so can’t make a comparison, but I found the Sling kit to be well organised and it came with everything you need including all hardware and the various loctite adhesives for specific applications. The kit also contains jigs to get accurate alignment of certain key sections of the build. All solid rivets on the wing spars and main spar carry are already set, leaving pulled rivets for the builder.
I set about building the empennage and very much feeling my way, taking inventory, seeing if any parts needed deburring and so on. The factory had done a pretty good job and all of the components were preformed, drilled and free from significant burrs, but there was still a little cleaning up to do. Once this had been done and following considerable handling, I washed and degreased all the parts in low profile box baths lined with a plastic sheet. I used the same method to then go on and Alumiprep and Alodine bathe all of the components.
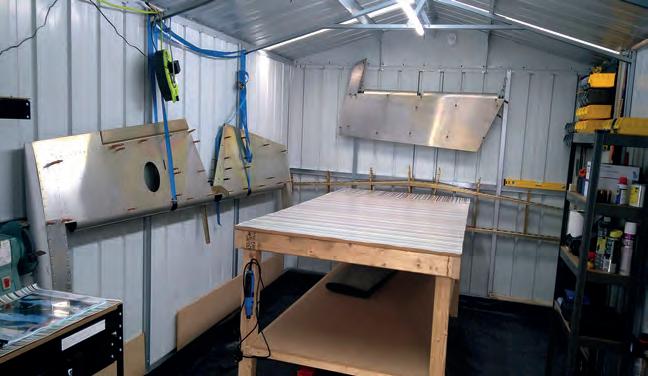
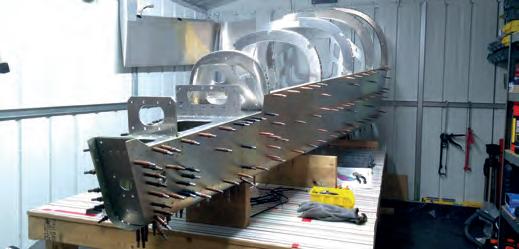
1 A wing under construction, filling the workshop and with supplied alignment jigs either end and limbo opportunity underneath.
2 The inhouse storage rack to keep the workshop clear.
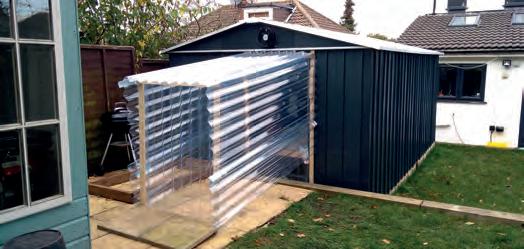
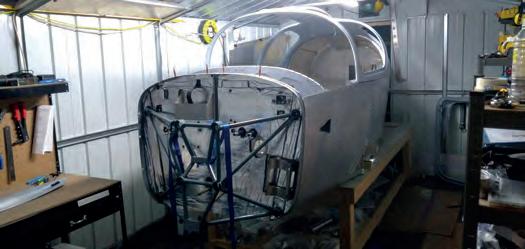
3 Workshop extension to accommodate the aft end of the fuselage.
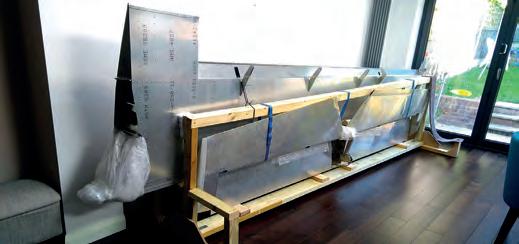
4 Aft fuselage under construction.
It was time to assemble the frame of the horizontal stabiliser and elevator, then pausing to allow the inspector to check my work before skinning. The skins and underlying structures required dimpling for pulled flush rivets using a large deep-throated bench dimpler (a DRDT2 borrowed from an RV builder) and smaller hand-held dies for the smaller limited access parts. Once inspected the stabiliser could be skinned, surprisingly there is only one skin for each side, left and right. Each skin is pre-formed running from the spar around its curved leading edge and back to the spar again. Amazingly, most of the pre-drilled skin rivet holes lined up perfectly with only a few needing a little assistance from the drill. When completed these finished components were all moved to the house to maintain space in the workshop.
I had a delay beginning construction of the wings as my next shipment of Alodine was held up, but in the end I needed to make progress and proceeded without it, considering I may just dip the wing tank components and wing skins. The printed A3 manual instructions were good and clear with excellent exploded drawings and the wings were not difficult to build. The main spar is really a pre-built sub-assembly with all of the solid riveting already done and the root end of the main spar is two hefty U-shaped sections riveted together to make a very sturdy I-beam. Both ends of the spars are supported on special jigs / end plates supplied with the kit and the whole structure just floats in mid-air meaning a 5m long bench is not needed. Beneficial, as the whole assembly only just fitted into the workshop lengthways and I had to limbo underneath to work on the opposite edge of the wing.
Although pre-built, the main spar had what seemed like thousands of holes along its top and bottom length that needed countersinking for the skin-flush pulled rivets.
Then it was just a case of building up the wing ladder style, fitting ribs between the spars followed by the fitting of belcranks and torque tubes etc. The pre-drilled holes all lined up reasonably well. Sometimes, especially where there were more than two components being riveted together, it was a case of juggling the assembly order of a joint to get everything to align nicely. The skins are all pre-formed with any bends and again all of the rivet holes pre-drilled. Only the leading edge of the wings, horizontal stabiliser and forward section of the fuselage use flush rivets, the rest are standard domed rivets. All of the flush rivet holes need dimpling, these holes are slightly undersized and the dimpling process brings them up to size. As much of the wing assembly as possible was put together ‘dry’ at first with Clecos to ensure I’d understood the manual and to maximise the hole alignment. Once satisfied I’d go ahead and rivet. Mistakes were kept to a minimum with only a few rivets having to be drilled out. Once completed, the wings were stored with the empennage in the house to make space in the workshop.

The fuselage delivery was delayed by two months and this resulted in a period of no building. It was a slow build fuse, but a quick build would have been delayed a further six months due to high demand. By the time I finished, the QB still wouldn’t have arrived. It is made up from a number of bulkhead type frames that are themselves riveted up from a number of component parts, these are then assembled onto the lower skin and a number of side and lower longerons. This is the manner by which the rear fuse is assembled and the whole assembly fitted onto the workbench. Again much Clecoed ‘dry’ assembly was run through before pulling rivets.
The rear fuse extends aft from the back of the passenger compartment and, once complete, construction of the main fuse centre section can commence and is joined to the aft section in the process. This is where the length of the fuselage becomes an issue and at that point I had to make a hole in the rear shed wall, build a temporary structure outside and push the rear fuse down this new tunnel to enable construction of the centre section on my build table.
By the start of 2021 the fuselage was ready to have the canopy installed. This isn’t a canopy in the conventional sense but the whole roof of the passenger compartment and carries the two gull wing doors, aft glazing and windscreen, a huge piece of GRP. A lot of care and test fitting, and it was ready to bond and rivet in place.
My strategy for the corrosion protection of the airframe ended up a mix of many. Empennage, fuel tanks and all skins were alodined. Duralac was applied between all mating surfaces during assembly. Fuel tank sealant used as a barrier when using stainless steel rivets on aluminium parts. Sikaflex used to seal off any water entry points. Outside surfaces were all etch primed and painted while interior surfaces were given the Corrosion X treatment upon completion. The final empty weight ended up at 521kg, so not much weight was added in the name of corrosion protection.
5 The nearly complete fuselage with its tail end in the shed extension.
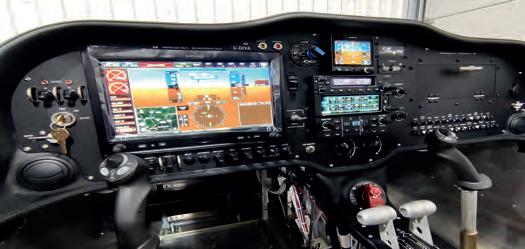
6 The panel is wired in and fired up.
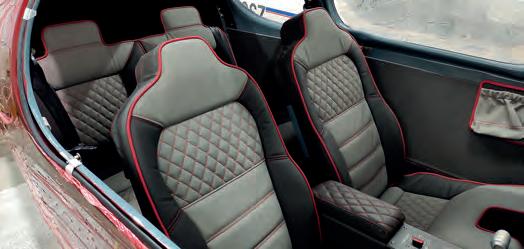
7 TAF supplied interior is very professional and plush looking.
8 This is where it all comes together –final assembly at the hangar.
Instrumentation is a Garmin G3X with IFR capabilities for later use. I ordered the panel from the US as I wanted a quality product and didn’t have the expertise to build one myself. Midwest Panel Builders in Michigan specialise in Sling panels and have made more panels for the TSi than TAF. It supplies panels to all US Sling kits and its customer support has been nothing but amazing. They provided all the metalwork and an extensive pre-made wiring loom.
The upholstery is a standard kit from the factory and looks very nice when fitted. The interior quality and the seat fold for rear access makes the whole interior just like a modern car in use, appearance and quality. The front seats, even for a tall person, are very comfortable with plenty of fore and aft travel, the rear seats are a little more snug but there is plenty of legroom.
Painting took a lot longer than expected, the amount of preparation on the fibreglass parts was considerable with sorting pinholes and general filling required. Fuse prep was considerable as that’s where the bulk of the fibreglass components are to be found. The colour was chosen by my wife and is pearlescent, so the quality of spraying had to be good. I did most of the prep and a custom body shop did the actual spraying taking two people several months to complete. A complete respray of a classic VW beetle was happening concurrently and they had painted aircraft components before but never a complete airframe. I worked with them to perfect the process of priming etc.
There was no point having the engine at home as there wasn’t the room, so that was sent straight to the airfield. Equally, I couldn’t fit the undercarriage at home due to space reasons. As it was, it took four able-bodied people to extract the fuselage from the shed and into a 7.5t lorry for the trip to the airfield. And so the aircraft went to the airfield for final assembly and engine fit.
The tricky parts of the project were; building the fuel tanks, getting the flight controls nice and smooth and fitting of the windscreen, windows and doors. Speaking of challenges, the first covid lockdown imposed delays to parts and tools, full-time working from home and homeschooling the kids kept me away from the build. The same also allowed more time on weekends and evenings as there was no commute, no school runs, no weekend birthday parties and no family visits.
Build up to the final inspection was in the two months leading up to Christmas 2021 and the paperwork was sent to the LAA immediately after the break. The Permit to test was issued on 1 February and by the end of the month four test flights had been completed in a month of short days, very poor weather and three named storms in one week, with some of the highest wind speeds seen for a long while. The test flights have gone well revealing a few snags but nothing serious.
The first person to thank is my wife who agreed to this craziness and even helped save up for the project. Secondly, Nick Crisp a colleague and fellow LAA member for assisting at key stages and being my aircraft electrics mentor. James Bentley and team at Ventura Aviation for final assembly assistance at Top Farm Airfield. Tim Hardy the UK Sling agent and my test pilot. Tony Kay and Peter Richbell my Inspectors, Bob and Frey from Customs &
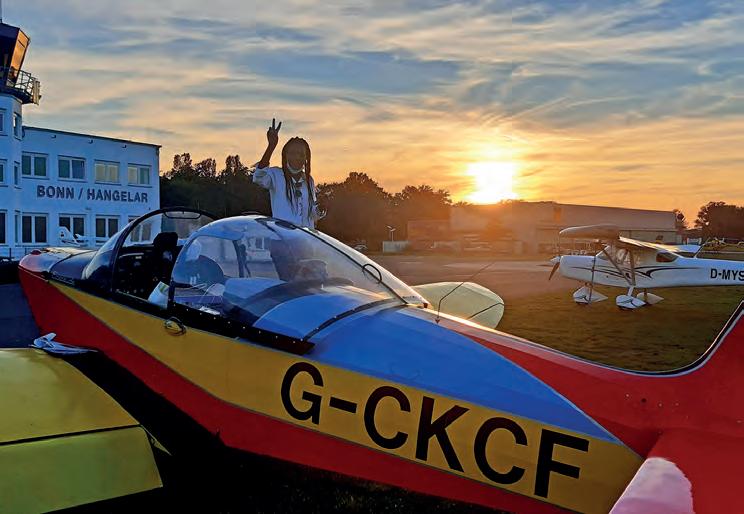
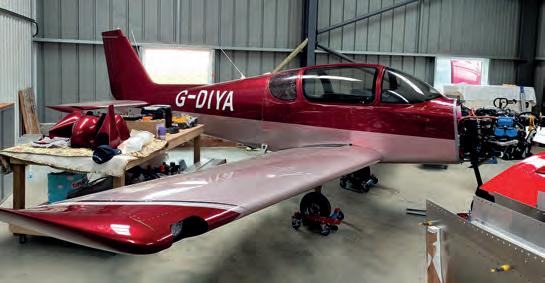
Below What a splendid looking flying machine.
Classics for the slick paint job. Steve and Adam from Midwest, USA for their amazing support. Hitesh Sanganee and family… this wasn’t just a ‘one man in a shed’ build!
Al Seymour (G-SLPC) , Steven Lamb (G-TSII), G Holford (G-HTSI) and Paul Hennessy (G-HYPE March 2022 Project News) were all a great help, as was the UK Sling builders WhatsApp group of around 20 members. They shared parts, tools, information and expertise. Sling Aircraft has been particularly helpful in the latter stages of compiling documentation to support the permit application. Apart from some quality issues, delivery delays and an average two to three day turnaround on emails, Sling can’t be faulted.
The first flight was carried out by Tim Hardy at Top Farm on 7 February, there were no real problems, maybe a slight tendency for the aircraft to roll to the right but that’s about it. Testing and debugging continue.

A comprehensive video diary of the whole build in much more detail can be found at https://tinyurl.com/ slingbuilduk
I also found this basic comparison of the Sling TSi with the RV-10 here https://tinyurl.com/tsirv10compare n
New Projects
If your aircraft has been featured in the New Projects list, please let Project News know of your progress at: projectnews@laa-archive.org.uk n Replica Blackburn Monoplane (LAA 429-15816) 25/2/2022
Mr A J Smith, Ash View, 5 Park Meadows,
Gateforth Hall Estate, Selby, N Yorks, YO8 9RG n Bristell NG5 Speed Wing (LAA 385-15814) 16/2/2022
Mr K Faint, 7 Posthorses, Ashington, West Sussex, RH20 3QF n Sling 4 TSi (LAA 400A-15813) 8/2/2022
Mr G Davies, Sayonara House, Common End Lane, Lepton, Huddersfield, HD8 0AL
If your aircraft has featured recently in the magazine and has subsequently completed its maiden flight, Project News would like to hear from you at: projectnews@laa-archive.org.uk n G-EKTP Saab 91D Safir (s/n 91.464) 23/2/2022
Name & Address held by LAA Engineering n G-DIYA Sling 4 TSi (LAA 400A-15689) 1/2/2022 n Van’s Aircraft RV-12iS (LAA 363A-15812) 3/2/2022
Name & Address held by LAA Engineering n Bristell NG5 Speed Wing (LAA 385-15815) 22/2/2022
Name & Address held by LAA Engineering n KFA Safari (LAA 402-15817) 28/2/2022
Name & Address held by LAA Engineering
Inditu Air Services Ltd, 6 Beverley Rise, Billericay, CM11 2HU n G-PEVA Aeroprakt A32 Vixxen (LAA 411-15767) 14/2/2022
Name & Address held by LAA Engineering