5 minute read
Top tips for a passive house retrofit


Get a quantity surveyor to price project before speaking to a builder. Assume €1,800 to €2,000 per sqm.
Spend a lot of time on the plans and use the passive house software, PHPP, to model your energy use. Do this as early as possible. It really is a design tool.
Get a general drawing done for the interior design. Knowing the furniture arrangements in advance will help with all aspects of the design, down to socket placement.
Pick a builder who’s keen to work to passive house standards. We are delighted with how our builder approached our build, but not everyone will be happy to take on a project like this.
Avoid corner windows and floor to ceiling glass unless your views really demand it. Our experience of window costs was €400 to €800 per sqm so reducing unnecessary window area will save on both running costs and build costs.
Invest in the building fabric above everything else as it will pay off in the long term. Building fabric meaning the build up of your floor, walls, and roof.
Enjoy. Yes, it’s stressful, it’s expensive and there are unknowns. But it’s a real privilege to have the opportunity to undertake a self-build project. And if you’re doing it, you may as well enjoy the process and get as much from the experience as you can.
The way to get to the EnerPHit standard is by implementing the five passive house principles which are:
� High insulation levels
� Limiting thermal bridging
� Installing tripled glazed windows
� Paying attention to airtightness
� Installing centralised mechanical ventilation with heat recovery (MVHR)
These five principles taken together make up the secret sauce. That is how you will deliver on actual performance. The reason why so many projects do not achieve the results they hoped for is because there was a weak link in one of these five aspects. They work together, you can’t pick and choose.
Once the five elements are done, you’re on a roll. This is where introducing renewables such as a heat pump and perhaps photovoltaic (solar panels that generate electricity), starts to make sense. The secret sauce is how you’ll get the best performance from these add ons, as the heat demand of the house will be so low.
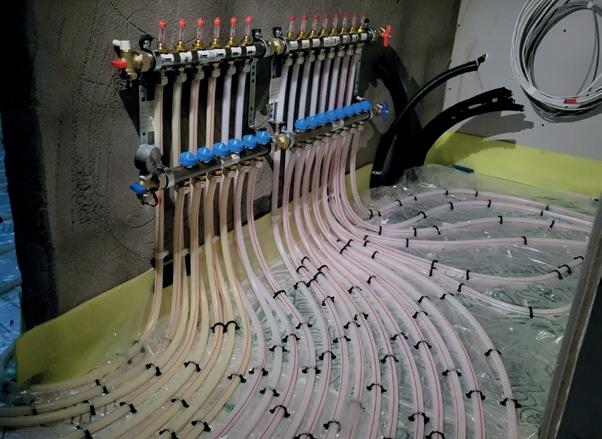
Our heating system will be an air to water heat pump to underfloor heating in a 100mm sand cement floor screed. This should help performance in that it will hold heat longer than a lighter or thinner screed.
We also optimised the system further with a larger hot water storage tank which is 500 litres. This is then paired with a 6kW photovoltaic system. These technologies complement each other as the energy input for heat pumps is electricity.
Insulation
On our project we ended up only keeping 25 per cent of the overall structure but this included 65 per cent of the existing 100mm cavity external walls. We matched the new 35 per cent with the same build up.
The finished build up consisted of a 100mm cavity pumped with bead insulation and then a 200mm EPS External Wall Insulation (EWI) system. Our existing floors had been dug out, so we rebuilt from a new sub floor with a 180mm PIR insulation layer and a 100mm sand cement floor screed.
Our roof was a new premanufactured
Heat Loss Indicator (HLI)
The HLI is the total heat loss per sqm of dwelling floor area, i.e. the total fabric and ventilation loss for the dwelling divided by the total floor area.
The HLI is calculated using DEAP, the software used to prove compliance to the building regulations and the one that calculates your Building Energy Rating (BER).
If your home gets a HLI score of between 2 and 2.3, retrofitting your home won’t necessarily lead to savings in running costs. Your technical advisor will have the details about your specific property.
Note that to get a grant to install a heat pump in your pre-2011 home in ROI, you will need your technical advisor to show that your home has an HLI of 2 or less.
In Barry’s case, pre works his HLI was 2.69 and post works it’s estimated to be 0.71.
truss roof which had a build-up of 50mm sheep’s wool insulation, 220mm cellulose insulation and a layer of 35mm wood fibre to the outside of the roof before felt and batten to support concrete roof tiles.
Thermal bridging
On the thermal bridge elements, our 35 per cent new external walls, coupled with all the internal wall, had a course of aerated concrete thermal blocks used to match the floor insulation layer.
Much of the rest of the common thermal bridging was dealt with by the external wall insulation (EWI) system. EWI is a complete consistent layer of insulation that uniformly wraps around the building. This is one of the benefits of paying to get EWI.
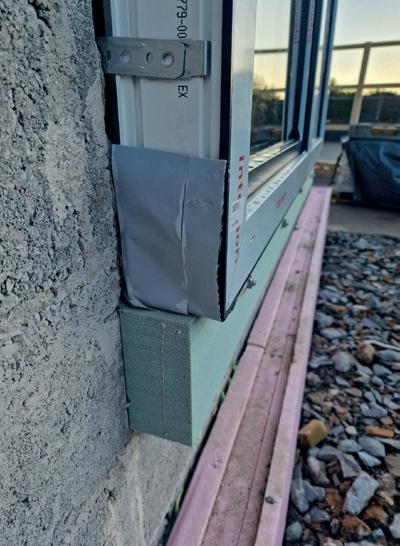
The other area with respect to thermal bridging was our window installation. In effect, we installed the windows within the EPS insulation layer which dramatically reduced thermal bridging around these opening. The windows are now flush with the outside of the existing/new wall.
Windows
The windows had an eye watering price tag of €24,000 and €11,000 for the rooflights, or €800 per sqm overall. We looked at entry level options but, in the end, we decided to go with the highest performing passive house certified windows we could find.
And now that we have them installed, we are just delighted with them. The five roof lights are passive house certified and they really are a highlight of our build in that they are quintuple glazed (five layers of glass).
Airtightness
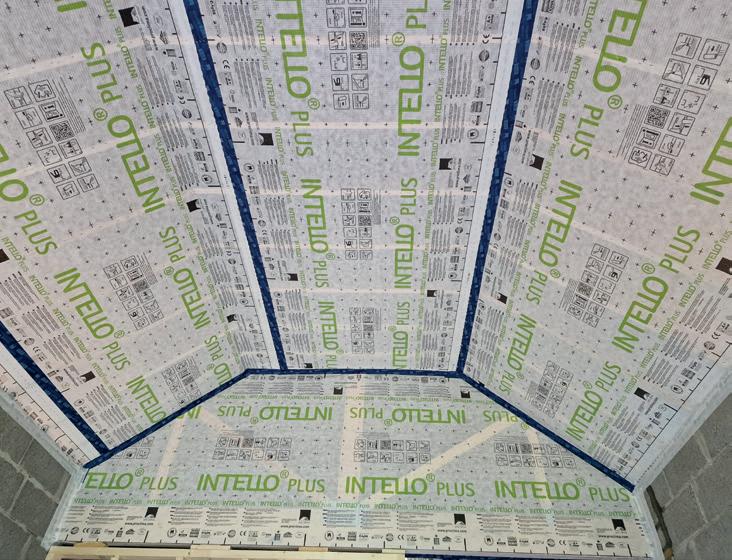
Because the target level is to get below 1 ACH, I chose to go with an expert from the passive house community here in Ireland. We used airtightness membrane and tapes in the roof which also then held our cellulose layer in the roof build up. The masonry element of the project was made airtight with a sand cement scratch coat and before that, we used airtightness paint where the subfloor and wall meet and where we had walls chased for electrics.
Ventilation
Our MVHR unit has a heat recovery efficiency of 84 per cent which means we will only be losing 16 per cent of the heat from the home. There is a unit in the attic which extracts stale air and preheats fresh incoming air with the latent heat from the extract.
In our kitchen and bathrooms, the air used to be extracted directly outside. When the standalone fans weren’t on, the holes in the wall for natural ventilation led to further uncontrolled heat loss. What we are really looking forward to here is good Indoor Air Quality (IAQ).
Final costs and thoughts
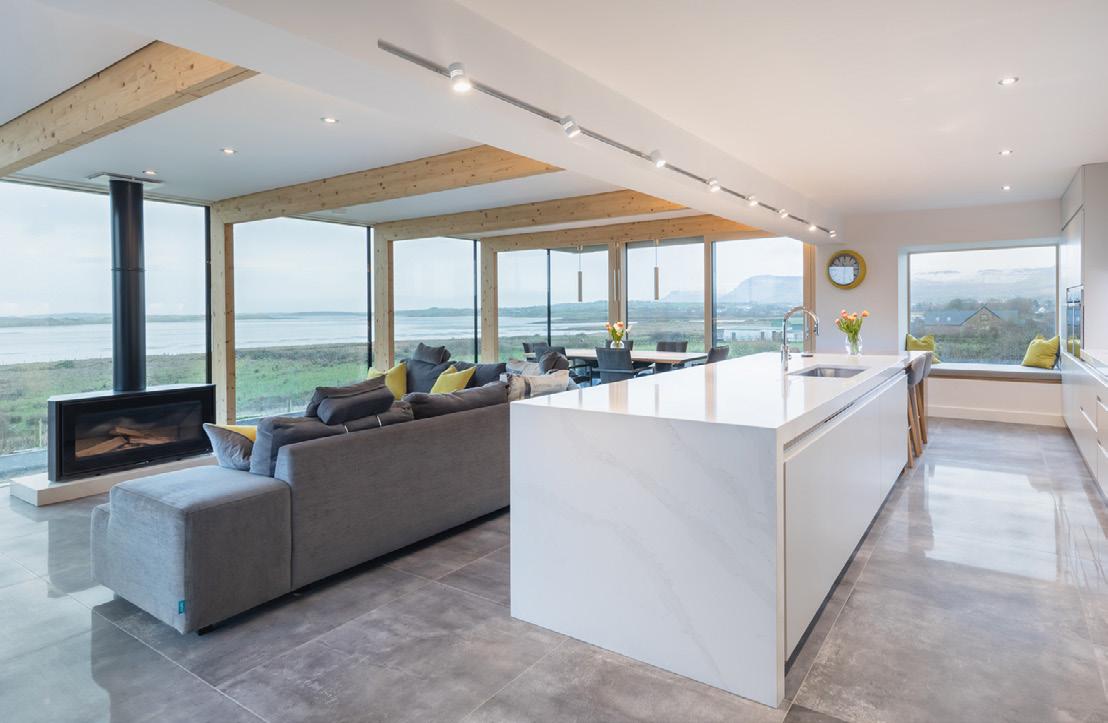
Overall, we are delighted to have decided to go on this journey. It will be great to monitor performance in terms of IAQ and energy costs over the next few years. We love our vaulted kitchen living space and our master bedroom. The external appearance is
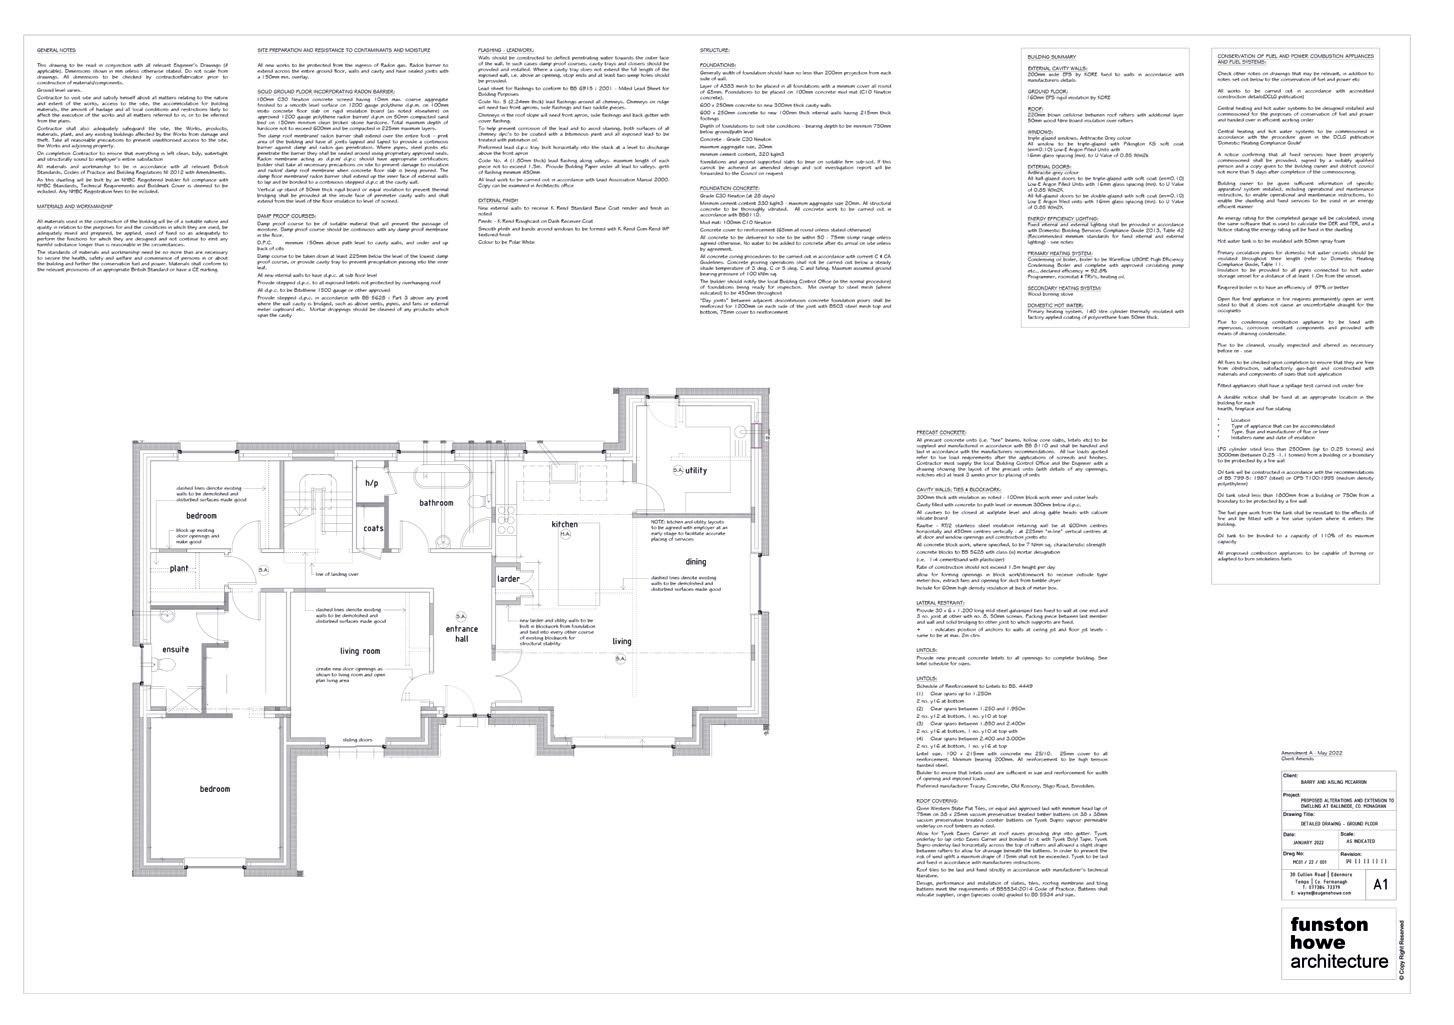
Ground Floor
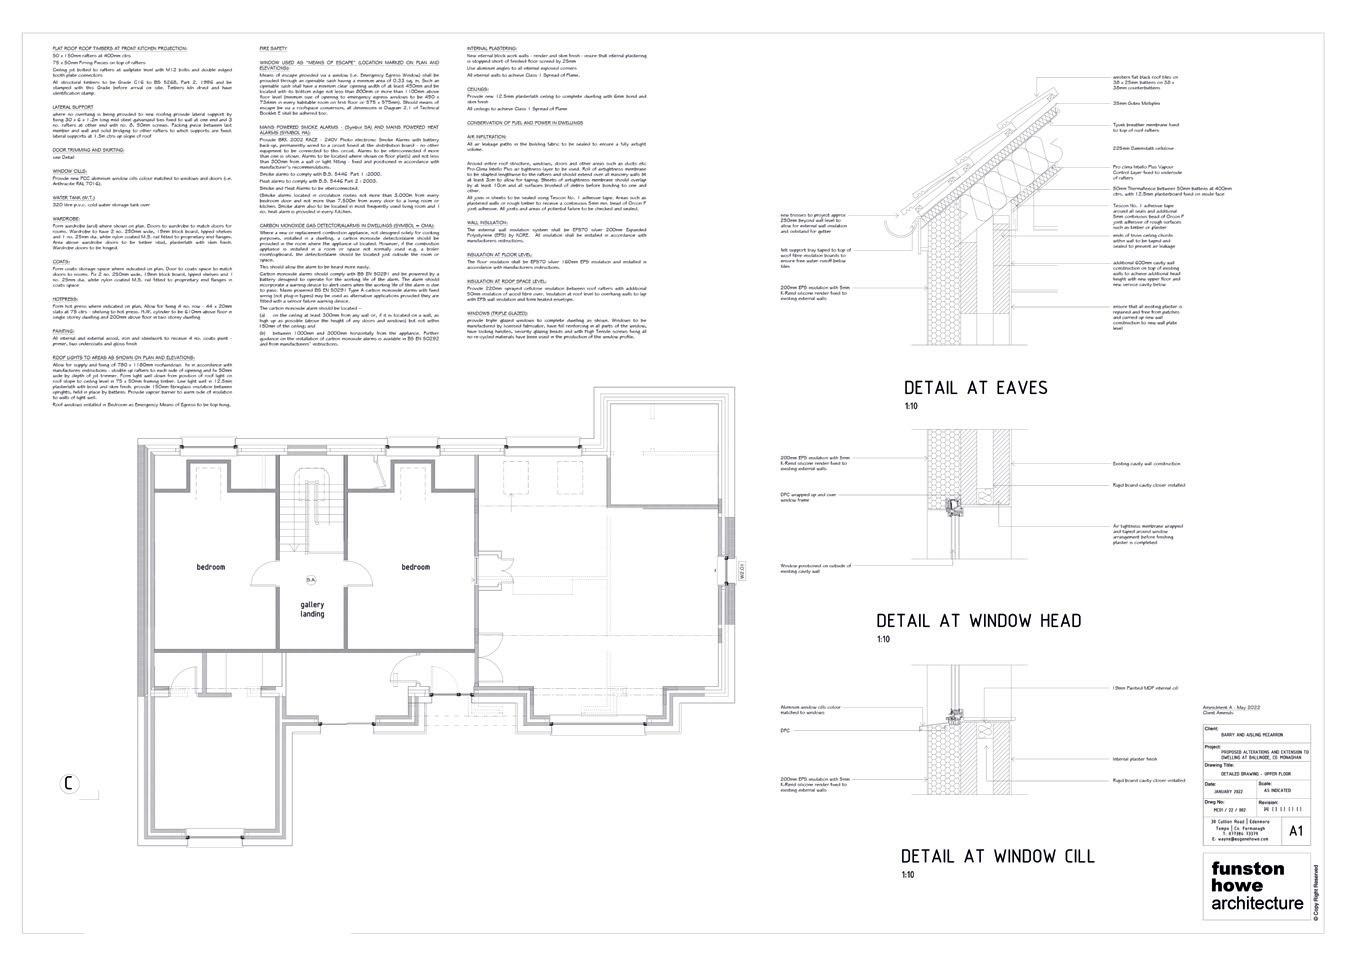
First Floor
still that of a humble bungalow but inside it’s a complete transformation. It is so unexpected.
It does show what can be done with a bungalow in Ireland today. In ROI, 300,000 bungalows like ours exist dotted around the country and 80 per cent of these have a BER of D or worse. It’s true that the project has been expensive, and that was mostly because in many respects it was a rebuild. But, at less than €2,000 per sqm, it came in on budget.
We expect we will only be paying around €500 per year for all our energy needs. That will accumulate to over €100,000 in savings over the lifetime of our mortgage. The extra cost to reach the passive house standard for the project was seven per cent which is equivalent to a five year payback. That is not bad for a bespoke design.
See passivehouse.com for more about the passive house standard and follow Barry’s project on Instagram @bungalow_retrofit