5 minute read
TIMBER FRAME GUIDE / STICK BUILD METHOD

achievable.
Even with such a simple approach, it is still possible to achieve a wide variety of configurations including the use of one or two storeys, double height rooms, split levels, courtyards, flat or pitched roofs and so on.
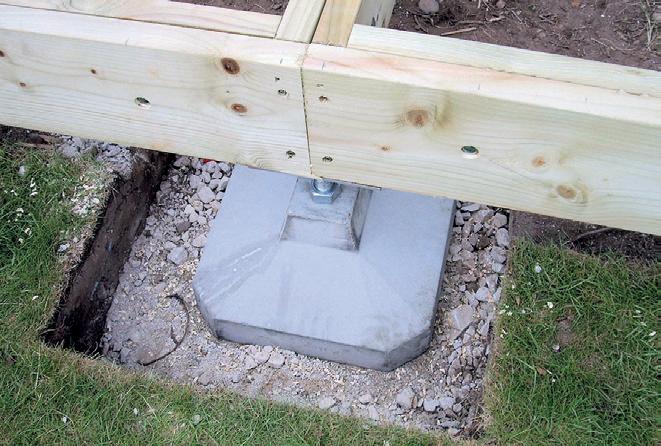
The use of simple dry joints fixed with bolts or screws makes it easy for almost anyone to assemble such a structure with minimal assistance. A structural engineer will be required at the design stage and as with any other dwelling, the relevant approvals must be obtained before works commence.
Roundwood structures
This is a much older building method than that of the squared off timber method. The usual procedure for building a roundwood structure is to create the structural framework using poles or logs and then build the wall panels between or around the timbers.
The wall panels can be similar in composition to those of any other timber frame structure but apart from their own lateral resistance to wind, don’t need to carry any other loads.
The usual timeframe for constructing a roundwood framed structure is governed by the right time to fell the timber (autumn), cutting the joints in the winter, then erection of the frame in the spring so that it can be made weathertight by summertime and ready for finishing out in the autumn.
The overriding principle is that the timber comes directly from the forest to your site. Benefits of using roundwood as opposed to sawn timber planks would include:
� It looks natural, is aesthetically pleasing, and reminds us of where timber comes from.
� A circular section pole is stronger than any plank cut from it.
� It allows the use of coppiced trees and smaller diameter trees.
� It reduces the energy and financial costs of intensive industrial processing and unnecessary transportation. Roundwood generally describes timber that is cut from the tree without further processing, such as sawing into planks or squaring it off, although debarking it will increase its longevity and this should be done as soon as possible after felling. Some timber frame companies will debark logs and poles using high pressure water, which leaves a smooth timber finish. DIY debarking is usually done using simple tools, but care needs to be exercised to ensure that only the bark and no timber underneath it, is removed.
After debarking, get rid of any stringy material which has been left and scrub off the sap residue using a natural watered vinegar solution. Then stack the poles or logs to dry, off the ground and separated from each other, in a position where air can circulate freely through the stack. Some forestry professionals suggest that the cut ends of the timber be sealed with natural wax to dry the timber more evenly throughout its length and to prevent cracking at the ends. The best place to store the timber would be under a roofed, open sided shelter and not under a tarpaulin or in an enclosed shed.
Timber used for construction purposes within a building is regarded as dry when its moisture content is kept below 20 per cent, but to dry timber naturally down to this level could take a long time. The length of time needed will depend on factors such as the timber species, its age, density and dimensions, the time of year it was harvested and the ambient air humidity.
One rule of thumb is that it takes about a year per 25mm for solid timber to dry, so a 200mm diameter roundwood log would take about four years to dry all the way through. The faster alternative is to transport the timber to a timber producer’s premises to get it kiln dried, although this extra transportation and high energy processing somewhat dilutes the environmental value of using the timber in the first place.
This means that a decision needs to be made as to whether to use green timber. Being used in its ‘wet’ state, green timber will likely develop some splits and cracks known as ‘checks’ arising from uneven shrinkage as time progresses. As long as these checks do not continue all the way through the timber, it should remain structurally sound and the appearance remains naturally rustic.
Building using green oak is a well developed building method and there is no reason why other species of trees cannot be used in the same way. After all, many timber structures remain in perfect condition today after being built at a time when there were no timber drying kilns in existence.
The main thing to consider when using green timber is that it will continue to shrink after it has been erected, so joints and other components need to be formed with this in mind. Timber shrinkage will occur mostly across its width or depth and is negligible along its length.
Joints for roundwood frames are similar to those used in oak type framing in that they are usually formed using a pegged mortice and tenon joint, but do not tend to use the offset pegging method of tightening the joint.
The timber pegs are handmade and can be circular and slightly tapered or octagonal so that the edges lock it into the joint. Wedges can also be used to tighten up the joint. Remove sapwood from any joints that are likely to be exposed to moisture.
If you are considering a DIY roundwood home build and haven’t attempted anything like it before, start with a small garden project to see how you get on. Every child, including the grownup ones, loves a treehouse.
Maybe also get yourself onto a green woodworking course. Seek advice from a designer, especially if you are taking on something which might need planning or building control approval. You could find power tools for most of the jobs, but they tend to remove the natural look that is so characteristic of roundwood structures. The greenest and most natural way to build with roundwood is to use hand tools such as these:
� Mallets of different sizes.
� Wedges of different sizes for splitting timber.
� A set of good quality wood chisels, straight and curved.
� A hand auger and a few suitable sized bits for drilling holes.
� A decent handsaw and a bow saw.
� An adze for bigger hewn work and a spokeshave for finer finishing work.
� A froe. It looks a bit like a sturdy knife but with the handle set at right angles to the blade.
� A side axe which has the blade bevelled only on one side.
To make your own pegs for the timber joints, a shave horse and draw knife are not difficult to set up yourself and speeds up peg making. A dowel plate is useful too, which in its simplest form is a piece of steel with a number of different diameter holes through which you bash roughly rounded pegs to improve their shape.
If you don’t have the time to follow the complete DIY route, you could get a specialist joinery company to make up the timber members and all the joints, then assemble it on site yourself with some assistance if need be. Some joinery firms will take the conceptual design from your designer and combine this with 3D CAD models to let you see what can be built and also to help them in the manufacturing process. They will use machines to cut, joint and plane the timber, but should leave it looking as natural as possible.
Follow the Segal method for the siteworks and use stainless steel dowels and plates to keep
