15 minute read
UNDERWATER PHOTOGRAPHY


Seasoned photo pro Martyn Guess provides some tips on how we can all improve our macro photography by paying close attention to the background, or negative space
Advertisement
Photography Martyn Guess
In any type of photography, we need to be aware of the background behind the subject – the picture of the lamp post behind your loved one’s head comes to mind! It is important that we deal with the background behind the subject, in a positive and creative way, and to take control.
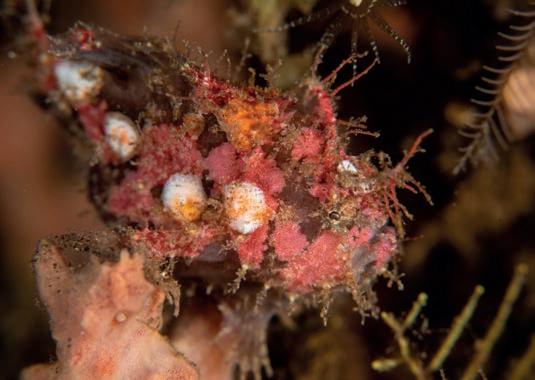
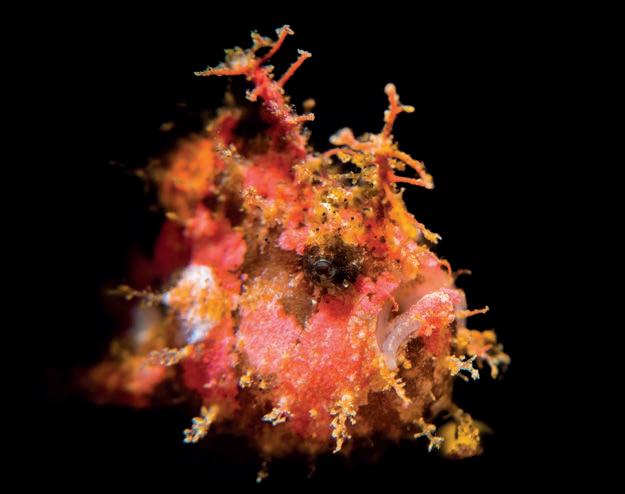
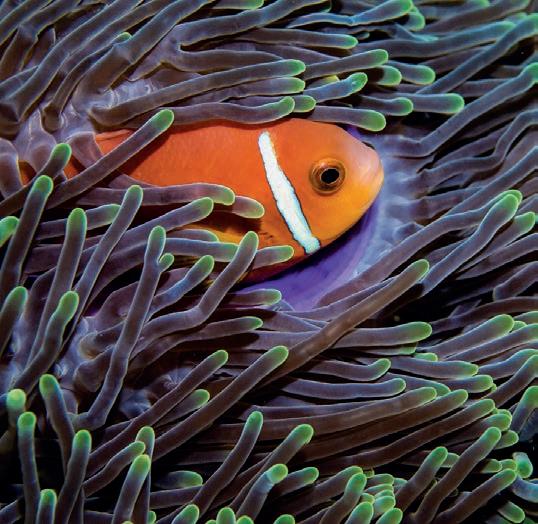
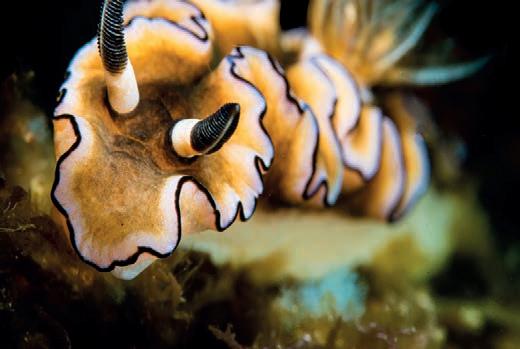
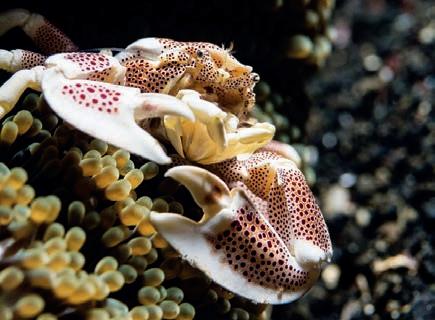
The background or negative space behind the subject can make the picture a good picture or a bad one (see picture of the Rosie Frogfish in image 1, where the subject is blending in with the background and the picture is a little confusing). The common mistake is to capture the image with the camera pointing towards the reef and to light the whole scene. A distracting background like this overpowers the image and dilutes the impact of the subject. Separating the subject from the background will make it stand out and lift the image (Image 2 - see the image of the same frogfish as in image 1, but this time lit carefully with a snoot (narrow beam of light) to hide the complicated reef background).
There are many lighting techniques we can use to achieve this separation.
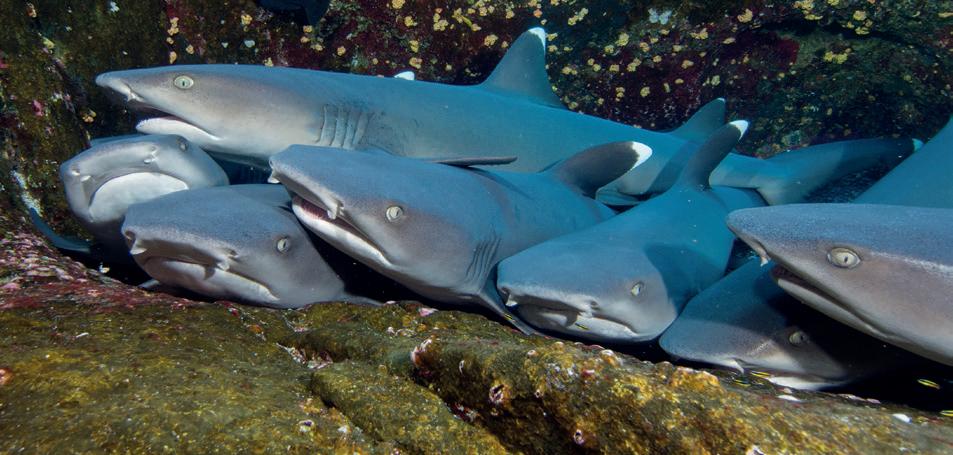
These include: Snoot lighting – where a snoot is attached to the strobe and a very narrow beam of light is emitted – more on this later. Cross lighting – where the strobes are pointed at each other in front of the camera to cut out light hitting the background and also help to create texture as it is a fairly harsh directional light (see image 3). Inward lighting – an extreme version of cross lighting with the strobes pointing back towards your head on longer strobe arms and out of the field of view. This is useful where the background is very close to LEFT Rosie Frogfish with unsightly and confusing background
ABOVE Same Rosie Frogfish Snoot lit giving the image impact
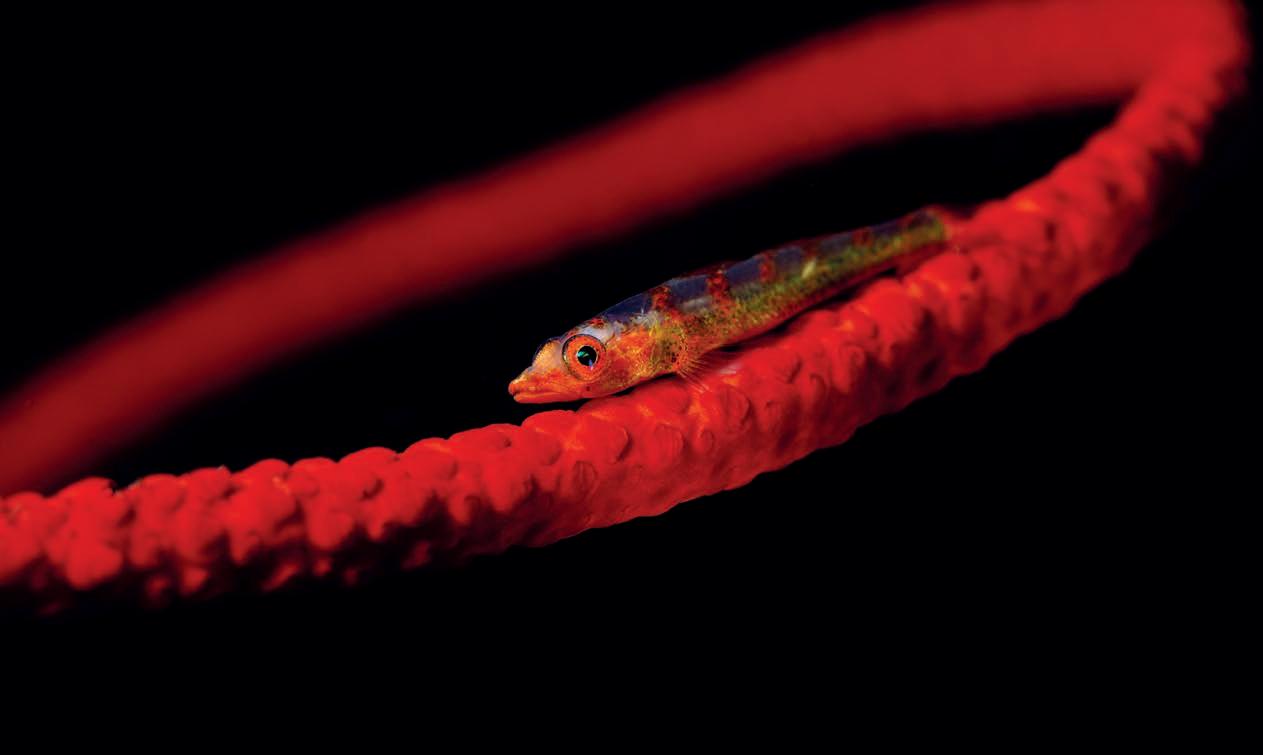
OPPOSITE TOP Whip Coral Gobie – Cross lit
BIOGRAPHY MARTYN GUESS Martyn has been diving for over 30 years and taking underwater images for over 25 years. He has been very successful in National and International competitions and regularly makes presentations to Camera and Photography clubs and Diving shows as well as The British Society of Underwater Photographers (BSOUP)and other underwater photography groups. Today he shares his passion and knowledge - as well as teaching underwater photography courses, he leads overseas workshop trips for Scubatravel. Check out his IG account at martynguess_photography.
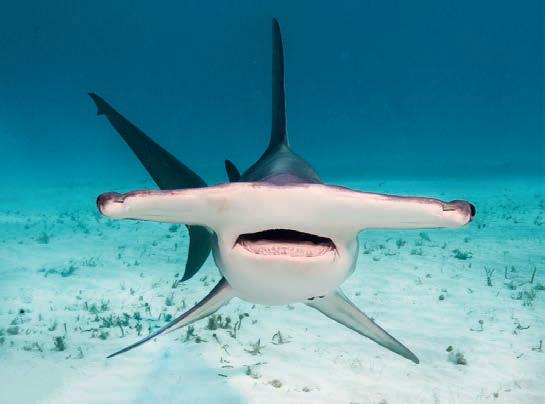
the subject as only the edge of the beam is used – I remove the strobe diffusers to help give a sharp edge to the beam. Back lighting – where the light source is placed behind the subject and blacks out the background (see image 4) and is very useful where the subject is right on the bottom. This technique will create memorable and sometime abstract images, and work best with closed apertures and faster speeds.
We can also take control of the color of the background water column. Pointing upwards into the water column and using a fast speed will help to darken the background and slowing the speed right down to say 1/60th second will help you achieve a blue background (Image 5). I keep reducing or
increasing the speed until I get the desired color background. A very good method of separating the subject from the negative space behind is to use lower apertures and create a pleasing Bokeh or blurred background (see image 6). There are subtle differences between apertures, so try a few different settings on

each subject until you get the effect you require by reducing the aperture a step at a time. Beware that as the aperture opens, the depth of field reduces and with a fully open aperture, the choice of focus point is critical – often the eye of the subject or the rhinophore of a nudibranch, for example. As the aperture opens the amount of light hitting the sensor increases, so control this by reducing strobe power and /or ISO or increasing the speed.
I sometimes use artificial creative backgrounds such as sparkly Perspex (Image 7) or even metallic scouring ABOVE Blue background behind Weedy Rhinopias created by using low speed
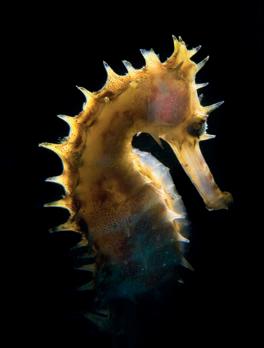
LEFT Back lit Seahorse hiding messy background
pads. These can only be used where it is safe to hold them behind the subject and not to touch or disturb the critter, such as a whip coral gobie with plenty of open water behind the whip coral. Artificial backgrounds work best with relatively open apertures. Moving the background closer or further apart will create a different look. Reflections are also a wonderful background if you find a subject close to the surface.
When shooting be aware of the background behind the subject and look for interesting and uncomplicated negative space. I often swim around the reef looking for an interesting background color – often a sponge - and then wait for a critter to appear to set it against. Sometimes by simply changing the angle of the shot you can find a moreinteresting background or lose something which will overpower the image so look carefully around the subject to get the best angle of view. Coming back to snoot lighting, this is in my opinion one of the easiest techniques to use to hide a difficult background. A dive guide can hold the snooted strobe for you and direct
the beam of light onto the subject. If using a buddy, reciprocate for them. The Retra LSD snoot is one of the best that I have used, and it is easy to see where the strobe light will hit the subject as the in-built spotting light in the strobe shines through the tube and this can then be accurately directed. I set the strobe power to about 3/4 and then change the exposure by adjusting the ISO leaving the aperture fairly closed at say F22 and the speed at the maximum the camera will sync at – in my case on a Nikon D5, 1/320th. I start with a lowish ISO and increase as needed. Check the Histogram after every shot to make sure that highlights haven’t been blown, as the snooted light is both bright and harsh. An interesting snooting technique is to lower the speed so that the background is darkened, but not entirely black (image 8) - this will give you a slightly different image.
Generally, the snoot is pointed straight downwards for portraits of critters and will give great separation from the bottom where the subjects live. Remember, snoot light is very harsh as it is not diffused so is great for showing off texture, such as the skin of frogfish. When you next dive with a camera think about backgrounds and try some of these techniques to help your images stand out. n
Escorted trips. Want to learn how to take or improve your underwater images? Why not come on a photo specific trip? These trips are meticulously planned to the best destinations at the best time of year where the conditions should be perfect for building a portfolio of great images. The workshops, which are for all levels of experience but mainly aimed at people with a few trips under their belts, include classroom sessions and presentations as well as in-water help and guidance, all done in a relaxed and non-competitive friendly environment. There is a Northern Red Sea Relaxed trip in July 2020, where the emphasis is on an open-deck policy with time spent on the same sites .There are also trips to Atmosphere Resort, Dauin Philippines in May 2020 and Lembeh Resort and Murex at Bangka in September 2020. Please contact the Scubatravel team or check out their website: www.scubatravel.com
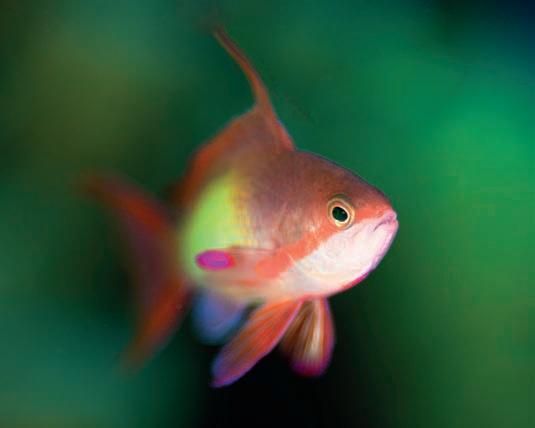
TOP LEFT Open aperture used to blur background and create Bokeh
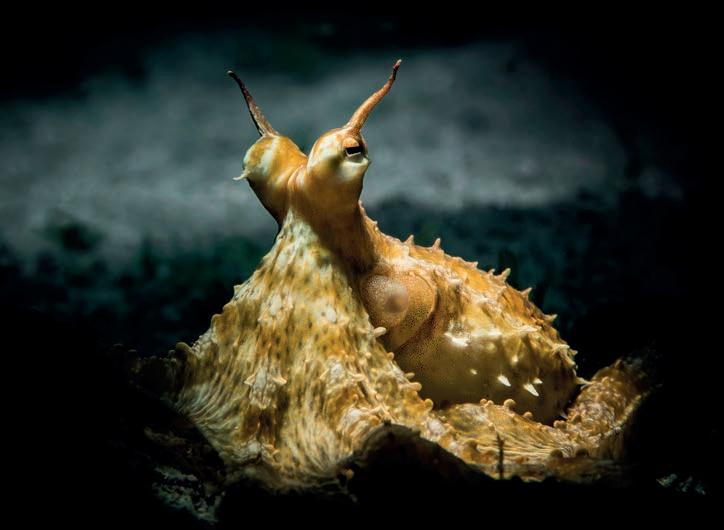
ABOVE Snoot lit Wunderpus Octopus with low speed to show background
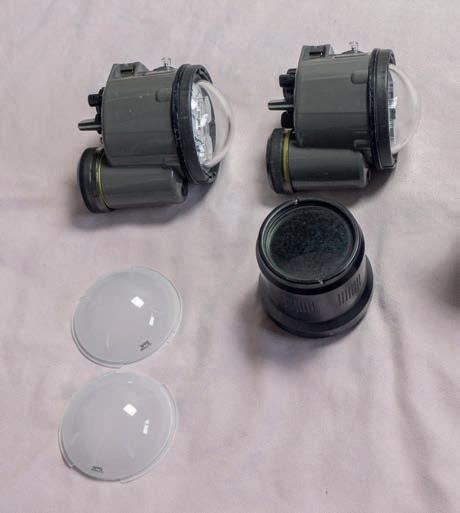
BOTTOM LEFT Black sparkly Perspex used for background
This month, we ask our panel of experts what routine maintenance/care do they carry out on their precious, expensive camera gear both pre- and post-dive trip
Photography Paul Duxfield, Mario Vitalini, Martyn Guess, and Anne and Phil Medcalf
Always a hassle when I get home from a trip, but as soon as practical, I make myself take everything out from the various bags. Don’t leave equipment in your bags for weeks before you do this, as corrosion sets in quickly, even if equipment is rinsed on location. I make a list of anything that I didn’t use to help plan for the next trip, or anything that will need replacing or repairing.
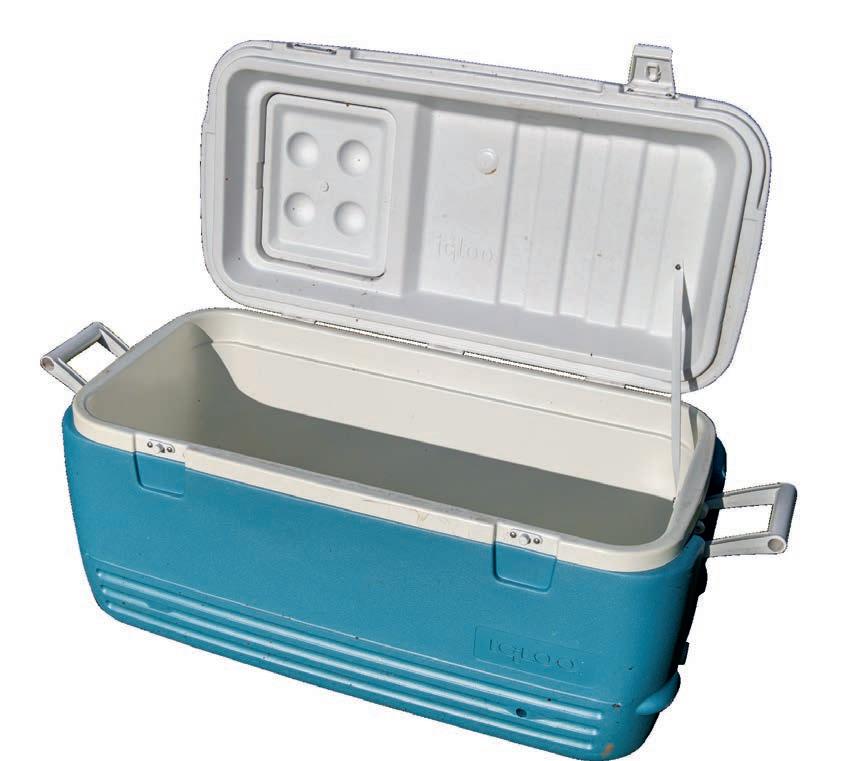
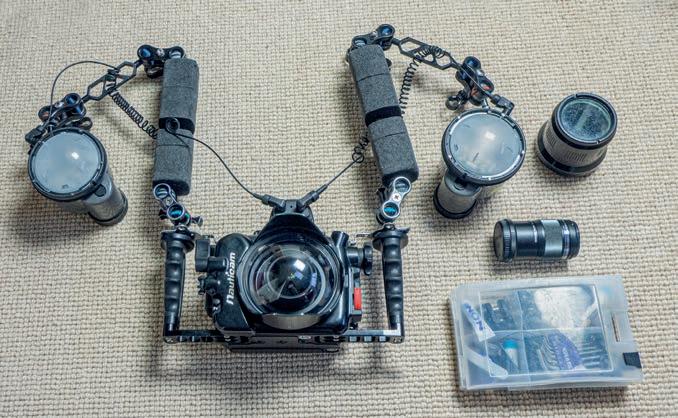
I reassemble my housing without camera and also my strobes and everything that I used on the trip, make sure it is all waterproof and place everything in a large ice cooler (the biggest container I have). You can, of course, use your bath but I tend to leave my equipment soaking for several days. I fill the ice cooler with fresh water and a couple of 500ml bottles of distilled vinegar, which helps get rid of the salt. I leave it for several days and then empty and fill again MARTYN GUESS
with freshwater for another day or so. When everything is dry, all O-rings are re-greased and then stored, loose, in the housing and the battery boxes of my strobes. Don’t leave O-rings in place for months at a time. The housing and ports are polished and everything else is re-assembled. Strobe arm clamps are taken apart and sprayed with silicone and then stored in a clean bag. The strobes are tested to make sure they are working okay and then everything is stored, safe in the knowledge that it is all clean, lubricated, free of salt and working – that is until the camera cupboard gremlins get to work! When going on a trip, everything is reassembled, tested, fired and practice shots taken so that any problems can be resolved before departure.
Ok, how do I care for my photo kit and make sure it’s all tickety boo before and after a trip? Pre-trip, as hinted at on the last Shoot Like A Pro, I put all of my kit together before packing as if I was going on an imminent dive. I even go as far as taking a couple of shots with both wide-angle and macro lenses so that I know ahead of time that nothing in the chain will let me down. This allows me to see if I have any problems with things like fibre-optic cables, loose clamps, worn O-rings, etc.
I will then grease all the O-rings, not forgetting the lessobvious ones like the ones on the strobes that are for the lessfashionable electronic synch. As these rarely get used, there is a tendency to forget about them, but a regular peek and a regrease will keep them in tip top condition.
Don’t forget vital stuff like battery chargers - on my last trip I found out that one of my chargers had given up the ghost, I have a spare, but it was best to know in good time.
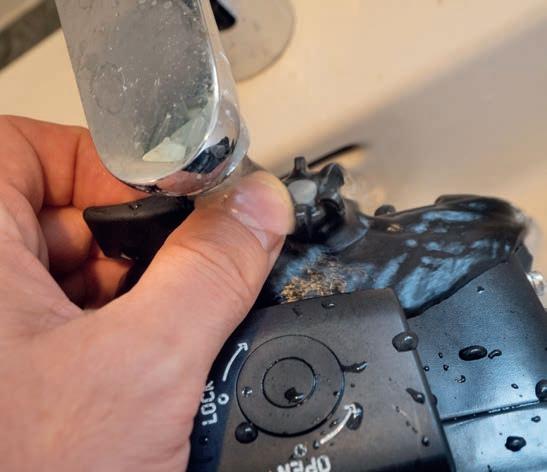
Check your memory cards too, they can fail, so make sure you’ve got back-ups, and free up enough space on your hard drives so that you don’t run out mid-trip. Upon my return, all the waterproof stuff gets a thorough rinse. I fill up the bath and leave it all to soak for a few hours, pressing all the buttons periodically. I then put it on the draining board to air dry, before putting it all away ready for next time once it’s completely moisture-free. And so as not to waste water and use the time more effectively, after I’ve removed all the camera kit from the bath, I’ll put all my dive kit in the bath water too so it can get rinsed. PAUL DUXFIELD


Our underwater photography professionals have, between them, literally thousands of hours of dive time and countless hours spent traveling the world shooting underwater images and teaching workshops. If you have a question you’d like them to address, email: mark@scubadivermag.com
From our experience as dealers of underwater photography equipment, one of the best bits of advice we can suggest is, weeks before a trip, set your camera rig up. Check that everything is functioning properly and that nothing is missing or broken. Underwater photography equipment is very specialist, manufacturers often only produce small quantities at a time and because of the diversity of items, dealers and importers don’t hold large stocks. This means if you order at the last minute, you may not get what you need before a trip.
We keep all our kit as organised as possible in a set of labelled boxes when we aren’t diving. This is a necessity for us given how much equipment we take on a trip. It saves the stress of hunting around for things and reduces the chance that something will get left behind.
We also use a lot of equipment that has been loaned to us by manufacturers and importers to try out. Keeping track of what came from who and when it needs to be returned is a job in itself. All this gear gets carefully checked and cleaned before it hits the water along with our own. The last thing you want when someone lends you some shiny toys is for it to be flooded for the sake of a bit of time cleaning an O-ring. If you do borrow or rent equipment, do the same, don’t presume the last user put it away ready to use. ANNE MEDCALF
Lists play a big role in how we get things done on a diving trip. As we mentioned last month we try and have a list of everything we take somewhere with us so we can make sure it all makes it back home at the end. Providing replacements for lost equipment is a small but significant portion of our sales business. Common things left behind or mistakenly picked up by other divers include batteries, chargers and housing port covers.
Create a checklist before you pack everything and make sure it is all still there when you pack to come home. This will at least give you the chance to search the boat or resort before the journey back. During the trip, you’ll likely discover a few things that you should’ve brought - bung these on the list for the next expedition.
The other list we put a lot of thought into when prepping for a trip is our ‘shot list’. This is a plan of what pictures we want to get while we are diving somewhere.
For us it’s a mixture of test shots using different equipment, and images we need for blogs, talks and workshops. But it also includes any funny ideas we have along the lines of ‘I wonder whether this will work?’. Look at what pictures you want to achieve and put it on the list. Planning like this can really help to take your photography up a notch. PHIL MEDCALF
Some of the best photo locations are far away and there is nothing worse than to arrive to your destination after hours of traveling and realise that you left a key piece of equipment behind. To avoid this, I always recommend checking all your photo equipment before you start packing and, more important, assemble everything at least once, If you are planning to use different lenses make sure you set up your kit in every configuration you intend to use to ensure you have all the bits you will need and making sure everything is working. After this I normally take everything apart, add any spares I may need such as O-rings, grease and my housing maintenance kit, and put it in a box so is all together for when I start packing.
Rinsing your camera kit after every dive is always a good practice and helps to prevent any problems. At the end of the trip, after the last dive, a more-thorough rinse is not a bad idea but when back at home, reassemble the housing and ports and give it a proper soak in a big plastic container or in the bath with lukewarm water. Work all the dials and buttons to ensure you rinse out all the salt and plankton. Sometimes, especially if I’ve been diving in particularly salty environments such as the Red Sea or in sandy spots like Lembeh, I leave my kit in water for a couple of days. MARIO VITALINI
Use a micro-fiber towel to dry ports and domes to avoid watermarks. I then remove all the O-rings, grease them as when I use them in the housing, and store them in a plastic bag. I then store the housing ports and strobes in a cotton bag inside a cardboard box ready for my next trip. n