7 minute read
Cyanotype Charles Binns guides us through this rewarding but simple alternative process and explains how he made an ultra violet exposure unit


The Cyanotype Process and how I got started Charles Binns
Cyanotypes are the easiest of the alternative photography print types to produce successfully and a good ‘primer’ for more advanced processes such as salt prints, platinum prints and others. Having read the excellent writings of Dr. Mike Ware on the internet –https://www.mikeware.co.uk/mikeware/New_Cyanotype Process.html I took it as my call to arms and instruction set to proceed. The next step was gathering the equipment and materials to proceed.
EQUIPMENT
Contact Printing Frame 10 x 12
I refurbished an old one from eBay but two sheets of glass held together with bulldog clips will get you started.
Ultra Violet (UV) Light Source
I used a Philips face tanning lamp. A UV bulb from any lamp standard can be used or even sunlight, but the tanning lamp solution gave consistency and reasonable speed. I built a box around mine for operational efficiency but not strictly required – just prop it up in front of the frame and leave the room as a working solution.
Glass sheet for base for paper coating
I used the glass from an old picture frame with the edges taped for safety.
Glass or plastic coating rods
Silverprint supplied mine but an online search will reveal other suppliers. A sponge or broad fine paint brush could also be used.
Cheap plastic syringe – from local pharmacy
Explain why you want it, it is the kind they use to give babies medicine – not the fine needle type used for medical injections.
Tungsten light source
Just a tungsten bulb in an old lamp holder to give a safe light whilst coating and processing.
Spirit level
For keeping the glass sheet level on the horizontal axis.
Small wooden wedges
The type used to level kitchen unit installations, again to level horizontally the glass sheet.
Horizontal wooden block
For providing a vertical slope. Note the last three items are only required for glass rod coating and are not required for the brush ‘puddle pushing’ approach to coating.
Inkjet Printer A4 or A3
For printing digital negatives.
MATERIALS
Fotospeed Cyanotype Sensitiser
A major cheat and time saver this, versus mixing chemicals – not cheap at £20 per bottle though, supplied by Fotospeed direct and other analogue materials suppliers.
Canson Arches Platine paper
Other papers work but this is the best start point as it is proven and usable for other processes. Art supply sites and Silverprint can supply this.
Great Art Supply Shop – 56cm by 72cm sheet £12.00 Silverprint 25 sheets A4 £44.96
Citric acid for clearing Cold tea for toning
Digital negative film – Permajet 50 sheets. £72.92
The Process
As can be judged from the above equipment and materials listing this is not an inexpensive process, but the results are very satisfying. Producing a fine image from self coated papers seems to reach back into the spirit of photography and the results feel worth the effort and expense. The production of a fine digital negative is a big subject in itself and has the potential for an article on its own. However as a starter I took well defined negatives or digital files with increased contrast – upped the contrast even more in Photoshop and printed the negative on that basis. This got me to first base and allowed me to produce a satisfactory batch of prints. Going forward I will explore adding a step wedge and producing a more sophisticated and repeatable digital negative. An article here: https://www.freestylephoto.biz/al ternative-process/making-digitalnegatives from Freestyle gives a good set of instructions for a more advanced approach Following Mike Ware’s instructions and the leaflet that came with the Fotospeed sensitiser, coating the paper was very straightforward and the single tungsten light worked well. I tried both the glass rod and the brush method of coating and both have their merits, but on balance I prefer the glass rod approach. I used my film drying cabinet to dry the coating two sheets at a time, which speeded up production and feedback loops no end. A tray of water followed by citric acid solution followed and I air dried the final prints. I did try toning in tea which gave interesting results and I understand that a 3% solution of hydrogen peroxide at the end gives more intense blue. Yet to try that one – more information including the intensification step can be found here: https://www.sciencecompany.co m/The-Cyanotype-Process.aspx. Mike Ware runs through his process here: https://www.ephotozine.com/arti cle/cyanotype-printing-with-drmike-ware-4707 And again here: https://www.mikeware.co.uk/do wnloads/CyanoWork.pdf Online resources are plentiful on this subject which is just as well as MikeWare’sbook: https://www.goodreads.com/boo k/show/1790931.Cyanotype now sells for over $140. It occurs to me that the Cyanotype process can be completed without a darkroom or an enlarger. A darkened room with the tungsten bulb is all that is needed to coat, dry and process the results. Well worth a try and a very enjoyable process.
UV Light Box Construction
With the availability of digital negative film the world of contact printing based alternative photography processes opens up to anyone with an inkjet printer, rather than requiring a large format camera giving a negative the same size as the desired end print. All film formats and digital capture can now be printed as alternative process images using a digital negative. But you knew all that anyway I suspect. I thought I would give it a try and share with you my progress to date. I picked up a very fine 10 x12 contact printing frame from the usual auction site and spent an enjoyable couple of days

1.The digital negative is trimmed to size.

2.A sheet of watercolour paper is coated with Fotospeed Cyanotype.
3.The negative is placed above the coated paper in the frame and the lid is closed to make a firm contact.
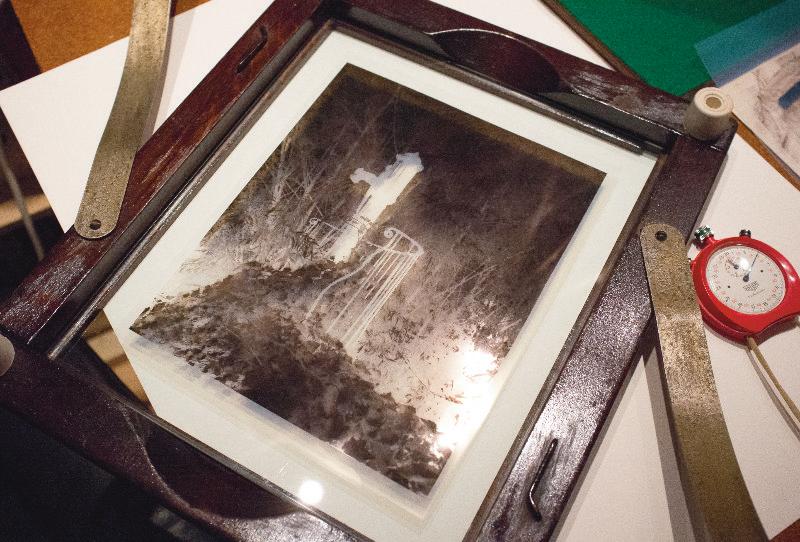
4.The printing frame containing the negative and coated paper is placed in the exposure unit.
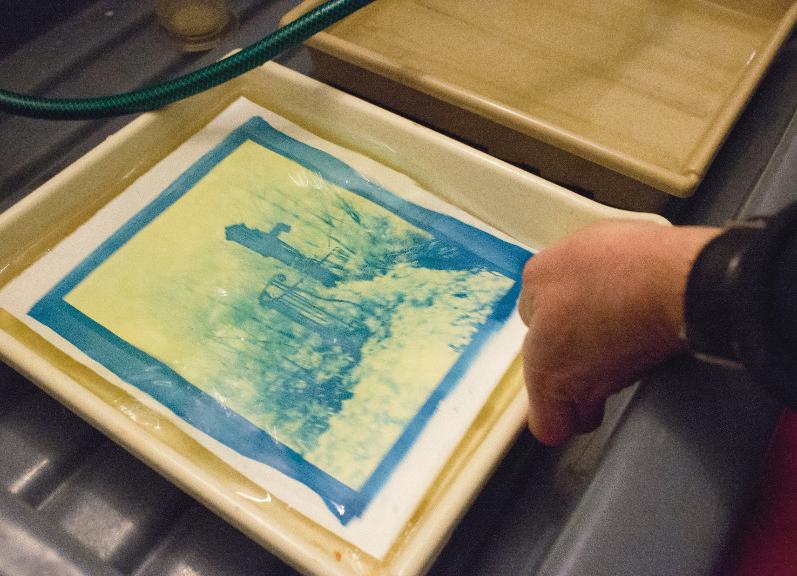
5.The exposed image is developed by washing in water.
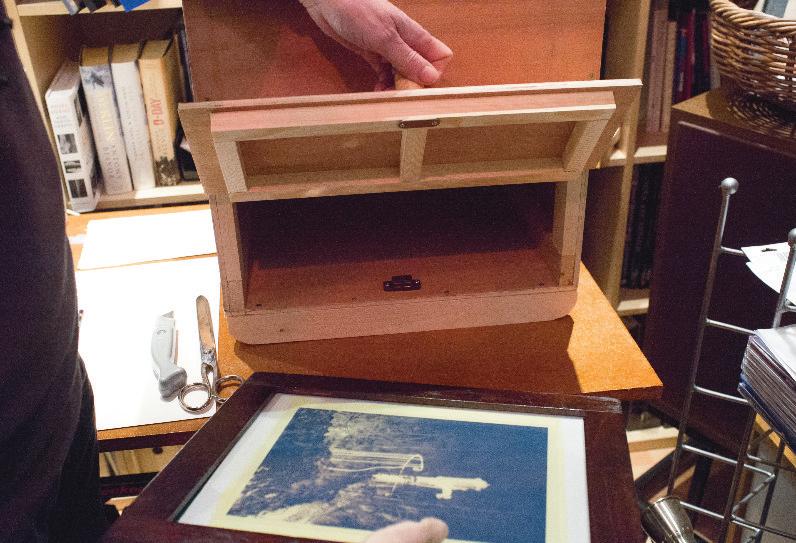
6.Construction of the exposure unit starts with the printing frame, the tanning lamp and assorted
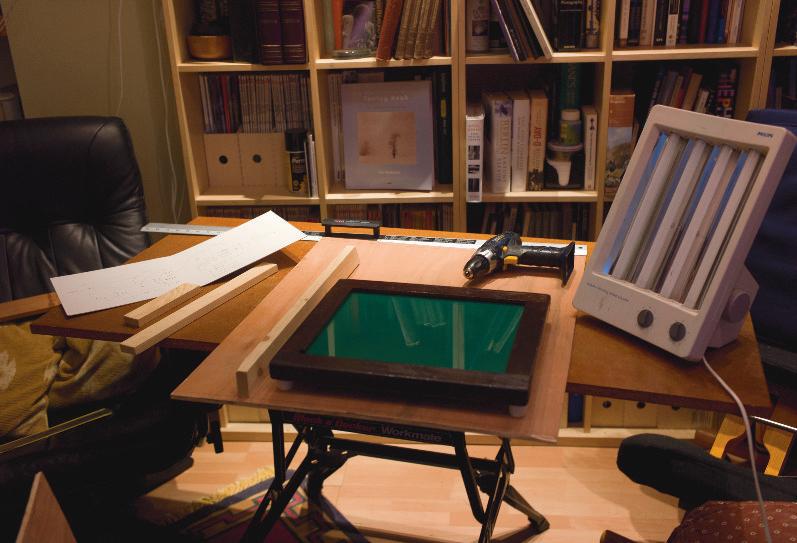

7.The exposure unit nears completion with the tanning lamp in position. cleaning and restoring it. Whilst it is a very fine example, hardwood construction, steel back springs and thick beveled glass, two sheets of picture frame glass clasped with bulldog clips will get you going. Having got my frame the next stage was a UV light source required for these processes. The sun is used by many photo artists but as I do not live in either the South of France or California – the sun not too reliable a source around here in the UK I had to find an alternative. As long ago as the early 1990’s the late Roger Hicks writing in ‘Darkroom Magazine’ advised the use of a Philips face tanning lamp set on an upturned paper basket opposite a propped up printing frame would do the job. Just leave the room while it exposes the light through the negative. This works no problem, but does not make for a comfortable or productive working environment. I paid £25 for mine but I see some very silly prices on the usual site for these. If you see one in working order at a car boot etc. buy it, even if you are not going to use it now, as you never know when the alternative photography printing bug may bite. I deployed my ‘O’ Level woodwork skills to construct a holding case around the Philips face tanning lamp sized to take the 10 x 12 contact printing frame with a closure door to facilitate being in the same room whilst UV light printing. The wood was thin standard exterior ply left over from building a shed, supported by softwood battens. Piano hinges and magnetic catches finished the job. Not pretty but it works. Having got this basic UV printing set up sorted I decided to start with the Cyanotype process, generally recognised as the easiest of these processes and a good place to start.
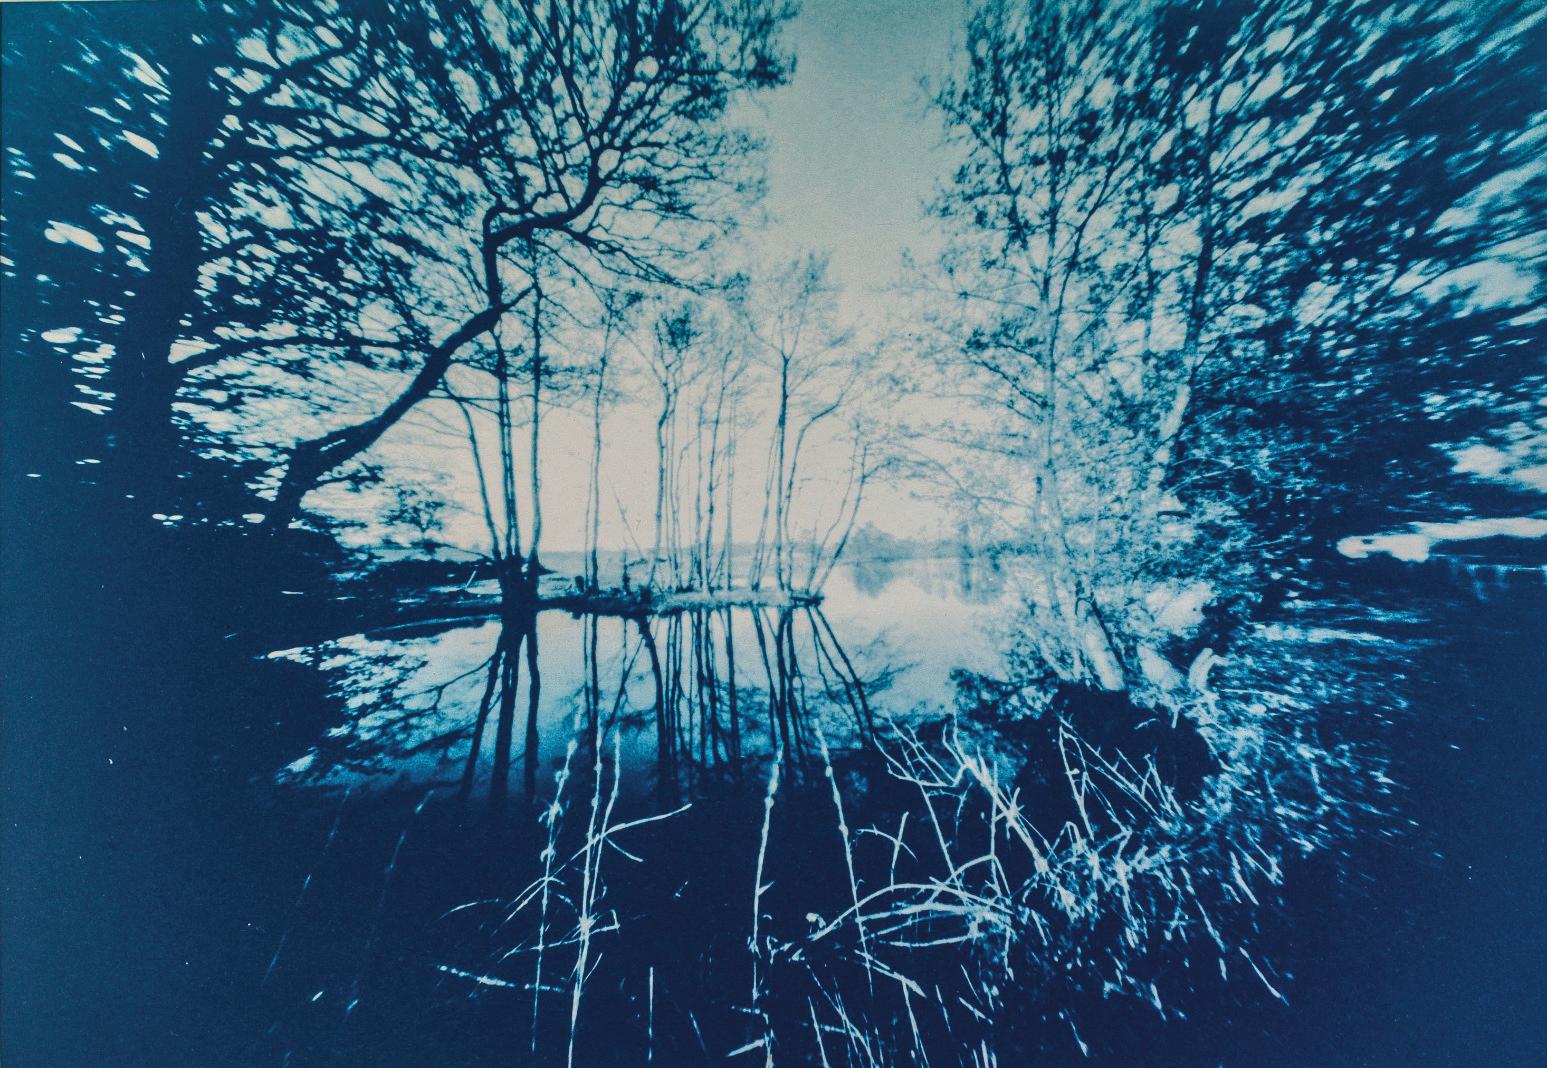
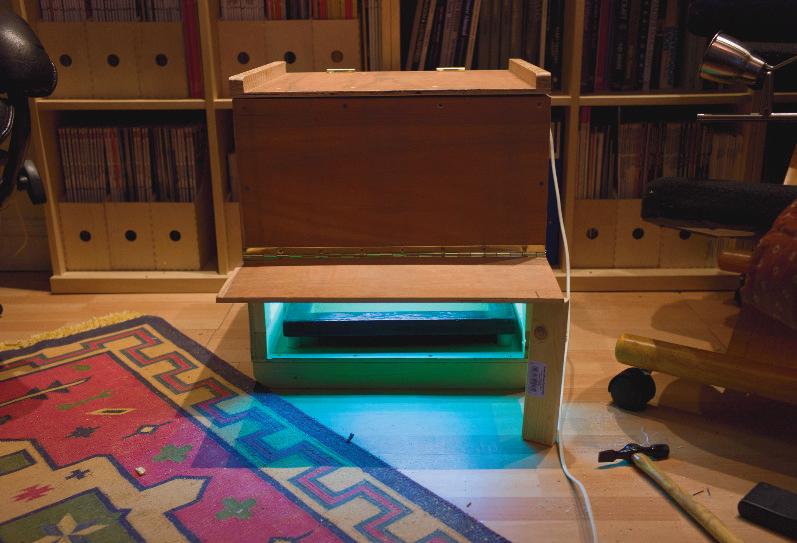
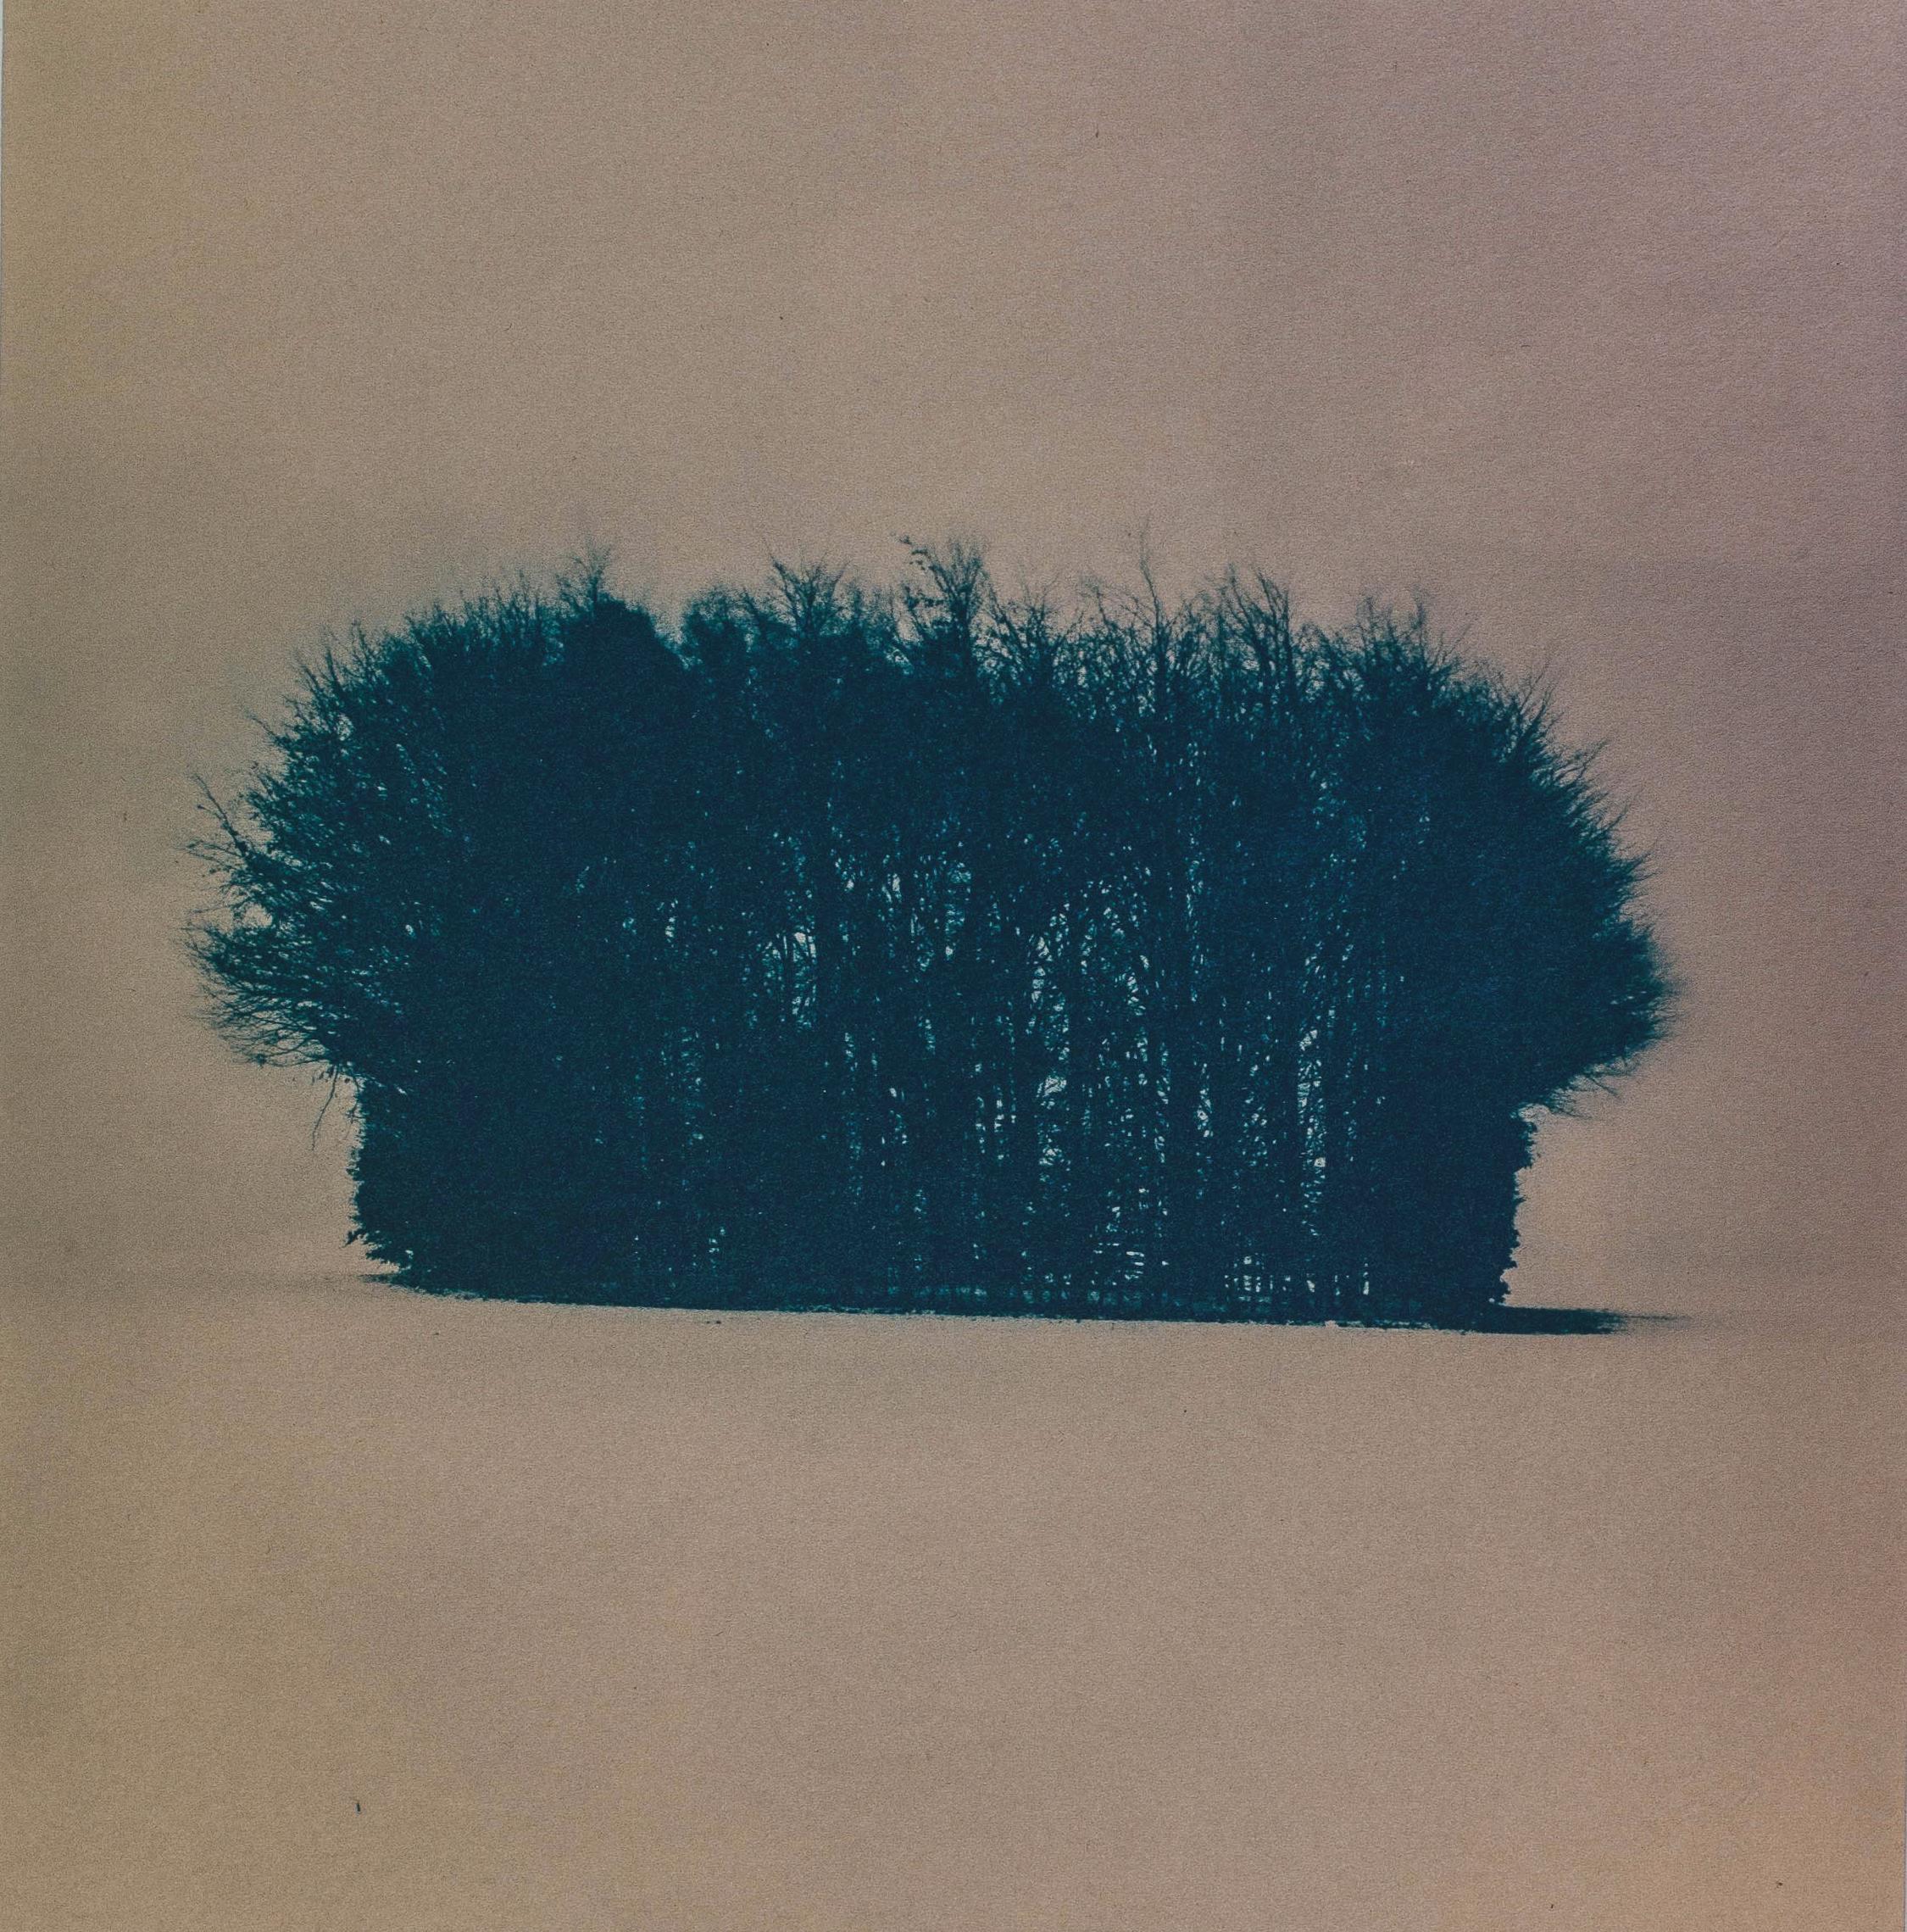
8.The lamp is shown switched on with the lower hinged part raised. Astwell Mill Pond, Zero 45 4x5 pinhole camera, Ilford Delta 400 film, Cyanotype.