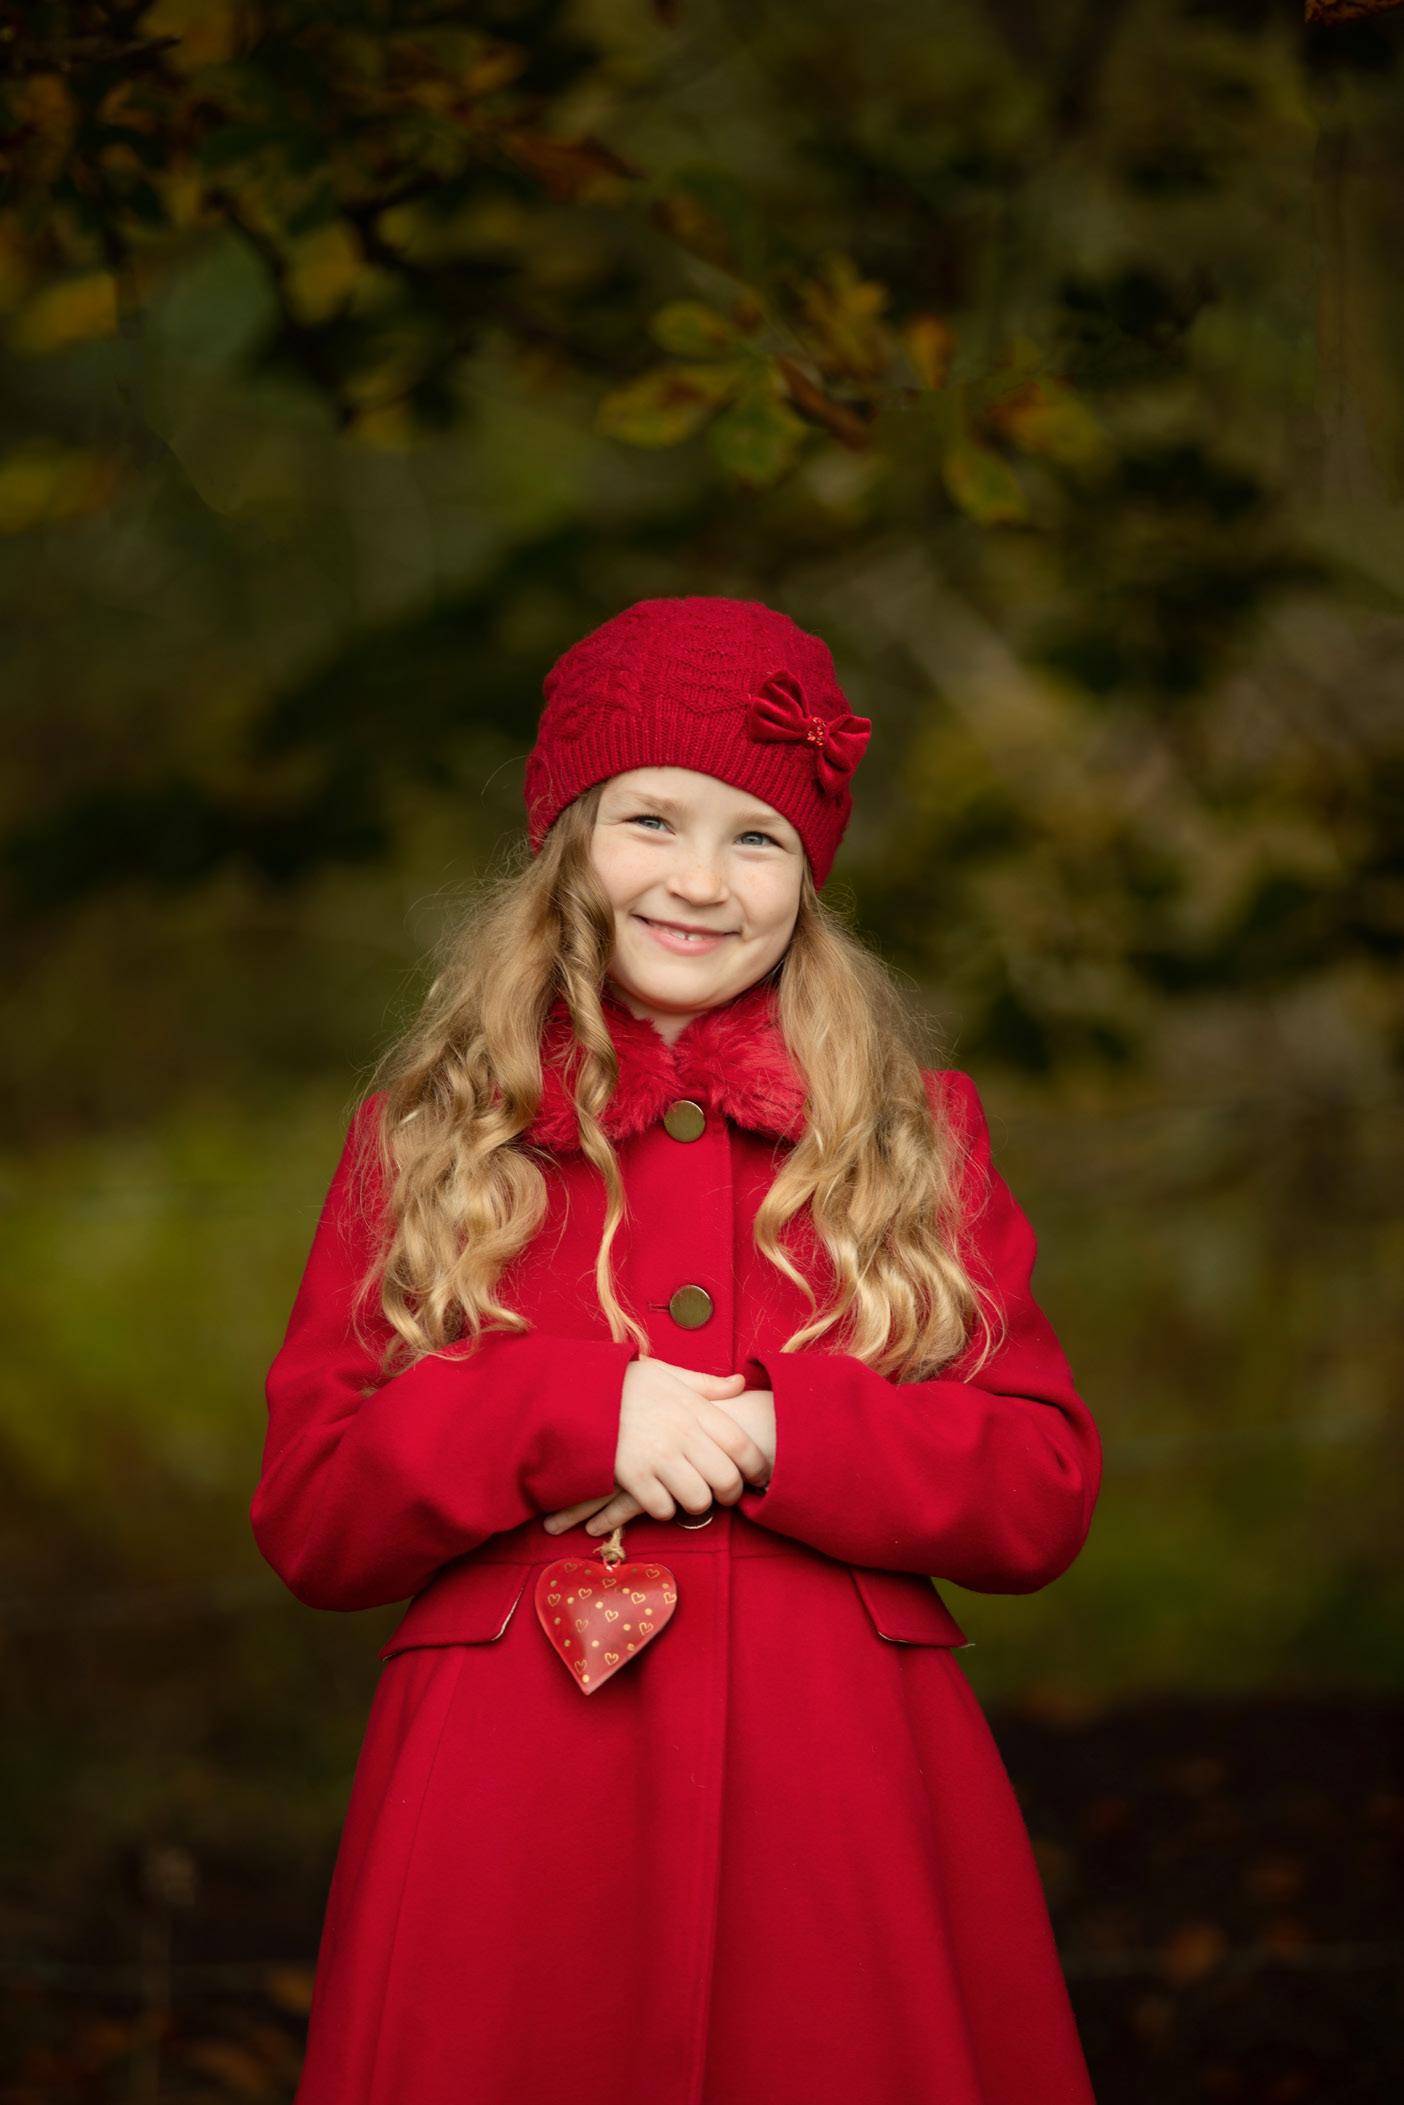
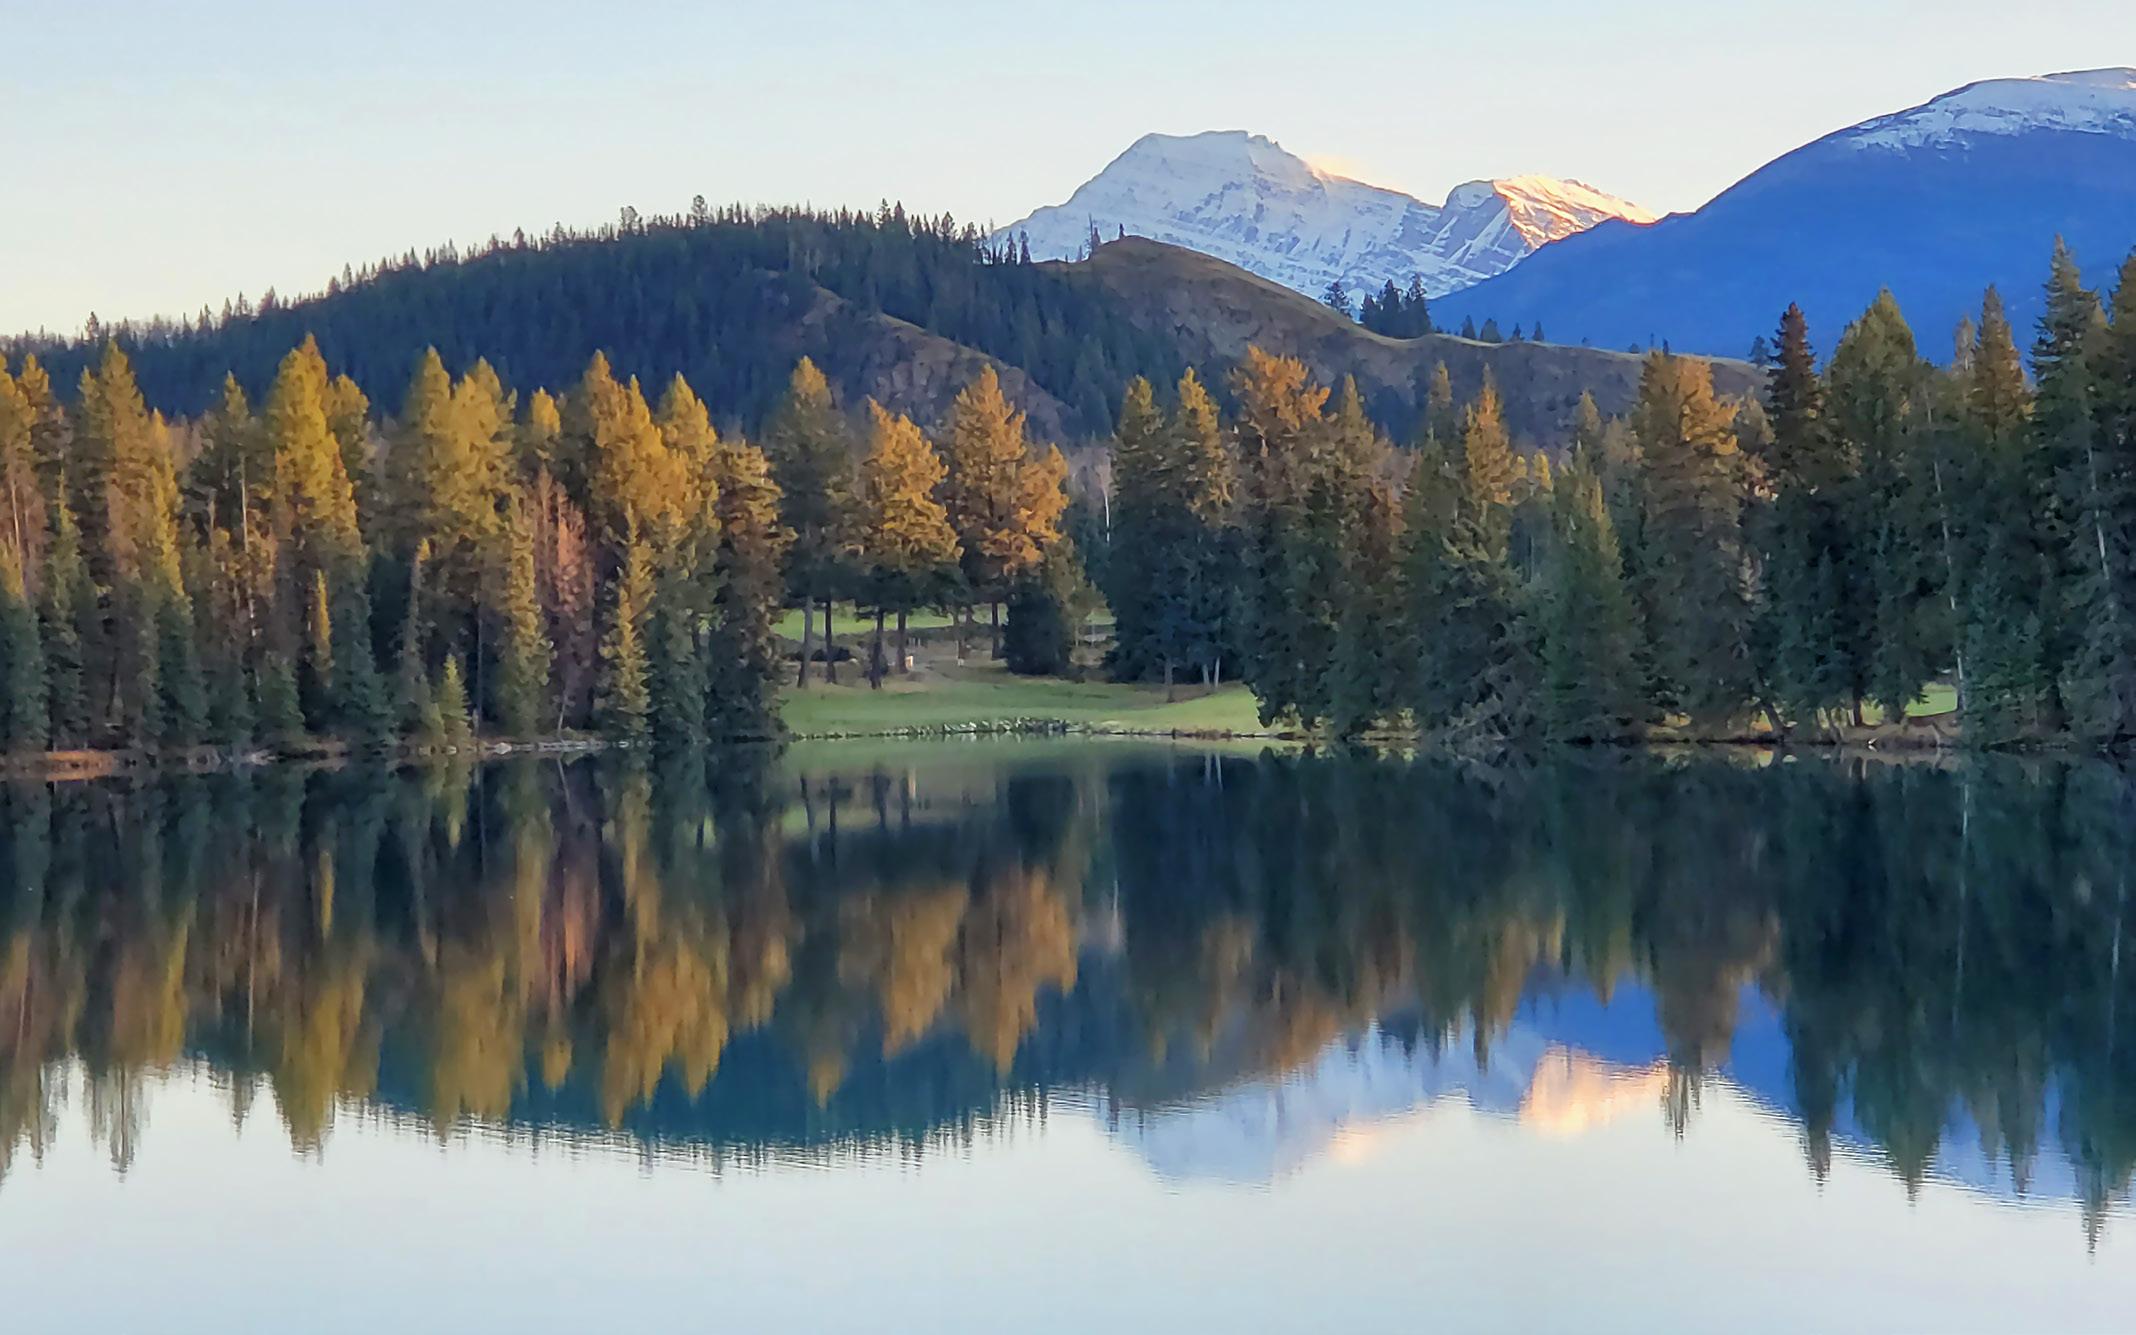
Unless otherwise indicated, all images are from, and copyright of, the authors.
FROM THE CHAIR
Our Society is on the up. The new CEO, Victoria Humphries, is a real breath of fresh air. Down to earth, realistic and very much a team player. We will see a far stronger ‘can do attitude’ as she starts to make impact on both the operations and culture of the RPS. Quite reasonably she cannot do it all overnight and nor will she ever be able to say ‘yes’ to everything, but the fact that there is already a discernible difference is so very promising for members and volunteers alike.
Victoria faces some quite significant challenges and has more plates to spin than any one person can possibly manage without dropping one now and again. As and when RPS House gets sold moving out into new offices is a big challenge whilst still maintaining member services. That’s tough enough without trying to sort out the web site and event booking systems etc., simultaneously. However, I predict that by this time next year we will be in a very different place - a happier place for staff, members and volunteers. Silos will be broken down; cooperation will be the norm.
EDITORIAL
In this issue we have a fantastic selection of contributors to inspire you. Drawn from all over the globe, we see a wide range of views, techniques and images.
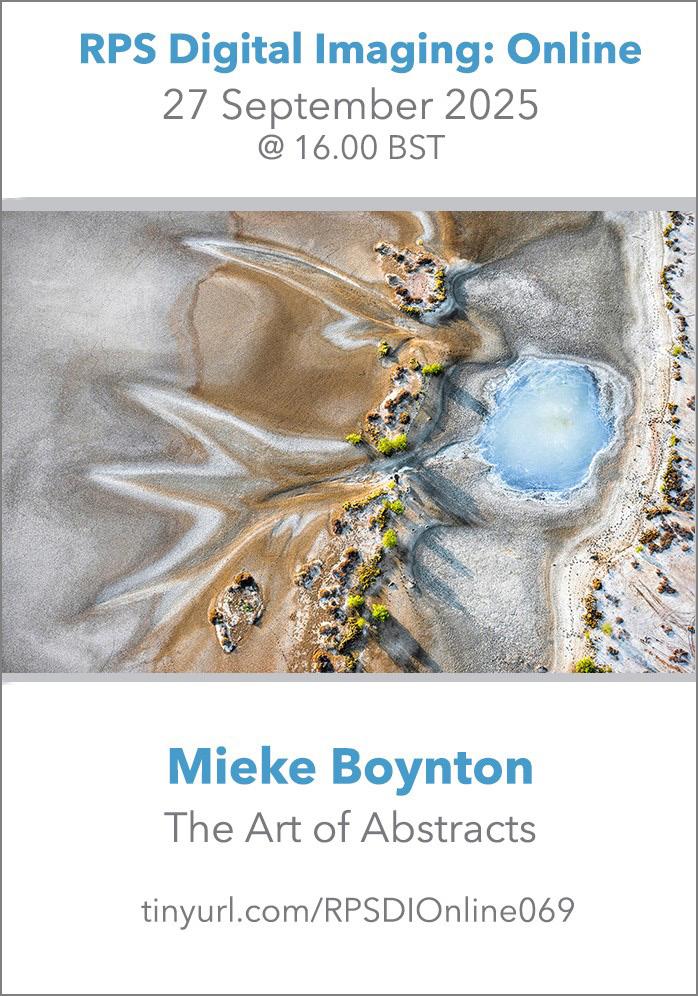
Mieke Boynton captures abstract aerial landscapes in sometimes remote parts of Australia, which often hang in the landscape photography gallery that she runs with her husband. She shares her journey from an early career as a teacher to photographer. If you like what you see in her article, don’t miss her webinar on 27 September (go to tinyurl.com/ RPSDIOnline069 for more details).
Theresa Bradley also takes landscape images but of a rather different nature. Based in Canada, she is ‘only a few hours’ from the Jasper National Park, a UNESCO World Heritage Site. The park suffered a devastating wildfire last Summer and Theresa is now documenting the recovery of both flora and fauna in the affected areas.
I would like to think that the glowing accolades that we here in DIG receive from our members for being welcoming and offering what you our members want, will be how you will then be feeling of the RPS in general.
All this is a bonus on top of that which you get from DIG. We are already planning our programmes into the autumn of 2025 and spring 2026. Member response to our series and themes of workshops has been very positive and will be continued. Using a variety of presenters on a given theme provides for more variety of ideas and inspiration. It has been great to see the experimentation from members that has followed on from sessions such as the Alternative View. We are even about to dabble into the controversial world of AI with a series of talks, culminating in a competition in the autumn. This may not be for everybody but hopefully some will have some fun from it.
So we have reasons to be cheerful - enjoy the rest of the summer everyone.
Janet Haines
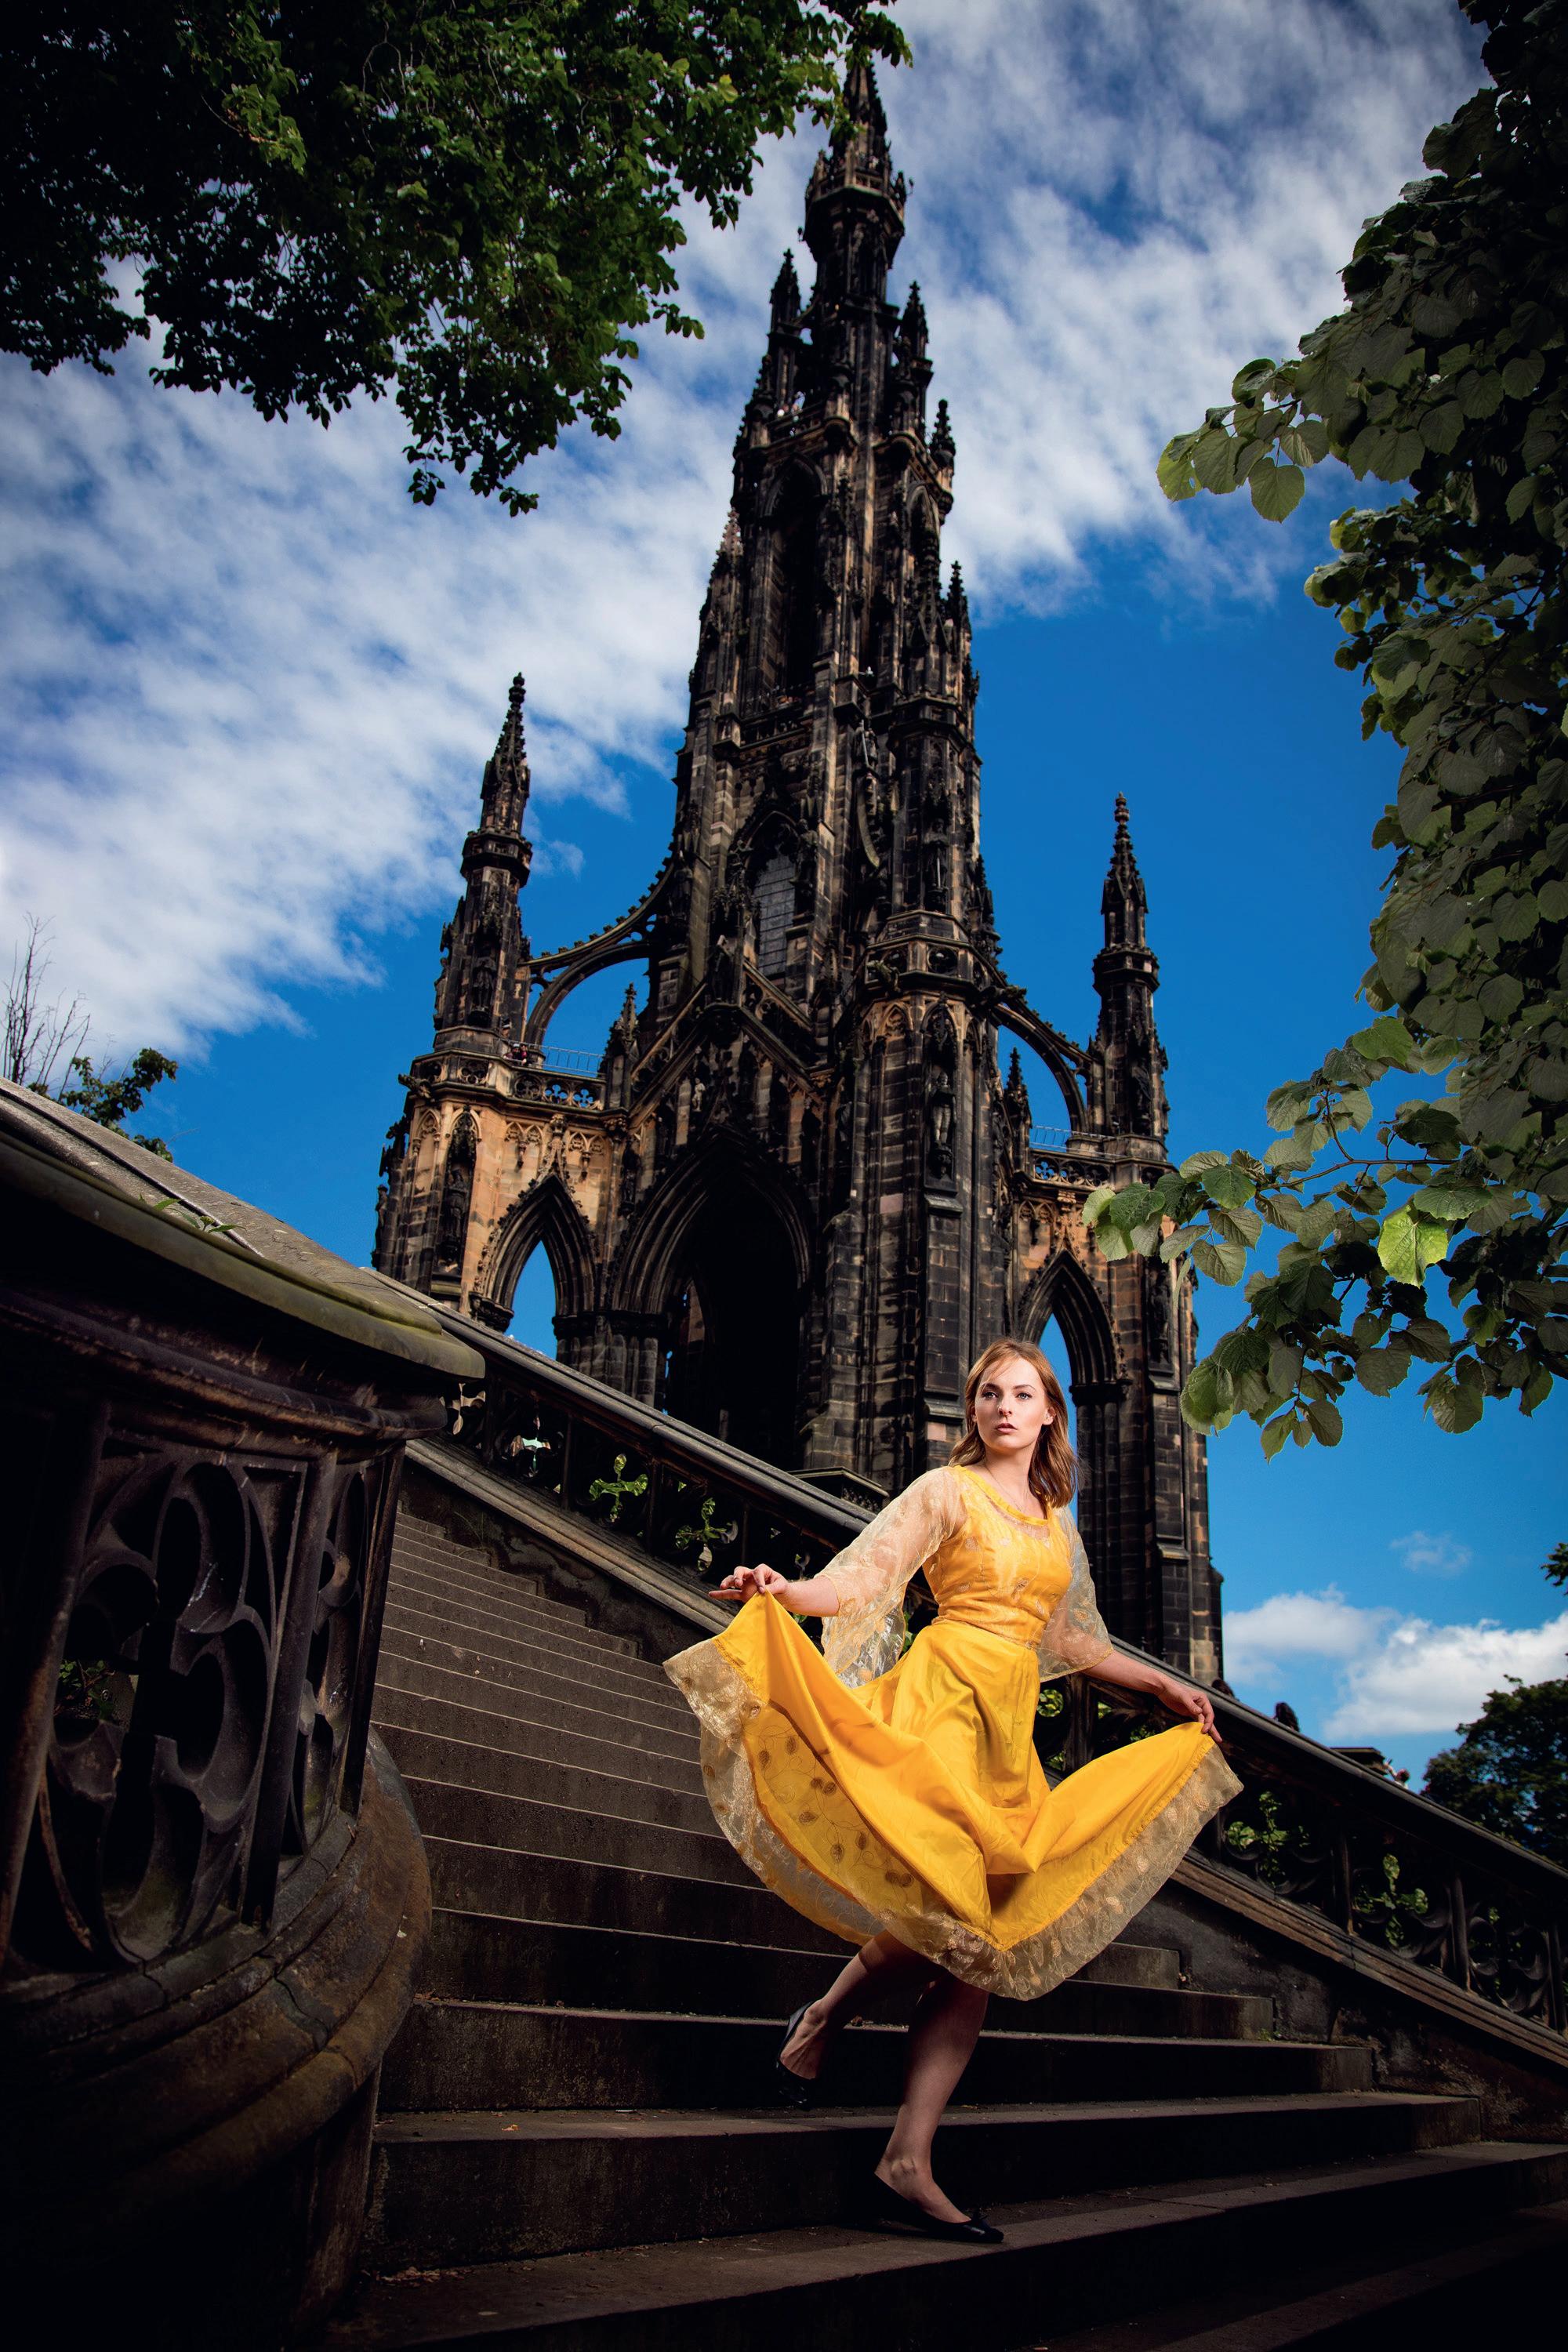
For those interested in portraiture, we have the second part of Michael O’Sullivan’s thoughtprovoking article about constructing the portrait that you want. Similarly, Emma Finch constructs portraits of children and manages to make it all look natural. She gives us a few hints about capturing characterful images of children of all ages.
Billy Arthur shares some of his beautiful and colourful underwater images. You would be forgiven, perhaps, for imagining warm waters but Billy’s pictures have all been taken in the seas around Scotland’s Shetland Isles.
Finally, for those of a more technical persuasion, Sean Goodhart discusses the relative merits of tools and techniques of processing HDR images taken from a drone.
I wish you a great summer (if you’re in the northern hemisphere) and good reading.
Gary Beaton
EARTH AND SKY: LANDSCAPE AND AERIAL MIEKE BOYNTON
It was 2012, and I’d driven a very long and hairy nine and a half hours along a rugged 4WD-only track called the Gibb River Road in the vast Kimberley region of Western Australia. I’d been nervously looking forward to attending a photography workshop at the remote but stunning Home Valley Station, and the time had finally come. The radio lost reception early on in the trip, and the car’s CD player wasn’t working, so during the drive, I had plenty of time to ponder my photographic journey
and the reasons I was so hooked on landscape photography.
Initially in High School and then again at University, I’d had some truly outstanding art teachers who’d broadened my knowledge not only of the processes of art-making, but of the history, traditions and theories of art. At that time, my favourite work was always figurative and I was in absolute awe of the hyperrealist artists whose paintings and drawings looked just like photographs. (The Romanticists took second place.) For me, painting and drawing
was always a labour of love - a painstaking process that took all my time and energy simply to create something passable as ‘good art’. I never had that easy, free-flowing relationship with creating work that other talented artists seemed to have, where they could put a few lines on paper and it was instantly recognisable as an artwork. I’d always loved art, but I’d been dissuaded from becoming an artist in my teens. It never stopped me from being an ardent admirer though: in fact, my acknowledgement of my own
Mieke Boynton swapped teaching English for her lifelong passion of art. Now she splits her time between making images and operating a landscape photography gallery with her husband.
Ocean Deity Gathaagudu/Shark Bay, Western Australia
limitations only made me more appreciative of others’ talent and skill.
In 2008, after graduating from University with an English degree and becoming a teacher, I took up a teaching position at a remote Indigenous school in the Kimberley and arrived in the wet season, surrounded by the most incredible landscape of verdant grasses and a plethora of wildlife, where the sky was impossibly huge from horizon to horizon, with mighty baobab trees dotting the scene. I was often stopped in my tracks to gaze in awe at nature’s artwork - the painted skies of sunrise and sunset; the delicate branches of the ancient baobab trees; the deep gorges carved out by powerful rivers… I took hundreds of photos with my little Kodak EasyShare, and soon, I felt that I needed to learn the rules of landscape photography in order to create worthy images, just as there had been strict rules to follow when I was drawing or painting.
Hence this epic drive across a dusty, ragged outback road to a remote cattle station in the Kimberley. It was a five-day, immersive workshop experience, and it proved to be a pivotal moment for my photography for a couple of very unexpected reasons. Firstly, I was devastated to discover that I really wasn’t as good at photography as I thought I was. And secondly, it was my very first opportunity to fly in a helicopter.
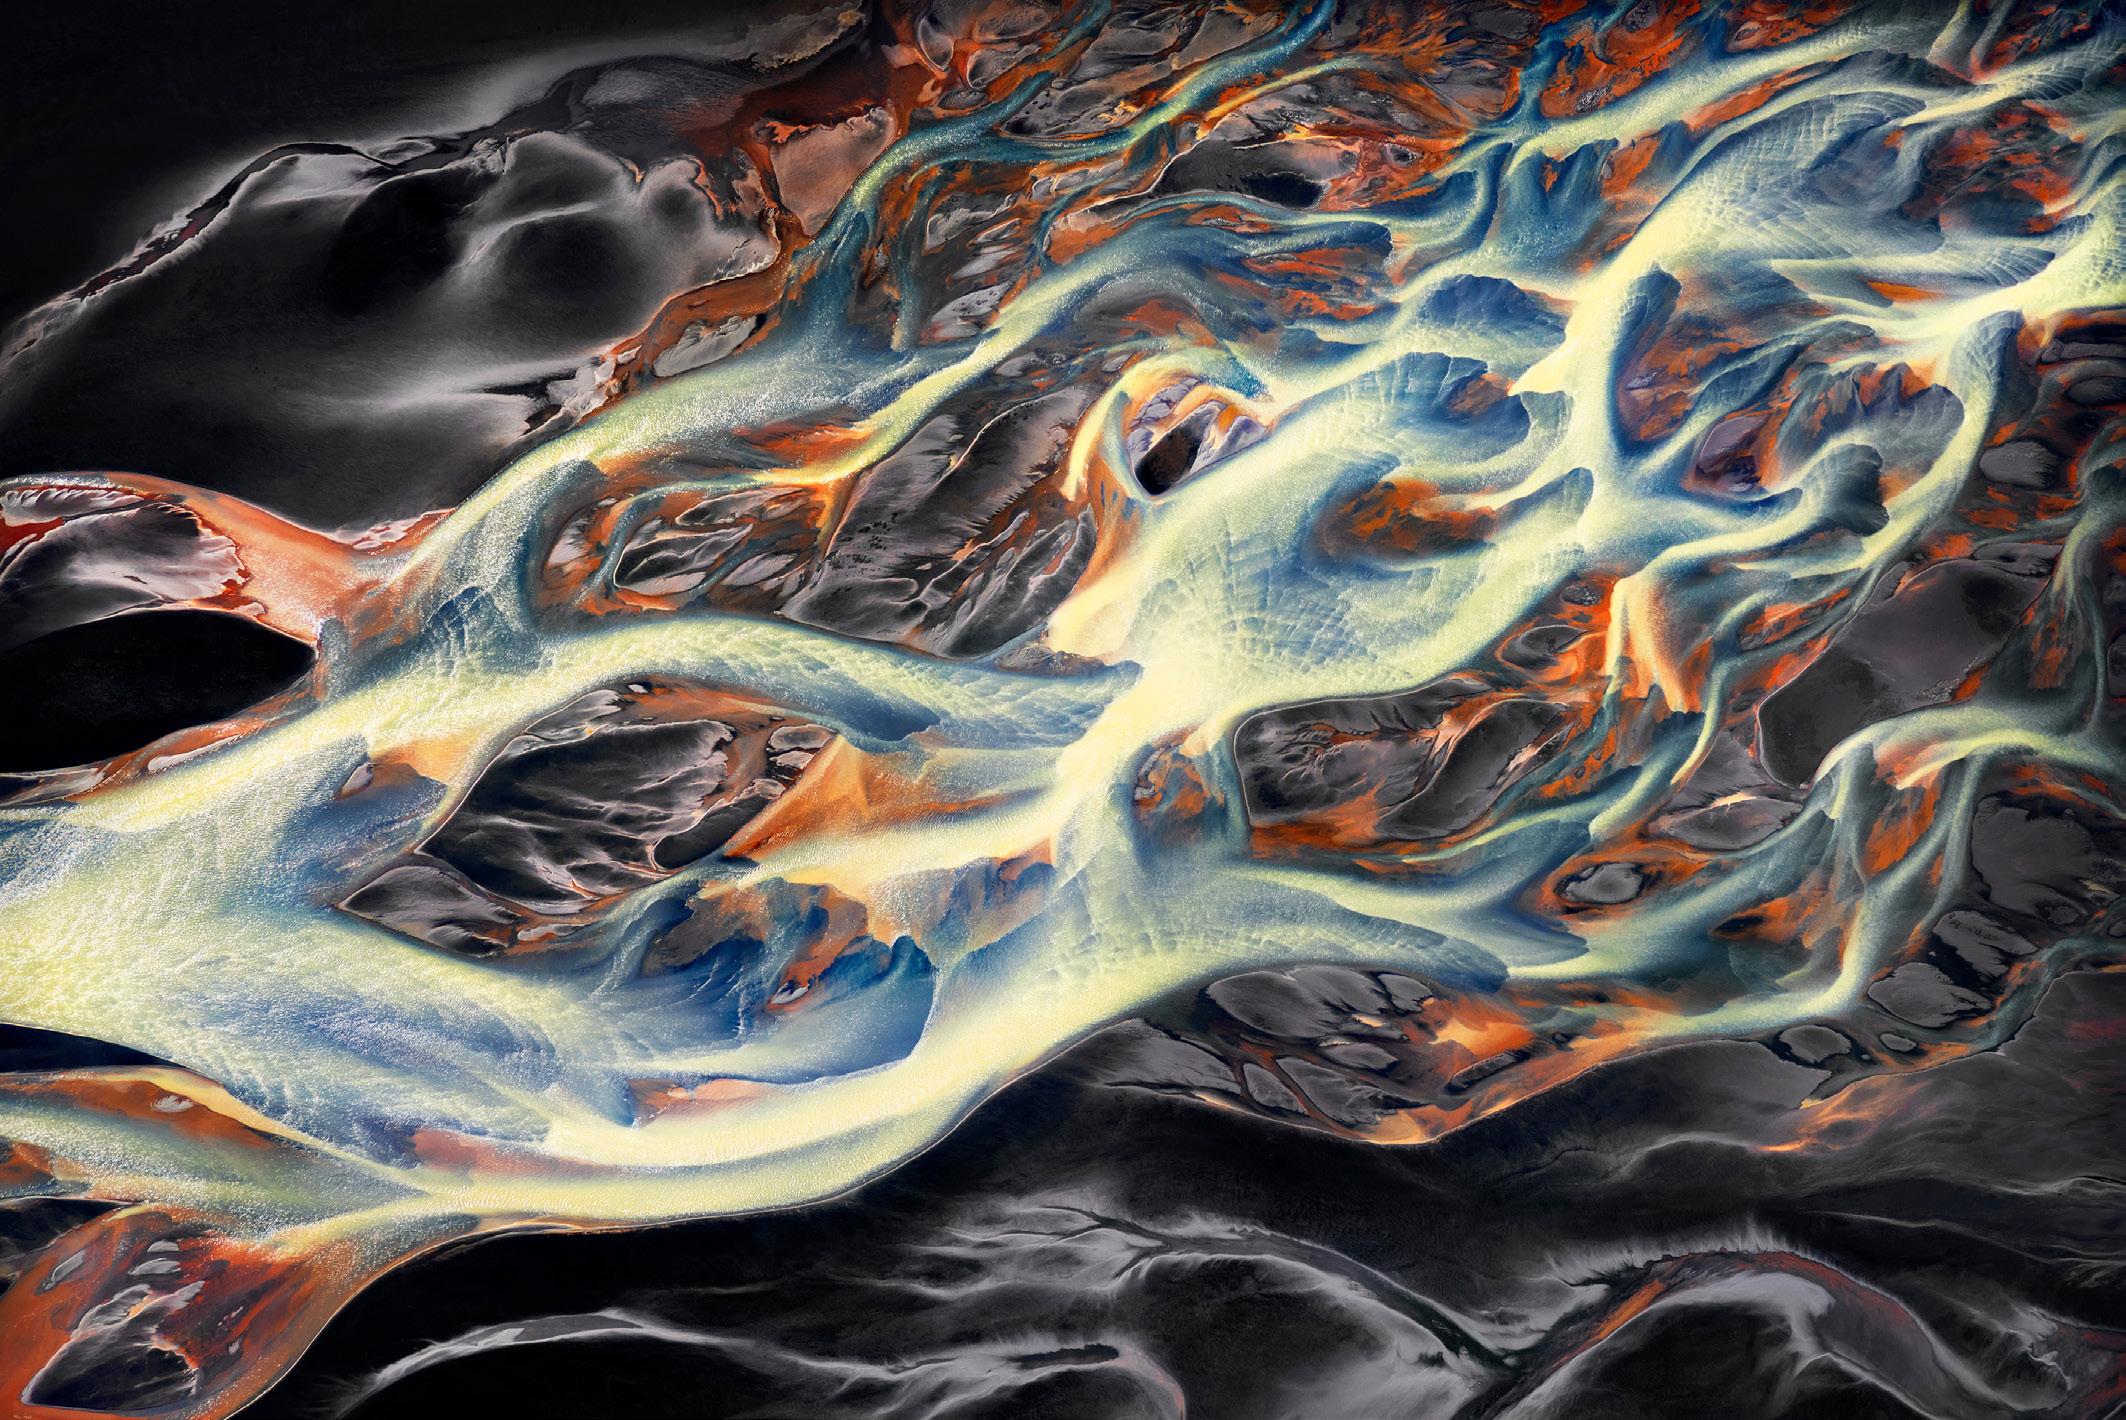
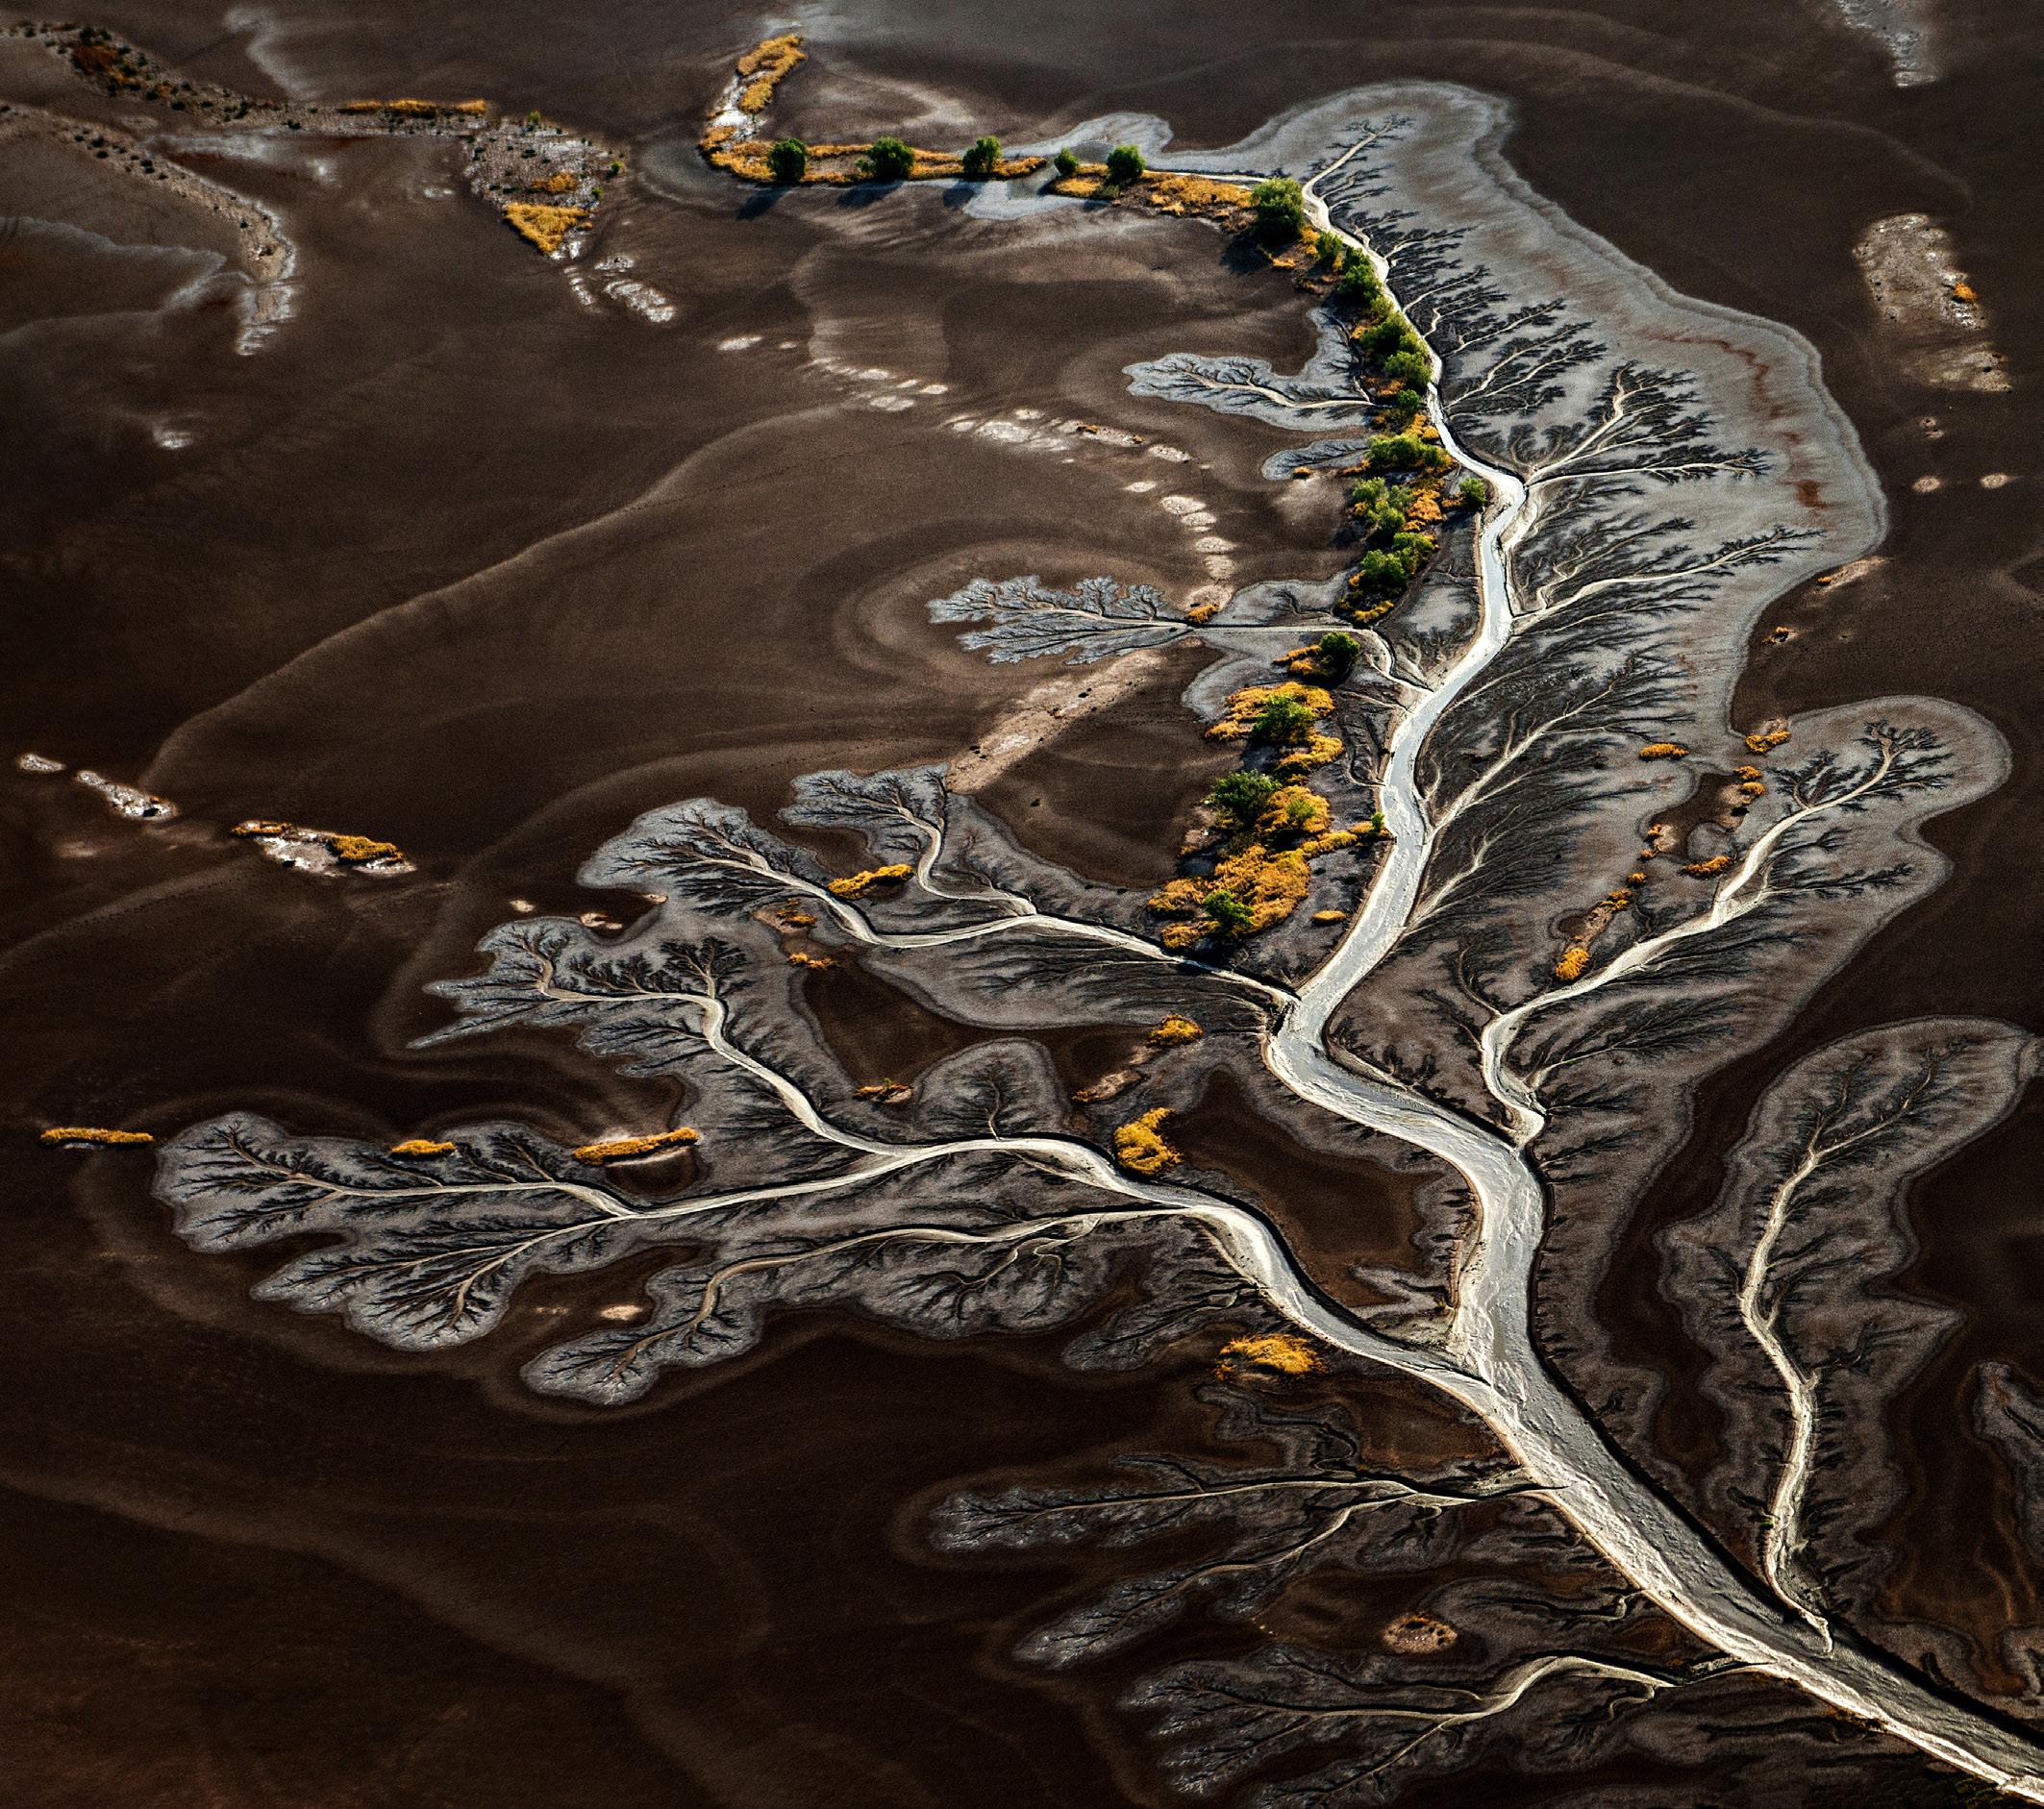
If you’ve ever seen aerial photographs of the incredible Kimberley ‘earth trees’ - formations that are created annually as the monsoonal water dries up after the wet season - you’ll be able to guess at how astonished I was when I first laid eyes on them. Intricate, detailed, almost fractal formations where the water has left pathways that truly look like the branches of trees, snaking their way across the vast, flat landscape. I also revelled in the feeling of flight - it made my heart literally beat faster and it felt risky and dangerous, which I loved. Unfortunately, my astonishment and delight quickly gave way to the
agony of realisation as I transferred the files across to my computer: my shutter speed hadn’t been fast enough and almost every image was unacceptably blurry. Still, that workshop lit the spark that became a passion that has stayed with me ever since.
By nature, I am a perfectionist, which carries with it both a strong desire for control and a crippling fear of making mistakes. But the joy of flying in a helicopter or plane somehow lessens these tendencies for me, and I simply have no choice but to ‘let go’. It is such a buzz! I’ve never used a drone, but I somehow doubt that I would experience the same level of joy and abandon that I experience when shooting from a plane or helicopter. There is no time to over-analyse or secondguess - there is only enough time to see and compose. I always have a door off or a window open, so it is incredibly noisy and hectic, and I’m constantly juggling the need to give clear instructions to the pilot over the deafening sound of the aircraft, whilst at the same time
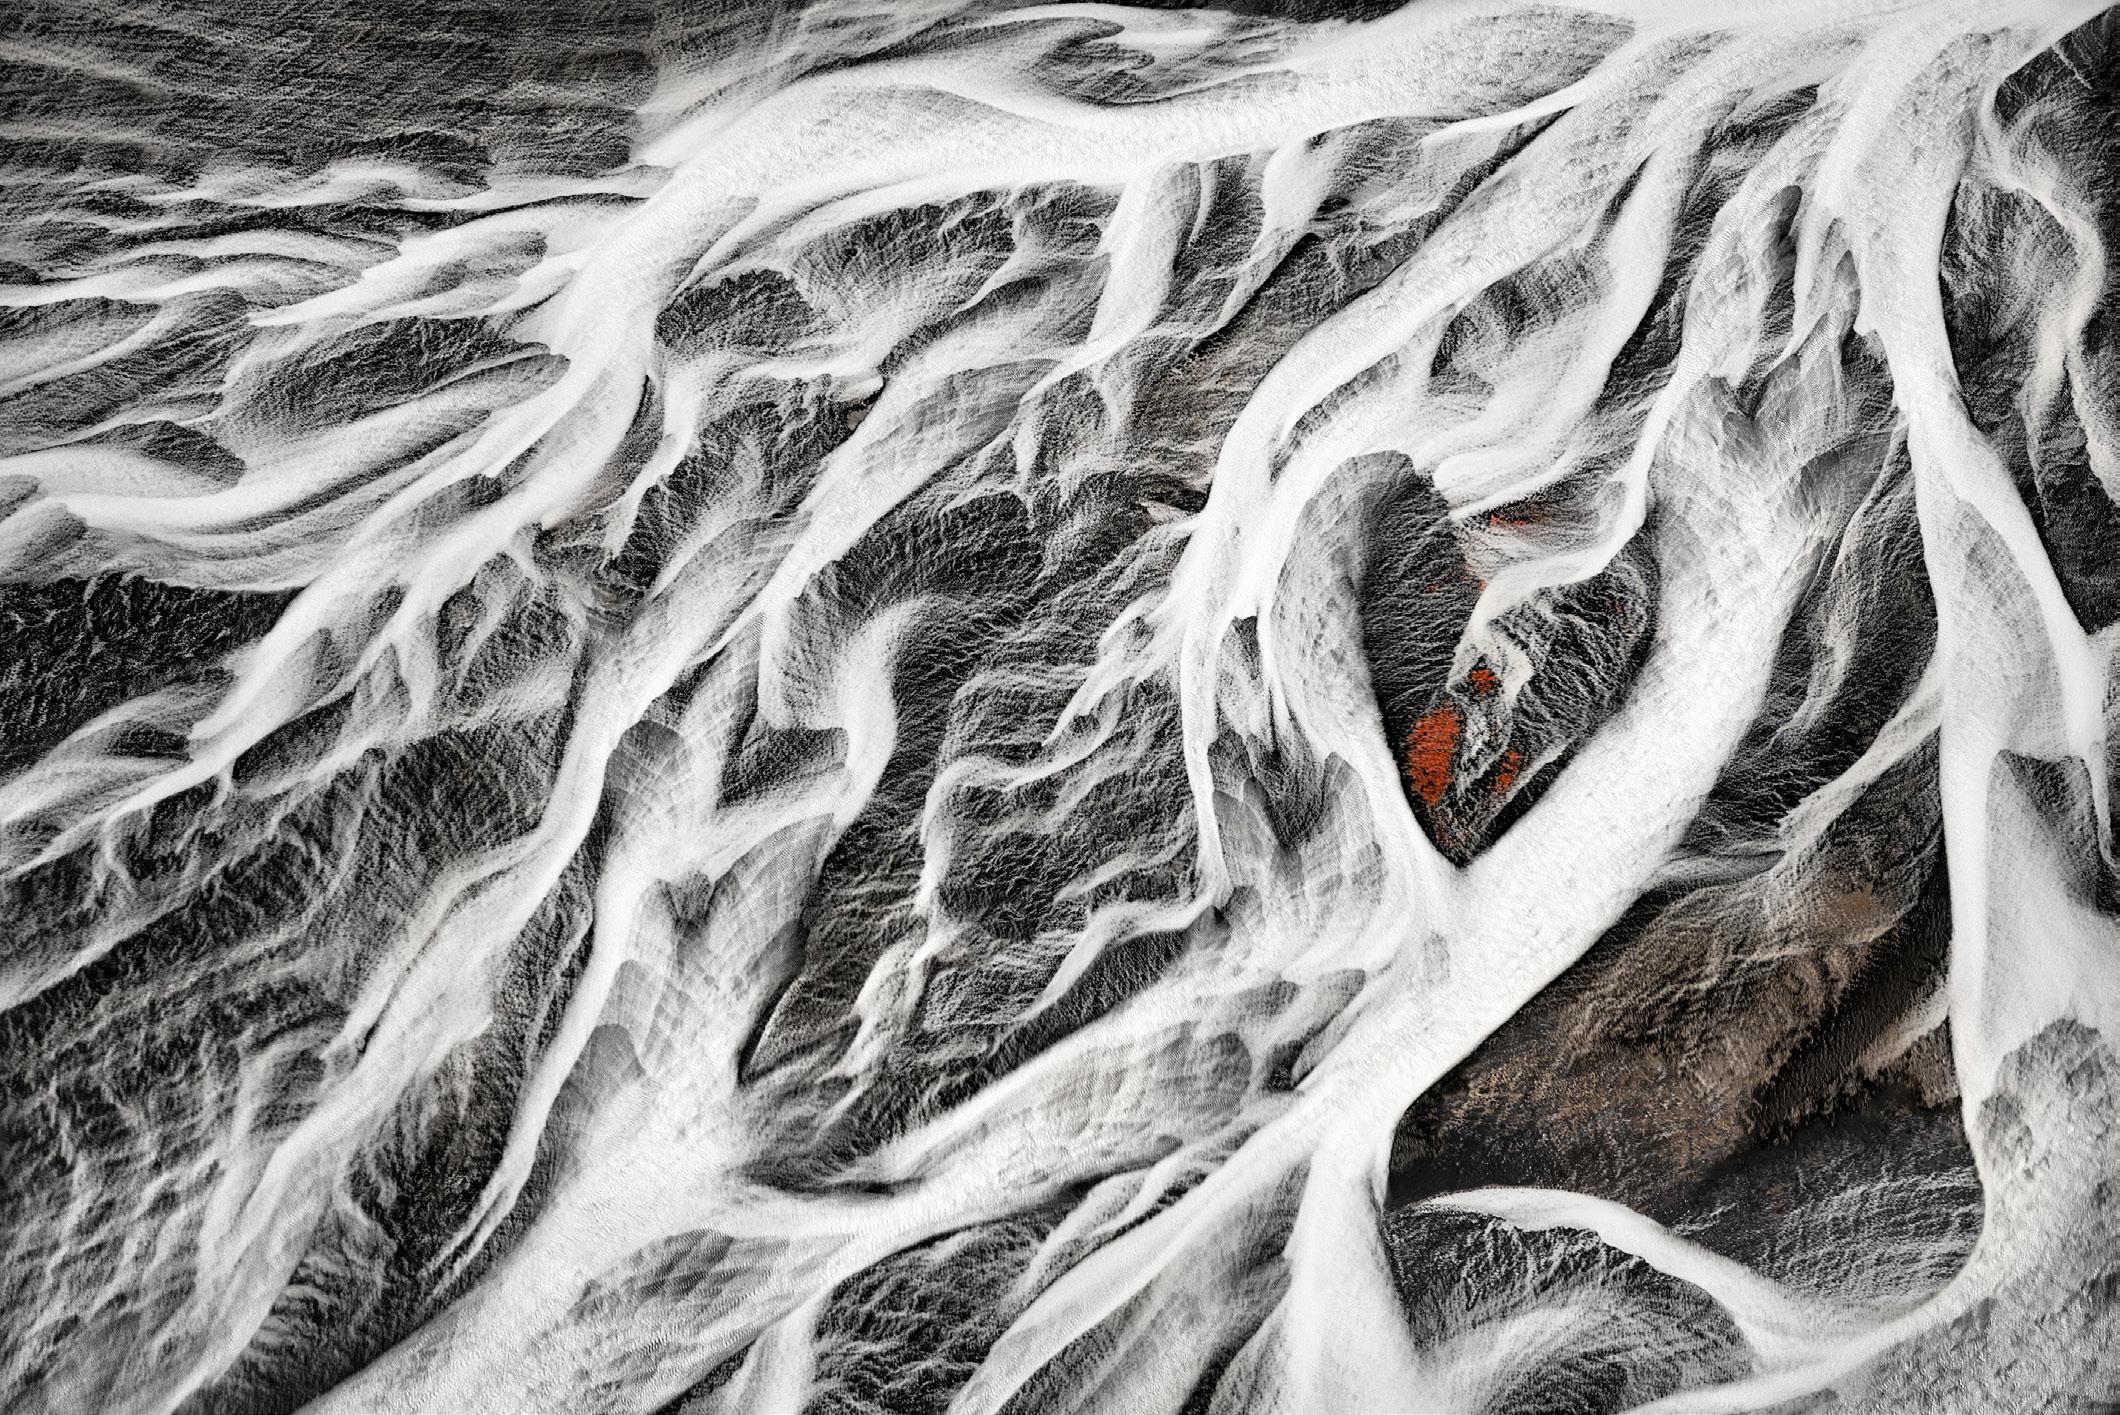
Dragonfire Braided Rivers, Southern Iceland
assessing the height of the aircraft and selecting the appropriate lens to capture a well-composed shot, all the time dealing with the rapidlychanging direction of light. These days, I now allow my camera to do some of the ‘thinking’ for me: I shoot in Aperture Priority mode and activate Auto ISO Sensitivity Control so that I can set a minimum shutterspeed and a maximum ISO and let the camera decide the settings within these parameters. I use prime lenses to maximise sharpness, and focus manually on infinity. I forego my trusty polariser to ensure a faster shutter-speed, knowing that the inevitable fading of contrast and colour can be sufficiently recovered in the editing process. This enables me to take photos more instinctively, without fear of failure.
Despite gravitating towards purely figurative art as a younger person, I never forgot the lessons I learned about the ‘big names’ of abstract art in high school, and their notable characteristics. I remember being impressed by the exquisite sense of balance evident in all of
Wassily Kandinsky’s geometric paintings. I was excited by the mind-bending illusions of the Op Artists, particularly the works of Bridget Riley and Victor Vasarely. I was intrigued and fascinated by the incredible aerial views of country depicted by the early Papunya Tula ‘dot painting’ artists of Central Australia. And I loved the bold power of Piet Mondrian’s rectangles and squares of red, yellow, blue and white, divided by crisp black lines. Surprisingly, as I’ve developed my skills in aerial photography, I have found myself gravitating more and more towards these abstract artists and their theories, and over time, I think I’ve figured out the reason why.
Abstract art allows for freedom of interpretation. For suggestiveness. For multiple ‘readings’ of a work that can even be contradictory. For an emotional response that is not always easy to articulate or explain. I have come to believe that a full appreciation of abstract art requires actual lived experienceswhich a teenager often has limited
possession of. For the artist, there is also a certain level of risktaking involved: the viewer’s life experiences are completely outside the artists’ control, so a certain amount of bravery is required to present abstract work with confidence and conviction.
For me, abstract aerial photography satisfies both my desire for precision and my appreciation for Nature’s inherent artistry. I love how flying through the air makes me ‘let go’ a little and be more creative and in-the-moment. I have an appreciation for the simplicity of colours, shapes, patterns and textures and how these combine to elicit an emotional response from an appreciative viewer. But I happily admit that the icing on the cake is when my abstract aerials contain an additional element (or elements) of symbolism that leads them back towards the figurative. Abstracts that look like trees, or branches, or feathers. Abstracts that look like birds, or dragons, or a wave in the ocean. Abstracts that trigger
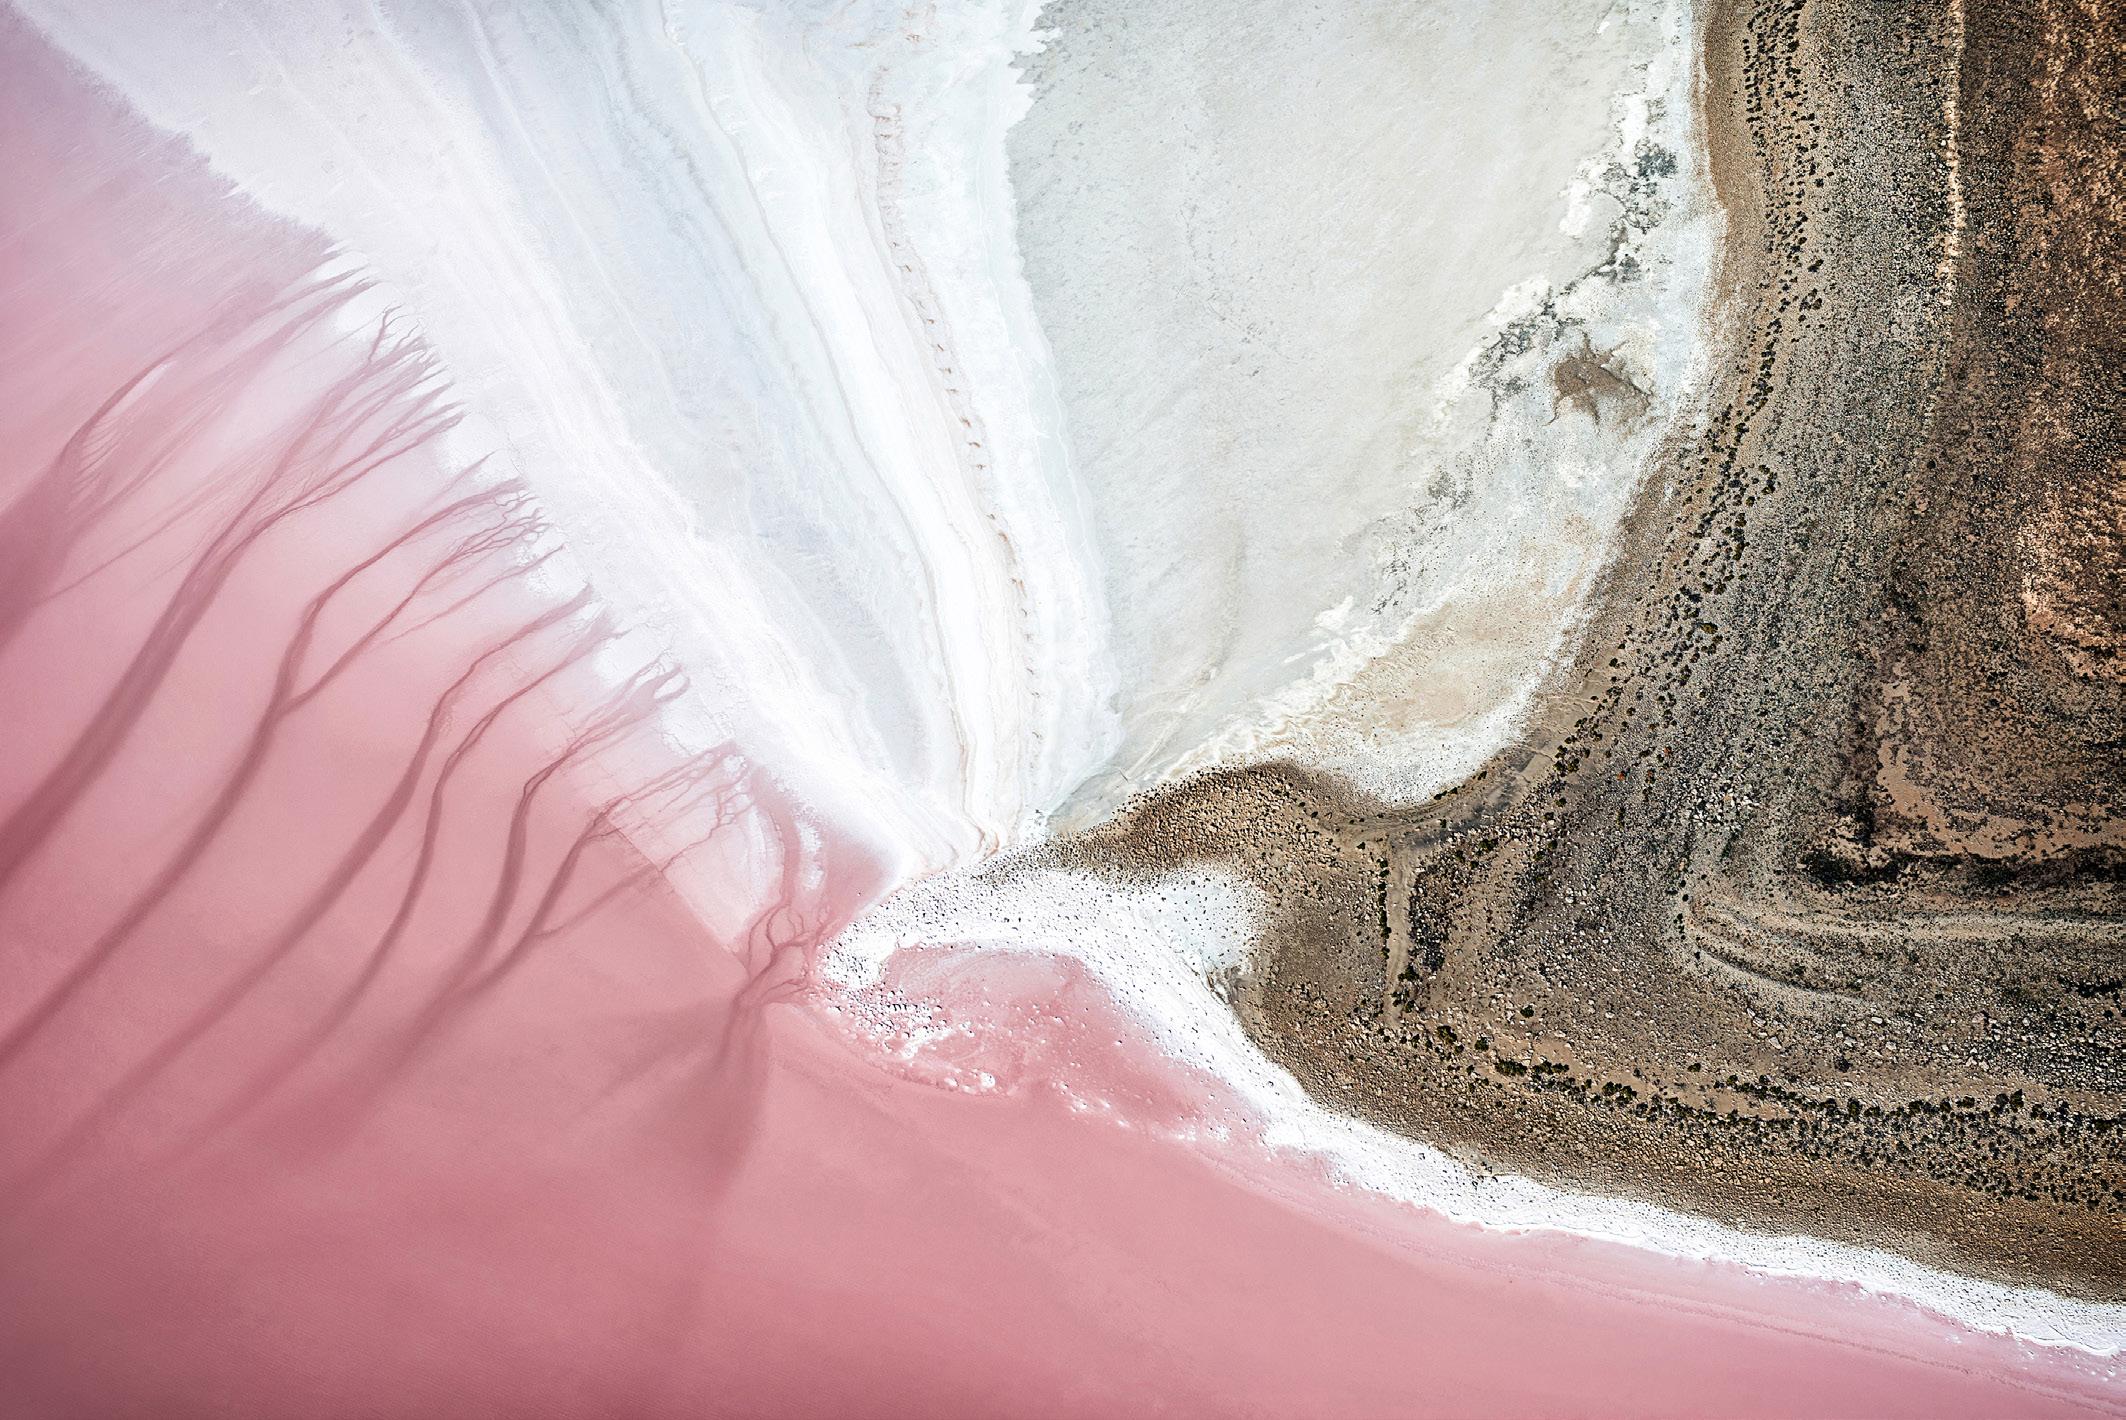
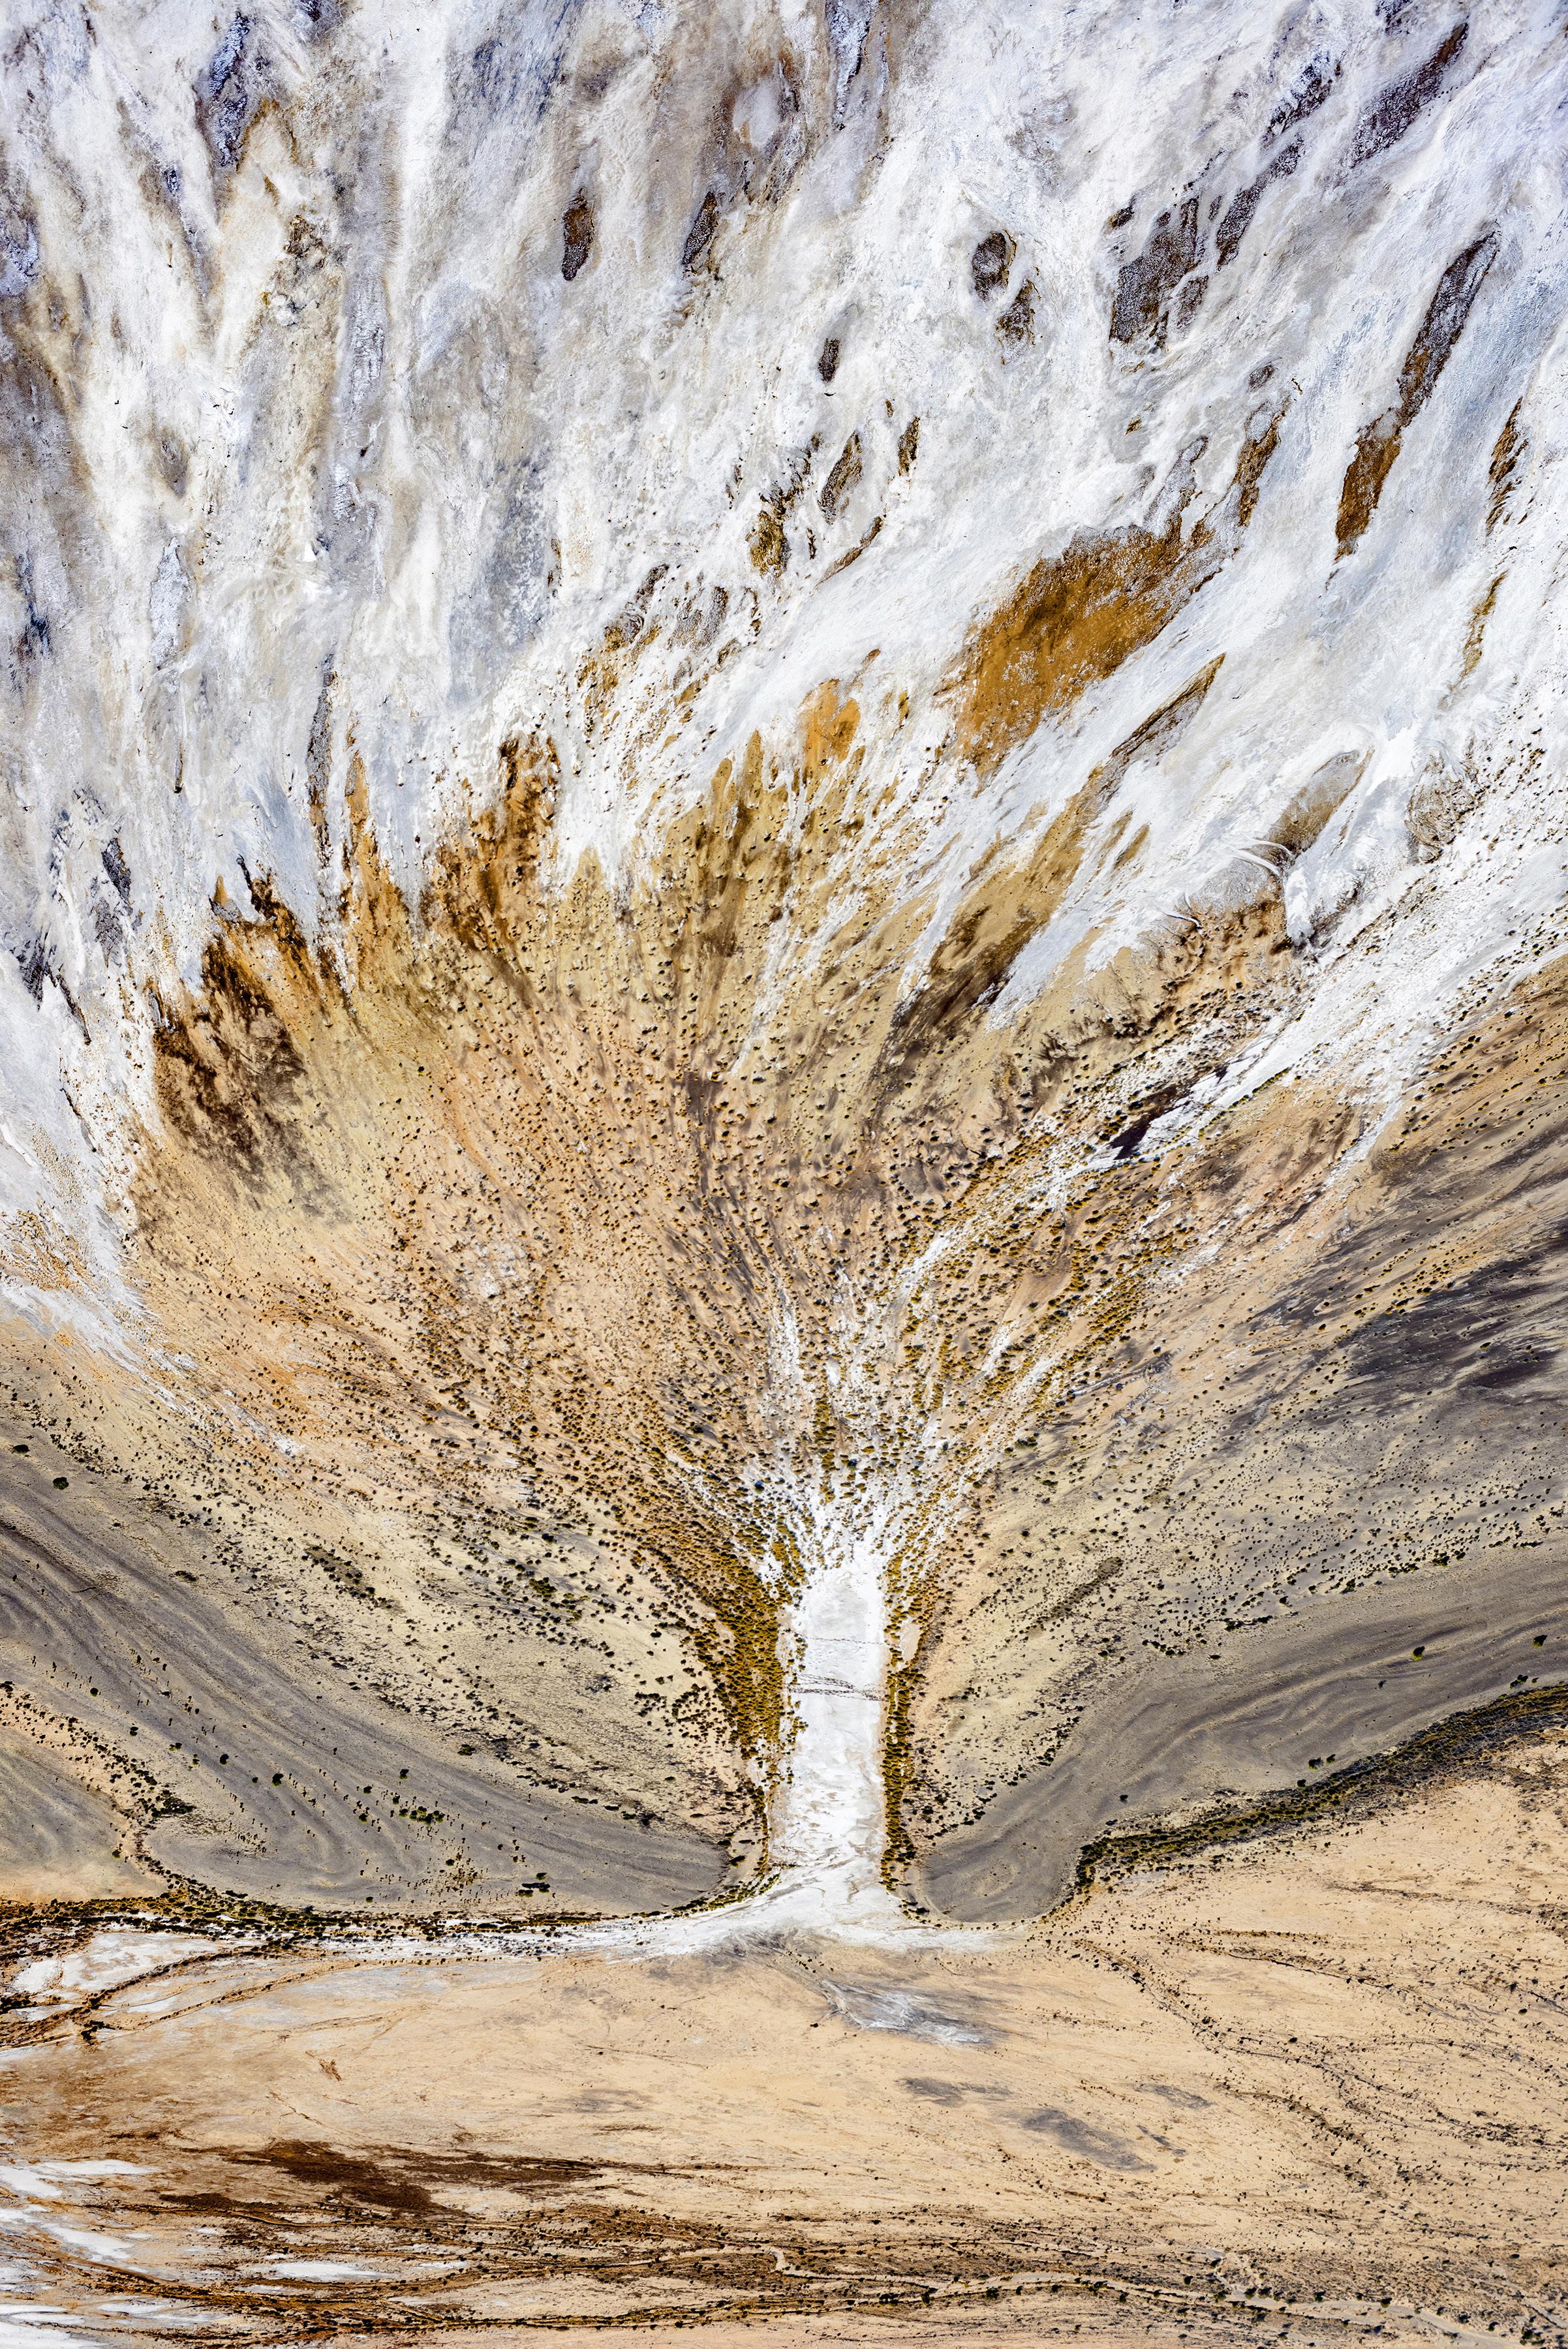
Kati Thanda: Taking Flight. Kati Thanda /Lake Eyre, South Australia
our natural tendencies towards pareidolia.
My wonderful husband (photographer Matt Palmer) and I opened a gallery three and a half years ago, and in the beginning, I was a little fearful of including my abstract aerials, given our limited wall space. We also live in a tourist destination, so we knew that people who walked in off the street would primarily want to see the local landscape represented on the walls. Well before we found our gallery space, we had an in-depth discussion about what we wanted our gallery to be, and one thing we both agreed on was that we would always include work that we loved, even if we didn’t think it would sell. At that time, I thought my aerials would sit in that category, but it turns out that I should have given people more credit! We love sharing the stories of our photos, and whenever there are abstract aerials on the walls, I inevitably find myself explaining what they are, how and where they were taken, and what they represent to me.
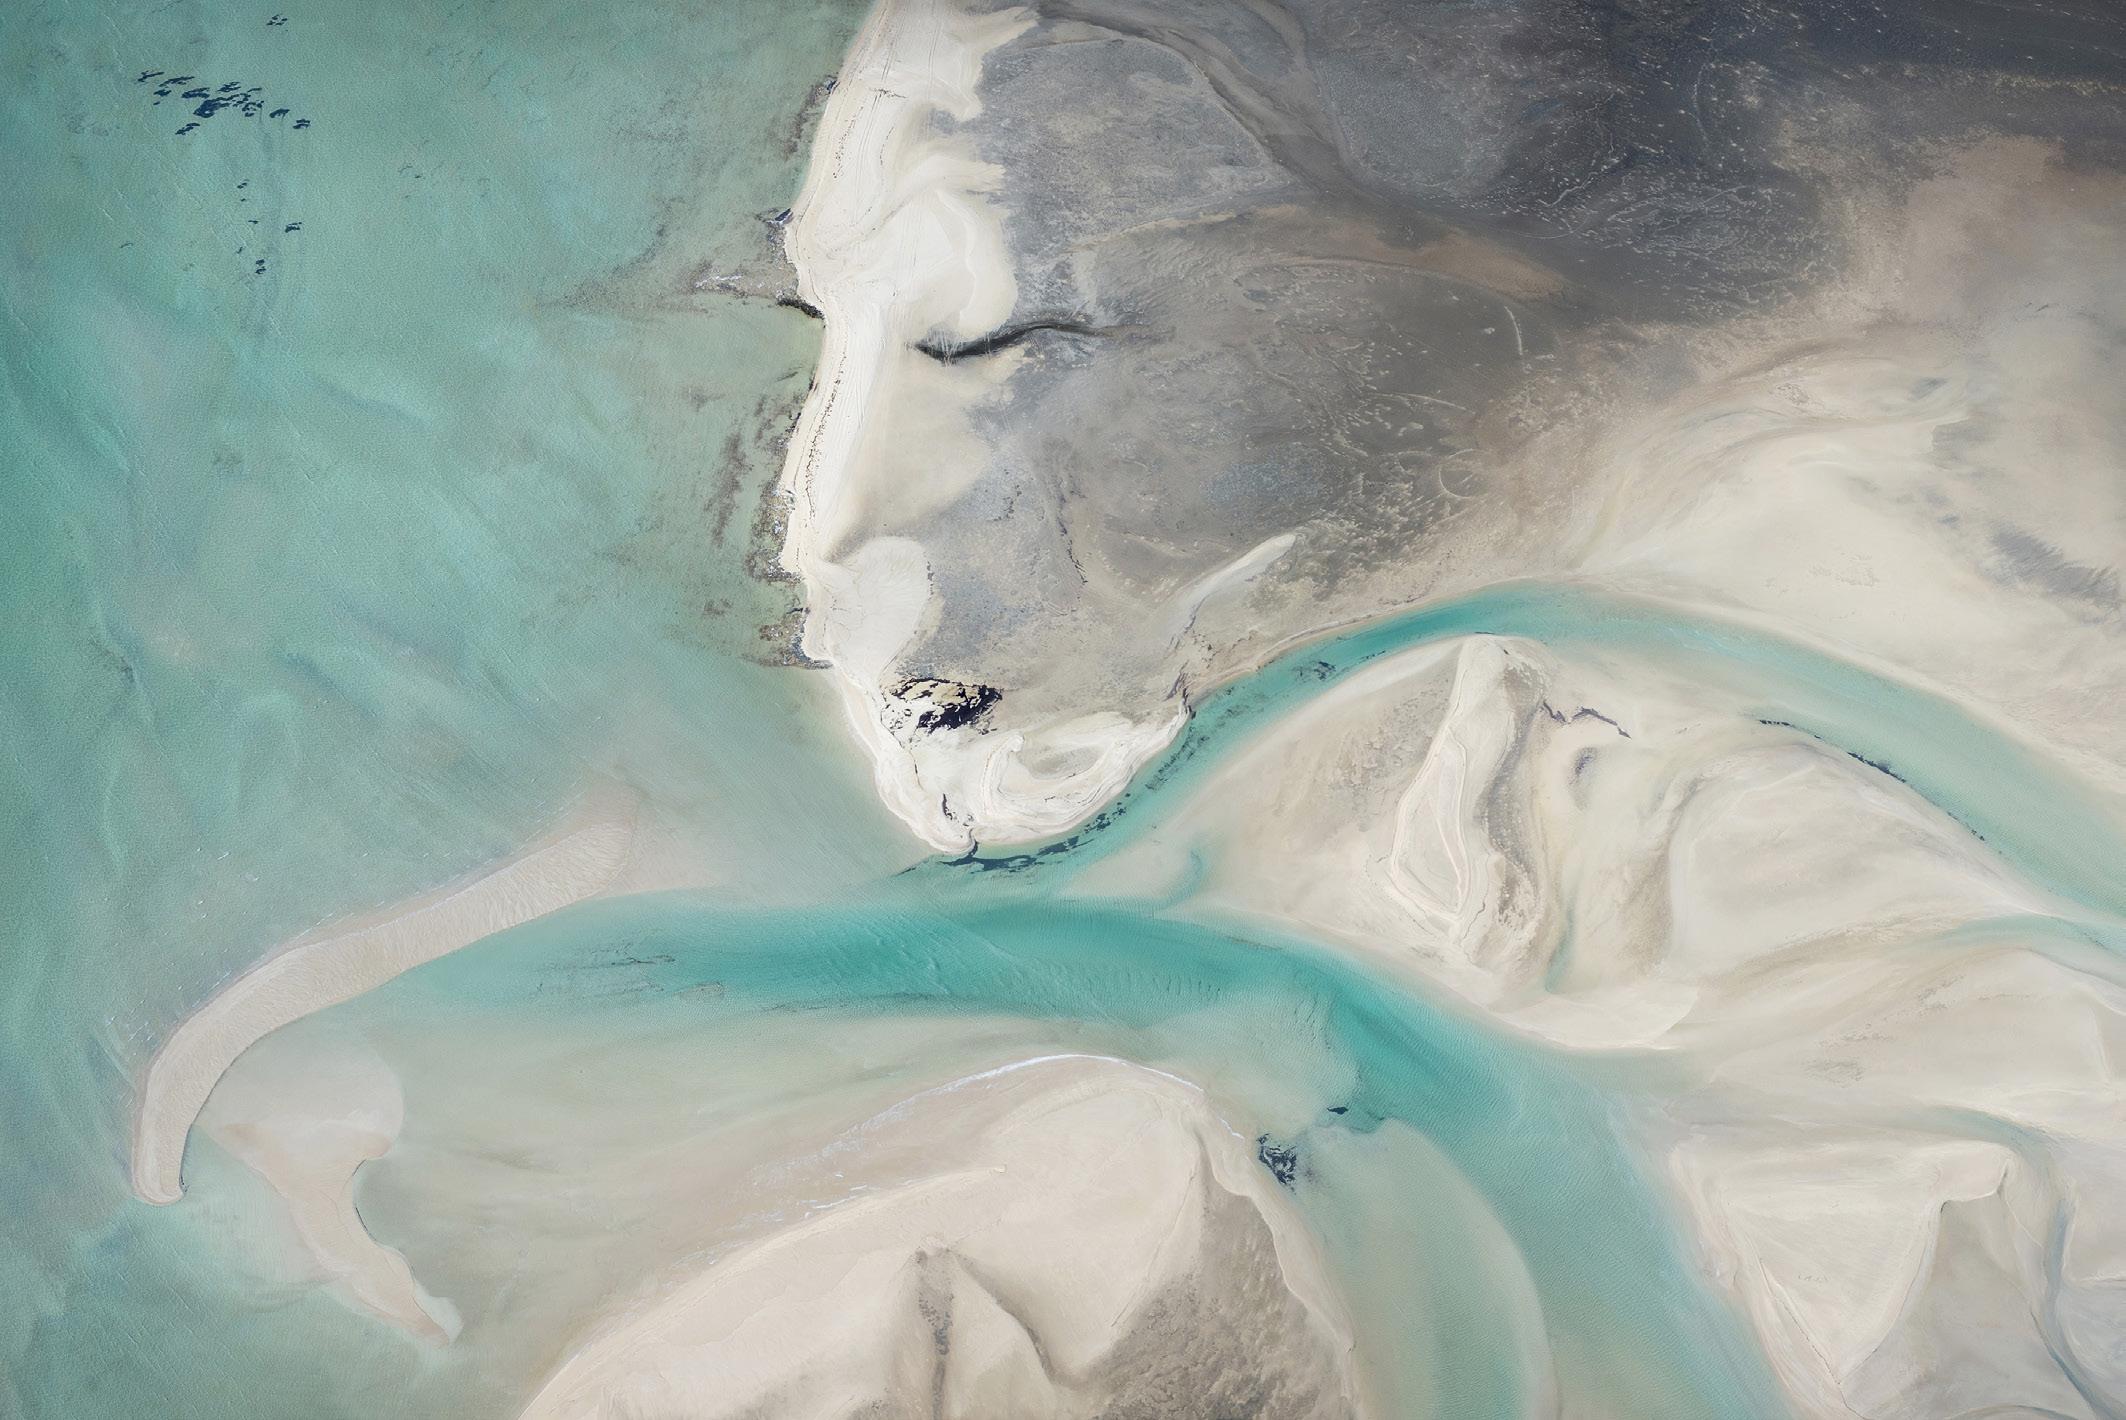
My favourite abstract aerial is called Ocean Deity. Matt and I fondly refer to her as ‘The Geisha’. It is a photograph taken from a Cessna 172 over an area called Gathaagudu or ‘Two Waters’ by the Malgana people of Western Australia but more commonly referred to as Shark Bay. Although I know it’s simply a photograph of sand and water, it’s impossible for me not to see her face. She is Mother Earth, with her hand below cradling the ocean and a scarf of impossibly clear water. There’s a further symbolic story here too. ‘The Geisha’ is located on a stretch of coastline similar to hundreds of kilometres of coastline along the top North-West corner of Australia - coastline where turtles, including the globally endangered green turtle (Chelonia mydas) and loggerhead turtle (Caretta caretta) lay their eggs. When the hatchlings emerge, they must quickly make their way out to the water or risk becoming a tasty feast for birds and crabs. In Australia, it’s common for people to go four-wheel driving along stretches of coastline like this
and unfortunately, during nesting season, there is the risk of driving over the turtle nests or - equally problematic - creating such deep tracks in the sand that they become like towering mountains that the hatchlings can’t climb over. When you look very carefully at Ocean Deity, you can actually see the tyre tracks of 4WDs down the length of her face… and across her closed eyes. I am certain that most people who drive in these areas are completely oblivious to the damage they’re causing, and so I tell this story often in the hope that I can create an awareness of this situation.
Visitors to our gallery often ponder out loud whether Ocean Deity is a painting, or if I have painted on top of the photograph! People so quicky assume that she is ‘Photoshopped’ that I now have a little sign accompanying the print stating that it hasn’t been manipulated. The editing from the RAW file literally only included a crop, a slight increase in contrast, the removal of four small patches u
Heartbeat Braided Rivers, Southern Iceland
Windswept Kati Thanda /Lake Eyre, South Australia
of distracting seagrass and a minor darkening of her eyelashes. That’s it. No warping, no added texture, no additional elements. Most of my other aerials have only minimal processing too; however, I am not averse to manipulating aerials when the focus is not on the magnificence of nature. If the ‘story’ told by the photo is more about the symbolism in the image rather than the nature story, I am happy to manipulate images to make the story clearer. For example, in Heartbeat, I have removed the yellowish colour of the water in the braided rivers, warped the heart shape to make it more recognisable and changed the soil colour from brown to red within the ‘heart’. My father was going through open heart surgery when
I was editing this photo, and these edits were a response to what I was experiencing at the time.
Landscape and aerial photography are two very distinct genres of photography for me, each with their own separate approaches to shooting and editing. The experience of shooting landscapes, where I take great care in my setup and mentally open myself up to the input of nature, is vastly different to the noisy chaos of shooting aerials from a helicopter or light plane. These differences influence my attitude towards processing too, as I feel that I can give myself permission to be more creative when it comes to abstract aerials and the messages they contain, whereas I am guided by a strong
desire to honour the reality of the moment in my landscape photos. I feel that my landscape photography hearkens back to my teenage fascination with hyperrealism, whereas my abstract aerials take inspiration from the abstract artists whose work I admire. And yet for both, it is my admiration for nature that inspires and motivates me to continue seeking out its places of beauty.
Learn more about Mieke’s work miekeboynton.com alpinelight.com.au
Skyview 2012 workshop, The Kimberley, Western Australia
PORTRAITS - THE HUMAN ELEMENT? OR THE HUMAN
ELEPHANT IN THE ROOM?
MICHAEL O’SULLIVAN
FRPS
Michael O’Sullivan continues his thoughts on how to construct a portrait by explaining his own approach.
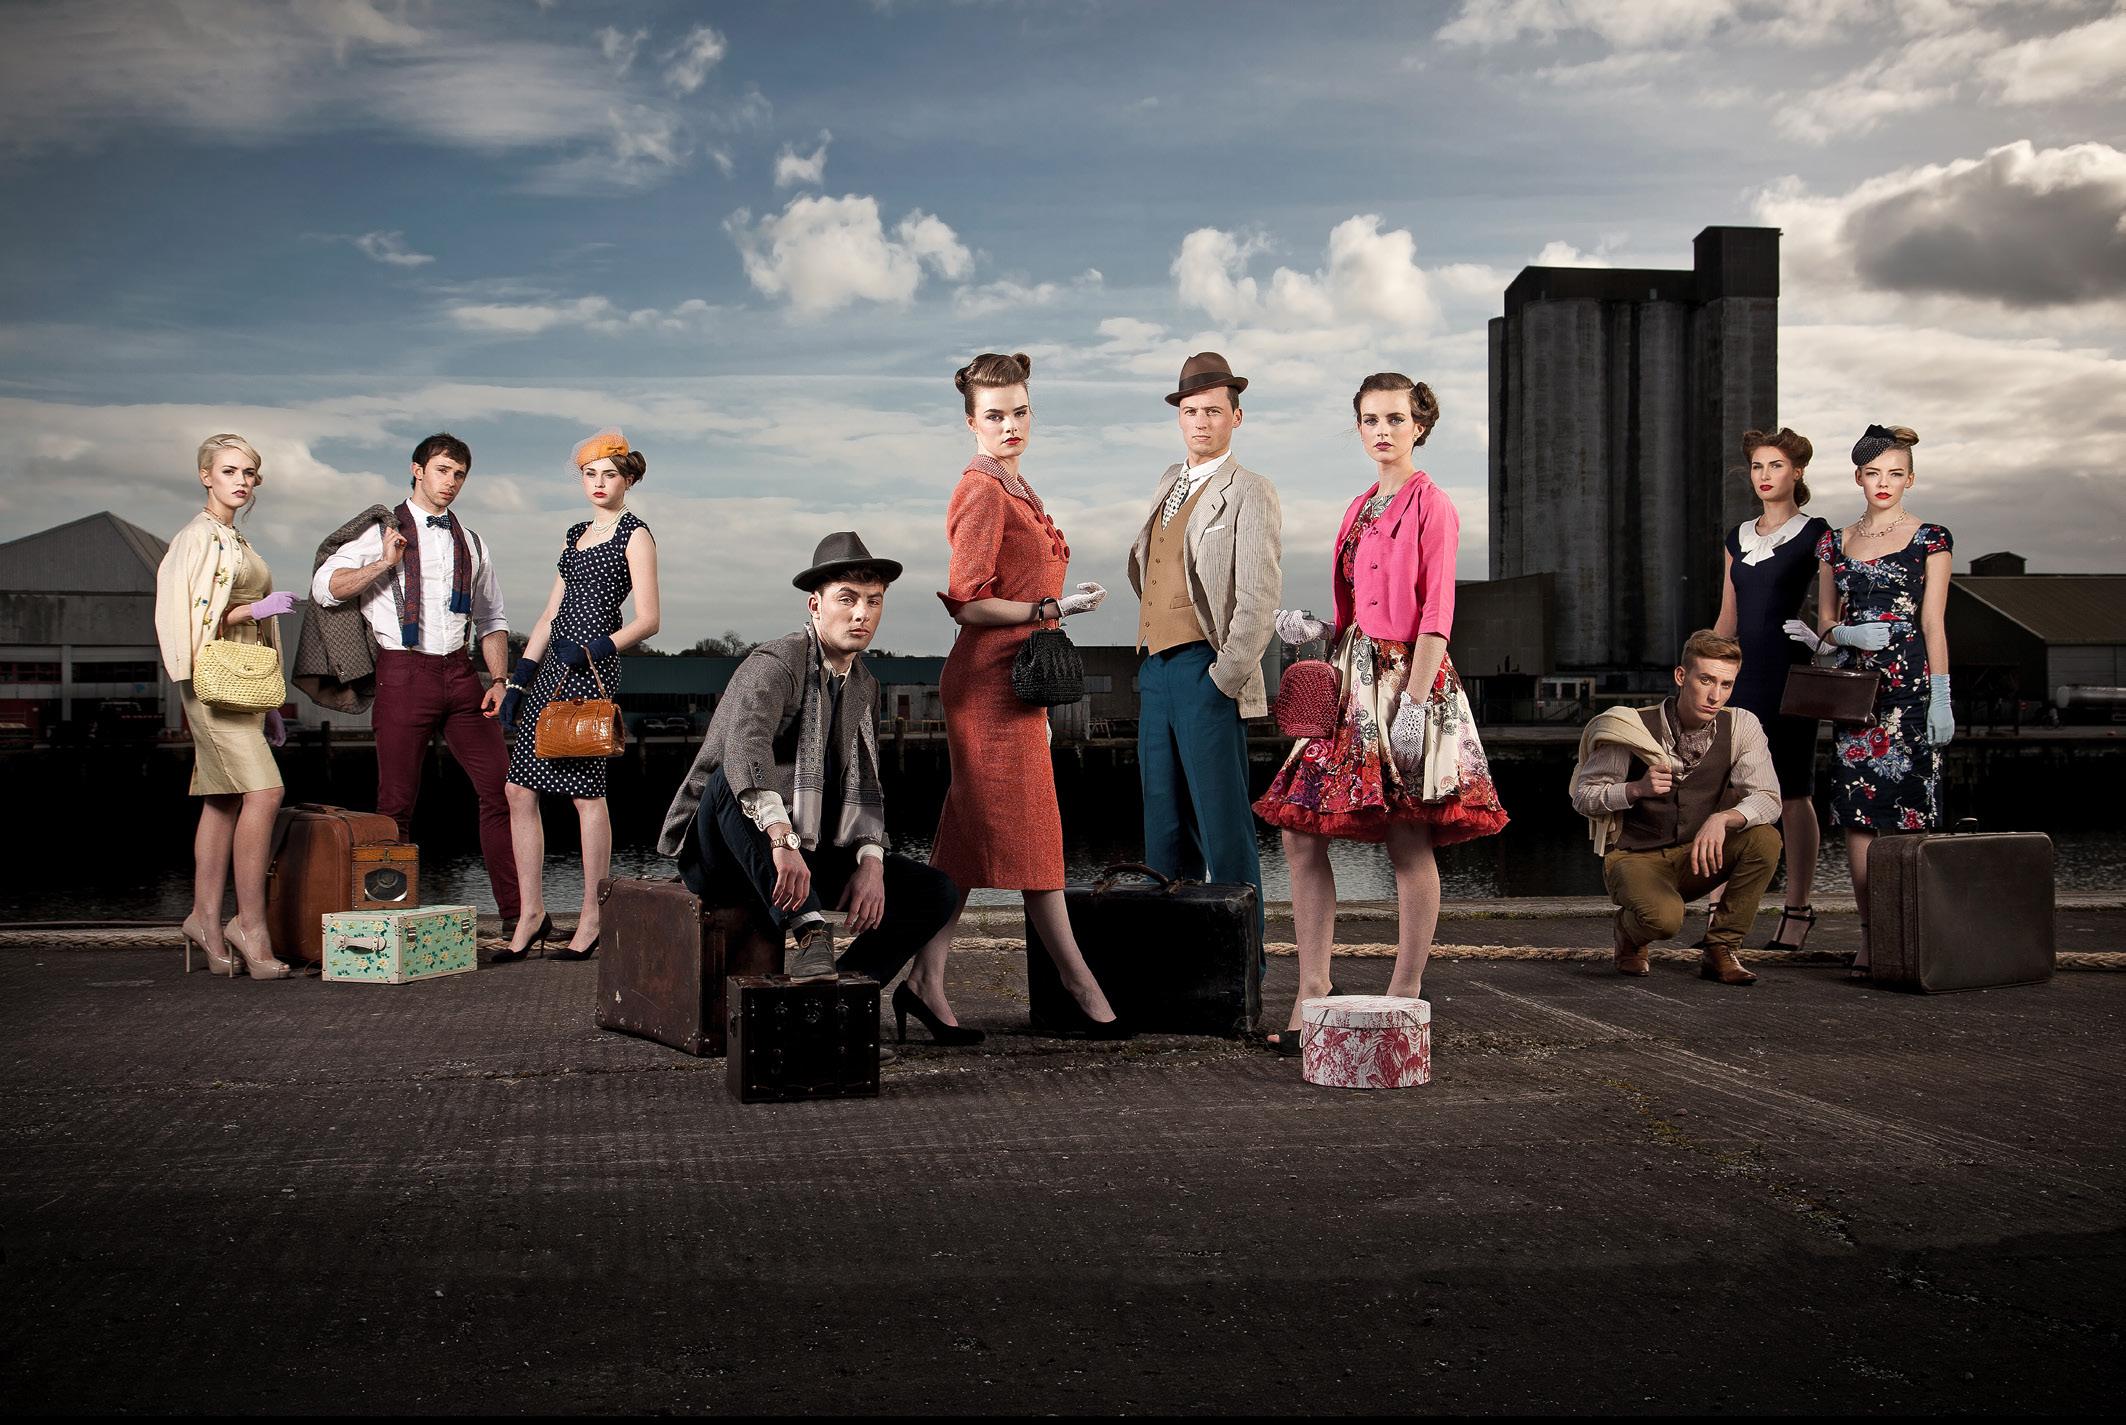
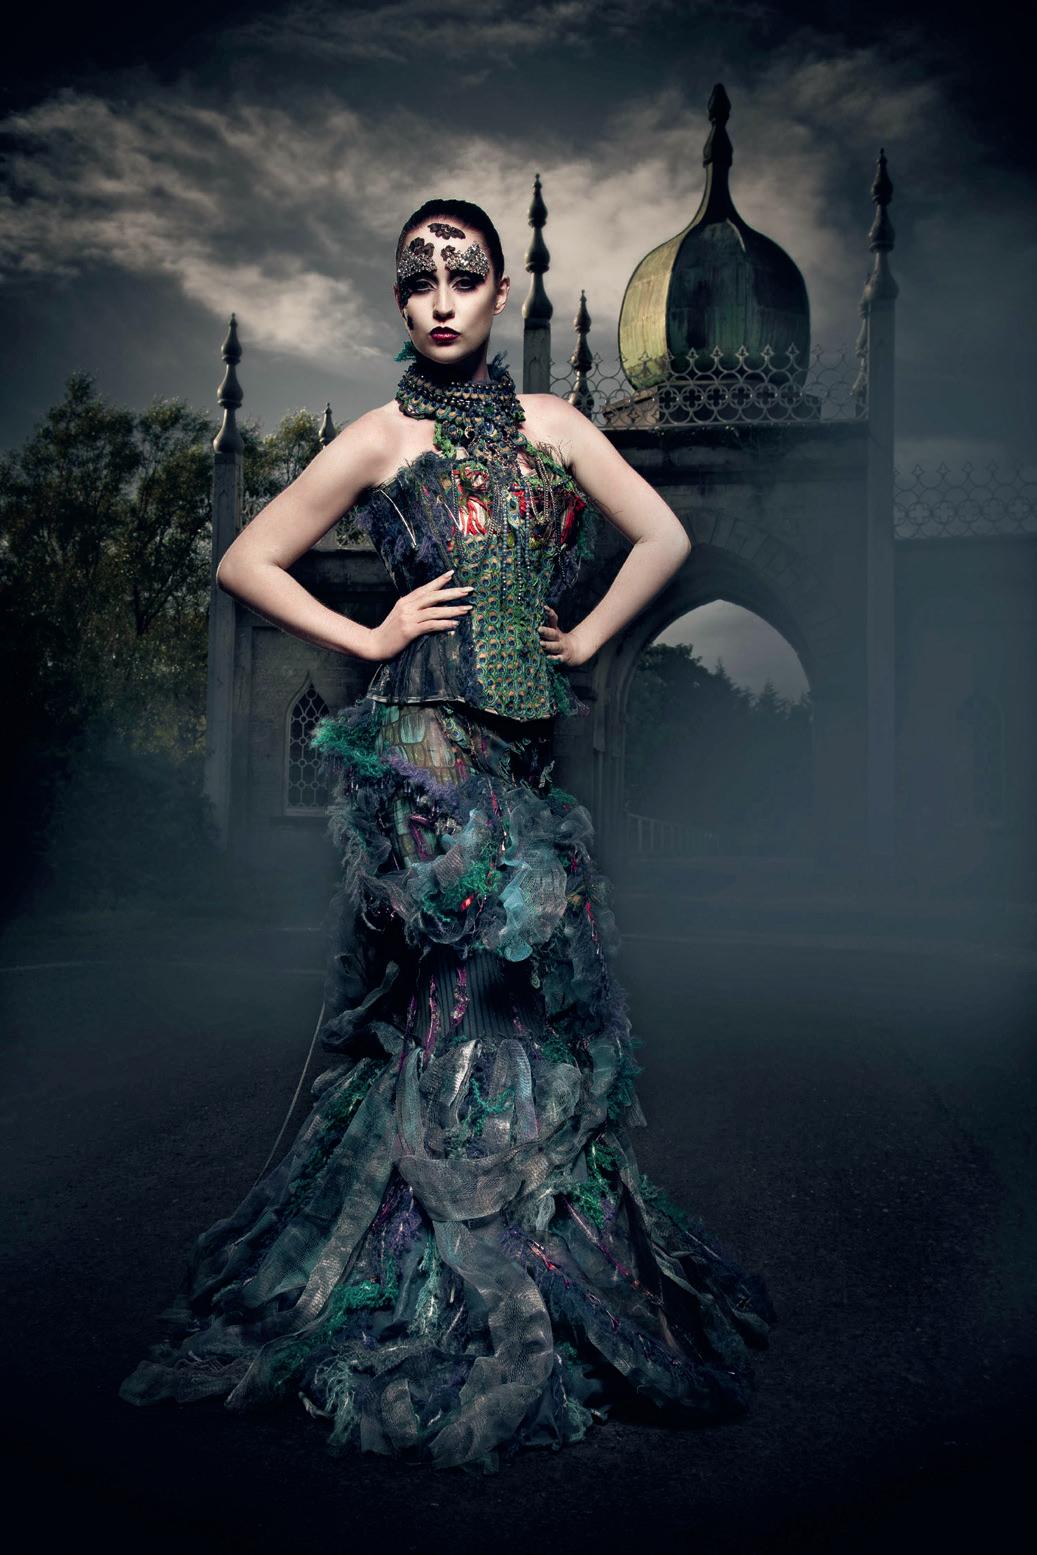
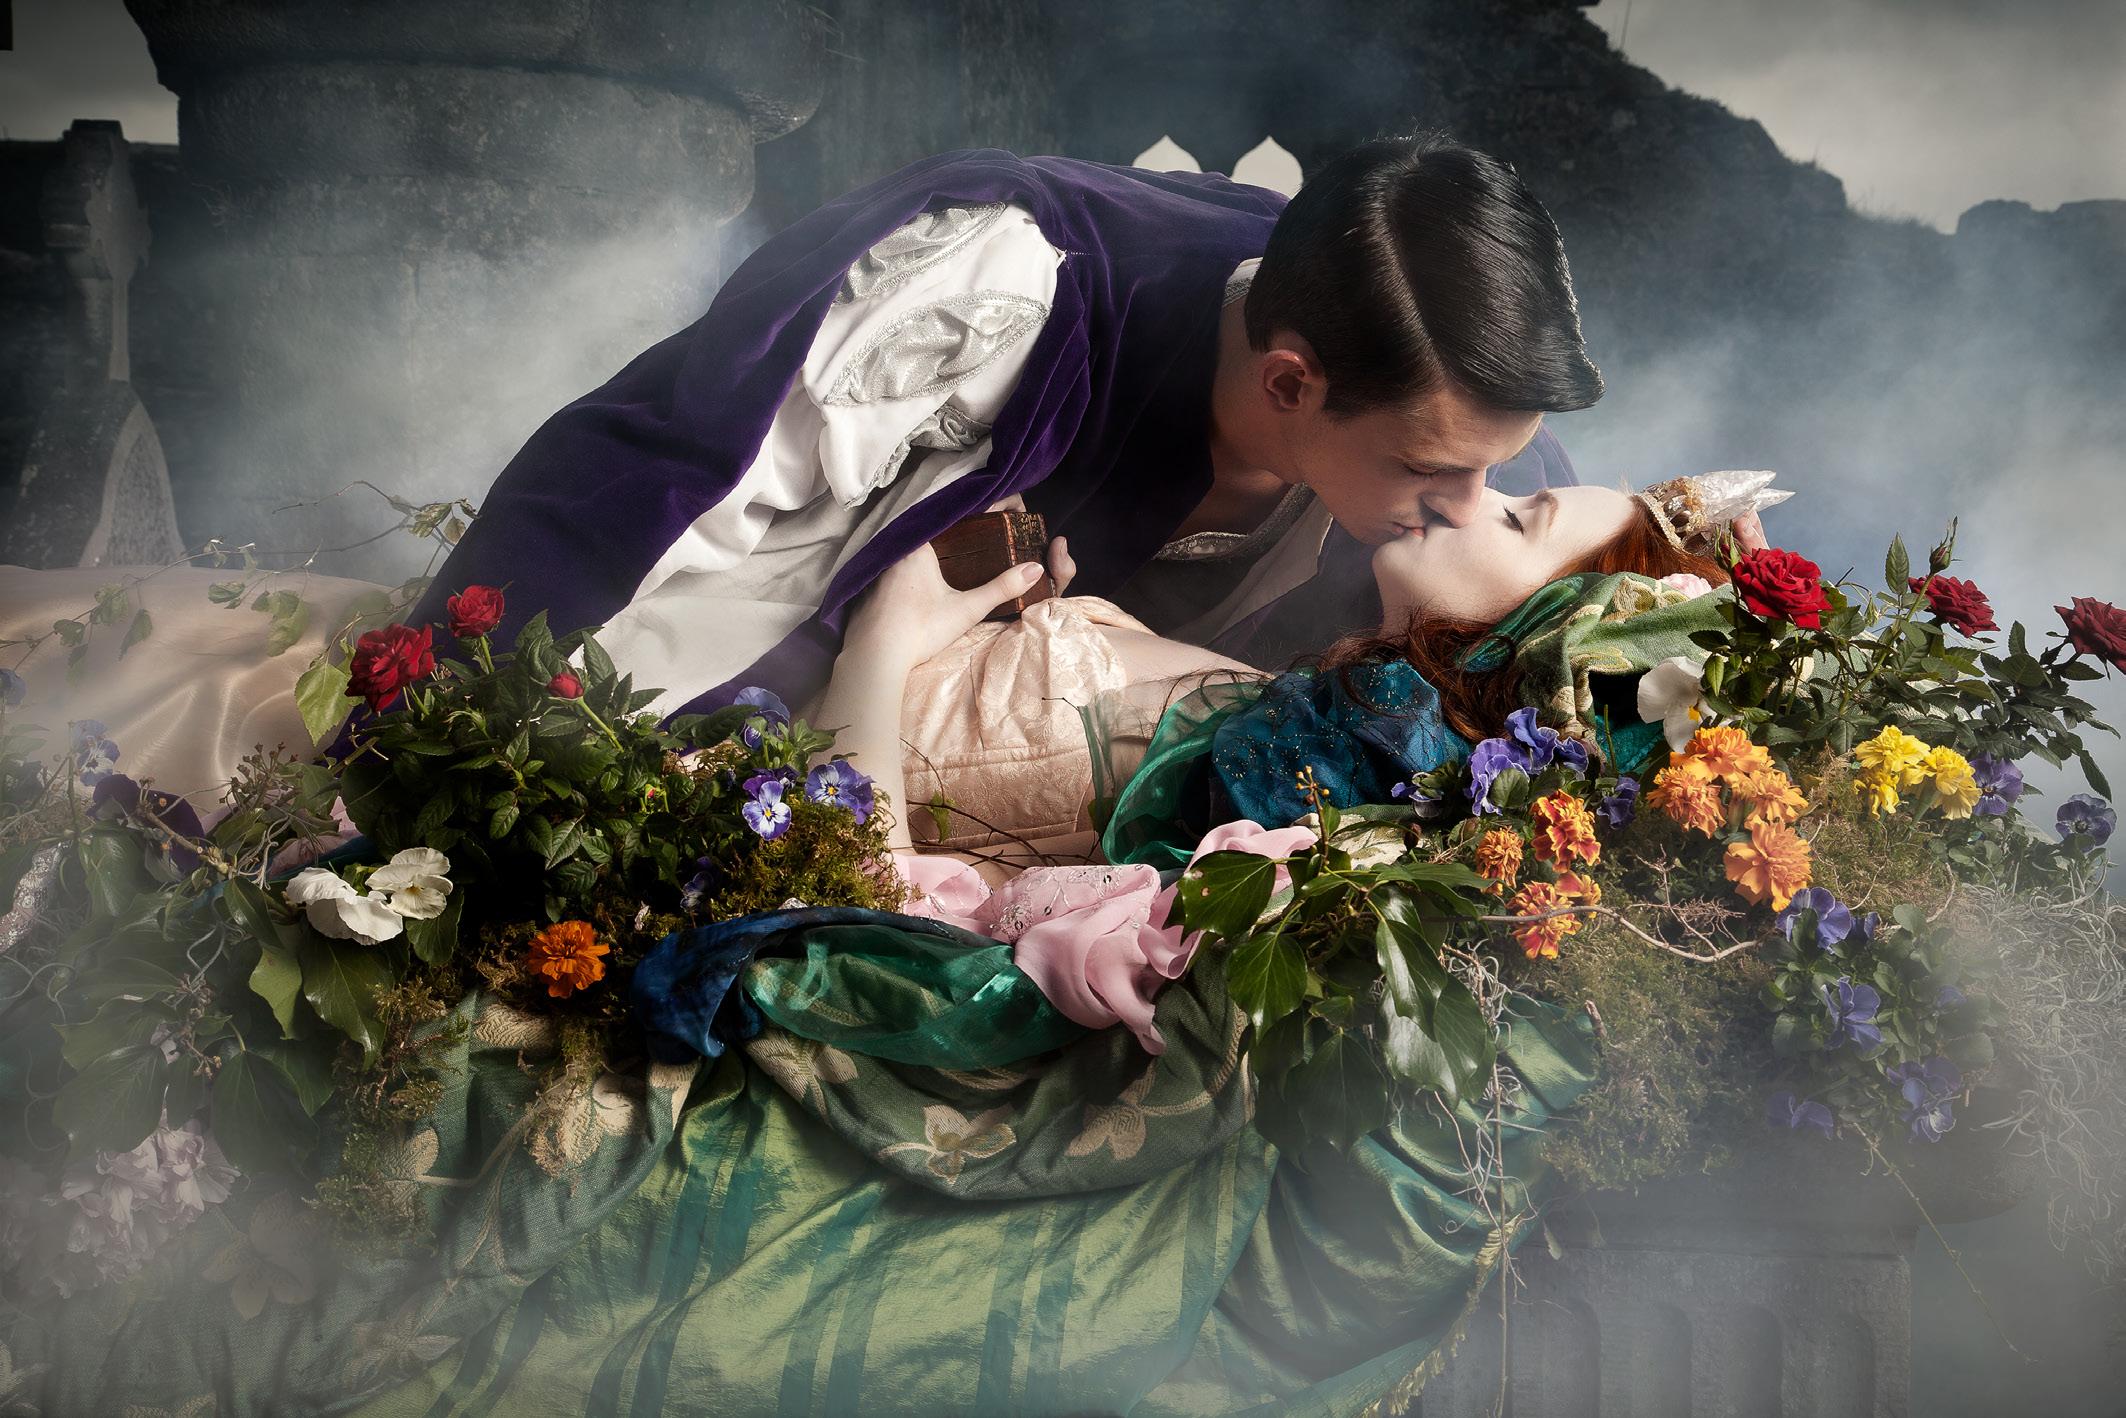
In the last issue I considered the various different types of image that might be called a portrait, and what might drive the photographer’s creative imagery. Here I offer my own personal example…. I see the world as a very dark place, with a lot of beauty in it, struggling to survive in the wilderness. We are billions of tiny lights flickering like candles, struggling to not get blown out or swallowed up by the darkness. This drives us to some very beautiful aspects of our nature, how we interact, we band together, laugh, cry, suffer, struggle, and prevail. It drives us to create and live out amazing stories. This is my way of seeing the world, and this way of seeing things informs how I express
myself creatively. Everything follows from this; narrative, lighting, composition, styling, posing, expressions, etc. In my personal work, this is at its most obvious, and it manifests in a number of ways. There is almost always a sense of foreboding, melancholy, and tension. In a lot of my personal work, it’s also taken to the extreme, as I often set the pictures in a distilled down fantasy version of our world, where it’s more in your face, like a really unforgiving mirror. In my editorial and commercial work, it’s often present in the mood and drama that follows from seeing things the way I do. I must stay true to the commercial brief, but my input manifests itself in a sense
of visual style. In commissioned ‘traditional’ portraits, I decide on an aspect of the person’s life or personality that I want to show, and I then still surround them to some degree with that sense of mood or drama. It’s not all about being dark, and tense, and generally, people are the ‘lights’ in the world, so I try to portray them accordingly.
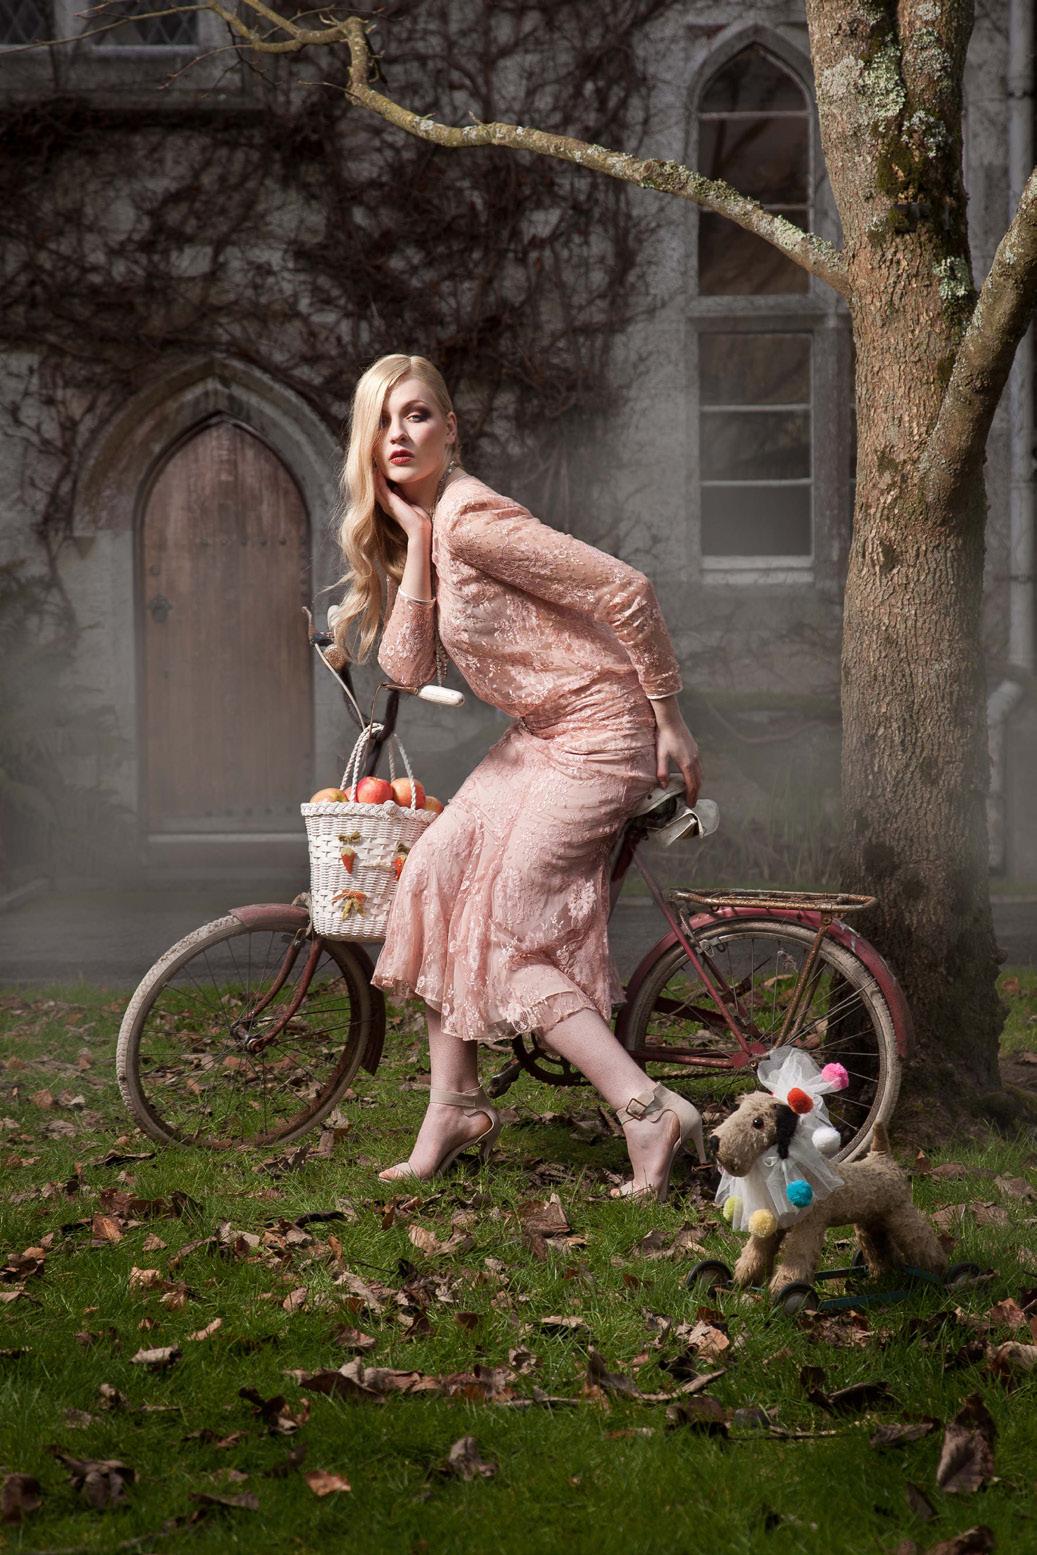
I like to think of it like this… A successful portrait should involve at least three personalities; the subject, the photographer, and the viewer. In a fantasy/theatrical, or similar narrative portrait where the sitter is the primary element in the composition, they are not necessarily the actual subject of
the portrait. The character they are playing is in my opinion, the subject of the portrait. This means in that case, you should have at least four personalities involved, adding in the character they are playing. The sitter/actor will undoubtedly bring something of themselves to the character. It’s important to note that this is only true when the sitter is in character, as opposed to just ‘in costume’.
Once you are clear on what you are trying to communicate, then you decide ‘how’ to communicate this.
If it’s a narrative: what is the story? What elements do you want to include/exclude? What is the mood? Following from the mood, how do you want it to look. Is it bright, or dark? What are the colours, and tones I would like to include? Is it on location, or. in studio? Indoors or outdoors? Do I need props, costume? What sense of scale do I want - does it need a lot of space, or a dramatic
landscape, or just enough background to tell the story?
If it’s a classic/traditional portrait: How do you want the person to come across? Apart from capturing a flattering likeness, what else do you want to say about them? Do you want to include elements from their life? Tools of their trade or interests?
Maybe it’s an environmental portrait. Is it someone in their home, or at work?
Everything follows from these questions. There are no right or wrong answers. They are examples of the decision making process to take you from what you want to communicate, through to the final image. Now is the time to decide whether it’s a picture of a red haired girl with freckles and blue eyes, or a picture of a man on a horse. This also helps you avoid having images with elements that really don’t hang together. It can be very obvious when people have jumped straight
into shooting an image, especially a narrative of some sort, where they haven’t really thought through the concept. Everything in an image should be there to support the narrative or the concept, but the amount of images that do not have an answer to the ‘why’ question is staggering.
So, you’ve decided on the mood, as you’ve now got a specific feeling you would like to evoke in the viewer. Next you can decide whether you are using available light (natural or ambient artificial) or if you want to use your own artificial light (flash or continuous). Neither is necessarily better than the other, and you should decide what you need to use to get you to the end result that you want. Many of my images contain a mix of flash and ambient light, but I will use everything from 100% available light to 100% constructed lighting, and all mixes in between.
When you are using lighting, one thing to bear in mind is the quality
of light you are using. People often don’t know when to use soft light or hard light, and some people are under the impression that soft light is always good, and hard light is always bad. The truth is that both are useful depending on the effect you want to achieve. Hard light mimics sunlight, and is great for evoking a sense of being outdoors on a sunny day, or if you want to create a gritty edgy look to your portraits. This is often great for commercial and fashion images, or for photographing rock musicians or athletes. Soft light generally mimics the kind of light that comes in a window that’s not in direct sun, or the light from a cloudy sky. Soft light is hugely favoured by traditional style portrait photographers as it can be very flattering and doesn’t accentuate skin blemishes. More important than the quality of light you choose is the attention you pay to where the shadows go. In the vast majority of cases, the main light should come from somewhere above the subject’s face, unless there’s an obvious reason for it to come from
below. I’ve come across countless traditional studio portraits which suffer from nose shadows running directly sideways across the cheek, or worse - upwards. When mixing artificial light with natural light, it’s a good idea to match the quality of your main light to the light in the scene. Hard light in a sunny scene, and softer light in a cloudier scene. Soft light (can be a reflector, or an actual light) is really useful as a second light in sunny conditions to lift the shadows on a subject.
Posing is probably the other key area that helps your communication to the viewer, and to present your subject in the manner that you want them to come across. Apart from some situations where your sitter is playing a character, and the narrative calls for the opposite, posing should generally be flattering. This is especially true in areas like traditional portraiture, corporate portraiture, beauty photography. This article is not about posing per se, and we could write a whole article on just posing, but I will take the opportunity to maybe address a few common
pitfalls that people fall into in this area.
One of the most common, and detrimental issues I see is where the subjects are leaning their torsos back from the camera. Nothing screams ‘I am not comfortable/ confident’ more than this. It also pushes their mid-section closer to the camera, making it appear larger, which obviously doesn’t flatter anyone. Asking them to kick their hips back and push their head forward while keeping their back straight and their chin level can help address this for some people. For others, where that doesn’t work, getting them to make a stepping forward motion, shifting their weight onto the front foot while leading with their head can be more effective. Whichever method works, run with it, but just be careful to avoid having them lean over awkwardly, and watch for slouchy shoulders. Subtlety in weight shifting is key here.
Some people tend to throw their heads back as well, and this can look really weird, especially in
formal/traditional portraiture where you don’t want to be shooting up their nose. Asking them to drop their chin and push their head forward a little can address this. If their chin gets tucked when they lower it, it’s usually because they are also pulling their torso back. A tucked chin can create double chins, make someone appear defensive, and restrict head movement. Keeping the chin forward will define the jawline, and dropping it a tiny bit can make someone appear less haughty and reserved. If you want to convey a slight sense of cockiness, in a character or dramatic portrait for example, it is OK to raise the chin slightly while keeping it pushed slightly forward.
If your subject is playing a character, or acting, avoid random positions. Sometimes people will try to make gestures, and will have hands floating in mid air, or will have no idea what to do with their hands and feet. The best way out of this is to give them an action to perform, rehearse it for a few minutes, and get them to adjust what they are doing with their hands, feet, eyes etc., on each run through. Resist the temptation to position them like a mannequin. With experienced fashion models, it’s possible to tell them where their range of motion is and the directions they need to stay in for lighting purposes etc., and even the rough geometry you need their body to be in and let them work away while you shoot. With most other people, though, you need to choreograph them and rehearse it with them until it’s fluid. People often underact in front of the camera. Showing them the pictures and explaining what you need them to change is often very effective in getting them to really ‘sell’ the motion or action you are trying to capture.
I could go on for volumes about the dos and don’ts in portraiture, but I really wanted to focus on the key elements that I think would be of most value to people developing their craft, based on the areas for
improvement I see time and time again. I also want to stay away from too many rules and conventions. Too often people jump straight into rules etc., before they have an understanding of what they are trying to achieve in the first place. In a nutshell, I guess we can sum a lot of the advice up like this: every portrait is really a story. Some are epic, and some are more simple. The final image is the climax of the story. We don’t start with the climax of the story. With every story, the best place to start is at the beginning. Don’t skip the beginning!l
NOISE REDUCTION IN HDR MERGES
SEAN GOODHART ARPS
Drone photography offers perspectives that have not previously been easily available to photographers. But the elevated viewpoint can create additional challenges to control for exposure. Sean Goodhart examines how a new tool available in Adobe Lightroom can be used to get the best results.
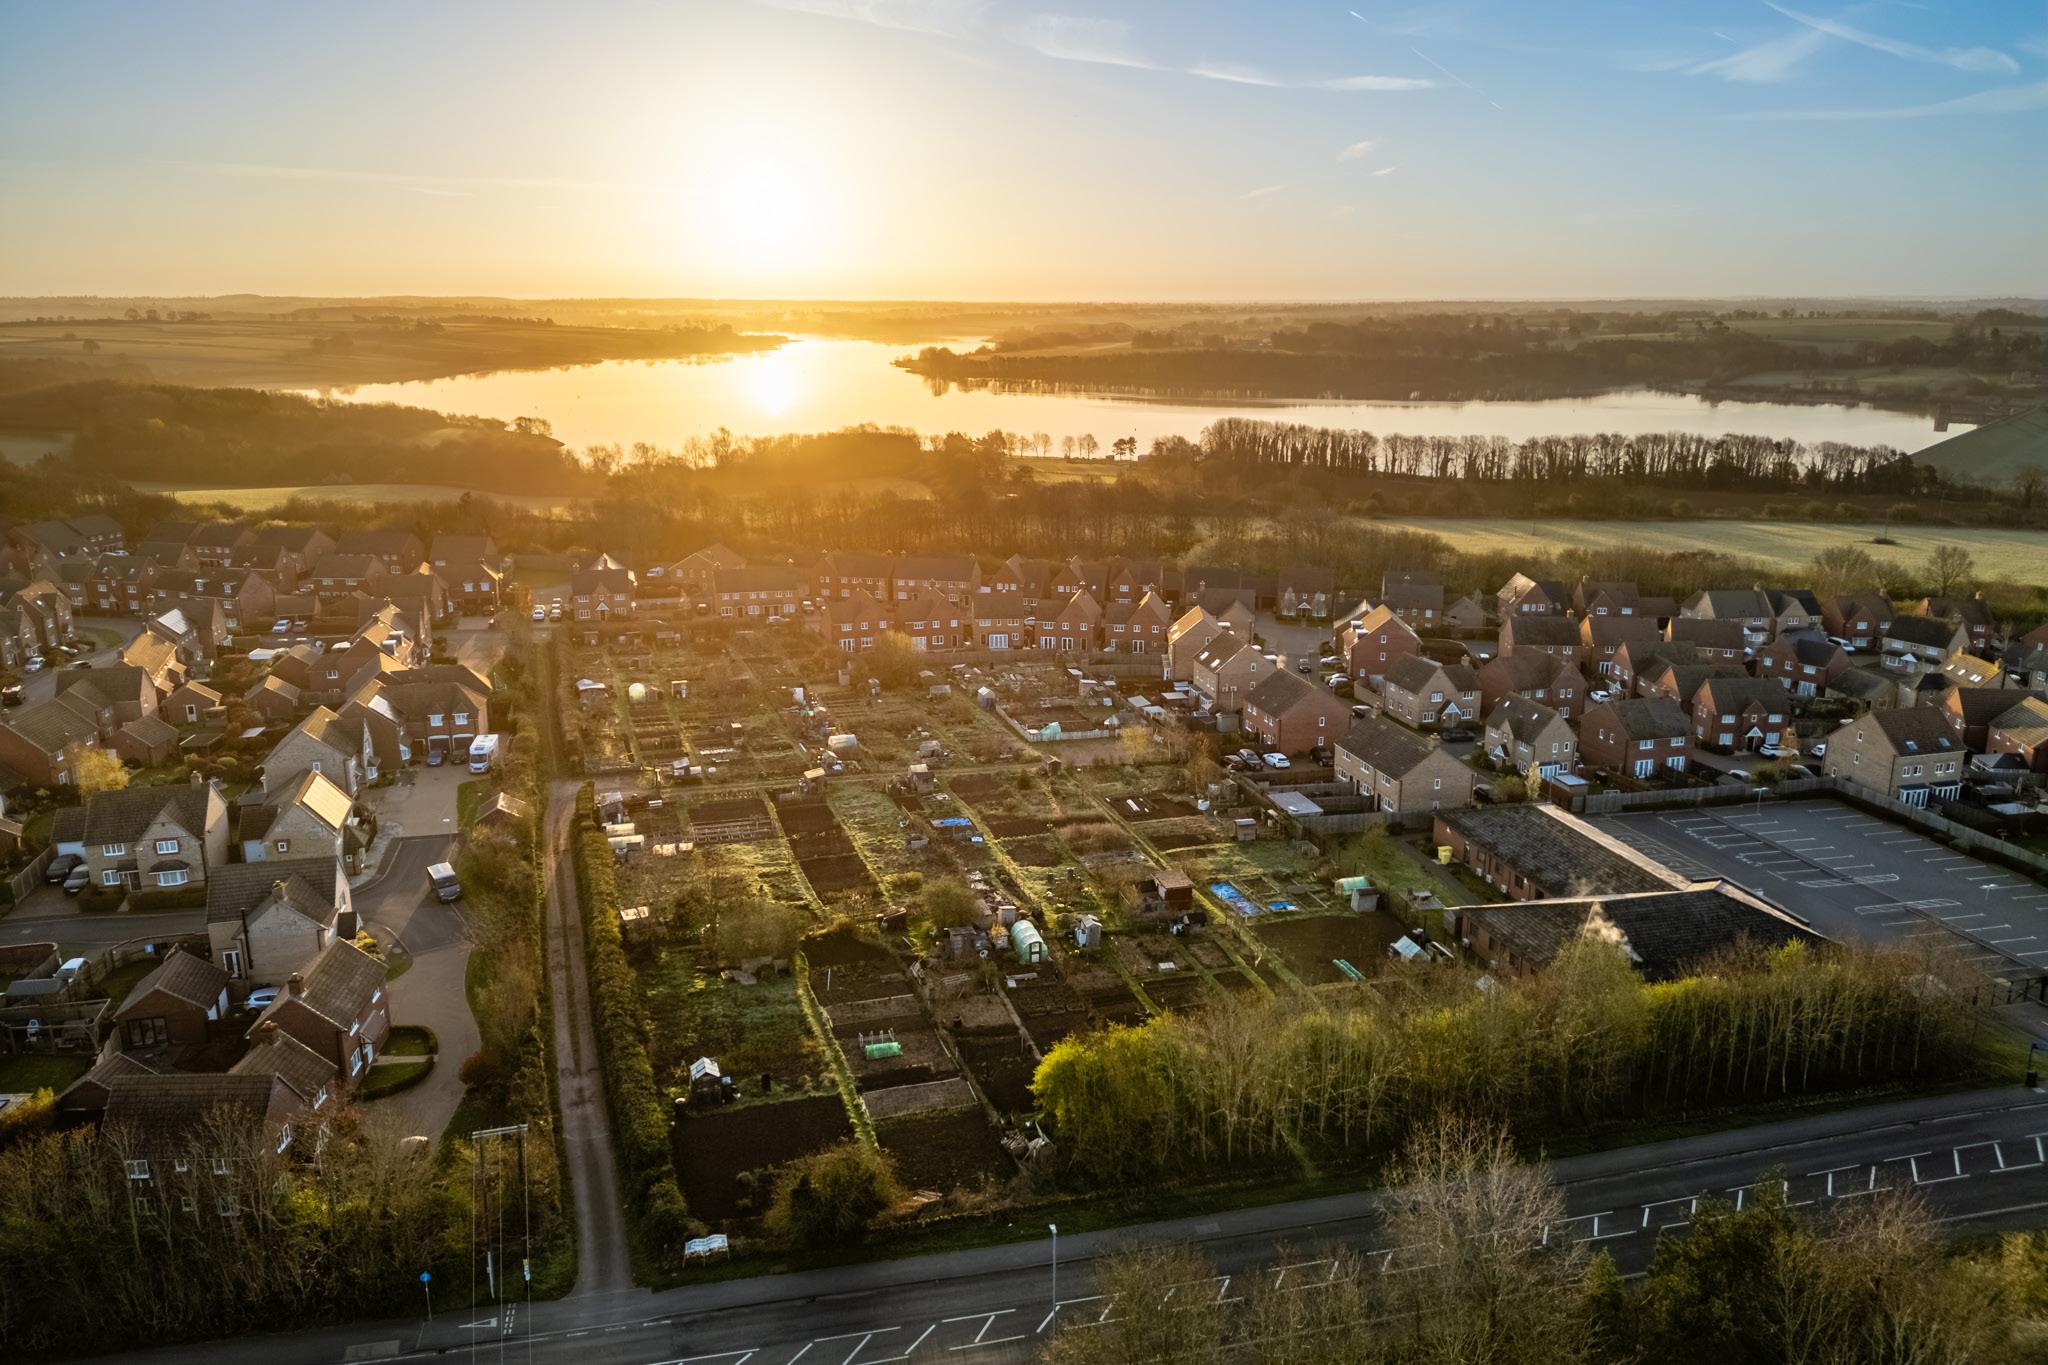
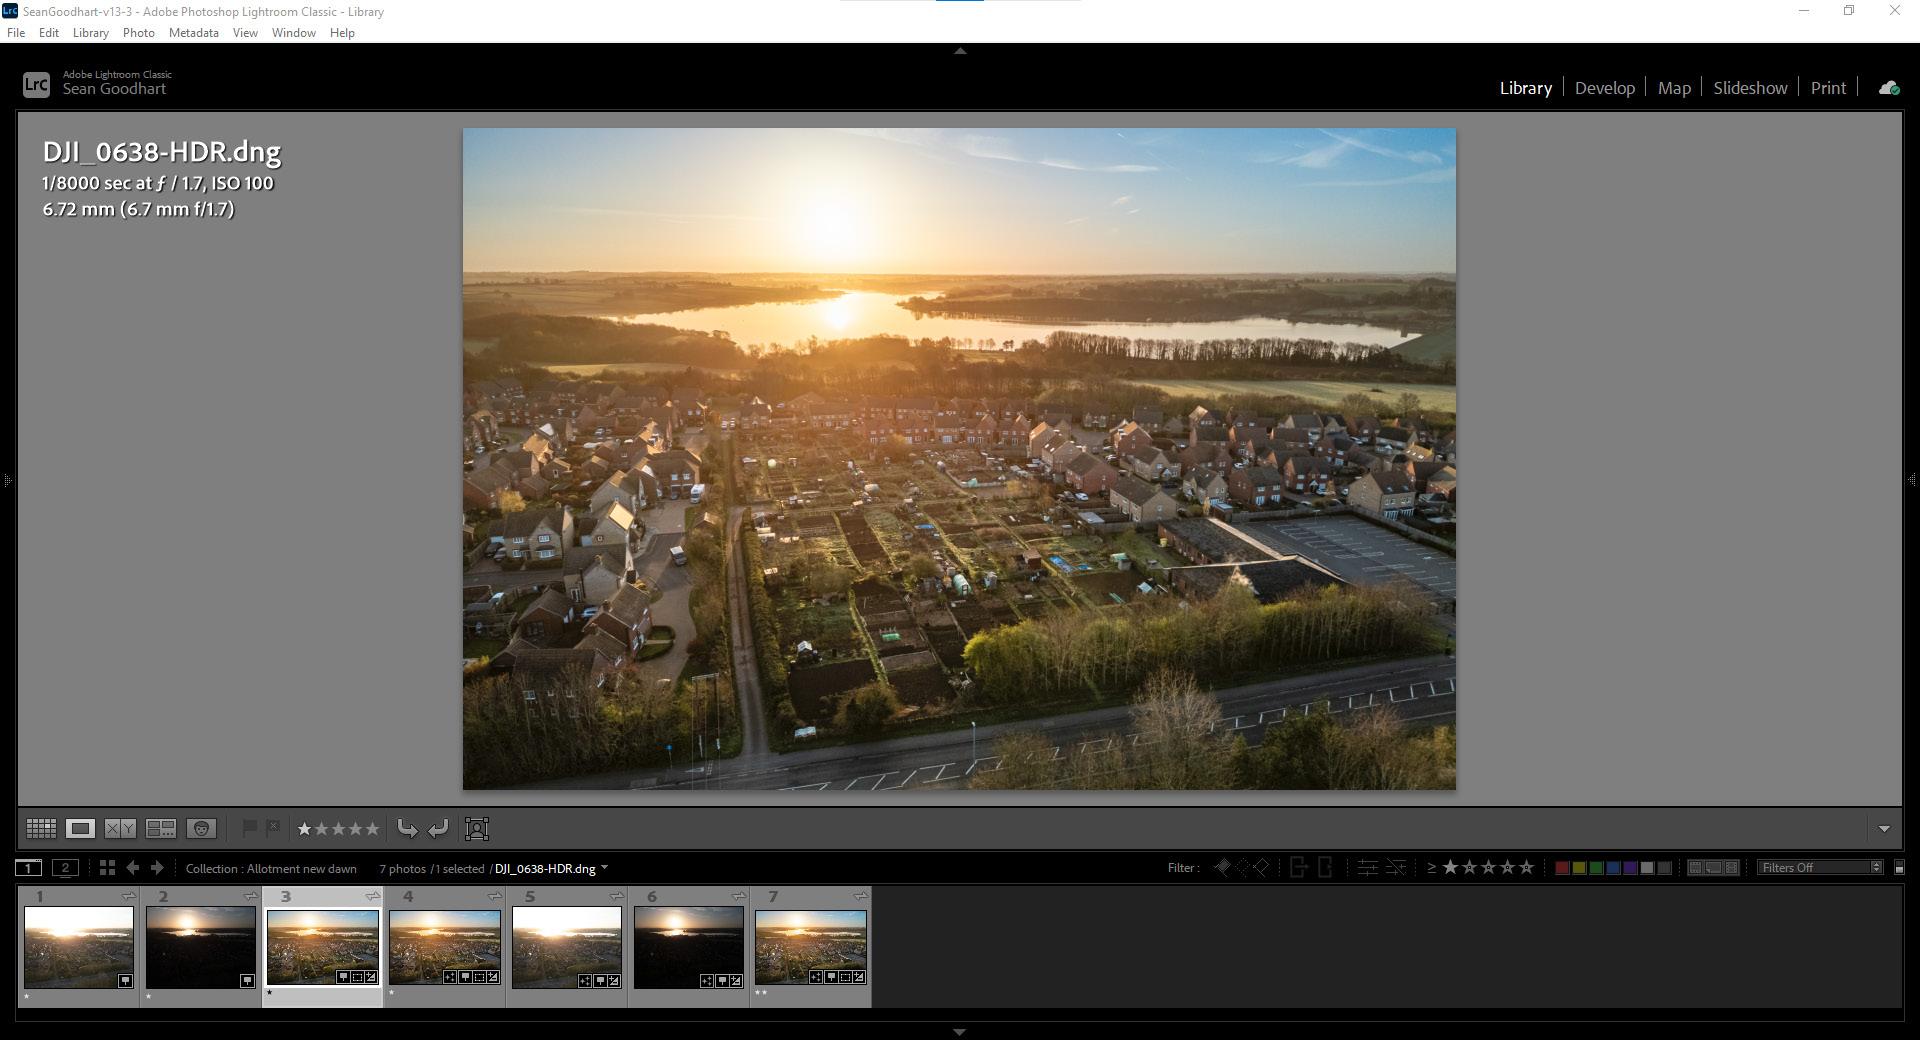
I was tasked with getting a drone image for a local magazine article talking about the district council taking ownership of a village allotment garden - a victory for a campaign to retain the space for gardening vs. the landowner wishing to sell for house building. I wanted to capture the sun rising over the village, emphasising a new start for the allotments (figure 1).
Clearly shooting against the sun is a challenge many of us have faced. My approach is to shoot images for the sky and land with appropriate exposure then fix using the high dynamic range (HDR) photo merge
tool in Adobe Lightroom Classic (LrC), see figure 2 for the result. I’ve talked about my use of HDR in a previous article (DIGIT issue 95).
A new option in Lightroom is to make use of the AI denoise toolreally useful in dealing with noisy sections of images where the noise appears from boosting exposure of shadows. I have found there’s an ‘order of execution’ benefit in how I use this new processing option. Let’s take a look at this…
Basic edit
My original starting place for edits is to perform an HDR photo
merge from the two original files, this is automatically named DJI_0638-HDR.dng based on the first of the original RAW files. I then apply my colour profile and use linear gradient masks for the sky plus reservoir and the ground, a ‘select sky’ mask for the sky alone and a radial gradient across the allotments. Each mask has appropriate edits for luminance, detail, clarity, colour. I also apply a couple of fixes with the ‘generative remove’ tool to remove some unwanted ‘green nasties’ from the lens flare; I’m interested in the result for the intended publication so not
Figure 1 Sunrise shot
stressed about ‘am I disqualifying myself from a distinction because less than 1% of the pixels in the image were computer generated’. After the edits are applied and I review at 100%, I see there’s some noise to deal with. Until the new AI denoise tool in Lightroom became available I would have just made quick adjustments with the colour and luminosity noise sliders; now I’ve seen the good stuff that the LrC/Lr/ACR AI denoise does I’m hooked on the drug. All the edits from the basic HDR result are carried through to the Enhanced NR version using the first approach below. I had to copy-paste the edits from the basic over to the image resulting from the second approach.
First method to denoise
Simply add the AI denoise as a final step on the combined HDR image. Select Enhance from the Photo menu, or right-click on the image and select. The enhance menu soon pops up after some initial processing. The challenge here is that an already processed image is not able to have ‘raw details’ enhanced - so this option is not available (greyed out) as shown in figure 3.
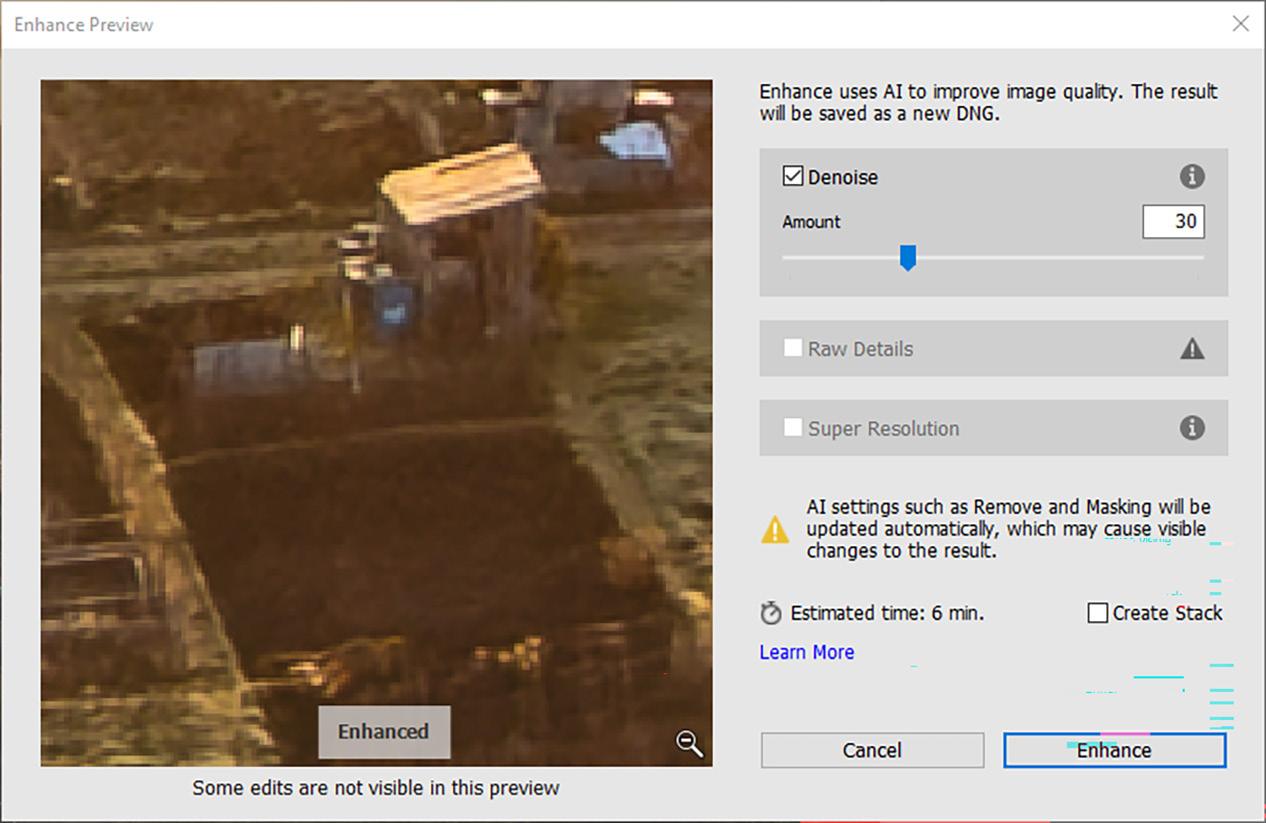
Another challenge is that I need to select one ‘amount’ setting for the whole image. Most of the time I find that the default 50 is ok, but sometimes I see I’m losing detail with the denoised image going mushy. I sometimes scale back denoise to 30 to ensure that details aren’t lost in the ground part of my drone images. The challenge then is that noise in the sky is not so well handled. After applying the denoise my resulting processed image is DJI_0638-HDREnhanced-NR.dng; the name being appended to show the operation that’s been performed. The edits from the DJI_0638-HDR.dng are automatically applied to the enhanced file.
Second method to denoise
Apply AI denoise to each of the HDR source images first.
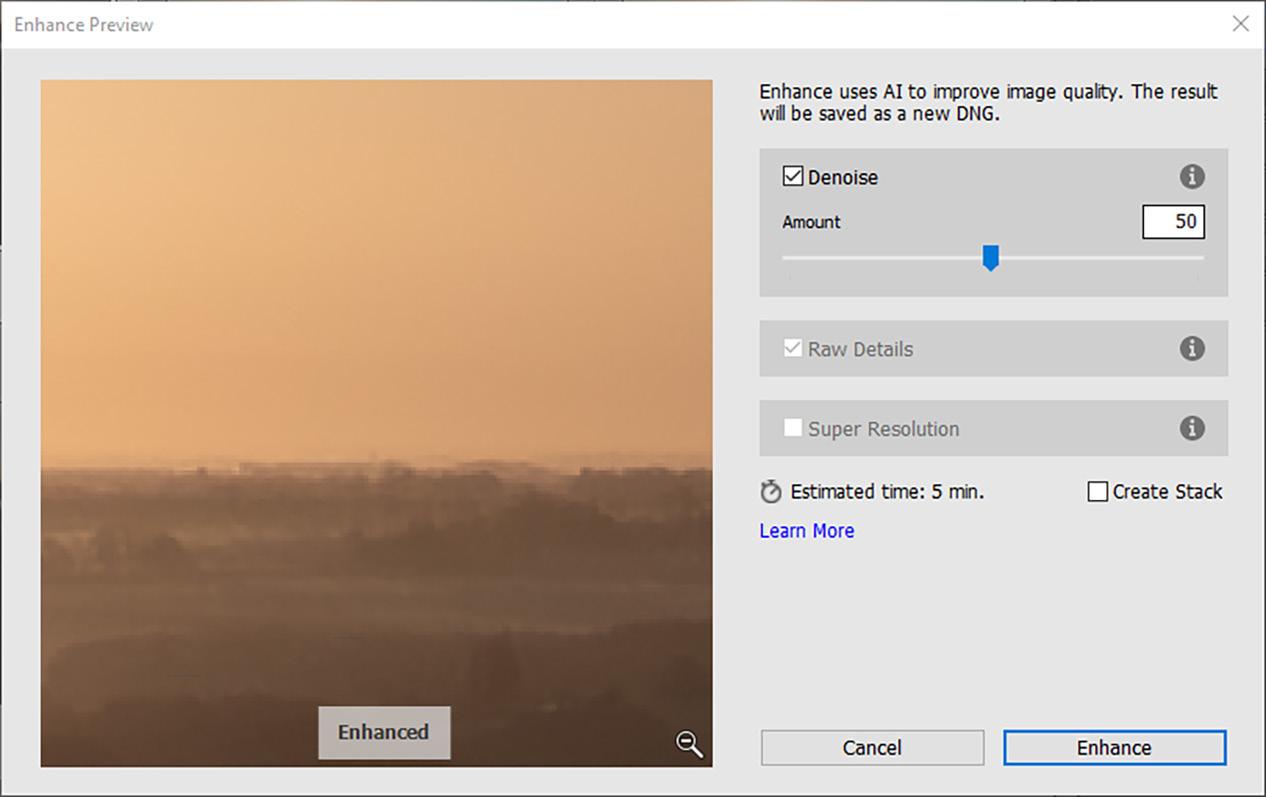
I process the ground image with denoise of 30, the sky with denoise of 50 - this combination allowing me to avoid excessive smoothing of the ground details. An important benefit of taking this route to the final image is that the ‘raw details’ option is used (see figure 4) - further improving the detail. I then use the Photo merge to HDR tool to combine these images, resulting
in DJI_0638-Enhanced-NR-HDR. dng. The automatic file naming helps keep track of the order of events. For this new file I need to copy-paste all the edits from the DJI_0638-HDR.dng.
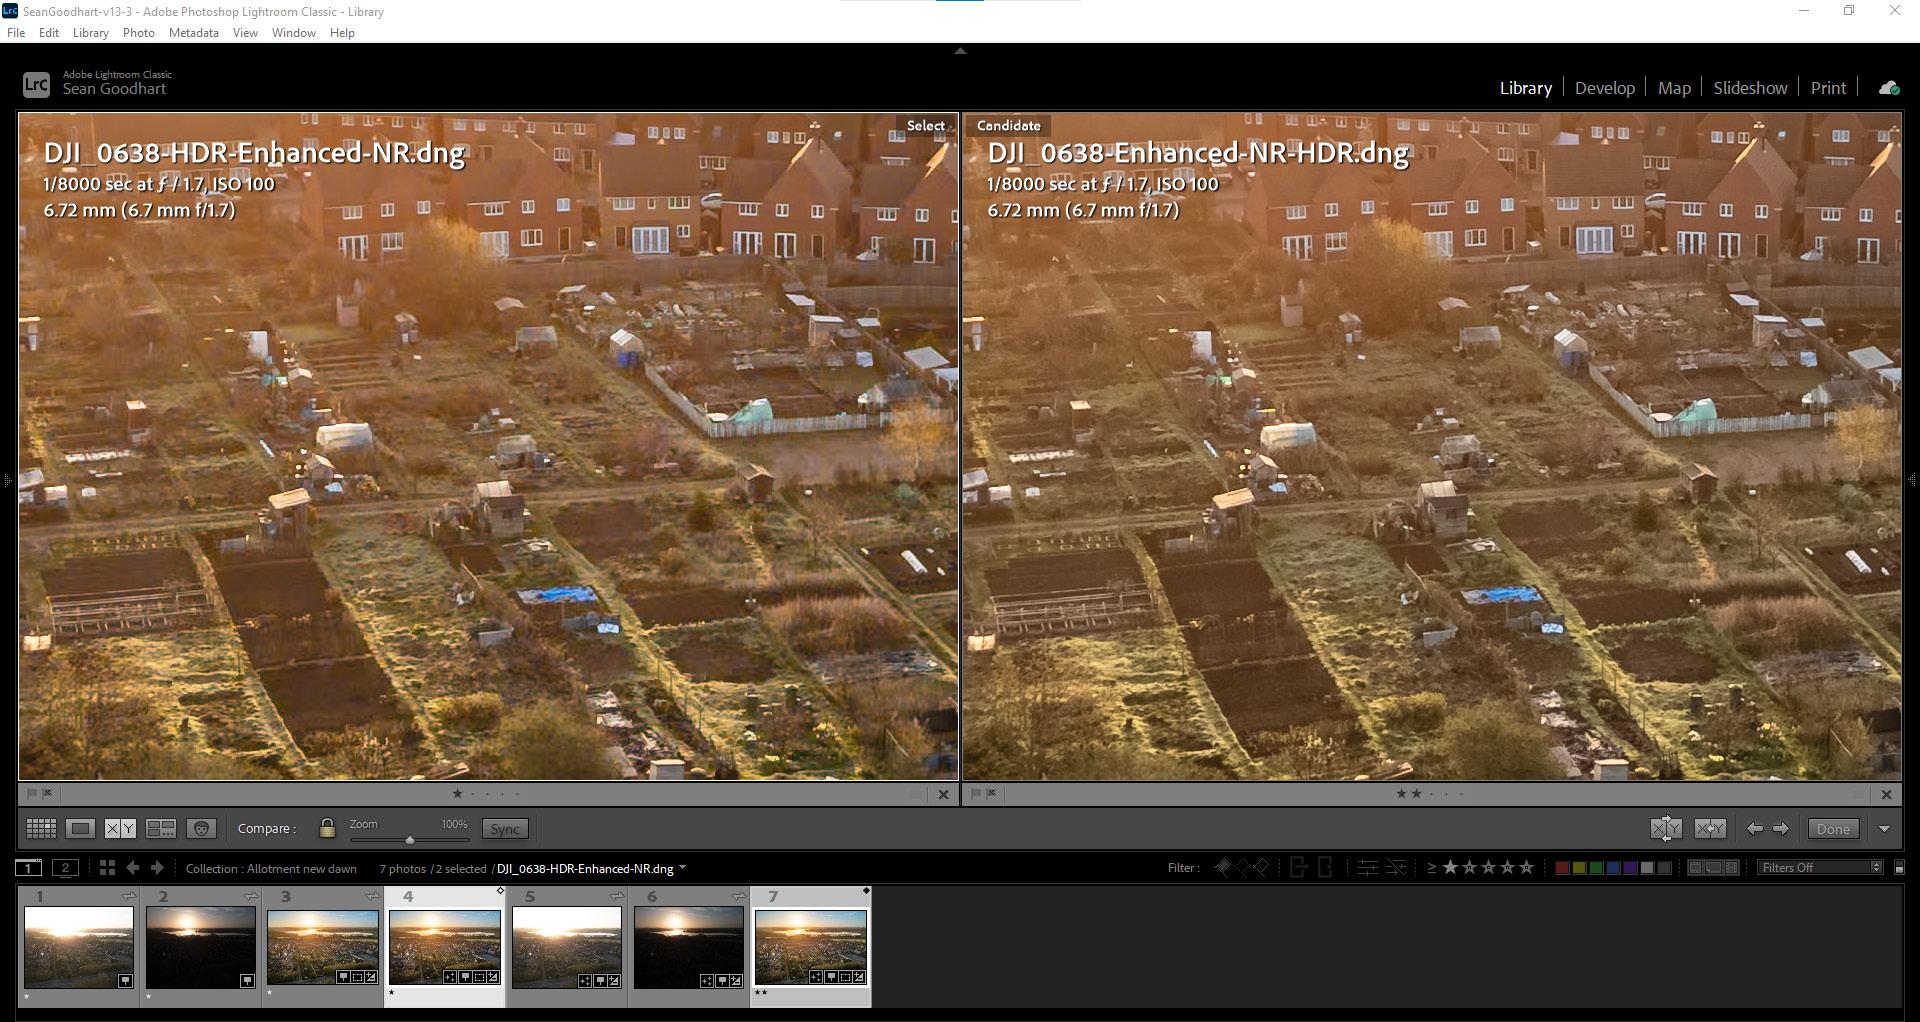
Comparing the first approach and second approach with a preview at 100% there are more details in the ground in the right image of figure 5, where I used the second noise reduction method applying noise reduction to the source images, compared to the left image which followed the first method applying noise reduction after HDR.
Concluding remarks
The Enhance tool is a powerful tool which is easy to use, but in complex use cases needs extra care to get optimal results. The combination of AI denoise and raw details recovery that the Enhance tool delivers is beyond what I can achieve in a few minutes of messing about with the sliders.
That the tool turns off the raw details feature if an image has already had HDR (or Panorama) processing is disappointing. The work-around is to apply Enhance to the source images first, then perform subsequent HDR (or
Figure 2 HDR result from two starting images
panorama) work. It’s worth noting that one can batch process images with the Enhance tool - but one loses the ability to individually set the Amount slider, all images being enhanced with the same setting. Batch processing prior to a panorama project makes a lot of sense - one can apply with fairly heavy denoise to a group of sky shots, then apply with less denoise to preserve ground detail.
Figure 4 Enhance allows selection of Raw Details tool on unprocessed images
Figure 3 Enhance will not do raw details on an already processed HDR image
Figure 5 Resulting Enhance-HDR vs HDR-Enhance at 100%
PHOTOGRAPHING SHETLAND’S UNDERWATER WORLD ACROSS THE SEASONS
BILLY ARTHUR
For many of us, underwater photography conjures up thoughts of tropical waters under a warm sun. Billy Arthur shows that stunning images of the continually changing underwater environment can be captured in Scotland’s rather more frigid waters.
I discovered diving in my twenties while travelling, with my first dive taking place off the coast of Cairns on the Great Barrier Reef. I’d been fascinated by marine life since childhood but hadn’t taken the plunge until I found myself on the other side of the world. From that very first dive, I knew it was something that would become a lasting part of my life. I bought a waterproof camera bag to use while snorkelling during my travels, but my real passion for underwater photography began when I returned to Shetland and slowly discovered the rich, vibrant world beneath the surface surrounding my island home - a true paradise for underwater photographers.
There’s a quiet kind of magic in diving the same site again and again - not for novelty, but for understanding. For me, that understanding comes not only through immersion in the water, but through the viewfinder of a camera.
As an underwater photographer based in Shetland, I’ve found that the real beauty of these northern waters lies not just in what’s visible, but in what’s knowable. And that takes time, patience, and a commitment to seeing a place through all its moods - through all its seasons.
Shetland’s underwater world isn’t the kind that shouts. It doesn’t dazzle with tropical colour or boast
the instant spectacle of coral reefs. Instead, it offers a more subtle, more textured kind of beauty - the kind that reveals itself slowly, over time, as the light shifts, the tides change, and the year turns.
And that’s exactly what makes it such a rich subject for photography.
Shetland’s photographic potential beneath the surface
From lush kelp forests to vividly decorated reef walls, Shetland’s underwater terrain is a cold-water photographer’s dream - if you know how to approach it. The clarity of winter, the explosion of life in summer, the low golden light of autumn - all these elements
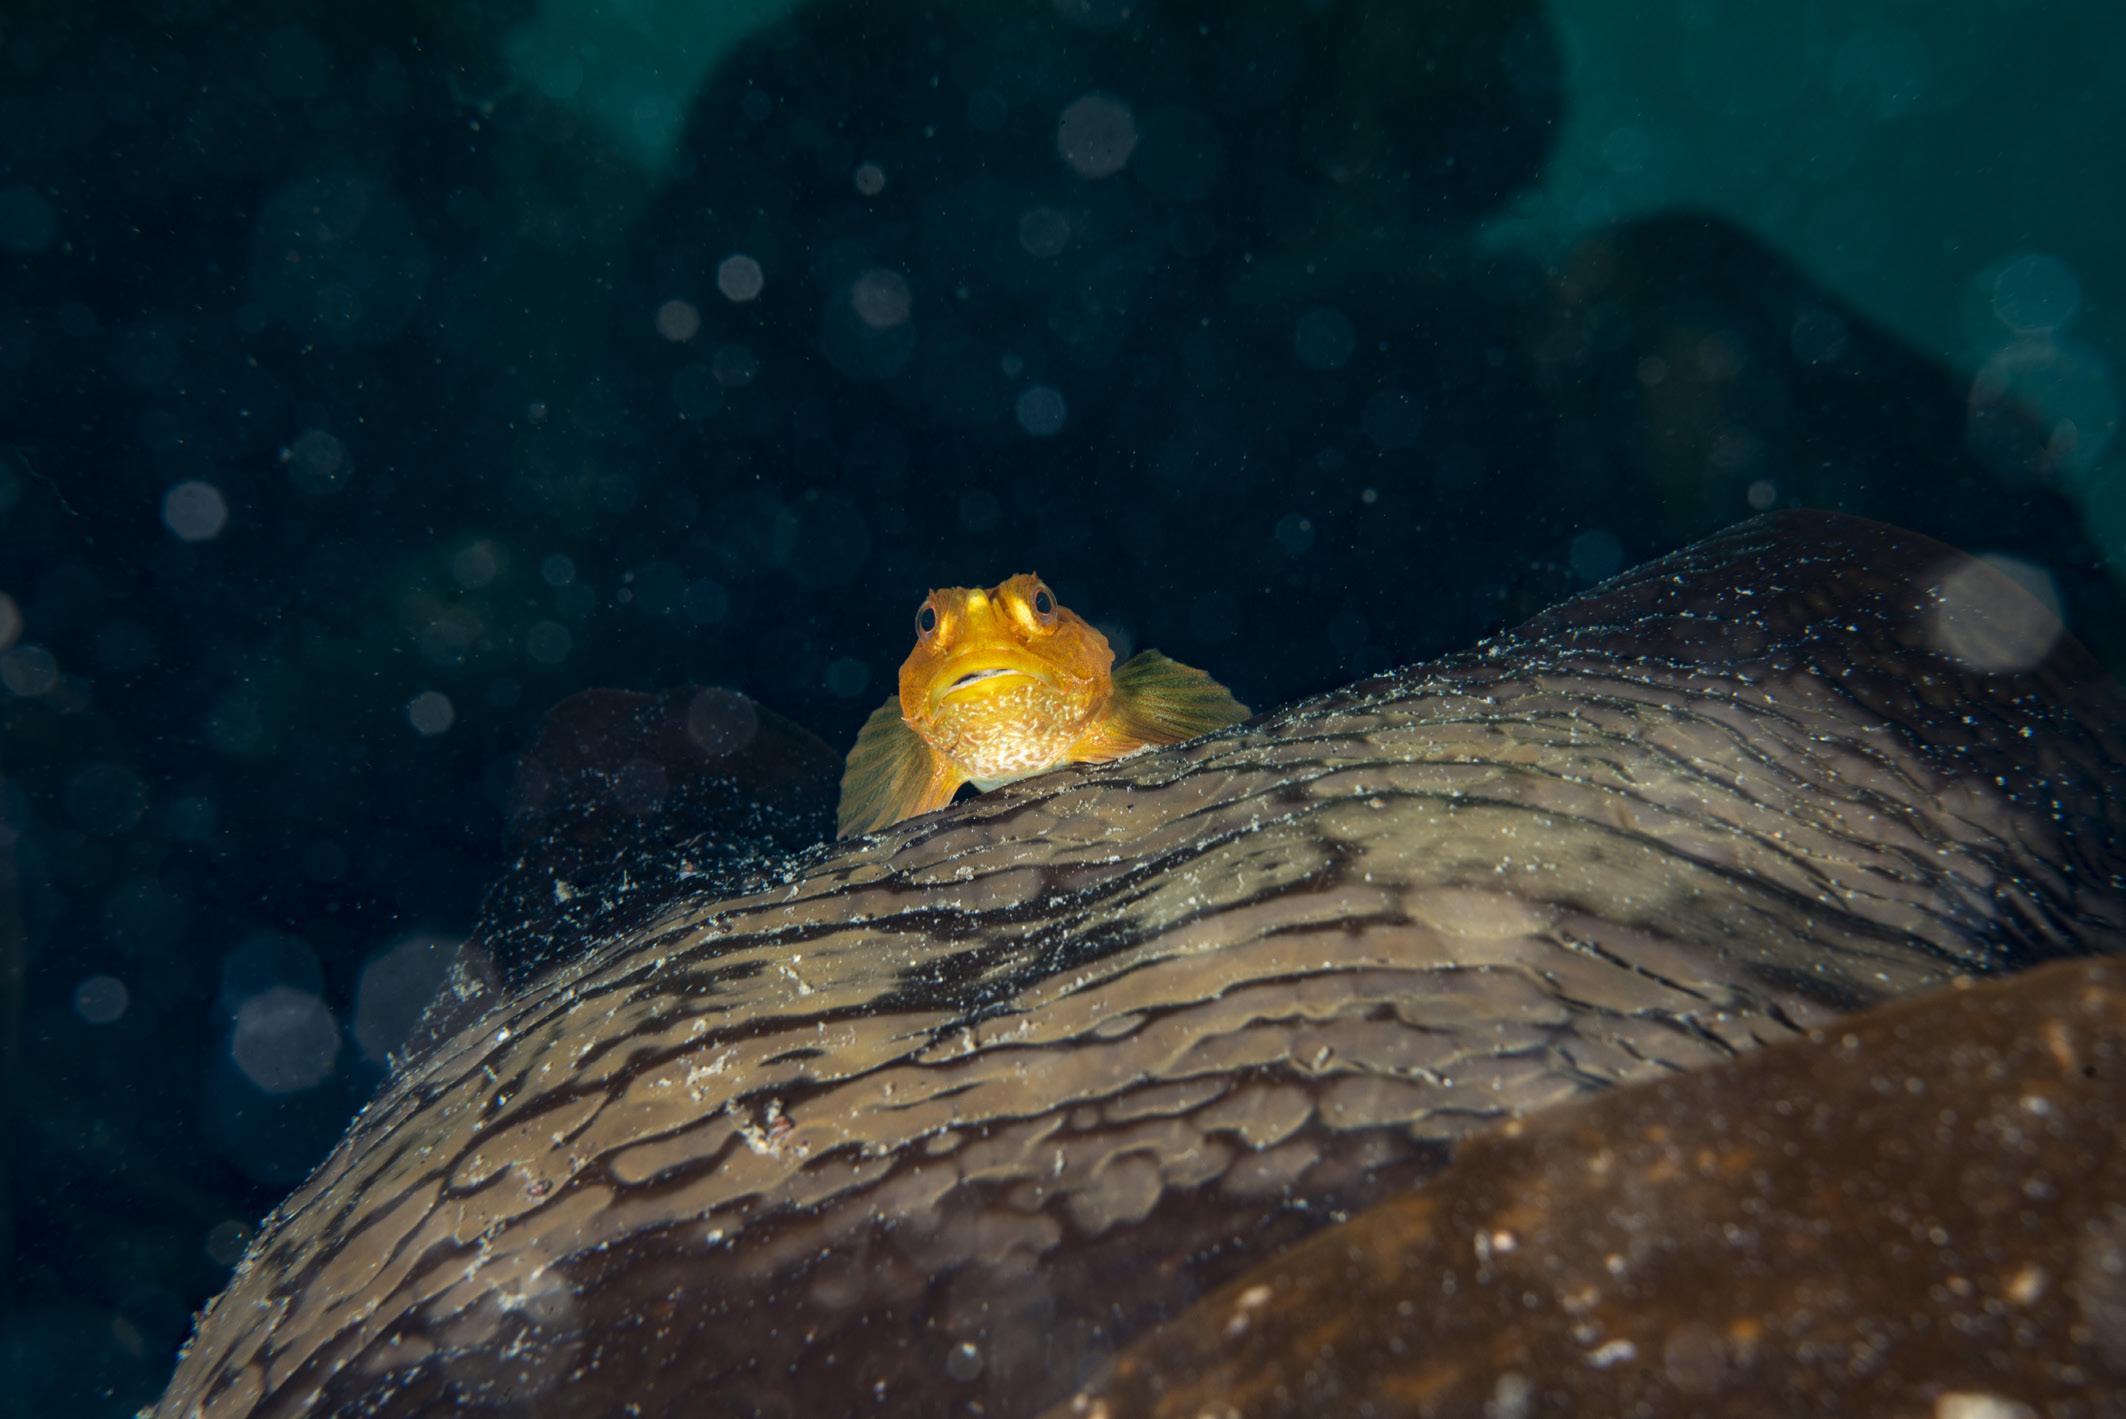
Sea scorpion on dabberlocks
combine to create scenes that are not only visually arresting, but deeply atmospheric.
What makes Shetland especially rewarding as a photographic environment is its seasonal rhythm. The same site can appear dramatically different at different
times of year - not just in colour and visibility, but in composition, wildlife behaviour, and even mood. That constant change invites a slower, more thoughtful approach to photography.
Over time, I’ve come to see each dive not just as a chance to
document what’s there, but as part of a longer-term photographic conversation with the place itself.
Returning through the seasons: a photographer’s practice
When you revisit a site through the seasons, you begin to learn its
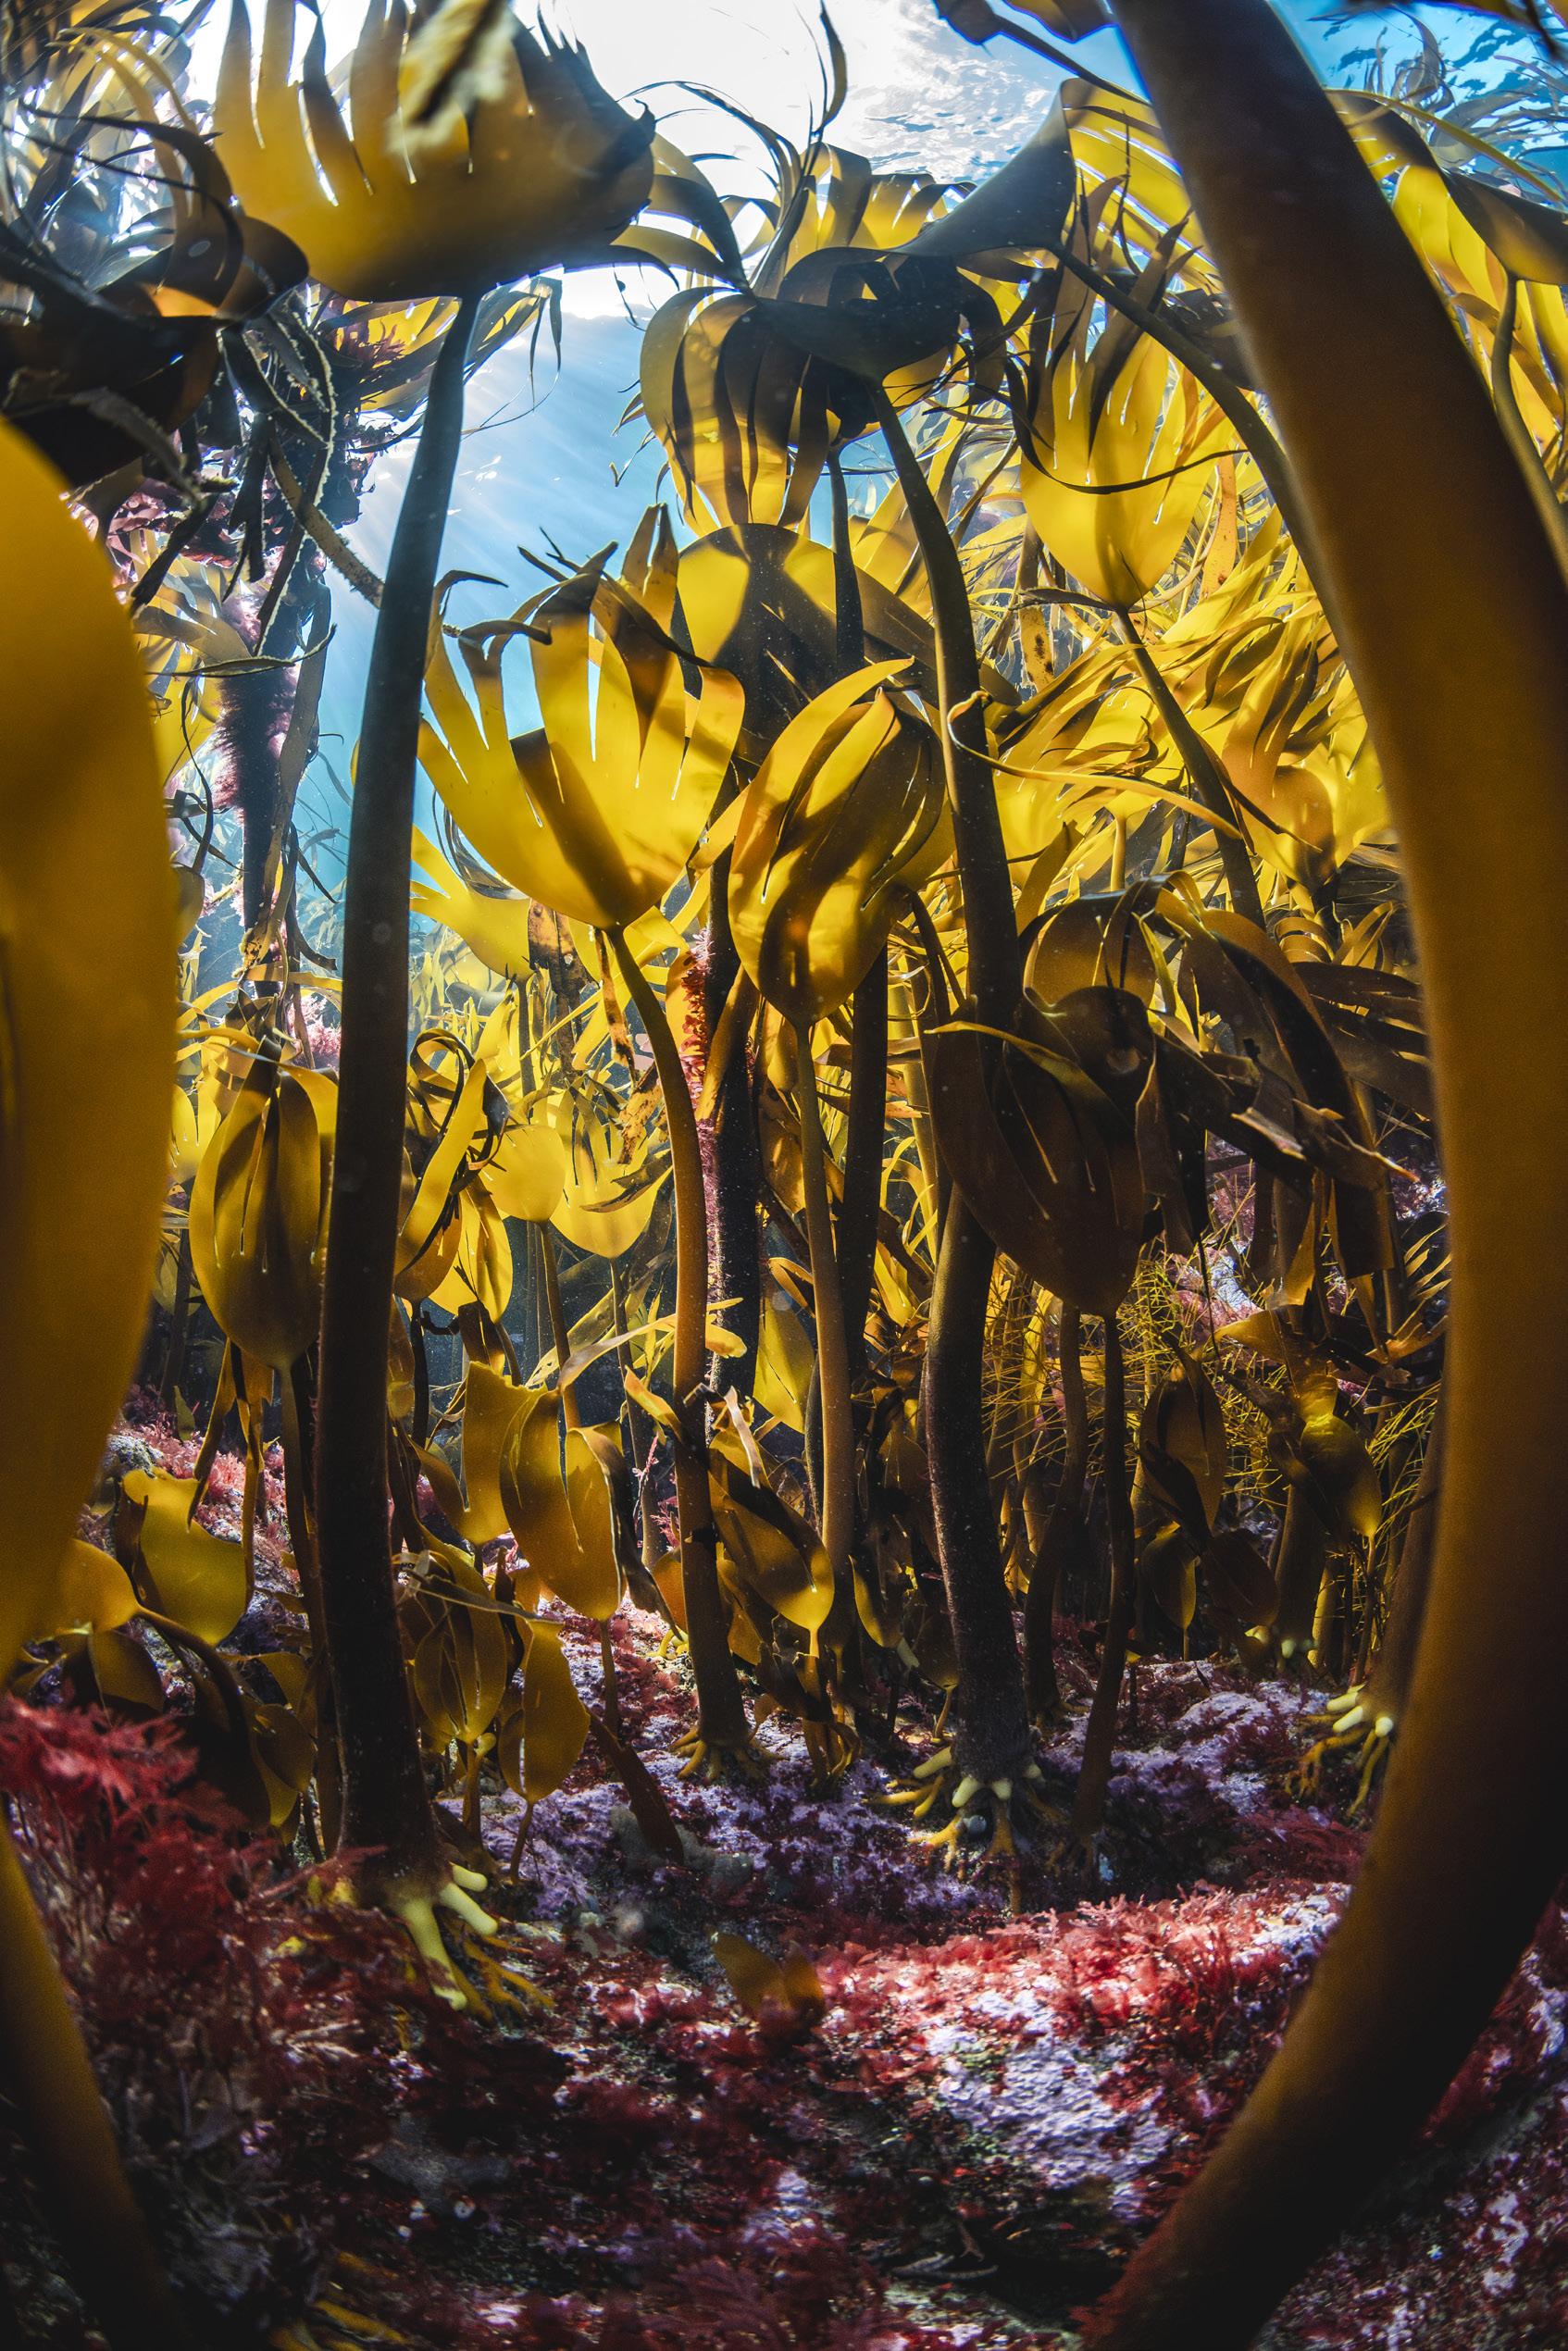
Golden spring kelp
language. You get a feel for how the light falls in midwinter, when the sun barely rises, versus in midsummer, when it lingers just above the horizon, casting long golden rays into the shallows. You learn when plankton blooms will soften your shots with a painterly haze - or obscure them entirely. You know
when certain species will appear to spawn, feed, or vanish.
This knowledge is gold for a photographer. It allows you to plan shoots with intention - not just reacting to what’s in front of you, but anticipating the right moment, the right behaviour, the right light. You
start to compose your shots before you even hit the water.
For instance, I have a particular site on the west side of the islands - a sloping kelp-covered reef that drops into a deep bowl of sand and boulders. In early spring, it’s stark and minimal: long shadows, clean lines, subtle colours. In summer, it
u
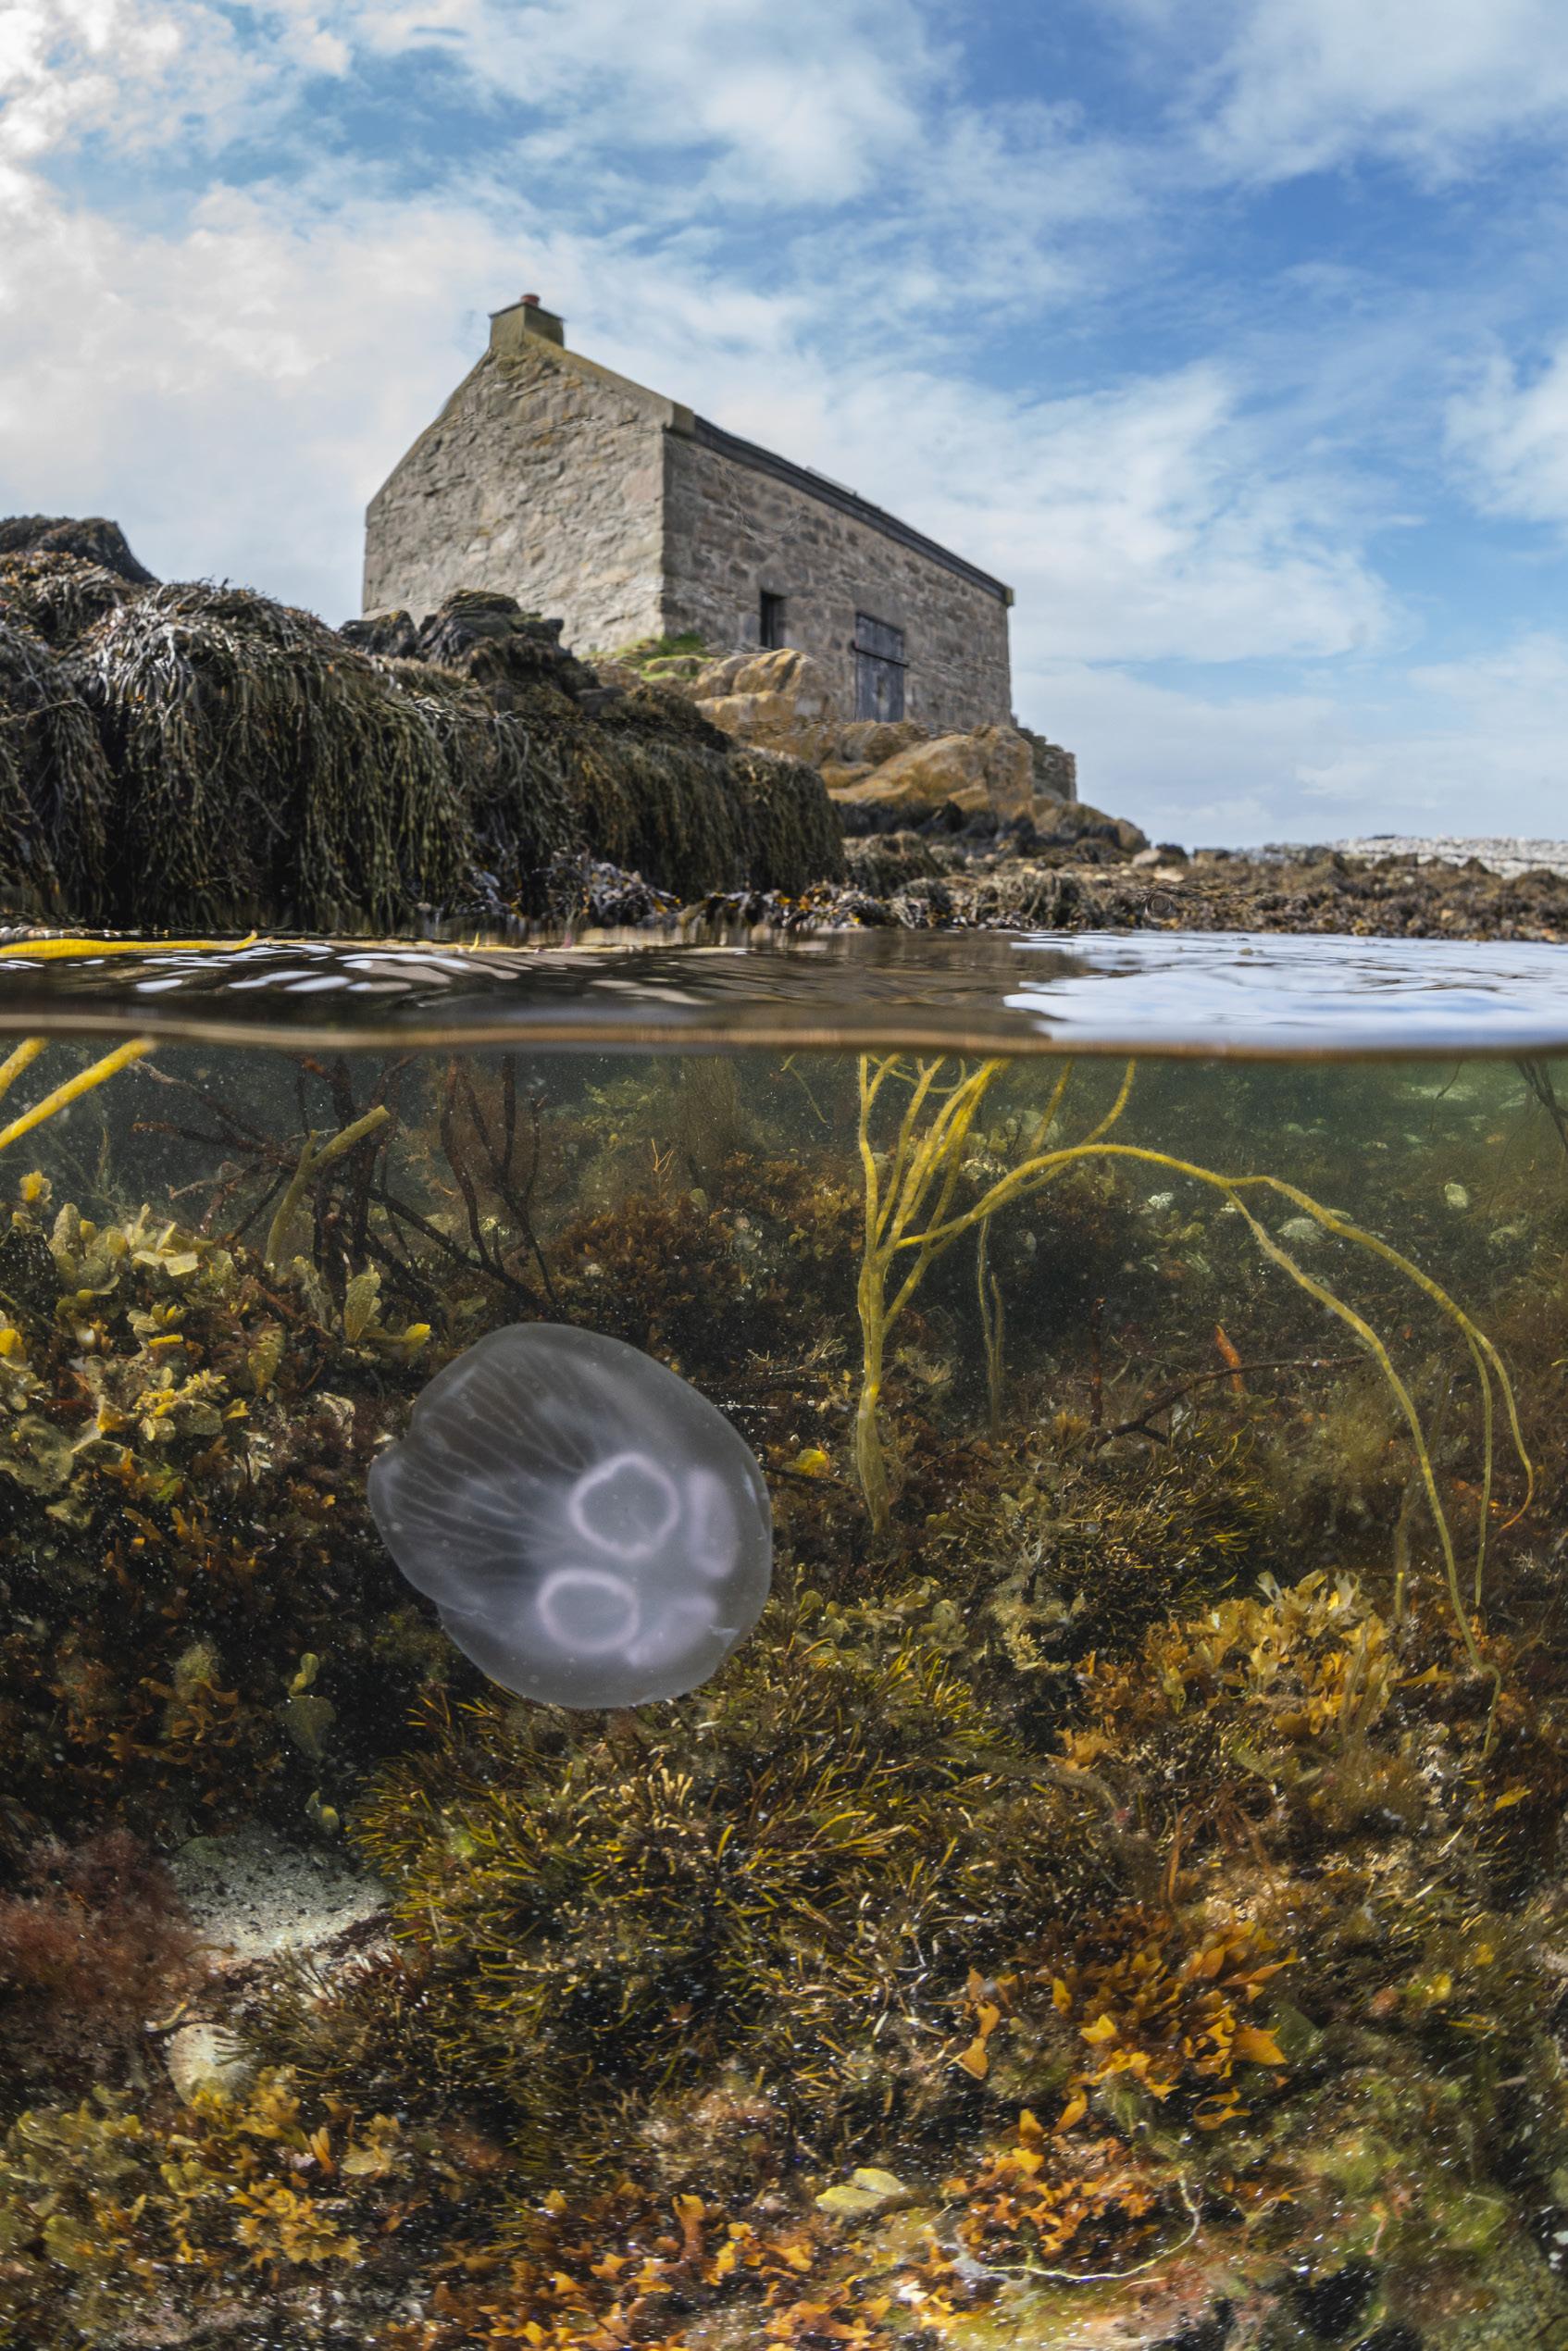
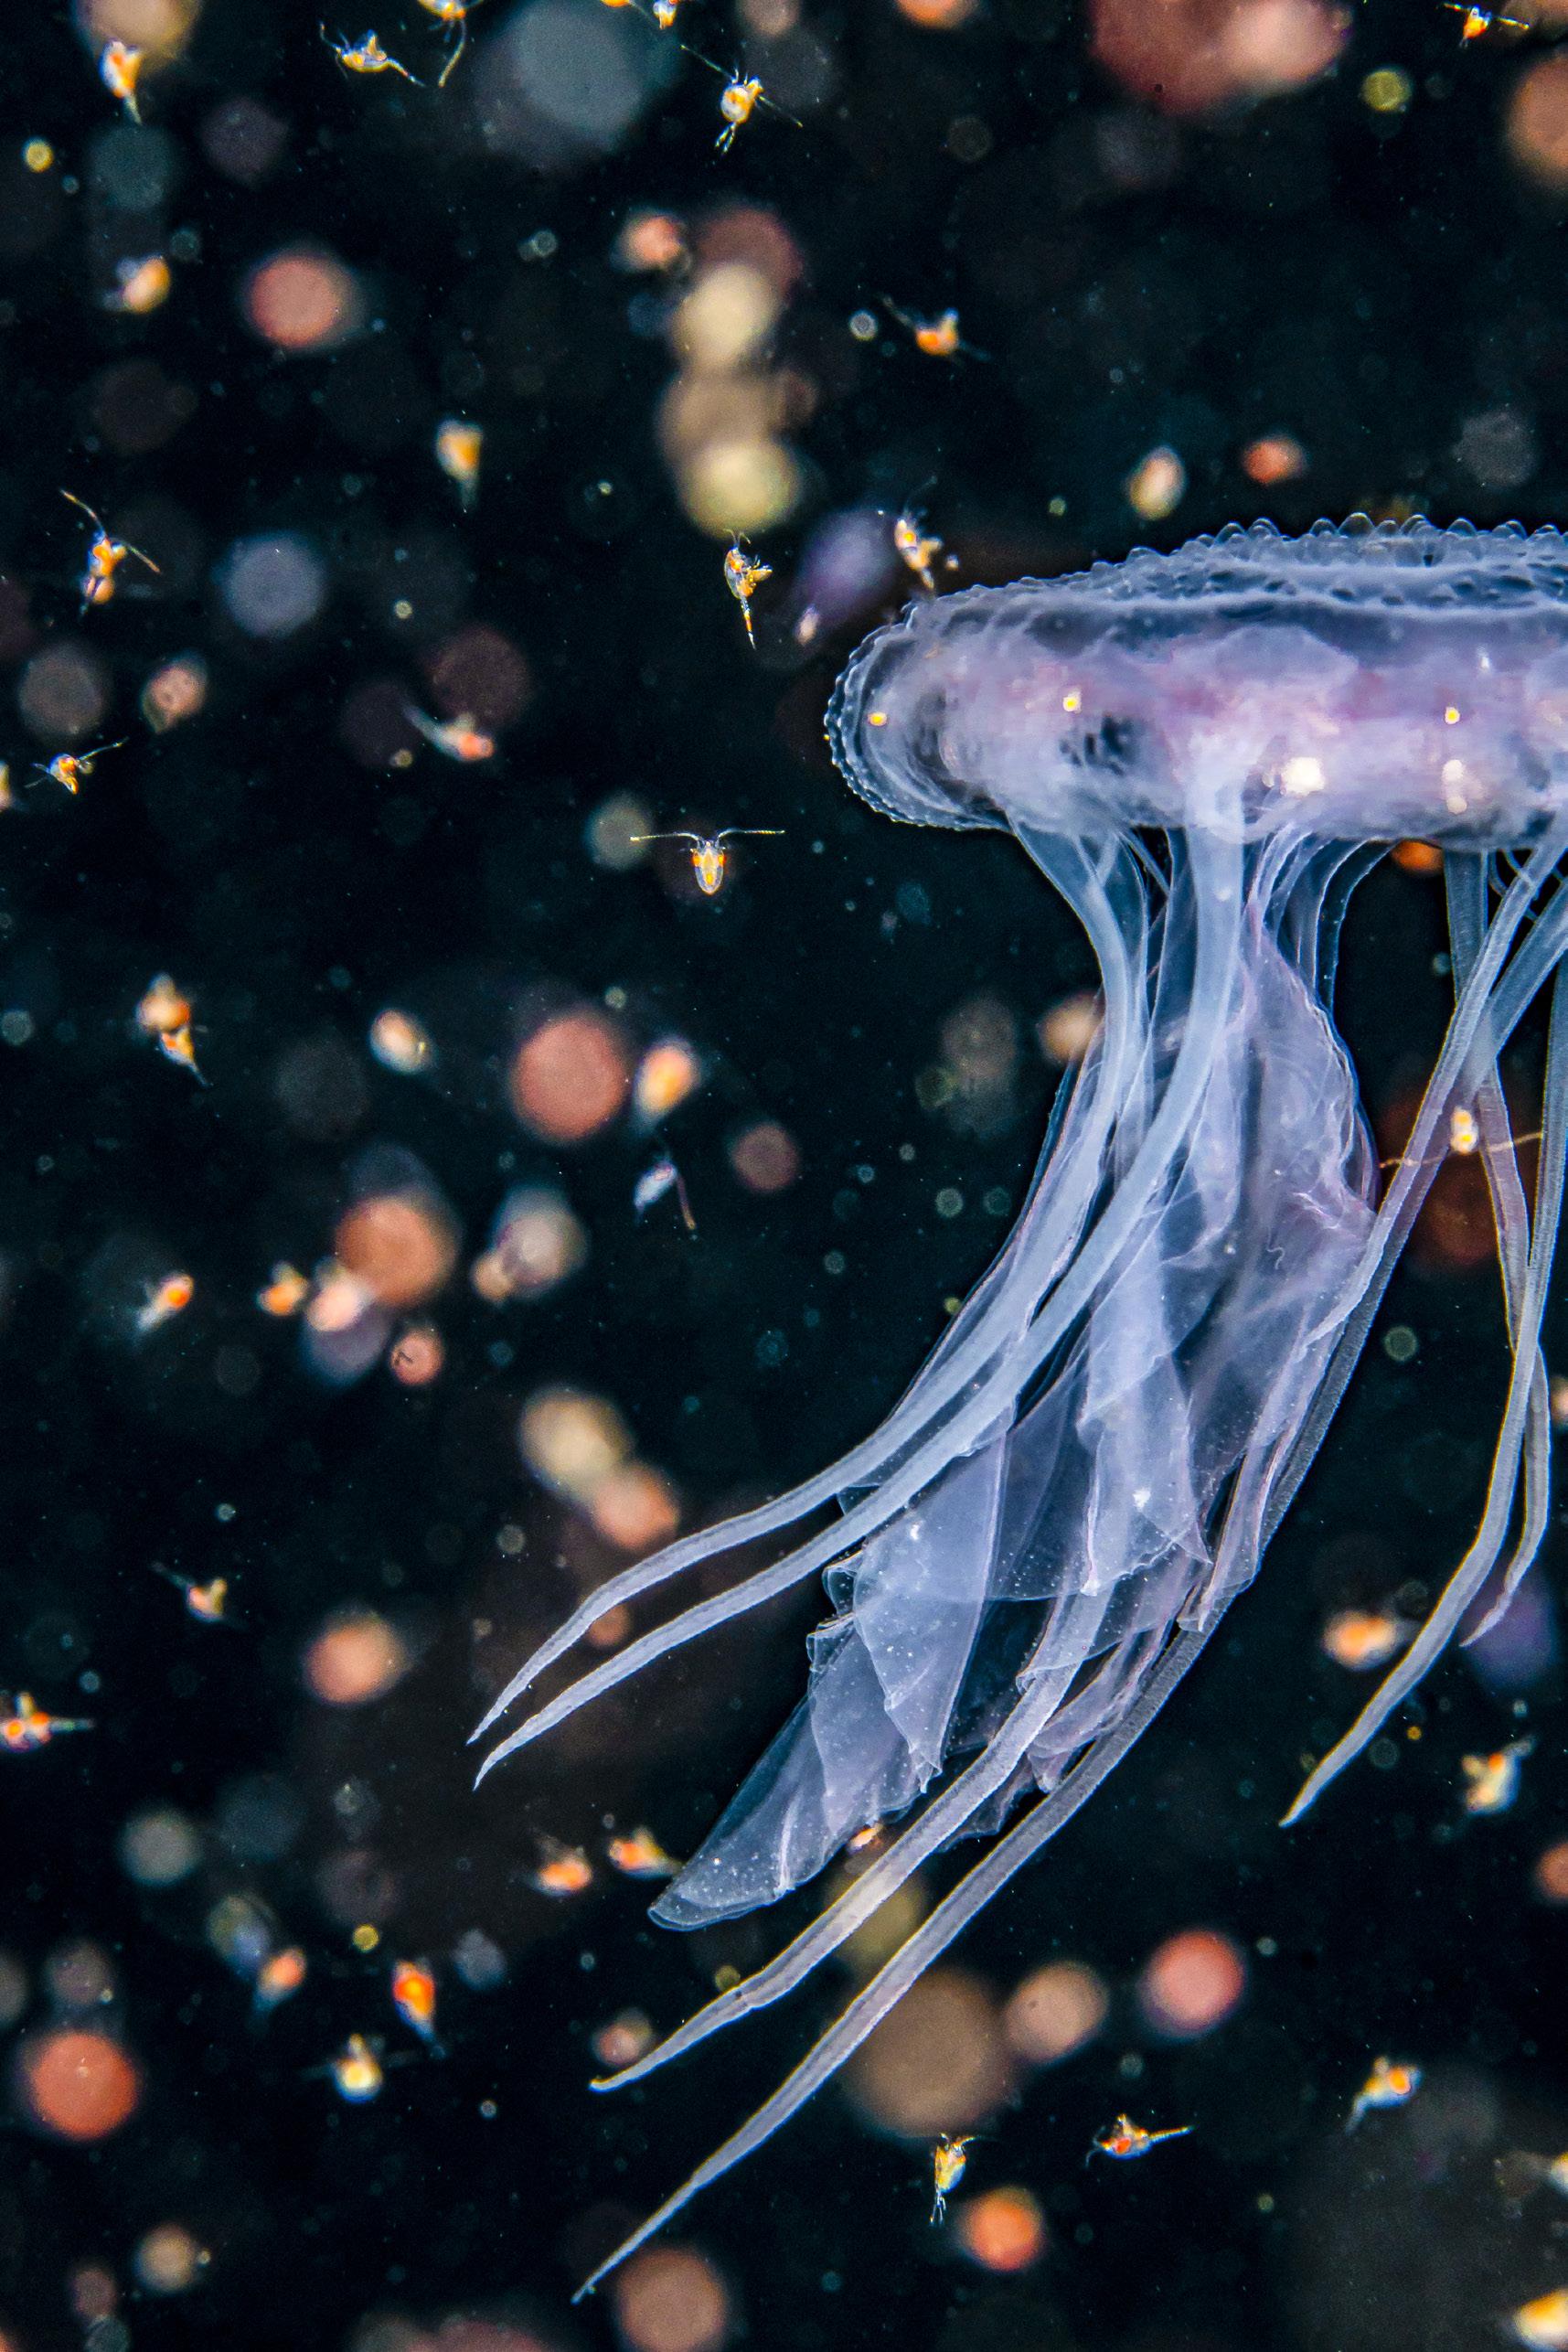
Moon jelly below Böd
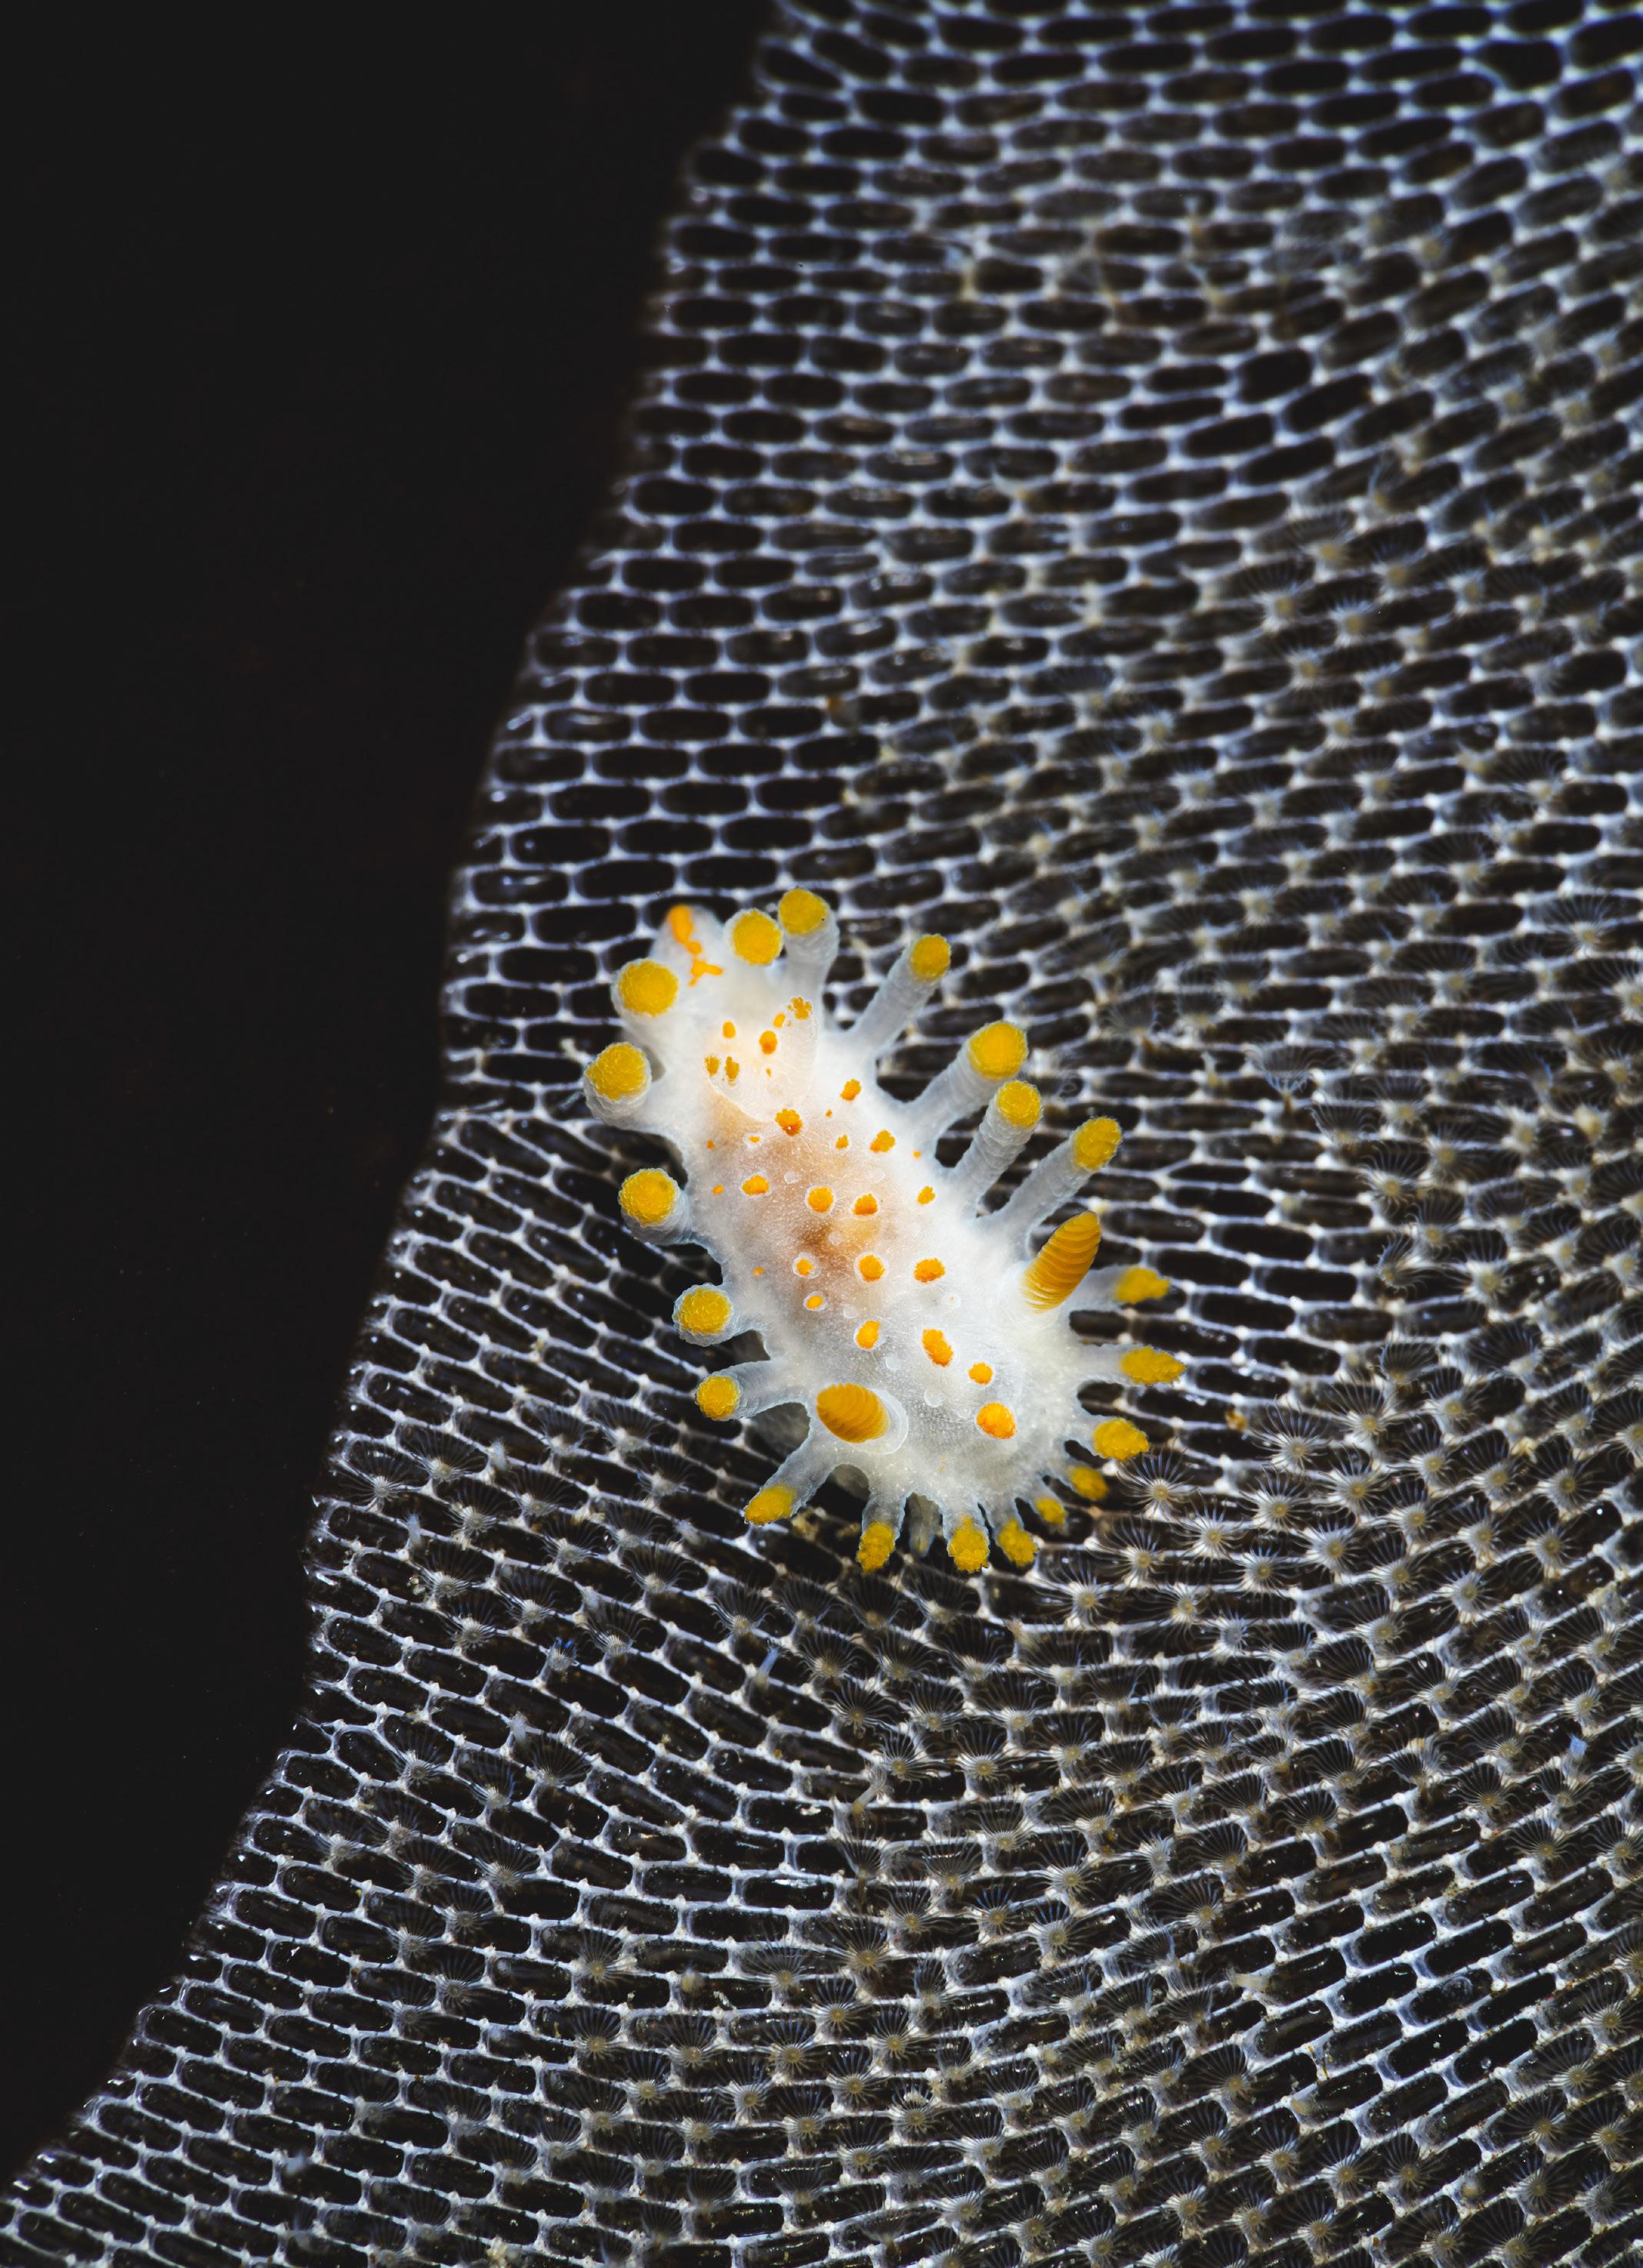
Orange-clubbed nudibranch feeding on a sea mat
transforms. The kelp thickens, the fish gather in shoals, and the water glows with the green fire of life. In autumn, the kelp starts to die back, revealing opportunities to shoot the life hidden beneath. Each season offers a completely different set of compositional opportunities - and
each one tells a different version of the site’s story.
The challenge of cold water
Shooting underwater in Shetland isn’t easy. The water is cold yearround. Even in summer, you’re lucky to get 13°C at depth. In winter, it drops to 6°C or lower. That’s hard on
both the body and the gear. You’re working in dry gloves, managing thick insulation, and trying to keep fingers warm enough to survive a 70-minute dive. You’re battling surge, tide, and the occasional seal curious enough to come for a look at your dome port mid-shot.
Plankton bloom
But that’s part of the appeal. These conditions force you to slow down, to be deliberate. Every frame matters, and every opportunity is hard-earned.
Yet the rewards are enormous. On a calm winter day, with the low sun slanting through 20 meters of clear water, you can capture images that feel almost otherworldly - scenes of quiet grace and alien beauty. The clarity, the stillness, the muted tones - it’s the visual language of cold water, and it’s utterly compelling.
Building a visual archive of a place
One of the most satisfying aspects of returning to the same dive sites across seasons is the chance to build a photographic archive - not just of individual species or moments, but of place. Over time, you begin to accumulate a kind of visual journal: the same ledge captured under winter’s crystalline light and summer’s bloom; the same species at juvenile stage and again as a fully matured male; the same wreck photographed at dawn, at dusk, in stormy light, and under bright sun.
These images, when viewed together, start to do something more than document. They communicate. They show the heartbeat of the place - the cycles of life and light, the growth and decay, the eternal motion of the sea. This is the kind of story that can only be told with time, commitment, and return.
As an artist, this long-term approach has deepened my work. It’s taught me to see beyond the single frame and think in sequences, in seasons, in chapters. It’s made me a better observer, a more patient diver, and a more intentional photographer.
Wildlife encounters on nature’s terms
One of the great privileges of diving regularly in the same area is developing an intuitive understanding of the local wildlifeand that has direct implications for photography. Rather than relying on chance encounters, you start to know when and where to look for
particular species. You learn the territories of certain seals, the den of that shy octopus, the patch where nudibranchs gather during summer. This kind of knowledge transforms your photography. You stop chasing shots and start waiting for them. You learn the rhythms of the site and work with them, not against them. Your images become less about capturing a rare subject and more about revealing the natural behaviour of familiar ones.
I’ve spent whole dives with individual animals - getting low, staying still, letting them get used to my presence. That’s when the real moments happen: a crab cleaning its carapace, an octopus hunting at dusk, a pair of mating nudibranchs in a delicate dance. These aren’t dramatic scenes. But in their intimacy, they’re profoundly powerful - and they’re the kinds of images that stay with people.
Working with the light: a seasonal approach
Light is everything in photography, and underwater photography is no different - except that light underwater is far more complex. In Shetland, the angle, colour, and intensity of light change drastically through the year, and learning to work with these changes is key to capturing compelling images.
In summer, you get long days, high sun, and a strong green cast from plankton-rich water. In winter, the days are short, but the light is low and golden - perfect for backlighting kelp fronds or creating dramatic contrast.
I’ve learned to love winter, where the simplicity of composition and the clarity of the water combine to create graphic, minimalist images. Summer, on the other hand, is the time for colour: jewel anemones glowing on dark rock, male lumpsucker flashing red and oranges, the bright yellow of a spiny starfish against deep green kelp. Strobe use, of course, is crucial, especially for macro - but even there, the ambient light shapes the mood
of the image. Over time, you get a feel for what kind of light suits what kind of subject - and how to position yourself to use it best.
A personal practice rooted in place
For me, underwater photography isn’t just about capturing beauty it’s about connection. It’s about developing a relationship with a place, not just visiting it. And that relationship deepens immeasurably when you commit to returning through the seasons.
By diving and photographing the same Shetland sites year-round, I’ve come to see them not as static locations, but as living, breathing ecosystems - each with their own rhythms, personalities, and stories to tell. And in turn, they’ve shaped my photography. They’ve taught me to wait, to watch, to work with the sea rather than against it.
There’s a quiet joy in this kind of practice. It’s not flashy or fast. It doesn’t yield instant gratification. But it builds something deeper - a body of work that reflects not just what’s there, but what it feels like to be there, season after season, year after year.
Looking forward
There are still sites I return to every month, still shots I haven’t quite nailed, still creatures I’m hoping to photograph just once in perfect light. And that’s part of the pull. The work is never done. The sea is always changing, always inviting you to look again.
In a world that often values the new and the novel, there’s something quietly radical about returningabout choosing to know one place intimately, rather than many places superficially. For me, that place is Shetland. And through the lens, I’ve learned not just to see it - but to feel it.l
DON’T SAY CHEESE: A GUIDE TO PHOTOGRAPHING CHILDREN NATURALLY EMMA FINCH
In the top ten photographic subjects, images recording children as they grow up must come fairly high on the list. But capturing natural images which show the characters of the children is less easy. Awardwinning Emma Finch shares a few tips.
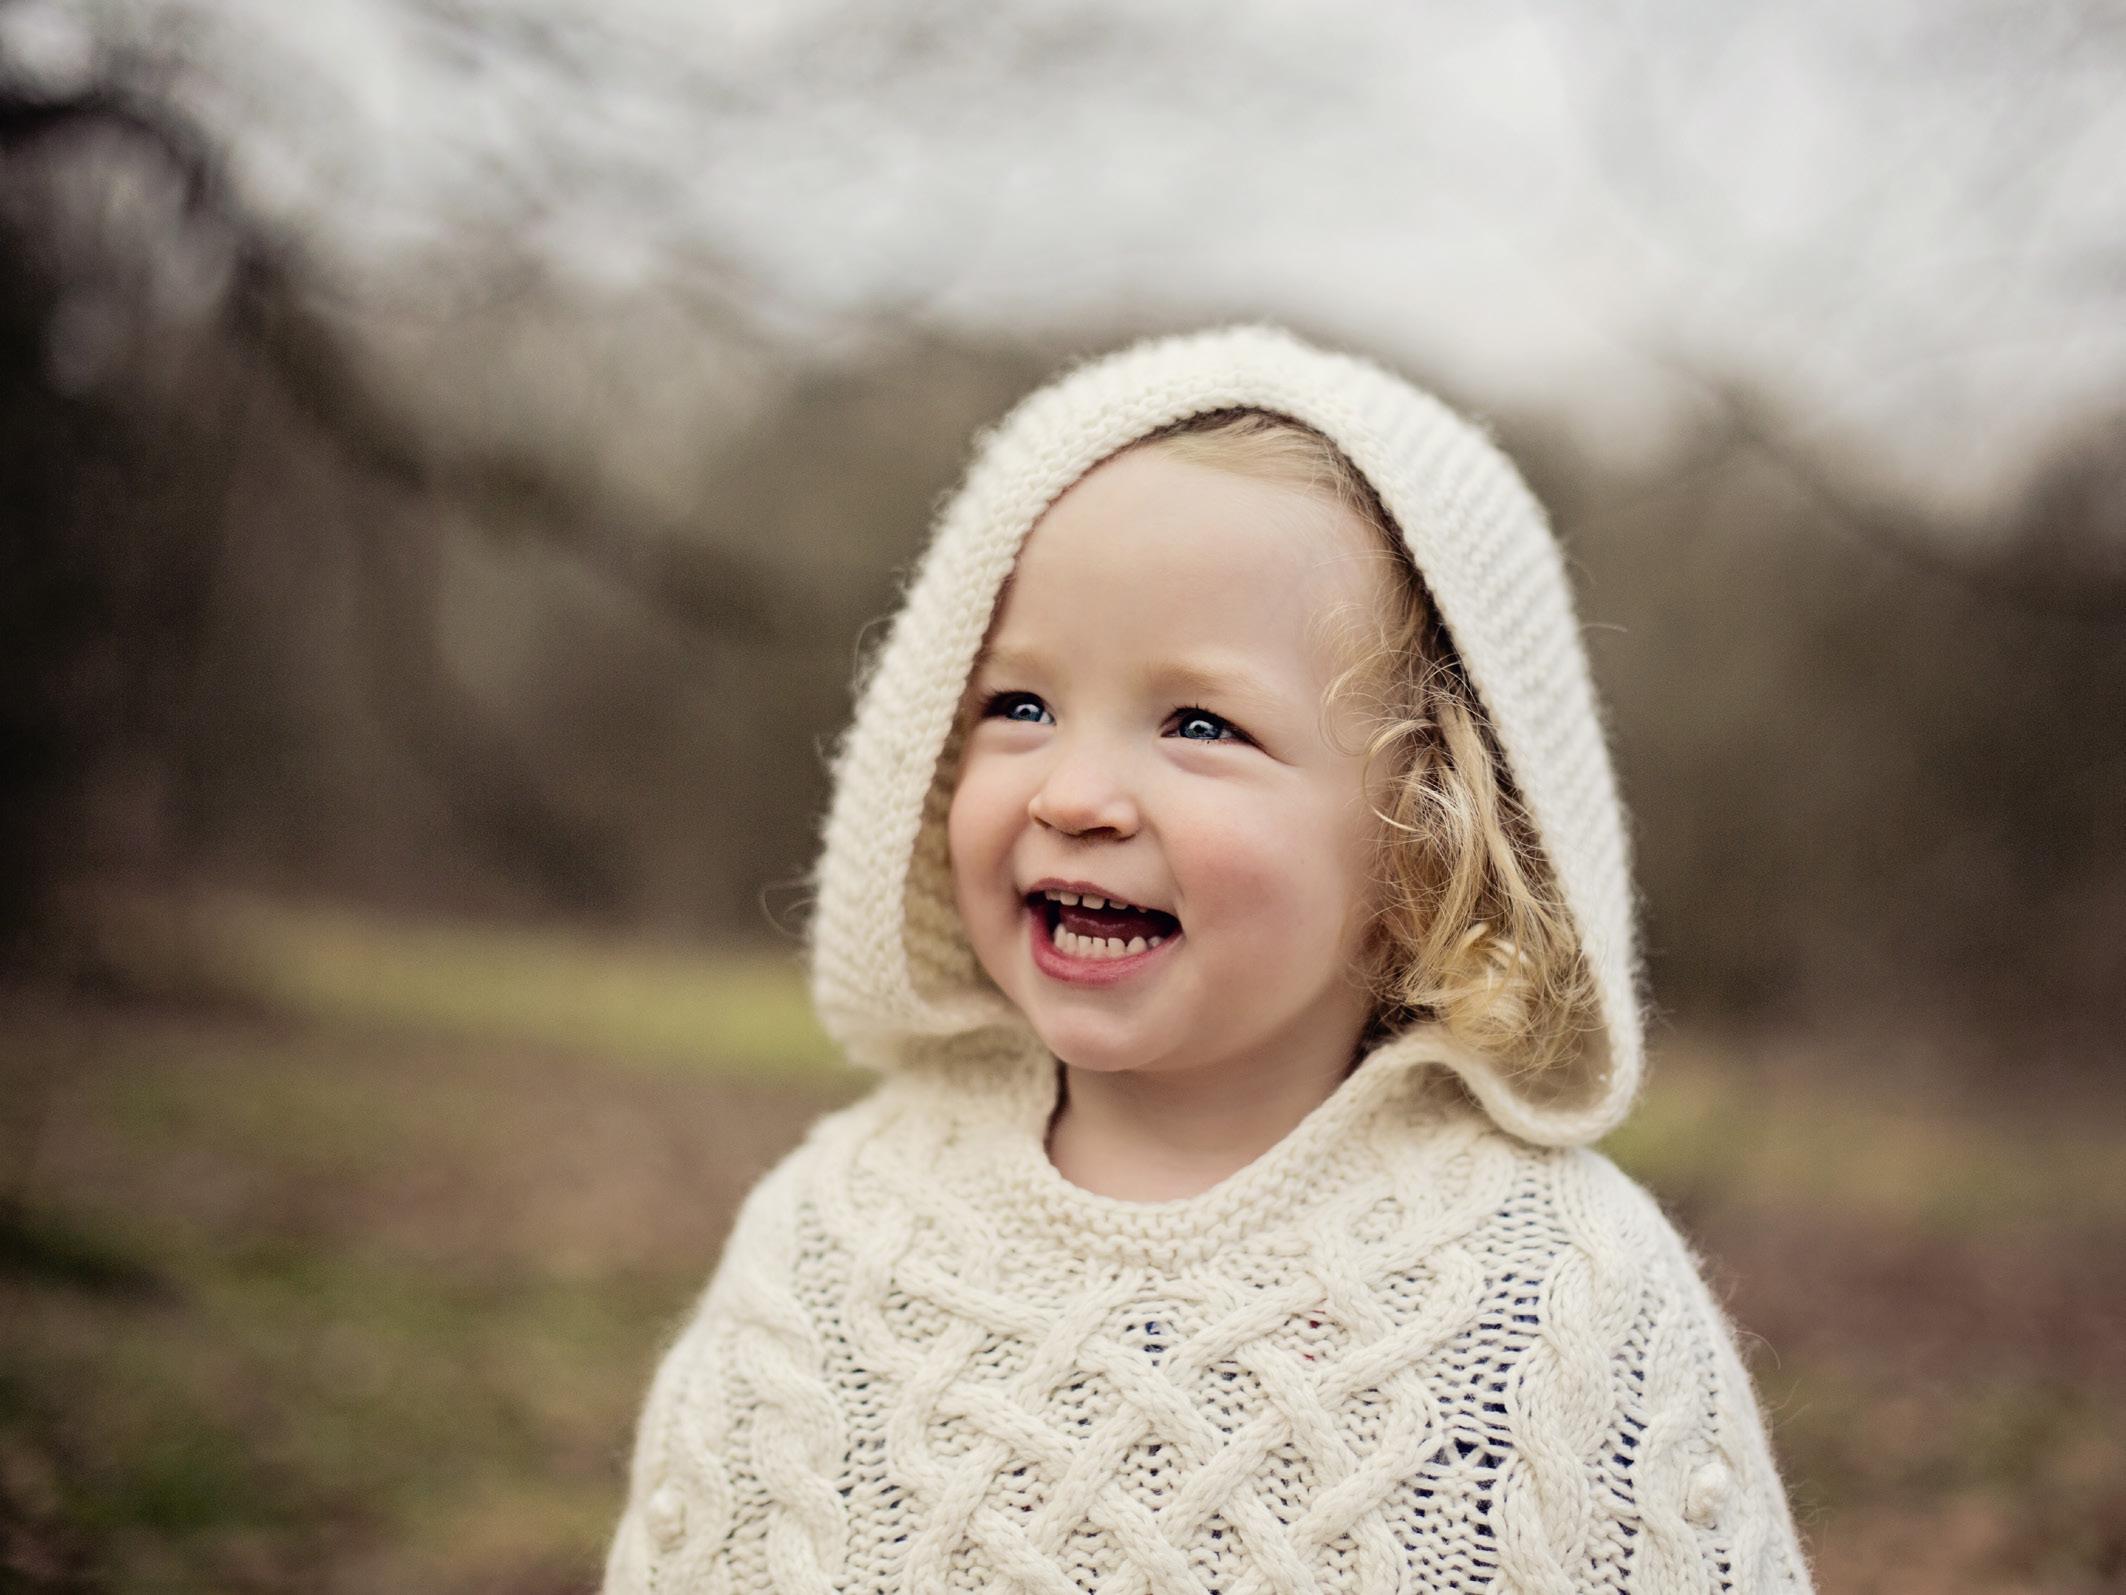
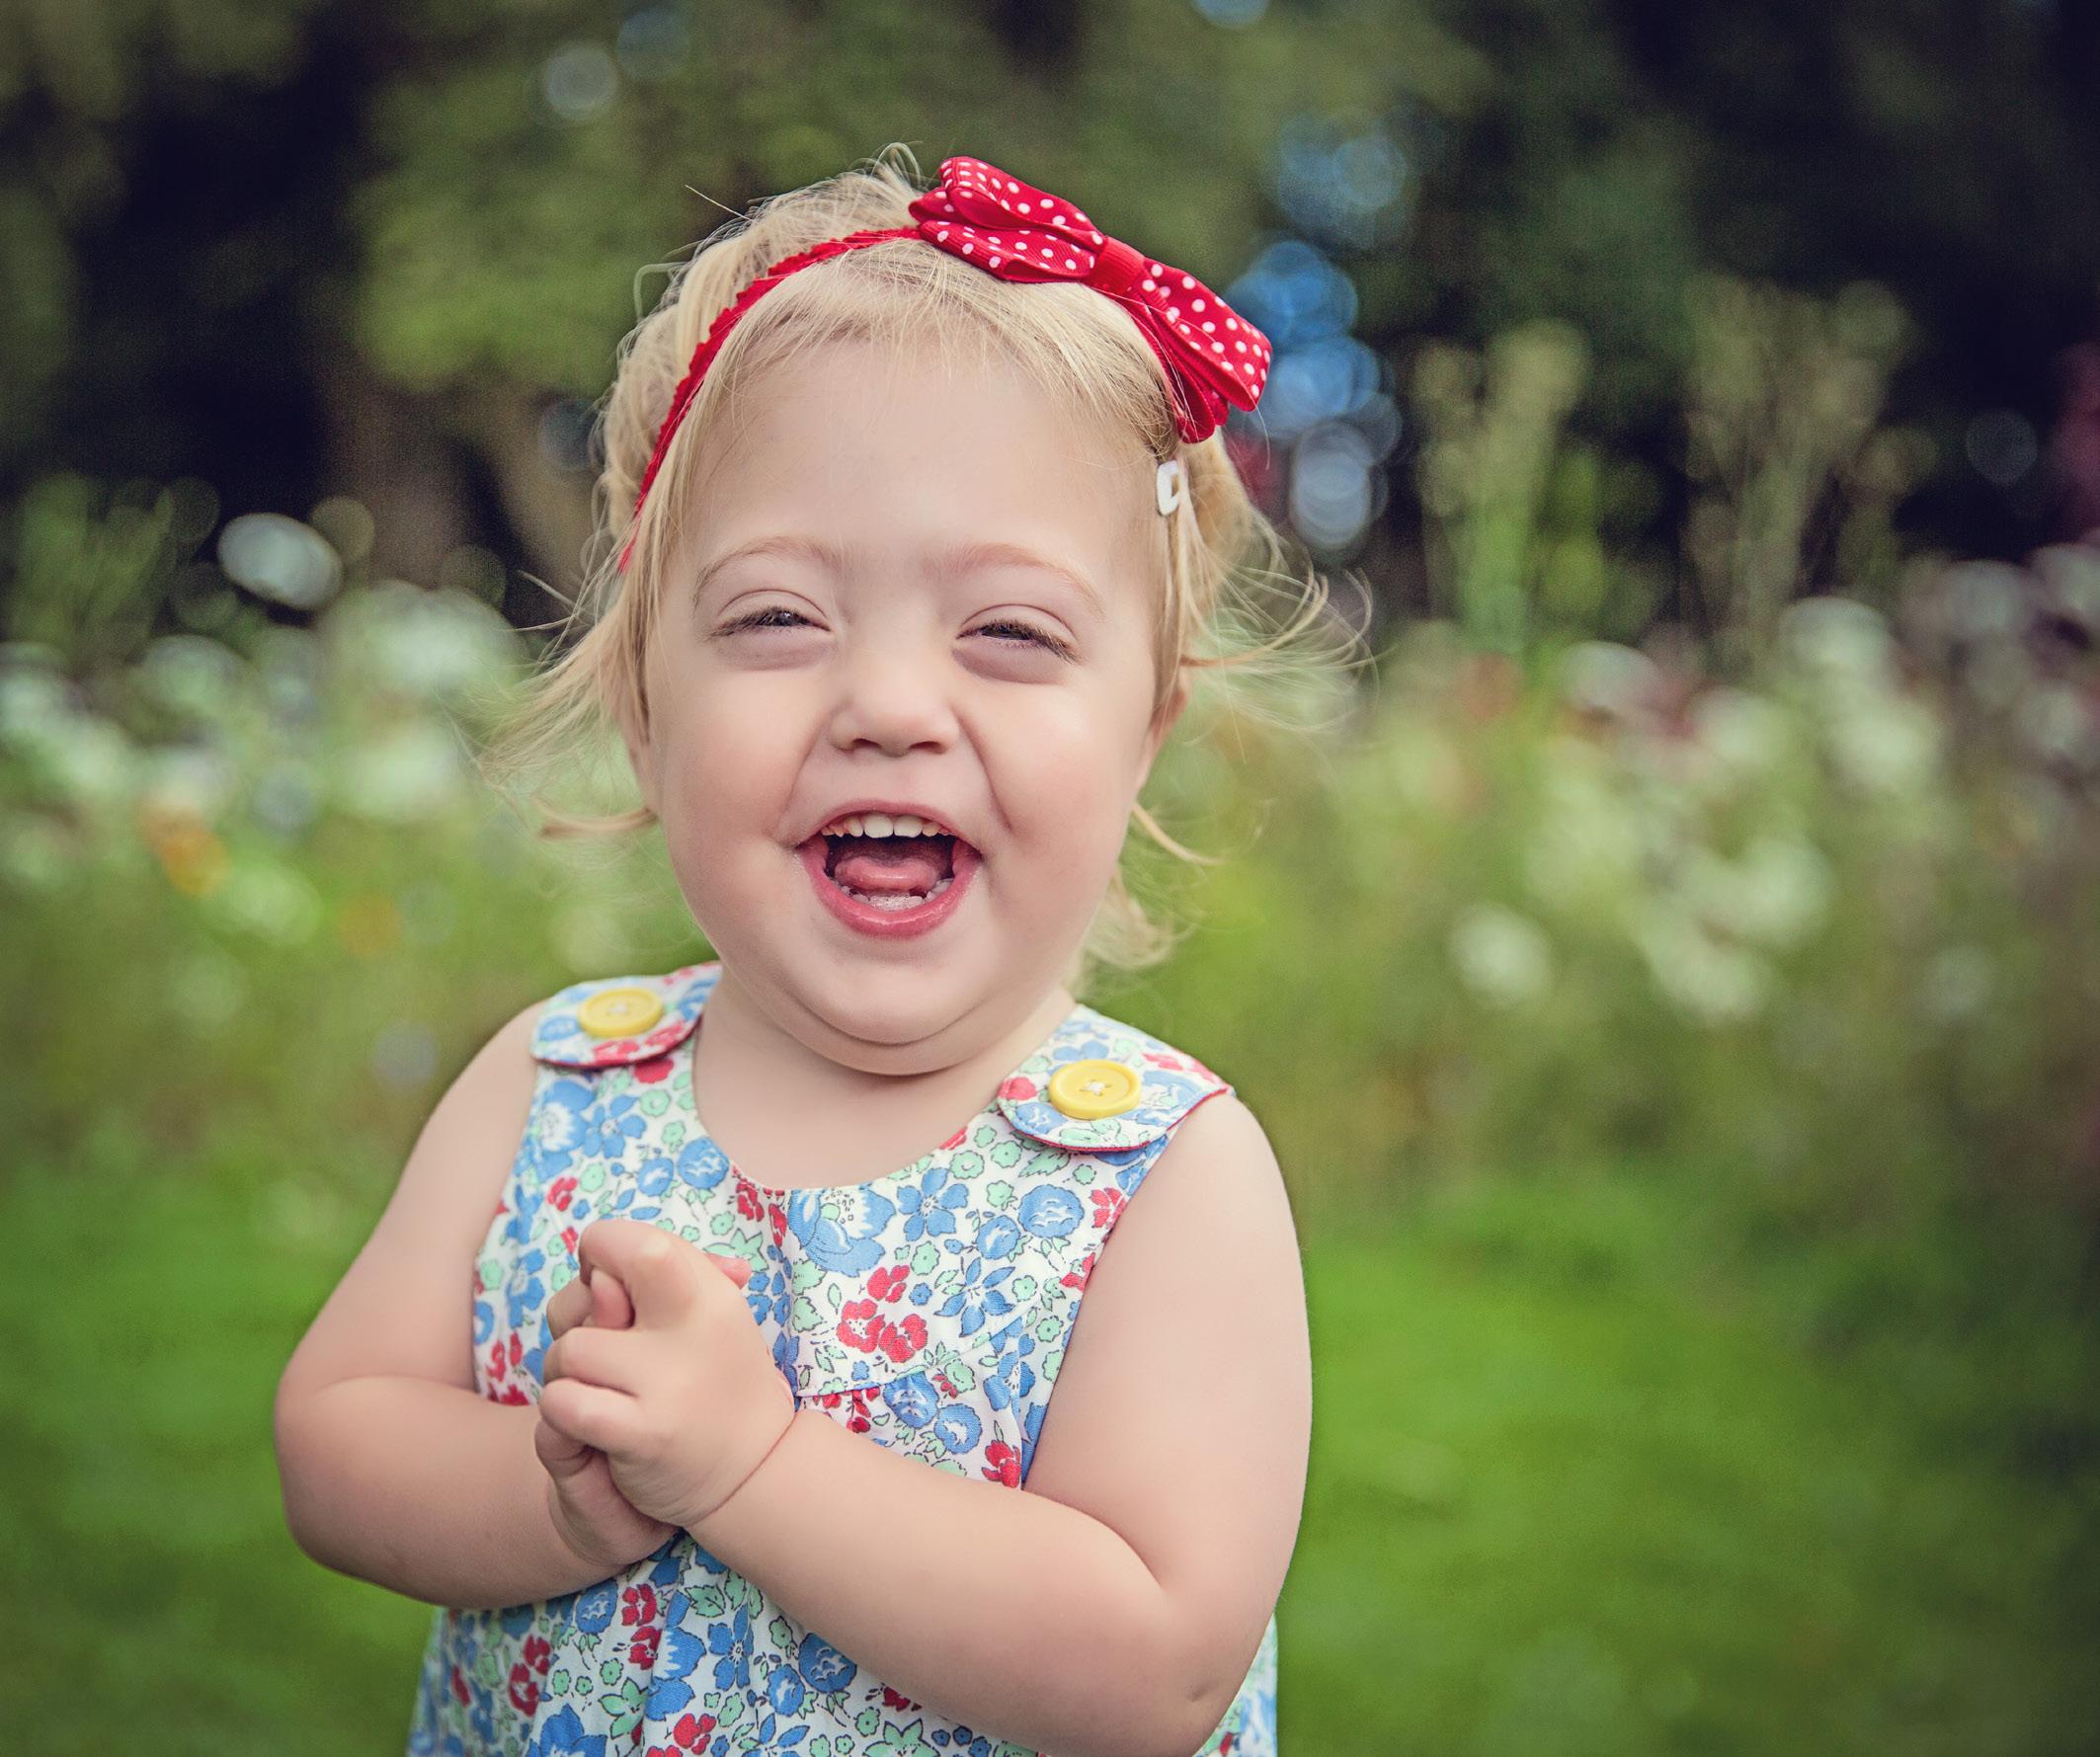
Photographing children can be one of the most rewarding yet unpredictable experiences for any photographer. Unlike adults, kids rarely pose on command and asking them to ‘say cheese’ often results in forced, unnatural smiles. The key to capturing beautiful, authentic portraits of children is to embrace their energy, curiosity, and spontaneity.
I’ve been a portrait photographer for over 12 years, and my journey began when my own two daughters
were little - I wanted to capture and document their childhood in a meaningful way. These early experiences taught me to work quickly, adapt to unpredictable moments, and master lighting on the fly. Now, I primarily photograph adults in the studio, which, I have to say, is much easier! But my foundation in child photography gave me invaluable skills that shaped my career. Learning to engage with impatient, often awkward little clients helped me
refine my technique, develop a fast-paced workflow, and truly understand my craft.
That early experience laid the groundwork for my (relative) success today - as People Photographer of the Year, the owner of three portrait businesses, and a speaker and educator travelling across the UK to share my passion for portraiture.
In this guide, I’ll walk you through everything you need to know to create timeless, natural portraits of
children - from choosing the perfect location to working with their unpredictable nature.
Choosing the perfect location
The right setting plays a huge role in the success of a child’s photoshoot. A familiar, natural environment can help children feel comfortable, allowing them to be themselves.
The best locations for child photography include:
- parks and countryside: wide open spaces where kids can run, climb trees, or pick flowers create
opportunities for beautiful candid moments,
- beaches: a beach session allows for fun activities like splashing in the water, playing in the sand, or running along the shoreline and - gardens: a family’s own backyard can be the perfect, intimate setting, filled with personal meaning.
Even though I am now predominantly a studio photographer, I still prefer natural locations for child portraiture. Why? Firstly it is timeless - nature will never date! I want images to go up on the wall and stay on the wall so I aim to make my work as classic as
possible. Secondly, children feel much more comfortable outdoors where they can have some fun. It is much less intimidating for them than being in the studio.
What to wear for the photoshoot
Choosing the right outfits can elevate your images and make them timeless.
My general wardrobe tips include: - avoid logos, words, busy patterns, or neon colours that can date the image,
- choose colours that complement the background (e.g., warm tones for autumn, pastels for spring).
- layers and textures (like knitwear, linen, or denim) add depth and interest.
Specific recommendations:
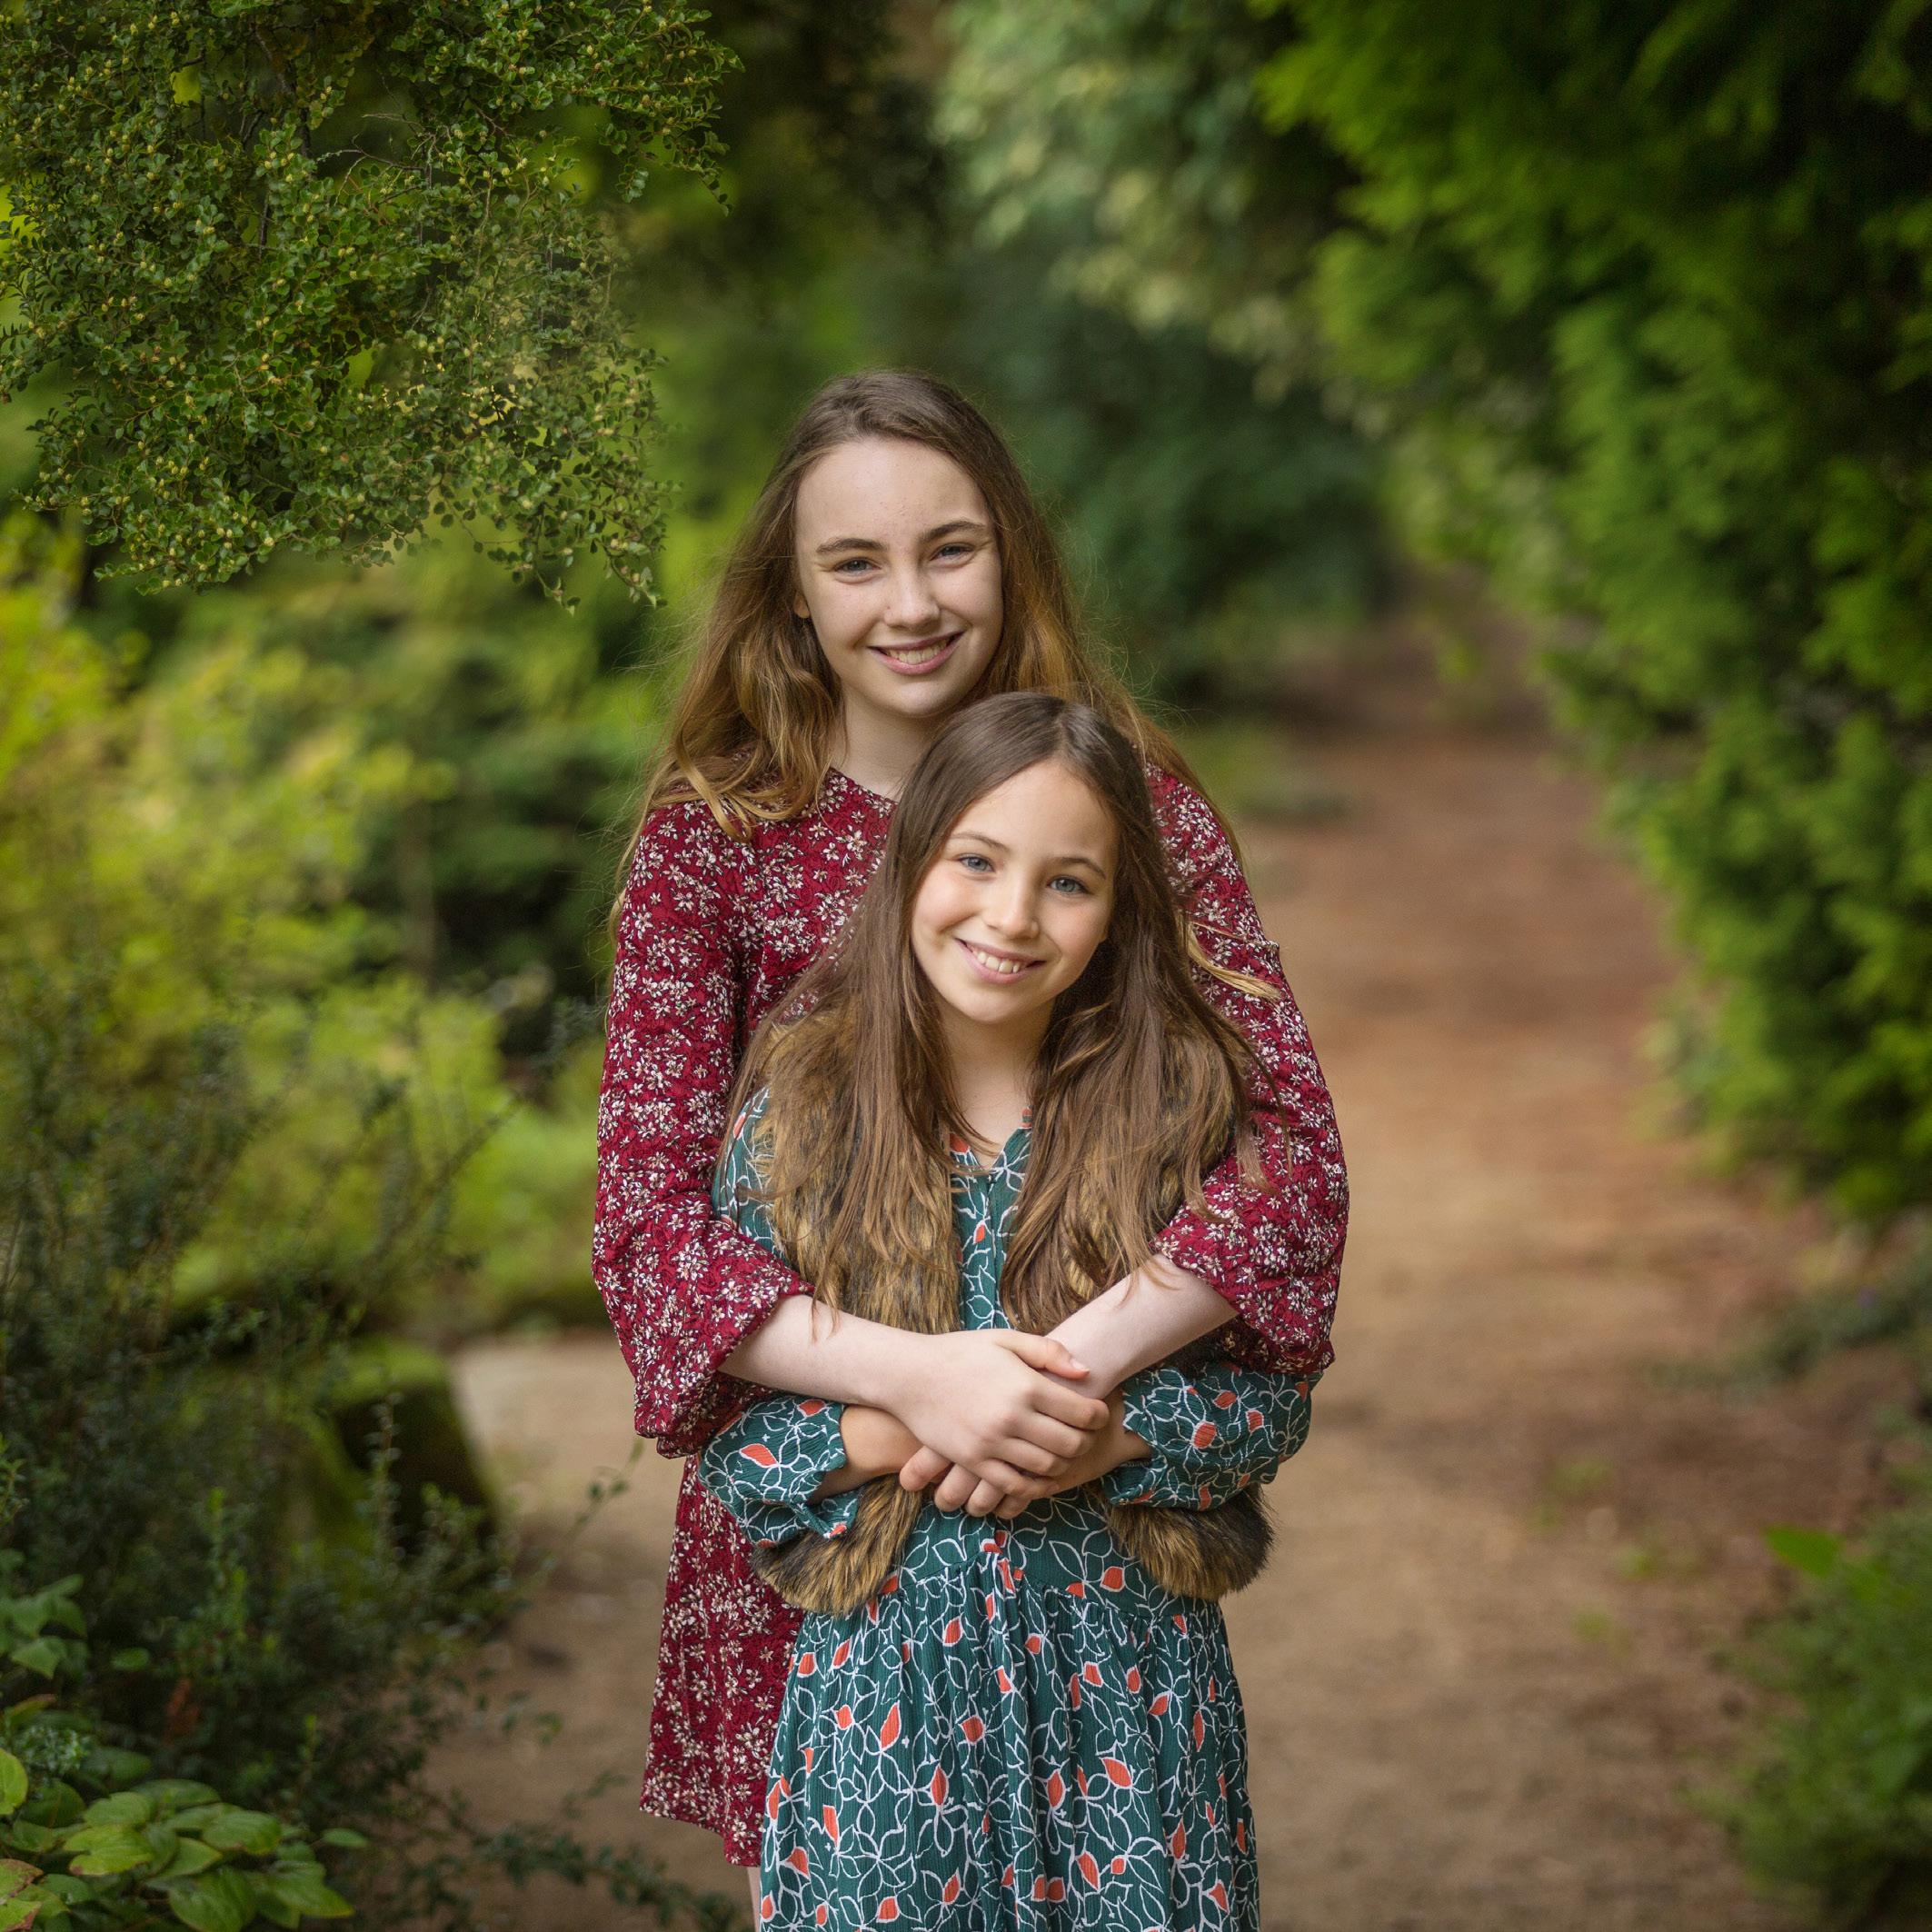
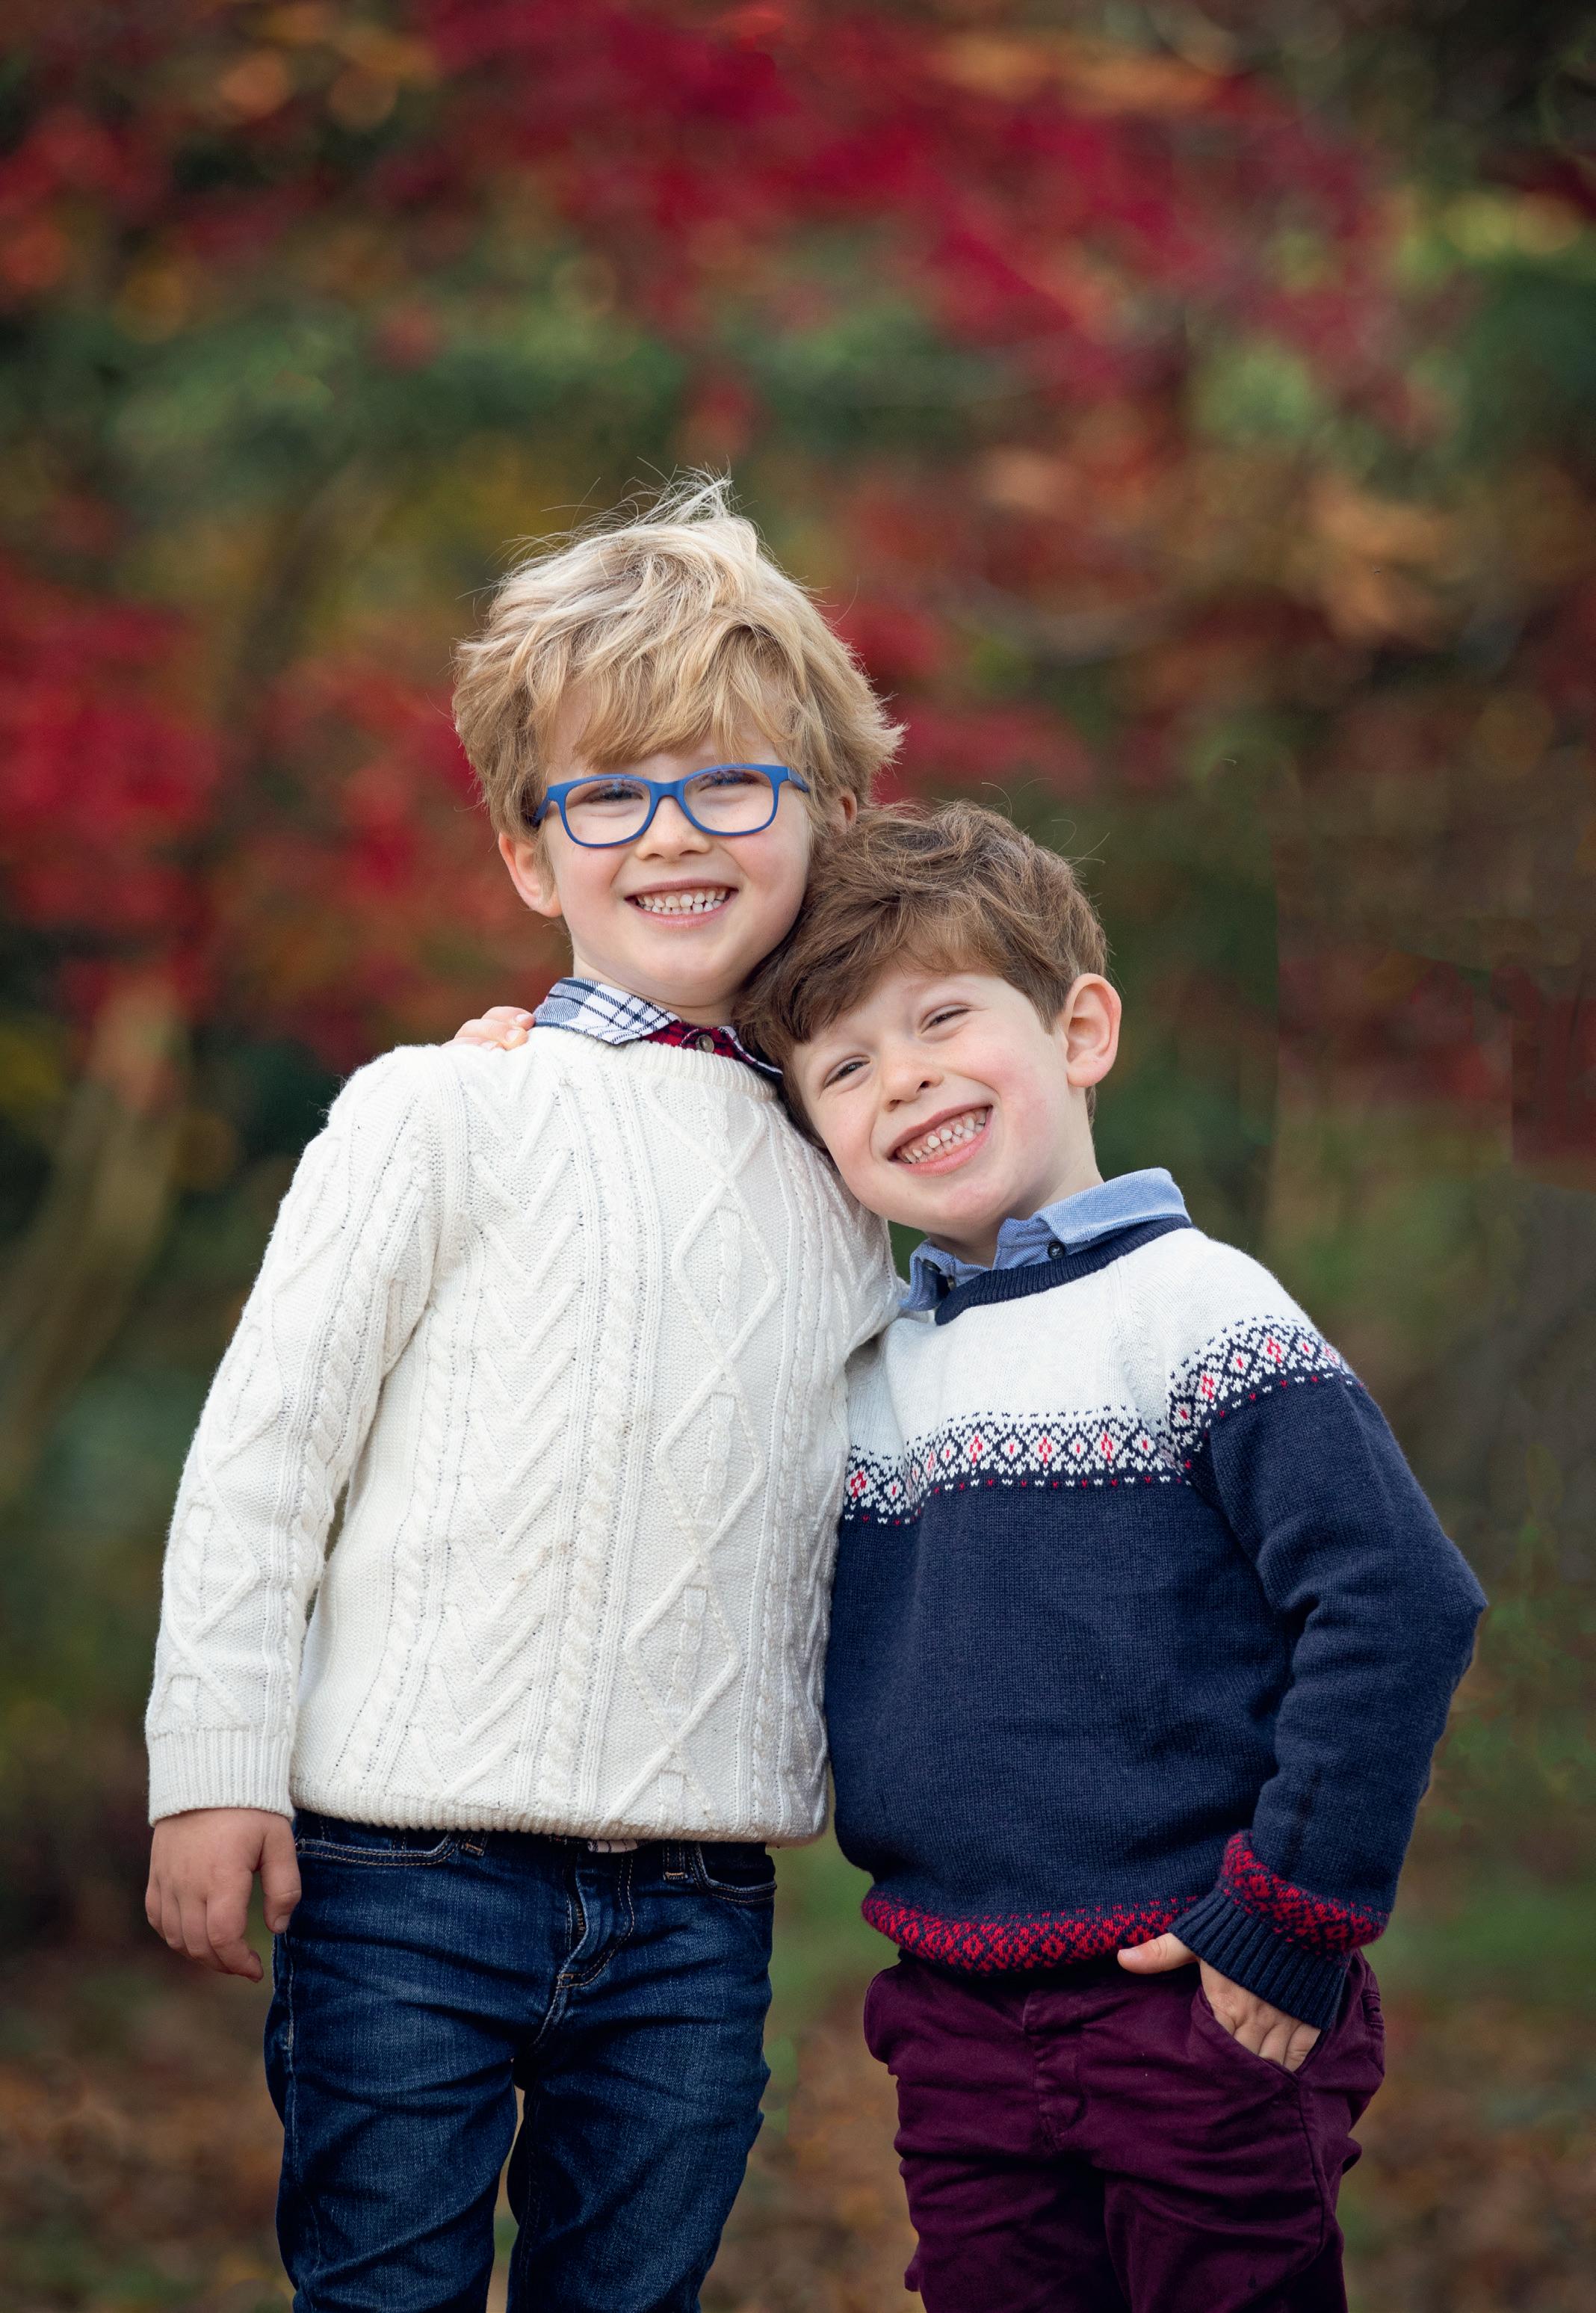
• For siblings or families: Wear complementary colours without matching exactly.
• For outdoor sessions: Dress appropriately for the weather so kids stay comfortable.
• For beach shoots: Barefoot looks natural and relaxed.
Planning for success
Shooting with children requires patience, flexibility, and a solid plan. There are some key considerations that I have before heading into a session:
Firstly, consider the child’s schedule. Young children are happiest and most cooperative in the morning when they are well-rested. Plan
the shoot around their nap times to ensure they are at their best. A grumpy child does not make for a successful shoot! The younger the child, the shorter the session will be - for most children, an hour is usually enough before they start to get cranky, tired or overwhelmed.
Keeping it fun and engaging is also important. Children won’t sit still for long, so embrace movement! Let them explore, play, and interact with their surroundings. Take the pressure off by letting them burn some energy in between shots. They are much more likely to be compliant if they are having fun.
Lastly, make sure to bring the essentials. Ask parents to pack spare clothes, wet wipes, snacks, and small toys to keep children comfortable and engaged throughout the session.
Lighting: the key to beautiful portraits
Natural light is your best friend when photographing children, but knowing how to use it is crucial.
The best times for shooting tend to be the golden hour and in overcast conditions.
The golden hour (early morning or late afternoon) offers soft, warm light and creates the most flattering effect. The best light is always when the sun is lower in the sky. Position your subject towards the light for catchlights in the eyes.
Overcast days are nature’s softbox! Clouds diffuse the light and prevent harsh shadow; the result is a much softer look.
Finally, avoid midday sun. Harsh sunlight can cause squinting, dark eye sockets and strong shadows, making it difficult to capture natural expressions.
A few tips for finding the right light include:
• If it is a bright day, look for shade. Shooting in the shade of trees or buildings can provide even, flattering light. Good light will always trump a good background so prioritise the light, even if that means your background choice is more limited.
• Use your hand to find the sun’s direction. Hold your hand up and turn it - when the light is flattering and soft, you’ve found the best light.
• Shoot with a wide aperture. Using a low f-stop (like f/2.8) creates beautiful background blur while keeping the child in sharp focus. Where possible, I like to keep a fully natural background for two reasons
- firstly it means that you can create beautiful separation from the
background by shooting wide open which in turn, makes your subject really stand out in the image. Secondly, it eliminates any boring white skies. White as we know will always draw the eye and I like to keep all eyes on my subject.
How to pose children by age group
Children of different ages react differently to the camera. Understanding these differences will help you set realistic expectations and create the best possible portraits.
Babies and toddlers (0-3 years)
• Work quickly - babies have short attention spans!
• Have your camera settings ready with a slightly higher shutter speed to avoid motion blur.
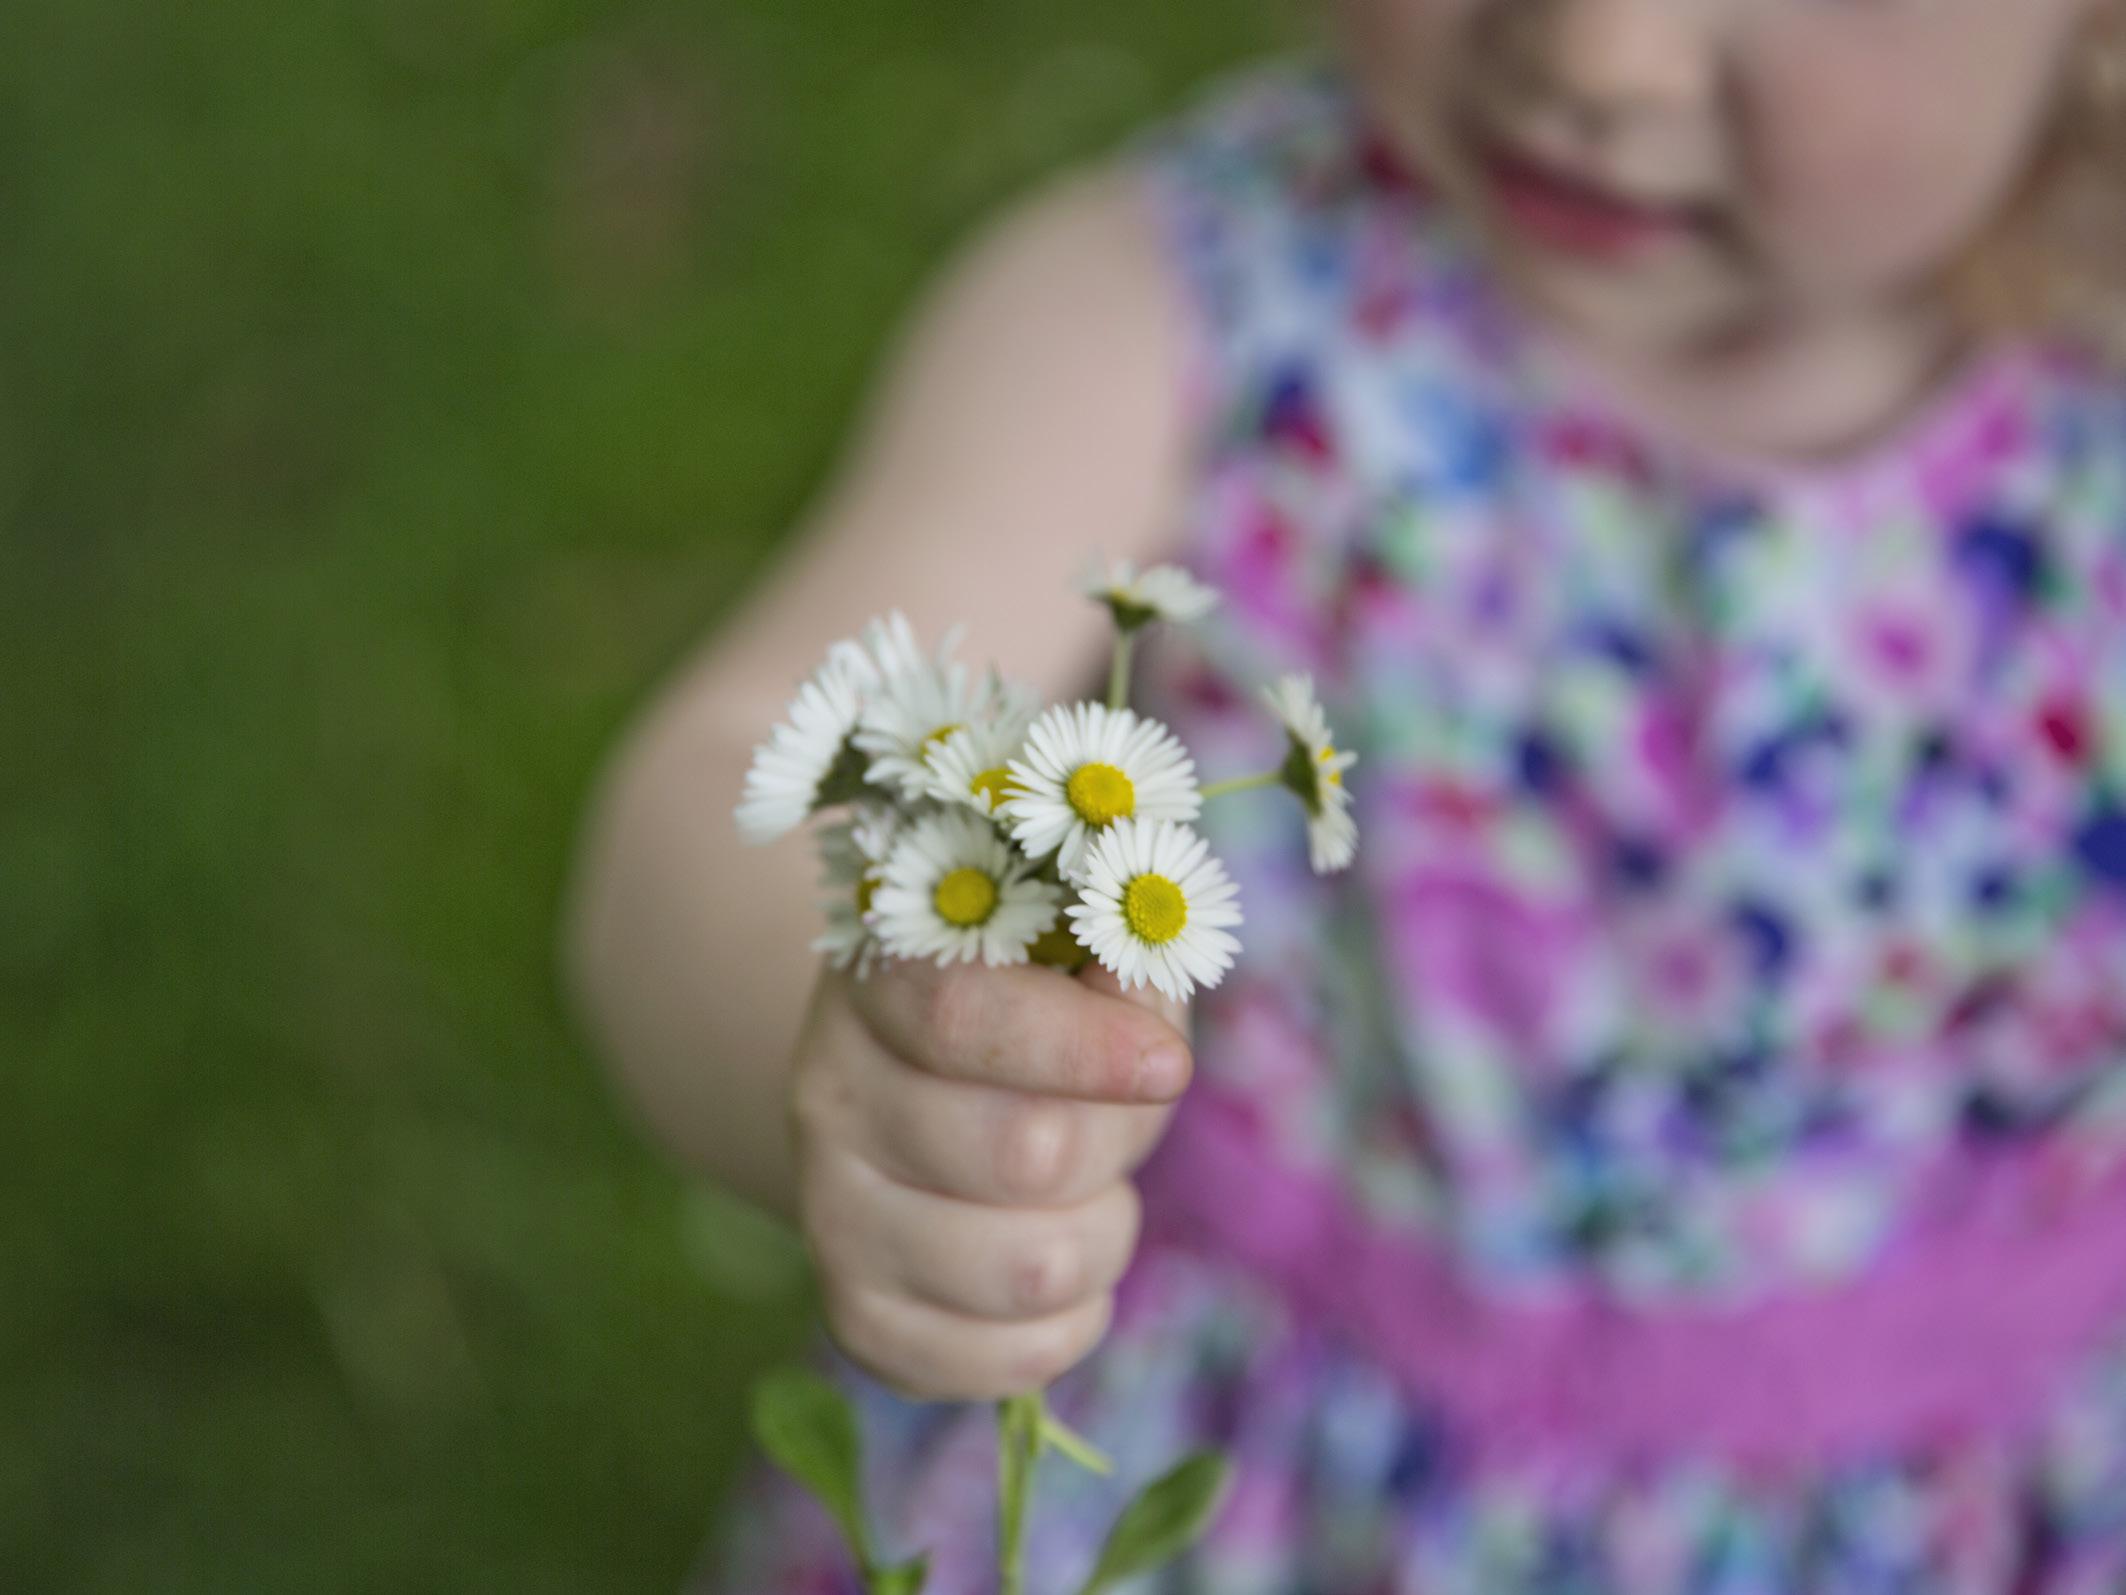
• Give them something to hold (like a flower, a leaf or small classic toy) to keep them engaged. If they are old enough, you can ask what colour is the flower, does it smell nice etc.
• Get down to their eye level for a more intimate perspective.
• Be playful - make silly faces or noises to encourage natural reactions.
Young children (3-6 years)
• Forget stiff poses - let them move, play, and explore.
• Capture interactions by asking them to whisper a secret in someone’s ear. You can get a sequence of very candid, natural images, and I guarantee, they will say something naughty or rude and both start laughing!
• Encourage fun prompts like “Can you see your face in my camera lens?” or “Let’s play Simon Says!”
• Get them engaged by asking them to jump, spin, pull a funny face or run towards you.
• Tell a funny story such as the time a dog did a wee in my camera bag on a family photoshoot. OK I didn’t find it funny at the time but the under 6s definitely did!
Older kids (6-12 years)
• There is a small window where they will follow instructions - use it wisely!
• Have your settings ready by photographing your camera bag or other inanimate object before asking your subjects to ‘pose’. Children will not hang around whilst we faff with ISO and aperture etc.
• Suggest fun yet natural poses, like back-to-back or walking hand-inhand.
• Capture their personality - whether it’s playful, shy, or mischievous.
• Let them suggest their own ideas to make them feel involved.
Teenagers (12-18 years)
• Some teens love posing, while others feel awkward - adjust your approach accordingly.
• Use more editorial-style posing to give them confidence.
• Encourage casual, connected poses that feel natural rather than forced.
Prompting natural expressions
Rather than forcing children to smile, use fun prompts and games to capture genuine joy. Here are a few ideas:
• “Yucky or yummy?” - ask them about foods they love or hate to get animated reactions.
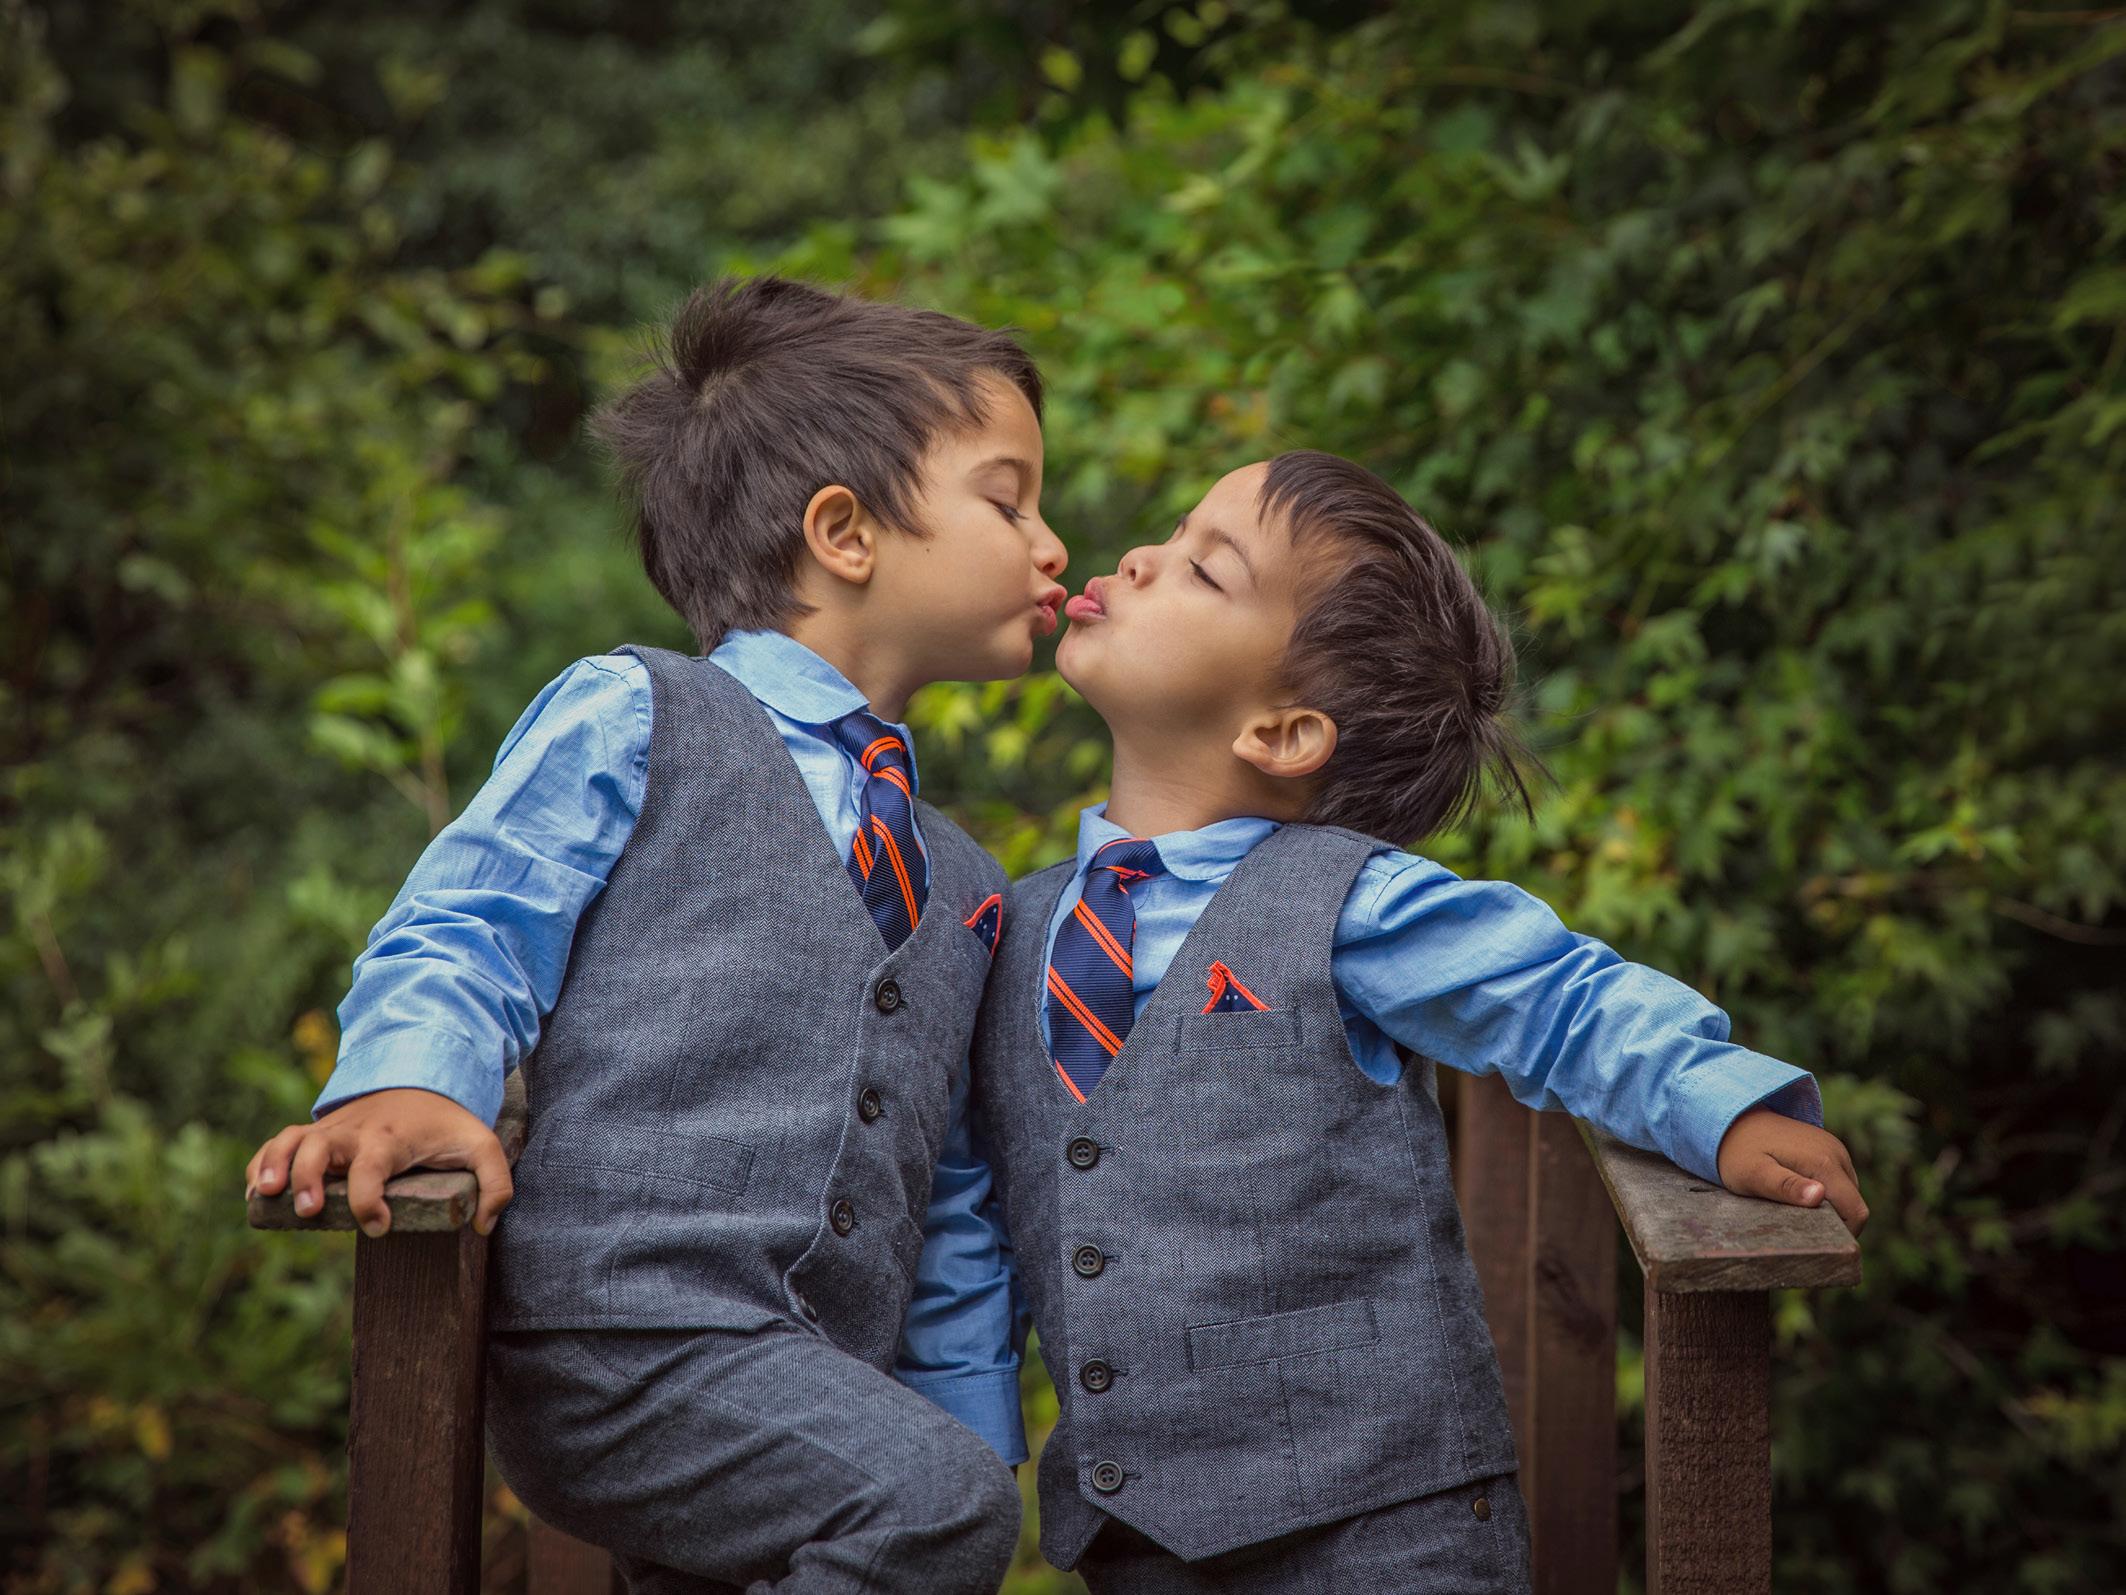
• “Let’s do an Eskimo kiss!” - sweet, intimate moments between siblings or parents and children.
• “Everybody group hug!” - creates a warm, connected image with lots of smiles.
• “Pull a funny face” - a good way to break the ice but keep clicking after they have finished as they continue to laugh and smile.
Essential camera gear and settings
Having the right gear and settings makes all the difference in capturing beautiful child portraits.
The equipment and settings I recommend are:
• Lens: a 70-200mm lens is ideal for capturing candid moments from a comfortable distance. A 24-70mm lens is good once the children are more used to you and you want to engage with them more. u
• Aperture: shoot wide open to create soft backgrounds.
• Shutter speed: use a slightly higher shutter speed than usual to freeze movement.
• ISO: increase ISO if needed in low light to avoid blurry images.
• If shooting aperture priority, make sure you have a lower minimum speed set because if the light drops, you will end up with blurry images.
Final thoughts: capturing the magic of childhood
Photographing children is all about patience, flexibility, and creativity. The best portraits come when they are comfortable, engaged, and free to be themselves. By choosing a meaningful location, working with natural light, and embracing the unpredictability of children, you can create stunning, timeless images that families will cherish forever.
So, next time you’re behind the camera, remember - ditch the “say cheese” and let the magic happen naturally! l
About Emma
Emma Finch is a multi-awardwinning professional portrait photographer, speaker, and educator with a career spanning over a decade. Her achievements include being named Portrait Photographer of the Year 2024, nine times Portrait Image of the Year Finalist and earning over 60 international publications, including multiple front covers.
Equally at home working from her Manchester studio or on location, Emma works with both commercial and private clients. Inspired by feminine strength and elegance, she strives to capture the essence of a woman’s beauty in timeless, sophisticated portraits. With extensive expertise in lighting and posing, combined with an innate ability to put women at ease, she has attracted clients from across the UK, as well as Europe and the USA, to her business, Belle Privé Photography.
Beyond her work behind the camera, Emma is a passionate educator and speaker. She has presented at major industry events such as The Photography Show and the London Photo Convention, as well as numerous camera clubs across the UK. She provides private tuition to photographers and even teaches virtually to students in the USA. As the co-founder of Photography Session Days, she leads portrait and lighting workshops and organizes photography events in unique locations throughout the UK.
In addition to Belle Privé Photography, Emma also runs Emma Finch Photography, specialising in family, children, and lifestyle photography on location.
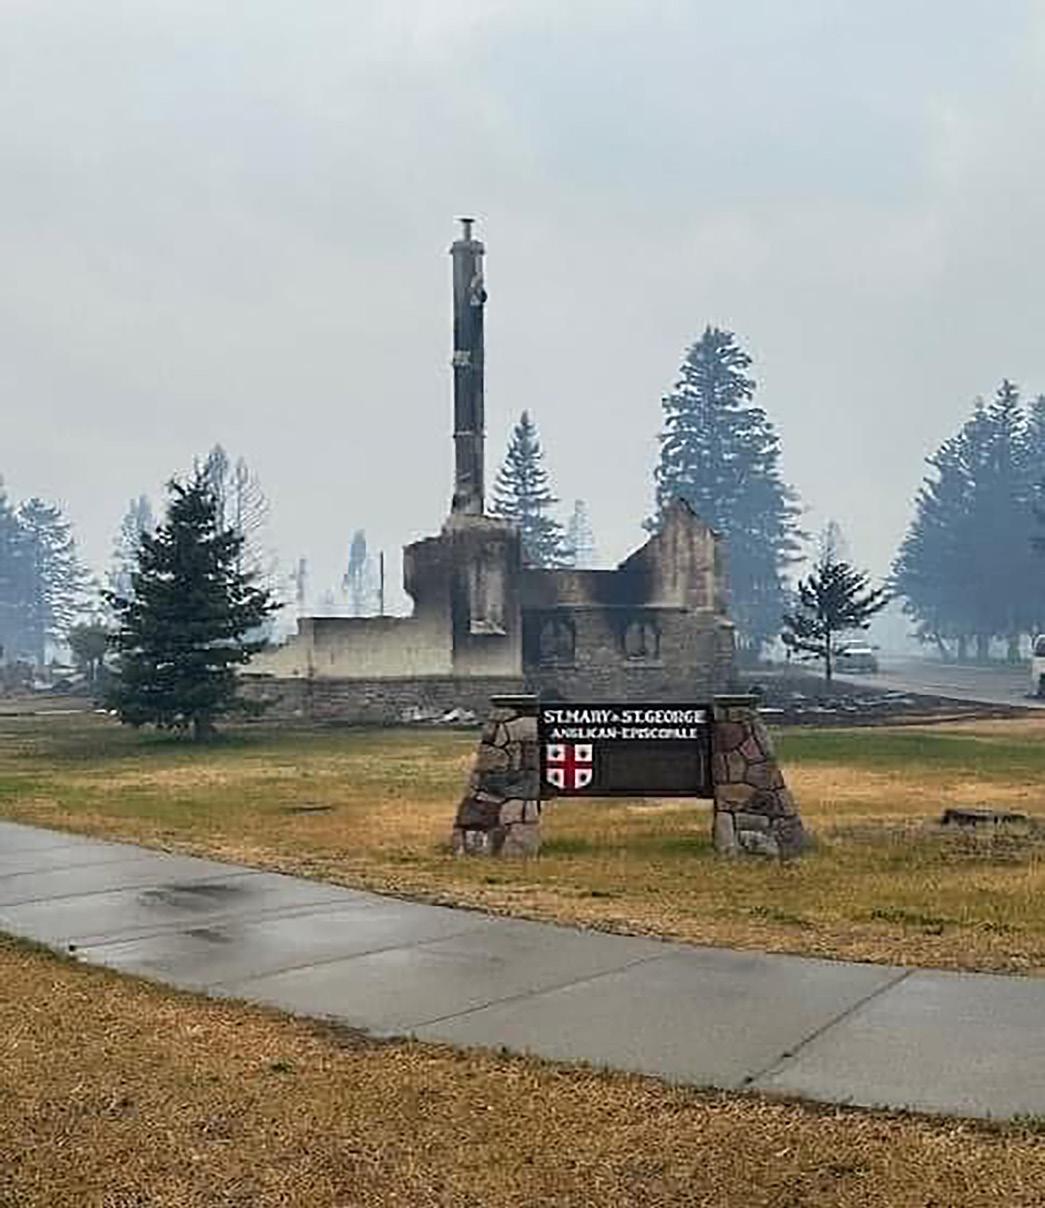
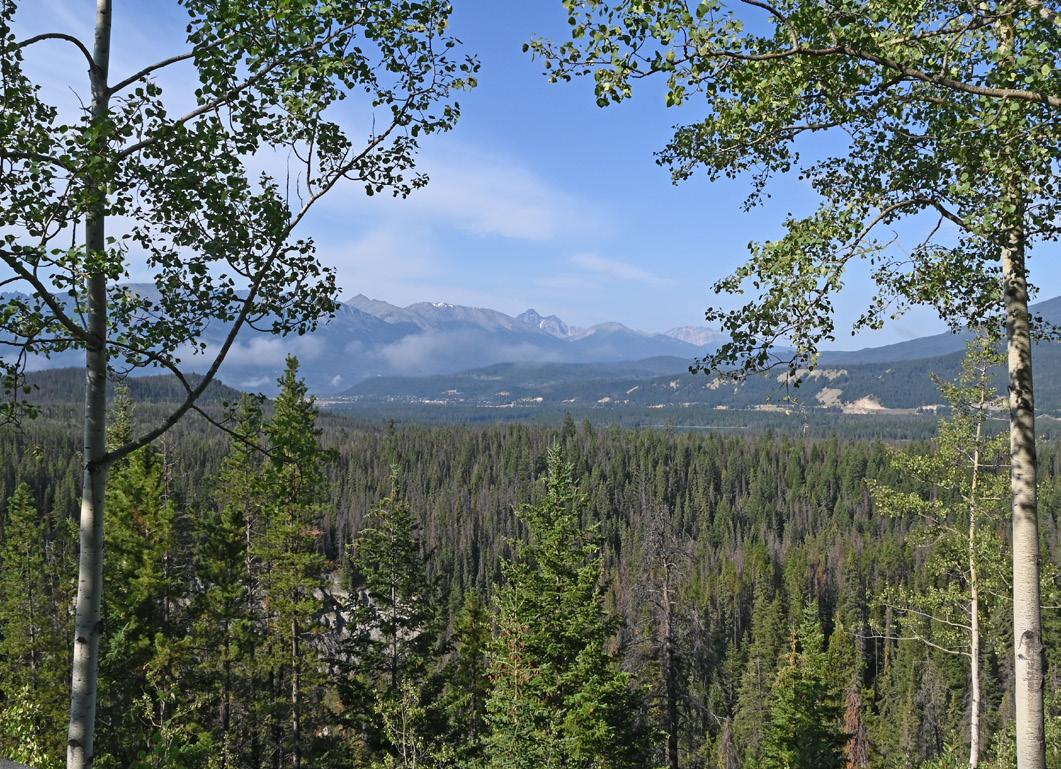
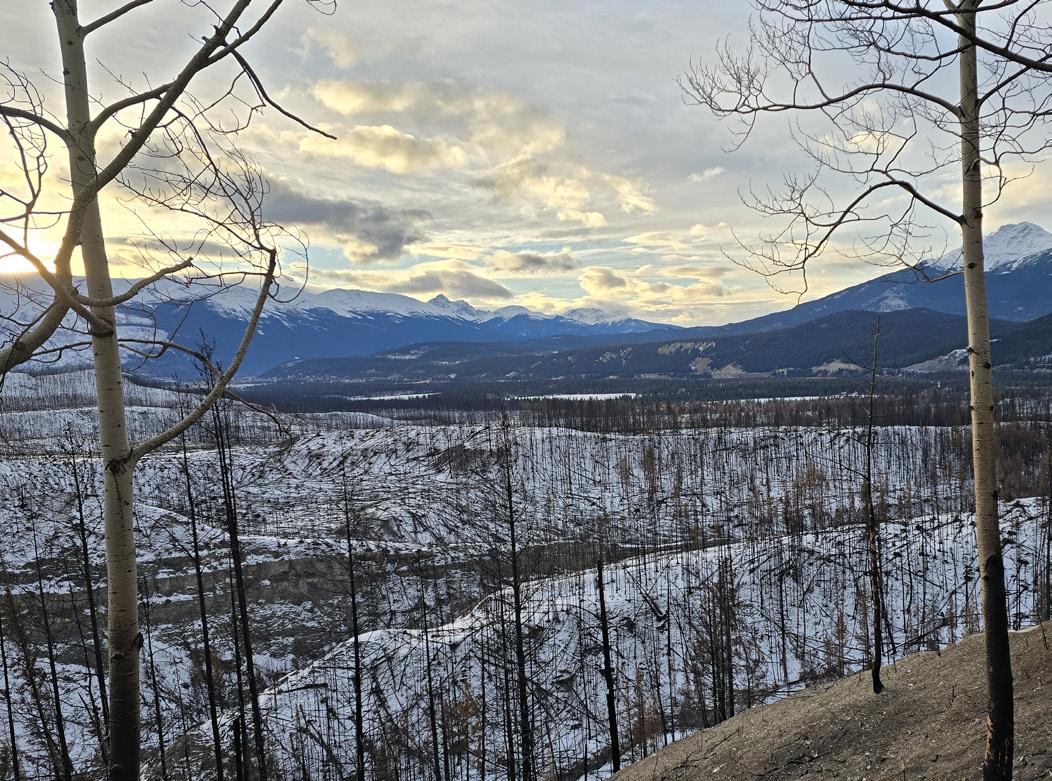
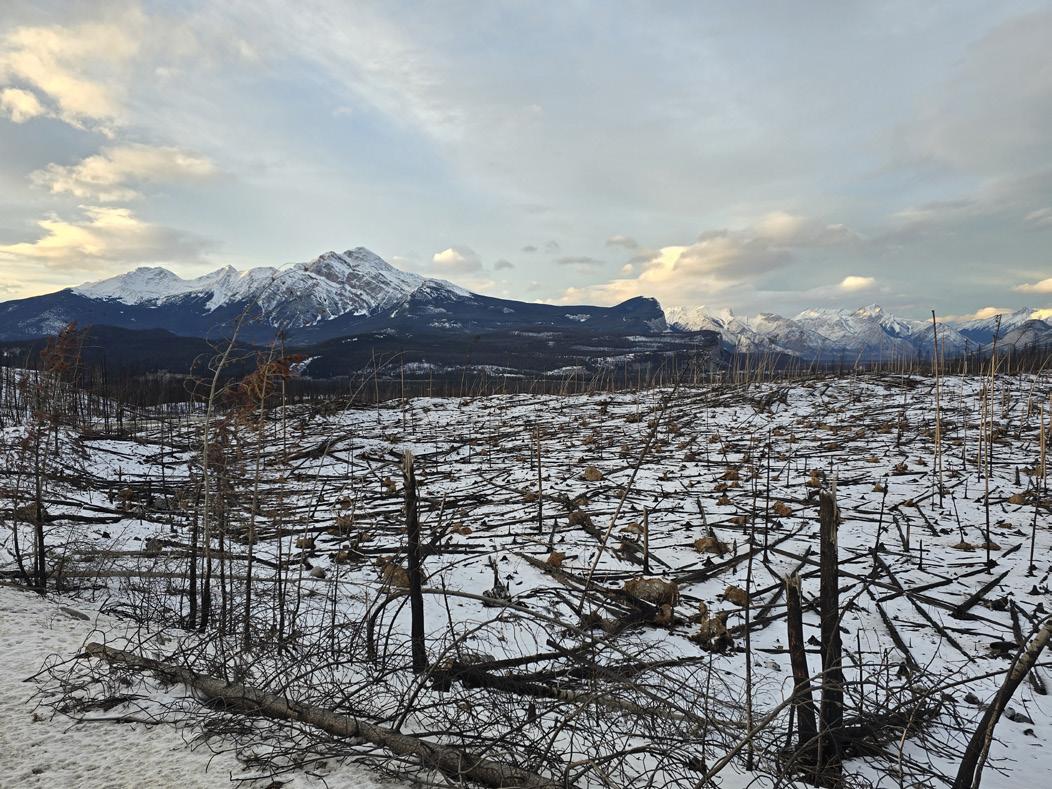
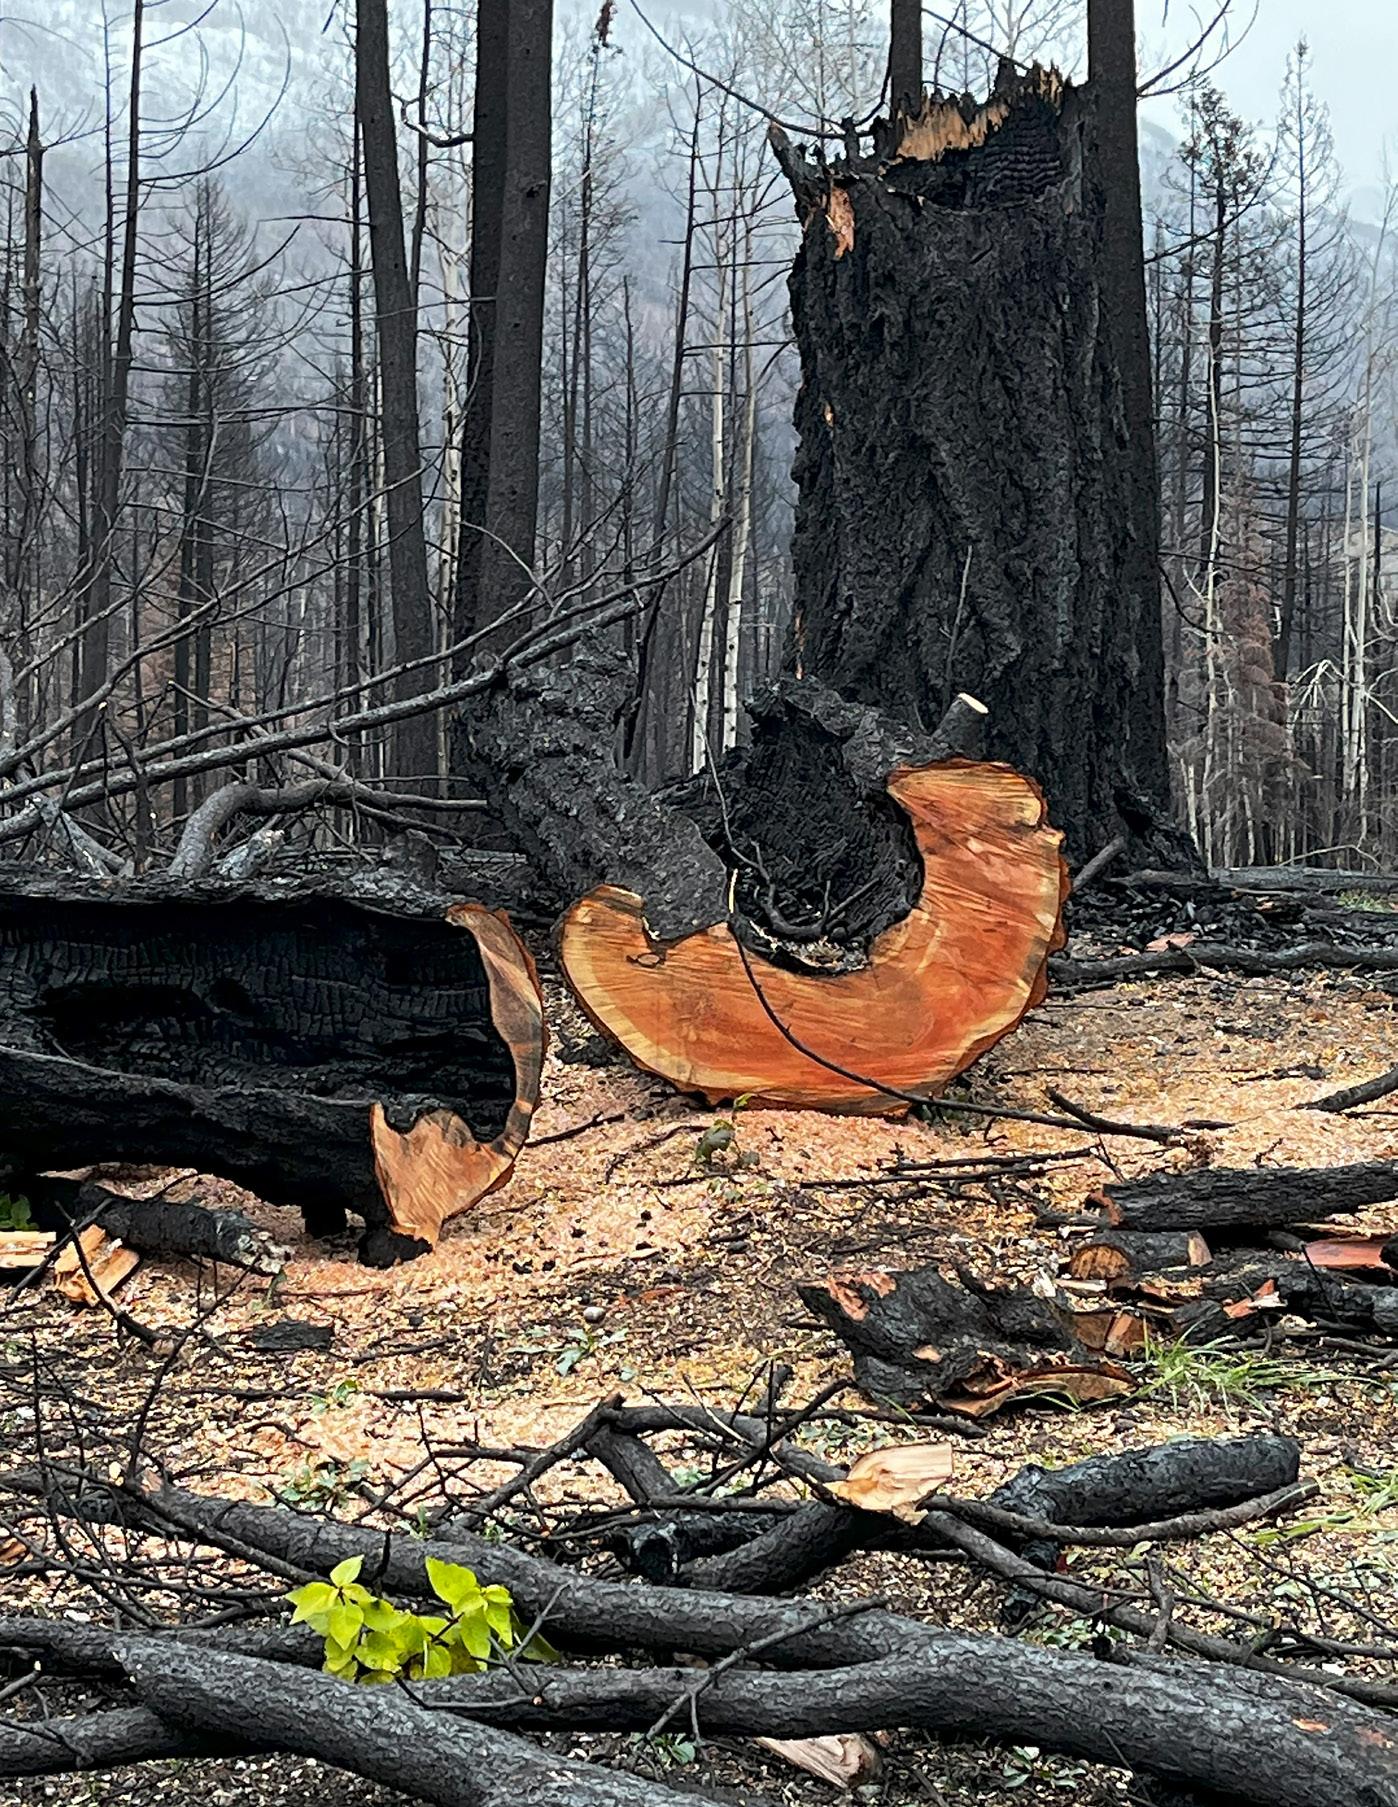
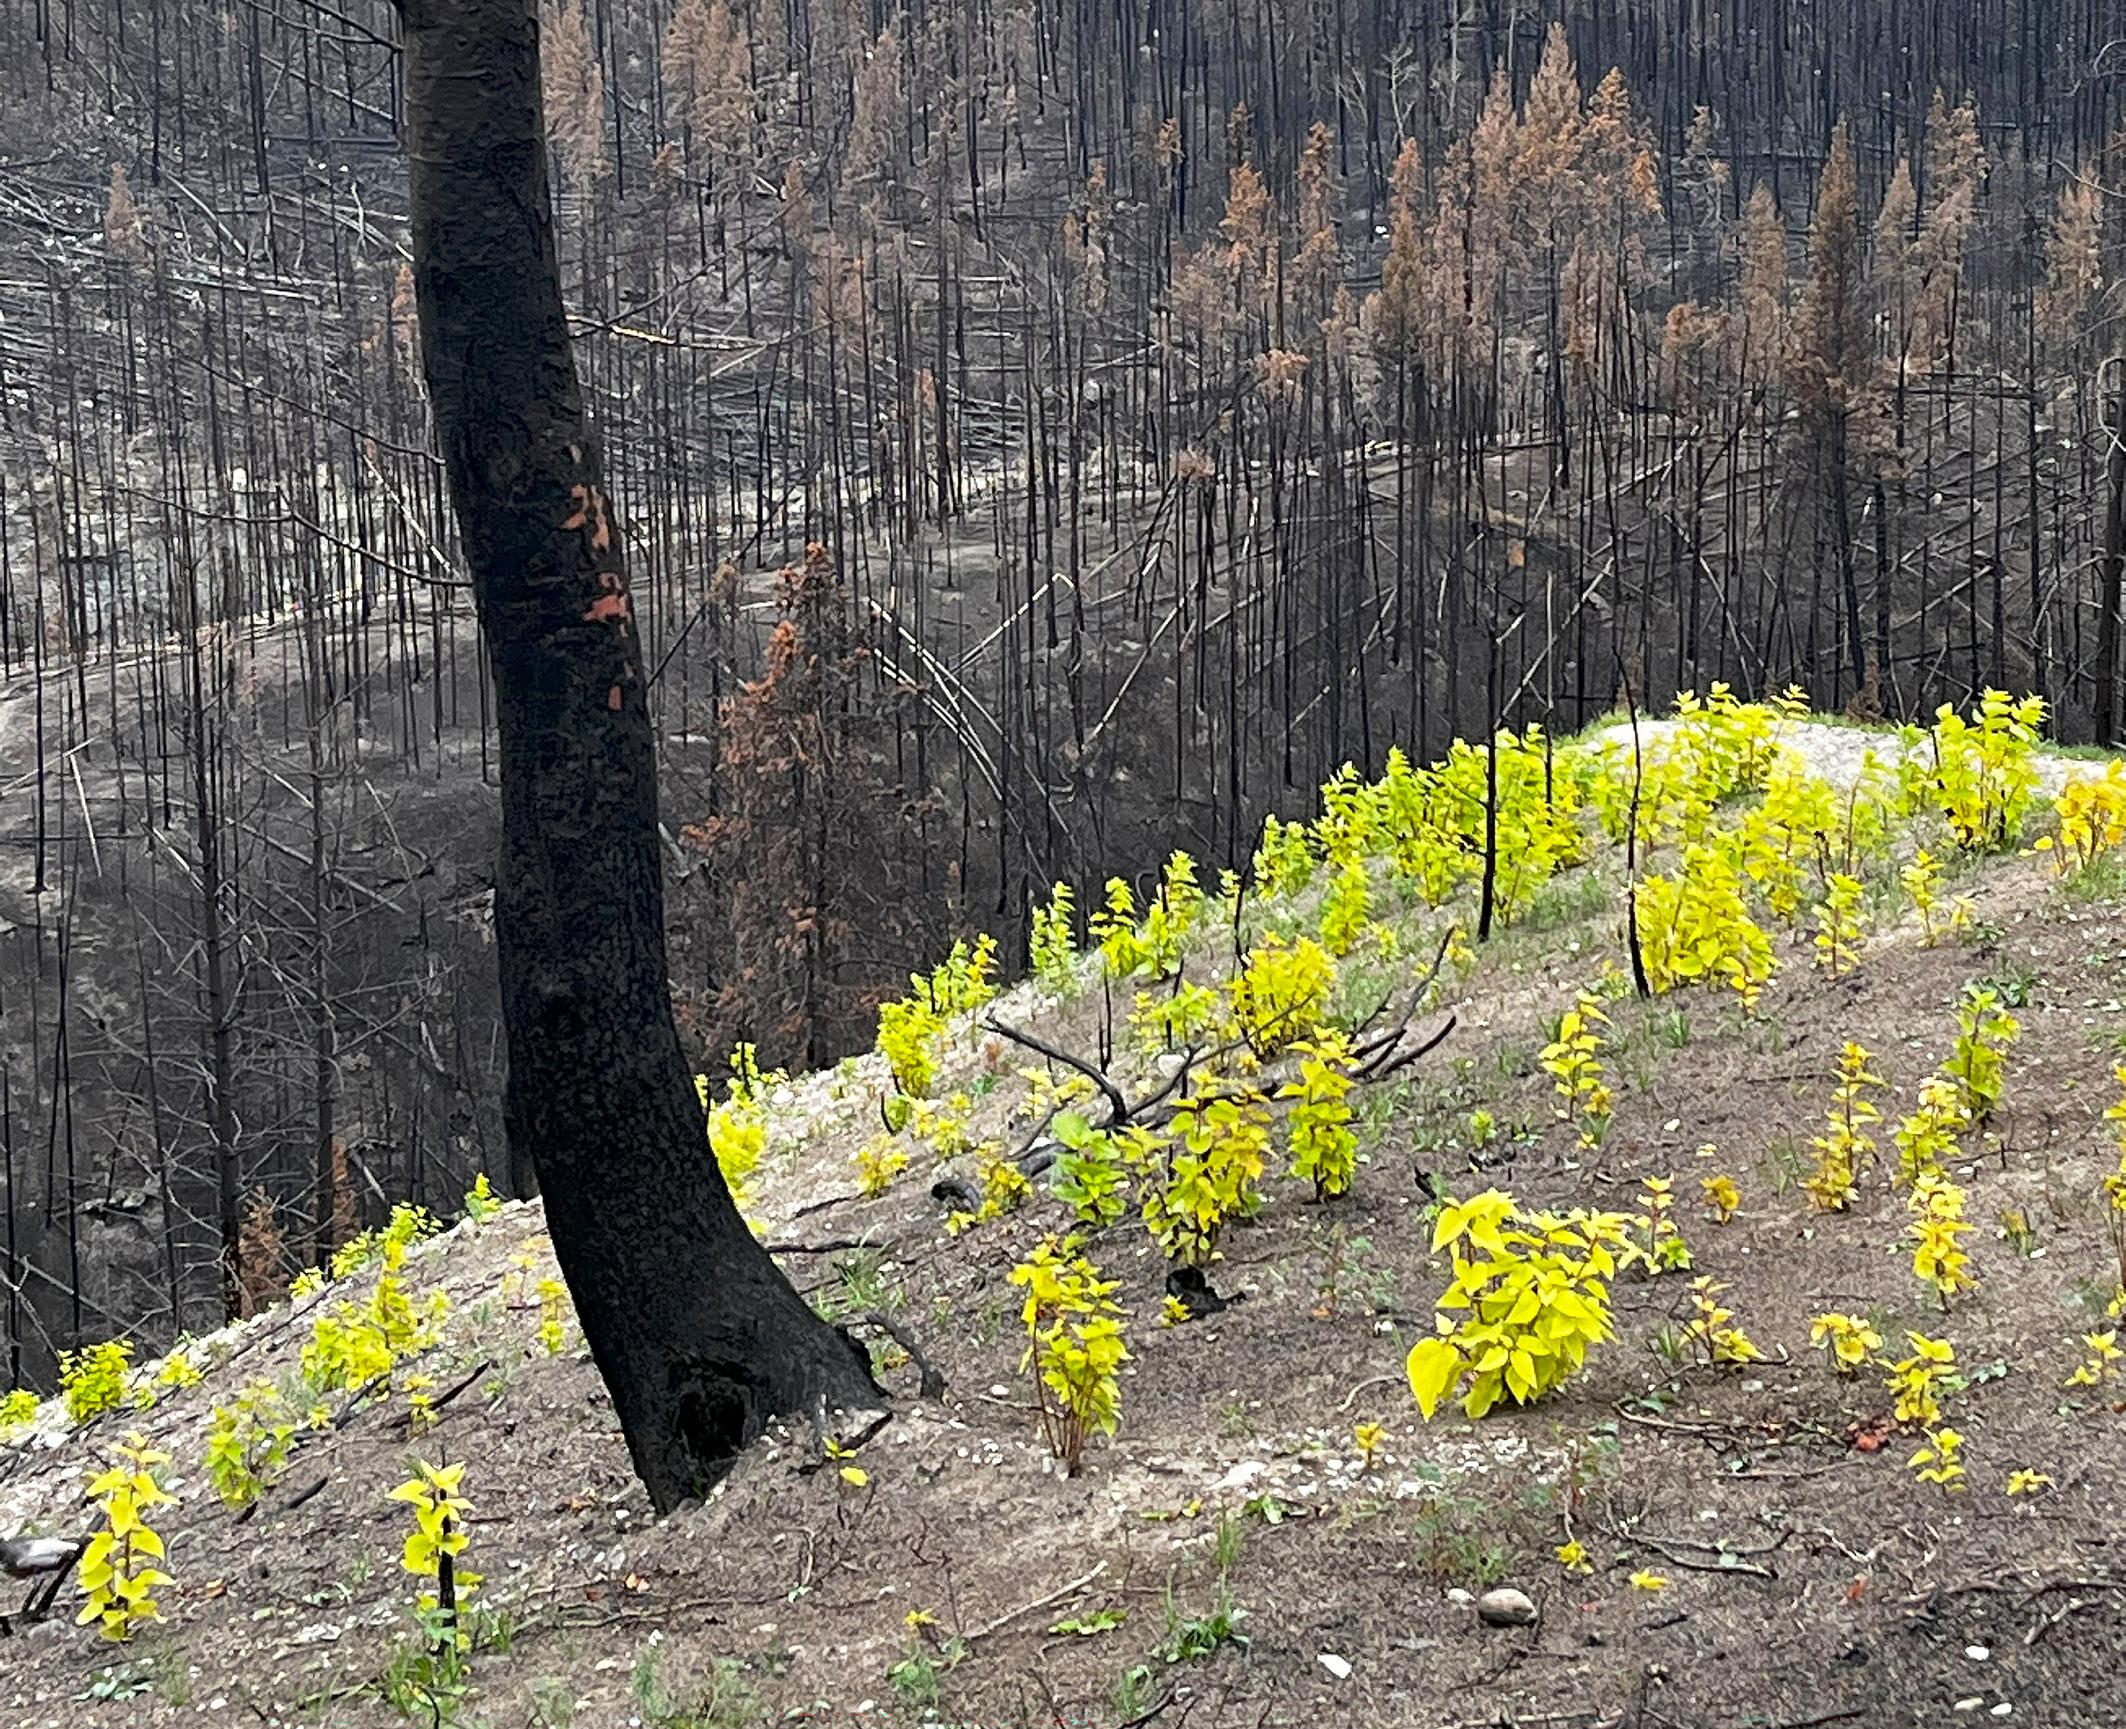
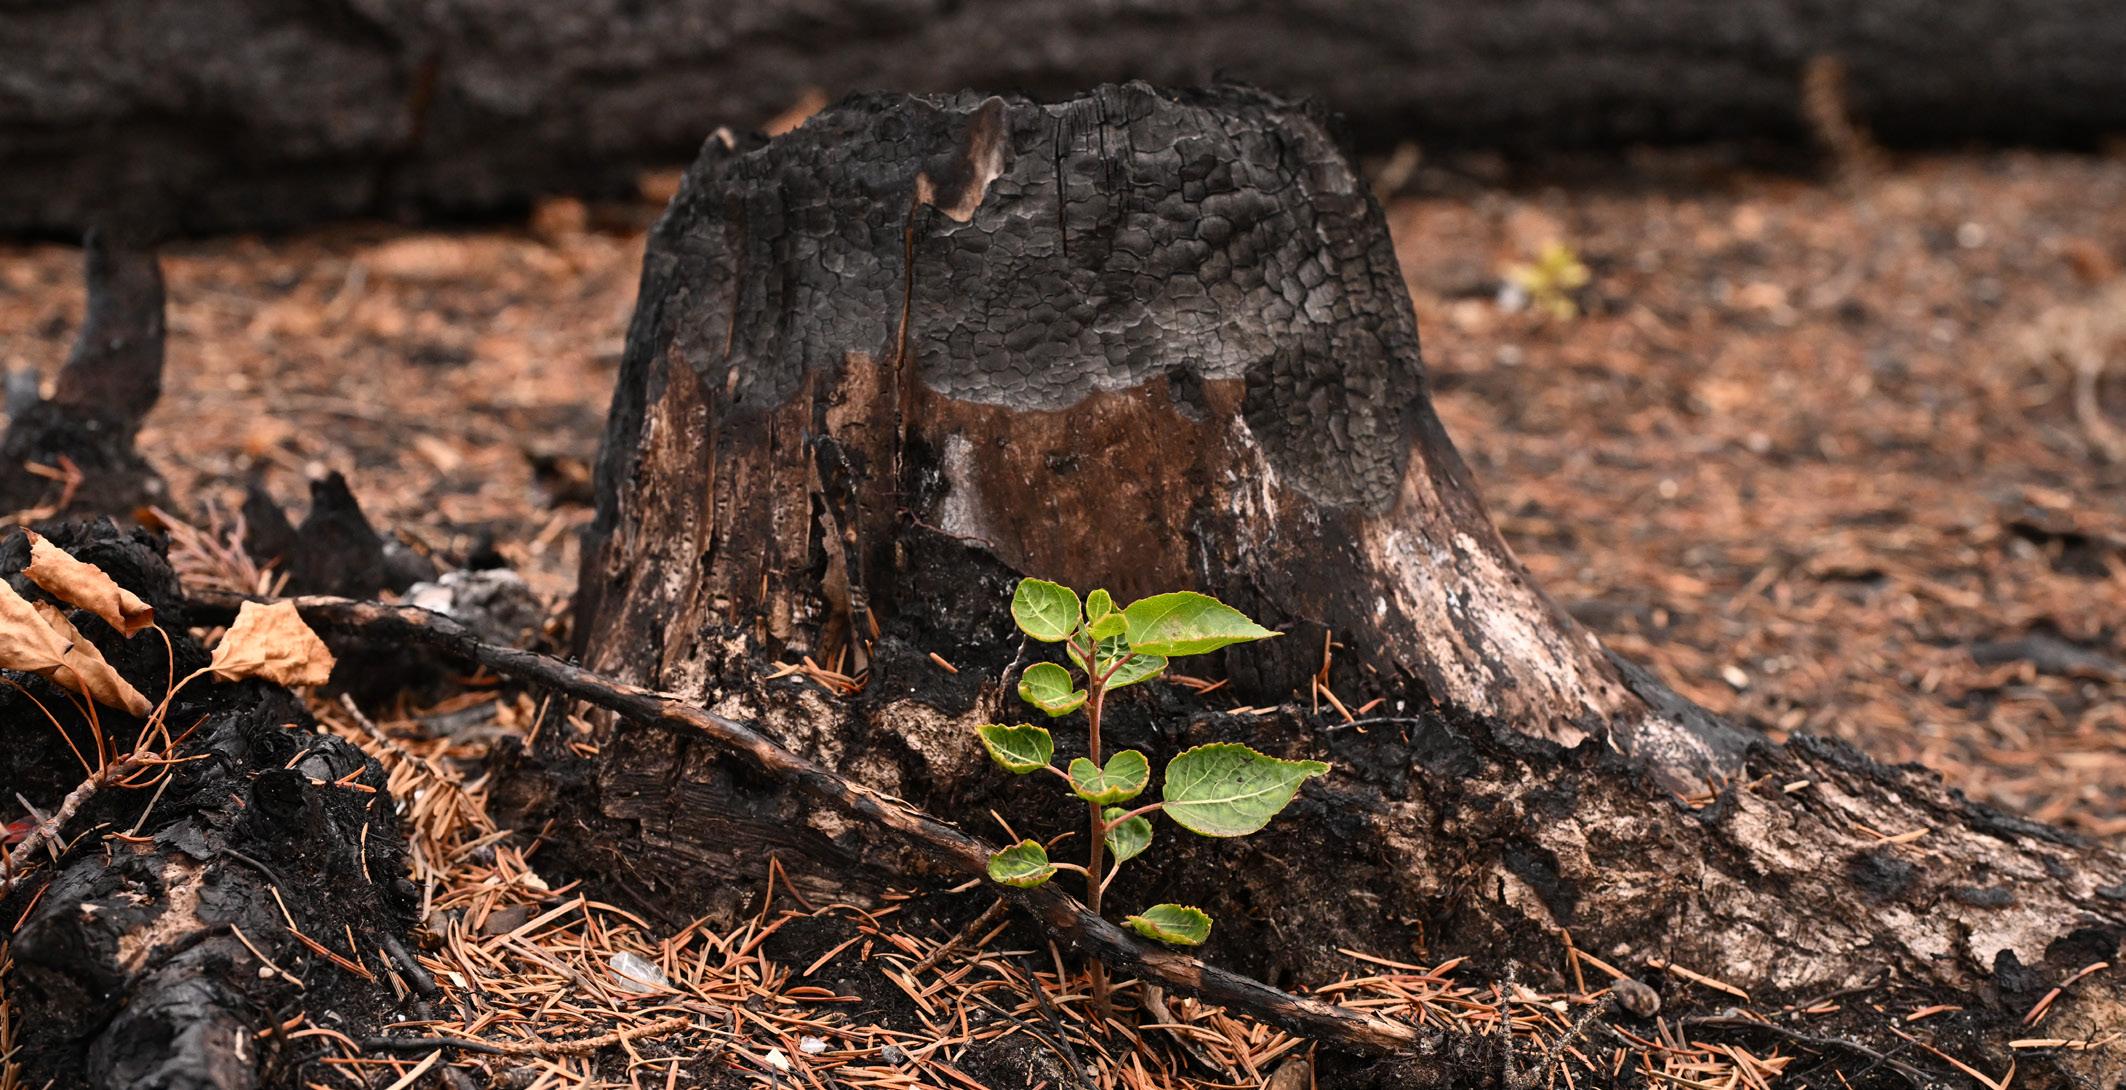
Last year’s wildfires around Jasper in the Canadian Rockies devastated both flora and fauna. Theresa Bradley is documenting the impact of the fires and the recovery that is taking place.
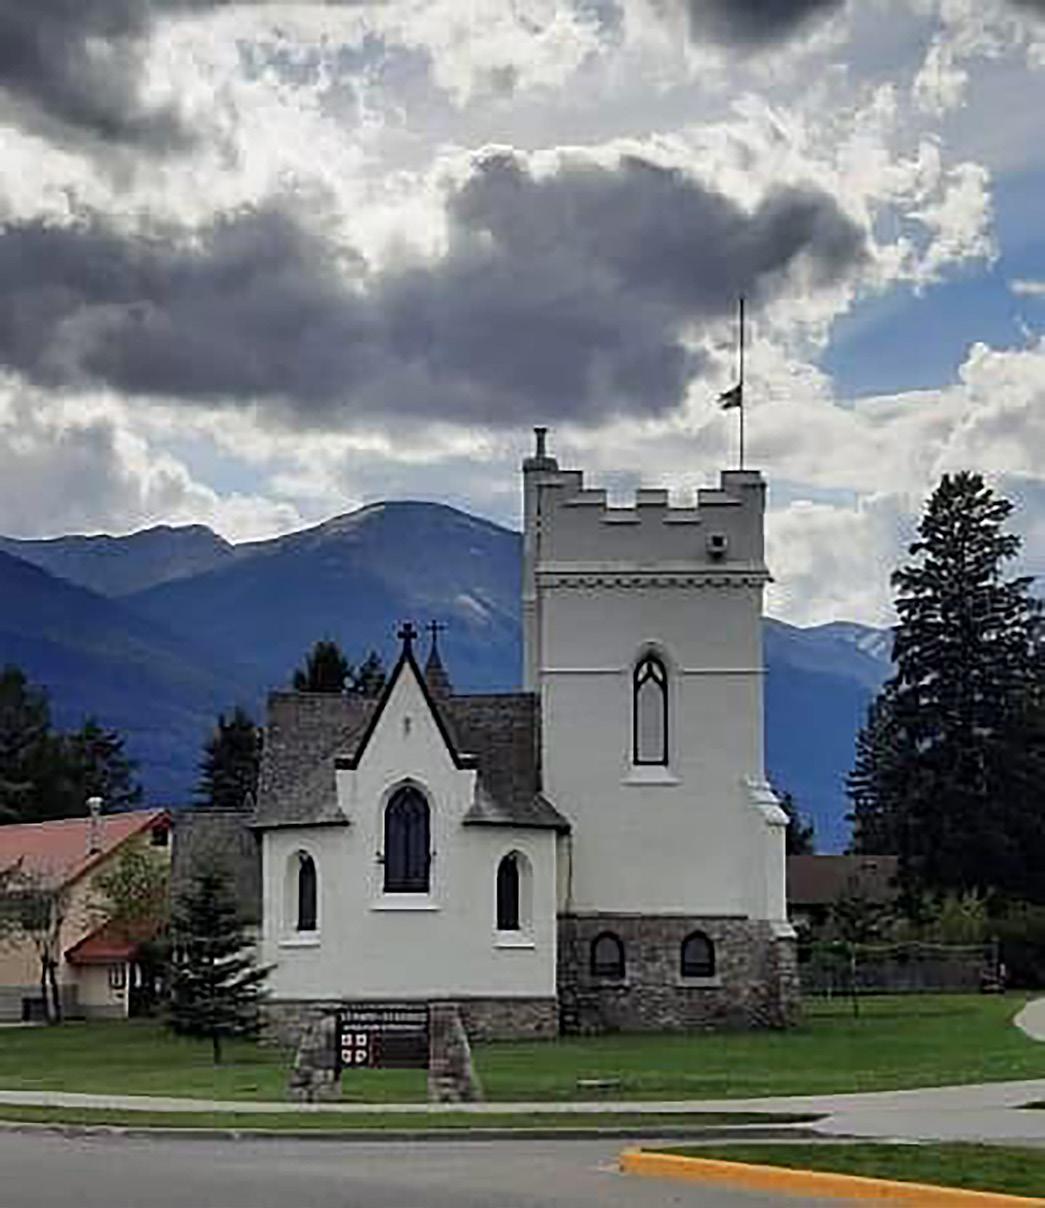
The town of Jasper, situated in Jasper National Park, Alberta, Canada is a favourite for many visitors along with other Canadian Rockies towns such as Canmore, Banff and Lake Louise.
Jasper lies four hours drive from the nearest international airport, therefore it can also be quieter than other national parks, and is a home away from home for many Albertans.
As a wildlife and nature photographer living in Alberta, only a few hours from Jasper National Park, I enjoy time in the town of Jasper and the park throughout the year.
This is an introduction to a portfolio of work I am undertaking, over the next few years, to document the recovery of nature in Jasper National Park after the devastating wildfires in July 2024 that became, when several of them merged, the Jasper Wildfire Complex.
Evacuation
The evacuation order was issued at 10pm on 22nd July 2024 for the entire Jasper National Park of around 5000 residents and 20,000 visitors.
The fire reached Jasper townsite at 6:40pm on July 24th and just over
three hours later, at 10pm, Parks Canada reported significant loss within the townsite.
It was confirmed two days later that while all critical infrastructure was saved, about 32% of homes and businesses were damaged or destroyed.
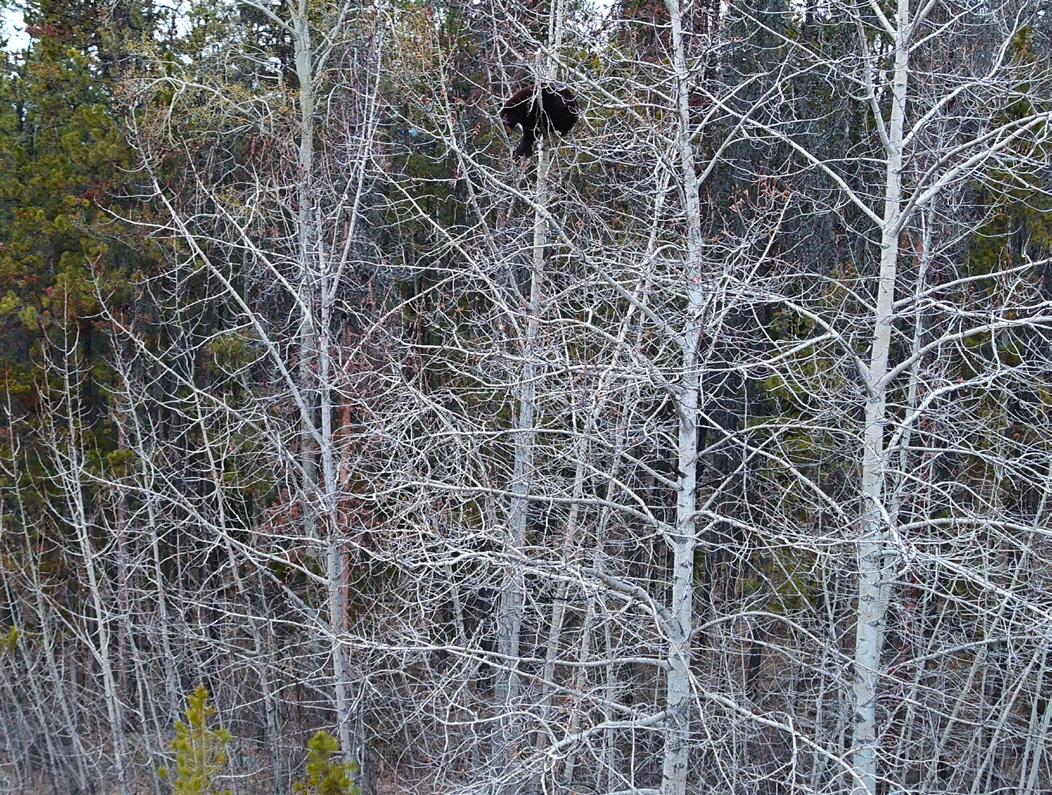
While the forests have started to regenerate, the wildlife have lost sources of food and cover. Black bears are adapted to forest environments where they find safe cover and climb trees for food. In Spring, tree buds help their digestive system after a winter in hibernation.
Lac Beauvert, Jasper National Park, Jasper, Alberta, Canada
In July 2024, the national park region was suffering hot and dry weather. A ban on visitors making fires was introduced on July 12. During the late afternoon of July 22, a fire was reported at a public waste processing plant a few miles north of the town of Jasper. Thirty minutes later, another wildfire was reported near Kerkeslin Campground, some 25 miles south of the initial fire report. Another ten minutes later, two more wildfires were reported near other campgrounds south of Jasper. Wind gusts soon merged the three wildfires south of the town into one, and became too big for local firefighters alone to handle.
Within the first hours after the wildfires started, the combined area of the fires grew to over 20 square miles. Flames over 30m high triggered new fires starting up ahead of the established fire and aerial and ground suppression efforts had limited success.
Officials acted quickly after the fires were reported which helped save lives. The town and national park were evacuated. Within an hour of the wildfire starting, they had evacuated several facilities, including five campgrounds. That same night, within just two hours, some of areas that had been evacuated were burning.
As the wildfires continued to grow, they generated internal winds that accelerated wildfire growth at an aggressive rate. The fire-generated convective winds uprooted healthy, mature trees including their entire root systems and threw large embers, sometimes up to half a mile or more ahead of the fire.
Air tankers (also known as water bombers) made multiple drops on the wildfire complex with little impact on fire activity. Fire retardant was deployed multiple times but because of the wildfire severity, it proved ineffective. By July 24, strong winds, unstable air, and very poor visibility made it unsafe for aircraft to fly.
Based on material published by Parks Canada at parks.canada.ca/pn-np/ab/jasper/visit/feu-alert-fire/feudeforet-jasper-wildfire/chronologie-timeline
Nature has started to heal
The park was closed to visitors for almost two months. On my first trip back, signs of growth, sprouting through the scorched ground and around burned trees promised new beginnings.
It is a different Jasper from the one we have known and loved, and we will hold our memories of that beloved Jasper in our hearts and images.
We, too, will learn to grow with this Jasper as it rebuilds the town and the forests heal.
Winter has settled in now, the snow providing moisture and protection.
Spring 2025 is expected to be a carpet of flowers and colour. l
Further information about this wildfire can be found at parks.canada.ca/pn-np/ab/jasper/visit/feu-alert-fire/feudeforet-jasper-wildfire fitzhugh.ca/jasperstrong/photos-jasper-wildfire-destruction-as-seen-from-above-9595920
IN PREVIOUS ISSUES
All previous issues are available from the DIGIT Archive at rps.org/di/digit-archive/
5 What is high key minimalist black and white photography?
Hugh Rooney FRPS
11 These are a few of my favourite things
Robert Bracher ARPS
15 The importance of seeing negative space
Christina Gundersen AIS ARPS
19 Photographic competitions for non-creative people
David Cudworth
24 Cyanotype magic in a summer garden
Melanie Chalk ARPS
29 DIGIT Challenge: Triangular Construction
Bob Sanders
31 DIGIT Challenge: An Alternative Reality
Roger Cookson ARPS 33 DIGIT Challenge: City Time Rob Kershaw ARPS 35 In previous issues
and
Toon 10 Creating infrared images with the iPhone
Rad A Drew 15 Composite magic
Lynda Haney
20 AI - How close is it to photography now?
Graham Whistler FRPS
23 The art of equine portraiture
Emma Campbell 31 DIGIT Challenge: Sky walkers
John Cavana ARPS 33 DIGIT Challenge: Warped John Bull
5 Pixels and perspectives
Edmund Nägele FRPS
11 My journey photographing the night sky
Colin Smith LRPS
16 War in Europe
Jonathan Vaines
22 Portraits - the human element? Or the human elephant in the room?