EDITION 2026
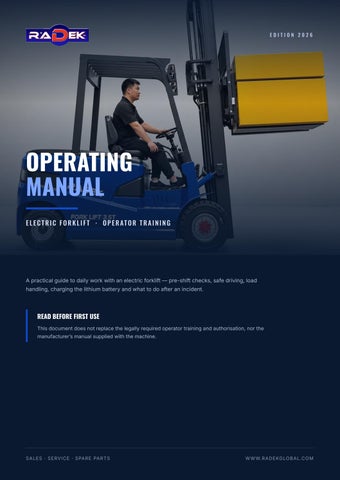
OPERATING MANUAL E L E C T R I C F O R K L I F T · O P E R AT O R T R A I N I N G
A practical guide to daily work with an electric forklift — pre-shift checks, safe driving, load handling, charging the lithium battery and what to do after an incident.
READ BEFORE FIRST USE This document does not replace the legally required operator training and authorisation, nor the manufacturer’s manual supplied with the machine.
S AL ES · SERVIC E · SPARE PART S
W W W.RADEKGLOB AL .C OM
INTRODUCTION
WHO MAY OPERATE
01
A forklift most often injures people who are not on it — pedestrians, colleagues in the warehouse, anyone passing under a raised load. The rules below are not paperwork.
ONLY A PERSON WHO MEETS ALL OF THE FOLLOWING MAY OPERATE is at least 18 years old has completed training and holds a valid operator certificate under local law is medically fit — vision, hearing and reaction confirmed by examination is authorised in writing by the employer, for this specific machine type and capacity is not under the influence of alcohol, drugs or medication that affects attention
CONTENTS Machine parts and controls
03
Pre-shift inspection
04
Starting up and basic driving rules
05
Stability and tip-over
06
Capacity and load centre
07
Load curve diagram — RK-15EFL-PRO
08
Load curve diagram — RK-35EFL-PRO
09
Load curve diagram — RK-50EFL-PRO
10
Handling the load
11
Ramps and gradients
12
Lithium battery and charging
13
Prohibited — the common mistakes
14
End of shift, parking and incidents
15
R A D E K · E L E C T R I C F O R K L I F T O P E R AT I N G M A N U A L
02
CHAPTER 1
PARTS AND CONTROLS
02
1
Overhead guard (FOPS) Protects against falling objects. Never removed.
2
Mast Raises and lowers the forks. Tilt is set with a lever.
3
Steering wheel and levers Lift/lower, tilt, side shift.
4
Seat with belt Seat switch — the machine will not move without an operator.
5
Counterweight and battery bay Balances the load. No weight is ever added.
6
Steer (rear) wheels The rear end swings wide when turning.
7
Drive (front) wheels They carry the weight of the load.
8
Carriage and forks Checked daily for cracks and locking pins.
1 2
4
3
5 8
6
7
Model RK-15EFL-PRO shown. The layout is the same across the range.
CONTROL LEVERS Lift / lower — back raises, forward lowers Tilt — mast back for travel, forward for placing Side shift — for fine centring only, never to drag a load
PEDALS AND SWITCHES Accelerator and brake — the service brake is the left or right pedal depending on model Forward / reverse — direction is changed only with the machine stopped Emergency stop — cuts the power supply immediately
DATA PLATE It carries the model, serial number, year of manufacture, service weight, battery voltage and the capacity diagram. It is the only source for how much this machine may lift in this configuration. If the plate is illegible or missing, the machine is not used until it is replaced.
R A D E K · E L E C T R I C F O R K L I F T O P E R AT I N G M A N U A L
03
CHAPTER 2
PRE-SHIFT INSPECTION
03
The check takes a few minutes and is done at the start of every shift, before the machine is used.
MACHINE SWITCHED OFF
MACHINE SWITCHED ON
Battery and cables — connector intact, no burn marks; casing free of dents or bulges
Instrument panel — no active faults, battery charge sufficient for the shift
Under the machine — no hydraulic oil on the floor
Horn and beacon
Hydraulic hoses and fittings — no cracks, swelling or leaks
Lights — front, rear, brake lights and indicators
Tyres — no cuts or embedded objects, tread above the wear mark Forks — no cracks or bending, heels not worn, locking pins down Chains — evenly tensioned, lubricated, no damaged or twisted links Overhead guard and load backrest — undamaged, all bolts in place
Service brake — stops without pulling to one side; parking brake holds Steering — no free play, no unusual noise Lift, lower, tilt forward/back and side shift over the full range Emergency stop — press it, confirm everything cuts out, reset it Seat switch — the machine must not move when you stand up
Seat and belt — the belt pulls out freely and locks on a sharp pull Data plate and safety decals — legible and in place
IF ANYTHING IS NOT RIGHT
Mirrors and lights — clean and undamaged
The machine is not used. Report the fault to your supervisor, tag the machine as out of service and take the key. Repairs are never improvised.
R A D E K · E L E C T R I C F O R K L I F T O P E R AT I N G M A N U A L
04
CHAPTER 3
STARTING UP AND DRIVING MOUNTING AND STARTING 1
04
BASIC RULES
Climb on facing the machine, keeping three
Speed follows the space, the floor and the visibility
points of contact. Never jump down.
— not the work schedule
2
Adjust the seat and mirrors before moving off.
3
Fasten the seat belt — always, even for the shortest move.
Keep at least three forklift lengths from another machine Pedestrians always have right of way; make eye contact before passing
Key to ON. Check the display: no active faults,
Sound the horn at every corner, doorway, junction
enough charge.
and rack aisle exit
5
Release the parking brake.
Look in the direction you are travelling, including in
6
Lower the forks to 15–20 cm above the floor and
4
tilt the mast back. 7
reverse Never carry people on the machine or on the load
Select a direction and move off slowly, looking where you are going.
A QUIET MACHINE IS AN UNSEEN HAZARD An electric forklift is almost silent. Pedestrians will not hear you coming the way they would with a diesel machine, so the horn and eye contact become your only warning.
R A D E K · E L E C T R I C F O R K L I F T O P E R AT I N G M A N U A L
05
CHAPTER 4
STABILITY AND TIP-OVER
05
A forklift does not stand on four points like a forks
car. The rear axle pivots on a central joint, so the machine effectively stands on a triangle. Drive axle
As long as the combined centre of gravity of machine
(two points)
and load stays inside that triangle, the forklift is stable.
Combined centre of gravity
The moment it moves outside, the machine tips. It happens in under a second and cannot be corrected by reacting. Central pivot of the steer axle (one point)
THE CENTRE OF GRAVITY MOVES OUT WHEN turning too fast, especially with a raised load
Stability triangle — plan view.
turning on a gradient or a ramp travelling with the load raised instead of at travel height the load is over capacity or unbalanced braking or accelerating sharply crossing a threshold, hole or uneven surface with a raised load
IF THE FORKLIFT STARTS TO TIP Do not jump — most fatal injuries happen when the operator jumps Stay belted and seated Grip the wheel firmly and brace your feet Lean away from the direction of the tip
THREE HABITS THAT PREVENT TIP-OVERS The load stays low. Travel only at 15–20 cm with the mast tilted back. Turns are slow. Speed is reduced before the turn, not corrected during it. The load is within limits. Weight is checked before lifting, never estimated by eye.
R A D E K · E L E C T R I C F O R K L I F T O P E R AT I N G M A N U A L
06
CHAPTER 5
CAPACITY AND LOAD CENTRE
06
The capacity marked on the machine applies only at a standard load centre of 500 mm and at standard lift height.
500 mm
The load centre is the distance from the fork face to the centre of gravity of the load. With a longer or
centre of gravity
deeper load the centre of gravity moves forward, the
The further out the centre of gravity, the less capacity.
lever arm grows and the usable capacity falls — even though the load itself weighs the same.
load centre
Capacity also falls as lift height increases Every attachment (side shift, fork extensions, rotator)
Load centre — side view.
reduces capacity Only the data plate on the machine, for its own configuration, is binding
INDICATIVE CAPACITY REDUCTION Load centre
500 mm
600 mm
700 mm
800 mm
Available capacity
100 %
about 85 %
about 75 %
about 65 %
Example: 3,500 kg machine
3,500 kg
about 2,980 kg
about 2,625 kg
about 2,275 kg
The table illustrates the relationship only. Actual values are read from the load curve diagrams on the next three pages and from the plate on the specific machine.
R A D E K · E L E C T R I C F O R K L I F T O P E R AT I N G M A N U A L
07
LOAD CURVE DIAGRAM
RK-15EFL-PRO
07
Load curve diagram as shown on the machine data plate.
Lift height (mm)
≤ 3.500
4.000
4.500
5.000
5.500
6.000
Capacity at 500 mm load centre (kg)
1500
1350
1125
975
825
525
The table values apply at a 500 mm load centre. For a larger load centre, read the capacity from the curves. From that figure deduct a further 10 % for the hi-lift duplex mast or 15 % for the triplex mast, plus the weight of any attachment fitted.
R A D E K · E L E C T R I C F O R K L I F T O P E R AT I N G M A N U A L
08
LOAD CURVE DIAGRAM
RK-35EFL-PRO
08
Load curve diagram as shown on the machine data plate.
Lift height (mm)
≤ 3.500
4.000
4.500
5.000
5.500
6.000
Capacity at 500 mm load centre (kg)
3500
3100
2700
2300
1700
1400
The table values apply at a 500 mm load centre. For a larger load centre, read the capacity from the curves. From that figure deduct a further 10 % for the hi-lift duplex mast or 15 % for the triplex mast, plus the weight of any attachment fitted.
R A D E K · E L E C T R I C F O R K L I F T O P E R AT I N G M A N U A L
09
LOAD CURVE DIAGRAM
RK-50EFL-PRO
09
Load curve diagram as shown on the machine data plate.
Lift height (mm)
≤ 3.500
4.000
4.500
5.000
5.500
6.000
Capacity at 500 mm load centre (kg)
5000
4800
4500
4000
3500
3000
The table values apply at a 500 mm load centre. For a larger load centre, read the capacity from the curves. From that figure deduct a further 10 % for the hi-lift duplex mast or 15 % for the triplex mast, plus the weight of any attachment fitted.
R A D E K · E L E C T R I C F O R K L I F T O P E R AT I N G M A N U A L
10
CHAPTER 6
HANDLING THE LOAD PICKING UP 1
10
PLACING
Approach the pallet square on, machine at right
1
angles to the load. 2
Set the fork spread as wide as the pallet allows.
3
Enter slowly, fully under the pallet, until the load rests against the fork face.
4
5
before lifting. 2
Raise to the required height only once the machine is stationary.
3
Move slowly over the placing position and level the mast.
Lift 5–10 cm and check that the load is stable and balanced.
4
Lower the load until the forks are free.
Tilt the mast back and lower to travel height, 15–
5
Withdraw the forks straight back, without
20 cm. 6
Approach the location square on and stop
Check behind you and move off.
turning. 6
Lower to travel height before moving on.
NEVER Never lift with the fork tips — the load must rest along the full fork length Never move a load by tilting forward when it is high up Never drag or push a load with the forks or the counterweight Never lift an unbalanced, damaged or loosely stacked load Never lift people — a forklift is not a work platform
R A D E K · E L E C T R I C F O R K L I F T O P E R AT I N G M A N U A L
11
CHAPTER 7
RAMPS, GRADIENTS AND VISIBILITY
11
On a gradient the load must always be on the upgrade side. That means a different travel direction with and without a load.
LOADED
UNLOADED
Forward up · reverse down
Reverse up · forward down
RULES ON A GRADIENT Never turn on a ramp and never travel across a gradient
VISIBILITY If the load blocks the view ahead — travel in reverse Look in the direction of travel, not over your shoulder
Never raise or lower a load on a gradient
now and then
Keep the mast tilted back and the load as low as
Stop and sound the horn when leaving a rack aisle
possible Keep clear of the edge of the ramp and of the loading platform Confirm the ramp is secured and the vehicle cannot
On a wet, oily or damaged floor reduce speed and avoid sharp braking In poor visibility stop and ask for a banksman to guide you
move away
ENTERING A TRAILER OR CONTAINER The vehicle must be stopped, engine off, brake applied and wheels chocked The dock leveller or bridge plate must be fully seated and secured against movement Check the floor loading of the trailer and the clear height of the entrance Inside, drive slowly with lights on — the space is narrow and poorly lit
R A D E K · E L E C T R I C F O R K L I F T O P E R AT I N G M A N U A L
12
CHAPTER 8
LITHIUM BATTERY CHARGING
12
SAFETY
Charge only in the designated area, with the charger
Never charge a battery with a damaged casing,
supplied with the machine
damaged cable or burnt connector
Before connecting, the machine is switched off and
Never leave metal objects or tools on the battery
the parking brake applied The connector must be dry, clean and fully inserted Never connect or disconnect while charging is
Never short the terminals Observe the temperature range given in the manufacturer’s manual
running Opportunity charging during breaks is fine — it does not damage a lithium battery
STOP IMMEDIATELY IF
Do not cover the charger and leave space around it
the casing is bulging, deformed or unusually
for ventilation
hot there is an unusual smell or visible smoke
MAINTENANCE FREE
there is cracking or hissing from the battery
A lithium battery is never topped up with water and needs no equalising charge. Opening the casing is a service job, not an operator job.
IF A BATTERY CATCHES FIRE Do not try to put it out with a hand extinguisher — a lithium battery in thermal runaway will not be stopped that way. Isolate the power if it is safe to do so, move people away, evacuate the area and call the emergency services on 112, stating that a lithium battery is involved.
R A D E K · E L E C T R I C F O R K L I F T O P E R AT I N G M A N U A L
13
CHAPTER 9
PROHIBITED
13
Every point below comes from an accident that has already happened somewhere. None of them is a procedural breach — each one is a direct risk to life. ✕
Carrying people On the forks, on the load or in the cab. Never, not even briefly.
✕
Standing under a raised load Or walking under it. This is the most common fatal accident.
✕
Leaving with the load raised Forks are always lowered before leaving the machine.
✕
Driving without the belt In a tip-over the belt is what keeps the operator inside the guard.
✕
Exceeding rated capacity Not even “just this once”. The data plate is a limit, not advice.
✕
Driving with the view blocked If the load blocks the view — travel in reverse.
✕
Turning on a ramp or gradient Travel straight up and straight down, never across.
✕
Using a damaged machine Every fault is reported; the machine is tagged and left standing.
✕
Phone use while driving Headphones and phones take away both attention and hearing.
✕
Lifting on one fork The load always rests on both forks, against the fork face.
THE RULE THAT COVERS ALL OF THEM If you have to think about whether something is allowed — stop and ask. No load, no schedule and no deadline is worth an injury.
R A D E K · E L E C T R I C F O R K L I F T O P E R AT I N G M A N U A L
14
CHAPTER 10
END OF SHIFT AND INCIDENTS PARKING 1
Park in the designated area — never in front of exits, hydrants, panels or walkways.
2
Lower the forks flat to the floor.
3
Tilt the mast slightly forward so the forks rest
14
AFTER AN INCIDENT 1
Stop at once and switch the machine off.
2
Secure the area so a second accident cannot follow.
3
fully. 4
Put the direction control in neutral and apply the
Help anyone injured and call for help — 112 for emergency services.
4
parking brake.
Inform your supervisor immediately, however small the damage looks.
5
Switch off and remove the key.
5
Move nothing unless it is necessary for safety.
6
Connect to the charger if that is planned for the
6
Complete a report while the details are fresh.
next shift.
WHAT THE OPERATOR DOES Cleaning, visual checks and reporting. All repairs, adjustments and hydraulic work are done by a trained technician. Never work under a raised mast without a mechanical support.
R A D E K · E L E C T R I C F O R K L I F T O P E R AT I N G M A N U A L
EVERY IMPACT GETS REPORTED A knock into a rack, a column or a door can leave damage that is invisible from outside. A damaged rack collapses later, when nobody expects it.
15
SERVICE AND SPARE PARTS For routine service, spare parts or technical support, contact us with the model and serial number from the machine data plate.
SERVICE
SPARE PARTS
WEB
tel. +389 __ ___ ___
parts@radekglobal.com
www.radekglobal.com
SALES · SERVICE · SPARE PARTS
© 2026 RADEK · All rights reserved