Photography Club
PI X EL Issue 1 - Jan 2022
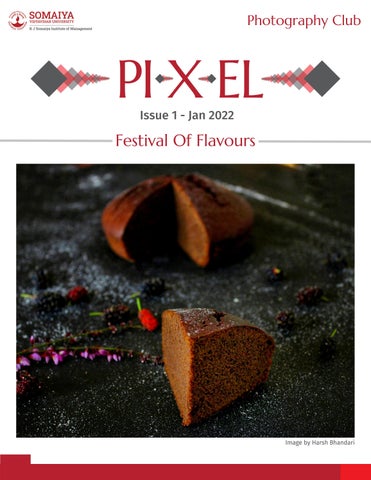
Festival Of Flavours
Image by Harsh Bhandari
THE TEAM D E S I G N E R S
Apoorva Sahu
Siddharth Yadav
C O N T E N T
Alipriya Ghosh
Shruti Sen
Disha Mishra
Yuti Talati
C U R A T O R S
Harsh Bhandari
Tuneer Sarkar
Krittika Tewari
Yash Munot
CONTENTS
1
Theme Overview Get introduced to the world of Food Photography
2
Capture The Perfect Shot
5
Aesthetic Edits
8
Tips & Tricks
Learn the techniques to click the best shot
Enhance your shot to make it look more mouth watering
Use hacks to get professional looking clicks
10
A Photographer's Journey
12
The Professional's Insights
20
Shots From The Club
Know about the journey of Rachel Korinek
Interview by Abhishek Khanna & Alok Verma
Glance through the best captures of our members
ABOUT US The Photography Club of K J Somaiya Institute of Management has been encouraging students to use the art of photography to express their emotions & thoughts. We aim to create an environment for all the students to discover, develop, and express their creativity in photos & videos, by honing their capturing & editing skills. To keep the passion of photography alive in the busy lives of the students, the club conducts workshops, events, photo-walks, competitions, and official photoshoots around the year, throughout the year under the guidance of Prof. Hitesh Punjabi. To be a member of the club, one may not need to technicalities of the photography world, but certainly have an eye for it and passion towards it as our shutters keep capturing moments and lives around us in some way or the other. The club believes that every picture has a story to tell, and to let everyone tell theirs, the club gives the whole institute the opportunity to showcase their best shots of various themes the club runs throughout the year for all the students of the institute. Pixel, the club's official magazine bringing various styles of photography and camera techniques together as well as expert's views and journeys to encourage the budding photographers to take on their picturesque journey forward. We hope you like reading through the content of this issue. Regards,
Photography Club
Theme Overview There are days when you open up Instagram and it is flooded with amazing photos of delicious food. They not only look really delicious but also are aesthetically pleasing to the eye. Food Photography is all about the set up, the angles, the colours, and of course the plate of food or glass of drink, at it's heart. While some chefs are turning into Food Photographers and bloggers themselves, there are some Photographers who specialize in Food Photography by taking photographs for restaurants, cafes, and Food delivery apps. Some will say that it's all about the light, like any photograph ever is. While some will say it's just about what is in the plate. There is no denying that a tremendous efforts go behind making the perfect photo in this genre. Be it a dish of Biriyani right before a festival, or a simple summer drink with eye popping colours, it always evokes a lot of emotions and hunger, and makes you want to just go ahead and take a bite. Presenting to you a scrumptiously themed first edition of Pixel, the Magazine of the official Photography Club of K J Somaiya Institute of Management. We will explore how the Pros are doing it, tips & hacks of doing it better along with Reader's Submissions and Guest Interviews.
1
Capture The Perfect Shot! Food photography can be broadly divided into two categories, mobile and DSLR. And although the basic principles of photography remain the same regardless of the medium, it is important to note that there is a significant difference between how the two systems work and therefore, how best to take advantage of each.
Mobile photography (Source: Google)
Focus The first thing to keep in mind is to keep the phones steady, although the increasing ability of phones for image stabilization has helped immensely.
Lighting Try to shoot in natural lighting. If the light is too harsh, gauzy curtains may help. And to illuminate the dark sections of the photograph, a white reflective surface works best. Avoid using the phone’s flash. Use your friends’ phones to illuminate the food in dimly lit restaurants or surroundings.
Camera angle While it is the norm to use overhead shots for food photography, sometimes a 30 degree or a 45 degree could work better.
2
DSLR Photography Lens
When using a camera, the choice of lens possibly makes the biggest difference between a great-looking picture and something that looks amateurish. An 80/85/90/100 mm prime lens is great for food photography. When choosing a prime lens, it is better to pick one with a macro function so that close-ups can be
(Source: digicamlens.com)
used with auto focus.
Results from a 100mm macro lens (Source: twolovesstudio.com)
The difference between a 50mm and a 60 mm lens for the same shot
When using zoom lenses, it is best to use a 24 – 70mm f2.8 or a 24 – 105mm f4 Tilt-Shift Lens is a specialist lens used to selectively choose the focus area, in a way that other lenses can’t It is expensive and used primarily by food and architectural photographers
The plane of focus is parallel With a tilt-shift lens, one can angle the plane of focus to the camera sensor using normal lenses
3
The Exposure Triangle Aperture
Shutter Speed
It is the amount of light that can hit the camera sensor, through the hole while passing through the lens. It is measured in f & is used to focus on a particular part of an image.
It is the amount of time the shutter is open. 1/125 s means the shutter is open for one one-hundred and twenty fifths of a second.
(Source: sallysbakingaddiction.com)
(source: icecreaminspiration.com)
Wider aperture allows focus Smaller aperture focuses on on smaller area of the image more area (f/2.8) (f/5.6)
Focal length: 100 mm, ISO 1600, aperture 2.8, shutter speed 1/1000/sec
Focal length: 100 mm. ISO 1600, aperture 2.8, shutter speed 1/500/sec
ISO It is the sensitivity of the film – the film’s ability to capture light.
The image gets brighter when ISO is increased from 100 to 1600
ISO 200
ISO 400
ISO 800
ISO 1600
At the end of the day, there are many resources to learn from but most importantly you need to experiment with your camera or mobile to see what works best for you. Enjoy the process and click some cool pictures!
4
Aesthetic Edits Food Photography is the art of making food look as aesthetically pleasing as possible. The idea is to make it appealing enough that the viewers can’t resist from drooling. This noodle wouldn’t have looked that appealing if not for those pooping colors adding more texture to the quality of the photo. (Source: somethewiser.com)
No matter how expensive or great your camera is, it can never capture the subject's natural beauty. Postprocessing is where the magic happens. It plays a vital role in making the pictures come alive. (Source: www.pinterest.com)
There are so many elements that come into play while editing an image. One of the most important factors is the lighting. Brightness and contrast let you control the relationship between the brights and darks, and increase/decrease the image's overall brightness. The right combination can dramatically impact your image, adding an extra punch or softening the visual impact.
5
Brightness and exposure can change the quality of photo
The right combination can dramatically impact your image, adding an extra punch or softening the visual impact.
If your camera's white balance is not matched up to the color temperature of the predominant light source, the resulting image can have a color cast that is undesirable. Depending on the subject/scenery, you can choose to make the photos "warmer" or "cooler".
(Source: www.pinterest.com)
(Source: www.pinterest.com)
High contrast effect
The following important concept is color grading. Saturation level plays a significant role in your picture and can help bring out bright colors.
Change in white balance
In warm pictures, the "Reds" are predominant than the "Blues." Due to that, many of the images look radiant with a pop of the dominant color they've been edited with. Every phone's camera has a default built-in saturation level which produces differences in WhiteBalance; for instance, Oneplus is 'Yellow tinted,' Samsung is 'Blue tinted.'
(Source: www.pinterest.com)
(Source: www.pinterest.com)
Saturation level increment
Blue tint vs Orange tint vs Original
6
In case you want a more natural effect on the photo, you've to be careful with the saturation level shifts; otherwise, it might look artificial and unearthly. But if you're going with a high-edited look of a landscape then you would require color palette popping out of the picture, for that you must have dramatic shifts in the saturation level.
But the end-goal is to make the picture standout without taking away the essence and that is only possible when you know what would make your palate.
7
Tips & Tricks Tripod For The Win... Use a tripod with a remote to keep your camera still and click clear photographs. Setting up a tripod can be annoying, but the results are worth it. Set up the camera/phone on a tripod > place the plate and props -> do a test photoshoot -> make adjustments if required and add the dish -> take photographs using remote trigger
Lightings, to add that extra oomph! Avoid direct flashlights Use a tissue on the flasher to diffuse and impart a softer Flash. Use Darker backgrounds for better depth of field with bright lights. Try Outdoor shoots to utilize the FREE OF COST naturally diffused lights and bright background. Experiment
with
White
and
warm
lighting; it affects a viewer's mood.
8
Tell your story...through a picture Add depth to the picture by telling the story of the dish. Add drip and spills. Use Flat lays for a fresher approach. Add fresh herbs that add to the aesthetics. Add steam in post-processing for better impact. Keep the background blur or add ingredients at the back.
Set yo’ dish right Set up the whole shot before your dish is ready. Paint oil on meat to make the dish look shiny and tempting. Spray water on salads to make them look fresh. Capture
hot
dish
for
a
natural
generation of interest towards the dish Avoid filling the dish too much Spray water on cups/glasses of cold drinks to get condensation effects.
9
A Photographer's Journey Rachel Korinek is a professional food photographer and digital content creator. Her journey recites tales of fresh flavours, bewitching photography, and captivating creativity. With a fresh and sophisticated approach, Rachel shoots contemporary images that capture her love of natural light and passion for good food. Brewing her passion for food photography and creating content, she builds visual stories that connect communities together and highlights the bonafide beauty of food.
As a commercial photographer, she conceptualizes and executes the production of high-quality images that capture each client's unique brand and brand message. She has always strived to find out exactly what her clients are looking for this turning their visions into prepossessing imagery. She relies the most on natural light and it is her favourite way to capture images. It exemplifies her capacity to capture an airy, uplifting minimalist look that her audience finds so appealing.
10
She's been told by her followers that they find her work visually stimulating with a simple and not overly fussy approach to styling, which is a relief from the chaos and clutter of certain food styling trends at the moment. However large or small the project, she’s always up for a challenge. Some of her clients are Bride Magazine, Nikon, Huffington Post, West Elm, Clean Eating, SisterMag, Woolworths, Aldi and more.
Her other interests lie in servicing retail, data analysis, reading books, hiking and yin yoga and her forte lies in capturing visual stories and having a tone of bright, clean and uplifting imagery that emphasizes the beauty of real food. Her editorial style of photography strives to focus on the honest details and intricacies that connect us emotionally to food. Her other interests lie in servicing retail, data analysis, reading books, hiking and yin yoga and her forte lies in capturing visual stories and having a tone of bright, clean and uplifting imagery that emphasizes the beauty of real food. Head on to her Instagram page : @twolovesstudio Check out her work : https://www.instagram.com/twolovesstudio/
11
The Professional's Insights Q. Please tell us where your story began. How did you find your niche in food styling and photography? What drew you specifically to food photography? In 2016, I left my corporate role and decided to pursue my passion for photography. Initially, I have worked on all kinds of assignments, shooting corporate events, birthdays, kids, and family portraits. My objective was to click and learn as much as I can. Gradually I realized that it was food photography that I loved doing the most and it brought out a creative side of me. I always had an inclination towards food as I even used to blog about it. Once I realized my true calling, I stuck to it and worked on improving my skills. With a selflearning approach, watching numerous videos, gazing at thousands of photos to understand techniques and most importantly by putting all of it to practice, I started styling and photographing food. My first major food assignment was with a well-known food delivery brand. I once shot a roadside Pav Bhaji rickshaw cart for them.
Abhishek Khanna
@abhishekhanna
Q. Your photos inspire a lot of novice photographers. Who or what inspires you and where do you get your ideas for photoshoots? I have always felt that I am a keen observer of things, I look at the work around and try to decode it, understand how the picture has been lit, try to understand the position of light, what makes the image work and what could have been done better. Whenever I am working, I always try to outdo myself, be a better photographer from what I was the last time I shot something. I don’t hesitate to experiment with lighting my setups, I am always on the lookout for finding different ways to create drama in my shots.
12
Q. According to you, how is the approach to food photography different from other genres? Food photography or still life photography is something which is usually carried out in a controlled environment, there is conceptualization and planning involved. You visualize first before you start painting the canvas. Though it's an advantage to work with still objects in a way that when shooting for personal projects one can take all the time they want, however the challenging part in still life photography is that you must create something from scratch. Build something which isn’t there and then capture it, unlike other genres of photography where in you capture mostly what’s already there or in existence. Q. What is your creative process (workflow) for any photo-shoot, personal or client work like? My first step is to understand my client’s need, figure out what is that they are trying to portray or communicate to their customers. Once this understanding is done, I then look at props or elements I want to use in my shots that communicate that. Choosing colors which will put the message across, figuring out the whole mood of the shoot in terms of lighting the food. Once this is done, I keep most of the conceptualization of the shots for the shoot day, almost all my shots are a result of on-the-spot conceptualization and imagination. I sometimes do conceptualize in advance; however, I prefer keeping the detailing for the shoot day, I feel it makes me more creative to think on the spot. Q. Continuing my previous question, how do you select photos’ props, background, style, and composition? And what’s the one piece of equipment other than your camera that you cannot do without for photoshoots? Again, like I said one needs to figure out what is being conveyed, is it a brand catering to a younger group, wherein they may want to use bright peppy colors or is it an authentic cuisine restaurant which wants to communicate that their food is as authentic as it can get. Accordingly, the choice of props, colors, etc. comes into play. I always recommend people to invest in a good tripod. It is an extension of the camera, and it really makes your job better when it comes to shooting food. Q. If you were to travel back in time and give your beginner self some advice, what would that be? (It could be related to work/life/any advice) I would say, hang in there pal, you are on the right track, you will love where you end up reaching after all these years. I would say continue making the most of it and enjoy the process like you always do.
13
Q. What way do you believe is the ideal way or mantra to create more original content for food photography? If you were to choose one favourite photograph from all your work, which one would it be and why? There is no ideal way. However, I recommend that it is always good to figure out your style of photography, something which people then start to identify you for. Instead of taking from others style of doing shots, which is fine to an extent to experiment, however one should not lose out on their originality or the way their vision for the shot works. People can see a picture and tell me that this was definitely shot by me, which is a big thing for me because it makes you realize that your way of doing a picture shows in it and people can identify you by your work. It is quite difficult to choose one, it’s like asking a parent to choose one favourite child from all the others. However, recently I did a shoot in which played around with the light to add some dramatic effect to the shot, and I was quite glad how it eventually turned out. I love this one, because I was experimenting and it turned out the way I wanted it too, plus I have always been fond of Indian food, its colors, and textures. The thing about Indian food is that you can go rustic and vintage, which is really one of my core styles and something which I love creating.
14
Q. It is said that habits create excellence. Could you share 3 personal traits or habits that you feel help you in becoming better at your craft every day? I always keep in mind that I must continuously evolve when it comes to my work, the way I do this is by always pushing myself to be a better photographer from the last time I photographed something. Also, I am always willing to learn, unlearn, experiment, I also fail sometimes, but I am able to also figure out what went wrong and how can I crack it next time when I shoot. I do not rest until I am able to find a solution for myself, I will read, watch tutorials, research, in other words I am always feeding my curiosity. I also love to observe things around, way they have been designed to operate, way things work, question what would happen if this was had been done differently, try to figure out why it is the way it is. Q. How important is post-processing? Is there any good tutorial or video or book on that? Which preferable post-processing tool(s) would you recommend? Post processing is definitely important; however, it is not something to be relied on completely. I believe in creating the image the way I want it to look when its finished. I always push myself to achieve the end result during the photography stage itself. However, a fair bit of post processing is required to enhance the picture and bring out the characteristics of the subject, the way camera captures something is different from how we see it in real. Also, coming to commercial photography, post processing is as important as anything else, inspite of being extremely careful during the shoot, there are certain things which do need fixing during postproduction. But, like I said, never think of it as your savior and instead push yourself to achieve perfection during the shooting stage itself, don’t leave everything to post processing.
Q. Lastly, can you please share some simple tips and apps for novice photographers. A budget friendly way to up their photography game without expensive gadgets? I would ask them to first work on getting the light in their photos correct. Observe the pictures around and try to decode how the scene has been lit up and then try replicating the lighting scenario. A good photograph is always about its lighting first and then all the other things. You don’t need expensive gears or tools to start it. I started with a very basic camera and used to shoot in natural light, it is as inexpensive as it can get. Gradually invest in more tools as you progress and when you have the budget for them. You make a photograph not your gear.
15
The Professional's Insights Q. Would you mind sharing with us where and how your journey began? How did you find your niche in food styling and photography? What drew you specifically to food photography? I was studying medicine from one of India’s finest medical colleges & through the process, realised that it wasn’t what I was passionate about & I couldn’t picture myself practicing the same decades later. Food always played a pivotal role in my life. After having graduated & acquired my degree, I decided to end my relationship with medicine and my passion for food drove me to start a food blog that cataloged some of my recipes & experiences with food & travel. I realised I was better at composing food pictures so delved into it while it was still a niche in India. After having shadowed a few already existing food stylists for a year, I started my own practice & have been doing so for over 5 years now, having worked with over 300 F&B brands around the globe. Supportive family & encouraging peers pushed me to develop my art over the years & there’s nothing I’d rather do at this point in my life.
Alok Verma
@allaboutthatpalate
Q. Your photos inspire lots of novice photographers like me. Who or what inspires you, and where do you get your ideas for photoshoots? When I first started exploring the world of food styling, the art was already highly refined and practiced in multiple European and a few Asian countries. I would keep staring at Instagram and Pinterest feeds of certain Russian food photographers, who were my initial sources of inspiration, and I started understanding how everyone’s sense of aesthetics and maintenance of feeds revolve around storytelling. I worked hard on finding my signature over time and maintain similar compositional techniques and a very specific play of colours in most of my work. If I followed a concept that failed to bring a smile on my face, I’d be doing injustice to my art. It’s important to maintain your originality and not stray away from it.
16
Q. How is the approach to food photography different from other genres? In food photography, your prime responsibility is to give voice to a subject that cannot speak and to do a bit of storytelling. This is achievable with a sense of colour theories (monochromatic, analogous and complementary) which is highly practiced by food stylists all over the globe, besides a play of props and backdrops which form the foundation of any well-styled food image. Imperfection is bliss. Addition of unintentional scatter, movement and human elements adds to the aforementioned storytelling. All of these are difficult or impossible to achieve in any other genre of photography. If you’re digging deep into the subject, there are sub-genres in food photography too, especially concerning dark/moody and bright/vibrant food setups. Q. What is your creative process (workflow) for any photoshoot, personal, or client work like? Weeks of planning generally go in to a well-budgeted food shoot. Having a mood-board forms the first step in formulating a plan. The mood-board comprises the look and feel of the brand, understanding the brand story, maintaining the brand colours and not straying away from the sale goal. If it’s for a personal project, things are a lot more spontaneous and the only bit of planning one needs to do is to see how a certain image fits on your Instagram feed, keeping the colours, mood and tone of your feed, in mind. If it’s for a restaurant, it’s important to get the chef on board and finalise the plating, portion sizes, garnishes and sides, so you’re shooting only what a guest is being served. The final plated shot cannot look any different from what the guest is getting. And eventually, finalising how many shots you’re able to achieve on the shoot day. Some photographers prefer shooting not more than 6-8; some are okay with shooting 12-15 dishes a day. Q. Continuing my previous question, how do you select photos’ props, background, style, and composition? And what’s the one piece of equipment other than your camera that you cannot do without for photoshoots? If it’s for a personal project or a FMCG brand, the props used have to be very neutral. They are only acting as supporting elements to the hero i.e. the food. They cannot, in any way, be distracting and take away the viewer’s attention from the food. It’s safe to play with neutral colours such as whites, blacks, baby pink, sky blue rather than something too striking such as purple or maroon with a print on it. Similarly, the choice of background has to be such that it’s not taking away from the food. One would ideally go with a wooden plank backdrop if it’s a more homely, domestic setup. If it’s a fine dining or luxurious setup, a marble board forms a good backdrop. When you’re shooting at a restaurant/bar, it’s always advisable to use their own crockery as that is what the guest will be expecting. With respect to composition, maintaining the rule of thirds and a “less is more” or minimalistic approach comes handy.
17
Besides my camera and lenses, the one piece of equipment I cannot do without would be my tripod. It helps in getting the desired clarity, especially if I’m not tethering the camera to my laptop, and also works best for flat-lay images to avoid any distortion which a few wide lenses offer. Q. How should one go about creating more original content for food photography? Also, what is your favorite photograph that you have taken and why? One needs to figure out their strengths in food photography. I personally love working with bright and vibrant pictures with a play of colour theory. Some people prefer working only with dark food photography. Once you’ve realised your strengths, you need to dig deep into it and keep experimenting with props and backdrops that fall under that category of food photography. Your content doesn’t get any more original than you working with failures and eventually ending up with successes. It’s always good to emulate from others’ work but definitely not good to imitate them. One of my recent favourite photographs has to be this picture of a French dessert called Mille Feuille that comprises everything I love, Christmas, a gorgeous play of colours, motion of dusted icing sugar. Q. It is said that habits create excellence. Three personal traits or habits that you feel help you become better at your craft every day? Planning way in advance. It helps me come prepared for a shoot with the necessary moodboard, the right choice of props, the apt backdrops and saves up a lot of time at the time of the shoot, rather than diving into a mess and winging it at the last minute. Maintaining a clean work station. When you’re working with food, there’s naturally going to be a mess at your prep table. It’s always a good idea to clean up your station after every shot and start fresh for the new shot. Timing the process. I avoid taking up shoots back to back so I can work on the post processing of the prior shoot and deliver the images on time. This helps me focus entirely on the next shoot.
18
Q. A piece of advice you’d give to yourself looking back to when you were a beginner? Try to explore all the avenues of food photography out there, be it dark photography, vibrant photography, shooting for FMCG brands, videos and figure out where your heart lies and what you’re strongest at; and thereby grow in it. I used to only practice dark food photography and only over the years, realised the importance of each of the aforementioned avenues and how each brand identity is different. Q. How important is post-processing? Is there any good tutorial or video or book on that? What is your preferable post-processing tool? Post processing is equally as important as composing and shooting an image. Post processing can make or break an award-winning image. You need to have the right softwares for the same and there are many readily available ones out there. The ones I prefer to use are Adobe Lightroom and Photoshop. While Lightroom is quite user-friendly and there are far too many online tutorials available for the same on YouTube, Photoshop can be very complicated and comprises tools that need a lot of practice and patience to figure out. Q. Lastly, can you please share some simple tips and apps for novice photographers to up their photography game without buying any expensive gadgets? Stick to minimalism and always opt for a “less is more” approach. It brings you closer to understanding everything about the subject and helps you figure out any existing flaws that you can instantly work upon, in comparison to filling the frame with multiple props, where the subject gets lost. Thereby, you build a storyline and keep adding a prop at a time, until it gives you the desired compositional result. Start working with natural light and only over time once you’ve understood how to make the best out of natural light, it’s a good idea to invest in strobe or artificial lights. I know food photographers that choose to use natural light even years into the business. You can use Snapseed or Adobe Lightroom mobile, both of which are free of cost, for editing your pictures. They’re quite user-friendly and quick to use.
19
HARSH BHANDARI
@harshh_bhandari
Shots From The Club
20
21
TANUSHREE MAROO @tanushree_maroo
22
KATE COLACO @bebombayfoodie
23
SIDDHARTH YADAV @mr.sy_8
24
RUDRANGSHU MALLICK @rudrabshu_mallick95
25
TUNEER SARKAR @selbst_ist_der_mann
PI X EL YOUR LENS TO EXPLORE THE WORLD OF PHOTOGRAPHY
Photography Club K J Somaiya Institute of Management REACH US OUT ON: