

12 servings
15-min prep time | 2-hr total time
Dough
1 pkg Pizza Crust Mix
1 can (15 oz./540 mL) pumpkin puree
1 tsp (5 mL) ground cinnamon or pumpkin pie spice
Filling
½ cup (125 mL) butter, softened (1 stick)
1 cup (250 mL) brown sugar, packed
2 tbsp (30 mL) ground cinnamon or pumpkin pie spice
1 tbsp (15 mL) cornstarch
½ cup (125 mL) heavy cream
Frosting
2 oz. (60 g) cream cheese, softened
1 tbsp (15 mL) milk
11⁄3 cup (325 mL) powdered sugar
1 tsp (5 mL) ground cinnamon or pumpkin pie spice
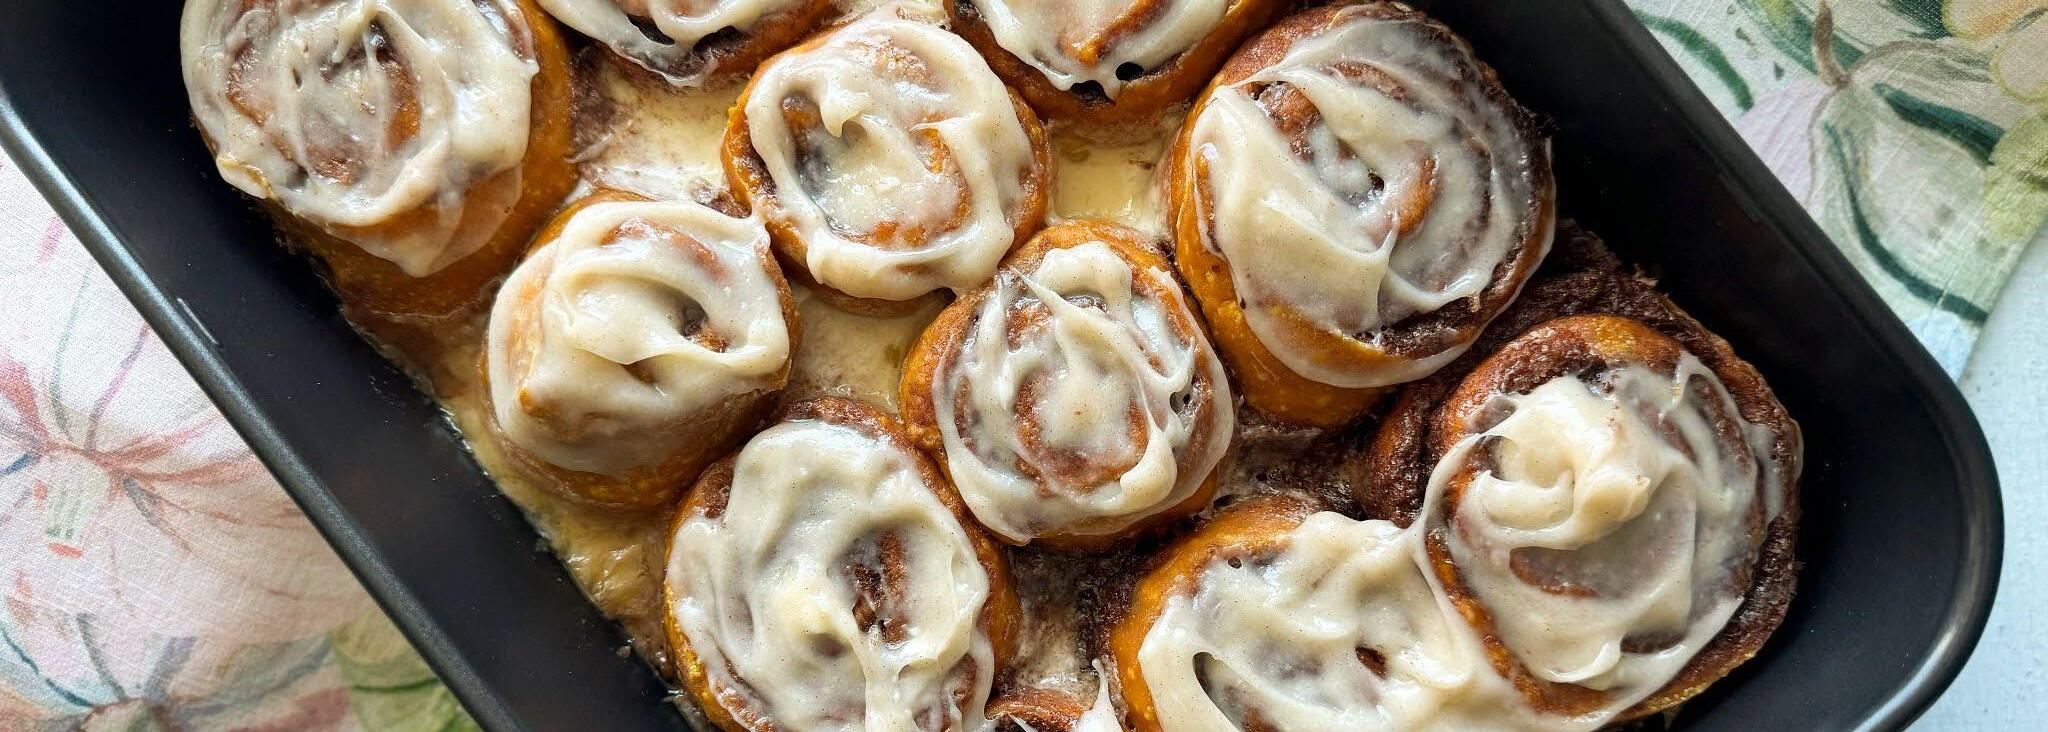
1. Combine the Pizza Crust Mix, pumpkin, and cinnamon in the bowl of a stand mixer. Knead with the dough hook attachment for 4 minutes, or until smooth. Let the dough rest covered for 5 minutes. Roll the dough on a lightly floured surface into a 15" x 10" (38 x 25-cm) rectangle.
2. For the filling, combine the butter, brown sugar, cinnamon, and cornstarch in a small bowl. Spread the filling over the dough and spread to within ½" (1 cm) of the edges. Starting on one short side, roll the dough tightly, pinching the seams to seal.
3. Use a serrated knife to cut the dough into 12 slices. Place the slices in the 9" x 13" (23-cm x 33-cm) Brilliance Nonstick Baking Pan and cover with plastic wrap. Let the dough rise for 1 hour, or until doubled in size.
4. Preheat the oven to 325°F (160°C). Pour the heavy cream over the rolls and brush to evenly coat.
5. Bake for 30–35 minutes, or until lightly golden brown. Let the rolls cool for 10 minutes before frosting.
6. For the frosting, whisk the cream cheese in small bowl until smooth. Add the milk, powdered sugar, and cinnamon, and whisk until smooth. Spread the frosting evenly over the warm rolls. Serve warm.
• You can use Korintje Cinnamon instead of ground cinnamon and Cinnamon Plus™ instead of pumpkin pie spice.
25-min prep time | 1-hr, 25-min total time
Ingredients
2 tbsp (30 mL) olive oil
3 carrots, thinly sliced
3 medium zucchini, thinly sliced
3 garlic cloves, pressed
¼ tsp (1 mL) salt
1 can (28 oz./796 mL) Italian-seasoned diced tomatoes, drained
1 container (15 oz./450 g) part-skim ricotta cheese
1 egg
1 oz. (30 g) fresh Parmesan cheese, grated (¼ cup/60 mL)
4 cups (750 mL) marinara sauce
18 uncooked lasagna noodles (about 1½ boxes)
4 cups (1 L) grated mozzarella cheese
Directions
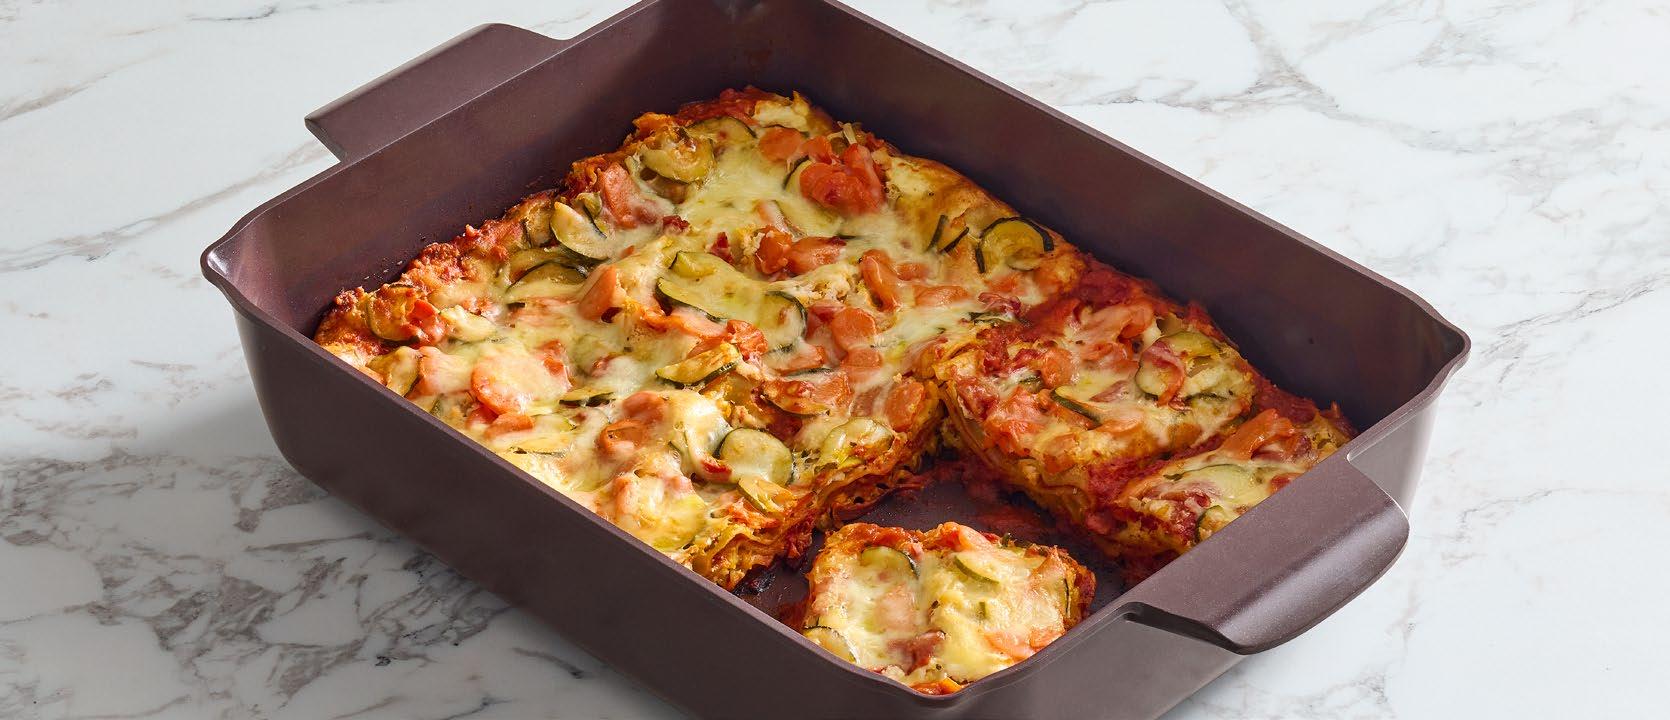
1. Preheat the oven to 350°F (180°C). Heat the oil in the 16" x 12" (40.5-cm x 30.5-cm) Cast Aluminum Roasting Pan over medium heat for 2–3 minutes. Add the carrots, zucchini, garlic, and salt. Cook, stirring occasionally, until the vegetables are crisp-tender, about 7 minutes. Remove the pan from the heat and transfer the vegetables to a large bowl. Mix in the tomatoes and set aside. (Let the roasting pan cool before assembling.)
2. Combine the ricotta and egg in a large bowl. Add the Parmesan. Mix well and set aside.
3. To assemble the lasagna, spread 11⁄3 cups (315 mL) of the marinara sauce over the bottom of the roasting pan. Top with one third of the uncooked noodles (6 noodles) in a single layer, pressing the noodles into the sauce. Spread one third of the ricotta mixture over the noodles. Top with half of the vegetable mixture. Sprinkle with one third of the mozzarella cheese. Repeat the layers, starting with the marinara sauce and ending with the mozzarella cheese.
4. Cover with aluminum foil and bake for 50 minutes. Remove the foil and continue baking for 10 minutes. Remove from the oven and let stand for 15 minutes.
• The Rapid-Prep Mandoline is great for slicing zucchini and carrots. Just slice with the No. 3 thickness.
servings
5-min prep time | 20-min total time
Ingredients
½ lb. (250 g) prepared pizza dough
Cornmeal for dusting
1 tbsp (15 mL) olive oil
2 garlic cloves, pressed
4 oz. (125 g) mozzarella cheese, coarsely grated (1 cup/250 mL)
½ oz. (15 g) Parmesan cheese, finely grated (¼ cup/60 mL)
½ cup (125 mL) whole milk ricotta cheese
¼ cup (60 mL) oil-packed, sun-dried tomatoes, drained and chopped
Salt and pepper
4–5 chopped basil leaves
Directions
1. Place the Pizza Stone or Medium Pizza Stone on the middle rack of the oven, and preheat the oven to 450°F (230°C) for up to 30 minutes (see cook’s tips).
2. Place the dough on a lightly floured surface and flatten with your hands. Starting at the center and working outwards, turn and stretch the dough into a 12" (30-cm) round disk, forming a lip around the edge. Fold the dough in half twice.
3. Transfer the dough to a pizza peel dusted with cornmeal and unfold.
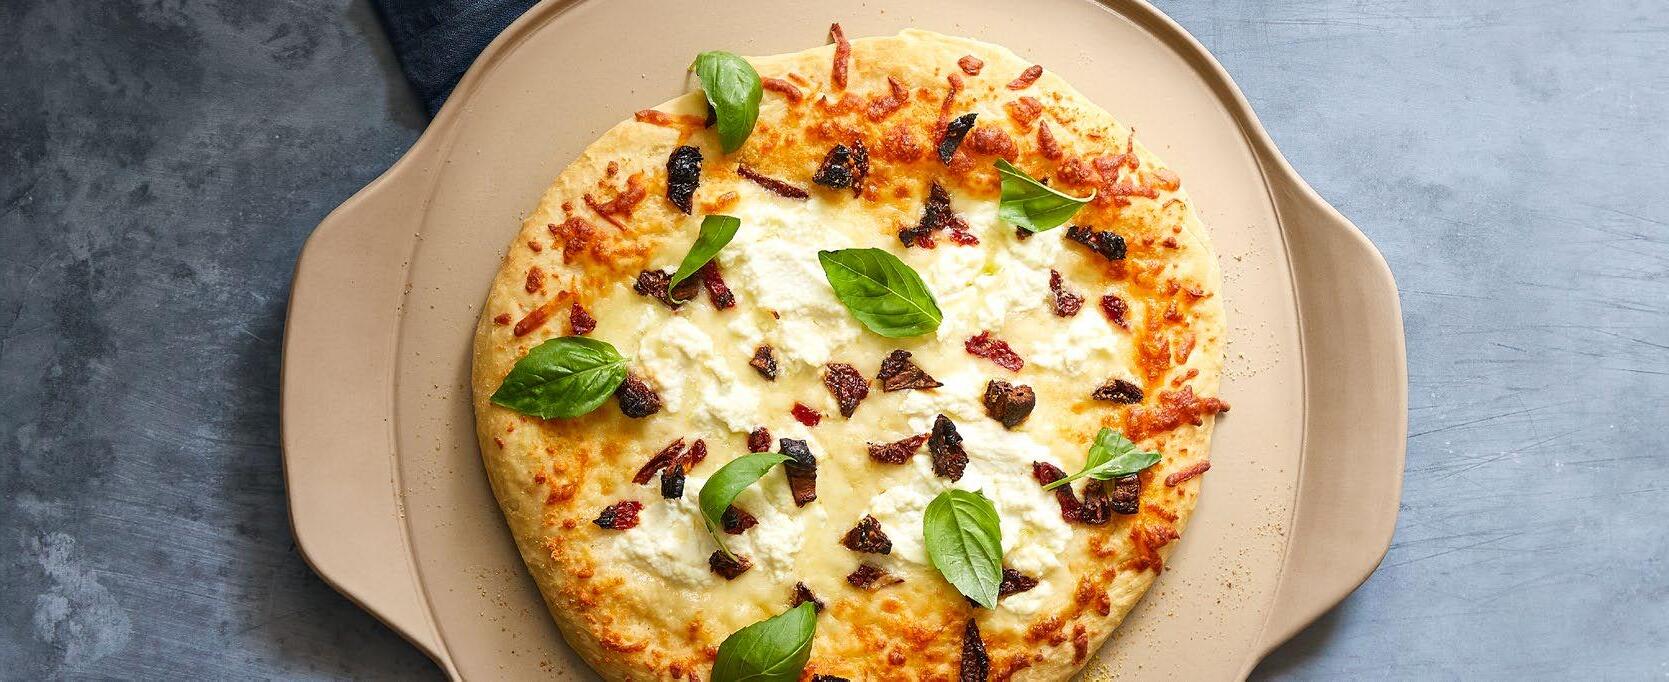
4. Combine the olive oil and garlic; brush on the dough. Sprinkle with mozzarella and Parmesan. Spoon on dollops of ricotta. Top with chopped tomatoes, salt, and pepper.
5. Transfer the pizza onto the stone in the oven and bake until the crust is browned and the cheese is melted, about 12–15 minutes. Top with basil just before serving.
• Pizza crust gets even crispier when cooked on a preheated stone. If you don’t have a stone that can be preheated, add a few extra minutes to the cook time.
• Check out your local pizzeria or supermarket for fresh or frozen dough. Or, you can easily make your own. See our website for Homemade Pizza Dough and 5-Minute Dough recipes.
• Leftover dough? Tightly wrap and freeze it. You can thaw it overnight in the fridge or let it sit on the counter for about an hour.
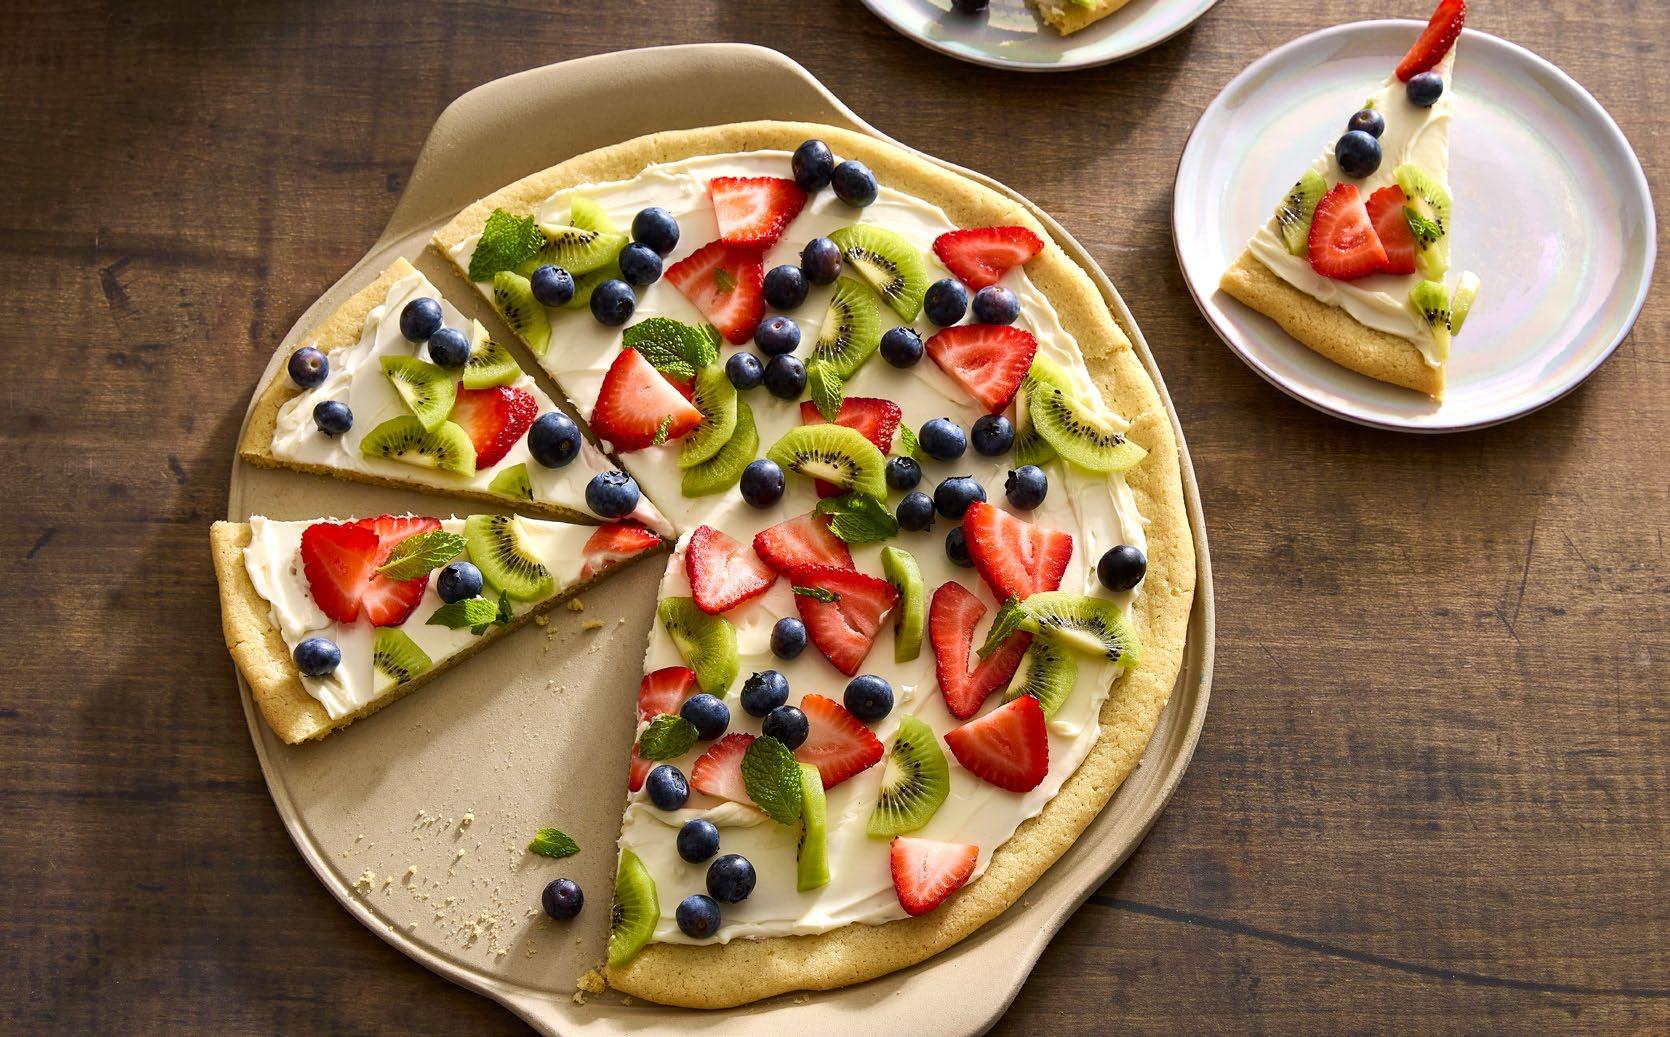
16 servings
5-min prep time | 30-min total time
Ingredients
1 pkg (16.5 oz./468 g) refrigerated sugar cookie dough
1 pkg (8 oz./250 g) cream cheese, softened
1⁄3 cup (75 mL) sugar
4 cups (1 L) assorted fresh fruit (strawberries, kiwi, bananas, peaches, blueberries, or raspberries)
Directions
1. Preheat your oven to 350°F (180°C). Brush the Large Round Stone or Pizza Stone with oil. For the crust, shape the cookie dough into a ball. Place the dough in the center of the stone and flatten slightly with the palm of your hand and press the dough to a 12" (30-cm) circle, about ¼" (6 mm) thick.
2. Bake the sugar cookie dough for 18–20 minutes or until it is a light golden brown. Remove the pan from the oven and let cool completely.
3. For the topping, combine the cream cheese and sugar in a small bowl; mix well. Spread the mixture evenly over the top of the cookie. Arrange fruit over the cream cheese mixture. Refrigerate. Cut into 16 wedges and serve.
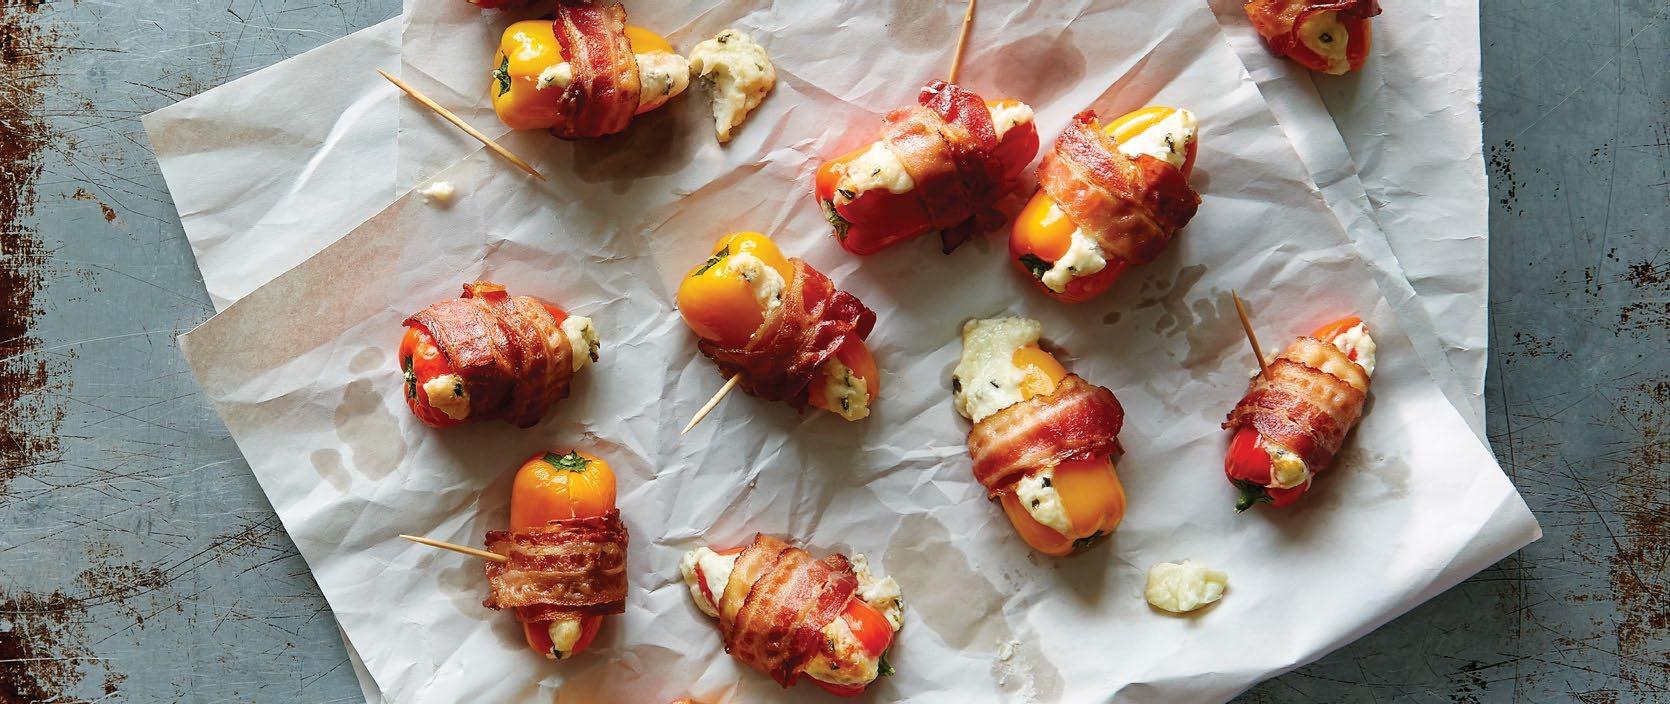
10 servings
15-min prep time | 40-min total time
Ingredients
10 sweet mini peppers
8 oz. (250 g) chive & onion cream cheese, softened
4 oz. (125 g) cheese of choice (1 cup/250 mL), grated
1 tsp (5 mL) hot sauce (optional)
10 slices fully cooked packaged bacon
10 wooden picks
Directions
1. Set the Deluxe Air Fryer & Oven to at 375°F (190°C) for 15 minutes.
2. Core the peppers with the Pepper Corer. Cut a slit halfway through lengthwise from the top to the bottom of each pepper.
2. Mix the cream cheese, shredded cheese, garlic, and hot sauce in the Small Batter Bowl until thoroughly combined. Microwave, uncovered, on HIGH for 15–20 seconds, or until the mixture is softened.
3. Spoon the mixture into a large resealable plastic bag. Trim corner of the bag wide enough for filling to squeeze through easily.
4. Gently open the peppers and squeeze the filling evenly inside. Wrap a slice of bacon around the center of each pepper and secure with a wooden pick. Arrange the peppers on the Air Fryer Sheet Pan.
5. Place the pan in the oven and press . Remove the pan and cool for 5 minutes. Remove the wooden picks before serving.
Cook’s Tip
• You can stuff the peppers ahead of time and bake when you’re ready to serve.
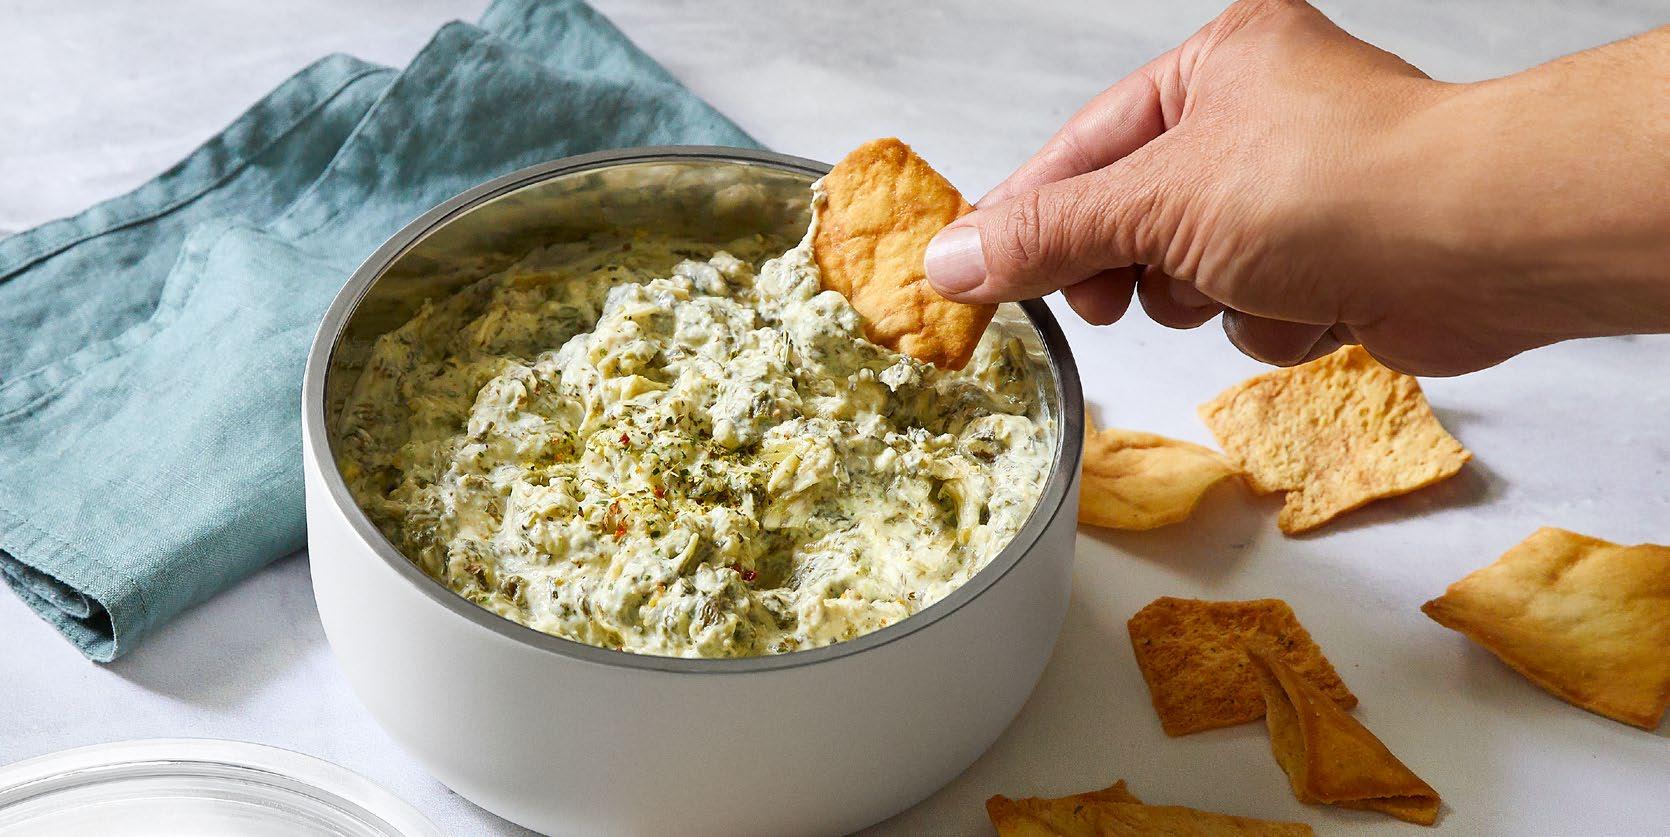
16 servings
5-min prep time | 23-min total time
Ingredients
1 jar (12 oz./340 mL) artichoke hearts, drained and chopped
1 pkg (10 oz./283 g) frozen spinach
8 oz. (250 g) cream cheese
½ cup (125 mL) vegetable stock
1 tbsp (15 mL) Greek Rub, plus more for serving
2 garlic cloves, pressed
¼ tsp (1 mL) salt
Add-Ins
4 oz. (125 g) white sharp cheddar (1 cup/250 mL grated)
½ cup (125 mL) low-fat Greek yogurt
Directions
1. Add the dip ingredients, except the add-ins, to the Deluxe Multi Cooker. Cook on for 6 minutes.
2. Meanwhile, coarsely grate the cheese, if you’d like.
3. When the timer is up, manually release the pressure. Stir in the add-ins, if you’d like. Let the dip sit for a few minutes to thicken before serving. Place in a serving bowl and sprinkle with additional rub.
Cook’s Tips
• To keep the dip warm, serve in an Insulated Serving Bowl.
• Double the recipe and serve it in the 2-qt. (1.9-L) Square Insulated Serving Bowl!
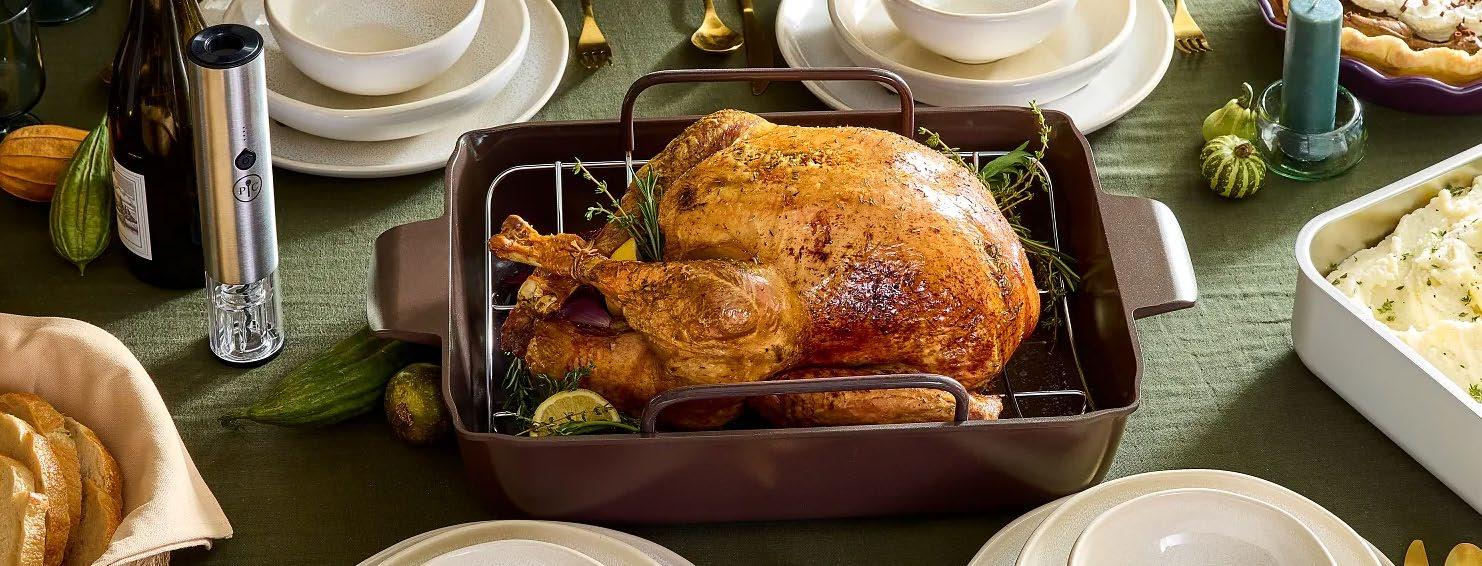
10–14 servings
10-min prep time | 4-hr, 30-min total time
Ingredients
1 thawed, frozen or fresh turkey, 12–18 lbs. (5.4–8 kg)
1 large lemon, sliced
1 onion, cut into wedges
2–3 sprigs fresh thyme
2 tbsp (15 mL) vegetable oil
2 tbsp (15 mL) Rosemary Herb
Seasoning Mix
1 tsp (5 mL) salt
½ tsp (2 mL) pepper
Directions
1. Preheat the oven to 325°F (165°C). Remove the neck and giblets from the body and neck cavities; cook and reserve them for use in stuffing or gravy, if you’d like. Rinse the turkey inside and out and pat dry with paper towels. Lift the wing tips up toward the neck, then tuck them under the back of the turkey. Place the lemon, onion and thyme inside the body cavity. Tie the ends of the legs together with cotton string. Place the turkey, breast side up, on the rack in the 16" x 12" (40.5-cm x 30.5-cm) Cast Aluminum Roasting Pan.
2. Brush the skin with oil using the Chef’s Silicone Basting Brush. Sprinkle with the rub. Roast the turkey 3–4 hours or until a thermometer registers 180°F (82°C) in the thickest part of the thigh and the juices run clear. Baste with melted butter or pan juices every 45 minutes. (To prevent overcooking, loosely cover the turkey breast with aluminum foil when the turkey is about two-thirds done. Check for doneness about 30 minutes before the turkey is expected to be done.)
3. Remove the turkey from the oven and let it stand for 20 minutes. Carefully remove the turkey from the pan to a cutting board with wells. Cut the string from the legs and discard. Carve the turkey using the Carving Set
• Plan on cooking your turkey for 10 minutes per pound.
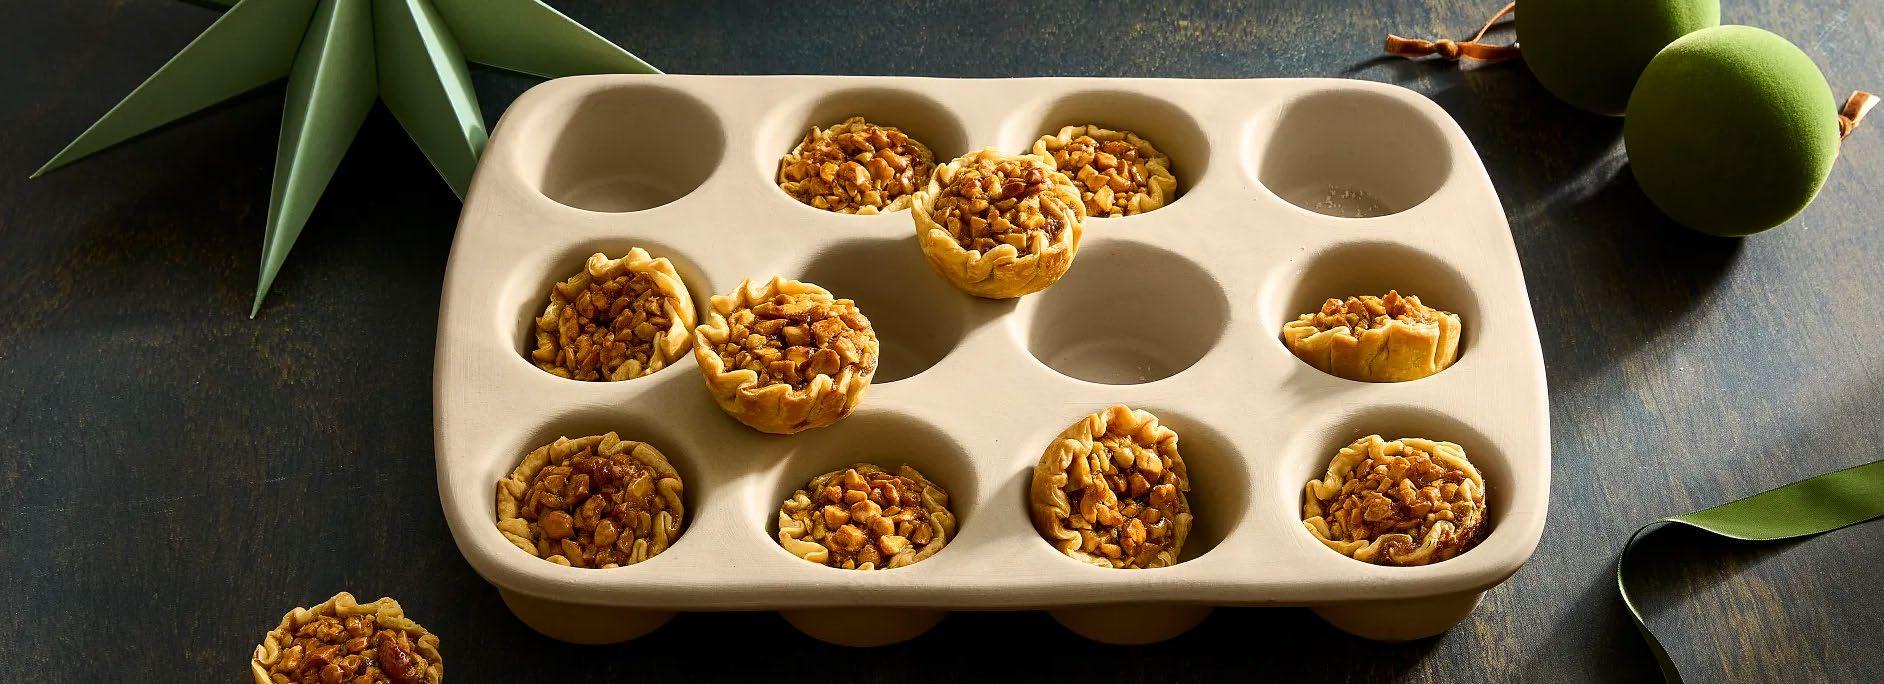
servings
20-min prep time | 2-hr total time
Ingredients
1 cup (250 mL) salted cashews
2 eggs
½ cup (125 mL) packed dark brown sugar
½ cup (125 mL) pure maple syrup (do not use maple-flavored pancake syrup), divided
1 tbsp (15 mL) butter, melted
1 tsp (5 mL) Double-Strength Pure Vanilla Extract
1 pkg (15 oz./350 g) refrigerated pie crusts (2 crusts), softened according to package directions
Directions
1. Preheat the oven to 375°F (190°C).
2. Coarsely chop the cashews with the Food Chopper. In a large bowl, combine the eggs, brown sugar, 1⁄3 cup (75 mL) of the maple syrup, butter, and vanilla. Whisk until smooth. Stir the cashews into the egg mixture; set aside.
3. Unroll one pie crust onto the Pastry Mat. Using the wide end of the clear Food Chopper collar, cut out six pastry circles. (Circles will measure 3¾"/9.5 cm. Discard the remaining dough.) Pinch the edges of the circles inward at ½" (1-cm) intervals, creating ruffled shells. Place shells into the 12-Cup Stoneware Muffin Pan wells; repeat with the remaining pie crust.
4. Stir the cashew mixture until combined. Pour evenly into the shells until they’re two-thirds full. Bake for 18–21 minutes, or until the shells are golden brown. Remove the pan from oven to a cooling rack to cool completely. Brush the tops of the tarts with the remaining maple syrup.
• To create pastry shells with the prettiest fluted edges, it's best to shape them before placing them into the Muffin Pan. After shaping each shell, immediately place it into the pan well.
• You can use any mixed nut blend instead of the cashews, if you’d like.
• Serve these pretty tarts in place of pecan pie for the holidays.
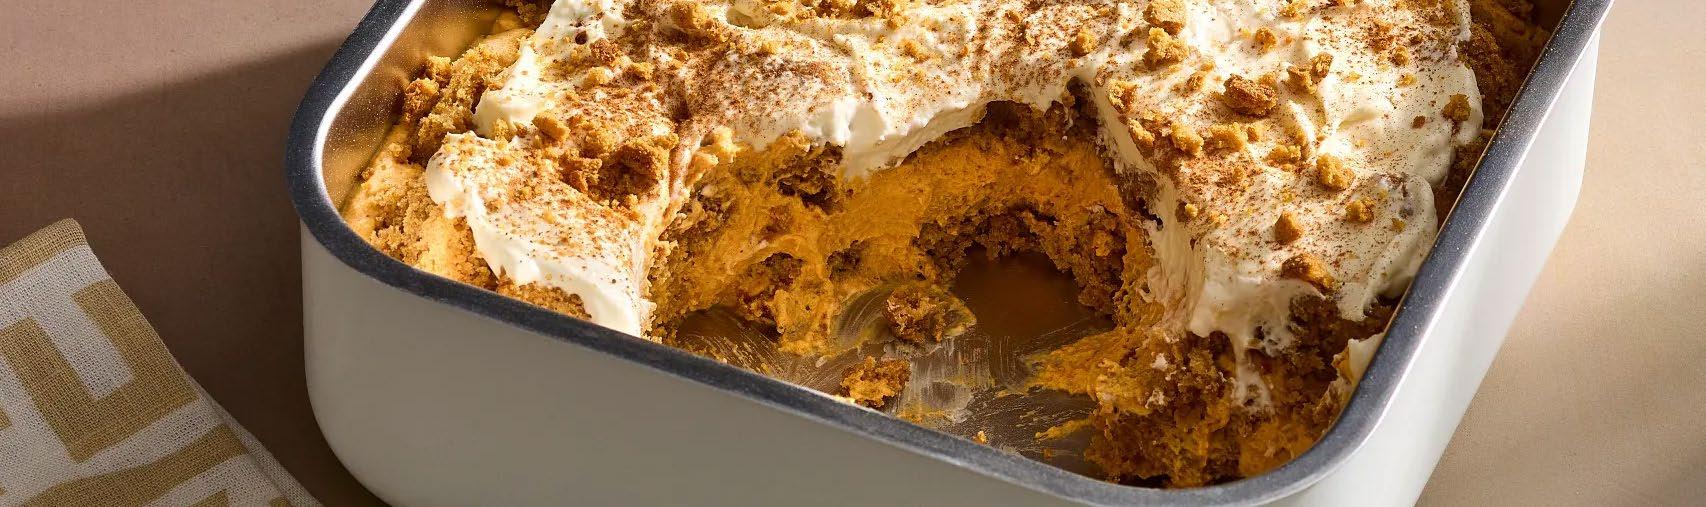
10-min prep time | 2-hr total time
Ingredients
2 cups (500 mL) heavy cream
1 pkg Salted Vanilla Dessert Mix
½ cup (125 mL) white chocolate chips, melted
1 can (15 oz./540 g) pumpkin puree
½ tsp (2 mL) Cinnamon Plus® Spice Blend, plus more for garnishing
1 prepared pumpkin bread (about 20 oz./570 g), cut into cubes (see cook’s tip)
Optional: Caramel sauce, crushed gingersnap cookies
Directions
1. Add the cream and dessert mix to the Deluxe Stand Mixer fitted with the whisk attachment. Set to for 2 minutes and 45 seconds.
2. Stir ¼ cup (60 mL) of the cream mixture into the melted white chocolate to temper. Add the mixture back to the stand mixer bowl. Set to speed 2 for 30 seconds.
3. Remove 2 cups (500 mL) of the mixture and set aside.
4. Add the pumpkin and cinnamon to the stand mixer and set to speed 2 for 45 seconds, or until combined.
5. Place half of the pumpkin bread in the 2.5-qt. (2.5-L) Insulated Serving Bowl or 2-qt. (1.9-L) Square Insulated Serving Bowl. Spread the pumpkin mixture on top.
6. Top with the remaining pumpkin bread. Dollop the reserved cream mixture on top and spread to smooth. Cover and refrigerate for at least 1–2 hours, or up to overnight (see cook’s tip).
7. Garnish with a drizzle of caramel, cinnamon, or crushed gingersnap cookies before serving, if you’d like.
• You can use a different cake for this recipe! Spice cake, coffee cake, or pound cake are all delicious options.
• Tempering the white chocolate with the whipped cream mixture helps it blend in smoothly and evenly without seizing or hardening.
• You can serve this dessert right away—but it’s even better chilled. It’ll firm up in the fridge and the flavors will develop even more.
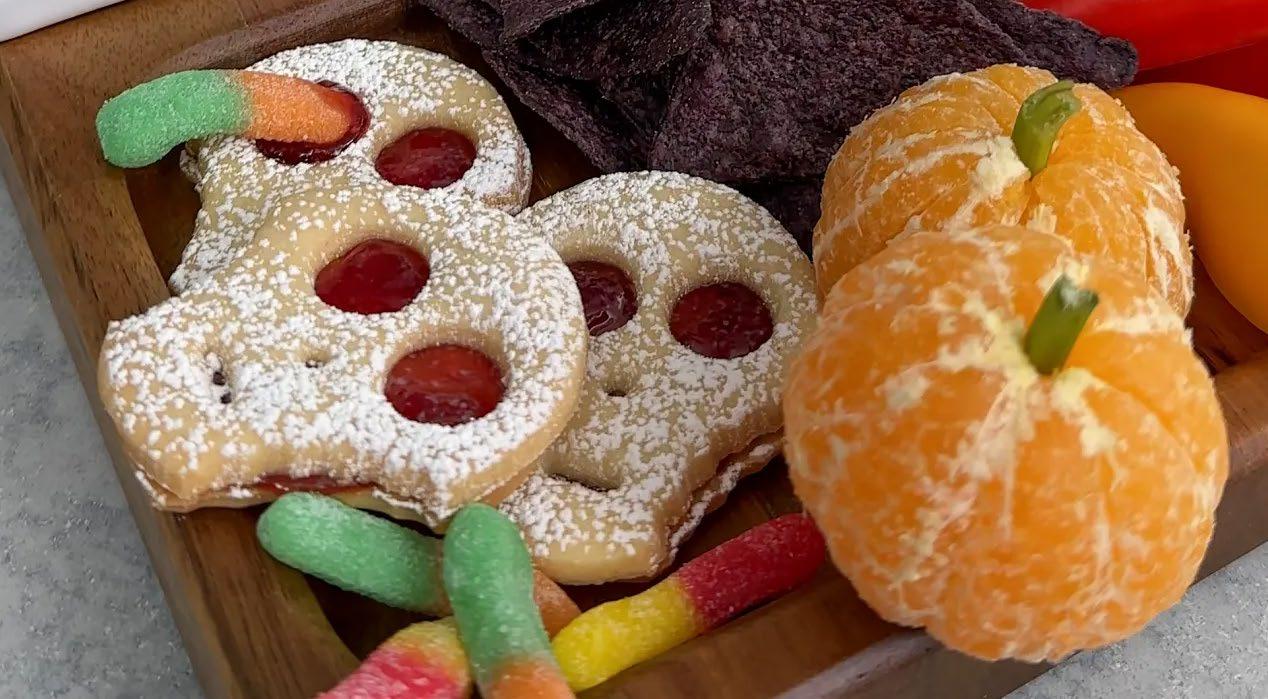
24 servings
30-min prep time | 45-min total time
Ingredients
1 pkg Shortbread Cookie Mix
1 cup (250 mL) butter, softened (2 sticks)
½ cup (125 mL) raspberry jam or jam of choice, divided
Powdered sugar for dusting
Directions
1. Preheat the oven to 350°F (175°C).
2. Prepare the cookie mix according to the package directions.
3. Roll the dough out onto a lightly floured surface. Cut circles with the smooth edge circle side of the Linzer Cookie Cutter. Use the round scalloped edge to cut a small portion out from each side of the cookie to make the cheeks.
4. Use the large circle side of a piping tip to cut out 2 eyes. Use the small circle side to cut out a nose. Then use the wide ribbon tip for the mouth.
5. Transfer the cookies to a baking sheet. Cut out additional cookies with the smooth and scalloped circle cutters for the cookie bottom (do not cut facial features on these cookies).
6. Bake for 10–12 minutes, or until golden brown on the edges. Cool completely before filling.
7. Spoon about 1 tsp (5 mL) of jam onto the flat cookie. Top with the face cookie and sprinkle with powdered sugar.

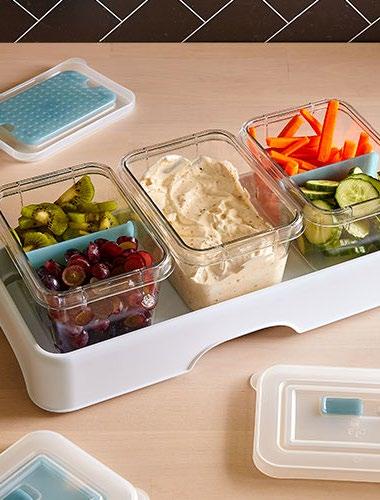
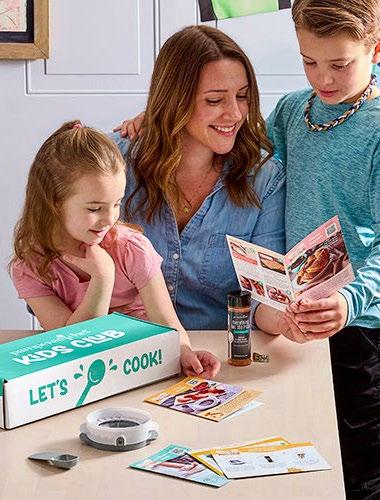
3. Get the Kids Involved
Set up a table for little chefs to build their own creations It’s fun and stress-free!
1. Prep Ahead
Chop veggies, shred cheese, mix dips, and get the basics ready before guests arrive.
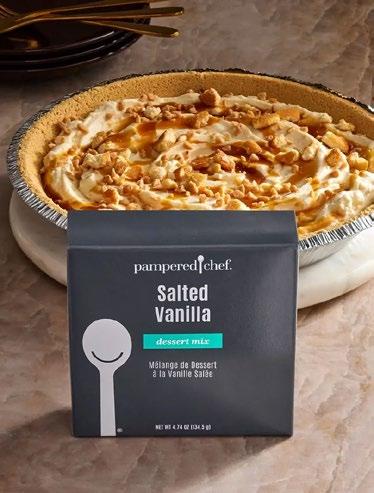
4. Save on Dessert
Skip pricey store-bought sweets and make your own pie instead. Bonus: It'll make your house smell amazing!
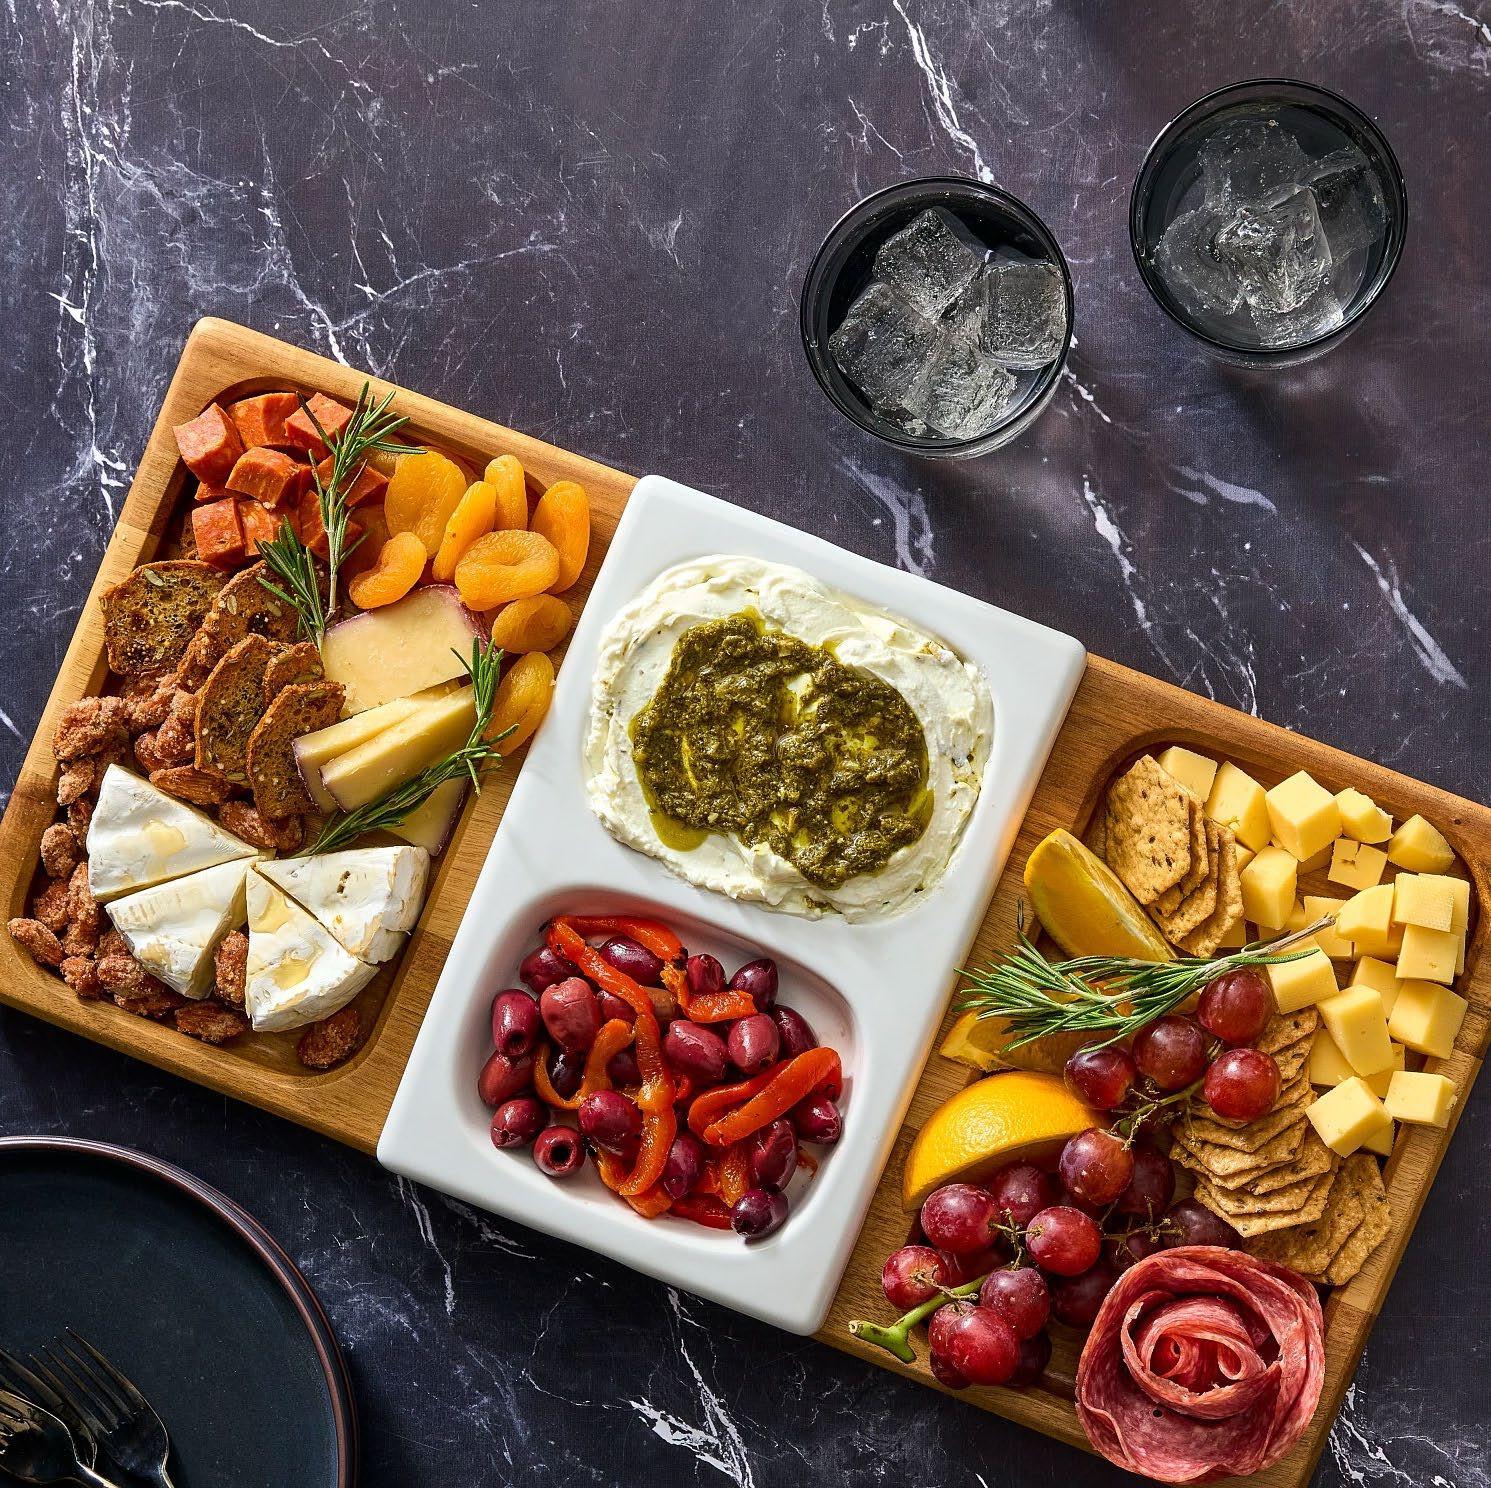
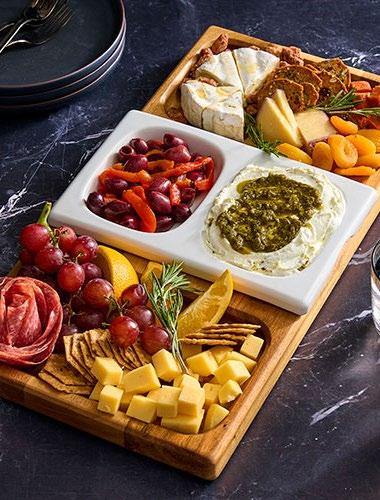
2. Set Up a Grazing Table
Small bites, easy serving, and mingling made simple. Everyone can nibble while chatting!
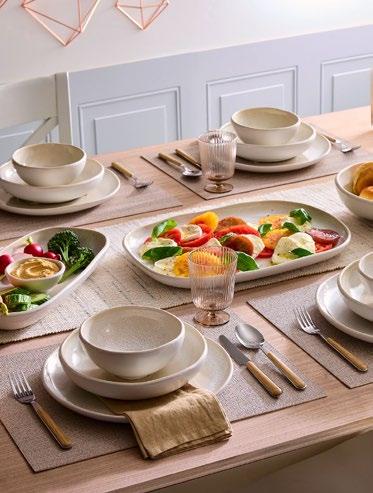

5. Build a Signature Look
Pick one main color to pair with your dinnerware. Your table looks styled without overthinking.
Turn holiday cooking into extra income by sharing products you love.
A Side Hustle That Fits Your Holidays
Reach out to start earning holiday cash!