7 minute read
Exteriors: small spaces, big dreams


SMALL SPACES CAN STILL INSPIRE BIG IMAGINATIONS, WRITES MARIANNE FALCONER
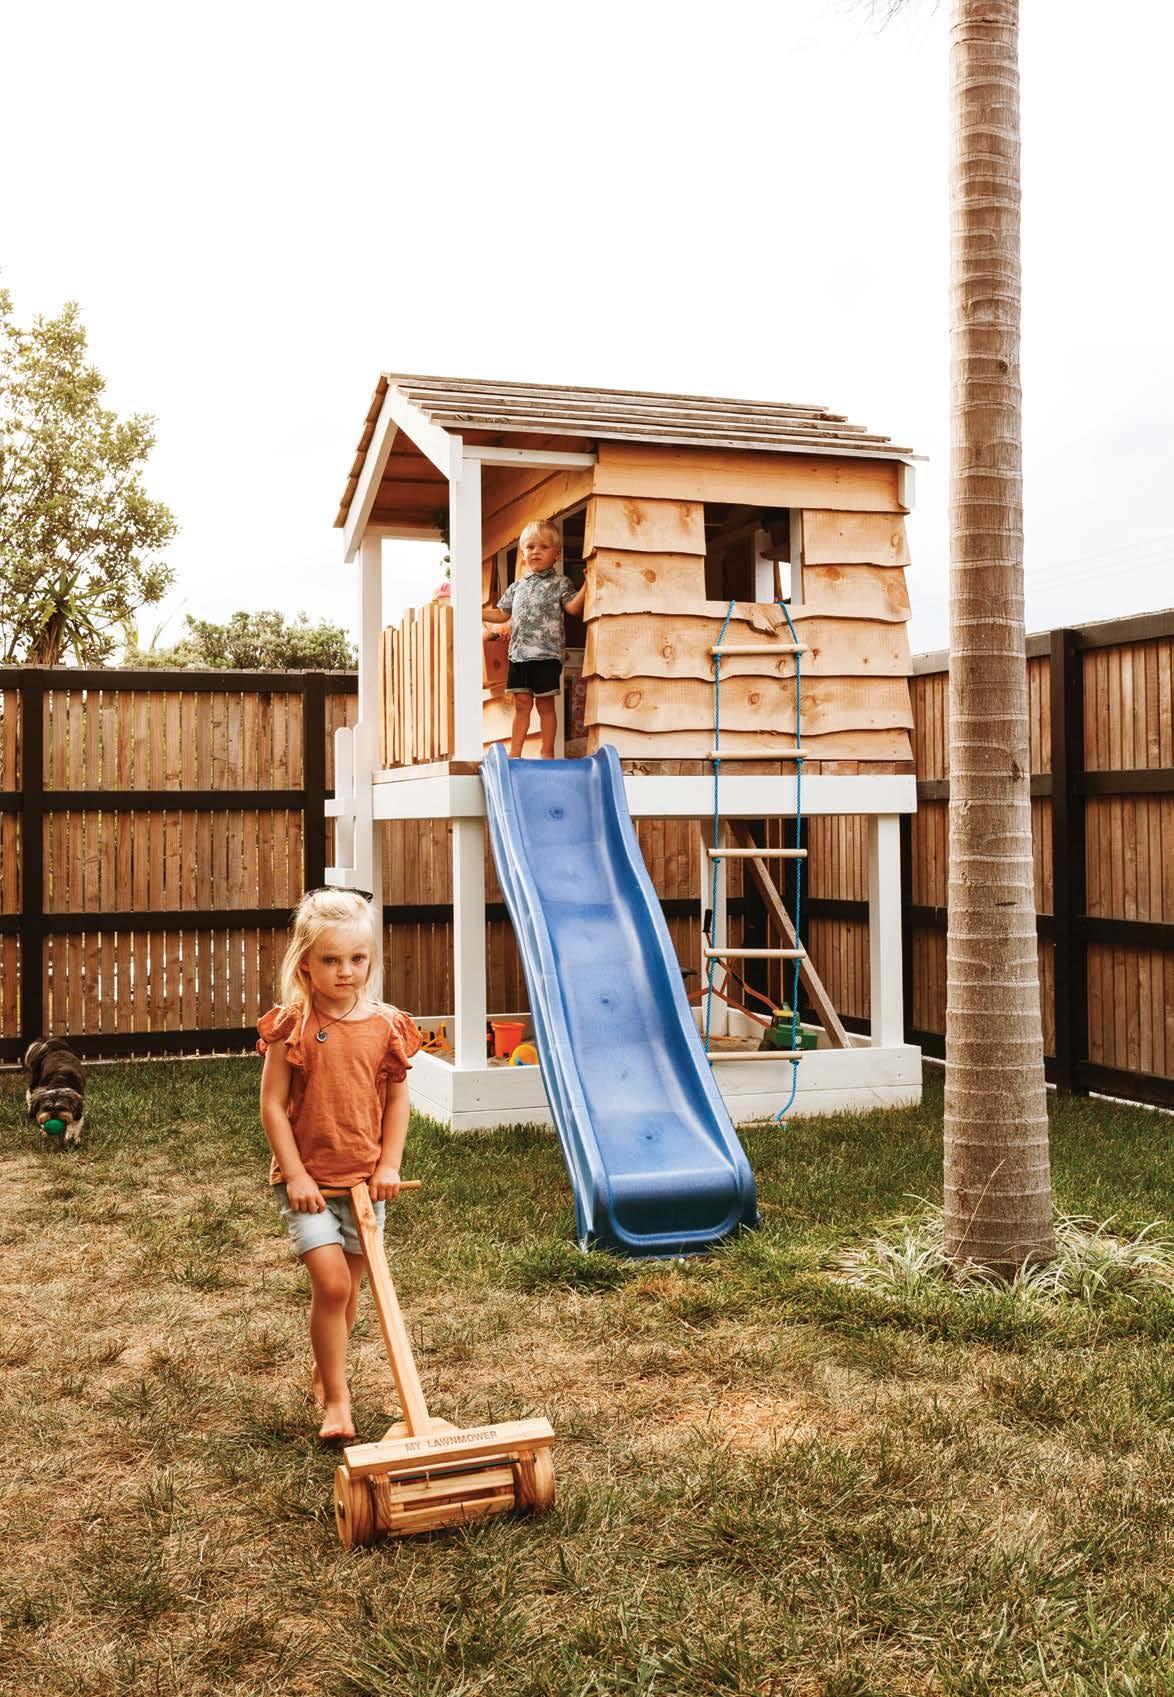
Current research shows that for children up to the age of seven, play-based learning is best. With this evidence at hand I had a solid argument for enlisting my builder husband, Sean, to create a playhouse for our two children, Frankie Grace (4) and Cohen Jean (2). And we have no regrets – the investment was well worth it as both kids now spend hours each afternoon (and into the evening if we allow it!) playing at making cups of ‘tea’, serving ice creams and scaling new heights in their brand new tiny home. Turns out that with the right ingredients, little spaces can really inspire big imaginations!
The New Zealand quarter-acre dream is nearly a thing of the past; that coveted outdoor space big enough to allow children to be free-range is no longer a given in every family home. My husband and I moved to Mount Maunganui to be closer to family and to the beach. We traded a large section in Titirangi, Auckland, for a compact half-site in Mount Maunganui. Admittedly we have the beach as our backyard so I’m not complaining, but when you have a toddler and a preschooler you need a secure space where you can all let your hair down and enjoy the sanctuary of home. When we first moved to the Mount, Frankie was a toddler and I was pregnant with Cohen. At first, our small yard was ample for one tiny girl and a baby, but little did we know our baby boy would turn out to be a runner and a climber who really needed to be exercised like a professional athlete! And I now understand why my mum and her peers would say “Now kids, go outside and play” on such a regular basis! There comes a time (most days!) when you need some space to finish preparing dinner and get some jobs done in peace.
As Cohen grew, our need for a safe outdoor space for the kids to play and run around in became paramount. Sean and his building skills came to the rescue, but it was no quick fix; a year later (goodbye weekends!) and we finally have a fully fenced garden complete with a gingerbread-style playhouse, custom built by Dad. We wanted to maximise our small outdoor space so we also undertook retaining works to level out the front yard, turning two unusable small terraces into one larger usable space.
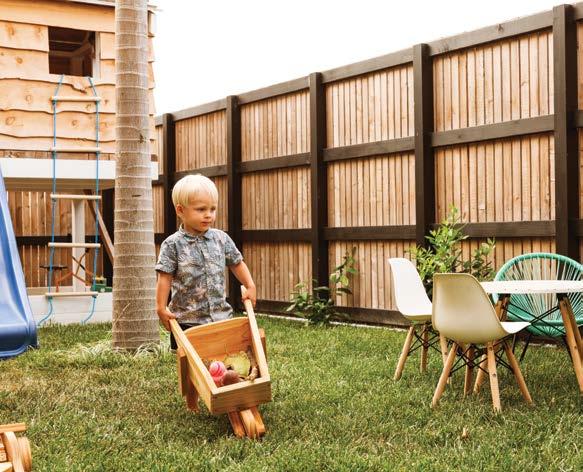
The fence was a game changer – you can’t value peace of mind highly enough. We live on a busy road, so a fully fenced section was an absolute essential. We also installed a gate that automatically closes to keep our little ‘runner’ safe. The addition of another plastic slide, this one attached to the fence, provides extra scope for adventurous – but safely contained – climbing and play.
With the retaining works and fencing completed, the lion’s share of the work was done. Stage two was landscaping and we chose the easy option of rolling out ready lawn!

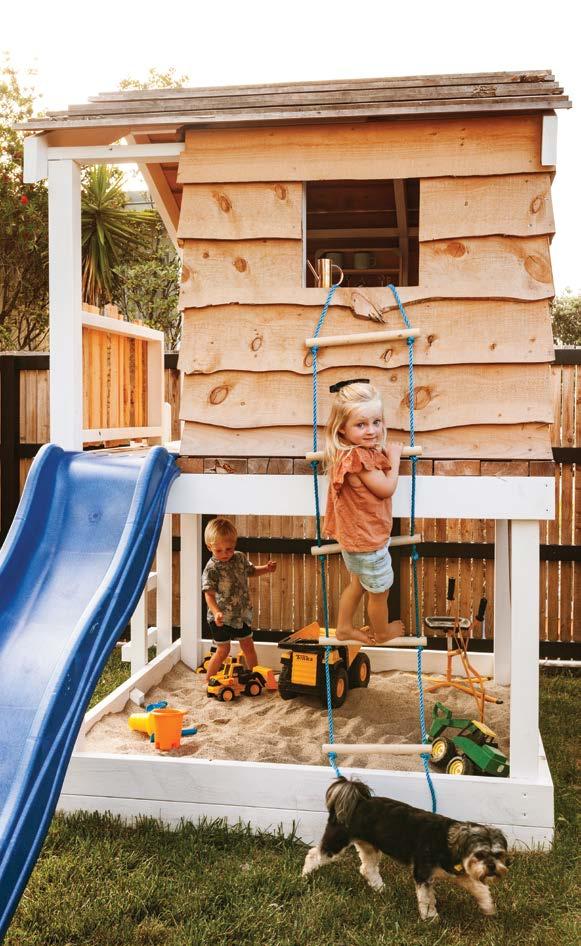
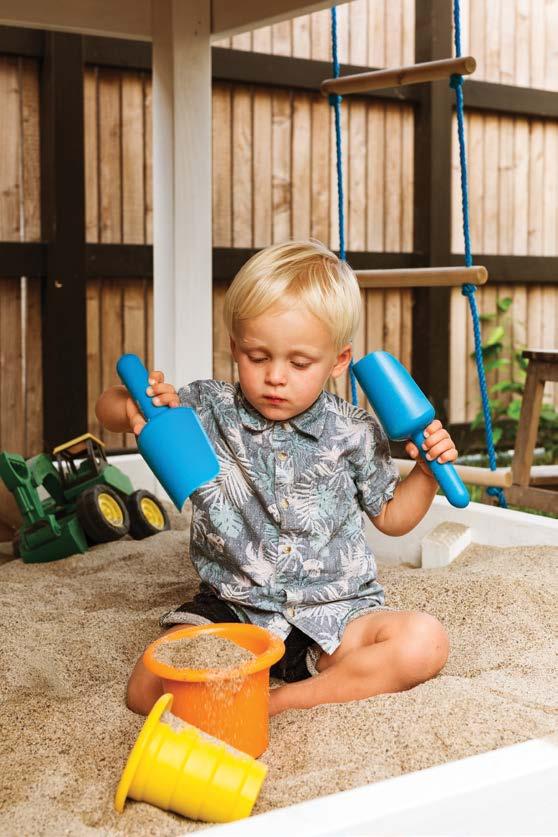
The macrocarpa playhouse is designed with the active child in mind, so incorporates a climbing rope, slide and sandpit. The little sandpit underneath is great for housing Cohen’s obsession with diggers and dump trucks. In summer we all play on the makeshift waterslide (a slide + hose = a dynamic water slide) which is great for cooling off on a hot day.
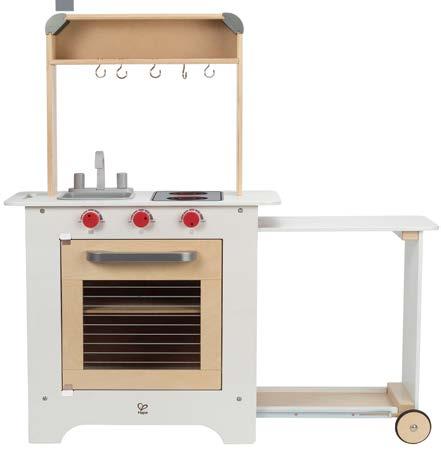
I painted and decorated the playhouse (and enjoyed my turn at playing house!) Once it was furnished with a Hape play kitchen, pots and pans, some cushions and other knick-knacks, the time the kids spent in it doubled. Now, after kindy, they’ll cook up a storm in their little kitchen while I supervise from the kitchen inside, or, if I’m feeling relaxed, from the hammock on the deck. The cushions and reading corner create a little sanctuary and I was delighted to see Frankie curl up like a cat in the cosy nook, glad that my efforts in making it homely have paid off!
The macrocarpa hot tub was also built by Sean and is something we brought with us from Titirangi. We created the lush tropical vibe by planting around it and using the shade of the existing palm trees to create some privacy. The kids love playing in the hottub and would use it every day if we let them. It’s a nice space that Mum, Dad and kids can all enjoy together, year-round.
I’m incredibly grateful that I no longer have to ask the kids to go outside – they’re drawn out there every day, morning and night. I love watching them play outside as it reminds me of my own childhood. And I’m especially thankful knowing that it’s good for their wellbeing, and my own, that we all spend an extra hour or two in the fresh air each day. •

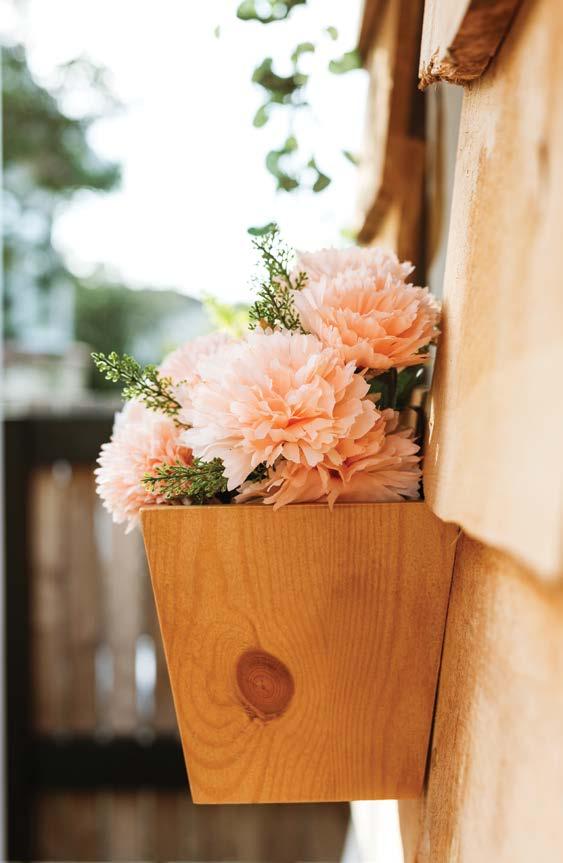
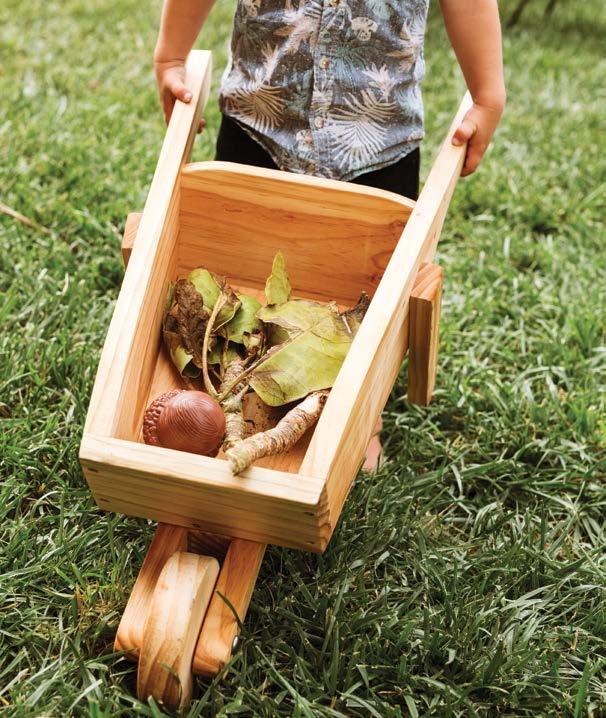

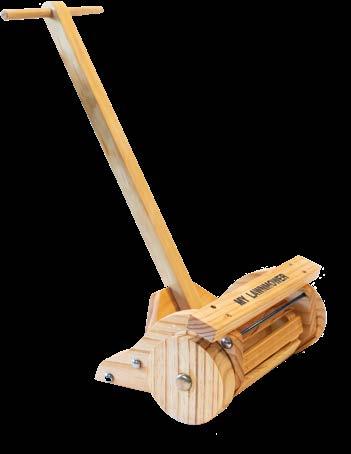
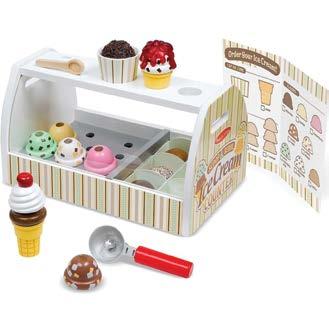
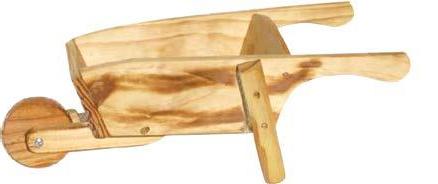
Emporium Darma Llama Plant Pot $35, shutthefrontdoor.co.nz; Curiate Wooden Lawnmower, $150, curiate.co.nz; Gentlemen’s Hardware ‘Hit the Road’ Enamel Mug, $19.95, smithandcaugheys.co.nz; Melissa & Doug Ice Cream Scoop & Serve Counter, $110, toyco.co.nz; Anko Lion Cushion, $7, kmart.co.nz; Rex Magical Unicorn Apron, $17.95, littlewhimsy.co.nz; Curiate Wooden Wheelbarrow, $150, curiate.co.nz; Hape Cook ’n Serve Kitchen,$299, hapetoys. co.nz; Cam Cam Kids Oven Glove and Pot Holder set, $29.95, littlewhimsy.co.nz.


A LICK OF PAINT TRANSFORMS TERRACOTTA POTS INTO PRETTY PLANTERS
YOU WILL NEED
Resene testpots in your choice of colours, or the ones we used
Resene Terracotta Sealer
Terracotta pots and saucers
Artist’s paintbrushes
METHOD 1. All pots: Start by first applying one coat of Resene Terracotta Sealer to the inside and outside of the pots as well as the saucers. This gives a long-term water-beading effect and deters water penetration, because terracotta is quite porous. Give the sealer two days to penetrate and cure. 24 hours might be enough in warm weather. 2. Paint all the pots and saucers (inside and out) with a light colour as an undercoat base to block out the deep terracotta colour. We applied two coats of Resene Eighth Drought, which also became one of the final colours. We gave the finish of the cactus pot some texture by applying the second coat of the light base colour thickly with a large artist brush, forcing the paint to ‘sag’ around the edges of the brushstrokes and left it to dry thoroughly. 3. Cactus pot: Apply two coats of the middle colour – we used Resene Soulful from the Resene fashion colours fandeck – allowing paint to dry between coats. Desert pot: Paint the entire pot again using Resene Half Spindle to create the sky. Apply two coats, allowing each coat to dry. Sleepy pot: Apply two coats of Resene Soulful to the rim of the pot as well as on the inside. Let each coat dry. 4: Cactus pot: Apply two coats of the bottom colour to both the pot and saucer – we used Resene Sunbaked. Desert pot: Using Resene Sunbaked, create the middle sand dune around the pot, again doing two coats. Sleepy pot: Using a thin artist’s brush, slowly and carefully create a wavy pattern around the rim and paint on the closed eyes and mouth, using Resene Sunbaked. This pot is done! 5: Cactus pot: With the thin artist’s brush, carefully paint on the cacti using Resene Sunbaked. Once dry, add the spines using the light base colour. Done! Desert pot: Apply two coats of Resene Soulful to the saucer and to the bottom of the pot, to create the lower sand dune. Finished!
■ Resene Sunbaked ■ Resene Soulful ■ Resene Half Spindle ■ Resene Eighth Drought

Visit your local Resene ColorShop, phone 0800 RESENE (737 363) or go to resene.co.nz/colorshops


