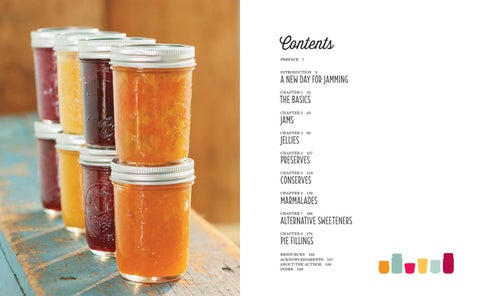
Contents PREFACE 7 INTRODUCTION 8
A NEW DAY FOR JAMMING CHAPTER 1 10
THE BASICS CHAPTER 2 43
JAMS
CHAPTER 3 80
JELLIES
CHAPTER 4 107
PRESERVES
CHAPTER 5 128
CONSERVES
CHAPTER 6 149
MARMALADES
CHAPTER 7 166
ALTERNATIVE SWEETENERS CHAPTER 8 176
PIE FILLINGS
RESOURCES 186 ACKNOWLEDGMENTS 187 ABOUT THE AUTHOR 188 INDEX 189
At some point while the canner is heating up or the jars are sterilizing, prepare your lids. Put your clean lids in a small pot, covering them with a couple of inches (5 cm) of water. Place the pot on the stove and bring the water and the lids up to a simmer. This softens the sealant around the edge of the lids. Do not boil the lids; rather, hold them at a low simmer in the pot until ready to use. Finally, place your clean bands nearby (I usually put them in a small bowl or on a dishtowel) so that they’ll be easy to reach when you need them.
ADJUST FOR ALTITUDE! At sea level, water boils at 212°F (100°C), but at higher elevations, water boils at lower temperatures. Additional sterilizing and processing times are necessary to compensate for this. The recipes in this book are written for elevations from sea level up to 999 feet (304.5 m), but if you live at a higher elevation, simply add 1 extra minute of sterilizing time and 1 extra minute of processing time for every 1,000 feet (304.8 m) above sea level. If, for example, you live at 1,300 feet (396.2 m), you’ll need to sterilize and process your jars for 11 minutes (rather than 10); at 2,700 feet (823 m), you’ll need 12 minutes; at 5,500 feet (1.7 km), you’ll need 15 minutes; and so on. If you don’t know your elevation, check with your county extension office for guidance.
STEP 4: PREPARE YOUR CALCIUM WATER AND INGREDIENTS Once your equipment prep is taken care of, and you have your recipe and ingredients on hand, you’ll want to make your calcium water (or confirm that you have enough left over from a previous batch). After that, you’ll prepare your fruit and other ingredients before you hit the stove for the actual jamming part of the process.
Preparing Your Calcium Water
As I’ve mentioned, every box of Pomona’s Pectin contains a packet of tan pectin powder and a smaller packet of white calcium powder. The two work handin-hand, as the calcium activates the jelling power of the pectin. Before making jam, use the calcium powder to make your calcium water, which you’ll need for every recipe. Simply combine 1/2 teaspoon (1.5 g) calcium powder and 1/2 cup (120 ml) water in a small, clear jar with a lid. This makes enough calcium water for
POMONA’S UNIVERSAL PECTIN
Smaller packet of white calcium powder
many batches of jam, so you won’t have to do this step every time you make jam. You can store extra calcium water in the refrigerator and use as needed, shaking before use. Refrigerated calcium water will keep for a number of months. Always examine your calcium water when you take it out of the refrigerator (before shaking it)—white sediment at the bottom of the jar is normal, but if you see any mold, scum, or discoloration, discard it and make more.
1/2 teaspoon (1.5 g) calcium powder
1/2 cup (120 ml) water
MIX UP THE CALCIUM WATER.
HOW RIPE IS RIPE? All of the recipes in this book call for ripe fruit. However, fruits can be ripe to varying degrees, and some recipes are best made with fruit of a specific level of ripeness. In this book, if a recipe calls for a “fully ripe pear,” for example, you’ll want to use a pear that is ripe enough and soft enough to mash. On the other hand, if a recipe calls for a “ripe, firm pear,” you’ll want a pear that is ripe but still firm enough that you can cut the pear up and cook it as called for without it turning to mush. If a recipe simply calls for “ripe” fruit, any degree of ripeness is fine.
Preparing Your Fruit
If you’re using fresh fruit, it should be as fresh as possible. Perhaps it goes without saying, but avoid any fruit that is overripe or diseased. Wash it thoroughly, and then remove and discard any bruised or damaged sections. Next, prepare the fruit as directed by your recipe (peeling, pitting, chopping, and so on). If you’re using frozen or canned fruit, you can obviously skip all of this—simply defrost frozen fruit or drain canned fruit (unless your recipe says otherwise), and you’re good to go. How you prepare your fruit from this point on will depend in large part on whether you’re making a jam, jelly, preserve, conserve, or marmalade. If you’re making a jam, conserve, or marmalade, mashing the fruit is typical, though some recipes will call for chopping or dicing. For preserves, you’ll want to leave the fruits whole if they are small, such as strawberries or raspberries. If your fruits are large, such as apples or peaches, cut them into uniform pieces. Some recipes require cooking the fruit during the preparation phase, while others require only mashing or chopping raw fruit. Preparation procedures will vary based on the type of fruit, type of jelled product, and the individual recipe, so be sure to refer to your recipe for specifics.
Packet of tan pectin powder
22
PRESERVING WITH POMONA’S PECTIN
The Basics
23
1. Pour your prepared, measured fruit or fruit juice into a large saucepan, and then add your measured amount of lemon juice (or lime juice or vinegar), if your recipe calls for it, and your measured calcium water.
2. In a separate bowl, combine your measured amounts of sweetener and Pomona’s pectin powder. Mix thoroughly and set aside. (Note that there are two recipes in this book—both pepper jellies—where this step is done differently. In those two cases, please follow the directions provided to properly mix your pectin into your sweetener.)
Pomona’s pectin powder
Dry sweetener (such as sugar)
COMBINE POMONA’S PECTIN POWDER AND DRY SWEETENER.
Lemon juice Calcium water
or Pomona’s pectin powder
Liquid sweetener (such as honey)
ADD LEMON JUICE (IF CALLED FOR) AND CALCIUM WATER TO PREPARED FRUIT.
28
PRESERVING WITH POMONA’S PECTIN
COMBINE POMONA’S PECTIN POWDER AND LIQUID SWEETENER.
The Basics
29
SIMPLE CLASSIC: BLUEBERRY JAM
Here in Maine, we’re fortunate that blueberries are abundant in late summer, and I never tire of this classic way to enjoy them. Blueberries require very little prep, and this jam has few ingredients, so it’s easy and quick to prepare, making it an excellent choice for new jam makers. A dollop of this luscious, deep blue jam on a muffin is scrumptious—or, try it on a cracker with some extra-sharp cheddar for an unexpected flavor treat.
21/4 pounds (1 kg) blueberries* 1/4 cup (60 ml) lemon juice 2 teaspoons (10 ml) calcium water** 1 cup (200 g) sugar 2 teaspoons (6 g) Pomona’s pectin powder *Not sure how much fruit to purchase? See “Measuring Up!” on page 26. **For information on how to prepare calcium water, refer to page 22.
CUSTOMIZE IT! If you’re looking for something new, try spicing it up! At the same time that you add the calcium water, add up to 1 teaspoon (2.5 g) of ground ginger, cardamom, cloves, cinnamon, nutmeg, or allspice. Or, you can mix and match these spices—just be sure that the total spice quantity does not exceed 1 teaspoon (2.5 g).
1. If you are new to canning, or need a refresher, refer to chapter 1
(pages 12–41) for step-by-step guidance and additional information on how to safely can your jam. Once ready, proceed as follows. 2. Prepare your jars, lids, and bands; heat up your canner; and sterilize your jars. 3. Rinse blueberries, remove stems, and mash in a large bowl. 4. Measure 4 cups (946 ml) of mashed blueberries (saving any extra for another use), and combine the measured quantity in a saucepan with lemon juice and calcium water. Mix well. 5. In a separate bowl, combine sugar and pectin powder. Mix thoroughly and set aside. 6. Bring blueberry mixture to a full boil over high heat. Slowly add pectin-sugar mixture, stirring constantly. Continue to stir vigorously for 1 to 2 minutes to dissolve pectin while the jam comes back up to a boil. Once the jam returns to a full boil, remove it from the heat. 7. Can Your Jam: Remove jars from canner and ladle jam into hot jars, leaving 1/4 inch (6 mm) of headspace. Remove trapped air bubbles, wipe rims with a damp cloth, put on lids and screw bands, and tighten to fingertip tight. Lower filled jars into canner, ensuring jars are not touching each other and are covered with at least 1 to 2 inches (2.5 to 5 cm) of water. Place lid on canner, return to a rolling boil, and process for 10 minutes (adjusting for altitude if necessary). Turn off heat and allow canner to sit untouched for 5 minutes, then remove jars and allow to cool undisturbed for 12 to 24 hours. Confirm that jars have sealed, then store properly.
Yield: 4 to 5 half-pint (8-ounce, or 236 ml) jars
JamS
45
SAVORY SPICED-MANGO CONSERVE
If you’re a fan of chutney, give this conserve a try! Inspired by the classic Indian condiment, this conserve melds the sweetness of mangoes with the earthy, complex flavors of garlic, ginger, and a variety of other spices. Remember, for canning safety, it’s important that you do not increase the quantities of any of the vegetables or spices in this recipe, and be sure to use bottled lemon juice.
2 pounds (910 g) ripe, firm mangoes*
∕ cup (110 g) diced onion
23
2 teaspoons (5.4 g) peeled, finely grated ginger root (for more information, see “Grate That Ginger!” on page 125) 1 teaspoon (3 g) minced garlic 3/4 cup (175 ml) water 3/4 cup (175 ml) white vinegar 1/2 cup (73 g) golden raisins (or dark raisins, if you prefer) 11/2 teaspoons (3 g) ground coriander 1 teaspoon (3.7 g) mustard seed 1/2 teaspoon (1.25 g) ground cinnamon 1/2 teaspoon (1.2 g) ground turmeric 1/4 teaspoon (0.6 g) ground cumin
∕ teaspoon (0.15 g) hot pepper flakes
18
1/4 teaspoon (1.5 g) salt 3 tablespoons (45 ml) lemon juice 2 teaspoons (10 ml) calcium water** 11∕3 cups (267 g) sugar 2 teaspoons (6 g) Pomona’s pectin powder *Not sure how much fruit to purchase? See “Measuring Up!” on page 26. **For information on how to prepare calcium water, refer to page 22.
1. If you are new to canning, or need a refresher, refer to chapter 1
(pages 12–41) for step-by-step guidance and additional information on how to safely can your conserve. Once ready, proceed as follows. 2. Prepare your jars, lids, and bands; heat up your canner; and sterilize your jars. 3. Peel, pit, and dice mangoes. (For more information, see “Mango Madness!” on page 63.) 4. In a saucepan, combine mangoes, onion, ginger, garlic, the 3/4 cup (175 ml) water, vinegar, raisins, coriander, mustard seeds, cinnamon, turmeric, cumin, hot pepper flakes, and salt. Bring to a boil over high heat, reduce heat, and then simmer, covered, for 20 minutes, stirring occasionally. Remove from heat. 5. Measure 4 cups (946 ml) of the cooked mango mixture (saving any extra for another use), and return the measured quantity to the saucepan. Add the lemon juice and calcium water and mix well. 6. In a separate bowl, combine sugar and pectin powder. Mix thoroughly and set aside. 7. Bring the mango mixture back to a full boil over high heat. Slowly add sugar-pectin mixture, stirring constantly. Continue to stir vigorously for 1 to 2 minutes to dissolve pectin while the conserve comes back up to a boil. Once the conserve returns to a full boil, remove it from the heat. 8. Can Your Conserve: Remove jars from canner and ladle hot conserve into hot jars, leaving 1/4 inch (6 mm) of headspace. Remove trapped air bubbles, wipe rims with a damp cloth, put on lids and screw bands, and tighten to fingertip tight. Lower filled jars into canner, ensuring jars are not touching each other and are covered with at least 1 to 2 inches (2.5 to 5 cm) of water. Place lid on canner, return to a rolling boil, and process for 10 minutes (adjusting for altitude if necessary). Turn off heat and allow canner to sit untouched for 5 minutes, then remove jars and allow to cool undisturbed for 12 to 24 hours. Confirm that jars have sealed, then store properly.
Yield: 4 to 5 half-pint (8-ounce, or 236 ml) jars
KEEP IT EQUAL If you have too much fruit and need to get rid of some to meet the required 4-cup (946 ml) quantity, be sure that you remove solids and liquids equally. This is very important in maintaining both the proper consistency and proper acidity of the final product. Don’t pour off the liquid—instead, remove extra solids and liquids from the measuring cup one spoonful at a time, making an effort to remove liquid spoonfuls and solid spoonfuls in roughly equal quantities.
138
PRESERVING WITH POMONA’S PECTIN
Chapter 7
ALTERNATIVE SWEETENERS
MANGO-PINEAPPLE JAM
Both pineapples and mangoes are naturally very sweet, and because of this they are some of my favorite fruits to use in jams where I want to minimize the amount of sweetener I need to add. Pineapple provides an appealing tang, which balances out the sweetness beautifully and yields an absolutely delicious jam. Suffice it to say that this jam never lasts long in my refrigerator, as I typically eat it by the spoonful.
2 pounds (910 g) fully-ripe mangoes* (for more information, see “Do The Mango Mash!” below) 2 cups (330 g) finely chopped pineapple (for more information, see “Persnickety Pineapples!” on page 132)
∕ cup (75 ml) lemon juice
13
3 teaspoons (15 ml) calcium water**
These days so many of us are trying to reduce our sugar consumption for any number of reasons—but we still want to enjoy delicious jams and jellies! Fortunately, Pomona’s pectin is extremely versatile and can be used with just about any sweetener. This chapter is dedicated to jams and jellies that use only alternative sweeteners, such as agave nectar,
3/4 cup (144 g) monk fruit sweetener blend 21/2 teaspoons (7.5 g) Pomona’s pectin powder *Not sure how much fruit to purchase? See “Measuring Up!” on page 26. **For information on how to prepare calcium water, refer to page 22.
stevia, and monk fruit. Monk fruit and stevia are available in a variety of strengths and formulations, as they are blended with other ingredients to make them easier to measure and use as a replacement for sugar. For typical monk fruit sweetener blends, one teaspoon of the blend is equal in sweetness to one teaspoon of sugar. Stevia blends tend to be sweeter, with one teaspoon providing sweetness equal to two teaspoons of sugar. Monk fruit and stevia blends in these strengths are common and widely available, and this is what I have used in the developing these recipes. To ensure success with these recipes, purchase blends with this same level of sweetness.
166
DO THE MANGO MASH! This recipe calls for mashed mangoes, so be sure that your mangoes are fully ripe and soft enough to mash. They’ll also be much sweeter if they’re fully ripe. If you simply can’t wait for full ripeness, however, place peeled, pitted, chopped mango in a saucepan with 1/2 cup (120 ml) water. Simmer for 5 minutes to soften, and then mash mango by hand or puree in a food processor, being careful not to liquefy it. (There’s no need to drain the water after cooking— simply mash or puree the mango mixture as is.)
1. If you are new to canning, or need a refresher, refer to chapter 1
(pages 12–41) for step-by-step guidance and additional information on how to safely can your jam. Once ready, proceed as follows. 2. Prepare your jars, lids, and bands; heat up your canner; and sterilize your jars. 3. Peel and pit mangoes, and then mash in a large bowl. 4. Measure 2 cups (330 g) of mashed mango (saving any extra for another use). Combine the measured quantity in a saucepan with the chopped pineapple, lemon juice, and calcium water. Mix well. 5. In a separate bowl, combine monk fruit sweetener and pectin powder. Mix thoroughly and set aside. 6. Bring mango-pineapple mixture to a full boil over high heat. Slowly add pectin–monk fruit sweetener mixture, stirring constantly. Continue to stir vigorously for 1 to 2 minutes to dissolve pectin while the jam comes back up to a boil. Once the jam returns to a full boil, remove it from the heat. 7. Can Your Jam: Remove jars from canner and ladle hot jam into hot jars, leaving 1/4 inch (6 mm) of headspace. Remove trapped air bubbles, wipe rims with a damp cloth, put on lids and screw bands, and tighten to fingertip tight. Lower filled jars into canner, ensuring jars are not touching each other and are covered with at least 1 to 2 inches (2.5 to 5 cm) of water. Place lid on canner, return to a rolling boil, and process for 10 minutes (adjusting for altitude if necessary). Turn off heat and allow canner to sit untouched for 5 minutes, then remove jars and allow to cool undisturbed for 12 to 24 hours. Confirm that jars have sealed, then store properly.
Yield: 4 to 5 Half-Pint (8-ounce, or 236 ml) Jars
Alternative Sweeteners
167