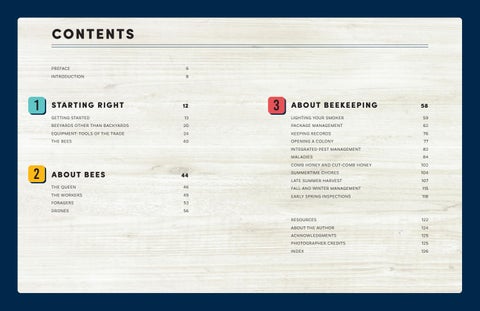
CONTENTS PREFACE 6 INTRODUCTION 8
1
STARTING RIGHT 12
3
ABOUT BEEKEEPING
58
GETTING STARTED
13
LIGHTING YOUR SMOKER
59
BEEYARDS OTHER THAN BACKYARDS
20
PACKAGE MANAGEMENT
62
EQUIPMENT: TOOLS OF THE TRADE
24
KEEPING RECORDS
76
THE BEES
40
OPENING A COLONY
77
INTEGRATED PEST MANAGEMENT
82
MALADIES 84
2
ABOUT BEES
44
COMB HONEY AND CUT-COMB HONEY
102
SUMMERTIME CHORES
104
LATE SUMMER HARVEST
107
THE QUEEN
46
FALL AND WINTER MANAGEMENT
115
THE WORKERS
49
EARLY SPRING INSPECTIONS
118
FORAGERS 53 DRONES 56 RESOURCES 122 ABOUT THE AUTHOR
124
ACKNOWLEDGMENTS 125 PHOTOGRAPHER CREDITS
125
INDEX 126
1
STARTING RIGHT Keeping bees is an adventure, an avocation, and an investment, much like
GETTING STARTED Your first step is to order as many beekeeping catalogs as you can find. They’re free, and
water, even for a week or so, can produce a
they contain a wealth of information. There are
whole brood of these often disease-carrying
also magazines dedicated to beekeeping. Look
pests. A water source that is cycled by a pump
particularly at those companies that offer preas-
or is changed on a regular basis is what’s
sembled products.
needed. It’s a trade-off. The choice can’t be
PROVIDING WATER
water for the bees and mosquitoes. It has to be water and no mosquitoes.
Providing fresh water for bees is mandatory.
preparing for a garden. You must plan what you will raise, be aware of harvest
A summer colony needs at least a quart (liter)
dates, prepare for how to preserve the bounty, and plan what needs to be
(4 L) when it’s very warm. Making sure that
done in the off-season.
Be careful not to raise mosquitoes. Standing
of water every day and as much as a gallon water is continuously available in your yard will make your bees’ lives easier, and it helps ensure that they do not wander where they are not welcome—such as the neighbor’s child’s swimming pool—in search of water. Whatever watering technique you choose for your bees, the goal is to provide a continuous supply of fresh water. This means while you are on vacation for a couple of weeks, when you forget to check, and especially when it’s really hot—bees always need water. To make water accessible to bees, try the following: Float pieces of cork or small pieces of wood in pails of fresh water for the bees to rest on while drinking. Install a small pool or water garden or have birdbaths that fill automatically when the water runs low. Set outside faucets to drip slowly (great for urban beekeepers) or hook up automatic pet or livestock waterers.
A beehive should be visually screened from the public. The site should have some afternoon shade, lots of room to work, and a low-maintenance landscape. Notice that the white hive seen here is highly visible. Stark white beehives with little or no screening will draw attention and invite trouble. Out of sight and out of mind is the goal. This site doesn’t work.
Starting Right
| 13
EQUIPMENT: TOOLS OF THE TRADE Here are some important considerations to make while choosing your hives and personal gear.
HIVES We’ve already looked at the basics of the beehives you’ll have. Seriously consider using preassembled, medium-depth, eight-frame boxes no standardized dimensions in the beekeeping industry. The dimensions of hives are not quite As a result, the parts of your hive may not quite
An eight-frame hive, right out of the box. It has three medium supers, an inner cover beneath a telescoping cover, a screened bottom board, and a mouse guard.
fit together if you mix parts from different If your boxes don’t quite match, your bees will adjust. But their best efforts to hold the hive together in ill-fitting boxes work against your
of foundation is made of beeswax, complete
at least three eight-frame, medium-depth boxes
with the embossed cell outlines. These sheets are
for each colony. You’ll soon need a couple
fragile and usually have vertical wires embed-
more, but we’ll explore those options later.
ded in them for support. When assembling
Frames hang inside each box on a specially cut
traditional frames with beeswax foundation,
ledge, called a rabbet. Frames keep the combs
you frequently need to add horizontal wires for
organized inside your hive and allow you to eas-
additional support. An alternative foundation is
ily and safely inspect your bees.
a sheet of plastic that is embossed like the bees-
USE A SINGLE SUPPLIER
wax sheets. These do not need supporting wires. There are also frames made completely of
Beehive frames are wooden or plastic rectangles
plastic. The outside support and the foundation
that surround the comb. The outside provides
inside are a single piece of molded plastic.
support and maintains the rectangular shape of
You can purchase unassembled wooden
the frame. Bees build their honeycombs within
frames that come with beeswax or plastic foun-
the frame.
dation sheets. Assembled wooden frames are
Brand-new frames start with the outside sup-
manufacturers.
beeswax cells that make up the comb. One kind
3-pound (1.4 kg) package of bees, you’ll need
Frames
and appropriate frames. Amazingly, there are
the same from one manufacturer to another.
To get a start in beekeeping with a typical
also available and come with plastic foundation.
port that holds a sheet of what is called founda-
If the frames you purchase have plastic founda-
tion within the frame. Foundation is a thin sheet
tion, you will have to add beeswax coating.
that is embossed with the outline of the six-sided
best efforts to take it all apart when checking on your bees. Sticky, runny, dripping honey from a broken burr comb (a free-form honeycomb built to bridge a gap between hive parts) makes a mess and will cause a great deal of excitement for your bees. Bees will weld ill-fitting boxes together (with a substance called propolis, which they make from plant resins) so that boxes become inseparable from adjacent boxes. The lesson: In the beginning, choose a supply company carefully and stick with it. Your first consideration should not be cost but ease and comfort for you and your bees.
All boxes are similar, but there are minor design differences between manufacturers. The primary difference is how deep the rabbet is cut. Deep cuts allow frames to hang lower in the box than shallow cuts. When a box of frames is placed on top of another box of frames, there should be a sufficient bee space—about ⅜" (10 mm)—between the two boxes. If a frame hangs too low or too high when the boxes are combined, there will be too much or too little bee space between the top bars of the frames in the box below and the bottom bars of the box above, and the bees will stick them together with propolis. If there is too much space, they will fill it with comb. Either way, it’s a mess. To avoid this situation, stick with a single supplier when adding or replacing equipment. This frame fits medium supers. It has a wooden exterior support that frames an embossed beeswax-covered sheet of plastic foundation in the center.
24
| F I R ST T I M E B E E K E E P I N G
Starting Right
| 25
GUIDE TO BEEHIVE ASSEMBLY
FLAT MIGRATORY COVER (B) PEAKED OUTER COVER (A) TELESCOPING OUTER COVER (C) INNER COVER (D) FEEDING SHIM (F)
HONEY SUPER WITH EIGHT FRAMES, RABBET JOINTS (I) HIVE TOP FEEDER (E)
FRAMES (J)
ESCAPE BOARD— INVERTED (K) QUEEN EXCLUDER (G)
BROOD SUPERS WITH EIGHT FRAMES, BOX JOINTS (H)
This illustration shows the parts and pieces of a modern beehive. There are three styles of covers: peaked, usually covered with a copper sheet (A), a flat migratory cover so colonies fit tightly together when being hauled on a truck (B), and the telescoping cover, which fits over the top of the hive (C). Colonies with migratory covers do not use inner covers (D), which sit directly beneath a telescoping cover and on top of the top super. Top feeders (E) allow bees to come up through the center slot and feed on sugar syrup you add to the trays on either side of the slot. A feeding shim (F) is for fondant, protein supplement patties, or as a spacer when treating your colony with formic acid pads. A queen excluder (G) is placed on top of the brood supers (H) and below the honey supers (I) to keep the queen from laying eggs in your honey supers. Frames (J) hang inside each super suspended by the extended ends on top of each frame. These ends are held in the groove, called a rabbet, on the inside of two ends of each super. Two joints are used to construct supers: rabbet joints (as on the honey supers) and box joints (as on the brood supers). An escape board is shown upside down to illustrate the bees’ one-way exit (K). A pollen trap (L) captures pollen that is either used to feed to the bees later or sold by the beekeeper. At the very bottom is a screened bottom board (M) that has a solid insert for inclement winter weather (N) with the insert partially exposed. Solid bottom boards are available.
POLLEN TRAP (L)
STICKY BOARD INSERT (N) SCREENED BOTTOM BOARD (M)
28
| F I R ST T I M E B E E K E E P I N G
Starting Right
| 29
FIRST INSPECTIONS
If the behavior seems casual, not urgent, laid
There are many recommendations on how often
back, then you can be relatively certain that the
to inspect your colony, especially a new pack-
queen and bees have accepted each other and
age. (Checking the amount of available sugar
things will go as well as things can go. I know,
syrup and protein patty doesn’t count as a visit.)
since you haven’t been doing this how do you
Do not remove the covering from the candy
tell urgent from casual? Here’s my yardstick. I
end of the queen cage for at least five days.
pick up the queen cage and gently blow on it
After the package has been installed, you
to remove any adhering bees and put it back. If the cage is immediately covered again, that’s
must wait patiently. Watch the front door for activity, make notes, take pictures, watch more, and be patient. Be more patient. Check the food situation on top, but don’t worry about the pollen patty yet.
This is what you might see when the workers are still aggressive toward the queen. They cling tightly to the cage, biting the wires and are difficult to push or blow away because they are trying to get at the new queen.
When it is time, remove the cork on the candy end of the cage. Use the corner of your hive tool. Don’t remove the cork on the other end or the queen will walk out prematurely. If you have the plastic cage with a tube full of candy, open the cap at the end exposing the candy.
urgent. If they leave it alone, that’s casual. You might try this two or three time, and over a couple of days to get a feel for this. It’s an expensive bug, so take your time and know for sure. If, however, the bees are still clinging to the
After five days, open the colony carefully, using as little smoke as possible. Put a single
cage and the screen, if after being removed
puff into the front door. Then, lift the cover
they return immediately, you can be fairly cerOOPS! DID YOU DROP THE QUEEN’S CAGE?
and put in a puff. Wait a couple of minutes. Remove the cover and look into the box with times to move bees out of the way. Take the box off, remove the feeder, and puff into the hole in the inner cover. Wait a minute. Lift the inner cover on the end, a couple of inches (cm), and puff a couple of times. Replace. Wait a minute. Remove the inner cover and puff a couple more times to move bees away from the top of the see what the bees are doing around the queen
and they need more time. Give them a few more days. Check again, and if they’ve settled down
the feeder or the top feeder. Puff a couple of
top bars. Now, peer between the frames and
tain that they haven’t yet accepted each other
This is comfortable behavior—the bees aren’t clinging to the cage or biting the wire. Queen release now is safe.
cage. Are there lots of them hanging on tightly?
“I dropped the queen’s cage into the package! Help!” This happens, especially when you’re wearing gloves. You have to get it. Here’s how: Quickly put the cover back on the package. Look for the queen cage in the mass of bees inside. If you don’t see her, gently roll the package until you spot the cage. If you don’t already have a glove on, this may be a good time to get it. Gently thump the cage to confuse the bees and spray them with syrup. Remove the cover and reach in, grab the cage, and pull it out. Quickly replace the cover. It’s that simple. If you can, don’t wear your glove. The texture and feel of all those nonthreatening bees on your fingers and hand is a feeling like no other.
(they almost always do), the queen-to-colony relationship has been established. Releasing the queen is the next step. If the behavior seems friendly, proceed to the next step. Lightly smoke the colony in the area of the queen cage so the bees retreat. Remove the cage and remove the cork from the fondant candy end with the corner of your hive tool or a toothpick or if you have a plastic cage remove the cap covering the tube with the candy. Test the candy with the toothpick to see if it’s hard. If
Or are they milling around, moving over and
grab it tightly? Do they walk around and over
around the cage? Then, remove the cage, either
the cage, and then walk away? Do some stay,
by lifting the frame with the cage banded or
touching with antennae, feeding the queen? Or
gently poke the toothpick through the candy,
taped to it, or simply lift the cage out using the
do they cover the screen and holes and look as
making a small hole all the way through it. Just
hanger. See if she is alive and moving, then
if they are trying to smother the queen? Let this
be very careful not to jab the queen when you
gently lay her cage on the top bars, screen side
go on for a few minutes. Be patient and do not
break through.
up, and observe. Do bees rush to the cage, and
use smoke.
72
| F I R ST T I M E B E E K E E P I N G
it’s soft, your work here is done. If it’s hard, very
About Beekeeping
| 73