
Thank you for your purchase
Atlanta M3 Plug & Play Pack ENGLISH Issue 01 - March 2025
For best results, have this light fitting installed by a qualified electrician, following these instructions. Keep this leaflet for future reference.
Safety
• Mains powered – installation must comply with building and electrical regulations.
• Always switch off and isolate the power before installation or maintenance.
Need Help?

For advice or accessories, contact us at the address above. Please have the product name, model, and purchase details ready.
INSTALLATION
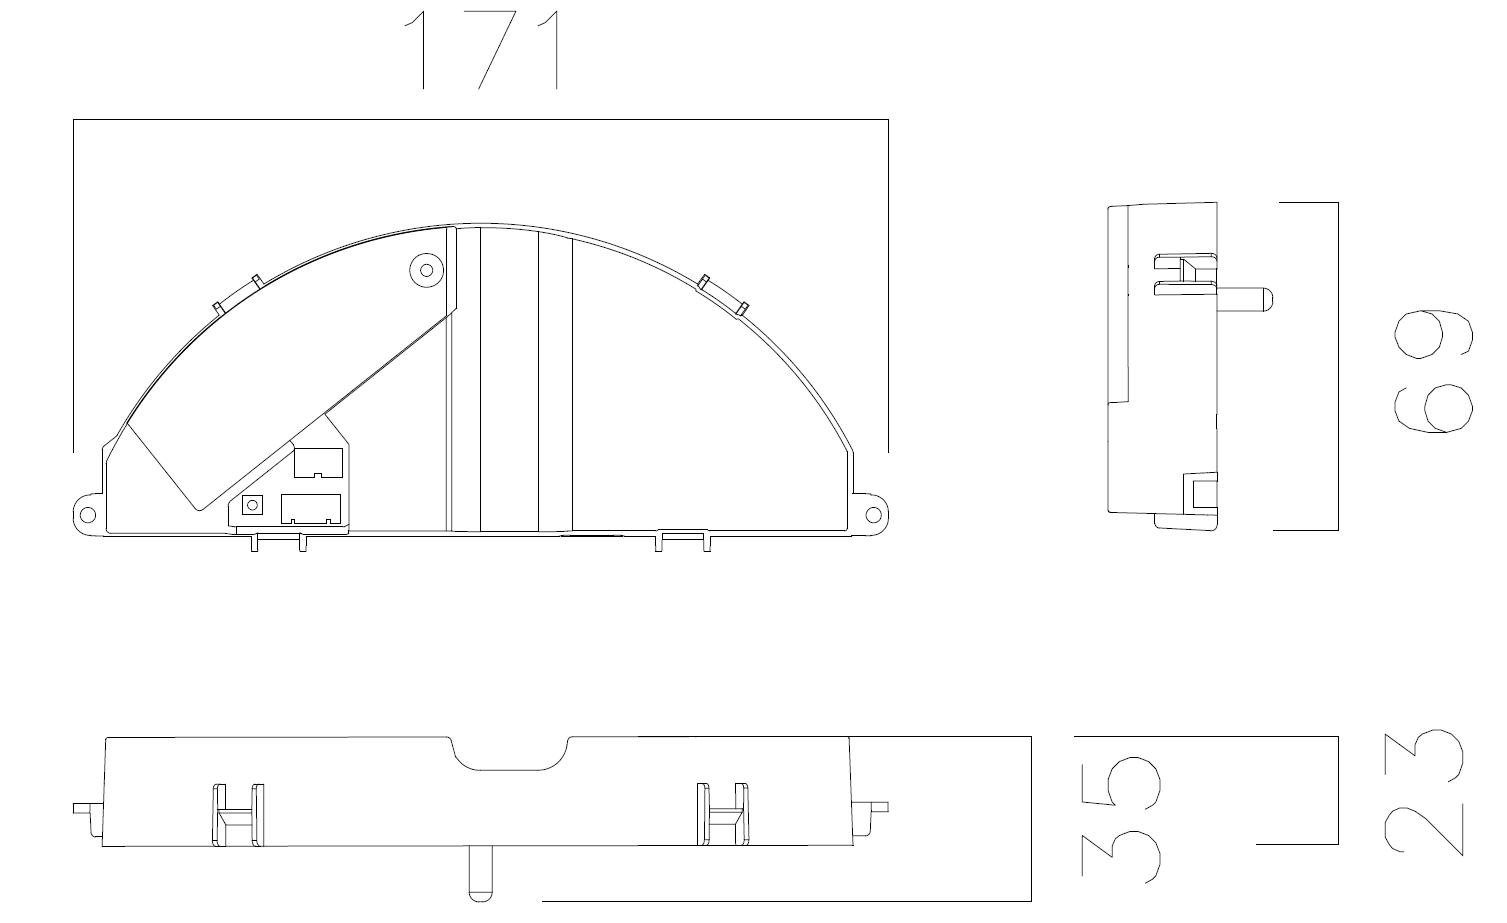
• The M3 Plug & Play Pack is designed to work with the Atlanta and Augusta fittings.
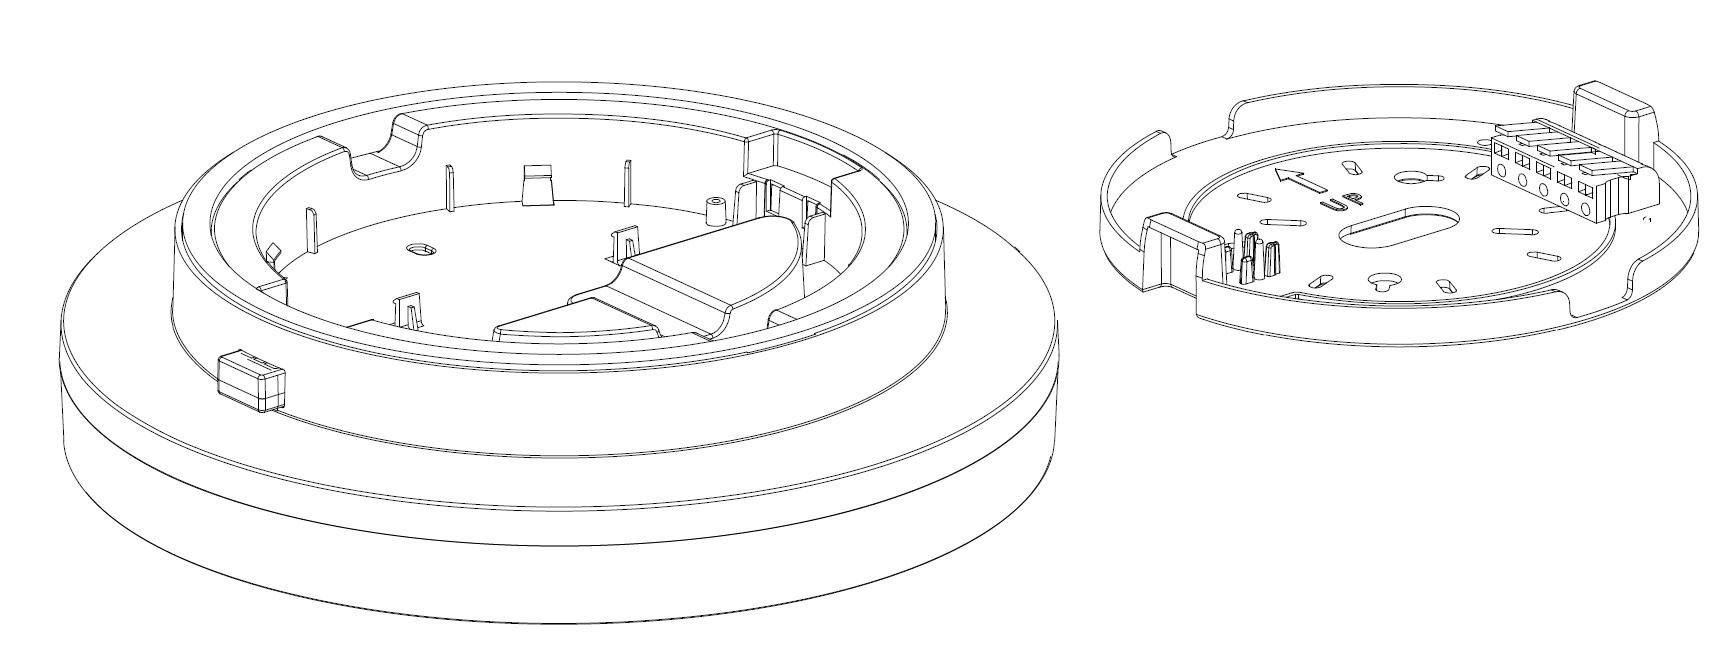
• To install the module, first remove the back cover of the fitting as shown below

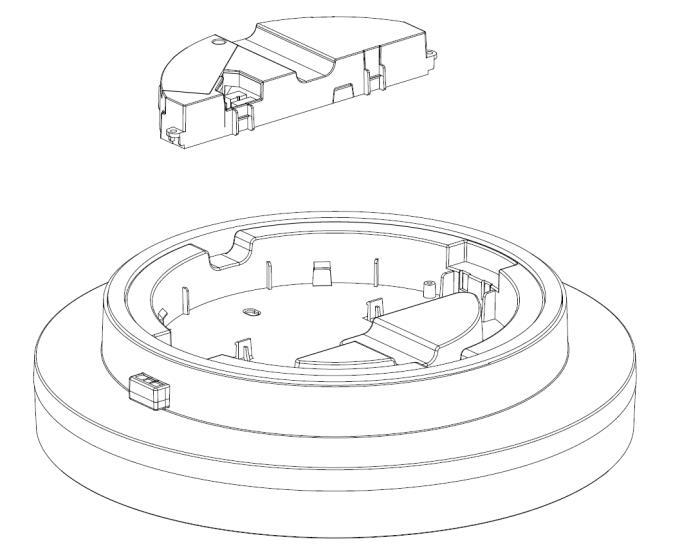
• Fit the module pack into place on the back of the luminaire so that the two side holes are positioned to screw into place using the fasteners included
• N.B. The emergency pack comes with the battery disconnected. THE BATTERY MUST BE CONNECTED BEFORE USE.
• Route the connections as shown in the image below, noting the polarity.
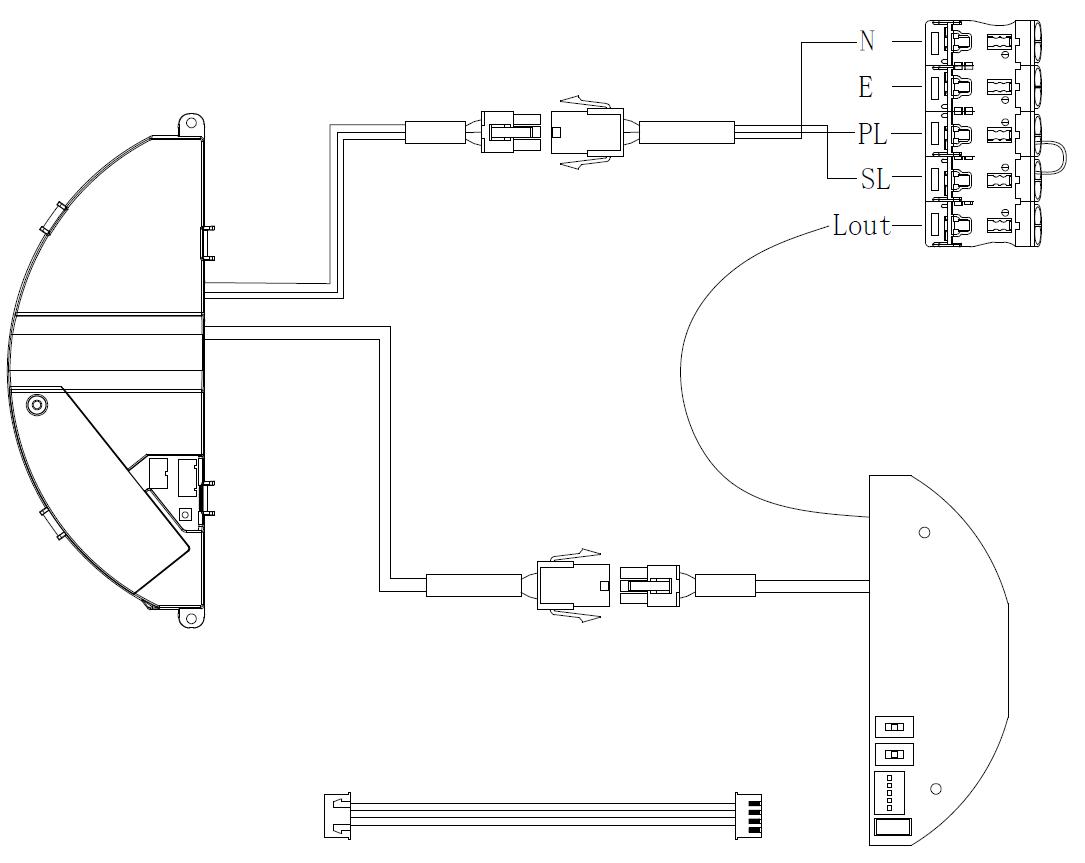
• Reconnect the power supply & check for correct operation.
• Note! DO NOT INSULATION TEST
• When the power supply is reconnected, check that the indicator LED is green to ensure the battery is charging. The battery should be allowed to charge for at least 24 hours, uninterrupted before carrying out a full discharge test to check that the full rated duration is satisfied.
****************************** IMPORTANT WARNING ****************************
The luminaire uses Lithium Iron Phosphate cells (LiFeP04) in its battery pack. These batteries include overcharge protection circuitry and a Negative Temperature Co-efficient (NTC) third lead to control thermal runaway. When the battery is no longer able to provide its full rated duration, it must be replaced with an identical type. Please consult the manufacturer if in doubt.
MAINTENANCE
When the lamp operates from the battery supply it will be at a reduced light level. Please ensure cleanliness of luminaires is maintained so as not to affect performance.
TESTING FOR EMERGENCY LUMINAIRES
Recommended routine test procedures in line with BS 5266 & BS EN 50172:2004
Monthly Functional Test
• Simulate a mains supply failure by isolating the circuit (ensuring if it is safe to do so) or by way of a test key switch if fitted into the circuit.
• Do this for a period of time sufficient to check that the luminaire illuminates in maintained mode.
• Once complete, ensure the normal supply is restored & that the green LED charge indicator illuminates.
• Log result/comments in the building Logbook.
Annual Discharge Test
• Simulate a mains supply failure by isolating the circuit (ensuring if it is safe to do so) or by way of a test key switch if fitted into the circuit.
• This should be for the full rated duration period for the luminaire, e.g., the reference M3 = Maintained for 3 hours
• Check that the luminaire illuminates in maintained mode & remains illuminated for the full rated duration period.
• Once complete, ensure the normal supply is restored & that the green LED charge indicator illuminates.
• Log result/comments in the building Logbook.
Mars 2025
TACK för att du har köpt den här produkten. För att säkerställa korrekt installation, följ dessa instruktioner noggrant och vidarebefordra dem sedan till en ansvarig person för bevarande och framtida referens.
SÄKERHET Produkten är konstruerad för att installeras av lämplig kvalificerad personal och i enlighet med tillämpliga bygg- och elföreskrifter. Spänningen måste slås av innan installation eller underhåll kan genomföras.

INSTALLATIONSSUPPORT Om du behöver installationsråd eller tillbehör, vänligen kontakta oss. Vi kommer att göra vårt yttersta för att hjälpa till. När du rapporterar ett misstänkt fel eller söker installationssupport kommer problemet sannolikt att lösas snabbast om du har fullständig produktinformation till hands, samt information om när och var den köptes.
INSTALLATION
• Nödljuskitet är utformat för att fungera med Atlanta och Augusta.
• För att installera batterimodulen, ta först bort bakstycket på beslaget enligt bilden nedan
• Montera batterimodulen på baksidan av armaturen så att de två sidohålen är placerade för att skruvas på plats med hjälp av de medföljande fästena.
• OBS! Batterimodulen levereras med batteriet frånkopplat. BATTERIET MÅSTE ANSLUTAS FÖRE ANVÄNDNING.
• Dra anslutningarna som visas på bilden nedan
• Återanslut strömförsörjningen och kontrollera att den fungerar korrekt.
• OBS! GÖR INTE ISOLATIONSTEST.
• När strömförsörjningen återansluts, kontrollera att indikatorlampan lyser grönt för att säkerställa att batteriet laddas. Batteriet bör laddas i minst 24 timmar, utan avbrott innan ett fullständigt urladdningstest utförs för att kontrollera att den fulla nominella varaktigheten är uppfylld.
**************************** VARNING ****************************
Armaturen använder litiumjärnfosfatbatterier (LiFeP04). Dessa batterier har överladdningsskyddskretsar och en negativ temperaturkoefficient (NTC) som hjälper till att kontrollera termisk rusning. När batteriet inte längre kan ge sin fulla nominella varaktighet måste det bytas ut mot en identisk typ.
UNDERHÅLL
När lampan drivs av batteriet kommer ljusnivån att vara reducerad. Se till att armaturerna är rena och underhållna för att inte påverka prestandan.
TESTNING AV NÖDLJUSARMATURER
Bör utföras enligt de rekommenderade rutinmässiga testprocedurerna i BS 5266 och BS EN 50172:2004. Dessa standarder ger vägledning om design, installation, och underhåll av nödbelysningssystem
Månatligt funktionstest
• Simulera ett strömavbrott genom att bryta strömmen (se till att det är säkert att göra detta) eller använd en testnyckelbrytare om den finns installerad.
• Utför testet tillräckligt länge för att säkerställa att armaturen lyser som den ska.
• När testet är klart, återställ strömförsörjningen och kontrollera att den gröna LED-laddningsindikatorn lyser.
• Anteckna resultat och kommentarer i byggnadens loggbok.
Årlig urladdningsprovning
• Simulera ett strömavbrott genom att bryta strömmen (se till att det är säkert att göra detta) eller använd en testnyckelbrytare om den finns installerad.
• Testet ska pågå under hela den angivna varaktighetsperioden för armaturen, t.ex. M3 = bibehållen i 3 timmar.
• Kontrollera att armaturen lyser som den ska och förblir tänd under hela testperioden.
• När testet är klart, återställ strömförsörjningen och kontrollera att den gröna LED-laddningsindikatorn lyser.
• Anteckna resultat och kommentarer i byggnadens loggbok.