4 minute read
Planting an Idea with Seed Paper


BY JEN KOSSOWAN
Making homemade paper is a fun and easy project to do with kids, and it’s also a great way to give old paper products a new life. Think old art projects, grocery lists, school newsletters, mailing envelopes, newspapers, paper bags, and crafting scraps… anything you can find around the house or in the recycling bin can be used, as long as it is uncoated paper (has a matte finish). Add some seeds into the mix and you’ve made new paper from old paper that’s plantable! Once the seed paper has served its purpose, it can be placed in soil, watered, and it will sprout.
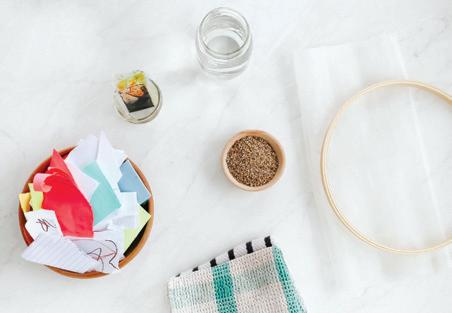
tools and materials: + embroidery hoop + netting material screen, drawer liners, or rug/embroidery canvas + uncoated (matte) paper raid your recycling bin for old artwork, school newsletters, envelopes, and paper bags + water + seeds small seeds like herbs and wildflowers work well + old bath and tea towels + food colouring (optional) + blender
JEN KOSSOWAN is a kindergarten and grade one teacher and mama of two gorgeous kiddos. She’s passionate about play, loves a good DIY project, and can most often be found in her kitchen whipping up recipes that taste delicious while meeting her crunchy mama criteria. She started Mama.Papa.Bubba. on a whim in 2010 while living in the Middle East and has been sharing her recipes and activities there ever since.
step 1: Make a paper making screen with netting material and an embroidery hoop.

step 2: Soak torn paper in water about 30 minutes.


step 3: Squeeze out excess water and transfer to blender. step 1: Prepare your paper making screen. Open up your embroidery hoop, place a square of netting material between the two wooden hoops, and fit the hoops back together again making sure the netting is nice and tight. Tighten up the screw on the outside hoop to ensure everything stays in place and trim away the excess netting along the edges.
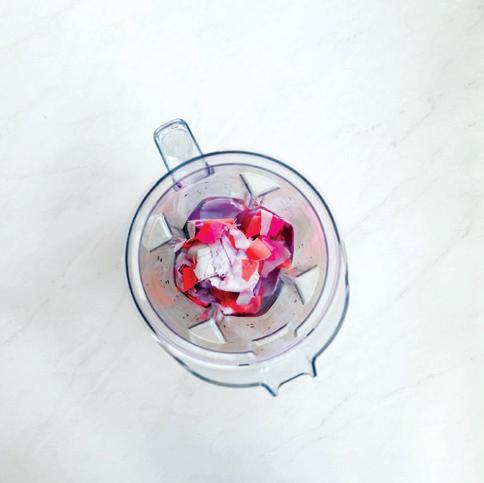
step 2: Now onto making the paper! Sort your reclaimed paper into colour groupings and tear it up into small pieces.
Cover the ripped paper with water and allow it to sit for at least 30 minutes.
step 3: Remove the paper from the water and squeeze out the excess moisture. Place the paper into a measuring cup and pack it down in order to determine how much paper you’re working with.
Transfer the wet paper into your blender and add 4 times the amount of water (for 1 cup of soaked paper, add 4 cups of water). If you’d like to add some colour to your finished paper, add some food colouring here, though you may be surprised by how much colour it has on its own, especially when using old art pieces.
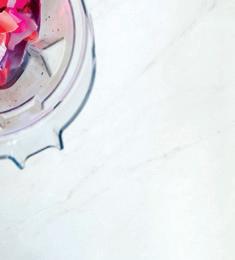
step 4: Blend the paper and water combination until it’s fluffy and free of big chunks.
step 5: Add in a generous amount of seeds and mix them into the paper pulp by hand. 1 3 cup of seeds for 1 cup of paper and 4 cups of water is a good place to start, but feel free to add a little more or a little less.
step 6: Place your paper making screen on an old folded towel so the netting lays flat against your work surface and the lip of the embroidery hoop is facing upwards. Spoon the paper pulp onto your screen, spreading it out to create an even layer. Use a folded tea towel to gently compact the pulp and release as much water as possible.
step 7: Carefully flip the embroidery screen over onto a fresh, dry towel. Use your folded tea towel to gently press down on the backside of the screen to release your freshly made paper.
Allow the paper to dry fully, carefully flipping it as needed. step 5: Stir in seeds.


step 6: Smooth pulp mixture onto screen and press out excess water.

step 7: Flip paper onto a dry towel and let dry.
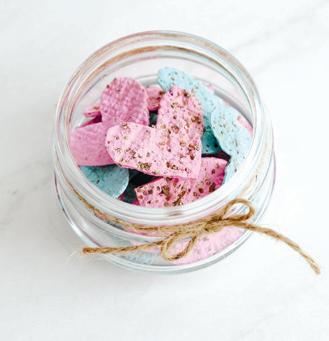
step 8: And that’s it! Once dry, cut your DIY seed paper into notecards, gift tags, place cards—anything you like, really! Or gift someone a pretty jar filled with seed paper hearts. Just be sure to include planting instructions for the recipient. All they’ll need to do is place their seed paper in soil, cover it with a little more soil (a centimetre is plenty), and keep it moist until the seeds sprout.