At only 10.5mm this board presents a minimal height increase and is ideally suited for refurbishments
Our insulation board is manufactured without the use of CFC or HCFC blowing agents
It is also environmentally friendly with zero Ozone Depletion Potential (ODP), is fully recyclable and reduces your energy costs.
INSULATION QUICK GUIDE
Our insulation board on its own will not satisfy current insulation requirements but when used will significantly improve underfloor heating efficiency.
We recommend the use of a flexible cement based tile adhesive to adhere our insulation board to the substrate. Your supplier will be able to advise and supply this. (For application of adhesive follow the adhesive manufacturers recommendations).
Do not use over the top of underfloor heating.
Cut to size using a wood saw or craft knife, making installation very quick and easy.
Timber substrate (Use Coated Boards)
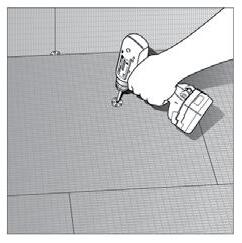
Use plastic washers and suitable screws to fix the boards in place (take care to identify pipe work and electrical cabling before fixing the screws into the floor).
Concrete substrate (Use Uncoated Boards)
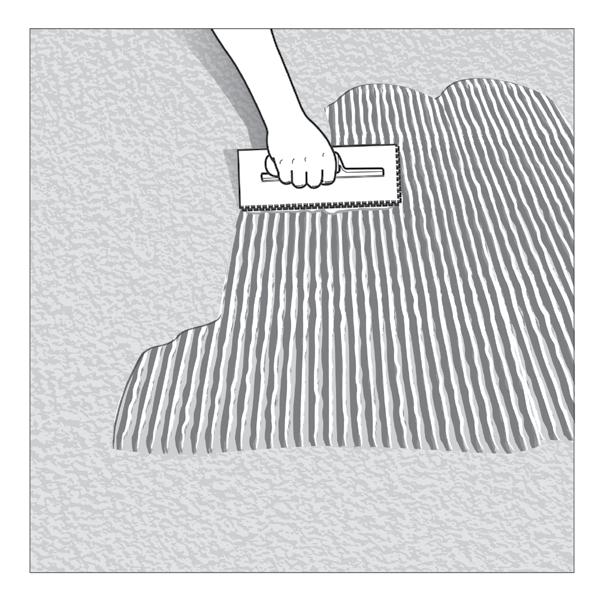
Apply a layer of flexible adhesive to secure the insulation boards to the substrate. 1 1 2 2
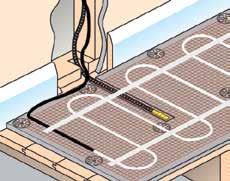
Lay boards directly on to timber substrate.
Secure with suitable screws and washers.
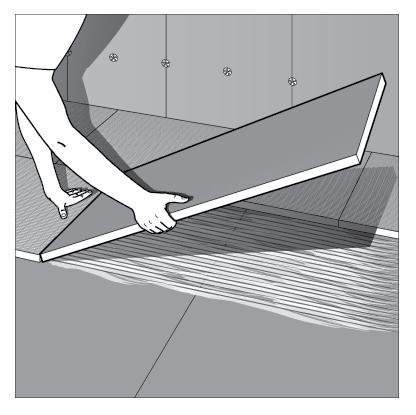
Apply a full bed of flexible adhesive
Lay boards directly on to adhesive.
Consider using in conjunction with a tanking system to create a sealed wet room. For structural or floor stiffening, walls and waterproofing applications use a coated insulation board.
Ensure the sub-floor is dust free, level and solid before laying the matting.
Apply primer if specified by the tile adhesive manufacturer’s guidelines.
Lay Insulation board (p3)
You can now begin to roll out the heating cables making sure to observe minimum cable spacing of 50mm
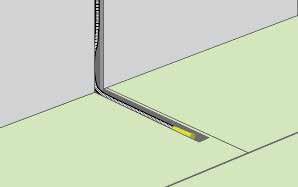
The floor sensor can now be positioned half way between two runs of the heating cable (See diagram below). Ensure the sensor does not cross any heating cable and is placed approximately 40cm into the floor.
INSTALLATION GUIDE
Important things to remember
Each system should be tested with a multimeter before it is unpacked to ensure it is in full working order. Complete the enclosed test results form as your customer will need it in order to complete the warranty application form on our website.
It is recommended that you draw a plan of your floor to show how the cable fits.
Multiple cables can be installed in one room & must be connected in parallel.
All tile adhesives and grout must be suitable for use with underfloor heating. Single part, flexible tile adhesive is recommended.
Do not turn the system on until all primers, adhesives and grouts have fully cured. (Usually a minimum of 2 weeks)
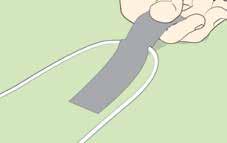
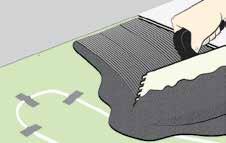
Cable should be secured to the floor using the tape provided in your Comfortzone kit.
Use the adhesive tape to fasten the heating cables to the floor.
Schematic Wiring Layout
Thermostats are floor sensing so can be positioned anywhere within regulations.
Cold tail connections are 3m long but can be shortened/extended if required. To Thermostat
CONSUMER UNIT (RCD) FUSED SPUR OR 20A SWITCH
TTHERMOSTAT
TEMPERATURE
Measure the available floor space excluding any fitted cupboards, sanitary ware, mat wells etc, and allow a 100mm border around the edge of the room
Apply primer if specified by the tile adhesive manufacturer’s guidelines
See page 6 for details on floor preparation, Thermostat and floor sensor installation. Refer to specific Thermostat installation instructions.
Work out the cable spacing using the calculation below:
Available floor space (m2) x 100
Cable kit length (m)
= Spacing (cm)
Optimum spacing for 150w/m2 is 7cm
Minimum spacing: 50mm
Your calculations:
Laying the Cable Kit
Install thermostat sensor cable and conduit for cold tail connections.
Fix firmly in position using the adhesive tape. 2 3
Work out the cable spacing using the calculation on page 5 of this guide.
IMPORTANT: Minimum spacing 5cm Measure and mark spacing onto the floor or insulation boards.
Lay the cable in parallel runs across the heated area of your floor, taking care to observe the minimum cable spacing of 5cm.
Clean the substrate and lay your chosen insulation boards as shown on page 3. 1 4
Cover the entire heating system in a 10mm layer of flexible self levelling compound, or tile directly over the cable using a flexible tile adhesive.
Use a full bed of adhesive to ensure cable is completely covered.
We’d love to hear your suggestions, feedback and product reviews! Feel free to get in touch via our website or email us directly
We care about the quality and lifespan of our electric underfloor heating systems. That’s why every Comfortzone mat is tested in excess of 2500V and protected by our Ten Year Guarantee.