




The following specification guide outlines tiling practices required for installers who wish to carry out tile installation work for National Tiles.
This guide is designed to provide detailed information to ensure that quality and consistent workmanship is performed on every job site. In addition, you must ensure workmanship meets standards as outlined in AS3958.1-2007 as a minimum.
If at any stage the tile installer is unsure of the work to be performed, and it is not clearly identified in the guide, then please contact the relevant Site Supervisor or Site Support for further details. It is important to note that as a professional tiler, you are the expert in your field.
If you believe there are inconsistencies with this document and your recommended practices to ensure high quality work, then you must contact the relevant Site Supervisor or Site Support for further instruction.


• Must have a White Card to be on site
• Ensure you leave the site clean and tidy, placing all rubbish in the bins as you go
• Ensure tools are tested and tagged and have all the guarding in place
• Wear glasses, ear muffs and gloves when using power tools
• Cut tiles outside to minimise dust
• Report incidents to Site Supervisor
• Work restriction times Saturdays 8am – 1pm as per interim construction noise guidelines. Note: any work carried out on site before or after the time specified may incur a substantial fine from EPA to any offending parties.

5.4.6 Tile finish and joints
The recommendations for tile finish and joints are as follows:
(a) When measured with a straightedge, the finished surface of the tiling should be flat and true to within a tolerance of ±4 mm in 2 m from the required plane. The lippage between two adjacent tiles should not exceed 2 mm. In the case of tiles where the surface has been ground flat, for example polished tiles, the lippage should not exceed 1.5 mm, and for joint widths of 3.0 mm or less the lippage should not exceed 1.0 mm.
NOTE: Lippage is inherent in all installation methods and may also be unavoidable due to the tile tolerances. Lippage may also be unavoidable where tiles larger than 150 x 150 mm are graded to a waste outlet, unless transverse cuts are incorporated.
(c) Joints widths should be consistent throughout the installation unless otherwise specified. The recommended joint widths are as follows:
(i) Floors:
(ii) Walls:
(A) Dust-pressed tiles ………. 3 mm.
(A) Dust-pressed tiles ….… 1.5 mm.
Wider joints may be required to accommodate larger tiles, dimensional irregularities in the tiles, to maintain modular discipline, or to provide a decorative effect. Where larger format tiles are laid using narrower grout joints, movement joints should be placed at closer centres.
Joint widths are normally measure at the tile face.
When spacer lug and universal edge tiles are used, the tiles automatically provide suitable spacing, approximately 1 mm to 2 mm for walls and 3 mm to 6 mm for floors.
(d) Joint alignment should be consistent throughout the installation unless otherwise specified. The final alignment should be within a tolerance of ±4 mm in 2 m from the specified joint alignment. Provision should, however, be made for variation in the type, size and quality of the tile.
(e) When tiles without spacer lugs are used, the correct spacing should be obtained by using spacing inserts of suitable thickness between the tiles as fixing proceeds. Tiles without spacer lugs should never be fixed with butt joints, as an adequate width of joint is necessary for the relief of any local stress.
Spacing inserts should be removed in conjunction with the preparation for grouting.
5.6.2 Thin-bed fixing
(a) Notched trowel method For internal applications where dry conditions will prevail after tiling is completed, the notched trowel method should be used. This method is as follows:
(i) Spread the adhesive on the surface to achieve the possible mechanical bond. ‘Rib’ the adhesive with a notched trowel of an appropriate size to obtain a uniform thickness. Flat-backed tiles measuring 150 mm x 150 mm should be fixed into ribs of adhesive spread by at least a 6 mm width x 6 mm depth x 6 mm spacing notched trowel. For other tile sizes the notched trowel dimensions are recommended as follows:
(A) 200 mm x 200 mm – 8 mm notched trowel.
(B) 250 mm x 250 mm – 10 mm notched trowel.
(C) 300 mm x 300 mm – 12 mm notched trowel.
(D) 400 mm x 400 mm and above – 12 mm notched trowel + buttering of the tile.
These ribs shall be horizontal for walls.
5.6.4 Adhesive coverage and distribution
5.6.4.2 Coverage
Adhesive should be applied to the substrate and then spread using a notched trowel of an appropriate size and shape. Optimum coverage requires pressing of tiles into the adhesive bed and move them perpendicular to the direction of the adhesive notches
The contact coverage of the adhesive should be maximised. Minimum contact coverage should be:
5.6.4.3 Distribution
The coverage should be sufficiently distributed to give full support to the tile with particular attention to this support under all corners and edges of the tile.
5.6.4.5 Good tiling practice
The following procedures should be carried out:
(a) Use appropriately sized notched trowels for spreading adhesive. Triangular (saw-toothed) trowels tend to wear down faster and may not give adequate depth of bed.
(b) Where possible, spread the adhesive so as to leave horizontal ribs on walls and unidirectional ribs on floors (See also Clause 5.6.2 (a)(i).)
(c) Occasionally remove a tile to check that adequate coverage is being obtained.
(d) Butter the adhesive onto the back of the tile when tiling in positions with difficult access.
(e) Use the trowel with the largest notches suitable for the situation, as this tends to give a greater depth of bed.
(f) Ensure adequate pressure and movement is applied to tiles when fixing (this affects both coverage and bed thickness)
(g) Allow for the effects of any embossing on the tile back (e.g., honeycomb, chocolate block, ribs, lugs, etc.) when selecting the size of notched trowel. Some tiles with deep keys may require the application of adhesive to the tile back as well as the background.
(h) Cross-shaped spacers inserted in joints before pressing tiles onto the adhesive layer may obstruct or reduce the shearing motion necessary to maximize contact area.
5.7 GROUTING
5.7.1 General
(a) Remove strings, ropes or pegs before grouting. Spacing inserts should be removed in conjunction with the preparation for grouting.
(e) Finish grout to the depth of the conclusion on cushion-edge tiles. All joints of square-edge tiles should be flush with the surface of the tiles. Tool the top surface of the grout to provide a contoured depression no deeper than 1 mm for up to a 6 mm wide joint, and 2 mm for a 6 to 10 mm wide joint.
(f) The finished grout should be uniform in colour, smooth and without voids, pinholes or low spots.
(g) After the grouting has dried, polish the tile surface, using a clean dry cloth.
Appendix D
D1 GENERAL
The primary consideration for falls in floor finishes is to ensure water does not remain on the finished floor in a manner that can adversely affect the health or amenity of the occupants or deteriorate building elements.
Falls in floor finishes should ensure water exits the area at the floor waste or doorway if that is the designed exit point (e.g laundry door to exterior). Water should not pond on the floor, with the exception of residual water remaining due to surface tension.
The recommended ratio of fall within a shower area is between 1:60 and 1:80.
The recommended ratio of fall in other wet areas is between 1:80 and 1:100.
In some circumstances the fall in the floor finishes in the same area may vary.
Where falls steeper than 1:100 are not achievable, the effectiveness of the floor drainage should be confirmed to ensure it meets the primary consideration set down in Paragraph D1 above.
Tiles may require diagonal cutting in the area around the waste to achieve the required falls, sufficient drainage and to ensure lipping is minimized and within the guidelines of Clause 5.4.6(a)
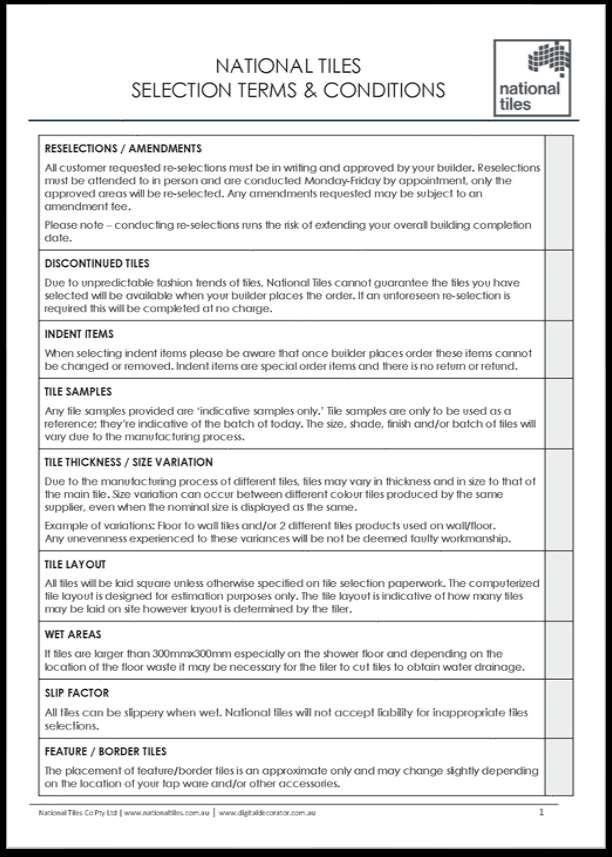
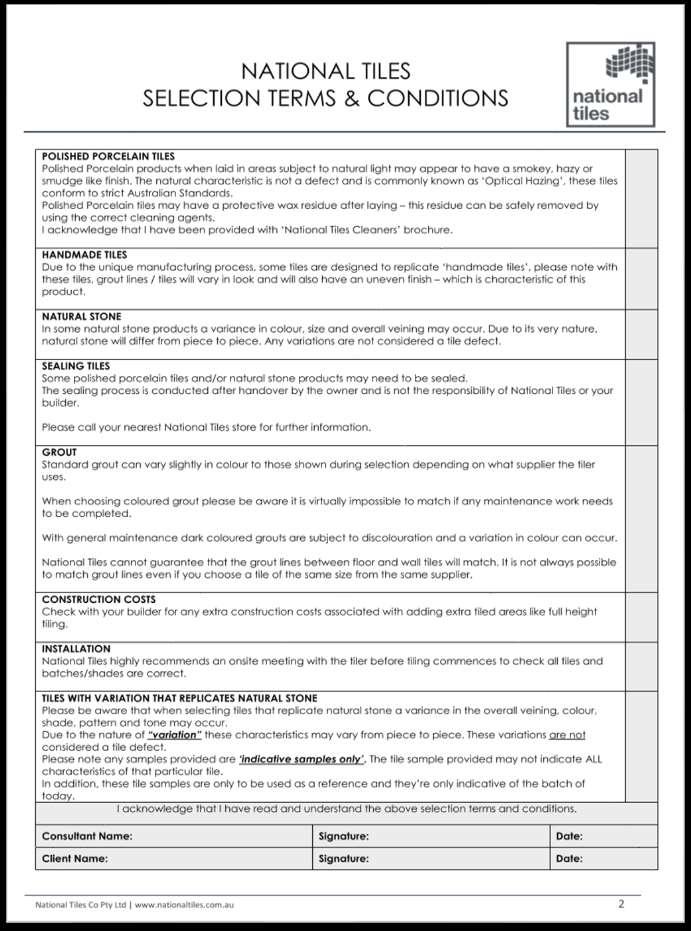
all clients are read the following conditions prior to signing off on their tile selection
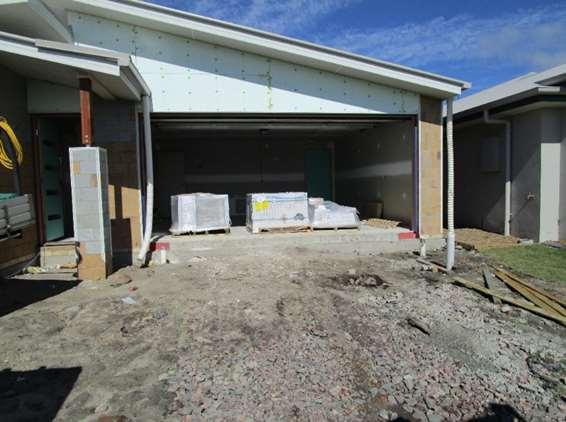
Before unpacking tiles, ensure tiles delivered are for the correct address by cross referencing the delivery label and the site is clear and ready for tile installation.
All site issues should be reported to National Tiles Site support, National Tiles office or site supervisor.
Paperwork will be found inside the delivered pallet for each site. The paperwork lists all tiles delivered including the product code (yellow), box code (orange), the area the tiles are to be laid in (pink), the quantity delivered in the unit of measure (green) and the quantity of pieces delivered (blue). It is to be used to confirm the correct tiles and the correct quantity have been delivered.
Check the quantity delivered matches the quantity on the despatch note and the quantity on the tilers copy paperwork.
Check that all of the boxes for each product are all of one shade and calibre.
National Tiles must be immediately notified of any issues, any costs incurred due to the delay in notification will be the responsibility of the tiling crew.
Below are pictures of 3 boxes showing the box code corresponding with the despatch note.



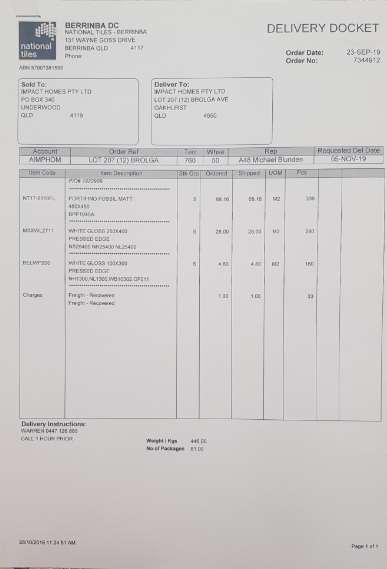
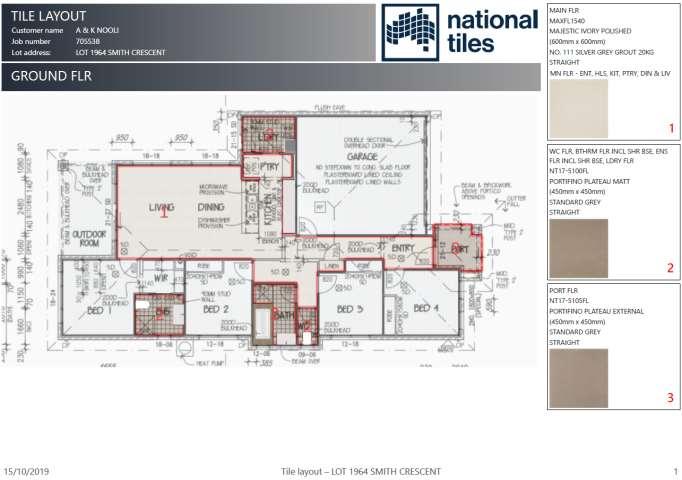
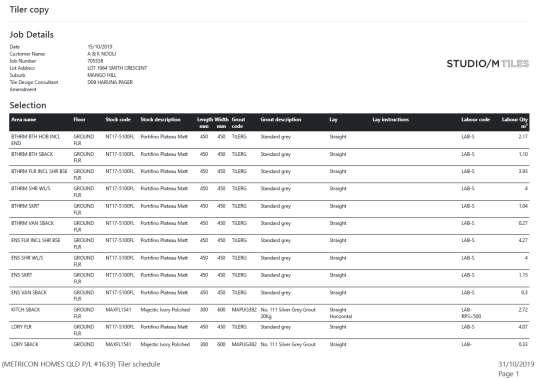
The site plans show which tiles need to be laid in each room, they also show wall elevations, and skirting tiles.
The tilers copy paperwork lists which tiles are to be laid in each room, this also details grout colour and lay pattern.
For any discrepancies between site plans and tilers copy paperwork, or for any clarification of any information, please contact the National Tiles site support person for this job.
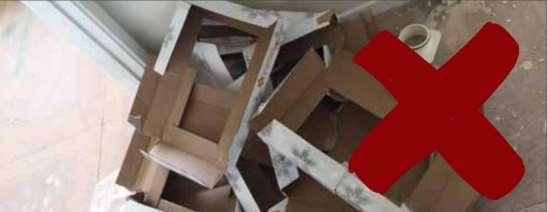
All rubbish is to be immediately placed in the rubbish bins provided on site, this includes empty boxes, unusable tile off cuts and food waste.
No cutting of tiles to be completed inside the house, excluding in the garage.
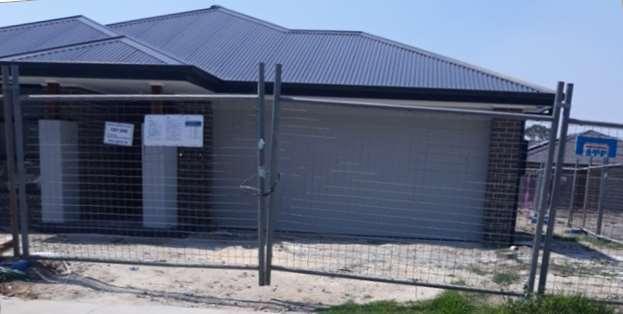
Houses and Site fences are to be closed and locked whenever leaving the site unattended.


Showers are to be screeded with a fall of between 1:80 and 1:60 from all edges of the shower falling down toward the wastes. This is a fall of between 13 mm and 17 mm over 1 metre.
All other internal wet areas including bathrooms, WCs and laundrys are to be screeded with a fall of between 1:100 and 1:80 falling toward the waste or drainage point. This is a fall of between 10 mm and 13 mm over 1 metre.
Balconys are to be screeded with an fall of between 1:100 and 1:80 falling toward the waste. This is a fall of between 10 mm and 13 mm over 1 metre.
All other external wet areas including porticos and alfrescos are to be screeded with a fall of between 1:100 and 1:80 falling away from the house. This is a fall of between 10 mm and 13 mm over 1 metre.
Before screeding, cover all wastes to ensure no screed enters any drainage points
All external walls to be taped up prior to screeding to avoid any staining or damage
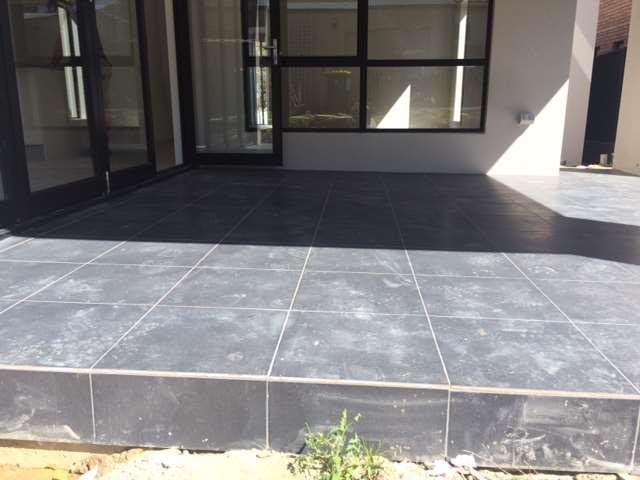
Wet areas and balconies are to be waterproofed before screeding
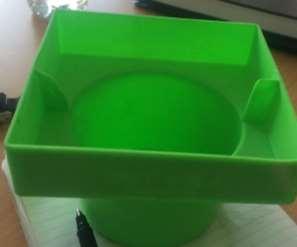
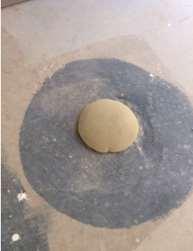
ALL WASTE PIPES ARE TO BE BLOCKED PRIOR TO SCREEDING
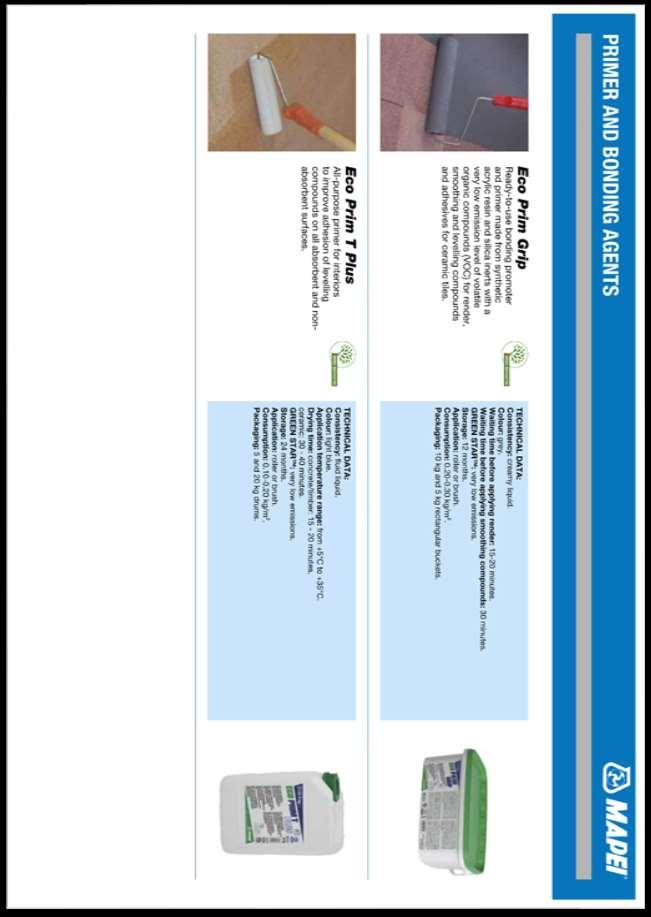
Before tiling is to commence a moisture barrier is to be applied after bedding all balconies, using Mapei’s Mapelastic Smart.






check site & understand site plans
bedding of all wet areas
tiling of wet areas floors
tiling of wet area walls
tiling of main floor
tiling of balconys/ patios/ kitchen splashbacks
tiling of piers(if applicable)
Quality control completed by site support
Any special lay types noted on plans and or tilers copy must be followed
Wherever possible the wet area grout lines must be a continuation of the main floors
If the wet areas are not connected to the main floor or they are different tiles, the wet areas are to be set out to avoid small cuts where possible, ideally centred.
Shower base grout lines must be a continuation of the wet area floor
Large format tiles greater than 150mm x 150mm may need to be split to achieve the required fall
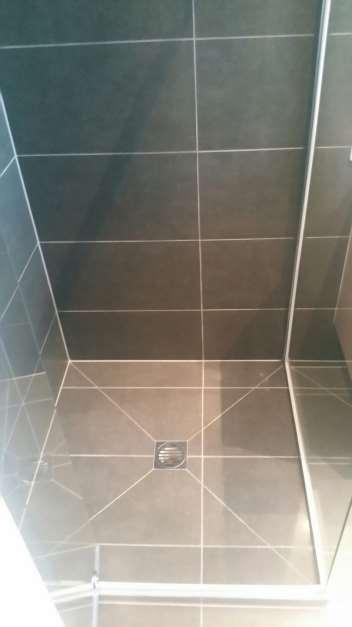
Aluminium angles are to be installed in the doorways to another room, this is to be completed during water proofing
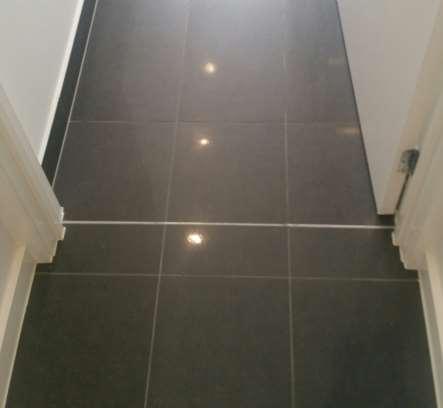
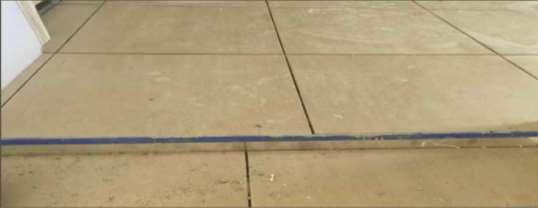
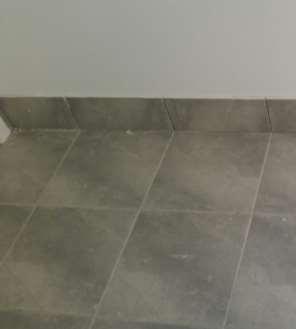
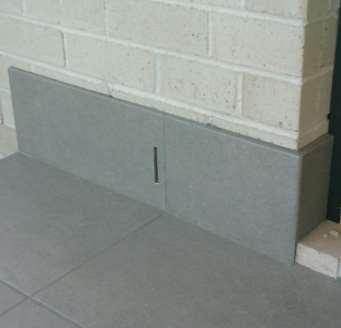
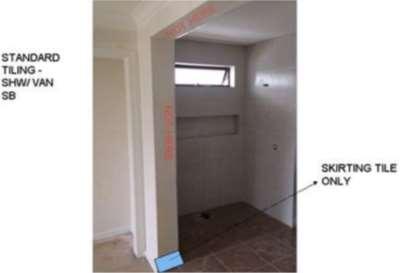
All wet areas with no wall tiling are to have a skirting tile installed
The skirting tile grout lines must match the floor tile grout lines where possible
Height of skirting tile is specified on floor plan
Cut side of tile is to be on the bottom
Grout is to be applied to the top of all skirting tiles
All corners are to be square set, not mitred
A 3mm gap for caulking must be left between all perpendicular surfaces
External weep holes are not be covered by skirt tiles
installation

Tiles must not be installed unless all wet areas have been waterproofed and the waterproofing has been certified
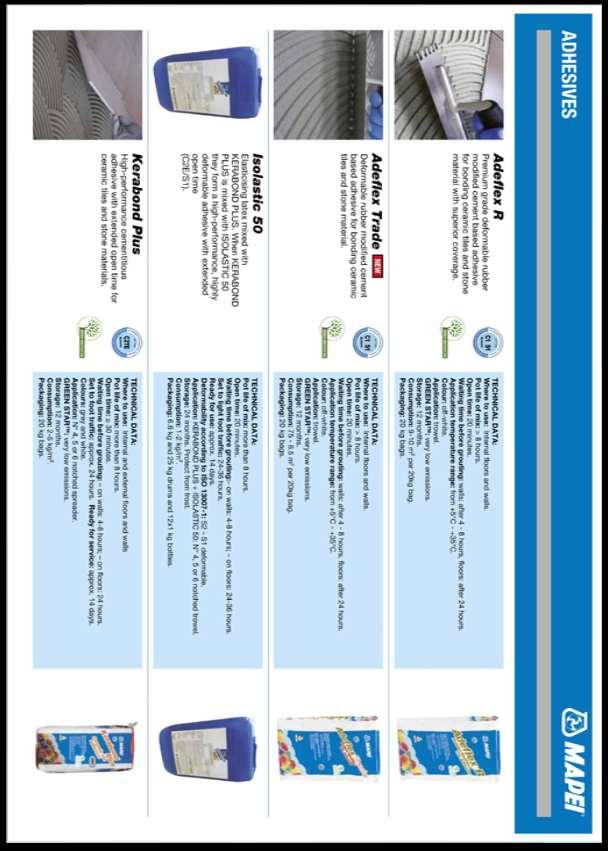
The tiles must be installed with the correct adhesive and primer for the type of tile being installed and the substrate the tiles are installed on as per the guide on page 19 of this document
The tiles must be installed with an adequately sized notched trowel using the correct method as per the Australian standards on page 6 of this document
The tiles must be installed with adequate spacing as per the Australian standards on page 5 of this document
Any special lay types noted on plans and or tilers copy must be followed
Where possibly wall tile grout lines need to match the floor tile grout lines exactly. If this is not possible they need to be offset completely
Avoid small cuts where possible
Cuts tiles are to be laid at the bottom of the wall
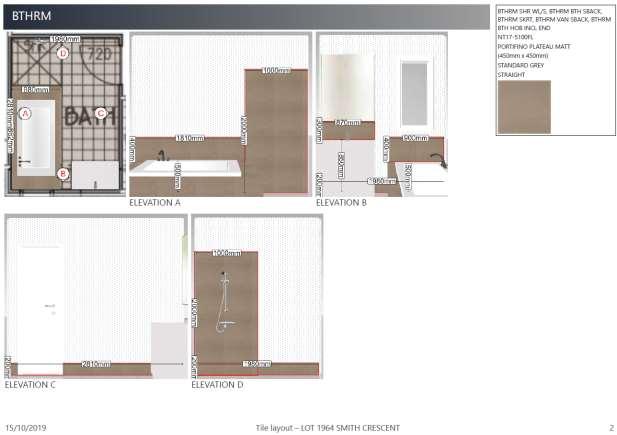
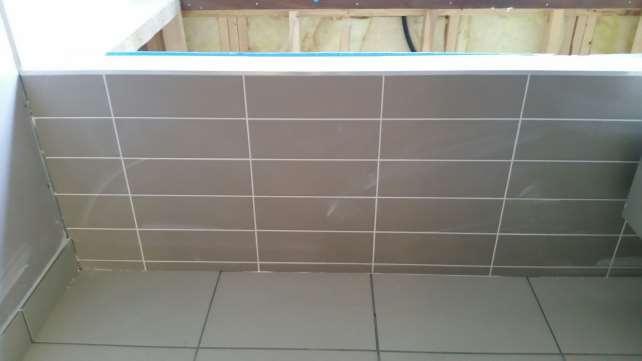
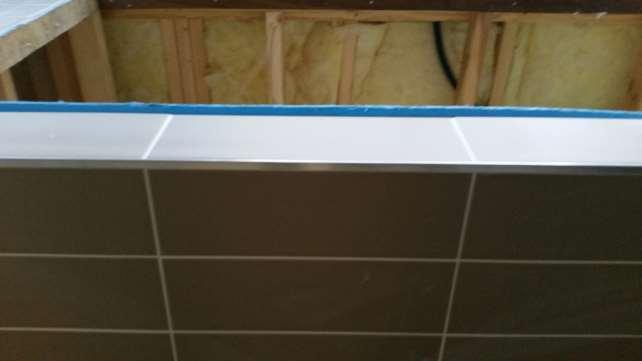
Bath hob grout lines need to match the floor tile grout lines and or wall tile grout lines
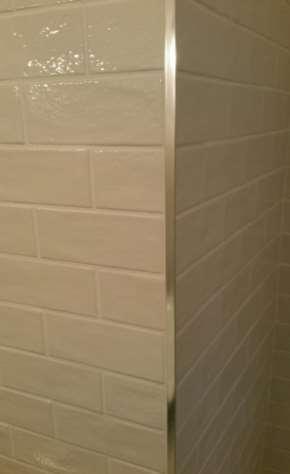
All bath hob external corners are to be finished with the trim specified on the tilers copy
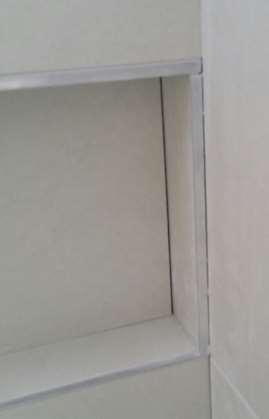
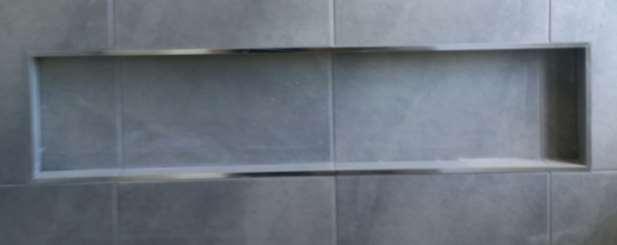
Niche tiles are specified on the plan
The niche tiles are to be installed after the wall tiles have been installed
The tiles to the back of the niche are to be installed before the sides, top and bottom of the niche
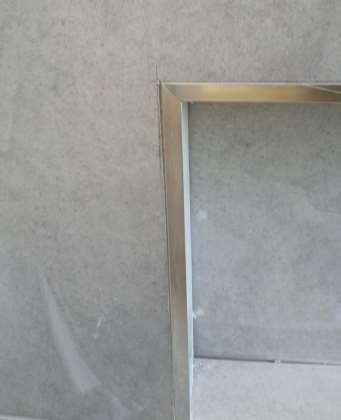
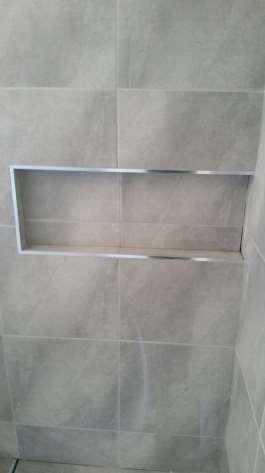
All external corners of the niche are to be finished with the trim specified on the tilers copy
All corners of the trim are to be mitred at 45 degrees
When wall tiles are to be installed from the floor to ceiling, even cuts must be installed on the top and bottom
The grout lines for all walls in the room must match horizontally when the same tile is used.
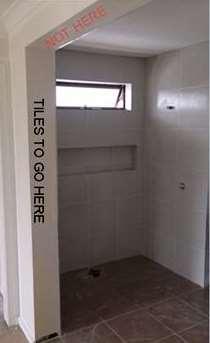
Feature tiles are to be installed as per the tilers copy and or plans
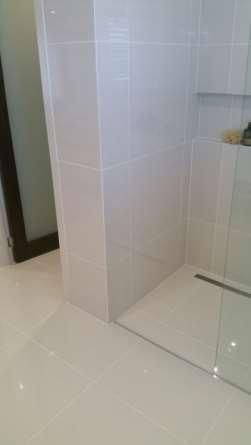
Any questions on the exact location of feature tiles must be clarified with the site supervisor and client before installation
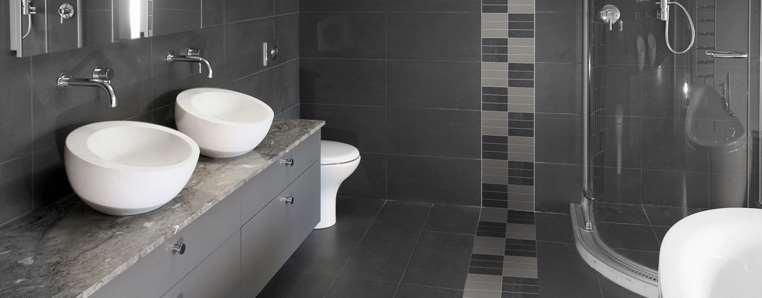
All external corners with tiles on both surfaces are to be finished with the trim specified on the tilers copy
All external corners of the niche are to be finished with the trim specified on the tilers copy
If there is a shower hob, the front edge is to be finished with the trim specified on the tilers copy
All other trim requirements will be specified on the tilers copy and or plans
Kitchen & Laundry tiles are to be installed as per the plans and tilers copy
Where the tiles are only installed behind the laundry trough, the tiles must be finished flush in line with the trough, with even cuts on both sides
All cut tiles are to be installed at the bottom
When tiles are to be installed on an island splashback all cut tiles with an exposed edge are to be sanded smooth
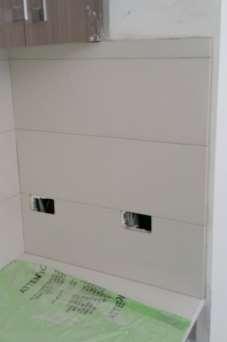
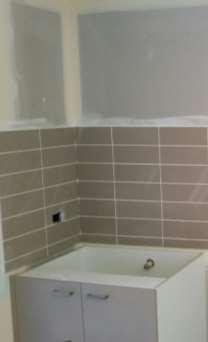

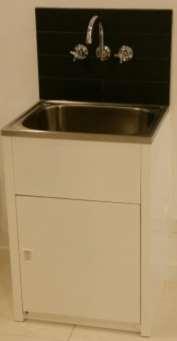
All cut outs for taps, power points and light switches are to be neat and as small as possible
installation
Tiles must not be installed unless all wet areas have been waterproofed and the waterproofing has been certified
The tiles must be installed with the correct adhesive and primer for the type of tile being installed and the substrate the tiles are installed on as per the guide on page 19 of this document
The tiles must be installed with an adequately sized notched trowel using the correct method as per the Australian standards on page 6 of this document
The tiles must be installed with adequate spacing as per the Australian standards on page 6 of this document
A 3mm gap for caulking must be left between all perpendicular surfaces, excluding where a trim will be installed
Tiles must not be installed unless the plasterboard / cement sheet has been installed with screws at a maximum of 200mm centres
Use a level or laser to check floors and walls are straight and level, advise site supervisor if any preparation is to needed prior to tile installation
Ensure the floor is clean, dry and free of dirt, dust, wax, grease, oil, paint, curing compounds or any other loose contaminating material that could affect the bonding properties of the primer, waterproofing membrane, screed or tile adhesive.
Any special lay types noted on plans and or tilers copy must be followed
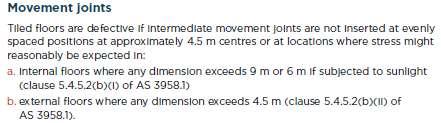
Expansion joints must be installed as per the Australian standards
Tiles are to be installed with the least amount of small cuts, tiles may need to be installed off centre in the entry to achieve this
Wherever possible the wet area grout lines must be a continuation of the main floors
Dry laying tiles is a good way to determine the best layout for reducing small cuts
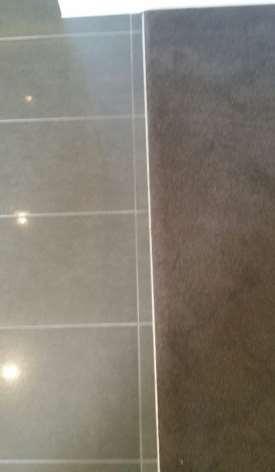
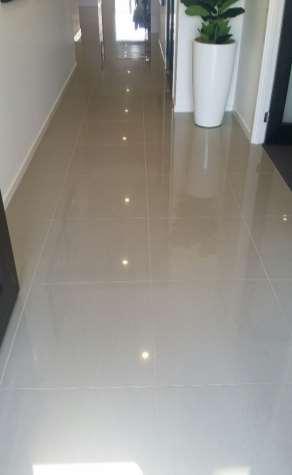
All tiles to carpeted areas are to be finished with the tile angle specified in the tilers copy
Tiles in the doorway to the garage are to be finished with the tile angle specified in the tilers copy
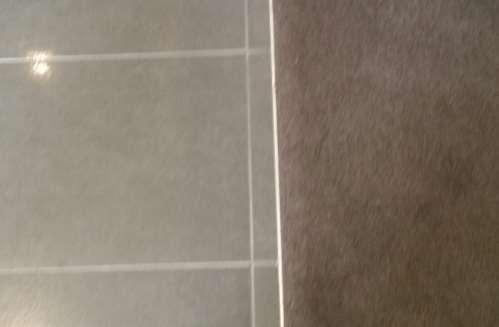
Floor levelling clip system should be used for installing all large format tiles
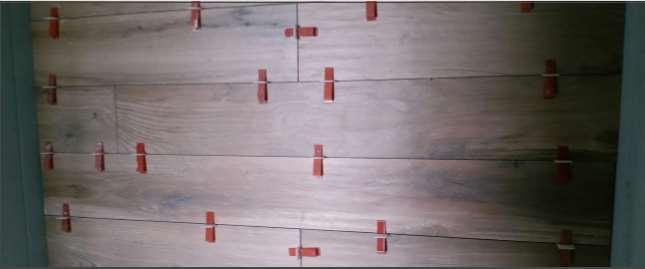
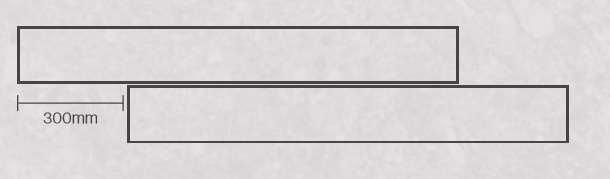
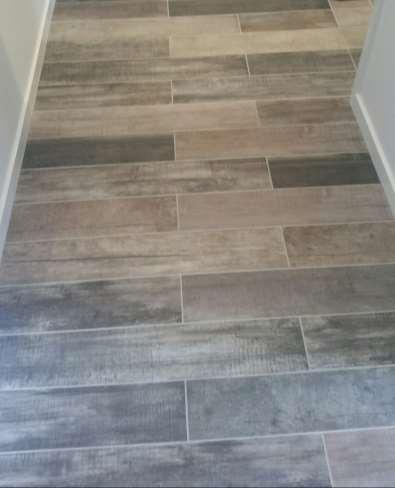
Timber look tiles are not to be laid in a 50% brick bond pattern, the joints should be staggered at a maximum offset of 25%
installation
The tiles must be installed with the correct adhesive and primer for the type of tile being installed and the substrate the tiles are installed on as per the guide on page 19 of this document
The tiles must be installed with an adequately sized notched trowel using the correct method as per the Australian standards on page 6 of this document
The tiles must be installed with adequate spacing as per the Australian standards on page 6 of this document
Balconies are usually screeded, but there may be a requirement by the builder to directly install tiles onto the waterproofed substrate
If the balcony is screeded, a moisture barrier must be applied prior to tile installation, mapelastic smart is to be used as the moisture barrier. This is to minimise efflorescence occurring
Balconies are to be screeded with an fall of between 1:100 and 1:80 falling toward the waste. This is a fall of between 10 mm and 13 mm in 1 metre.
All other external wet areas including porticos and alfrescos are to be screeded with a fall of between 1:100 and 1:80 falling away from the house. This is a fall of between 10 mm and 13 mm in 1 metre.
Any special lay types noted on plans and or tilers copy must be followed
Expansion joints must be installed as per the Australian standards on page 5 of this document
All external areas are to be set out with the grout lines matching the main floor grout lines
Tiles are to be installed with the least amount of small cuts possible
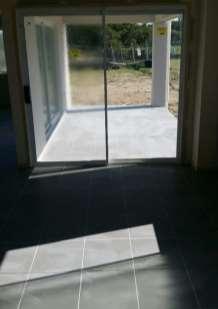
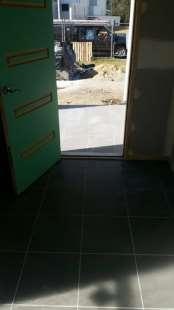
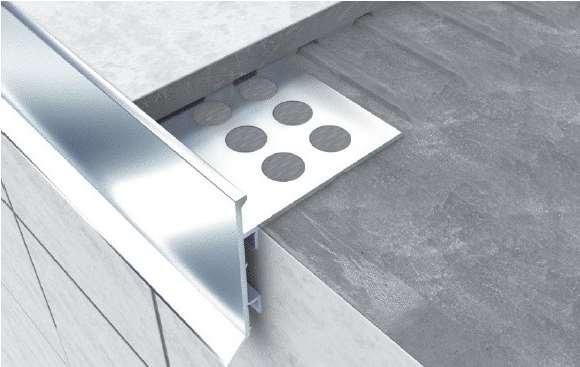
All balconies are to be finished with the balcony trim specified in the tilers copy
All other external areas are to be finished with the tile angle specified in the tilers copy
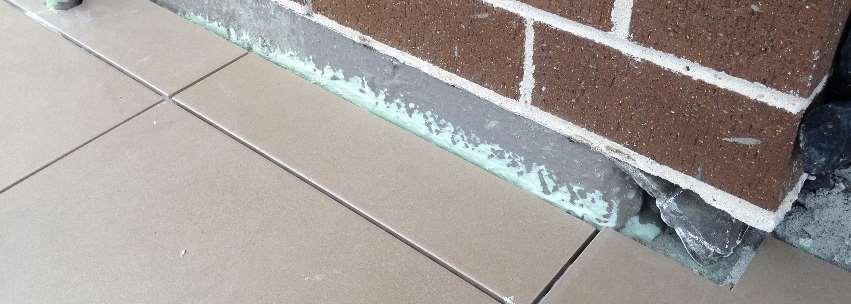
IMPORTANT NOTE: no balcony flashing’s are to be cut for the installation of tiles, if any flashing need to be modified please contact the site supervisor.
installation
The tiles must be installed with the correct adhesive and primer for the type of tile being installed and the substrate the tiles are installed on as per the guide on page 19 of this document
The tiles must be installed with an adequately sized notched trowel using the correct method as per the Australian standards on page 6 of this document
The tiles must be installed with adequate spacing as per the Australian standards on page 6 of this document
Grouting can commence 24 hours after the completion of tile installation
All glue, spacers, strings and any other foreign matter is to be removed from grout joints before grouting as per the Australian standards on page 5 of this document
Ensure correct grout is being used as per the plans and tilers copy
Ensure expansion and caulking joints are marked prior to grouting, this is to avoid filling these joints with grout
The finished grout should be uniform in colour, smooth and without voids, pinholes or low spots
The finish of the grout should be as close as possible to level with the surface of the tiles
Ensure there is no grout in the expansion joints and caulking joints
Grout is to be feathered on top of all skirting tiles
Use a sponge to remove excess grout
Use a clean dry cloth to remove all grout haze and residue
All rendered & brick walls must be taped up prior to grouting & screeding
Mapei Keracolour 100(white) 112 (Medium Grey) MUST be used for standards grout colours
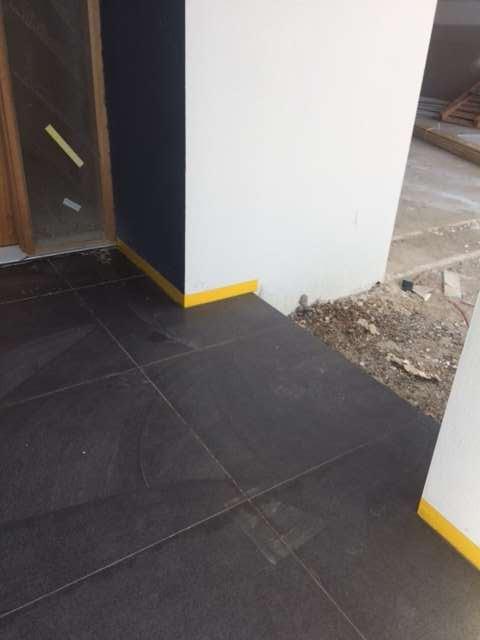
all corners of stackstone tiled piers must be mitred at 45 degrees with the cut piece being used on the next side, this process of using the cut piece is to continue until the job is finished. It will ensure the height difference in the stone match consistently
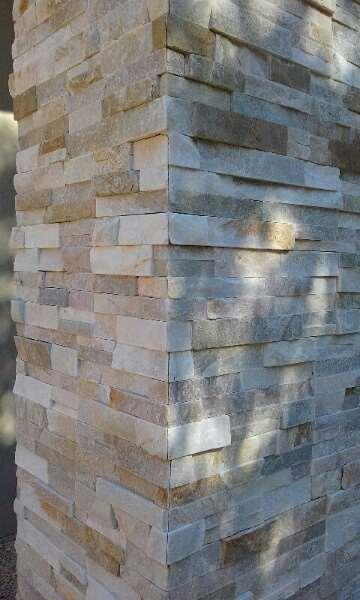
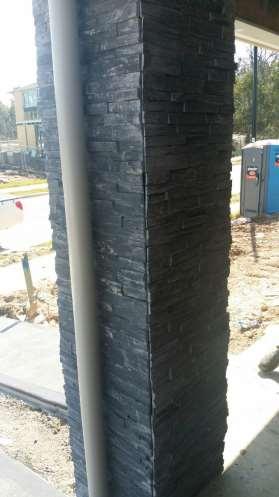
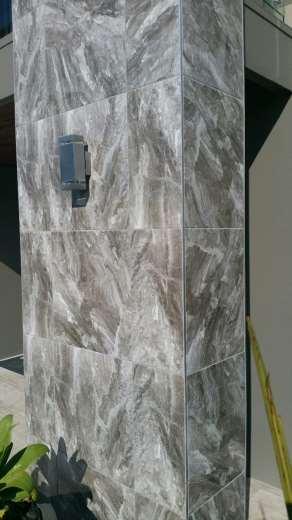
All corners of tiled piers must be finished with a trim specified on the tilers copy
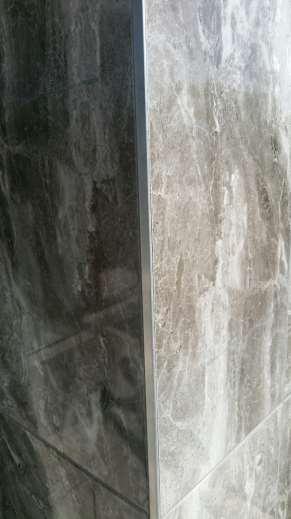
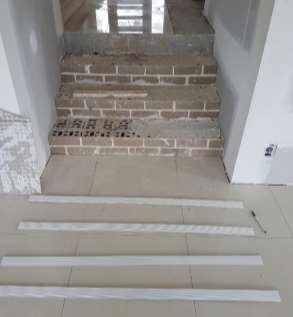
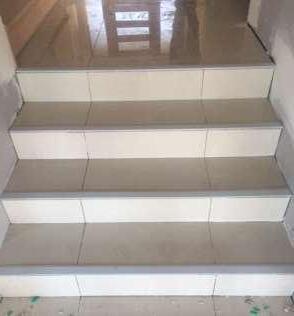
all stairs are to be finished with the trim specified on the tilers copy
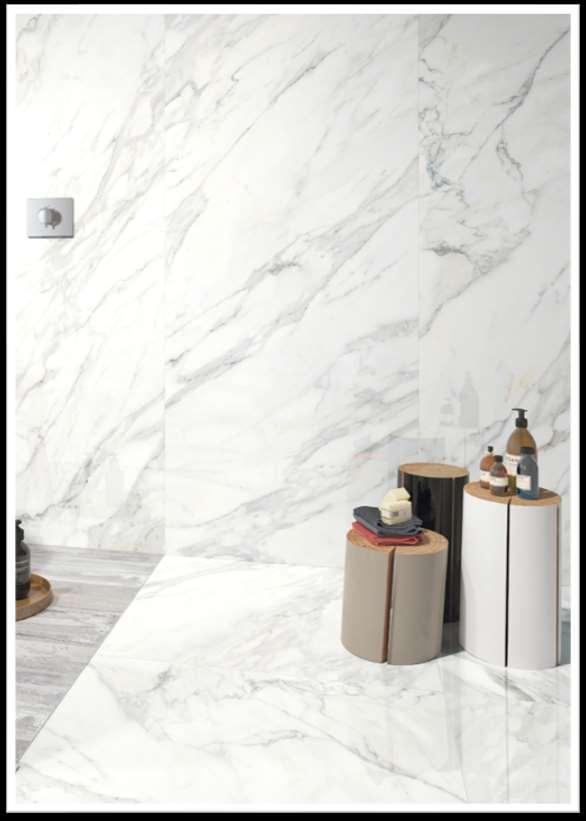
National tiles offers a full day training session to install and handle large format tiles Contact your site support for more information.
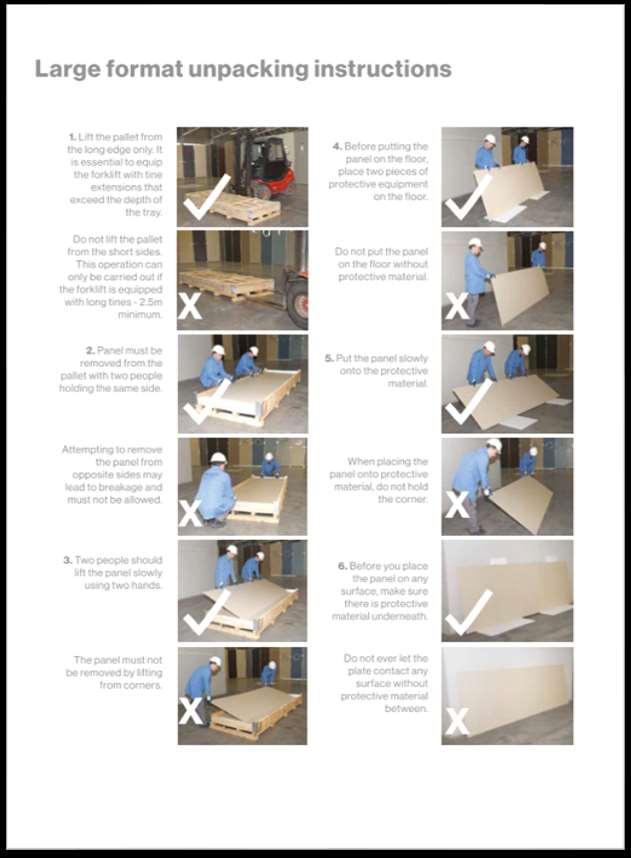
Due to their considerable size, large format tiles require specific handling and installation techniques along with specialised equipment. This guide is to ensure that large format tiles are cut, handled and installed safely and successfully. National Tiles will not be liable for any claims where Australian Standards have not been satisfied and where the instructions in this guide have not been followed.
Variation is an inherent characteristic of most porcelain and ceramic tiles. Large format tiles are no different and may display variations such as shade, colour and texture. Any concerns regarding variation in your order must be raised before installation.
All claims for tiles that are blemished, have defects or are the wrong shade or colour to those selected, must be made prior to installation. Once large format tiles are laid, National Tiles will not accept liability for any claims relating to the above issues.


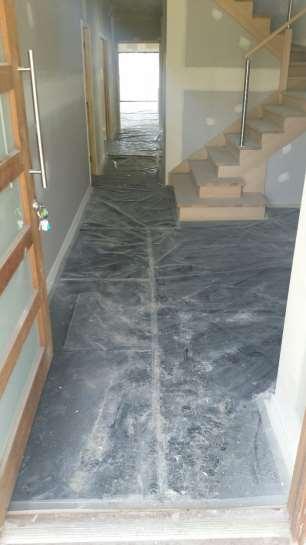
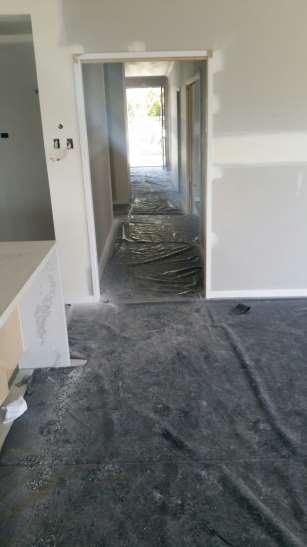
All floors with white grout selected are to be covered with a protective plastic All grout is to be left to cure for 7 days prior to covering Floor covering will be noted on the tilers copy paperwork
The Contractor acknowledges and agrees that it has not relied on any representation made by National Tiles in relation to the services to be delivered, or any Purchase Orders to be issued, under this Agreement. The parties agree that this Agreement alone does not form a contract to provide services. The obligation to carry out work only arises upon issue of a Purchase Order.
This agreement is to confirm the terms and conditions under which The Contractor will supply National Tiles with tile installation services for it and its’ customers.
This agreement encourages both The Contractor and National Tiles to work together for the mutual benefit of both companies.
The details of this agreement is to be treated with full confidentiality by both parties. Specific details of pricing must not be passed on to anyone within The Contractors business other than its owner. Specific details of the agreement should be passed on to anyone outside of The Contractor or National Tiles without prior written permission of the other party.
The Contractor must, in accordance with the Contract Documents, provide services for the installation of tiles requested and required in any Purchase Order issued by National Tiles under this Agreement and National Tiles must pay to The Contractor the amount stated in any Purchase Order in accordance with the Agreement.
The conditions contained within this Agreement are deemed to be incorporated into each Purchase Order issued by National Tiles.
Purchase Orders will be provided to The Contractor prior to the commencement of all chargeable work. Variations may be provided from time to time by National Tiles to The Contractor which must also be in writing. Full details will be provided to The Contractor on the works required including commencement and expected completion dates. Every effort will be made by The Contractor to complete the works by the expected completion date, with any expected delays to be notified immediately to National Tiles. Completion of works will be deemed to occur once sign off is received from the Site Supervisor.
Site hours will be determined by the Site Supervisor from time to time, however is expected to be Monday to Friday 7:00am to 5:00pm, and closed Public holidays. All activities will take place strictly within these business hours, unless approval is provided by the Site Supervisor to work outside these hours. NOTE: Environmental Protection Act 1994 Section 440R Building Work states “A person must not carry out building work in a way that makes audible noise on a business day or Saturday before 6.30am or after 6.30pm or on any other day at any time.”
The Contractor must follow the guidelines as set in the Tiling Specification Guide and also follow any valid instructions provided by the site supervisor on site. If The Contractor discovers any inconsistency, ambiguity or discrepancy in or between any documents or instructions relating to the Services, including the Contract Documents, The Contractor must immediately seek National Tiles’ direction as to the interpretation to be followed.
The Contractor must comply with and maintain all relevant and current environmental controls at the workplace and if damages or incidents occur, remediate immediately or report to the Site Supervisor. The Contractor is expected to maintain a tidy workplace, utilizing the skip bins provided on site.
Drawings, plans & layouts are diagrammatic only. Where drawings & dimensions are provided or calculable, but appear to be different on site, or where alternate instructions are provided by the Site Supervisor on site, you must first check with National Tiles prior to proceeding with the installation.
It is The Contractors responsibility to inspect conditions on site prior to the commencement of work. Any matters affecting The Contractors ability to complete the works are to be reported immediately to National Tiles and the Site Supervisor.
National Tiles will provide all adhesives to a storage location as determined by The Contractor, at The Contractors cost. National Tiles will supply all tiles for installation, to be delivered direct to site the day prior to installation commencing. All quantities and batches should be checked at the commencement of every job, with any discrepancies immediately being notified to National Tiles. During the installation process, any defects or inconsistencies that appear in the product being installed should be immediately notified to National Tiles, with further works being stopped until a satisfactory solution can be found. Defects include, but are not limited to, shade variations, batch variations, sizing issues, surface defects and quantity variations.
It is expected that all adhesive and related products (including, but not limited to adhesives, grouts, water proofing, silicones, trims) are to be supplied by National Tiles for all jobs, to ensure a consistent level of quality is able to be maintained across all jobs. The products can be purchased from National Tiles by The Contractor at the National Tiles Trade Club price. If The Contractor uses alternative products, they are to take full responsibility for the suitability and quality of the product, and ensure all works meet with the relevant Australian Standards, including, but not limited to AS3958.1-2007.
Attachment A includes all lay types and rates. Rates listed are on a square meter basis, unless mentioned otherwise. These may be altered from time to time by mutual agreement in writing with at least 3 month notice It is acknowledged that these rates include all labour for the installation, all adhesive, standard grout colours (light grey or white), standard trims and all material for screeding.
All completed installations are to be invoiced weekly. Every effort will be provided by both parties to resolve any billing and account issues promptly. Trading terms are to be maintained at 14 days from receipt of a valid payment claim with payment to be made by EFT into The Contractors nominated account. To avoid any delays in payment, claims should be submitted on the Monday following completion of works, with payments to be scheduled for the Friday of the following week. Payment claims should include the relevant Purchase Order number, and should be for a value of no more than the Purchase Order amount.
The Contractor warrants that:
(a) the Services supplied by it will be of a high quality, suitable for their intended use, and free of defects;
(b) the Services comply with all Australian and applicable Standards and the requirements of the Building Code of Australia ; and
(c) It will at its own expense comply with and give all notices required by all acts of parliament, ordinances, regulations or by-laws relevant to the Services.
A warranty period of seven years is to be provided by The Contractor on the workmanship of all work undertaken. The Contractor must at its own expense make good or rectify any installation that is defective or otherwise does not conform to the requirements of this Agreement or any Purchase Order, including any defects notified to The Contractor. National Tiles may direct The Contractor to correct, remove or rectify any defective Services. If The Contractor does not comply with such a direction, National Tiles may have that work carried out by others and any such cost incurred by National Tiles will be a debt due and payable by The Contractor to National Tiles.
The Contractor must before commencing with any works on-site, and until completion of the works, ensure any workers undertaking construction work has been inducted, trained and deemed competent in general industry induction , statutory, supplier and purchaser OHSE requirements.
The requirements of the Occupational Health & Safety Act, all relevant Regulations and Codes of Practice and any National Tiles OHS Management Systems and Standards will be observed by The Contractor and all parties engaged by The Contractor, at all times. Additionally, both The Contractor and its subcontractors must comply with any site specific safety requirements. Please refer to any Site Specific Construction Safety Plan that may be provided from time to time.
The Contractor shall take out a policy which shall cover liability to the public for an amount not less than $10,000,000 in respect of all accidents arising out of, in the course of or caused by the execution of the services, in the event of:
(1) Death or bodily injury (including illness) to any person not being a person who at the time of the accident is engaged in or upon the service of the insured under a contract of service or apprenticeship; and
(2) Damage to property not belonging to nor held in trust by nor in the custody or control of the insured
The Contractor shall insure for Worker’s Compensation and Employer’s Liability in accordance with the laws of the appropriate State or Territory of Australia; and
c) The insurances referred to in this clause shall be affected before the services are commenced and shall be maintained effective until completion of the services and shall if required, produce evidence of the currency of such insurance.
The Contractor indemnifies National Tiles and customers of National Tiles against all loss or damage to property, including the Services, and claims in respect of personal injury or death or loss of or damage to any other property, arising out of or in connection with the supply and delivery of the Services but the indemnity shall be reduced proportionally to the extent that the act or omission of National Tiles or it’s customer contributes to the injury, death, loss or damage. The Contractor shall advise National Tiles in writing as soon as practicable, any injury, illness or damage sustained in the delivery of Services and assist the investigative and corrective actions processes of National Tiles.
Performance issues:
National Tiles and its customers can expect a high level of service to be provided by The Contractor. If National Tiles wish to terminate this agreement due to service, performance and related issues, then The Contractor must first be given fair opportunity to remedy any issues. National Tiles must where practical provide at least 30 days notice that termination of the contract will occur should the issues not be remedied to acceptable standards. National Tiles must work with The Contractor to assist in having the issues rectified where ever possible.
If The Contractor wishes to terminate this agreement due to continued late payment issues or any other reason, then notice must first be provided to National Tiles, providing sufficient opportunity to rectify the situation.
Either National Tiles or The Contractor may terminate this Agreement by providing at least 30 calendar day’s written notice. Such termination will not prejudice the rights of either party accruing to the date of termination.
National Tiles may be required to hold back payment of some invoices on termination if during the Agreement the Contractor has regularly been slow at responding to and completing rectification works due to defective installations, or if National Tiles, acting reasonably, believes that future rectification works will be required and the Contractor is unlikely to perform such works within a reasonable period.
Executed as an Agreement.
Signed on behalf of The Contractor in accordance with section 127 of the Corporations Act 2001 in the presence of: Director Witness