1 minute read
COATiNG YOUR ROCkS wiTH RESiN

by RockBound

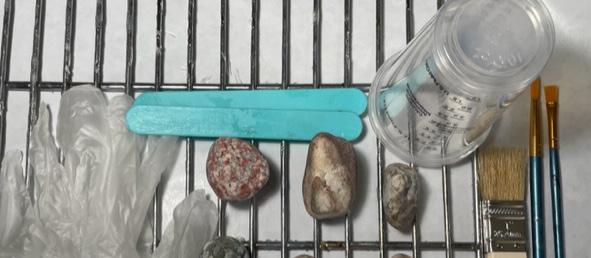
Once you have selected the resin that you are going to work with, you will need to get a few additional supplies:
• Disposable Cups
Advertisement
• Silicone Stir Sticks
• Silicone Mat (Recommended)
• Disposable Gloves
• Paint Brushes
• Silicone Drying Rack
• Rocks (Obviously)
Now that you have all your supplies it’s time to get started. Keep in mind that resin is created with two components that create a chemical reaction.
Once you mix the 2 components, the resin will begin to cure which causes heat as it hardens; you need to finish within 15-30 minutes in order to keep your hands safe from that heat.

1. Lay out your silicone mat or (alternatively) protective paper on your work area.
2. your drying rack so any drippings will fall on the mat.
3. Place rocks on rack 2” apart.
4. Have your silicone stir sticks and paint brushes laid out.
5. Pour the proper amounts of epoxy and hardener per instructions into separate cups.
6. Combine the 2 epoxy componentsAlways pour resin into the hardener!
7. Hand stir slowly for a minimum of 5 minutes until combined
Once completely combined, you are now ready to coat your rocks. Select a paint brush and simply dip it in the resin and start painting. Use as little resin as possible to coat the rocks to eliminate dripping. You will need to allow 16-24 hours for the resin to dry before flipping the rocks upside down to coat the underside. Once you have your rocks coated on both sides they are now ready to be displayed or used in further resin projects. Have fun!
8. Make sure to scrape sides and bottom of cups— if any swirls are visible, continue stirring.


