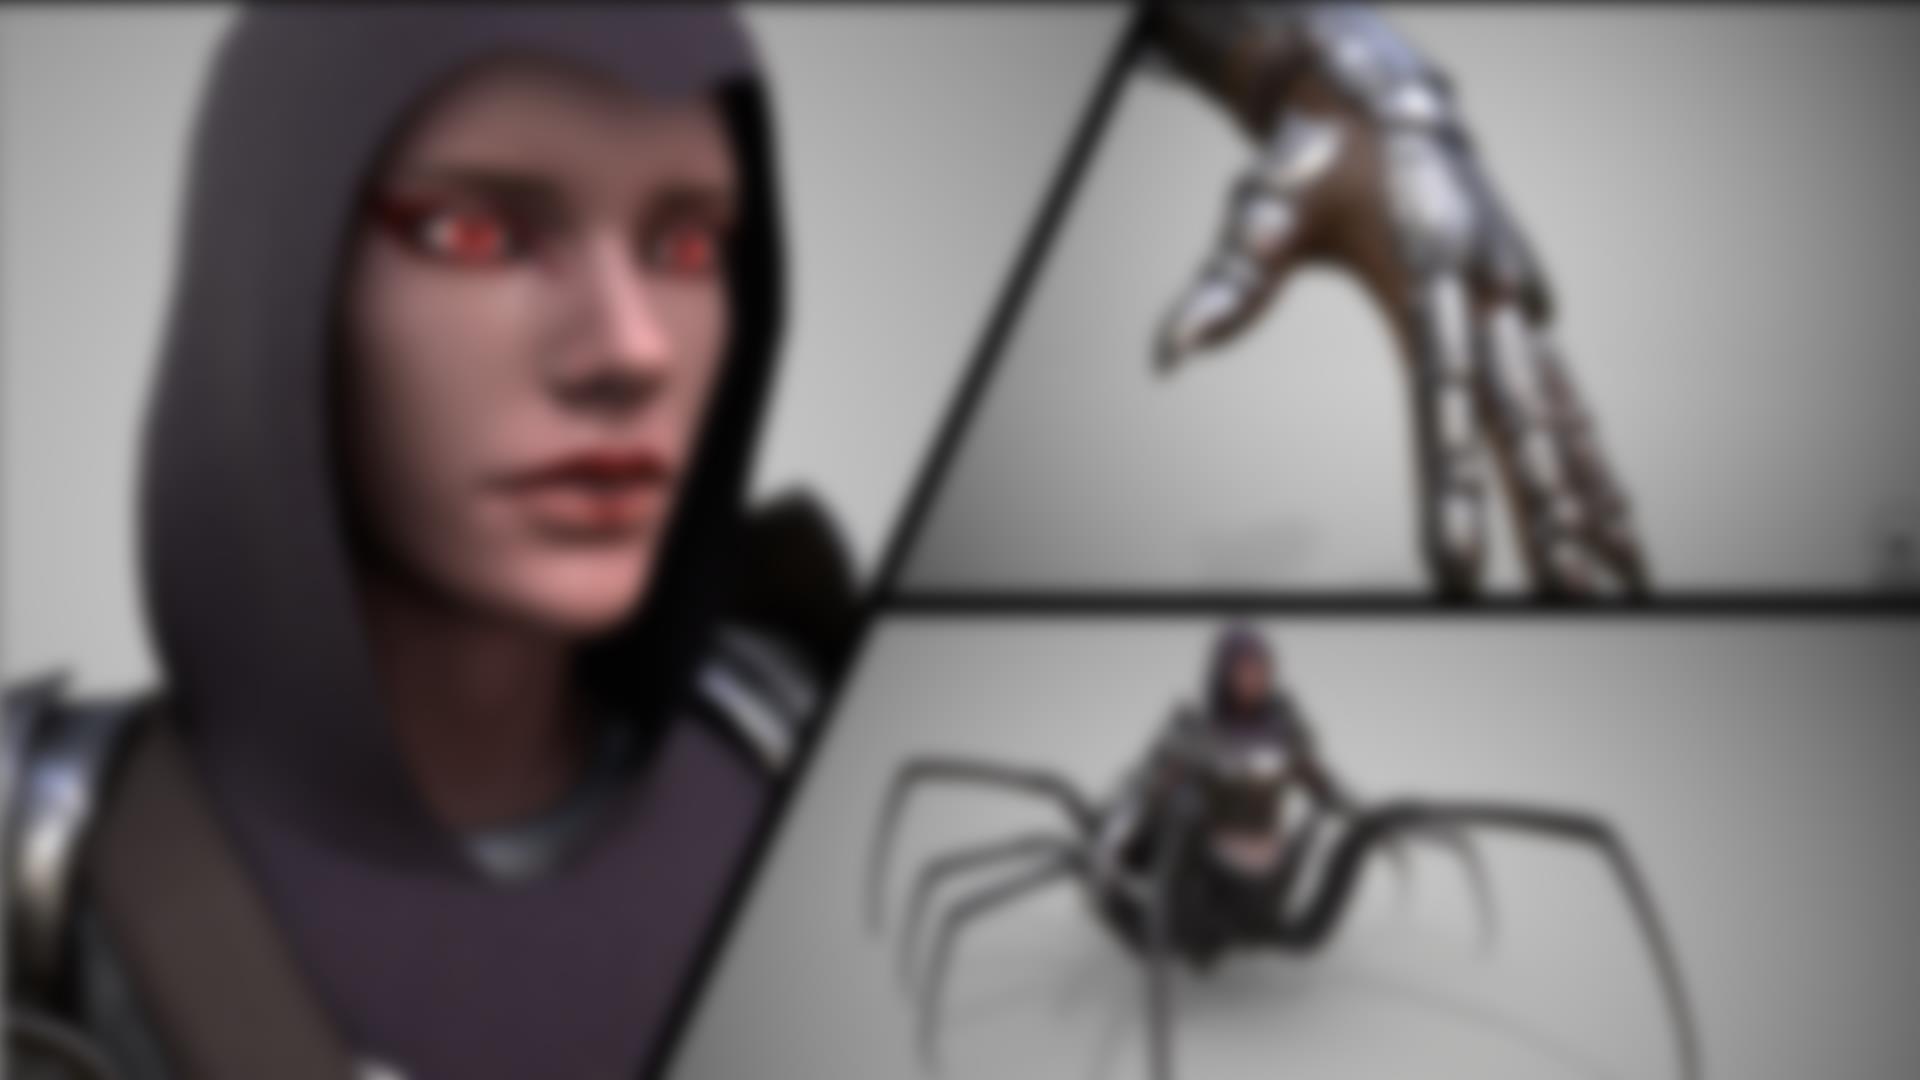
Fantasy Drider
Research & Reflective Journal
By Mahdi Taleshi

Proposal & Deliverables
To create a game ready fantasy creature that demonstrates my current skill set and showcases a variety of up-to-date industry standard techniques and development pipeline. Creating this creature has a mixture of complex characteristics, such as organically merging two different species into one organism, alongside adding armour which will demonstrate hard-surface modelling and understanding of different materials and surface details.
Art Style
A semi realistic art style with a subtle hint of PBR and detailed material properties but still leaning more towards a more realistic and polished look.
An example of this can be Baldur’s Gate 3 but keeping it simpler to prevent over-scoping and over complications.
Industry Techniques
- 3D modelling
- Digital Sculpting
- Creating Anatomy
- Retopology
- Unwrapping
- Baking
- Texturing
- Lighting - Camera Work
- Rendering
Base Mesh – Blocking Out Form & Proportions
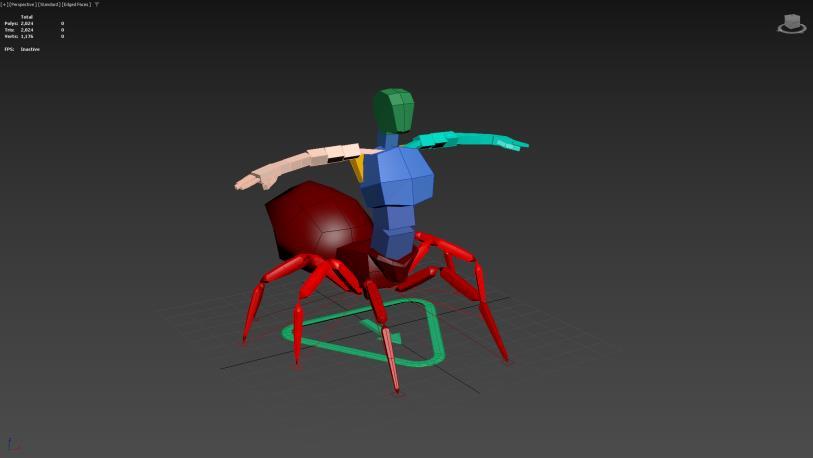
1. Using CAT rig to block out basic form.
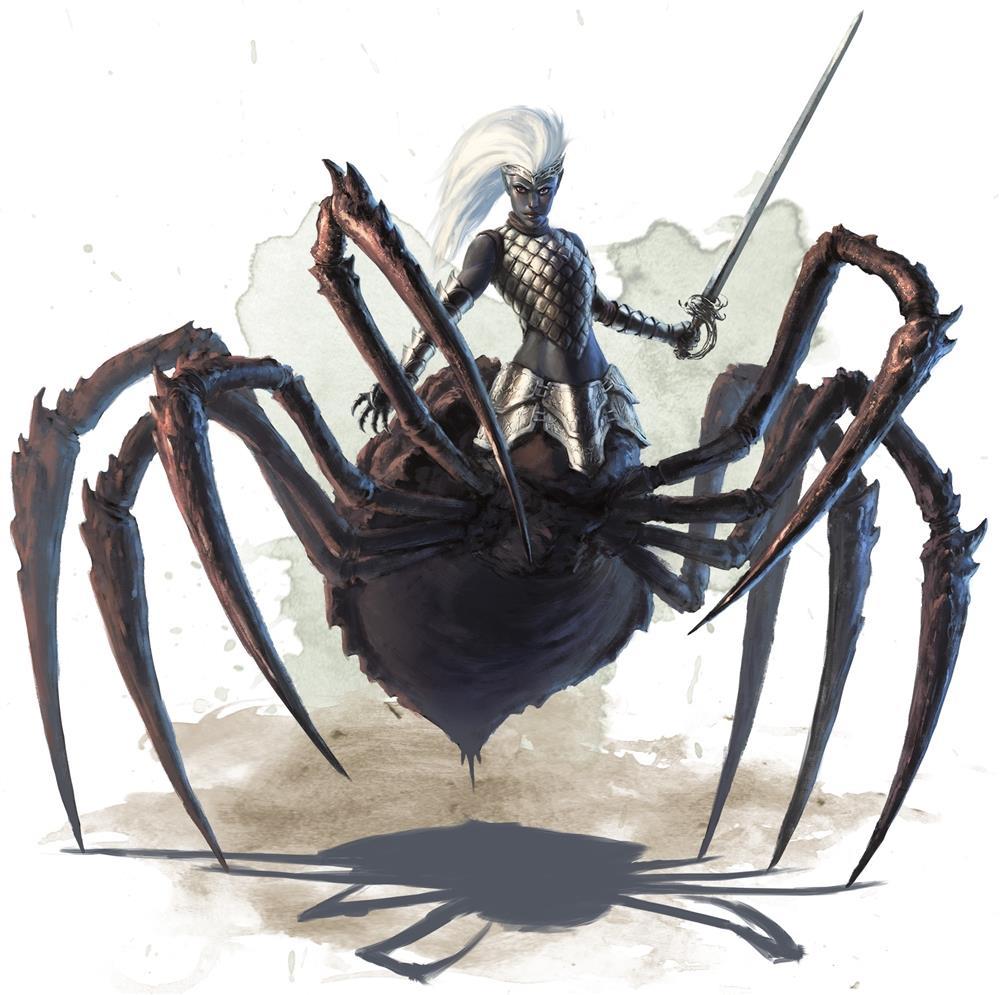
Using concept arts of a Drider, I was able determine where I wanted the intersection/ merging point between both species to be. As well as adjust bodily proportions accordingly.
(Exhibit A: Depicted by Daniel Landerman).
(Exhibit B: Depicted by Colby Stevenson).
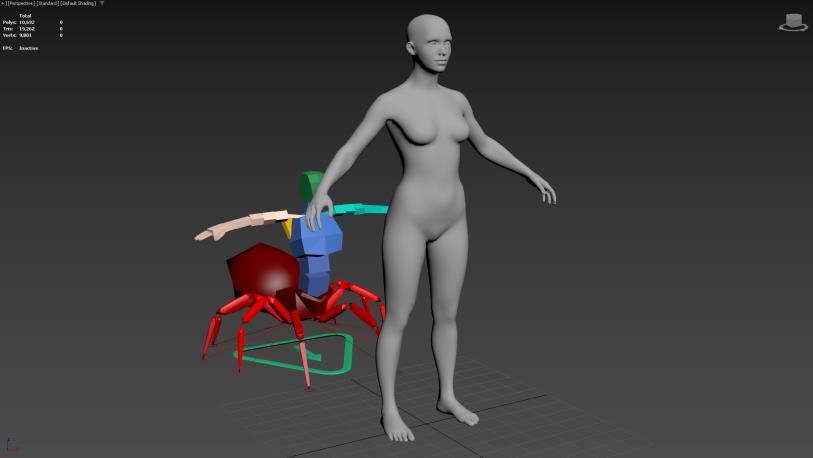
2. Imported my female base mesh to save production time.

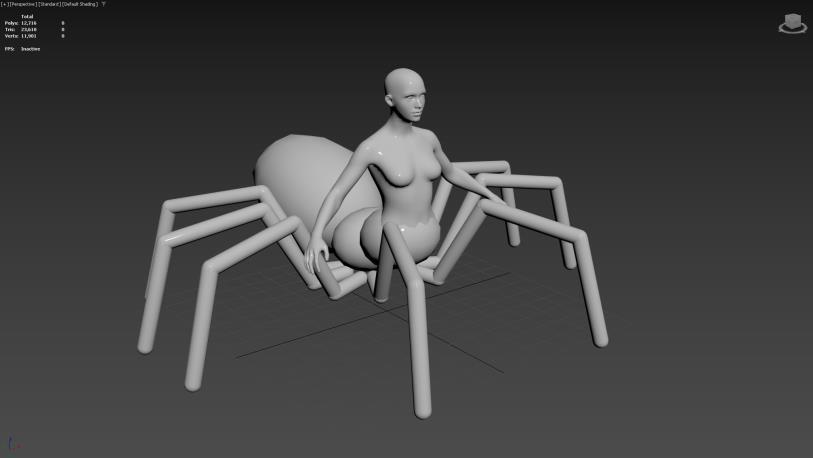
3. Used primitive shapes and adjusted proportions.
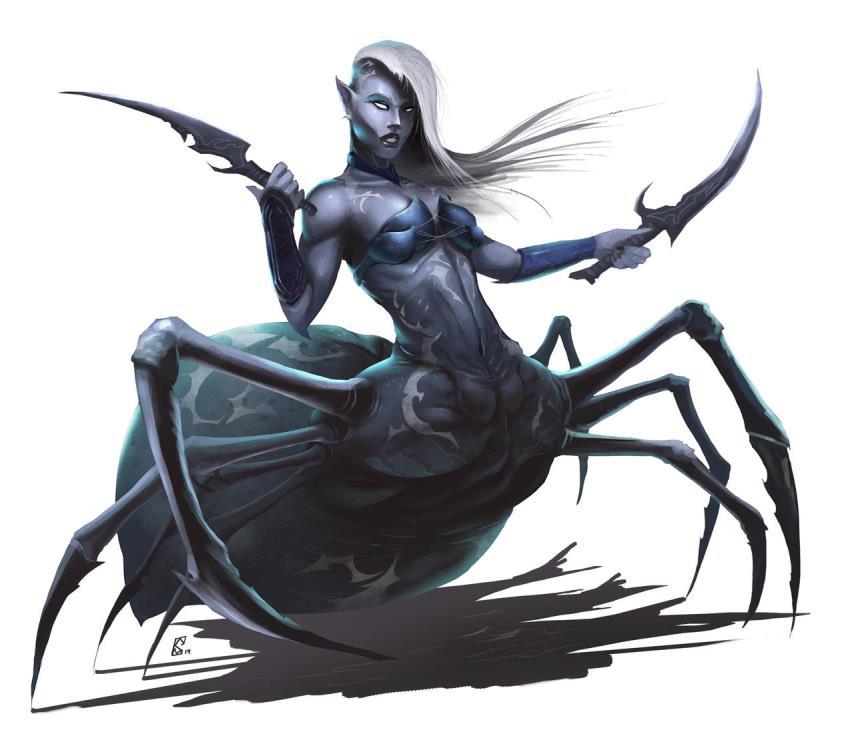
Exhibit A.
Exhibit B.
Base Mesh – Blocking Out Form & Proportions
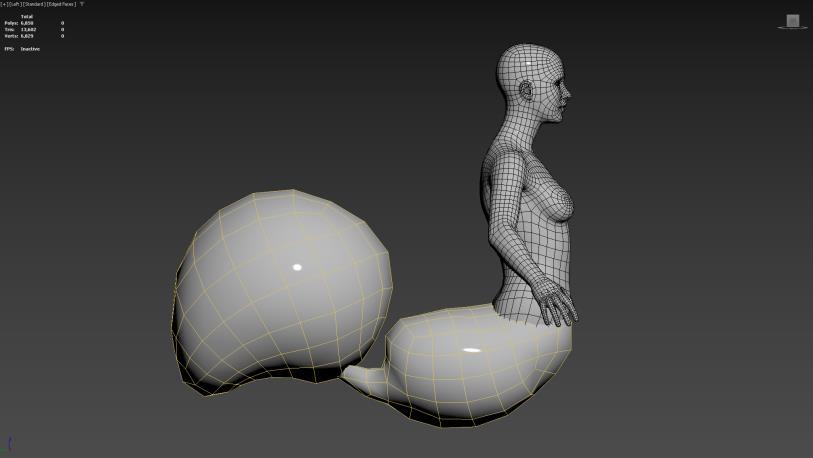
4. Adjusted primitive shapes for accurate spider anatomy.
5. Created large & small leg to be duplicated for efficiency.
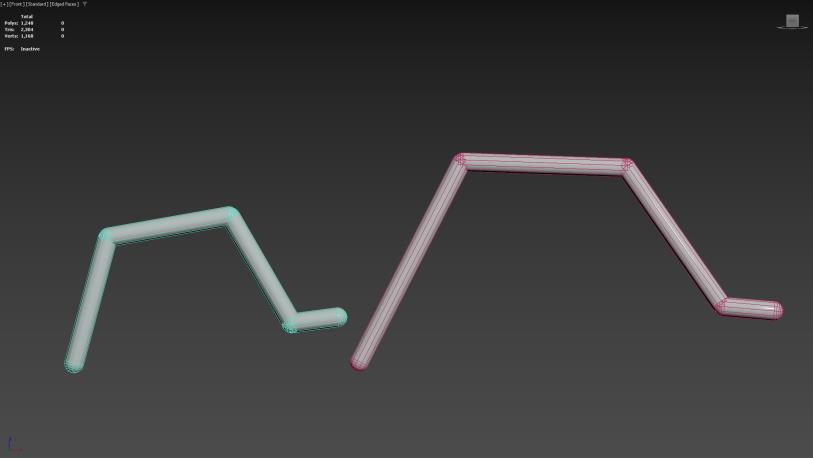
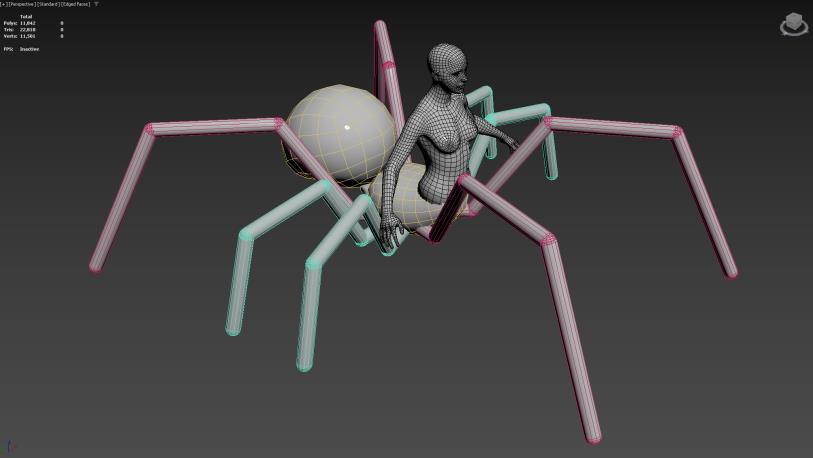
6. Duplicated & positioned legs according.
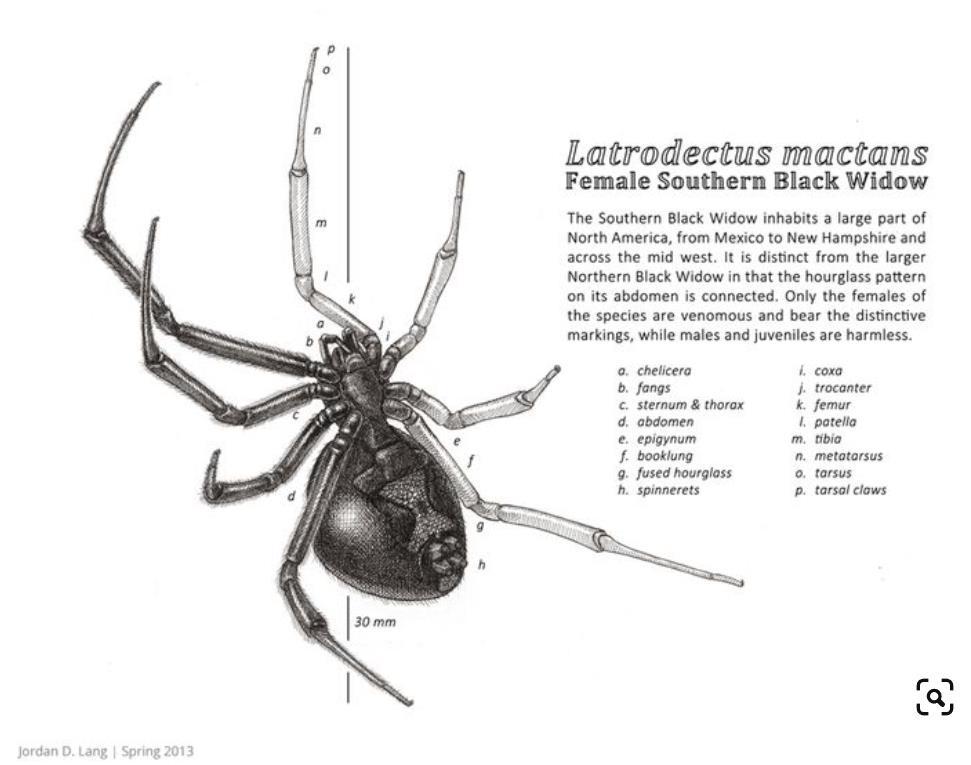
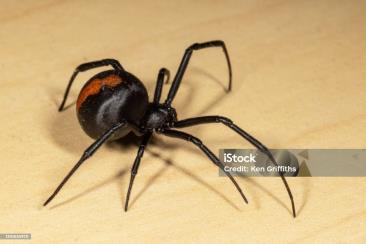
Using a reference depicting an in-depth diagram of a female black widow’s anatomy and bodily proportions, I noticed that a black widow’s have 2 main abdomens. The rear being larger and more bulbous compared to the main abdomen.
Additionally, another thing I noticed is that both front and back legs of this breed of spider are longer whilst the middle legs are shorter. So, I adjusted the legs accordingly for a more accurate and realistic look.
(Reference Image by: Jordan D. Lang).
Base Mesh – Blocking Out Form & Proportions
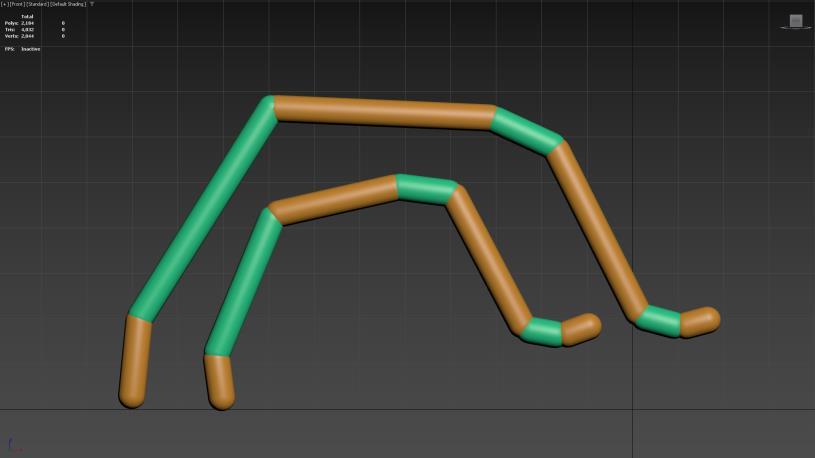
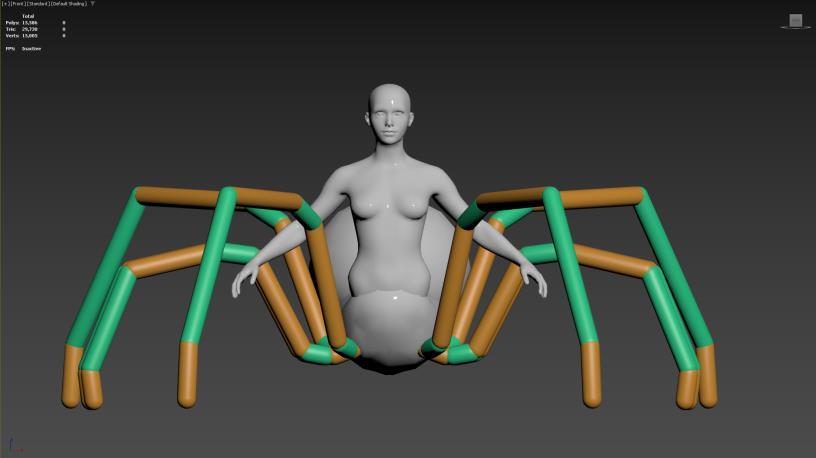


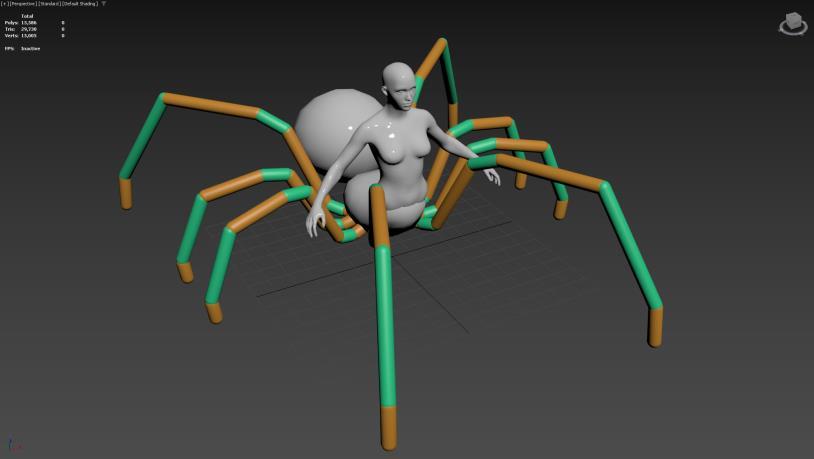
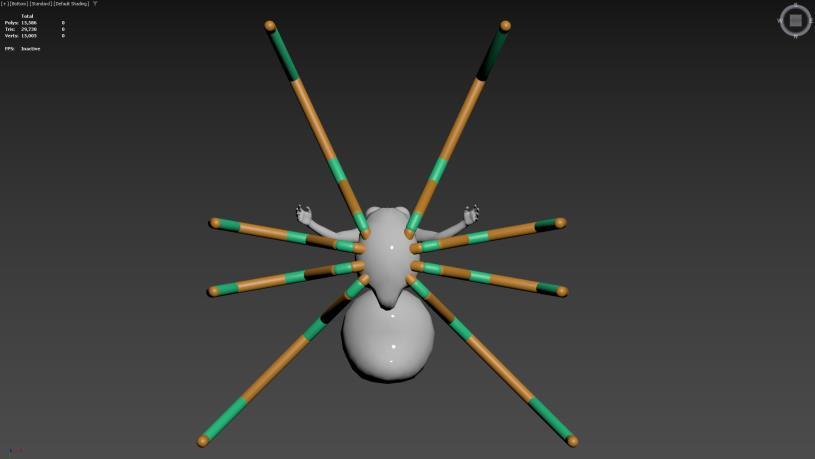
Taking a closer look at the reference I learnt that the legs are segmented roughly into 7 parts. So, I went ahead and added more primitive tubes and scaled them to the right size and colour coded them to be able to see them more clearly.
Pleased with the basic shape & form being done, I carried on to the next part of the project, which was sculpting a higher and more detailed mesh in Zbrush.
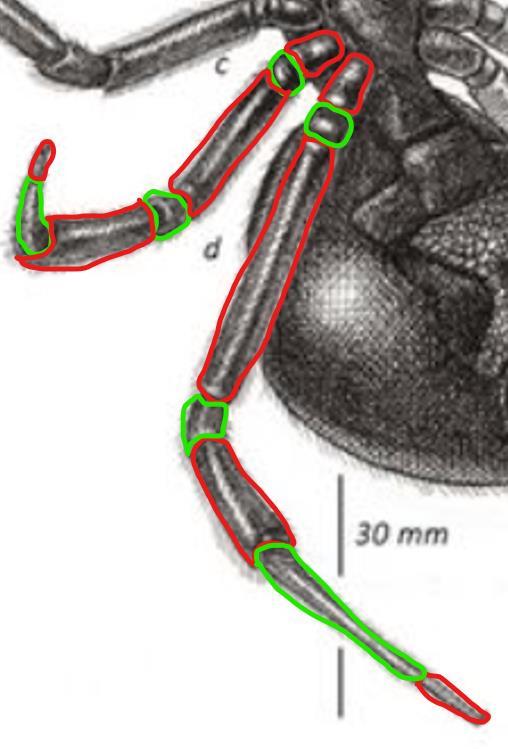
7. Segmented both legs for a more realistic look.
Newly adjusted legs – View 1.
Newly adjusted legs – View 3.
Newly adjusted legs – View 2.
Base Mesh – High Poly Sculpting
8. Imported base mesh into Zbrush with higher subdiv.
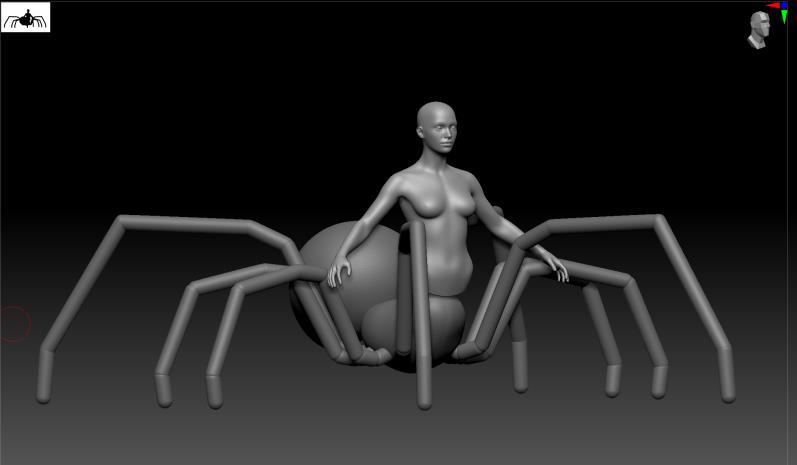
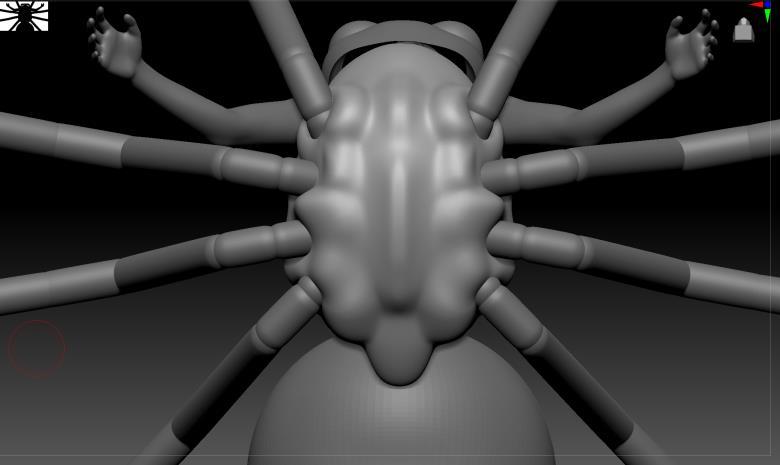
Began fleshing out centre abdomen’s leg sockets.
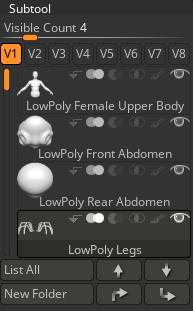
Split up the body parts into subtools for easier sculpting.
After importing mesh into Zbrush I split them up into different subtools so that I’m able to sculpt them easily.
I began by sculpting the centre abdomen as it was crucial to get this part done the most, as a lot of information is compacted into such a small area, spending more time on it before any other part and getting it right was a smarter choice.
To achieve this look, I used a variety brushes. Those being the clay buildup, smooth, move, and flatten brushes.
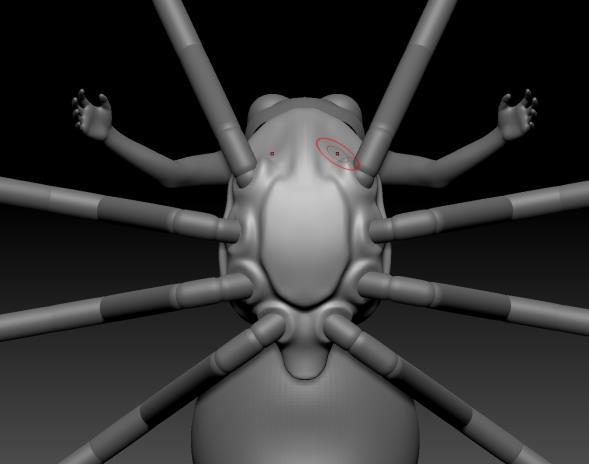
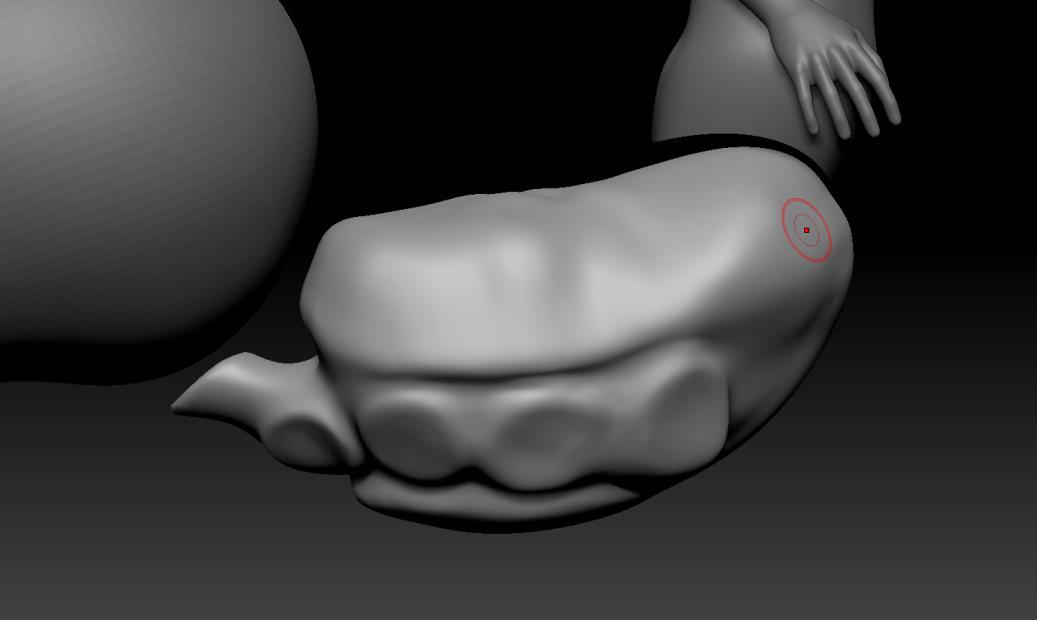
Completed centre abdomen – Side View.
9.
10. Toned & refined abdomen further.
Base Mesh – High Poly Sculpting
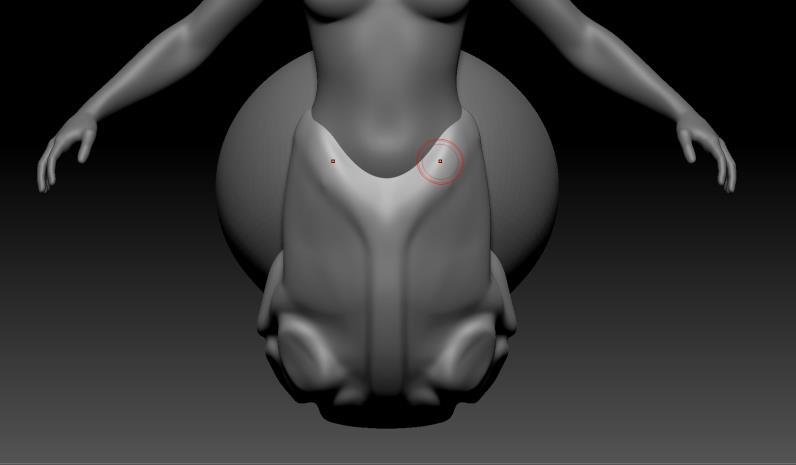
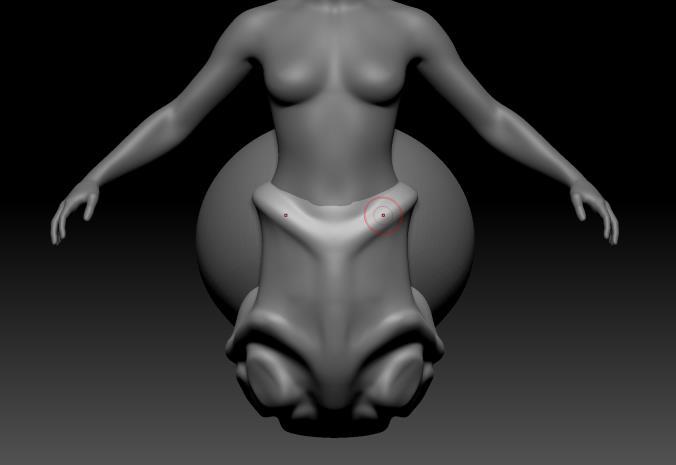
Using the same brushes and techniques as the underside of the abdomen I raised it higher to go over the human half and sculpted around it.
Achieving a realistic and organic look, I began moving the sides more inward, mimicking a form of hourglass figure. Though her lower body is a spider, I still wanted her more grotesque parts to have feminine attributes. When that was done and I was happy, I fleshed out the rear abdomen. Having it almost smooth and perfectly rounded, made it look more cartoonish, which was not the style I wanted for this project.
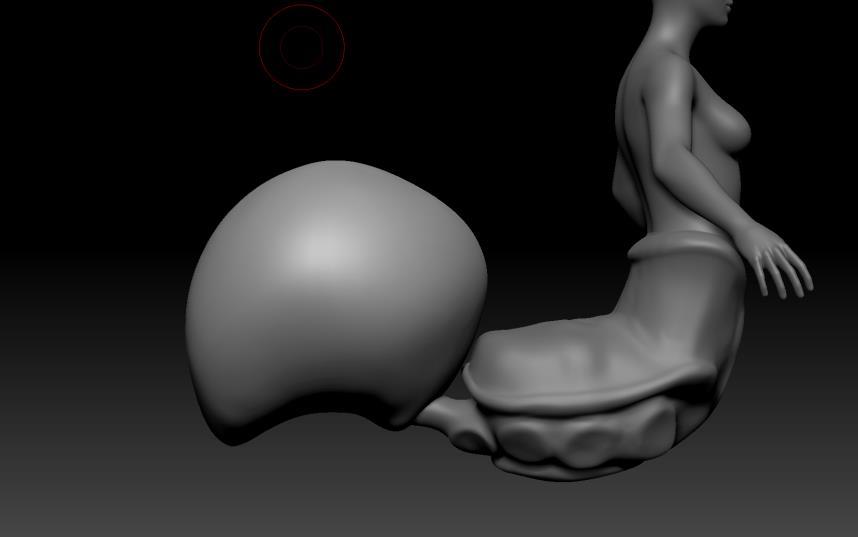
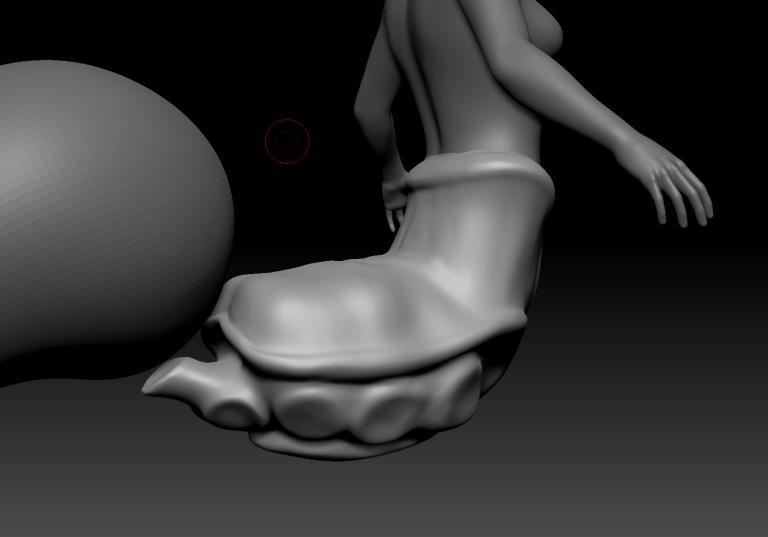
11. Raised abdomen & began fleshing out merging point.
12. Toned merging point more & adjusted shape.
Completed Merging point – Front View.
Completed Merging point – Rear View.
13. Adjustment on rear abdomen for a more accurate shape.
Base Mesh – High Poly Sculpting
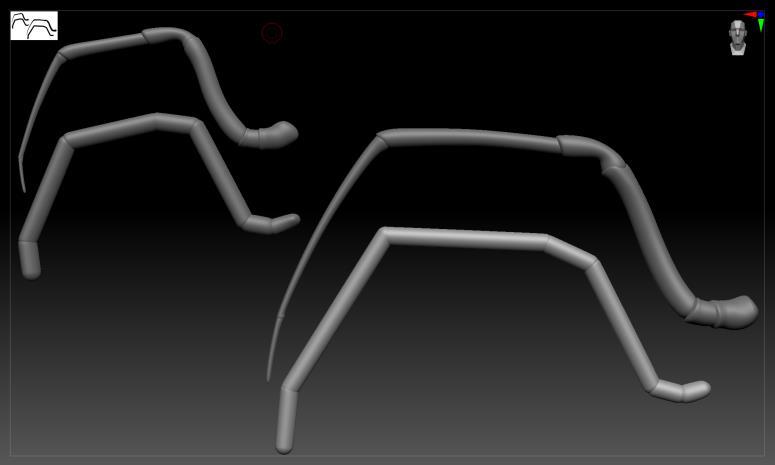
14. Adjusted legs with appropriate size and scales.
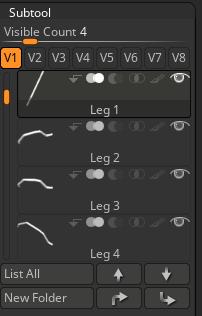
Split up legs further into 8 different subtools to keep things organised.
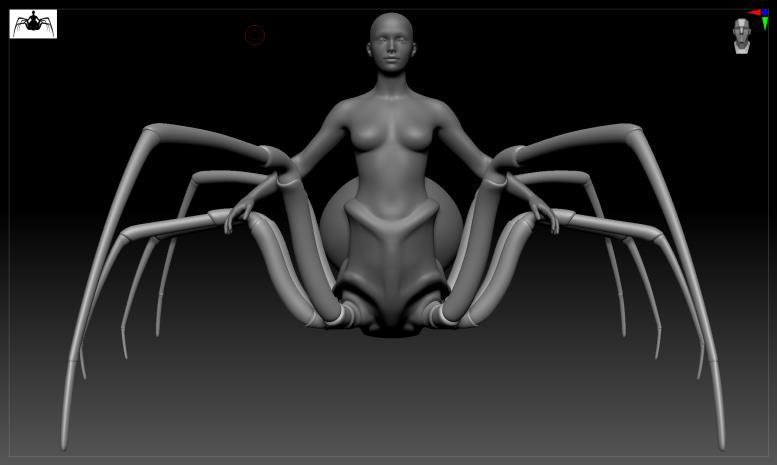
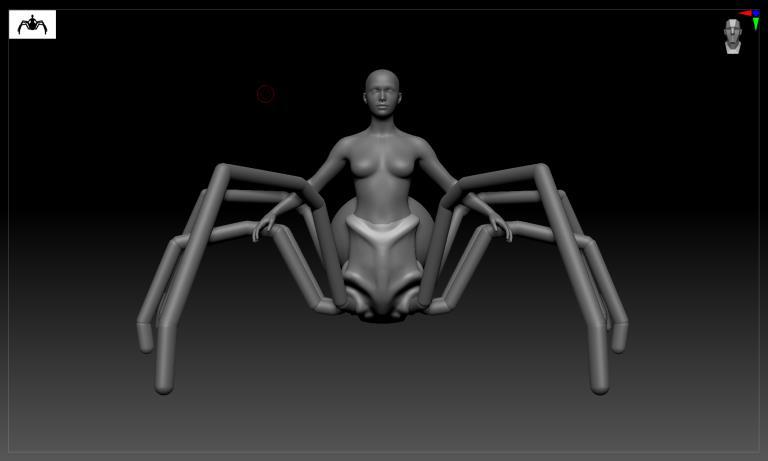
Updated me with new legs – Front View.
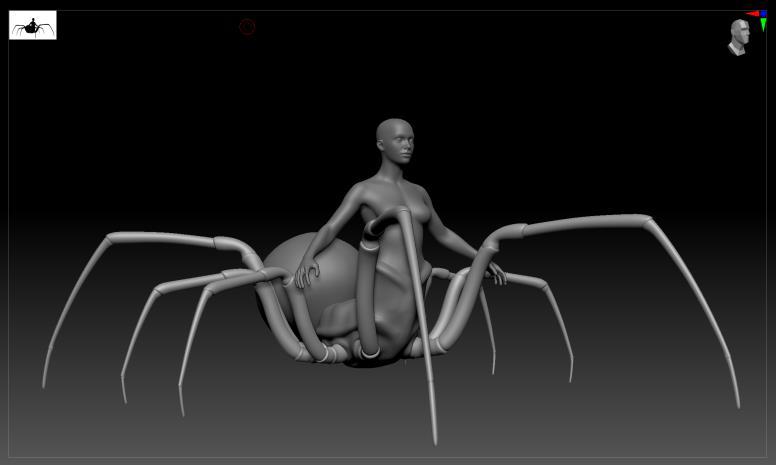
Prior to importing the base mesh into Zbrush, I mentioned that I had created 2 types of legs. Small & large. For the sole purpose of duplicating them and positioning them appropriately.
The reasoning for this decision was that by duplicating them, it would cut down production time quite a lot, yet keep things efficient and professional, and by that, I mean:
1. When unwrapping, it’s better to unwrap both types of legs once, rather than unwrapping all individually.
2. When placing them onto the UV space, as they’re all instances of one another they’ll already be stacked, making it easier to move them around at once.
3. With them all stacked on each other, it saves a lot of UV space for more crucial and larger parts, when reaching the texturing stage.
Updated me with new legs – ¾ View.
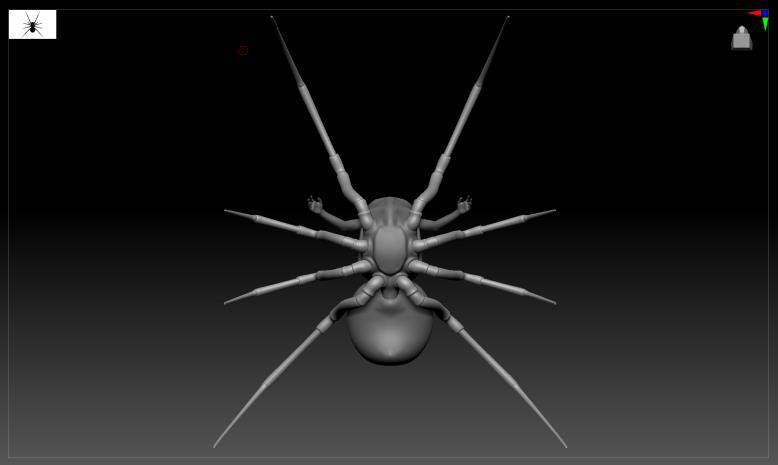
Updated me with new legs – Bottom View.
Medieval Armour Research & References
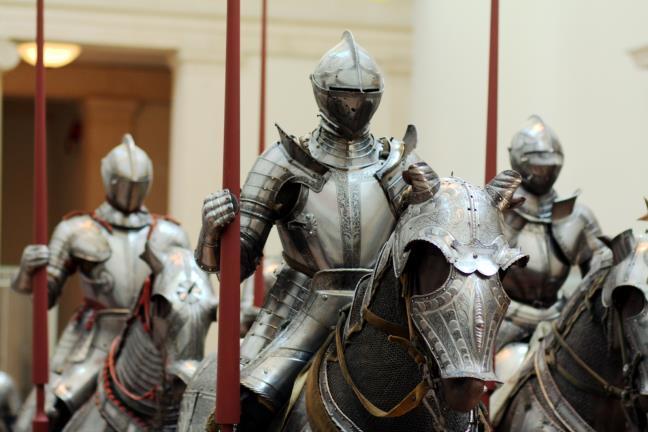
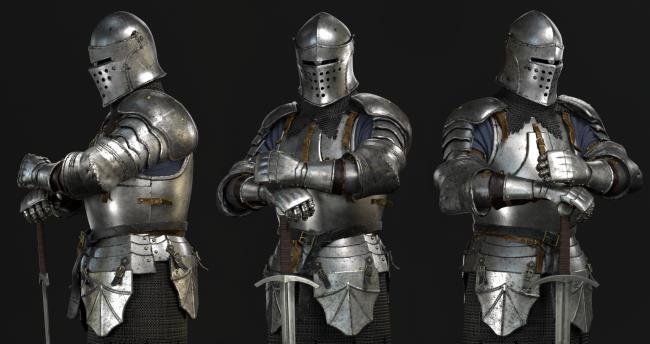
Happy with the base mesh being completed. I moved onto to collecting some reference images from Google to help me learn and understand the intricacy of medieval European armour. And how best to design and apply it onto the human half of my creature.
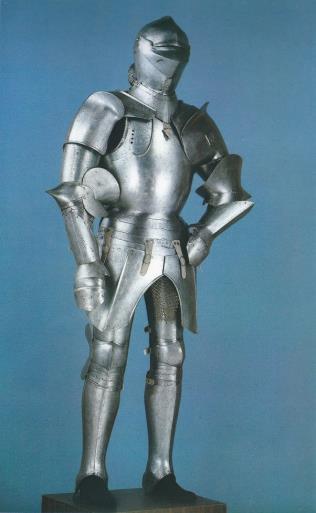
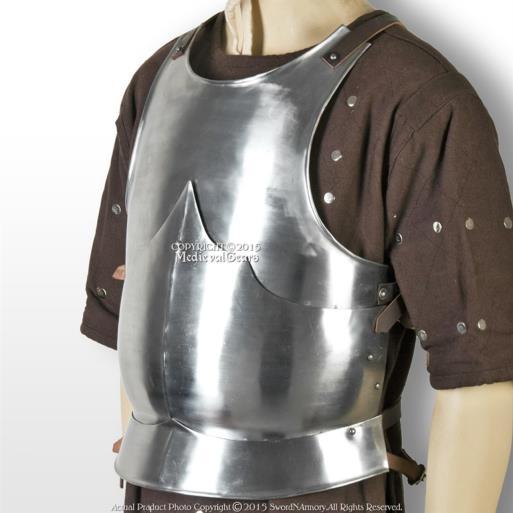
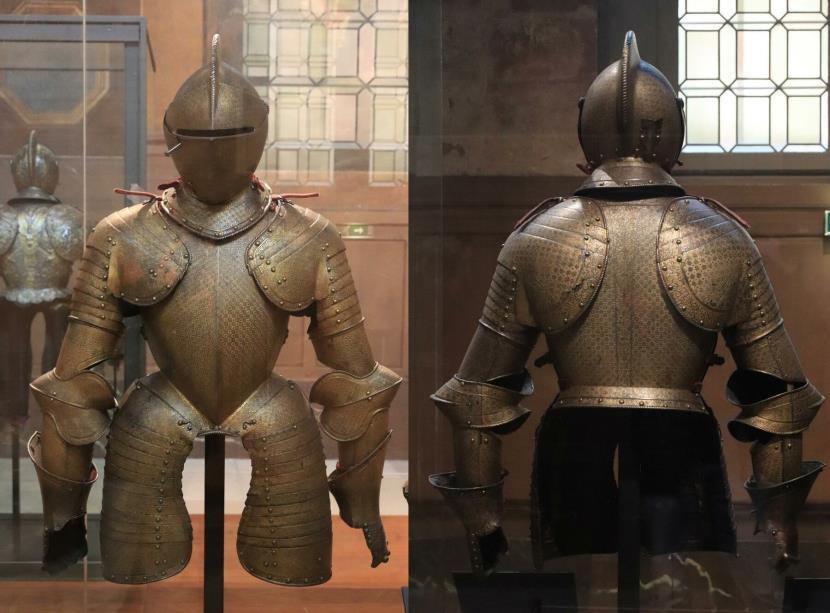
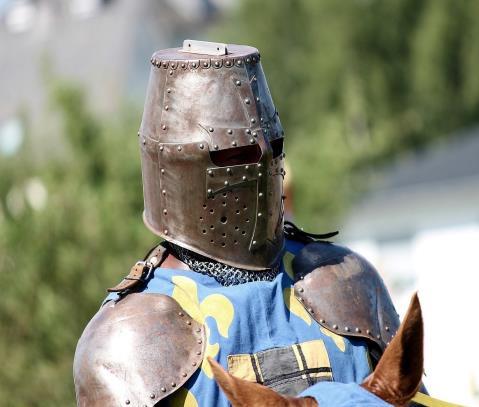
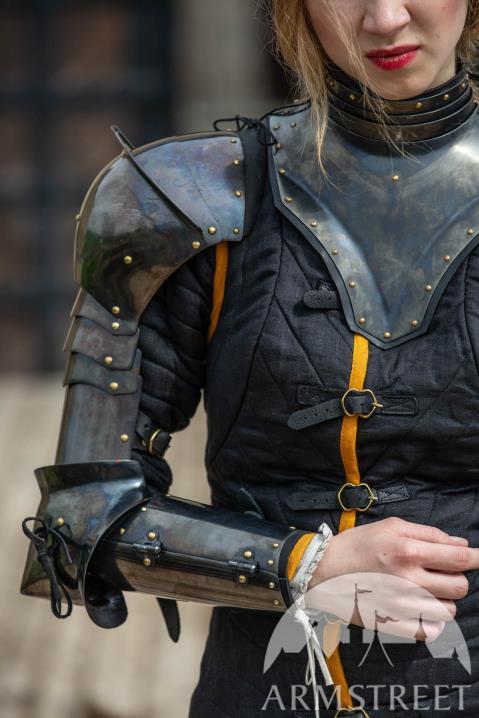
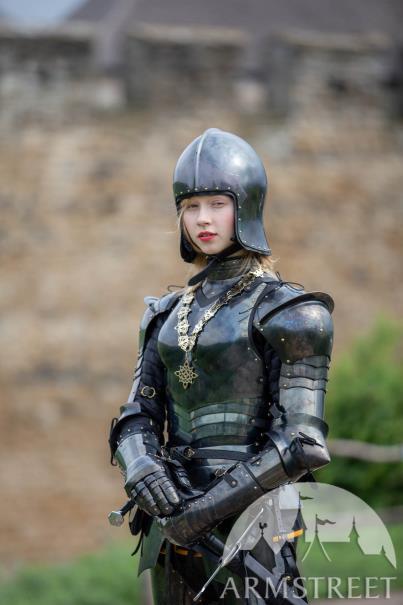
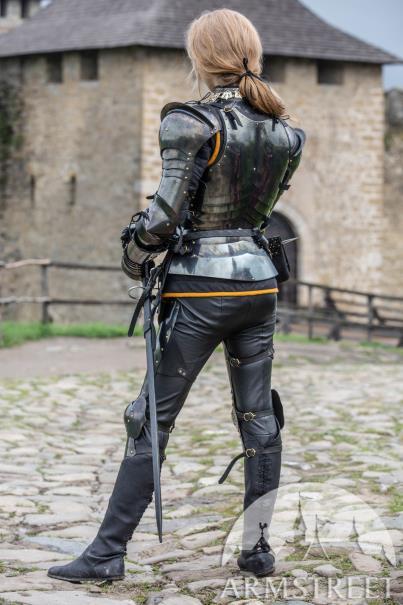
Base Mesh – High Poly Sculpting (Armour)
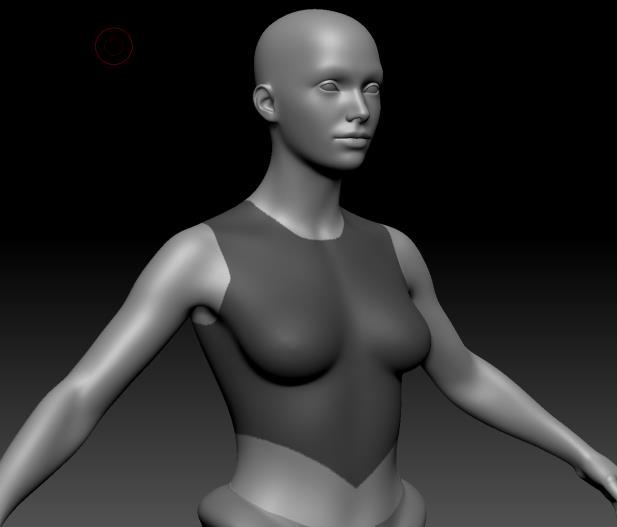
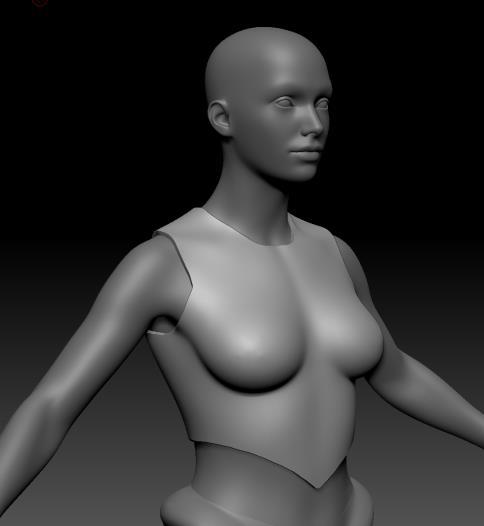
After gathering reference images and studying the designs of 15th century medieval armour. I learnt that most of the pieces, such as the Breastplate, Gardbrace (shoulder guards), Rerebrace ( upper arm guards), Couter (elbow guard), and gauntlets, derive of smaller parts bolted/nailed to each other and kept together using belt straps to go around each body part.
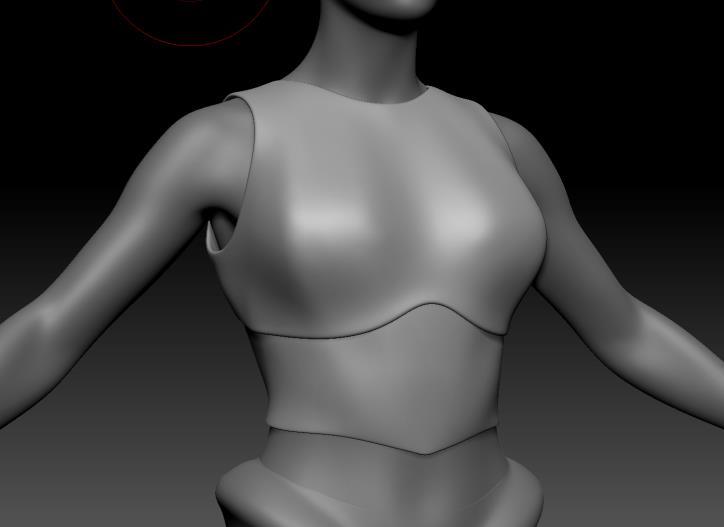
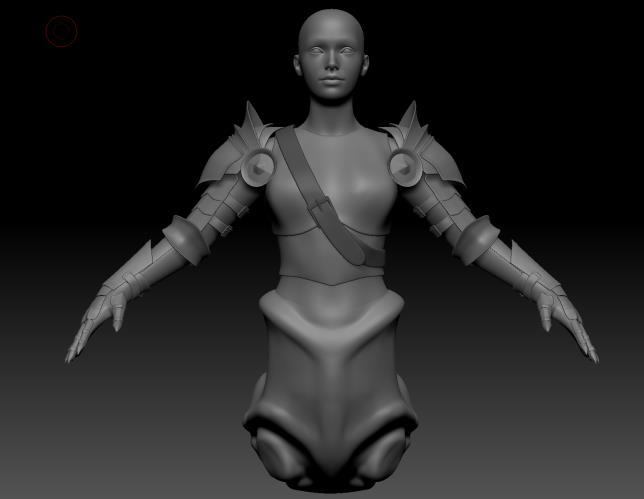
Using this knowledge I’ve gained; I began sculpting the armour out from the main body mesh and began fleshing it out. I began with the breastplate as it was the quickest and simplest to make, enabling me imagine how I wanted the rest of the pieces to look so that they matched.
I achieved this by using the masking tool, to mask out the desired shape/style, and then extruding it out twice into different subtools and began smoothening it out, making sure that some edges weren’t too smooth to so hard surface sculpting.
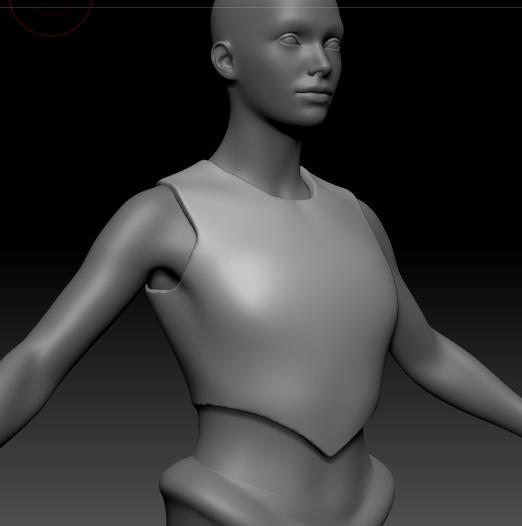
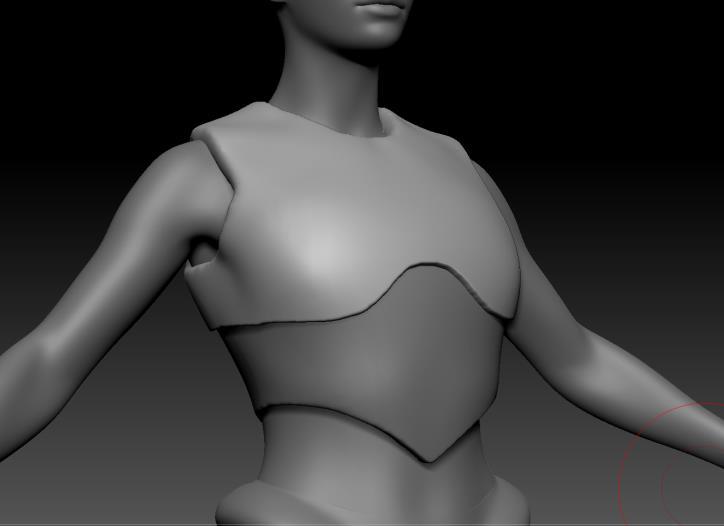
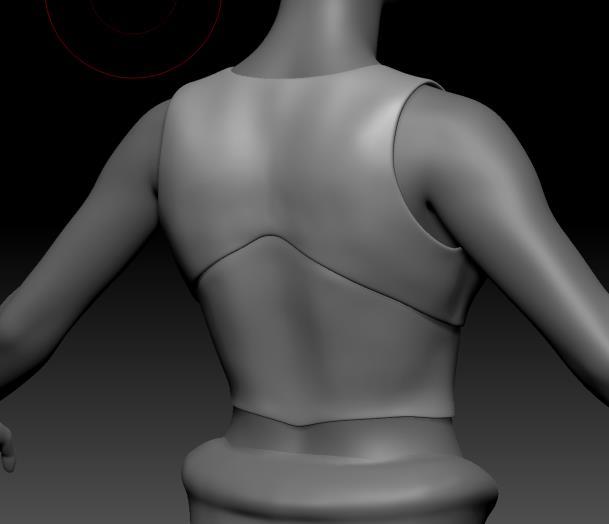
15. Masked chest to start sculpting armour.
16. Extruded into a new subtool. 17. Flattened for realistic look.
18. Extruded once more for a 2nd layer of armour.
Completed breastplate – Front View. Completed breastplate – Rear View.
Base Mesh – High Poly Sculpting (Armour)
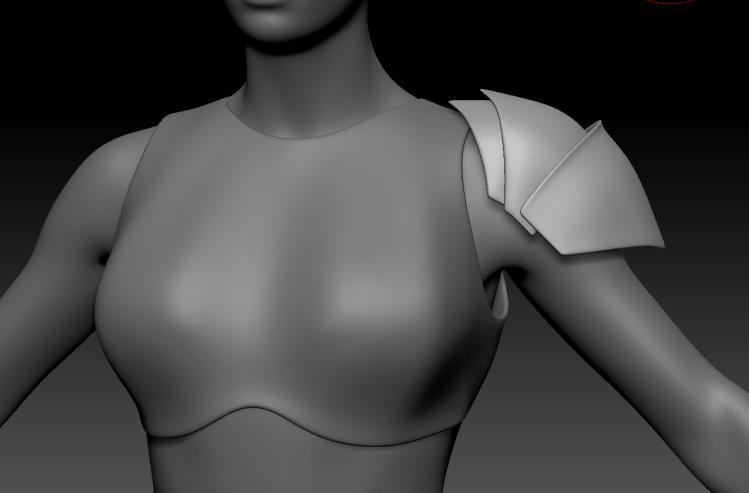
19. Used same technique for Gardbrace.
20. Updated with Rerebrace .
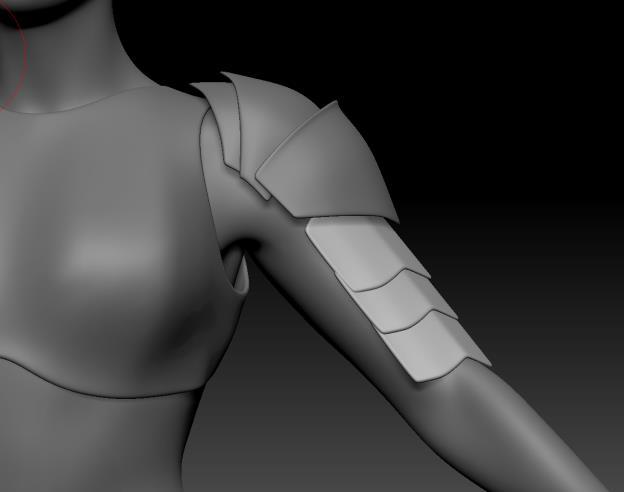
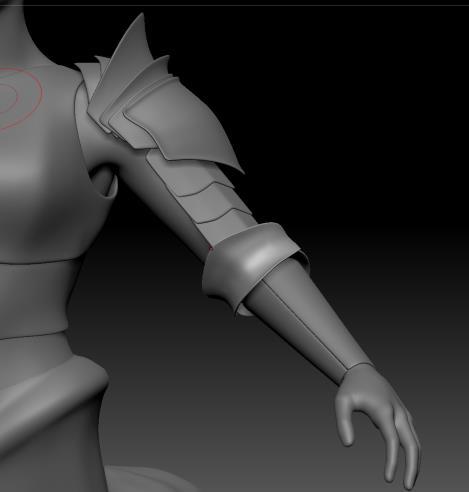
21. Added more shoulder plates.
Using the same technique as the breastplate I gradually worked my way down the arm, making sure that each piece was fleshed our properly and its own subtool, in case I needed to go back to do further sculpting/alterations, (Which for the Gardbrace, I did have to go back, as I wanted to add more plating to it).
Happy with the result, I merged all the pieces together, and then used Zbrush’s mirror tool, to duplicate the armour across to the other arm.
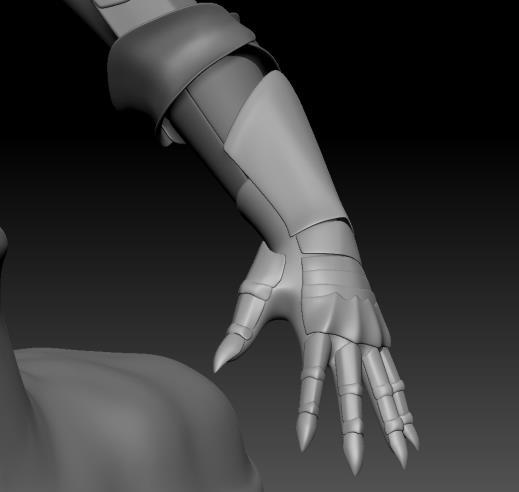
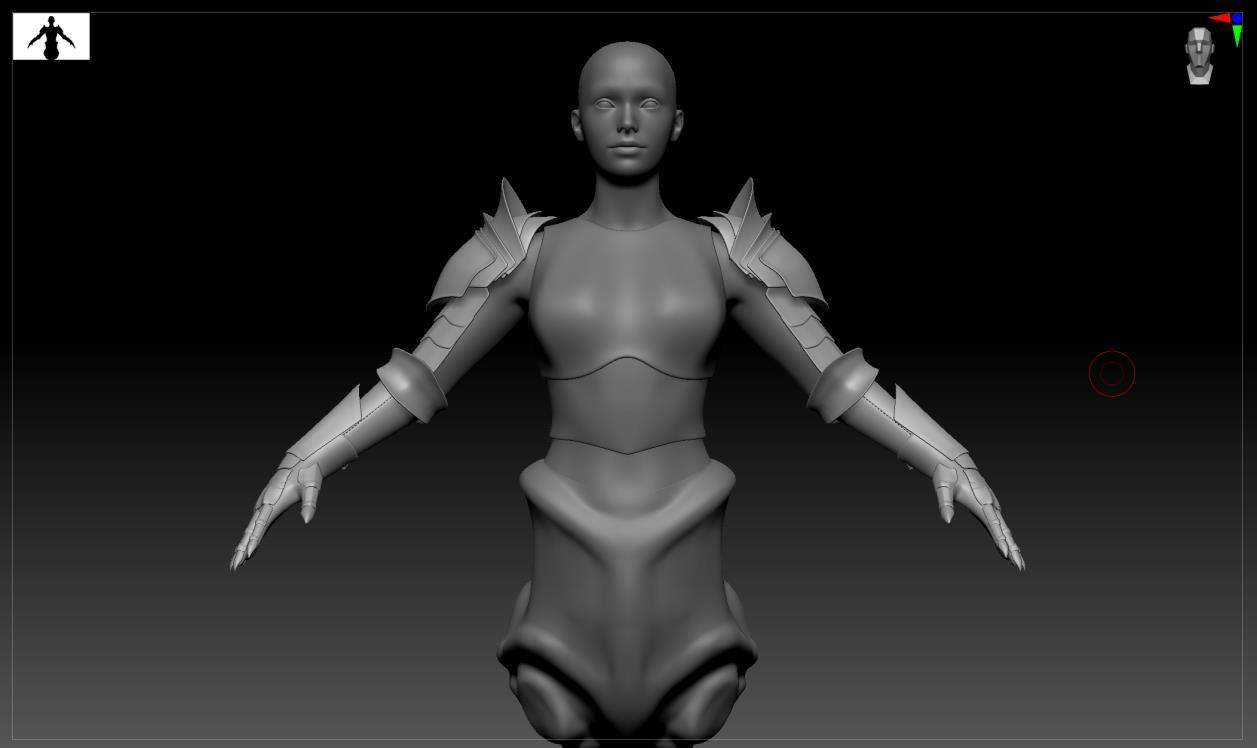
Completed arm armour mirrored across.
22. Finished it off with the gauntlets.
23.
Base Mesh – High Poly Sculpting (Armour Accessories)
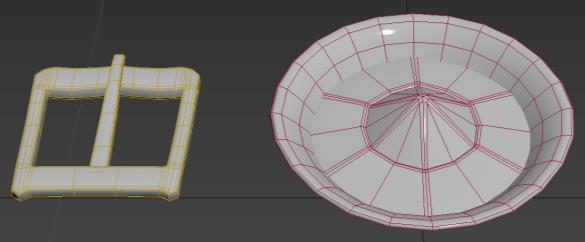
Went back into 3DS Max and quickly made a buckle, Besagew (Armpit Guards), and other accessories for the armour.
To save time and make the accessories, I went back into 3DS Max, to create the smaller intricate pieces. Such as buckle, Besagew, breastplate strap, and the smaller straps that go around the Rerebrace (upper arm guards).
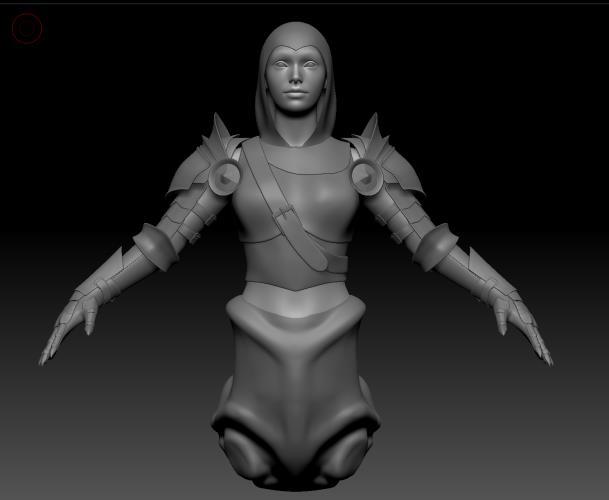
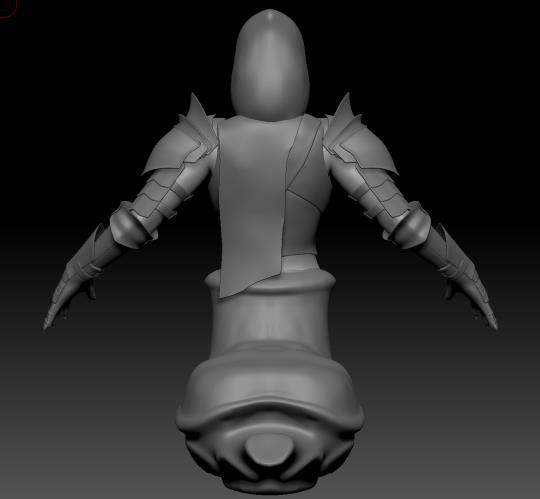
With the hood and cape, I took a plane in 3DS Max, increased its poly count and used the soft selection tool to warp it around the top of my original female body mesh that I used during the blocking out phase, and then imported it into Zbrush, with all the other accessories.
Once they were all imported, I adjusted their positioning, scaling, and forms accordingly so that they fit the high poly mesh.
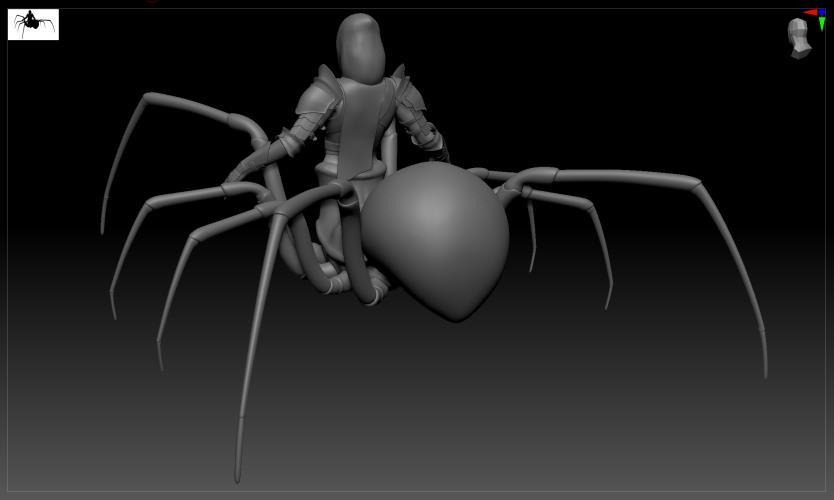
24. Imported buckle, Besagew & straps.
25. Imported hood and cape – Front View. Hood and cape – Rear View.
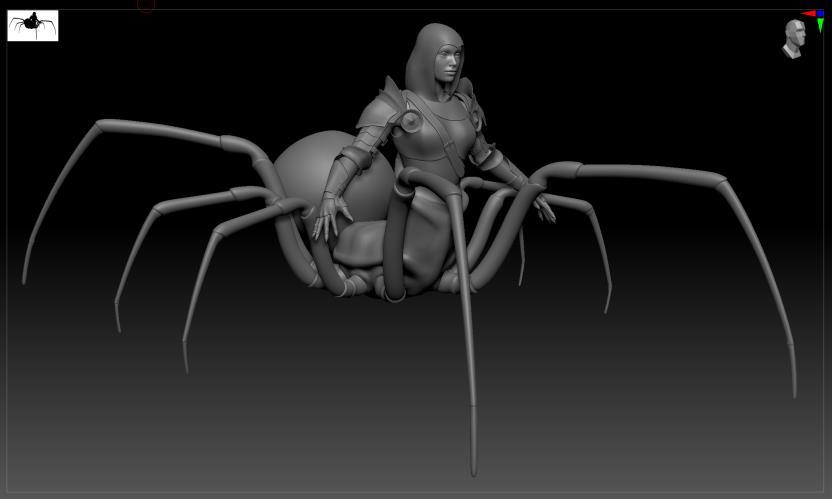
Overall armour & base mesh– ¾ Front View.
Overall armour & base mesh– ¾ Rear View.
Base Mesh – High Poly Sculpting (Major Feature Adjustments)
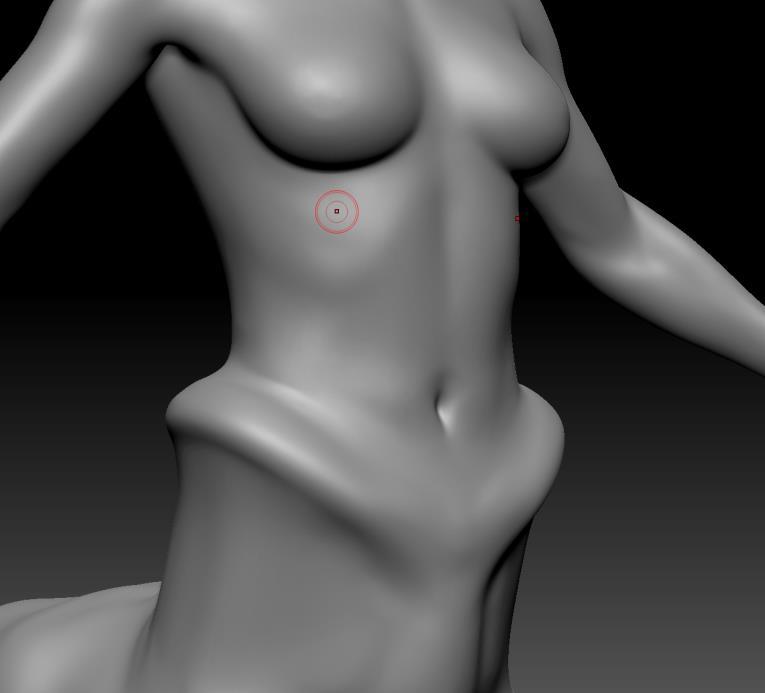
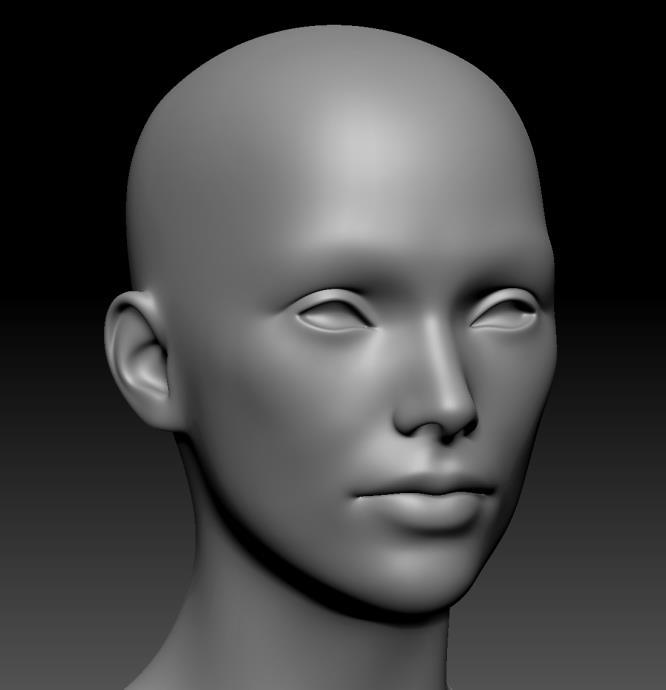
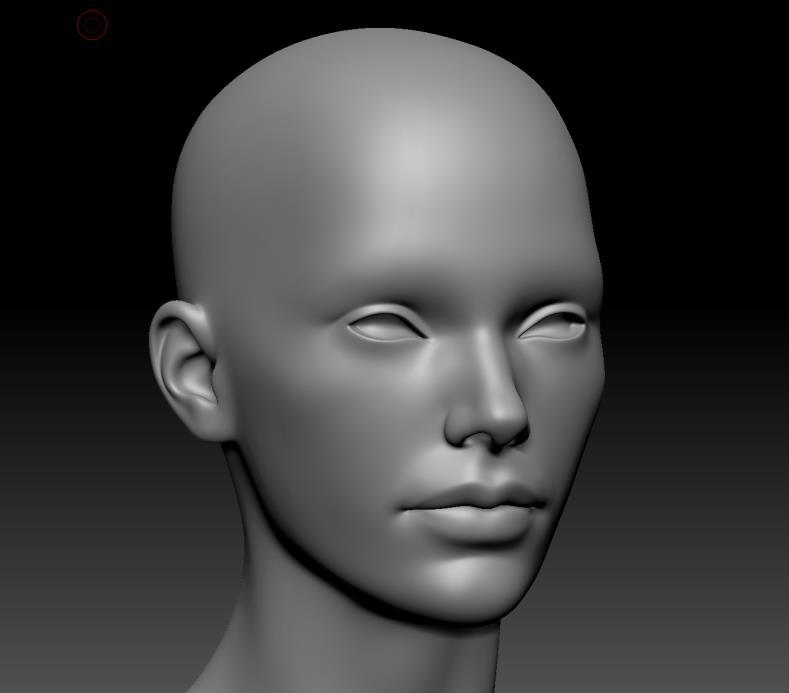
Merged upper and lower abdomen into 1 subtool, as I no longer needed them to be separate, since the overall sculpting was done and all that was left was to sculpt surface detail of skin, using a variety of alpha brushes.
Before that, I decided to do major adjustments to the intersection, torso, and face, so that it was a more refined and cleaner look, with the correct muscle tone and facial proportions.
26. Merged lower and upper abdomen and toned out.
27. Increased subdiv with subtle detail.
28. Lips, eye lids, ear, and cheek adjusted.
Base Mesh – High Poly Sculpting (Applying Alphas)
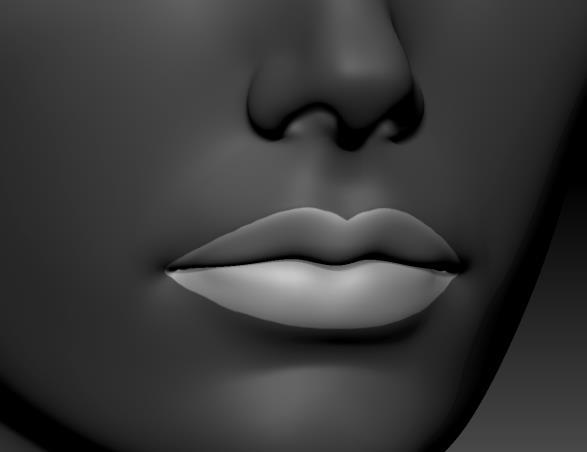
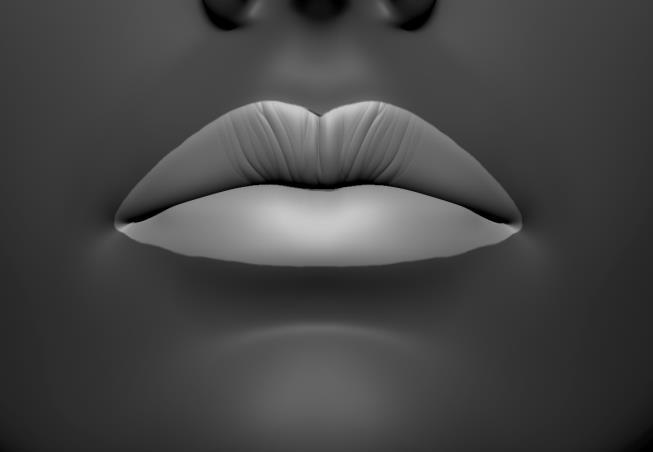
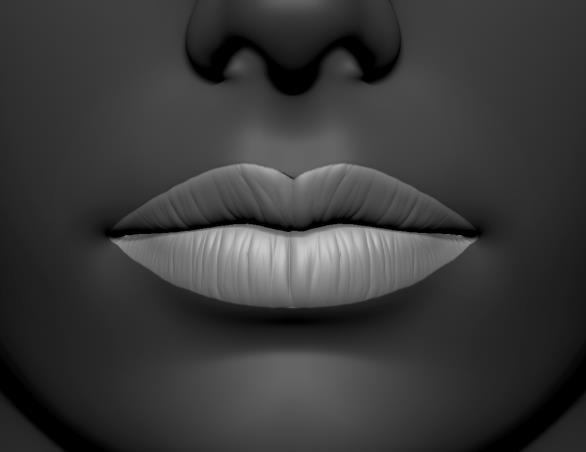
29. Masked lips so face remained unphased. 30. Early iteration of & testing of alpha brush. 31. Successful attempt of lip creases. 32. End result of applying alpha brush.
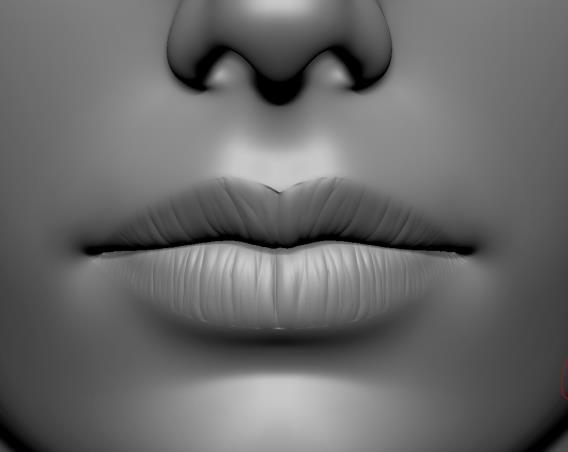
For the subsurface detail of the skin (And later for the spider half). I decided to use alpha brushes, with a few tweaks in their intensities and apply onto the areas that I wanted.
In doing this, I was able to cut back on a lot of production time, enabling me to progress faster in my high poly sculpting.
However rather than just recklessly applying the alpha brushes, I took the opportunity to learn and get a deeper understanding of the human skin, and applied the alphas accordingly, until I was happy with the results.
The types of references I used, include, close-up images of lips, eye wrinkles, skin pores, and ultra zoomed photos of black widow spiders.
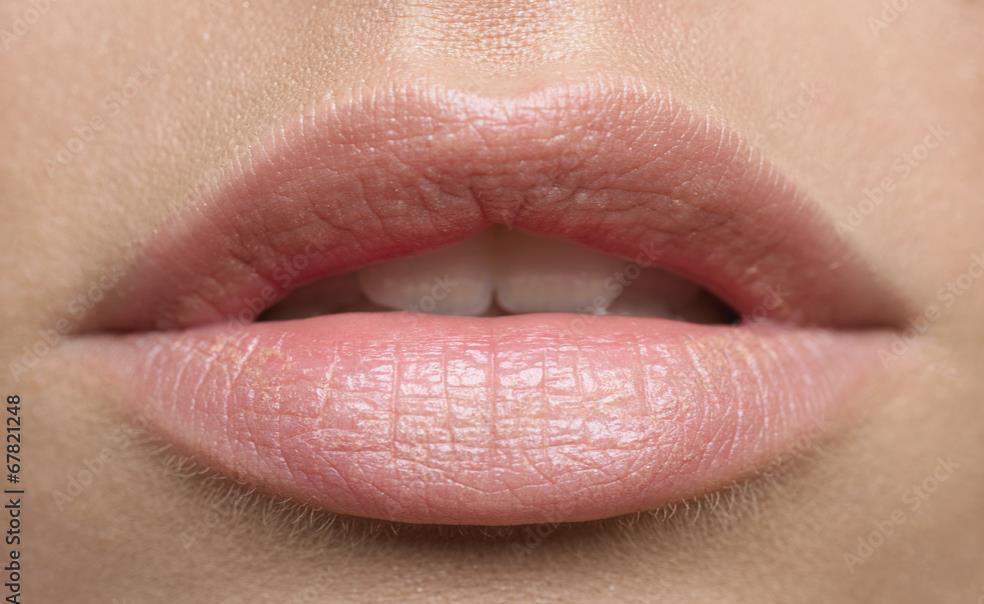
Zoomed in lip reference used to help see and imitate realistic lip creases.
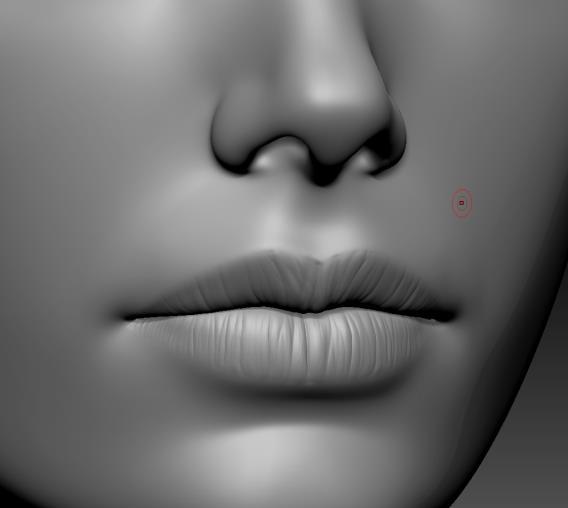
33. Smoothed edges for subtle blend.
Base Mesh – High Poly Sculpting (Applying Alphas)
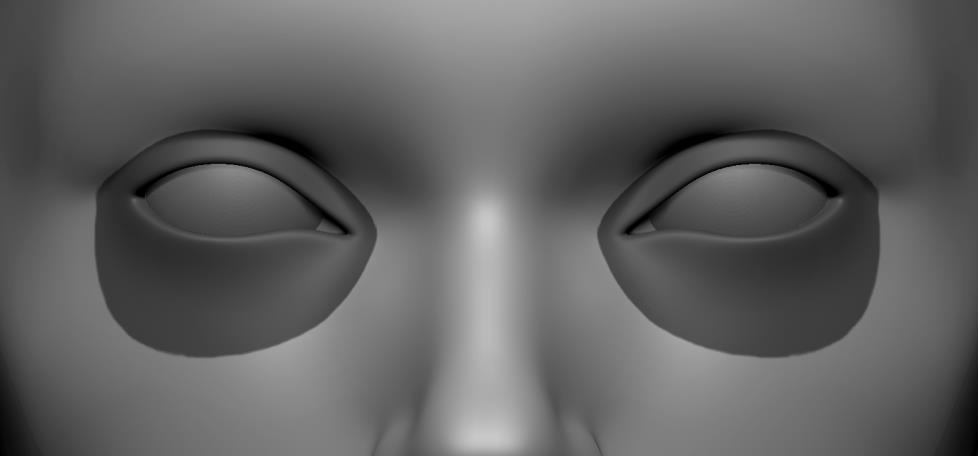
34. Masked eyes for applying wrinkles.
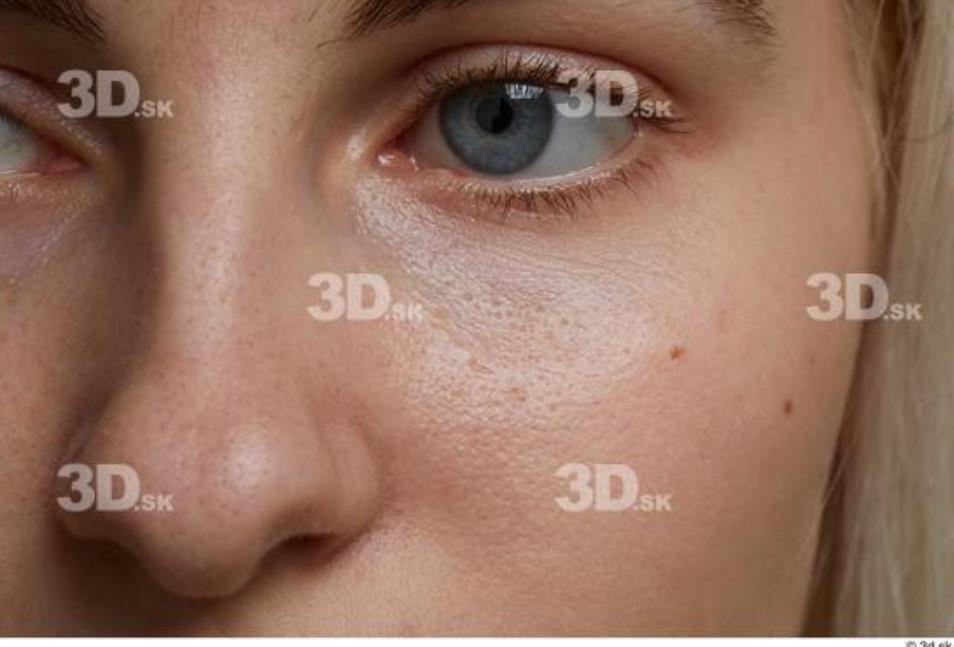
Carried on using a variety of skin alpha brushes, and applied them, accordingly, using close-up references of real people.
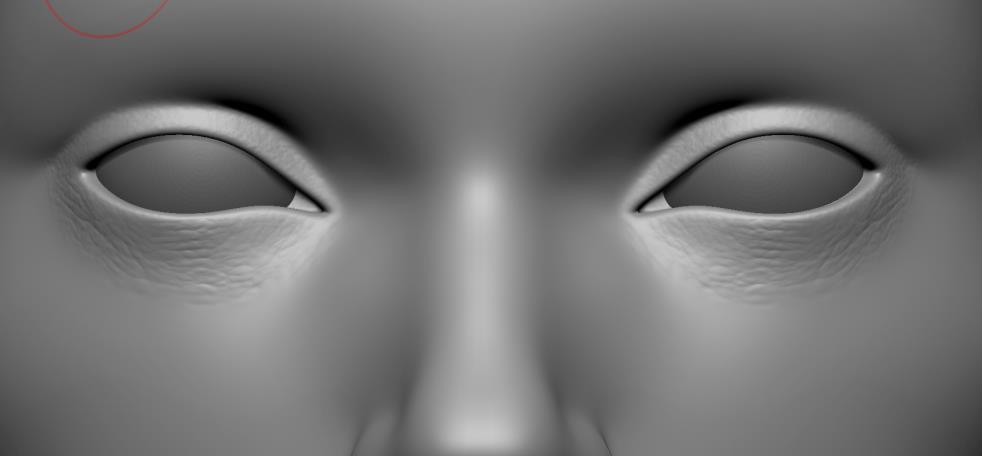
35. Applied alpha brush appropriately.
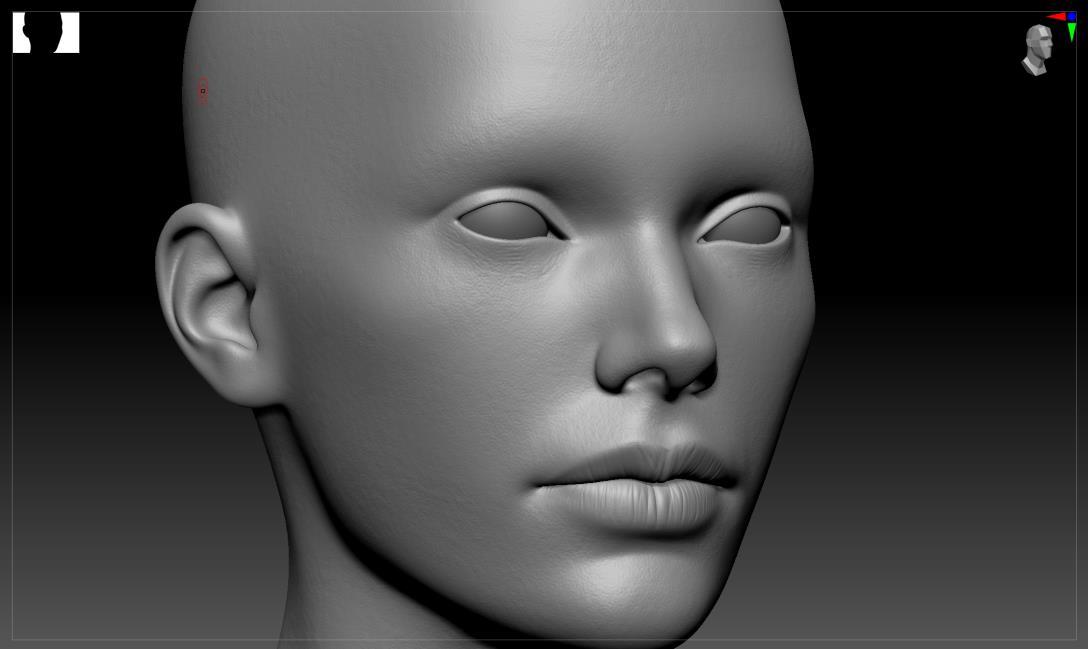
36. Overall subsurface skin detail.
Base Mesh – High Poly Sculpting (Applying Alphas)
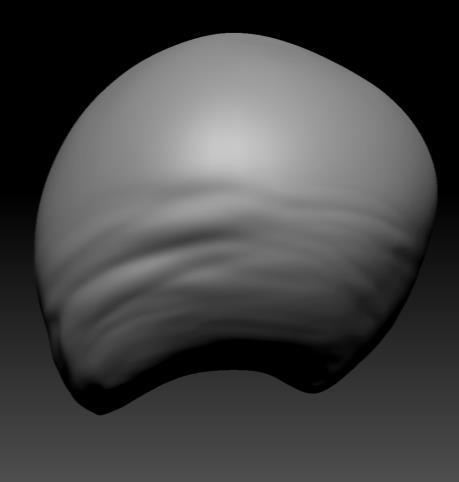
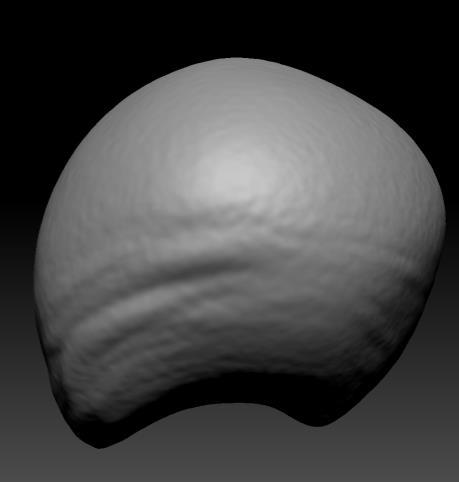
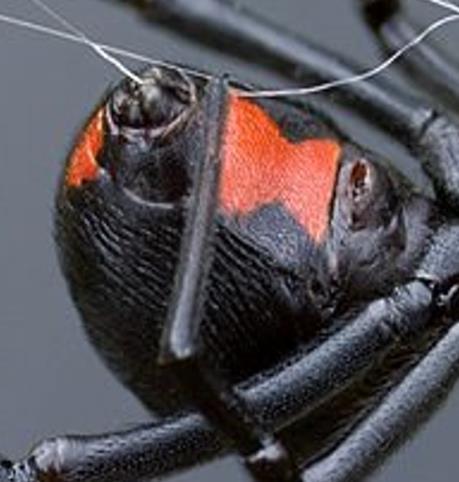
Close-up reference of black widow rear abdomen, showing in-depth surface details of stretch marks and bumpy surface. Faintly resembling leather.
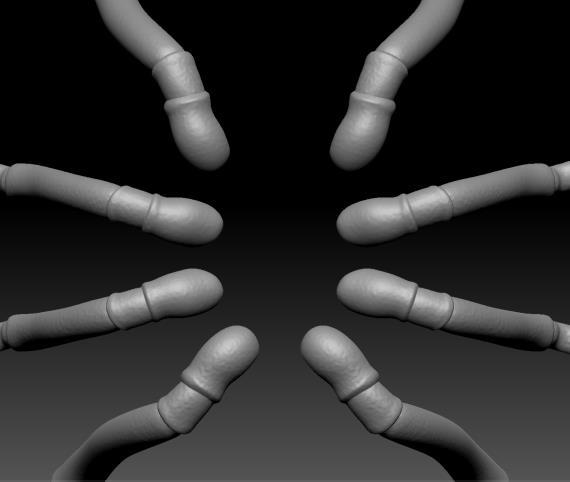

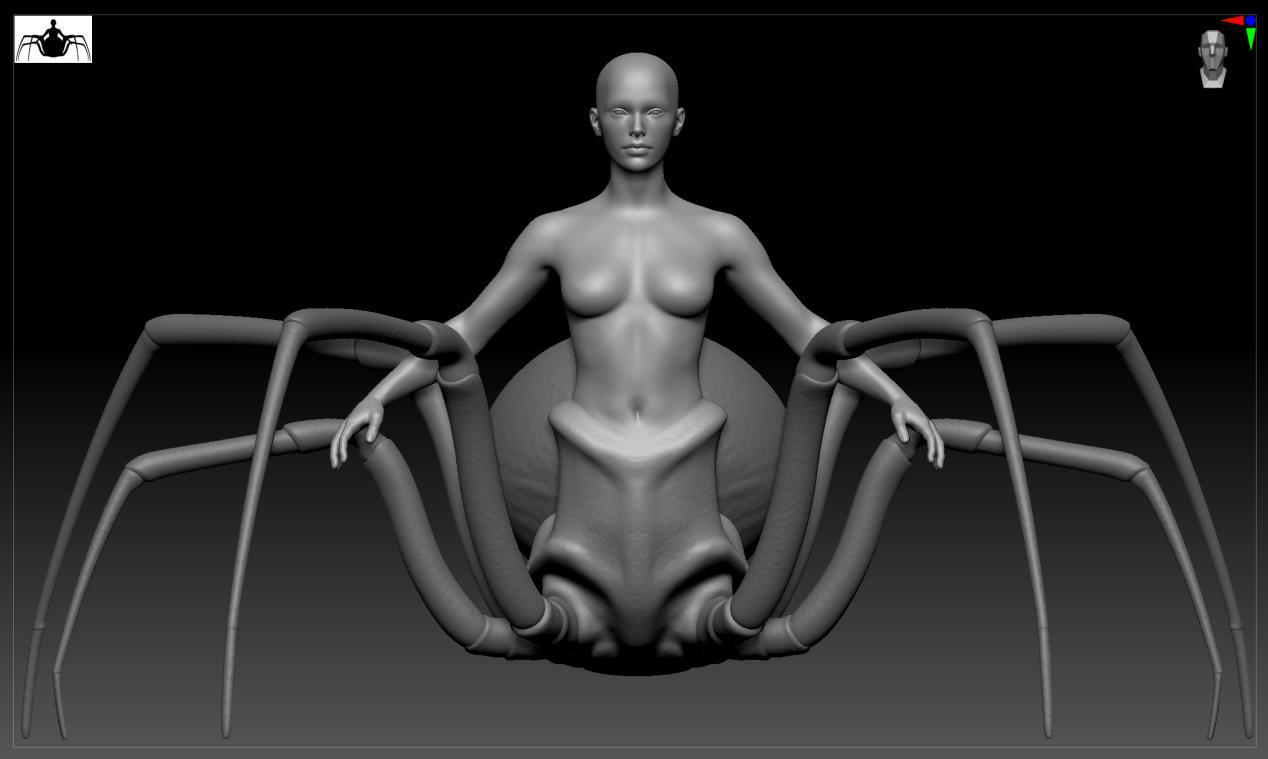
36. Applied 1st layer of alphas. 36. Applied 2nd layer of alphas. 37. Applied alphas on legs.
38. Full high poly base mesh with all relevant alphas applied
Base Mesh – Retopology (Using Maya)
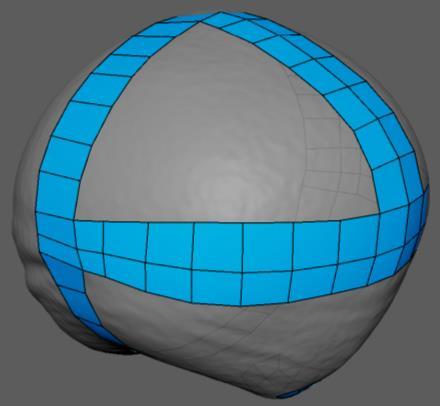
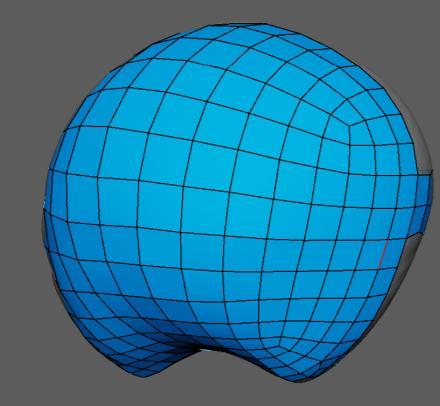
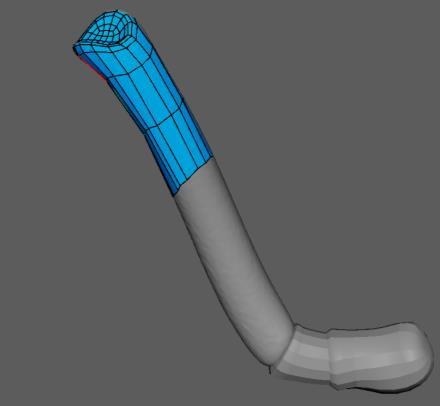
Imported high poly body parts into Maya separately and used retopology tool.
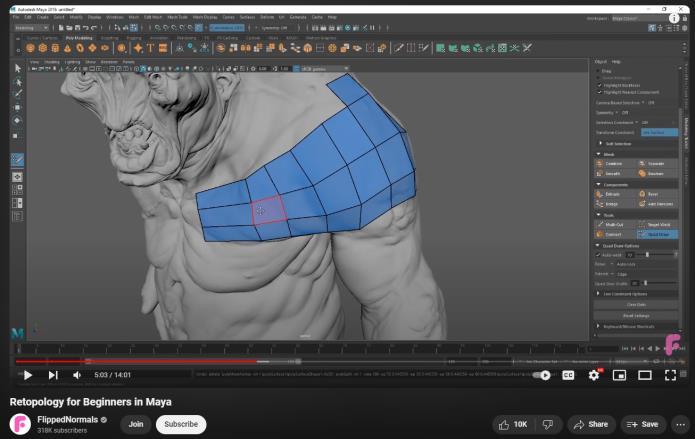
Used FlippedNormals video tutorial “Retopology for Beginners in Maya” as guidance.
https://www.youtube.com/watch?v=xpD Wta5O3n8
The reason I opted to use Maya’s retopology tool, rather than using 3DS Max or Zbrush. Is because I found Maya’s style more optimal providing me with a much cleaner topology.
Pieces to retopologize consisted of:
- Rear Abdomen
- Main Abdomen (Human & Spider)
- Small & Large Leg
- Armour & Accessories
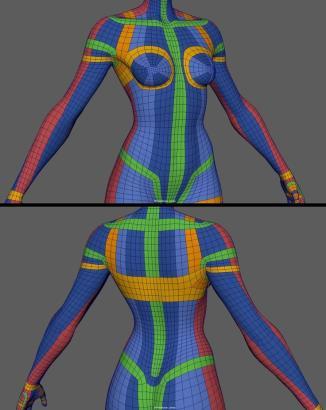
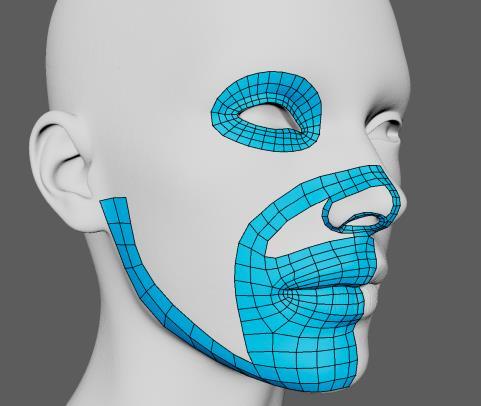
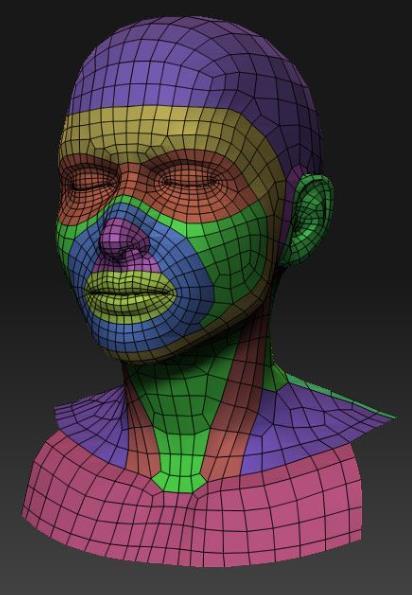
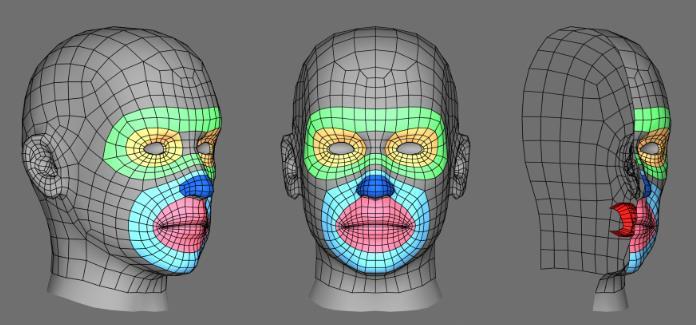
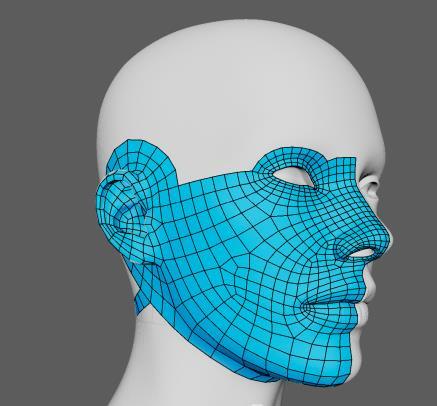
Human body topology references to help guide and visualise crucial poly loops. Retopped only half of meshes to then mirror them later.
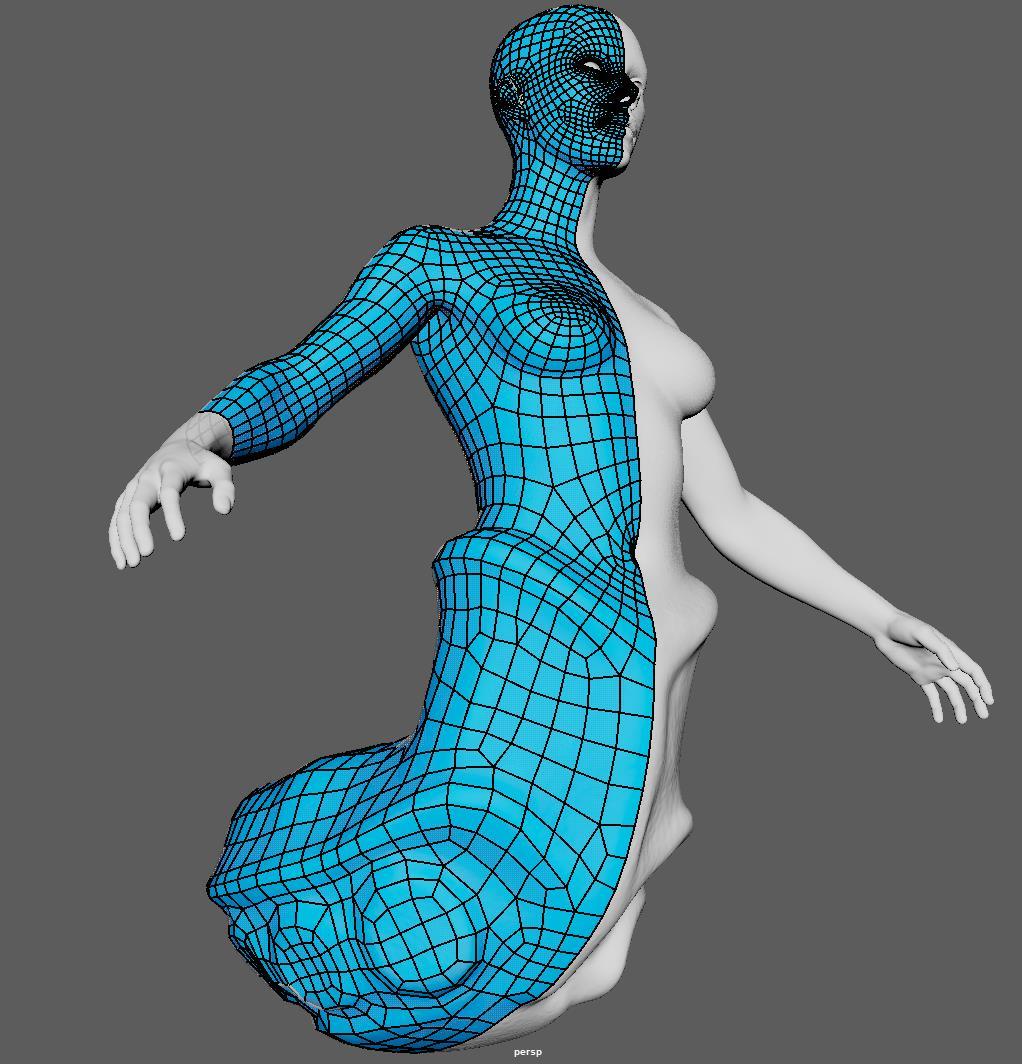
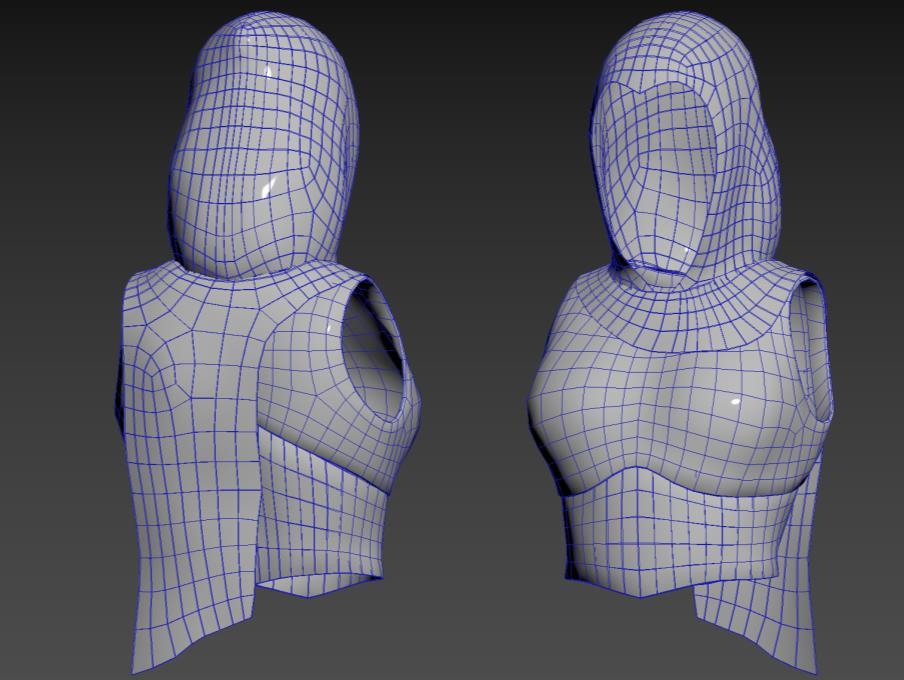
Base Mesh – Completed Retopology (54k Polys)
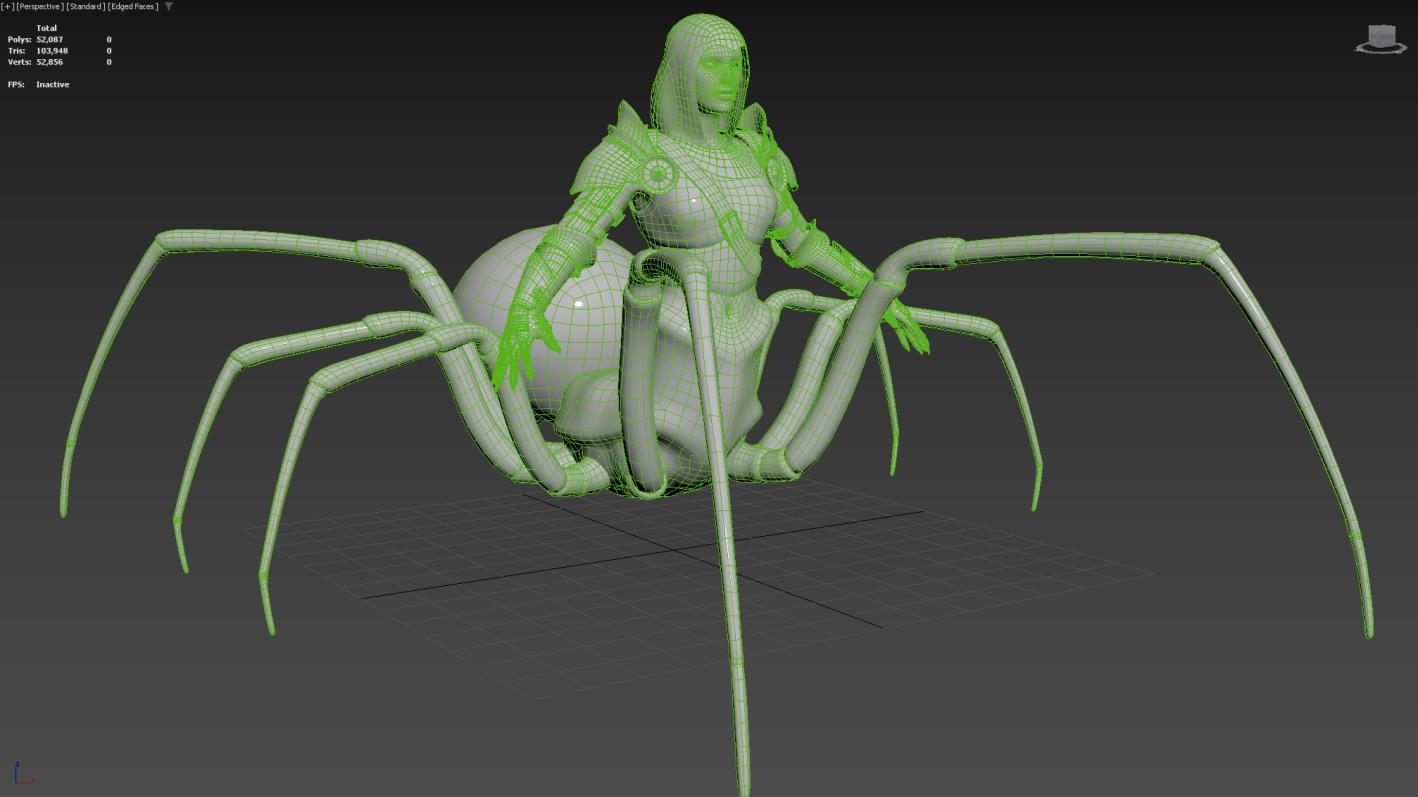
39. Full mesh retopology imported and viewed in 3DS Max.
With the retopology done, I moved onto the next stage of the project which was unwrapping the mesh.
Will go for a total of 3 UV maps:
- Body (Organic)
- Armour (Non-Organic)
- Eyes
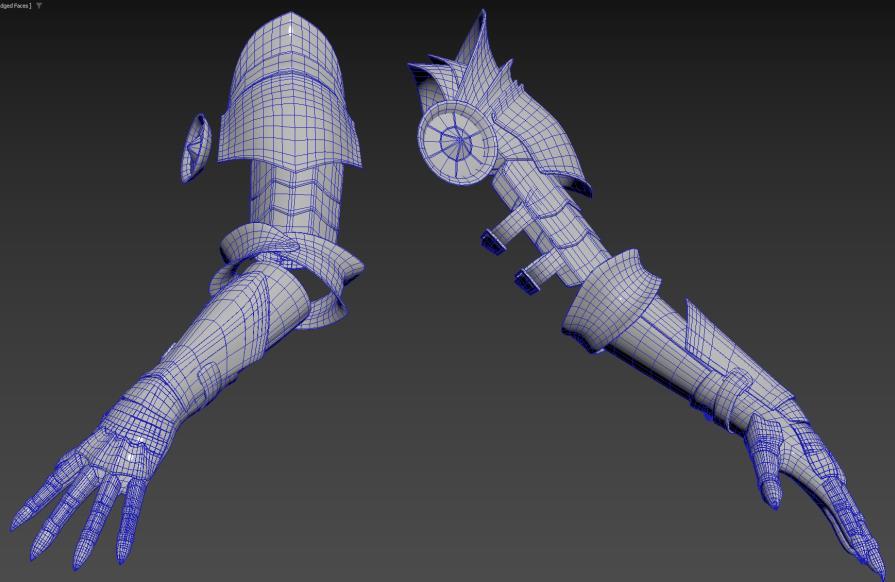
Base Mesh – Unwrapping
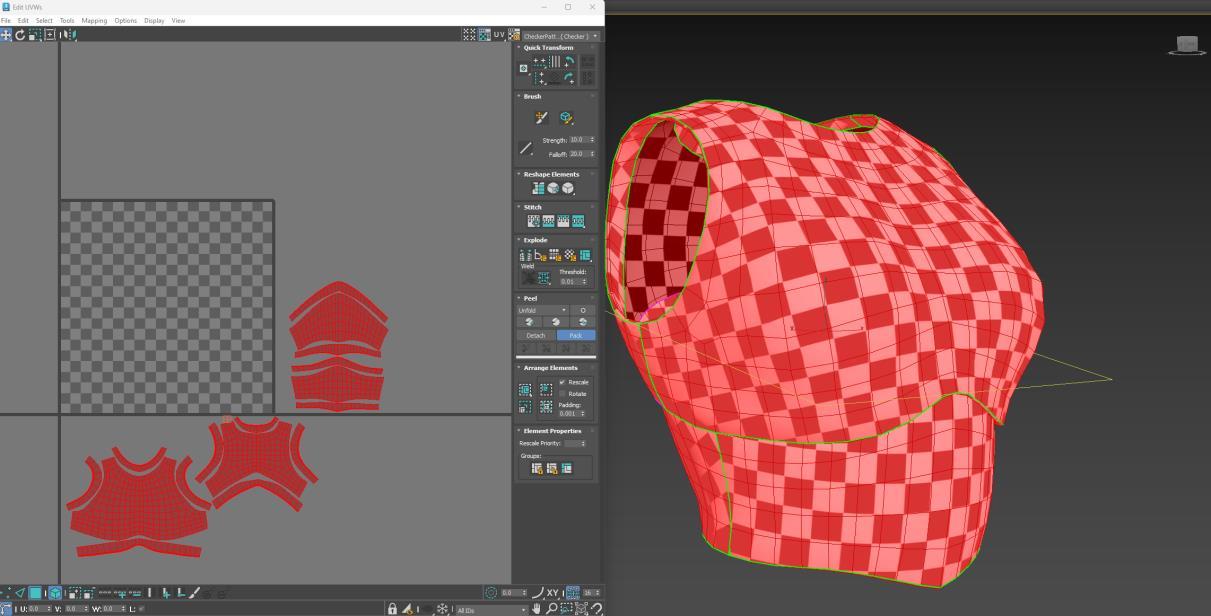
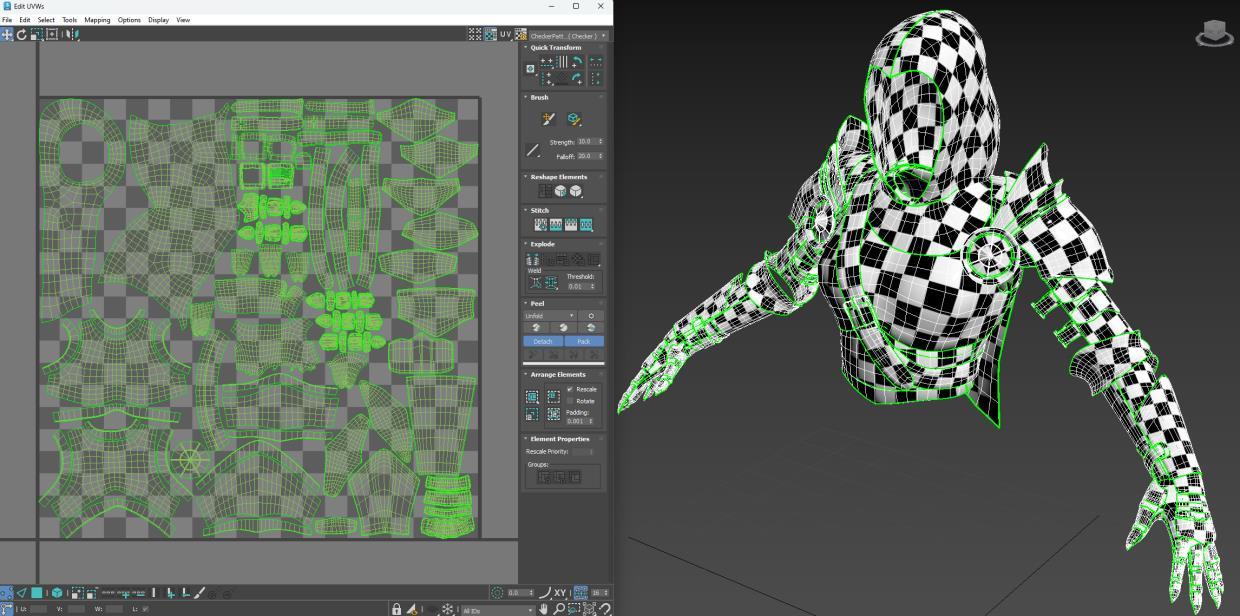
Unwrapped in 3DS Max and put them in their appropriate UV spaces. I chose to separate the body and armour into 2 UV Maps. Making sure that all parts that will have organic material stay on the same map, and the non-organic onto the other. For organisation and easy texturing.
Previously, I mentioned since I only had 2 types of legs produced, I only had to retop & unwarp them once each rather than retopologising and unwrapping 6 other legs.
Once I done that, I copied them as instances of each other and placed them at the exact XYZ coordinates of the high poly legs. And as they were instances of one another, I was able to stack them on top of each other for easy baking & texturing.

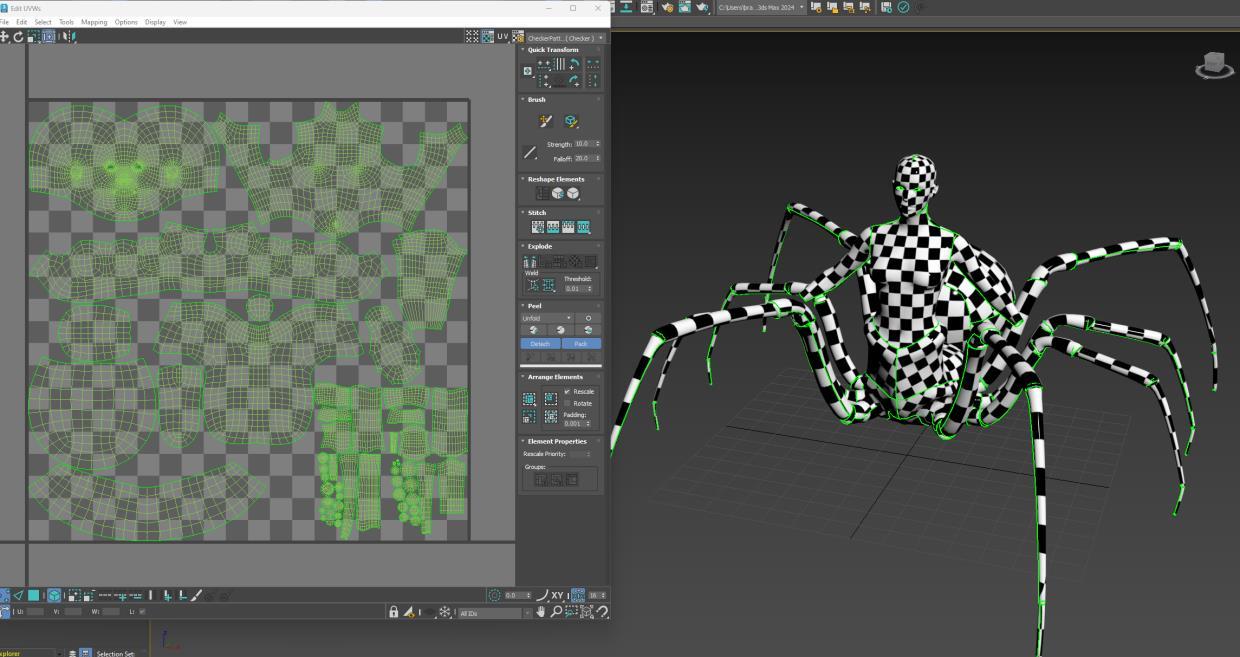
40. Early stages of Unwrapping.
Armour & accessories UVW Map.
Main body UVW Map.
Texturing – Armour & Accessories
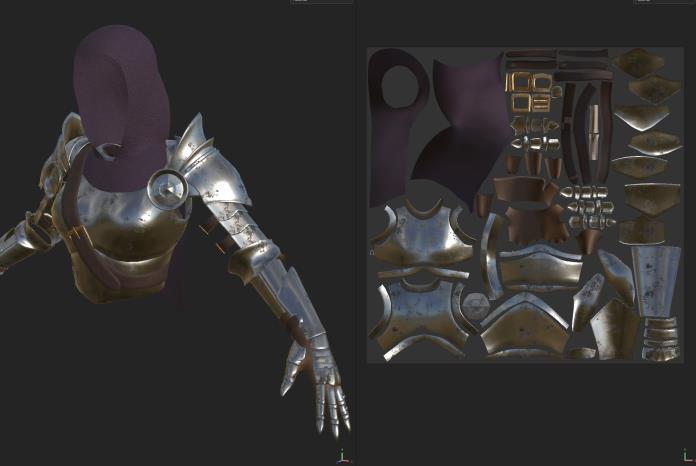
41. Early armour texture pass.
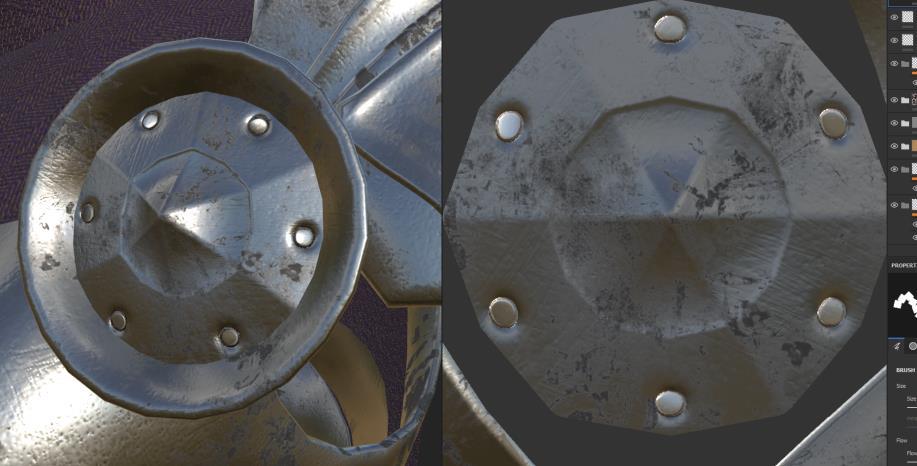
Added nails & grime for realism.
Imported armour into Adobe Substance Designer to do live texturing. Making it easier to alter and change certain parts of the materials if needed.
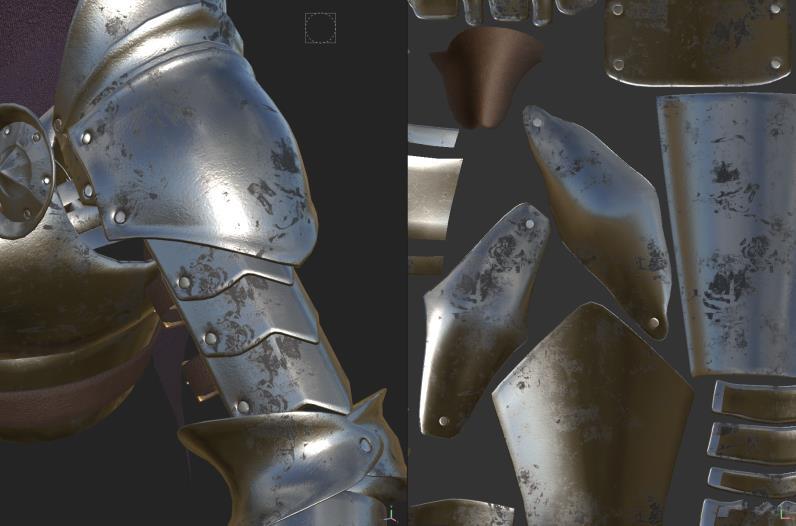
Used pre-existing materials such as “Metal Polished” that were already provided in Substance Designer but adjusted colour, roughness, scratches, intensities accordingly, rather than just dragging and dropping the materials and calling it a day.
Afterwards I added nails and grunge/grime to add more realism using alphas and nail brush. In doing this it adds more depth and character to the mesh, which is what I was looking for.
Upper arm surface texturing.

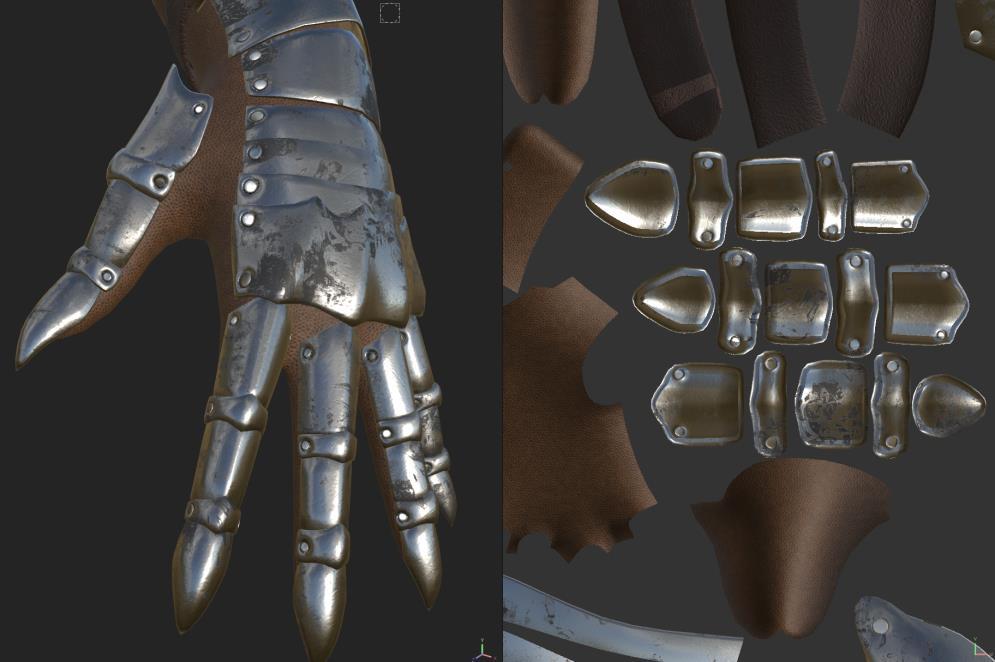
Gauntlet surface texturing.
Texturing – Armour & Accessories

Added glove stitching.
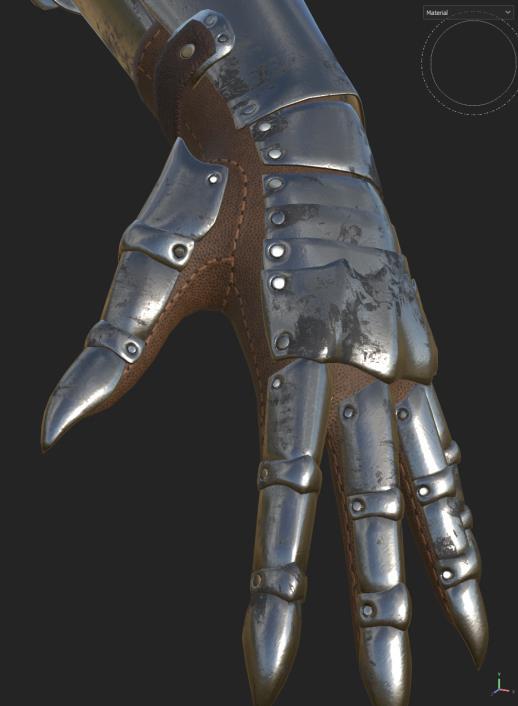
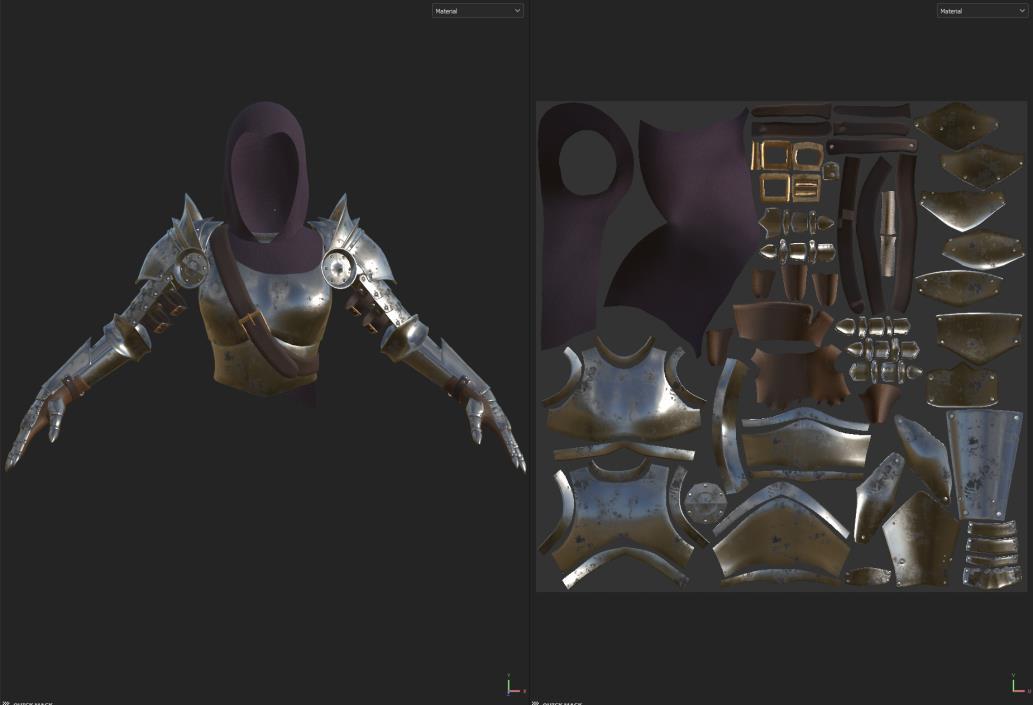
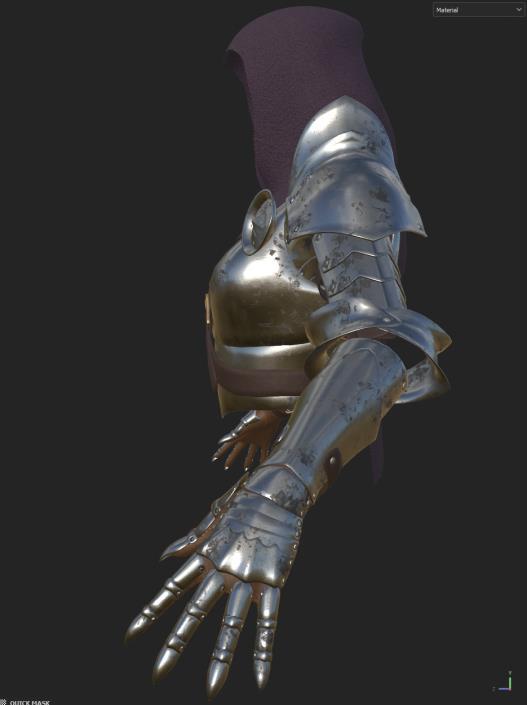
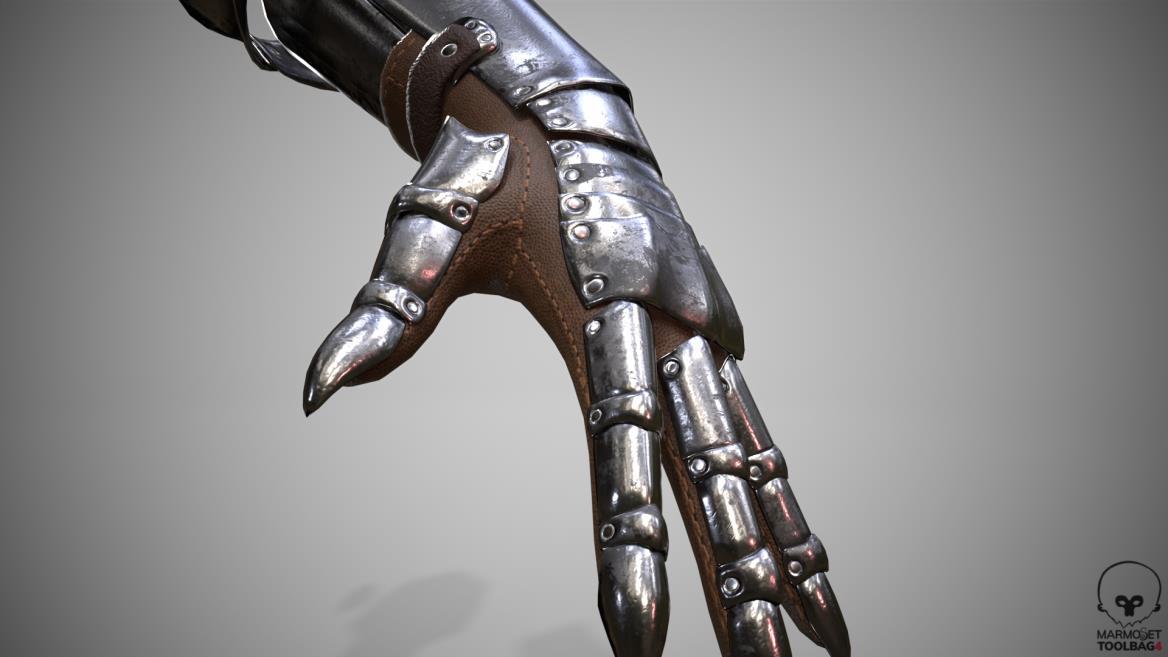
To finish the texturing for the armour, I went even beyond and used the stitching alpha and slowly went around the sides of the gloves and carefully went over the leather texture to create a stitching seam.
To make sure that the strokes weren’t messy or unsteady, I utilized the lazy brush tool.
Additionally, with adding the stiches, it helped hide some undesirable texture seams, which were caused in the earlier stages of production, when unwrapping the mesh.
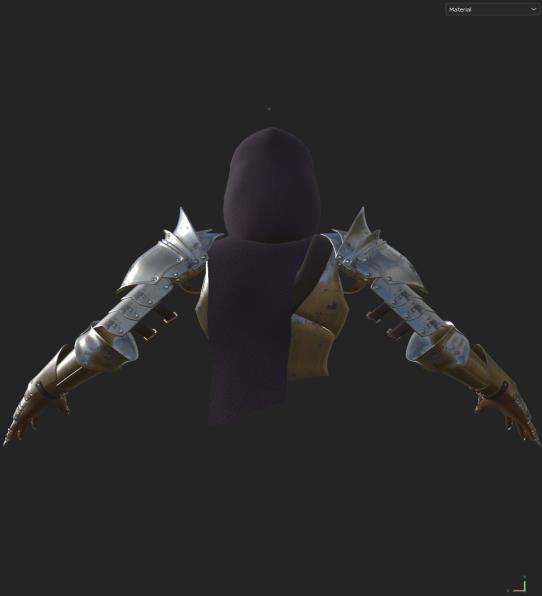
42.
Completed Armour Texture – Front View.
Completed Armour Texture – Side View.
Completed Armour Texture – Back View.
Texturing – Main Body
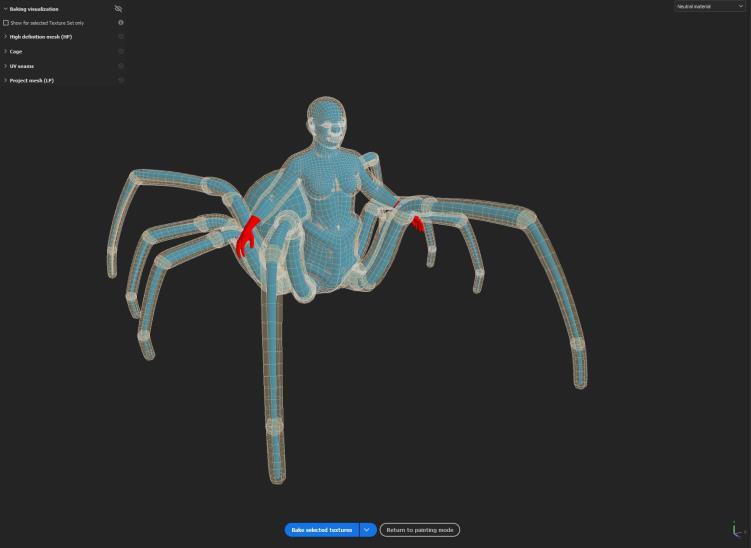
Used Substance Designer’s baking tool to bring all the details I sculpted back in Zbrush into the texture maps.
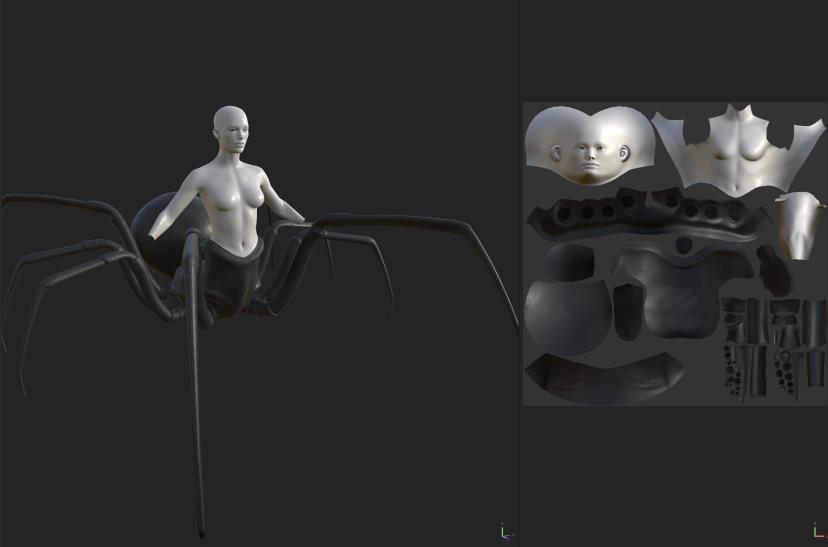
Applied a rubber material, but heavily changed its parameters and settings to roughly mimic a spider material.
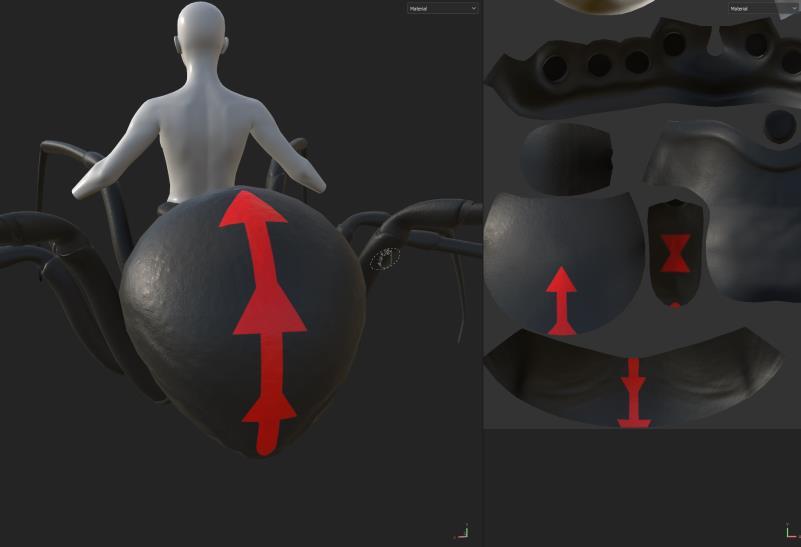
After which, I began using basic alpha brushes & shapes such as a triangle and rectangle to block out the pattern I wanted for the top of the rear abdomen.
What I learnt from studying black widows so closely, is that their famous “hourglass” pattern is underneath their rear abdomen whilst the top pattern can be all sorts of different patterns depending on certain breeds & genders.
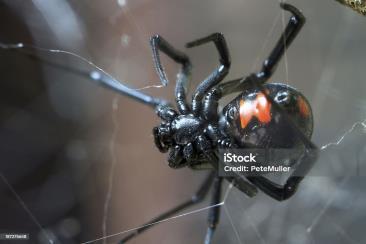
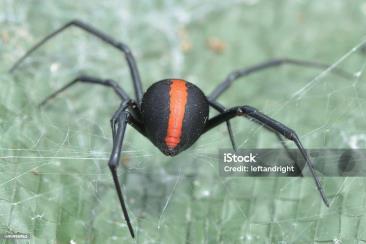
45. Fleshed out red marking using basic alpha shapes.
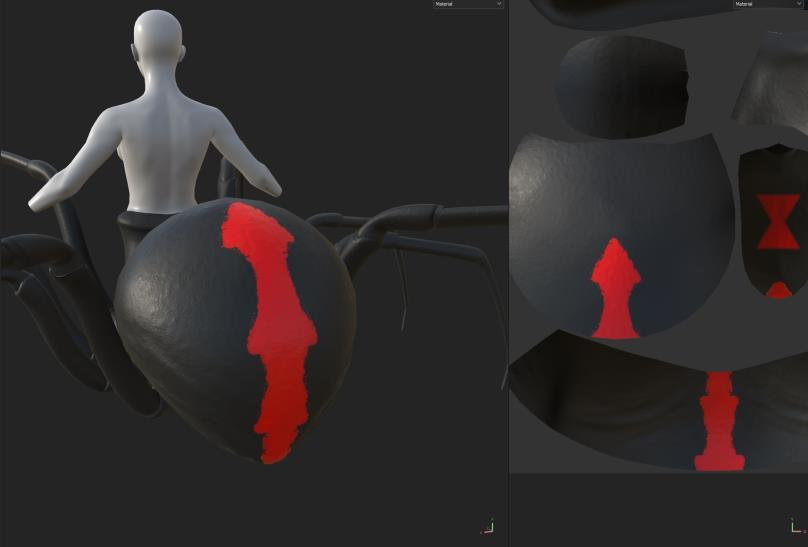
46. Used splatter brush to give edges an organic look.

Close-up references of black widow to visual guide on mimicking red markings.
43. Baking in Substance Designer.
44. Applying adjusted rubber material.
Custom hourglass alpha brush I made in photoshop.
Texturing – Main Body
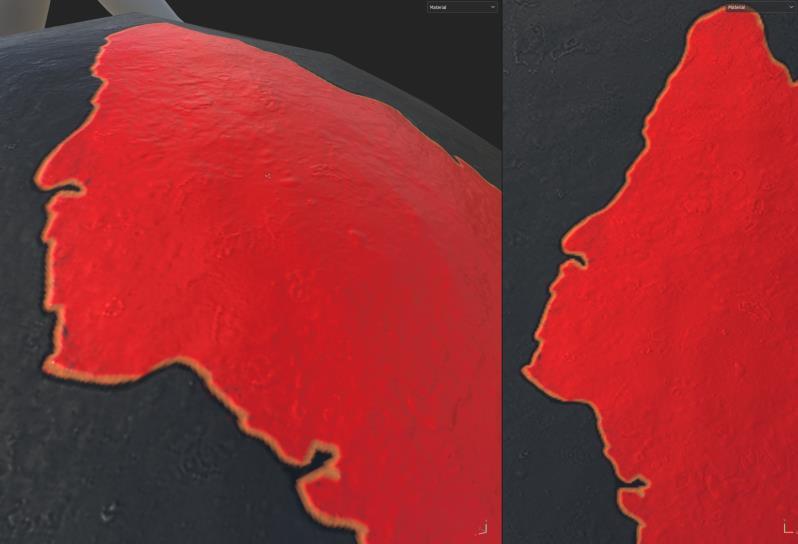
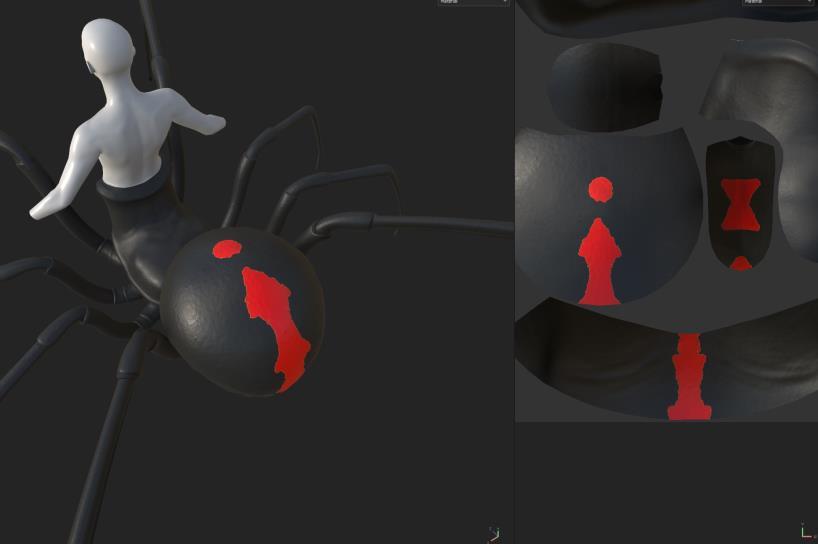
Adjusted the edges of the red markings and erased any rogue spots that were caused by the splatter brush. Afterwards I used the standard paint brush to draw an orange outline followed by a black outline to give the marking a little more 3D depth, to look less flat.
Additionally made the hourglass marking more organic, using the same technique. Finishing it off with a small spot at the tip of the upper marking for added flair. In doing this, it resembles an upside-down exclamation mark, to warn others of “Danger!”
Once the spider half was textured. I moved on to the human half. As the baking went very well, I just had to apply a pre-existing skin texture with a few minor tweaks.
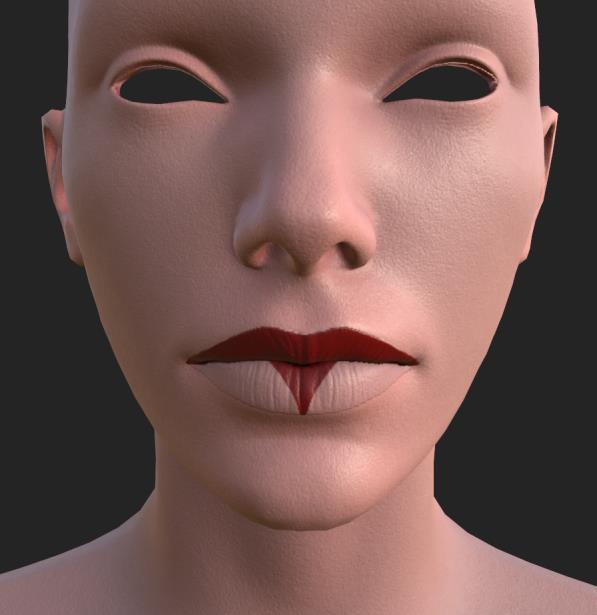
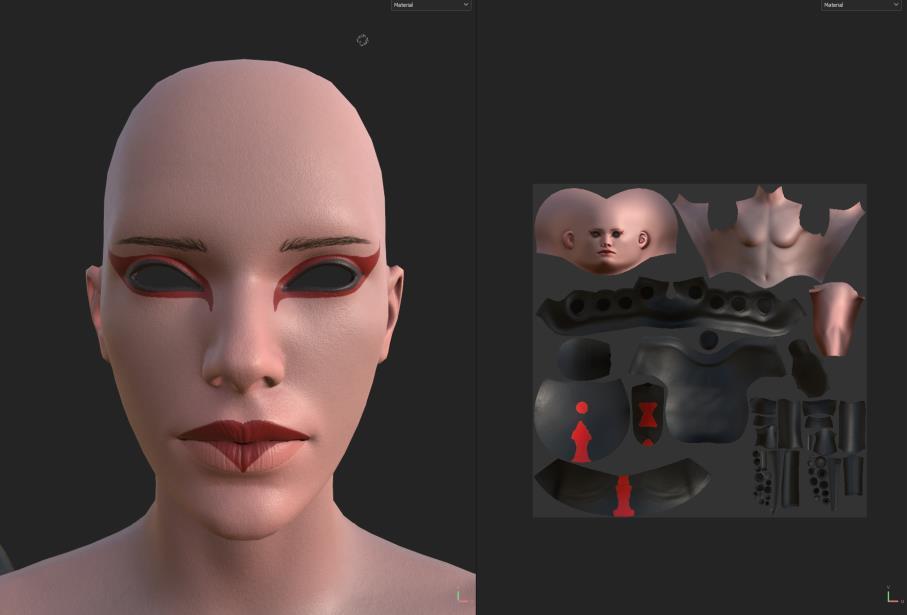
Used standard brush tool to paint cosmetics (Enabled normal on the brush to slightly raise the lips out to make them pop).
Though she’s a monstrous creature, I still wanted her to have elegance.

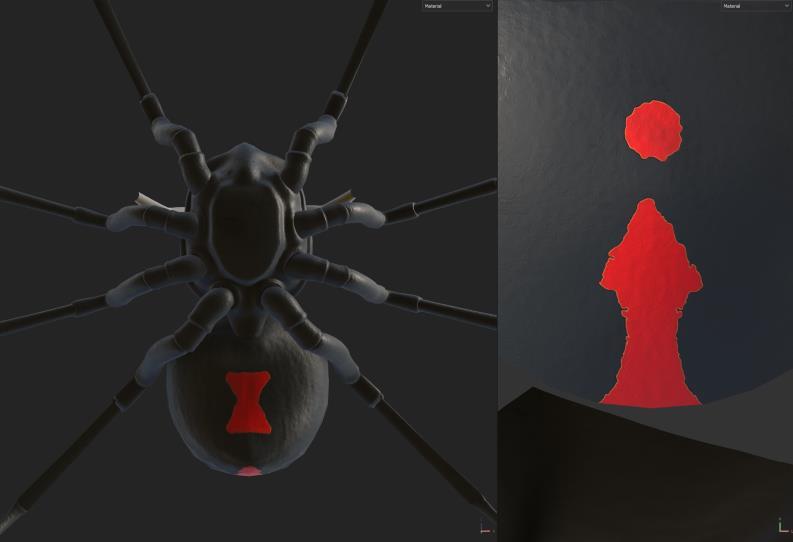
47. Applied outline for more depth. Finished red marking – Top View.
Finished red marking – Bottom View.
48. Early skin texture pass.
49. Finalised skin texture with pigment correction.
Creation Of The Eye
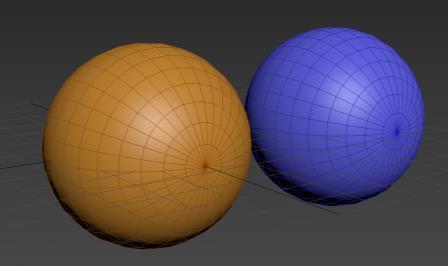
Created 2 primitive spheres in 3DS Max. Orange will be the Cornea &
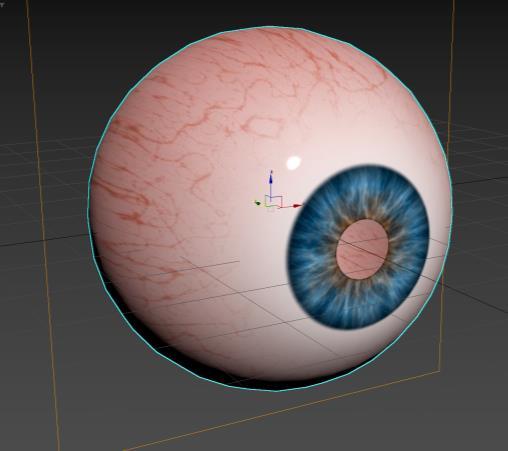
I used a combination of different video tutorial to learn and test different ways of modelling and rendering an eyeball and making it realistic as possible.
(Exhibit A: “Modelling an Eyeball” – 3DS Max by Clint DiClementi).
https://www.youtube.com/watch?v=eb6sS6YXpc0
(Exhibit B: “Eye Texturing Tutorial” – By Abe Leal 3D).
https://www.youtube.com/watch?v=NjhRRthbpBQ
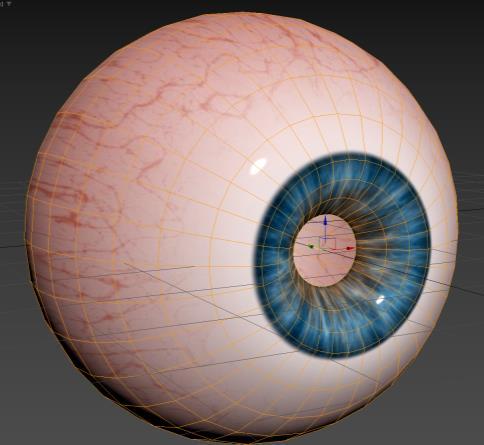

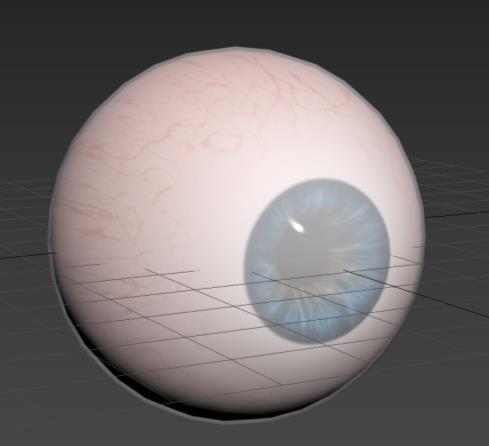
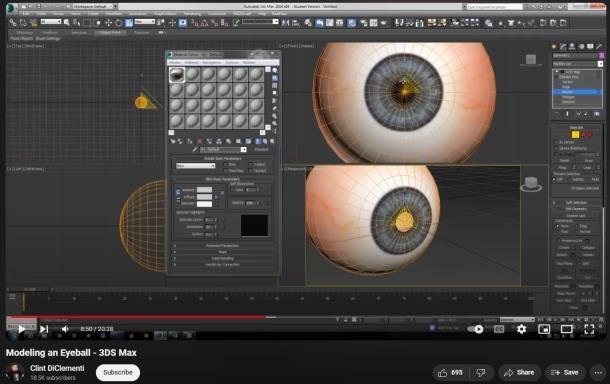
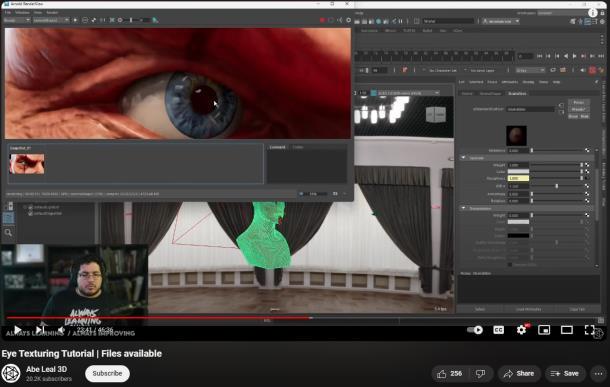
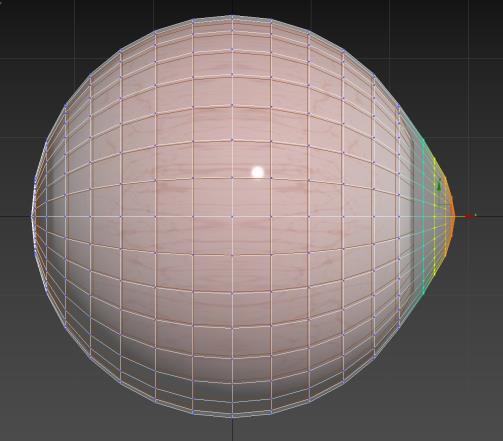

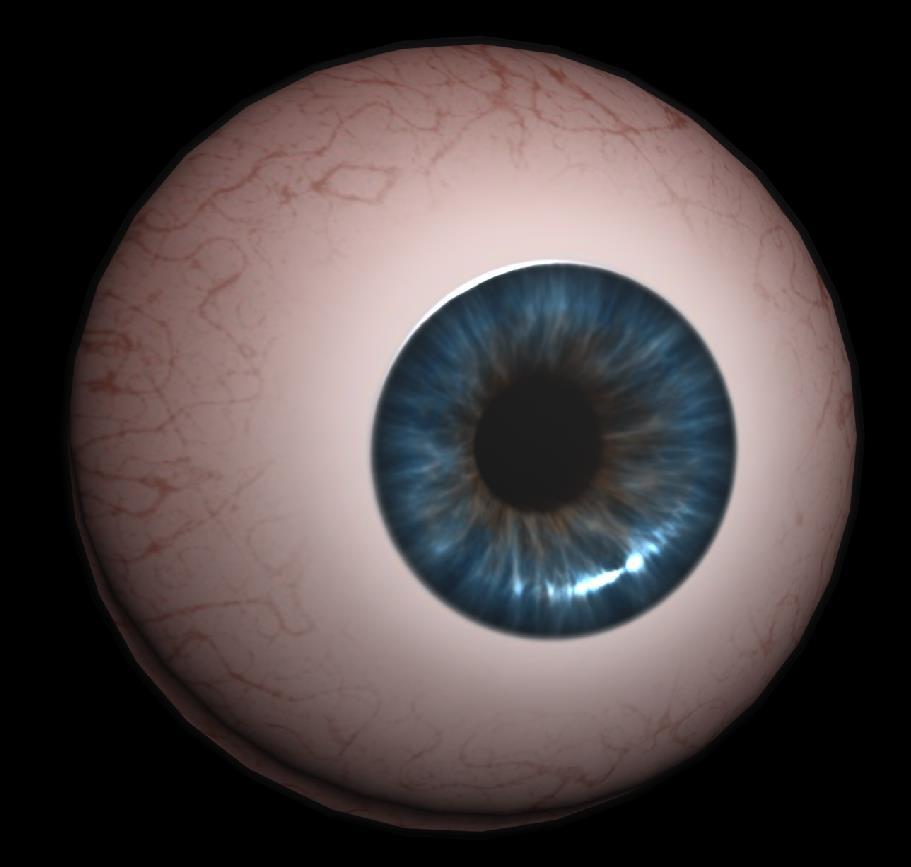
Exhibit A.
Exhibit B.
50. Applied unwrap UVW modifier.
blue will be the Vitreous.
51. Added 3D depth to Vitreous.
52. Applied Cornea with transparency & used soft selection to pull out. Eyeball 3DS Max render.
Creation Of The Eye
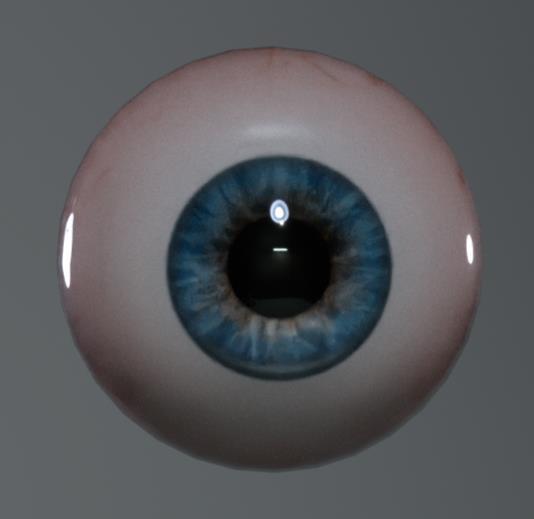
Exported from 3DS Max & rendered in Marmoset Toolbag 4 (with ray tracing).
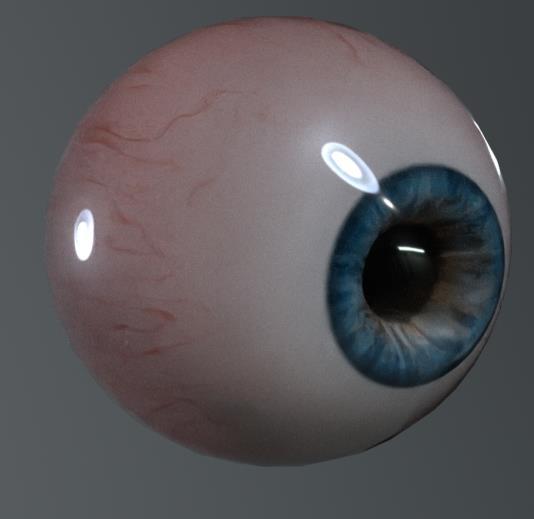
Not happy with the quality of the eye render in 3DS Max I exported the eye I made to test rendering in Marmoset.
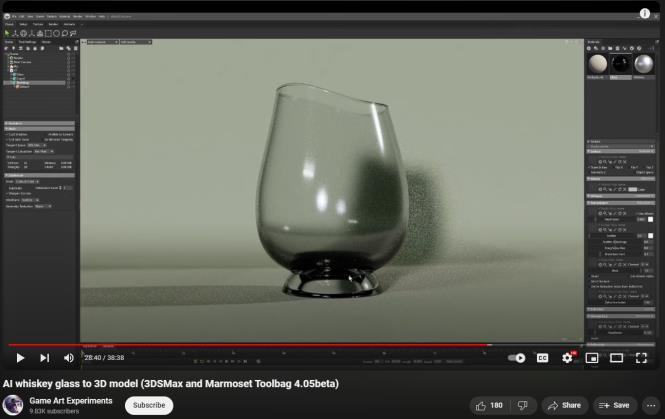
Since the Cornea of the eye reflects like that of clear glass, I found a perfect video showcasing how to create a custom glass material and render it with ray tracing, which gives it a realistic, organic and somewhat of a wet look when light hits it.
“AI Whiskey Glass To 3D Model” by, Game Art Experiments.
https://www.youtube.com/watch?v=xaL _YhtvyGQ
Adjusted eye texture by changing iris colour to a more intimating tint.
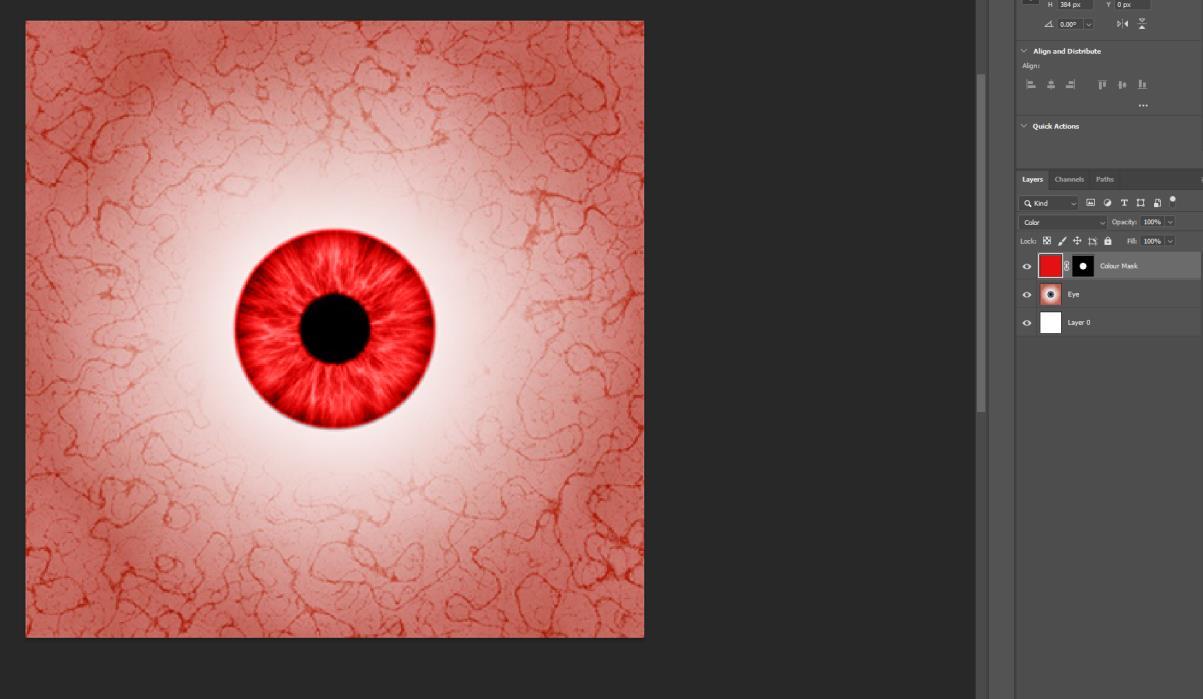
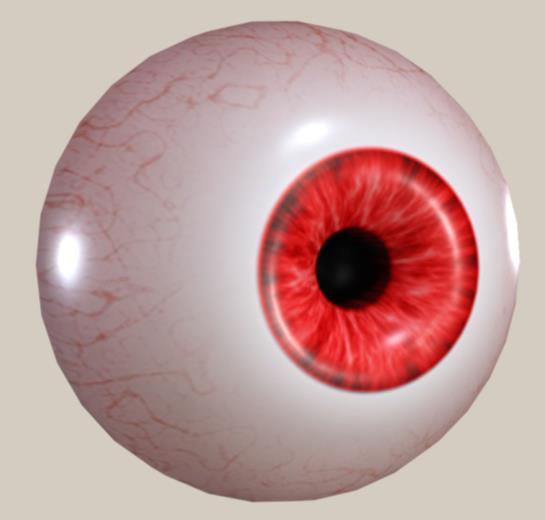
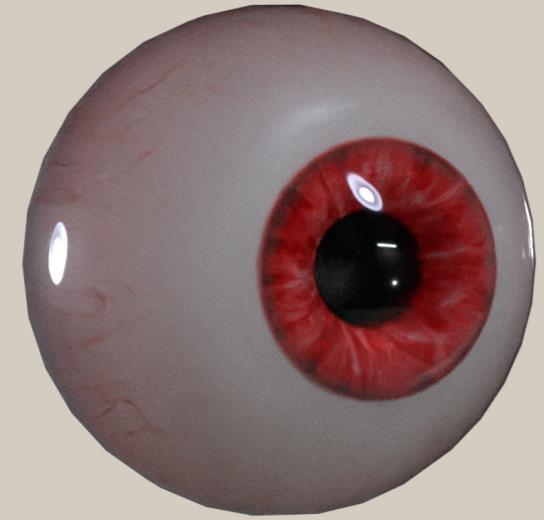
Eyeball with updated texture map – (With & Without Cornea).
Rendering Full Mesh
53. Imported full mesh into new Marmoset scene.
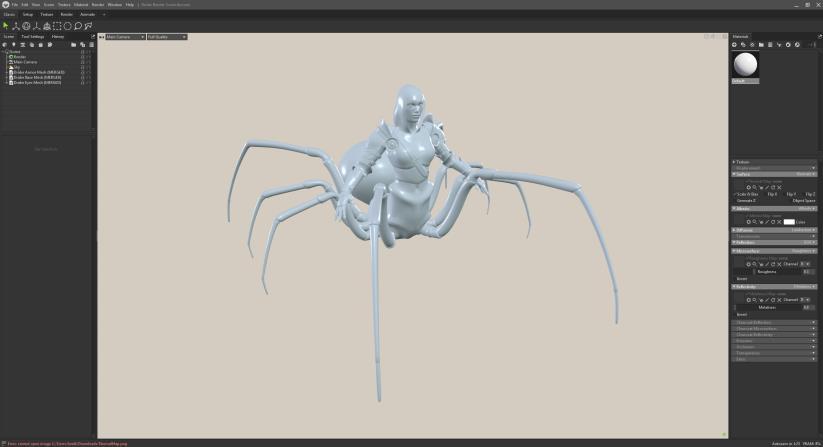
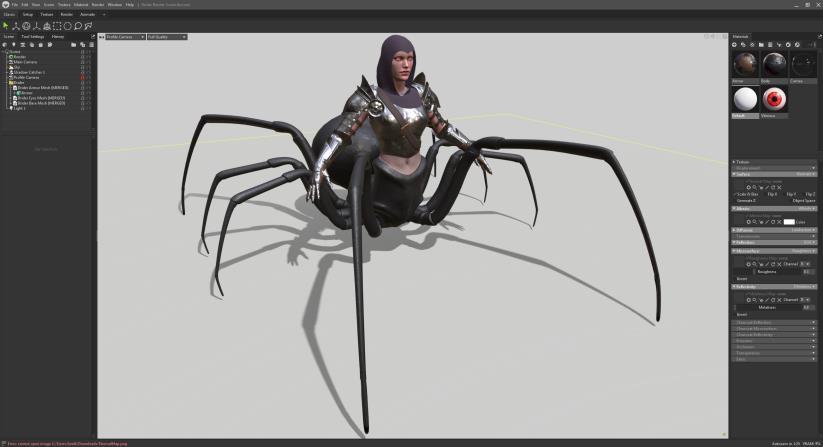
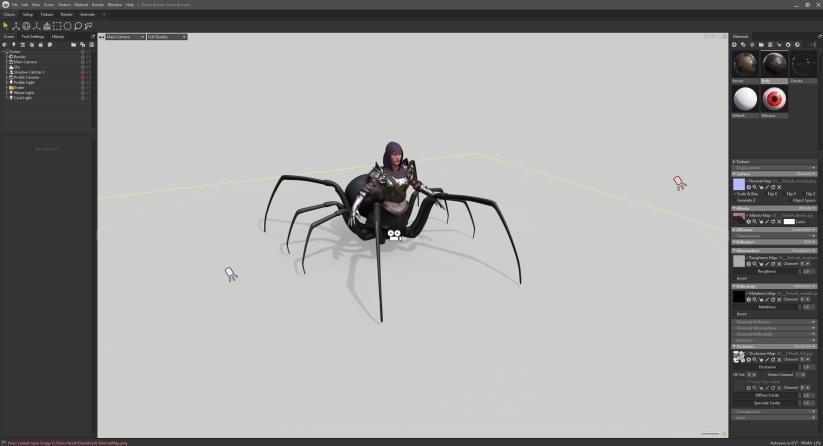
Happy with the outcome of the eye, I imported everything into a new Marmoset scene and began setting up camera, lighting, and rendering parameters.
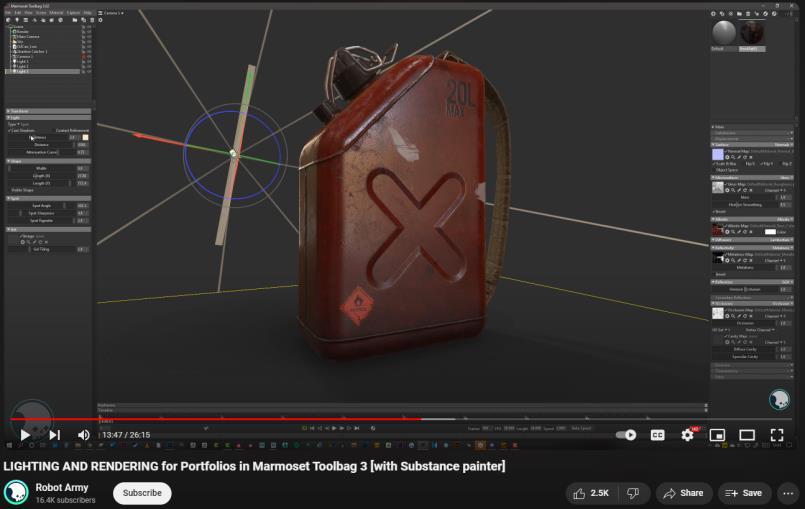
I found Robot Army’s video on an in-depth guide on how to setup a rendering scene in Marmoset for maximising your portfolio insightful and extremely helpful in showcasing your model professionally.
“LIGHTING & RENDERING for Portfolio in Marmoset Toolbag 3” – By Robot Army. https://www.youtube.com/watch?v=94smJykQ0mM
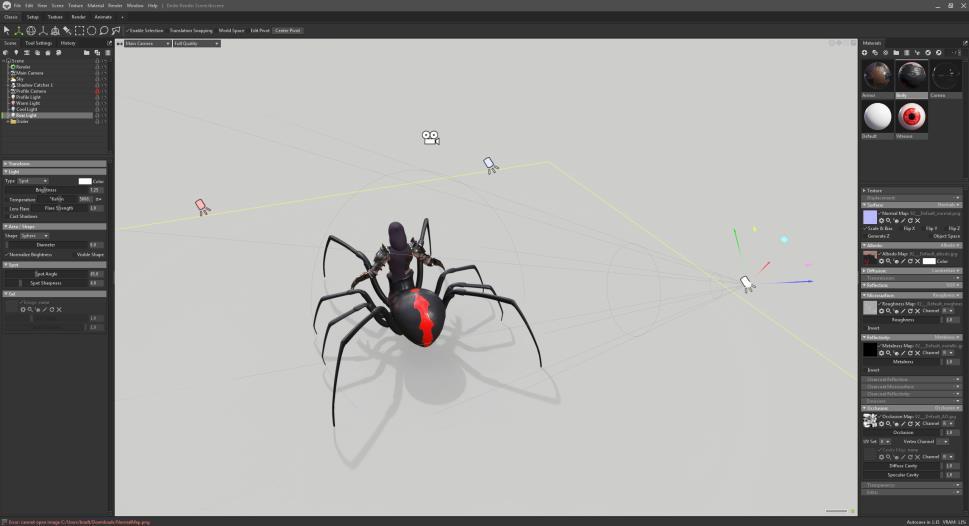
background
54. Applied texture maps with adjustments.
55. Added main camera, warm & cold lights for rendering.
56. Added
light to highlight front edges and make them pop.
Presentation – Beauty Renders (Full 3D Model)
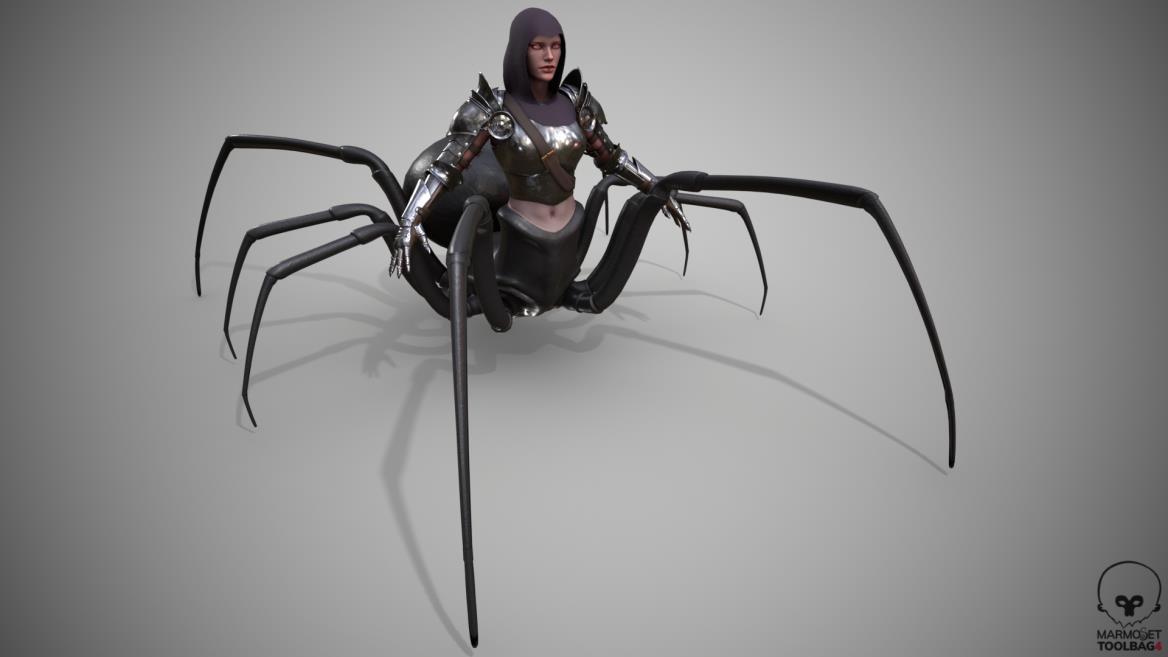
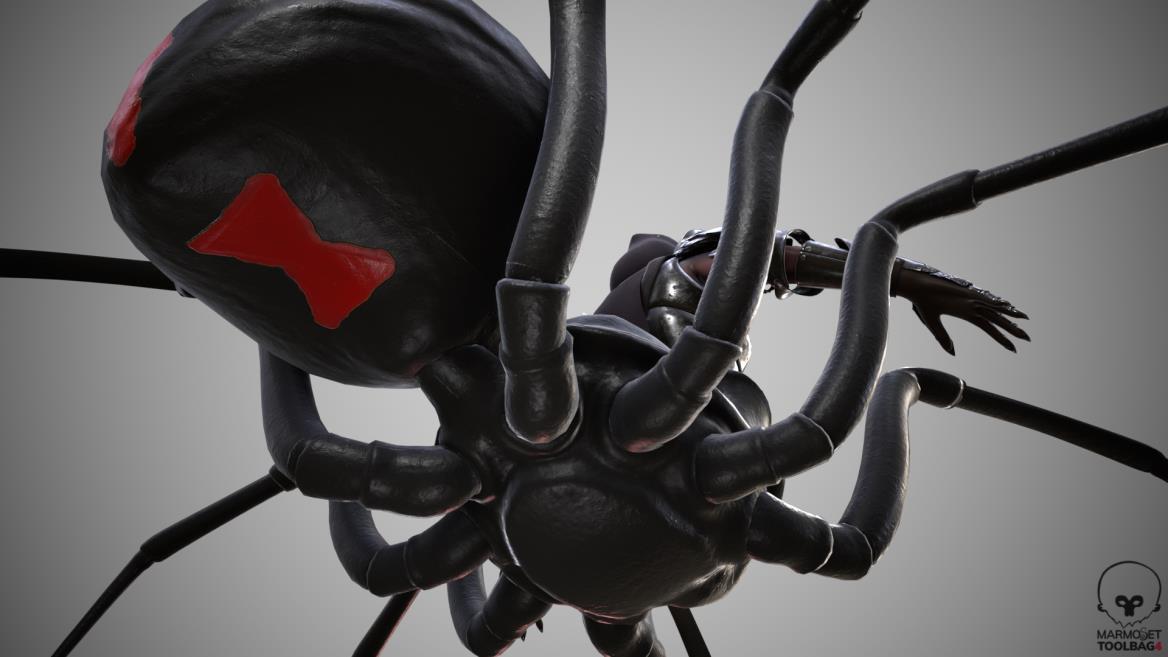
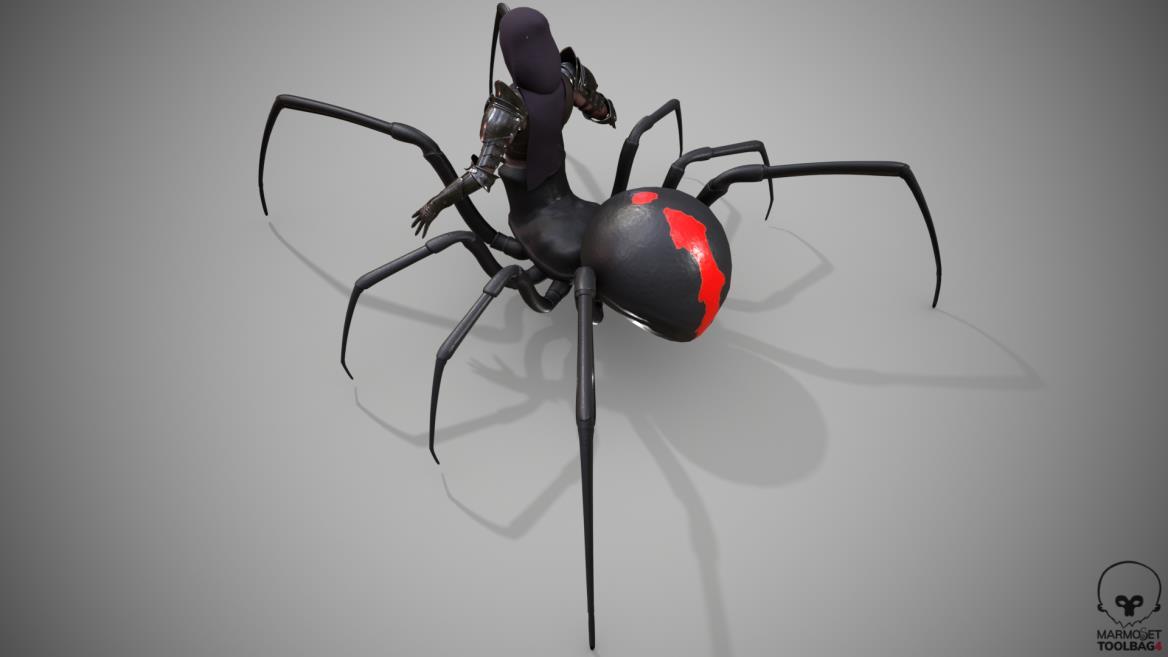
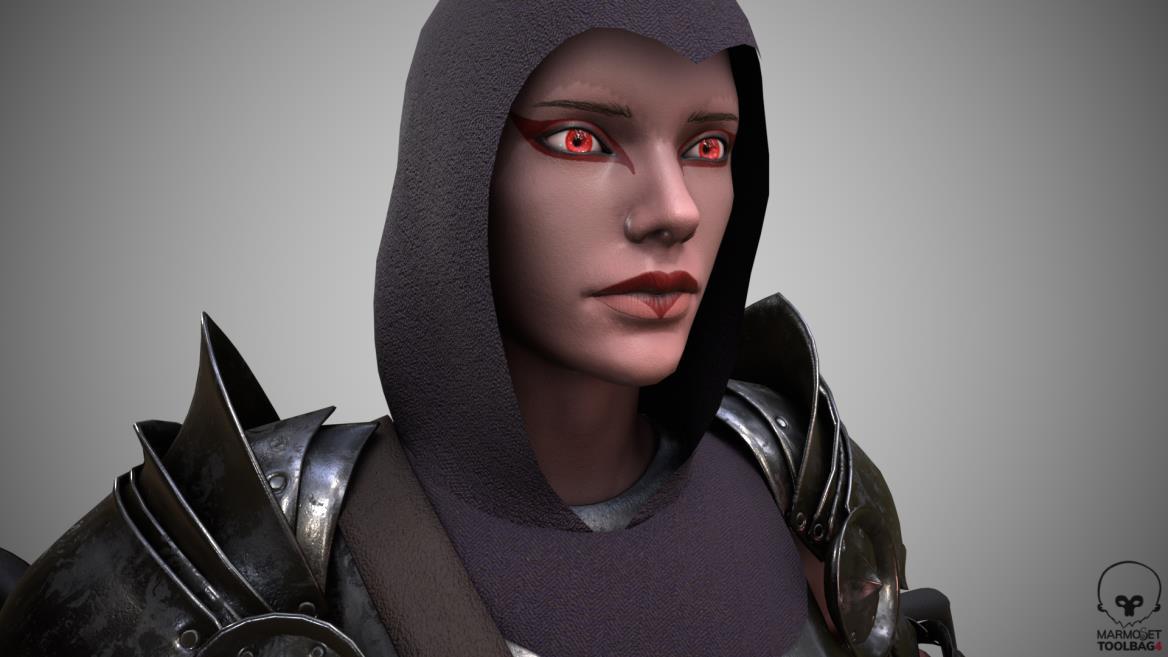
Presentation – Beauty Renders (Face)
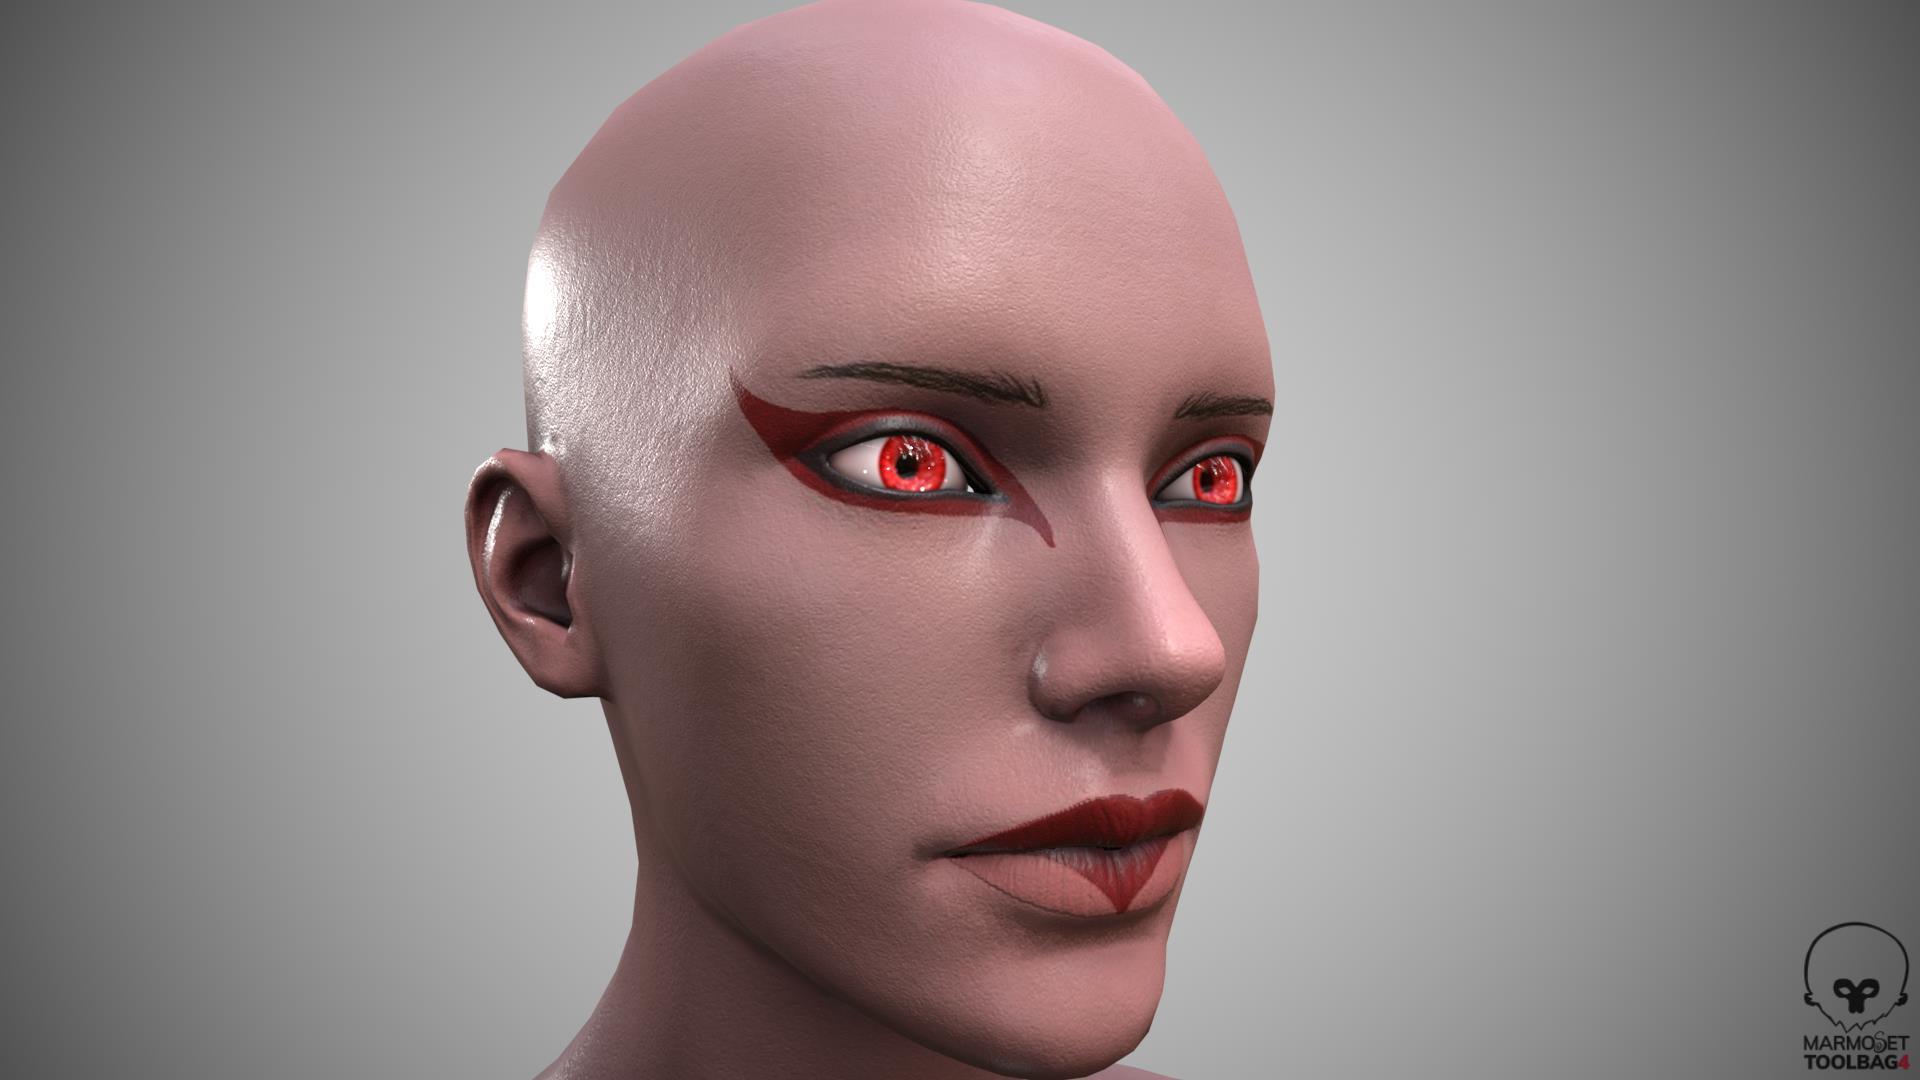
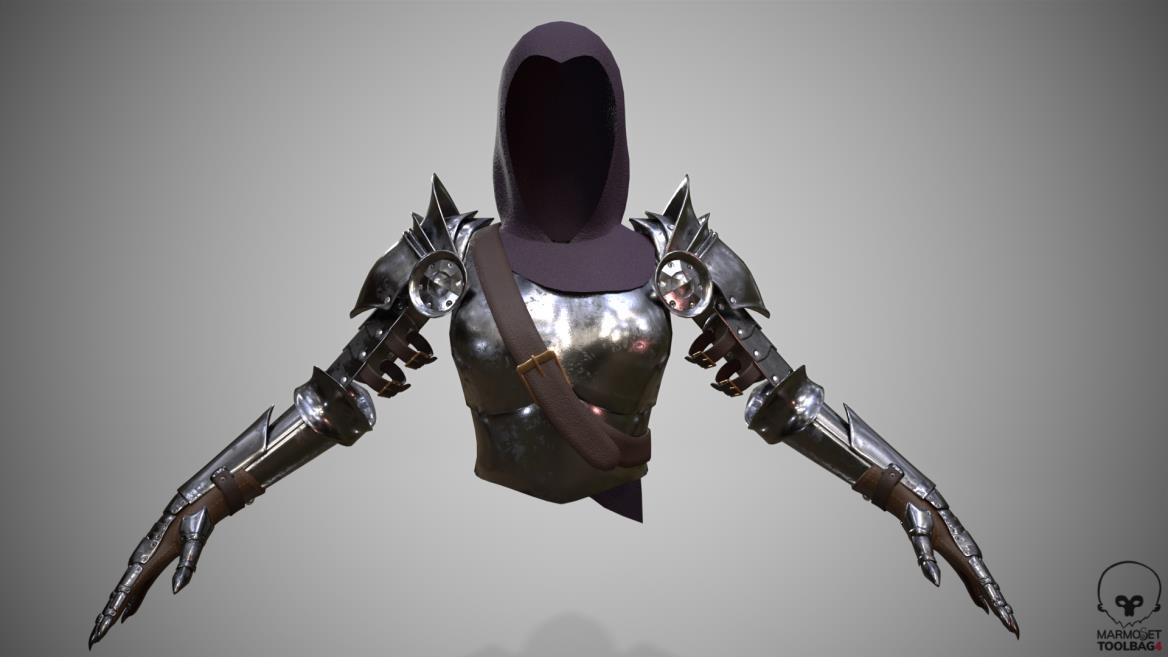
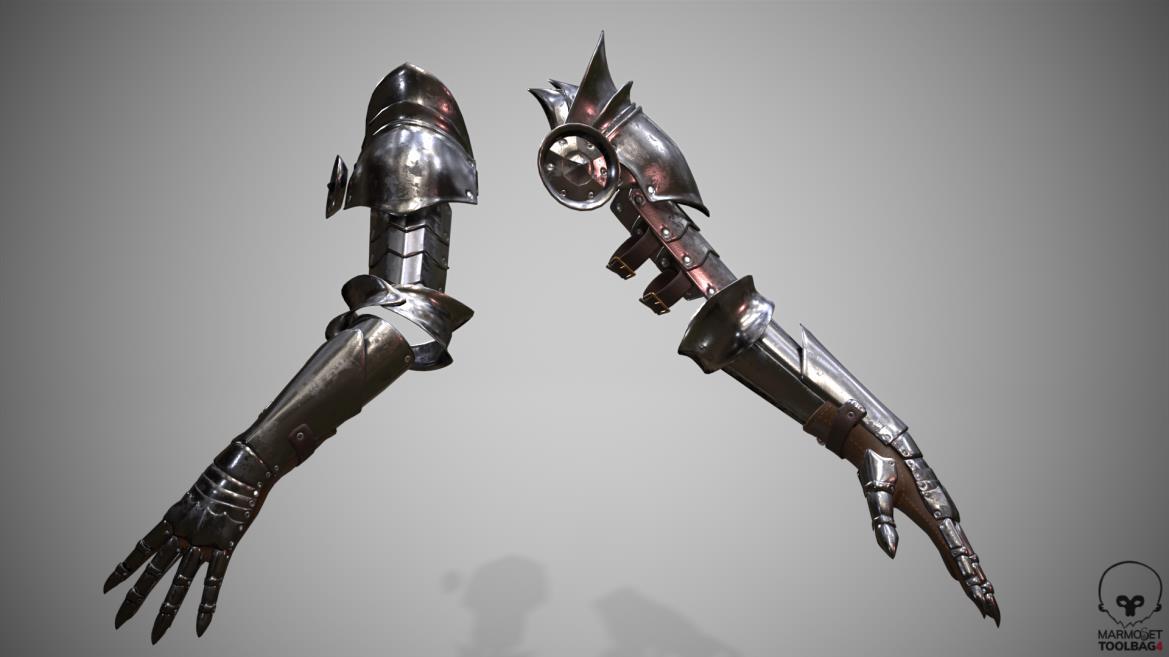
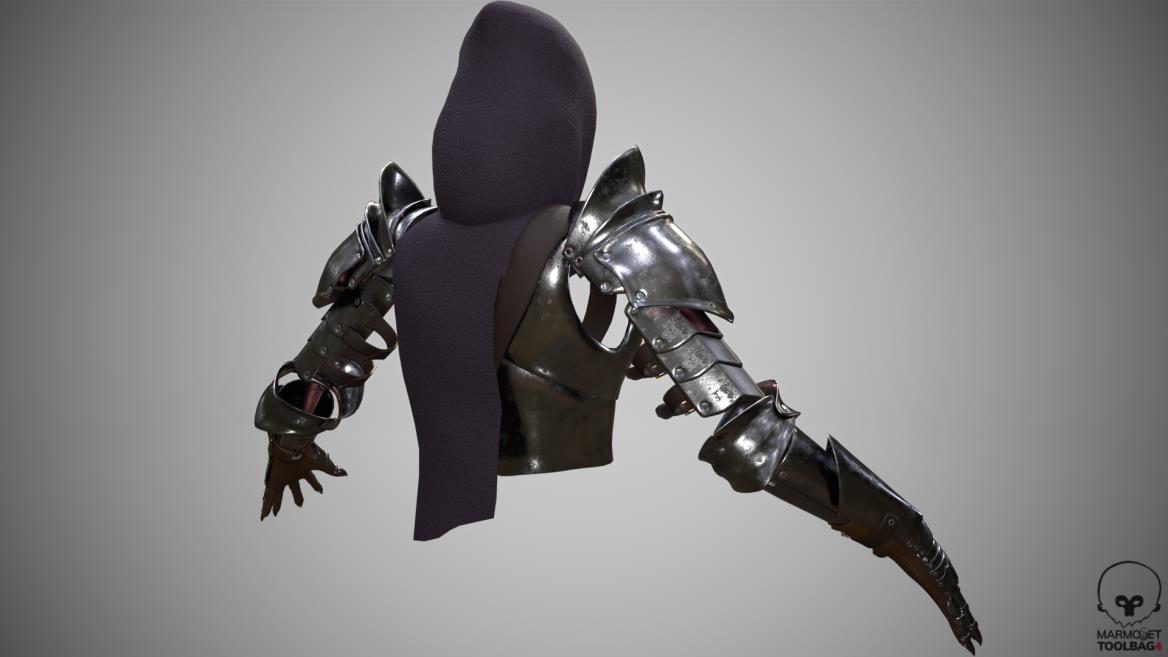
Presentation – Beauty Renders (Armour)
Conclusion
This project was a challenge and a huge step up from what I have attempted and achieved before. I was sceptical and doubted myself in learning Substances Designer, but I was able to learn this software in the end and found the process relatively smooth and refreshing. The texturing turned out to look great, when considering it was my first time properly getting to know and learn the software. Substance Designer will definitely be part of my standard workflow moving forward with my project. Alongside that the anatomy and form of the spider half turned out amazing, especially when comparing it to the original attempt I did back in my 2019 project. Though the whole process made me feel squeamish, it taught me that in-depth research into anatomy, bodily proportion, and visual representation really goes a long way in developing intriguing and complex creatures. One thing that I will aim to improve on for future projects is being more professional with my unwrapping and using my UV space efficiently. I felt that I didn’t spend as much time as I need to during the unwrapping stage. I know that if done right, the results in baking and texturing onto a clean & pristine UV map will produce amazing work.
Elements I didn’t dedicate enough time on were the fabric texturing and the overall design of the cloak. The design I went for ended up looking flat and very basic, and applied with a fabric texture it still didn’t look that great. I feel that sculpting creases and folds during the ZBrush stage would’ve done the it more justice. Other parts that I should have spent more time on were the leather straps & breastplate. One thing that I noticed near the end of the project is that the straps lacked holes for the buckle to go through, which ruins the sense of realism I was going with for this project. And for the breastplate, though the texture is good, and it showcases realistic metal work, one thing that I should have added was a seam on its side to show that the breastplate was being held together by hinges & nails, which would have added more realism to the functionality of the armour.
To make this project portfolio ready, I will be going back to make a few key improvements. Firstly, a complete overhaul on the cloak where I’ll add more depth and 3D elements to it, so that it doesn’t look quite flat, as well as implanting a few hair cards so that the head isn’t as hairless as it is currently. Secondly, I will be wanting to give this creature a weapon, for a bit of flair. I’m leaning towards a bow and arrow, and having the arrows made from hard/crystalised spider webbing, which I think would be very fitting for this creature. Thirdly, new texture pass, I’m a firm believer that there is no such thing as “the perfect model” and there’s always something to be improved on. Finally, giving this character a rig, so that I can animate and pose it for scenes, which will allow me to create much more intriguing shots as well as give the character more life.
Despite the minor flaws with the cloak, straps, and breastplate, I’m confident I succeeded in what I was aiming to achieve. Revamping its art style whilst giving the desired anatomy and theme. I also learnt a great deal of new and essential workflows, which I’ll use in many upcoming projects. I feel I have greatly improved thanks to this project, and now it’s time to improve even further and reach new heights.