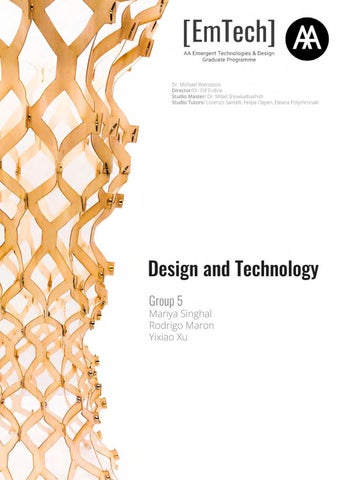
Design and Technology Group 5
Design and Technology 2021
Group 5
1
Contents Abstract
3
Introduction
4
1.Readings from BootCamp
4
• Experiment 1 • Experiment 2 • Experiment 3
2. Designing a combination component
6
3. Relative parametrization
8
• Aim • Observation • Conclusion
4. Curvature Analysis
9
5. Computational logic
10
6. Physical fabrication
11
7.Unit component behavior vs Branch assembly
12
8.Assembly of revolutionary surface
13
9. Structural Analysis
16
10. Conclusion
17
Design and Technology 2021
Group 5
2
Image 1. Inside of revolutionary surface.
Abstract The aim of this experiment was to design a revolutionary surface with a concave curvature. This experiment was based on range of computational form findings and analysis methods generated from three different preliminary experiments.The tensile behavior and the stress limits of different materials like plywood and veneer wood, was analyzed through variation in geometrical form and physical fabrication. Consequently, a combination of structural, morphological and performance related parameters could be set. A combination working component was designed that displayed the uni-directional tensile property of veneer wood. The reduction in material helped in creating a flexible component.This facilized the three- dimensionality of the component that helped in achieving a doubly tessellated surface. To establish a relationship between component geometry and curvature, experiments considering various parameters like the scale, thickness, and depth Design and Technology 2021
of the component were performed. Through the experiments it was concluded that the component showed a distinguishable change in curvature, through which a revolutionary global surface could be achieved. This information was translated into the digital medium and a final design prototype was generated. Through physical fabrication of the design prototype it was discovered that revolutionary surfaces with both convex and concave curvatures could be formed. To achieve the global surface with a concave curvature, different joinery combinations were experimented upon. Through material and geometrical differentiation, our final design prototype was achieved. Structural behavior of the component was analyzed on the Karamba 3D software to analyze various stresses and strain on the system. Material limitations were discovered that opened new avenues to improve the efficiency of the system.
Group 5
3
Introduction After the experiments conducted in the preliminary phase. The efficiency of component based on the bending properties of veneer wood in different geometrical shapes was analyzed. The main aim of the experiment was to design a combination component taking forward the principles of bending properties of veneer wood, creating a combination three-dimensional component. To understand the different curvatures attained by varying the thickness, scale and depth of the component was the initial step.
Establishing a curvature analysis was a very crucial stage of the experiment. As the relationship of curvature to varying parameters of the component helped us define a set of parameters to achieve the desired global surface. Experimenting on different joinery combinations helped us further explore the behavior of the component as an individual, and as a system. Our aim was to achieve the concave curvature on the revolutionary global surface.
1.Readings from BootCamp Experiment 1 Aim
Helpful observations
To achieve a transition curved surface, by using different variations of triangular and hexagonal geometry.
•
The three-dimensional nature of the component added stiffness and depth to the component.
•
The flap joinery system, helped in creating an efficient face to face joint system.
Setbacks The designed component had a relatively planar geometry to achieve the desired curvature. Hence, limitations of material - veneer wood were observed in achieving steep curvatures. More explorations on the behavior of component geometry could have been carried out to achieve the desired result.
Component
Global Surface
Image 1. Double layer component with depth and flaps for face to face connections.
Design and Technology 2021
Group 5
4
Experiment 2 Aim
Helpful observations
To achieve a transition surface, by using bending properties of veneer in the geometric component.
•
Setbacks The designed component displayed an exceptional behavior as a unit component. Since, the component was extremely flexible, it lacked stiffness when it was fabricated together in a system to achieve the global surface. Changing the scales at different curvatures would have helped in achieving better results.
The use of property of veneer wood helped in obtaining the desired bending. Loosing planar behavior by reducing the material use in the component helped in achieving various curvatures.
Component
Global Surface
Image 3. double layer component with depth but no stiffnes, disecting the component to understand its properties.
Experiment 3 Aim
Helpful observations
To achieve a revolutionary surface, by using a doubly tessellated system of triangles as the geometric component.
•
The logic of double tessellation helped in achieving the revolutionary surface with concave curvature.
Setbacks The limitations of the material plywood in achieving the revolutionary global surface were observed. The joinery system lacked efficiency in overcoming tension created along the global surface.
Component
Global Surface
Image 4. Revolutionary surface based on double tessellation system.
Design and Technology 2021
Group 5
5
2.Designing a Combination Component 1. A combination component was designed based on the following parameters
2. Digital Translation
•
Loosing the plane for gaining more flexibility
The designed combined component was formulated in the digital by using Kangaroo as a plugin.
•
Combining two geometries to have strength in the bi-component
Different location of anchor points were analyzed to achieve the desired curvature.
•
Decreasing connection points
•
Using the property of veneer material to achieve curvature
Some anchor points were fixed in all directions. Others were fixed only in XY plane to achieve the joinery flap.
•
Using the logic of triangulated tessellations
•
Achieving depth in the component
The loads assigned to the component were self gravitational load of the material and the assumed adjacent loads at the joinery locations.
Pinching the edges for gaining curvature and connect other elements of the branch
Flap for making a face to face connection
Flap for making a face to face connection
Decreasing connection points Achieving double tessellation through triangulation
Image 5. Designing the new combination componet.
Design and Technology 2021
Group 5
6
Image 6. Fabricating the combination component by pinching in X-Y plane
Designed component fabricated in veneer wood
Designed component in digital medium
Image 7. Pseudo code for the digital model of the component.
Image 8. Anchoring the geometry to achieve the designed component in the digital medium.
Design and Technology 2021
Group 5
7
Lenght = 14cm Thickness = 0.5cm
Lenght = 14cm Thickness = 1cm
Lenght = 14cm Thickness = 1.5cm Depth = 1.2cm
Lenght = 14cm Thickness = 1cm Depth = 1cm
Image 9. The curvature-slope graph shows that the curvature of the component has a direct relation with its thickness and size.
3.Relative parametrization Aim To observe difference in curvature of the geometry of combination component by varying scales, thicknesses and depth as relative parameters. The behaviour was observed in an individual component and a branch connection of two or more components. Observation A curvature- slope graph was plotted to observe the gradual increase in the curvature of the component with increasing thickness, keeping the scale constant. Where as it was observed that the steepness of the curvature was directly proportional to the scale of the component. Conclusion It could be concluded that a branch of components with varying scales, showed gradual decrease in the thickness. Hence, fabricating a branch in this combination gave an overall geometry with a steep curvature. Design and Technology 2021
1.
Length = 14cm
Thickness = 1cm
2.
Length = 14cm
Thickness = 1cm
3.
Length = 14cm
Thickness = 1.2cm
4.
Length = 14cm
Thickness = 0.5cm
5.
Length = 11cm
Thickness = 0.75cm
6.
Length = 8cm
Thickness = 0.5cm
7.
Length = 6cm
Thickness = 0.25cm
Depth = 1cm
Group 5
8
4.Curvature Analysis The basic behavior of curvature pattern of the combination component was similar to the global surface as observed. Hence, it was the component’s natural tensile behavior to form a concave surface when conjugated together, Curvature analysis of the global surface that is the revolutionary surface with concave curvature was performed. The red color denotes the region with maximum tension, hence the surface required stiffness. Hence, a component of smaller scale was used. Whereas when moving away from the center, the tension along the surface decreased. Hence, larger scale component could be used providing more flexibility.
Image 10. Physical curvature experiments.
Image 11. Curvature Analysis.
Design and Technology 2021
Group 5
9
5.Computational logic The designed component was formulated on the desired global geometry that is the revolutionary surface. According to the slope analysis in the physical experimentation. Certain scales of the components were fixed to achieve the desired curvature on the global surface. The radial planes of different radius were lofted into revolutionary surface in grasshopper from which
isometric curves were extracted. The surface was divided into twelve branches. With the help of the graph mapper -the curved revolutionary surface was interpolated along the bezier curve to achieve the desirable slope according to the curvature analysis. Then the surface was divided in boxes and components were assigned to the boxes. Collection of points from global surface was made into poly lines to obtain branches for fabrication.
20cm
10cm 7cm 6cm
1.8 2 1.6 0.8
8cm
Image 12. Pseudo code and first steps towards a digital model of the revolutionary surface.
Image 13. Pseudo code and adding the component to the revolutionary surface.
Design and Technology 2021
Group 5
10
6.Physical fabrication The joinery system was designed as an edge flap system fastened with the help of metal fasteners.
curvature. Perhaps this result did not produce the desired results.
During the fabrication it was observed that the component showed varying behavior when fabricated branches were joint in a system to form a global surface.
Hence, the joinery system was inverted to achieve a concave curvature system to achieve the desired global geometry of the revolutionary surface.
At first in an inward joinery system, it was observed that the system is naturally forming a convex
Image 14. Inside view of the revolutionary surface.
Image 15. Detail of the flap joinery.
Image 16. Unrolled surface.
Image 17. Revolutionary convex surface achieve by making flap joiney in the inwards direction.
Design and Technology 2021
Group 5
11
7.Unit component behavior vs Branch assembly
Image 18. Direction of flap joinery- inwards.
The component displayed a varying behavior on the method of its assembly in one branch. When the flap joinery was made in the inward direction. The components formed a revolutionary surface with convex curvature.
Image 19. Assembly of components in branch- convex curvature surface.
Image 20. Direction of flap joinery outwards.
When the flap joinery was inverted in the outward direction. The tension forces started acting in the opposite direction. Hence, when the components were assembled in branches, they started achieving a revolutionary surface with convex curvature.
Image 21. Assembly of components in branch- concave curvature surface.
Design and Technology 2021
Group 5
12
8.Assembly of revolutionary surface
4 3 2 1
Image 22. Documentation of final components in veneer wood.
Image 23. Branch assembly of components.
Design and Technology 2021
1.
Length = 14cm Thickness = 1cm
3.
Length = 10cm Thickness = 0.50cm
2.
Length = 12cm Thickness = 0.75cm
4.
Length = 8cm
Thickness = 0.25cm
After the assembly of components in branches it was realized that the surface naturally achieved a concave curvature. Hence the geometry of the component facilitated the formation of revolutionary global surface. After the assembly process of branches the surfaces was folded into the revolutionary surface. The assembly proved to be more convenient branch by branch as opposed ring by ring. Group 5
13
Image 24. Flexing the component to release the stiffness of veneer fibres.
Image 25. Pinching the component in X-Y plane.
Image 26.Creating one branch according to different scales.
Image 27. Connecting branches with help of flap joinery fastened with metal fasteners.
Image 28. Convex curvature behavior facilitating folding of surfacew.
Image 29. Assembling all twelve branches together.
Image 30. Bending the surface to form a revolutionary surface.
Image 31. Closing the surface with the help of flap joinery to form a revolutionary surface.
Design and Technology 2021
Group 5
14
Image 32. Image showing gradual steepness of curvature according varying scales of curvature.
Image 33. Interior view of the revolutionary global surface.
Image 33. Perspective view of the revolutionary global surface. Design and Technology 2021
Group 5
15
9.Structural Analysis The stresses and strain on the combination component were analyzed using the Karamba 3d software. Veneer wood as the material was used to analyze the strain in the material. Loads as the selfgravitational loads and adjacent loads at the joints were applied. Maximum deformations were observed in the regions of maximum bending. Hence, showing the limitation of veneer wood in achieving extremely steep curvatures.
Image 34. Structural analysis in the component showing displacement.
Image 35. Structural analysis in the component showing stresses.
Design and Technology 2021
Group 5
16
Image 36. Comparison between the digital and the physical moel.
10.Conclusions This experiment provided an opportunity to understand the relationship between geometrical parameters and three-dimensional behavior of the combination component. The curvature analysis of the combination component demonstrated the tensile behavior of the component according to the geometry. The similar nature of concave curvature was followed throughout the revolutionary surface. To achieve the accurate curvature, slope analysis of components of varying scales and thicknesses helped in defining a parametric relationship. The component geometry displayed curvatures of convex and concave nature both. Hence,
Design and Technology 2021
exploration of joineries helped in achieving the revolutionary surface with concave curvature. When the digital and the physically fabricated model were compared, it was observed that the surface geometry expanded along the surface. Whereas the physical model being made in veneer wood displayed limitations in expansion along the surface. The stress limits of the material were reached as shown in the structural analysis. Hence, It gives us an opportunity to explore the further alterations that can be made in the geometry at the component scale as opposed to its symmetric nature. The bi- component with larger upper lobe could help in achieving the desired global surface.
Group 5
17