9 minute read
Fast assembly instead of festooning


The cable carrier guidelok swing GLO.S increases the safety in the operation of swing cranes. The cost-effective alternative to cable loops reliably protects the cables and thus prevents them from getting tangled and tearing off. The space-saving system thus ensures increased system availability and reduces downtime costs.
Jaw Opening
Advertisement
All Caldwell / J.C. Renfroe clamps are identified and have the jaw opening on the label. It is important that you always follow the restrictions listed on the clamp’s tags.
Remember, just because a plate fits in the jaws doesn’t necessarily mean it’s the appropriate clamp for a plate’s thickness. The reason is because once the clamp’s teeth penetrate, they can upset the metal, and now, the plate gets thicker and your plate can get stuck in the jaw. This will prevent the clamp from releasing. Again, always follow the recommended jaw range that’s listed on the tag for each individual clamp.
Environmental Considerations
The next important item you need to consider is the environment you intend on using the clamp in. You need to identify if the clamps will be used in chemical conditions, sand conditions, and what kinds of temperatures (either extreme heat or cold), as all of those factors can affect the usability of the clamp.
All the Caldwell / J.C. Renfroe standard clamps have a temperature range of 0° to 93°. If the temperature range is beyond 0° to 93°, and it becomes too cold, the metal in the clamp can become brittle and cause the clamp to fail. When the temperature is too hot, it can damage the teeth and cause them to melt or lose their hardness and cause it to fail.
If your working conditions are outside of the 0° to 93°range, call your sales representative and tell them your desires to use a clamp in an environment that’s outside that range. Let the representative choose the appropriate clamp for the job. Caldwell / J.C. Renfroe does offer hot lift clamps that are capable of being used in environments up to 540°F. Certain clamps shouldn’t be used in sand-blasting environments, and that includes screw clamps. The sand could get stuck and affect the threads. Acids and alkalines can attack the teeth and cause them to dull out. For these environments, Caldwell / J.C. Renfroe offers special materials that can withstand the caustic environments created by acids and give your clamps better lifespans for that work.
Confirmation
To confirm that you chose the right clamp, first you’ll want to read the clamp’s accompanying manual. Then, you’ll want to inspect your clamp to make sure everything is in operable condition, and that includes having a legible tag. During the inspection, you’re looking to make sure the teeth are sharp, and the bolts holding the clamp together are tight.
Then, you will use your new clamp to conduct a test lift and check your “witness marks.” The first step in this process is outfitting yourself with the required PPE (personal protective equipment), which could include:
• Safety glasses
• Steel-toe boots
• Hard hat (where applicable)
• Anything else your company requires you to wear for safety purposes
“Witness marks” are the marks left on the plates after a load has been applied to your clamp. During a test lift, you want take your clamp, apply it to your plate, tilting it at approximately a 20-30° angle and lock the lock handle. Then, you’ll tilt the clamp back up, leaving a 1/4” gap between the edge of the plate and the interior side of the jaw.
This allows the clamp to seat properly. Then, you’ll hook up the clamp to a hoist, and apply just enough load to lift the plate off the floor before returning the load to the ground.
Once the plate is back on the ground, you’ll want to remove the clamp from the hoist, and disconnect it from the plate so you can inspect the witness marks. If you can feel an indentation, that clamp is suitable for your application.
When Would Clamps Not Be the Right Fit?
Sometimes, a clamp is not the right fit for your lifting application. In fact, if used improperly, clamps can be a hazard instead of a help. This is especially true for the following plates:
• Diamond plate
• Coated plate
Caldwell / J.C. Renfroe recommends using clamps ONLY on plates that are clean and have no coatings so the clamp can get a proper engagement.
Where Can You Use Clamps for Overhead Lifts?
A good application for any Caldwell / J.C. Renfroe clamp is a clean metal plate of proper hardness that’s a flat surface.
Many of these clamps are used in shipyards for boat building. This is a good fit because the clamps help:
• Save time
• Increase efficiency
• Provide a safer work environment www.mazzellacompanies.com for more info
R 2 500 Excl Vat
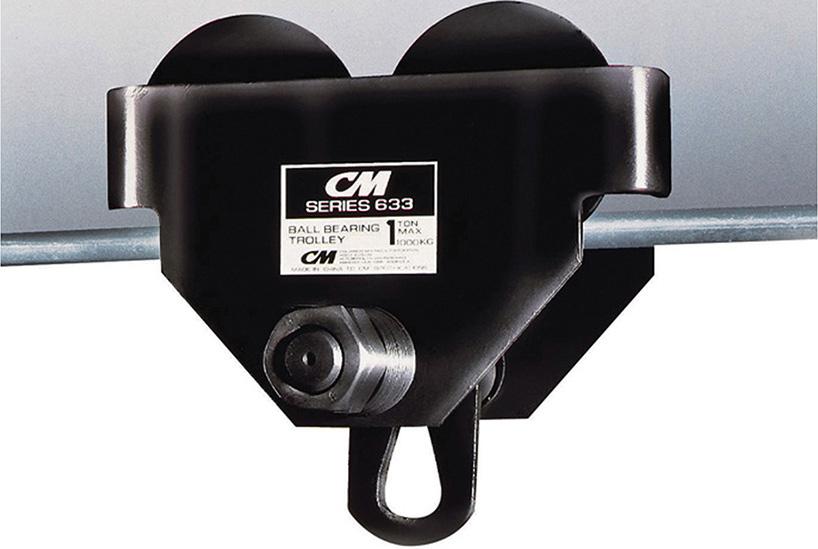
How do I select and install trolleys for manual and powered hoists?
Trolleys are available for underhung lug-mounted hoists and underhung hook-mounted hoists for monorails and single girder cranes.
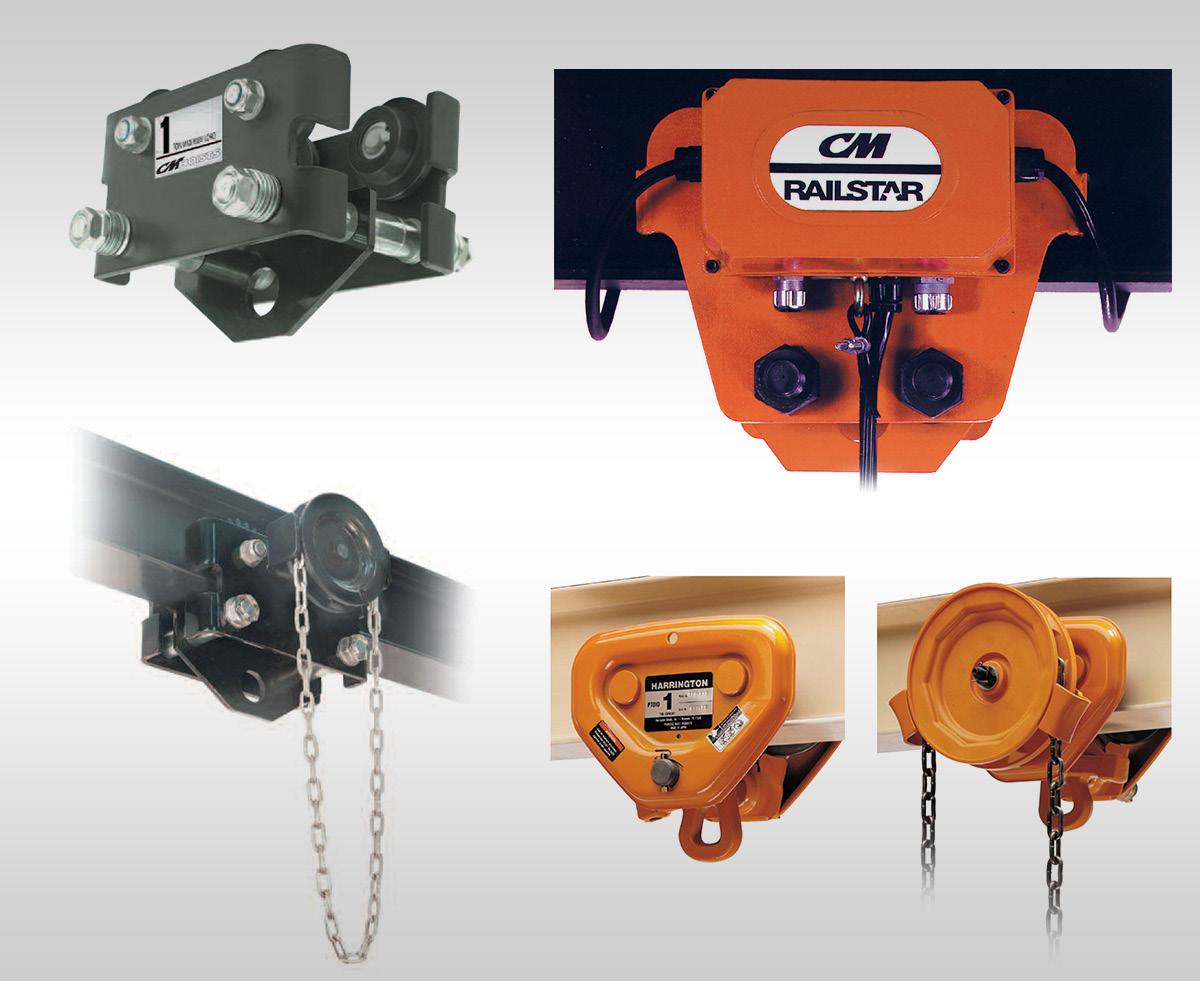
Types of Trolleys
Trolleys for Lug-Mounted Hoists
A lug-mounted hoist requires mechanical fasteners, including varying types of hardware and pins, to attach it to the trolley. The hoist gets attached directly to the trolley rigidly. That eliminates any flexing between the trolley and the hoist.
Underhung trolleys for monorails and single girder cranes for lugmounted hoists include:
• Push / Pull Trolley
• Motor-Driven Trolley
• Hand-Geared Trolley
Trolleys for Hook-Mounted Hoists
A hook-mounted hoist is one that uses a hook suspension to join the hoist to the trolley. These hoists are two individual components. The trolley is one individual unit, and it will have an eye at the bottom of it to which you can attach a hook.
Underhung trolleys for monorails and single girder cranes for hookmounted hoists include:
• Push / Pull Trolley
• Motorized Trolley
• Motorized Tractor Drive Trolley
• Hand-Geared Trolley
Tractor Drive Trolleys pull themselves along the bottom of the beam hanging from the wheels on the flange.
What To Know about Beams?
Trolleys are designed to fit specific beam flange sizes. Thus, you may not easily be able to convert trolleys from one flange size to another. While there could be two trolleys that fit the same beam, one trolley might be at its maximum adjustability range and the other might be at its minimum adjustability range.
Sometimes, price dictates the type of trolley you’ll purchase, but also, it could come down to availability or capacity. Switching a trolley from one flange to another requires removing certain pieces of hardware and adjusting the trolley side plates.
Standard Beams
There are many types of beams in use on the market, and they include:
“S” Section Beams, also known as “I” Beams
“W” Section Beams, which are also referred to as “H” or “WF” (Wide Flange) Beams
The “S” and “I” beams have a flange slope of 9°, while “W,” “H,” and “WF” beams have a flange slope of 0° to 2°. In some cases, these different beams can accept a universal wheel fit, but there are times when a universal wheel will not work properly. That would depend on the capacity and the size of the trolley.
Patented Track Beams
Patented Track Beams are manufactured tracks.
The inside track where the wheel of the trolley would ride typically is harder than the traveling surface of an “S” beam or the “WF” beams. That gives more longevity to the trolley wheel and will not be as susceptible to wear. That will save you downtime and money because the trolley will not need to be repaired or replaced as often as it would while installing and running on an “S” or “WF” beam.
While that is a big strength, there are some disadvantages to using a patented track beam. The wheels on the track are harder to match the hardness of the track. Those wheels tend to be narrower, so there is less contact between the beam and the wheel. You won’t have as much friction to stop, so the trolley’s braking system needs to be up to date and stronger than a normal system. Patented Track Beams are used a lot in curved sections because it tends to be stronger and have better longevity than a standard “WF” or “S” beam. These beams can be shaped and formed in different ways.
Selecting the Correct Trolley
In order to choose the right trolley for your beam, you either have to know or have an evaluation done to gather the following information about your working environment:
• Beam Shape
• “S” or “W” Section
• Patented Track
• Fabricated
• Beam Depth / Height
• Flange Width
• Flange Thickness
• Curve Radius and Type
• Measures radius
• 90°, 180°, or “S” curve
Disassembly and Reassembly of Trolleys
When any kind of maintenance is done, trolley wheels must be checked because they’re subject to the most wear. Just like the tires on a car, when in use, trolley wheels are the first component that will experience wear. The wheel bearings will need to be lubricated periodically. For more regular use, the bearings will need to be lubricated more often. Conversely, less frequently used trolleys will not need to have their bearings lubricated as often. Wheels should be lubricated with a manufacturer-supplied or recommended grease or oil.
Trolley Wheels
Trolley wheels are made from medium carbon-forged steel or cast iron. They have a dual-tapered tread to run on both “S” and “W” Section beams, and are equipped with precision ball bearings.
Patented Track Wheels
Patented track wheels have a narrow flat tread, and are heattreated to 425 BHM to meet patented track requirements.
Trolley
Construction
With many motor-driven trolley models, they will include VFDs (Variable Frequency Drives). Many manufacturers offer these units on their trolleys. The VFDs help ramp up or ramp down a trolley gradually, which will reduce high-impact collisions against the ends of the beams. The speeds can be adjusted based on your specific needs.
If you’re moving a hot material or a liquid (i.e. acids, plating compound), you don’t want it to spill. This is where the slow ramp up and ramp down comes into play. It helps you avoid a potential incident.
Key things to understand with trolley construction include:
• Structural steel side plates
• Drop stops bolt-on option on Shaw-Box models
• Rubber bumpers are optional
• The side plates are load-bearing, so they need to be inspected periodically
• Right angle worm gear reducers
• Provides braking to stop unit within 10% of rated speed
• Squirrel cage induction motors
• Similar features as hoist motor, except NEMA Design B motors
• VFD duty standard
• Controls
• Single-speed contactor standard
• Two-speed contactor and VFD available options
With trolleys, the following must be inspected periodically:
• Trolley wheels (plain or geared)
• Drop stops
• Space washers with nuts
• Warning label
• Suspension bolt nuts
• Load bracket
• Side plates (plain or geared)
• Suspension plate
When trolleys are purchased, the manufacturer will put in enough spacers and washers in the unit so you can configure that trolley from the minimum flange thickness allowed to the maximum.
Hoists
You cannot add additional non-OEM (Original Equipment Manufacturer)supplied spacers or washers to the trolley to fit on a bigger beam. Instead, you need to purchase a different trolley.
The suspension bolts are designed only to go to the maximum flange thickness that the trolley is made for.
How Do I Properly Fit a Trolley to a Beam?
Once it is determined that the trolley is compatible with the beam, the next step is to adjust the width of a trolley to fit the beam.
In order to adjust the width of the trolley, you want to:
• Remove one set of locking nuts on one side of the trolley
• Remove the washers / spacers from the shaft
• Space the trolley wheels the appropriate distance to fit the designated flange using the washers / spacers
• Set the distance on one side of the trolley and leave the other side loose
The next step includes:
• Placing the trolley on the selected flange with assistance from a person, jack, tow motor, or another hoist
• You may be attaching a lugmounted trolley separately or with the hoist affixed to the trolley, so this assembly can be heavy SO USE CAUTION.
• Assembling the last side plate to the trolley with the appropriate washers / spacers and tighten the remaining locking nuts
• Checking the clearance between the flange of the trolley wheel and the edge of the flange of the beam
• The gap should measure 1/8” to 3/16” greater than the flange width or what the manufacturer recommends
• Ensuring the trolley moves along the beam freely, and make adjustments as needed
• If the trolley is powered, test that the controls match the movements of the trolley, as well as the hoist
In working to select and install a new trolley for your manual or powered hoists, you must understand:
• The different types of trolleys and beams
• How to select and install trolleys for hoists
• Proper procedures for trolley use and inspection
• Operation of the trolley and its brakes
• Disassembly and reassembly of trolleys
• Performing a routine inspection
• Troubleshooting trolley issues
• Properly fitting a trolley to a beam www.mazzellacompanies.com


