How to Use This Product
This interactive eBook was designed to support your study in a simple, intuitive, and accessible way. You can use it at your own pace, exploring the contents, multimedia resources, and interactive activities available.
The page numbering of the eBook usually corresponds to the page numbering of the printed book. However, to keep activities on a single page, some activities were moved to the previous or following page compared to the printed book. Thus, improving the user experience and making it easier to complete the activities.Throughout the eBook, you may find some blank pages to maintain the correspondence between the eBook’s page numbers and those of the printed book.
1. How to Navigate the eBook ?
1.1. Navigating on a Computer
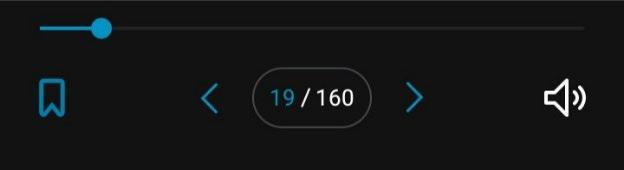
If you are using a computer, you will find a panel with two arrows in the lower-right corner of your screen, as shown in the image below.

To move forward through the pages, click the arrow on the right. To return to the previous page, click the arrow on the left.
If you want to go to a specific page, click on the current page number, type the page number you want, and then press the Enter key on your keyboard to be go to the page.
1.2. Navigating on a Mobile Phone
If you are using a mobile phone, there are different ways to move forward and backward through the pages. You can choose the one you prefer in the “Reader Preferences” panel, under “Display Options.” To access this panel, click on the icon with the letters “AA” located in the top navigation bar (see image below).

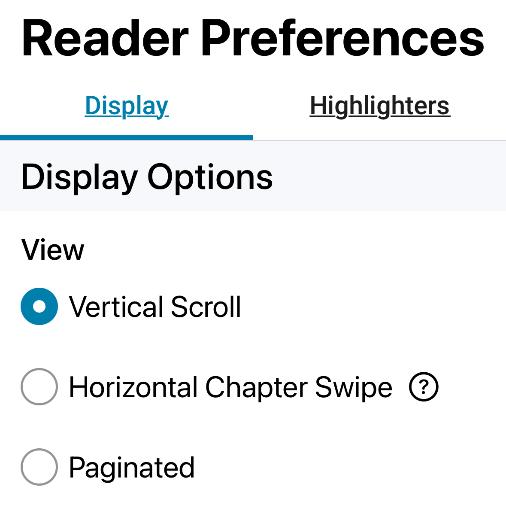
When you click this button, the following navigation options will appear: “Vertical S croll,” “Horizontal Chapter Swipe,” and “Paginated,” as shown in the image below.
1.2.1. Vertical Scroll
If you select this option, to move forward through the pages you should scroll to the bottom of the current page. When you reach the end of the page, scroll again by swiping your finger upward to “cancel” the page break and move to the next page.
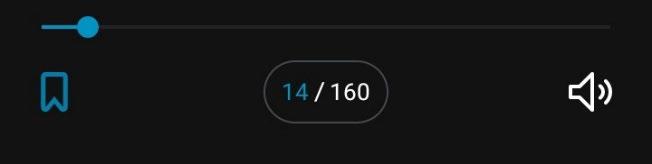
If you want to go to a specific page, click on the current page number located in the bottom navigation bar, as shown in the image below.
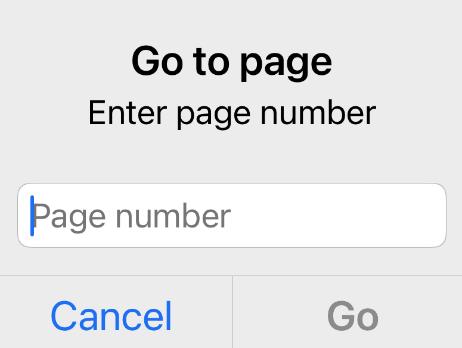
When you do this, a box titled “Go to page” will appear, allowing you to enter the page number you want to go to. Then simply click “Go” (see image below).
1.2.2. Horizontal Chapter Swipe
If you select this option, swipe your finger across the screen to the left to move forward through the pages, or to the right to go back to the previous page, as indicated in the bottom bar of each page.
Using this mode, you will still have a bottom navigation bar, as shown in the image below, where you can move forward by clicking the arrow on the right. To return to the previous page, click the arrow on the left. If you want to go to a specific page, click on the current page number. A “Go to page” box will appear, allowing you to enter the page number you want to go to. Then click “Go”.
1.2.3. Paginated
If you select this option, to move forward through the pages you should click the arrow on the right in the bottom navigation bar, as shown in the image below. To return to the previous page, click the arrow on the left. If you want to go to a specific page, click on the current page number. A “Go to page” box will appear, allowing you to enter the desired page number. Then click “Go”.
1.3. Using the Table of Contents
On all devices, you can also use the table of contents to access units and pages directly. To do this, simply click the button located on the left side of the top navigation bar of the eBook. When you click this button, the eBook table of contents will appear on the left side of the screen, as shown in the image below.

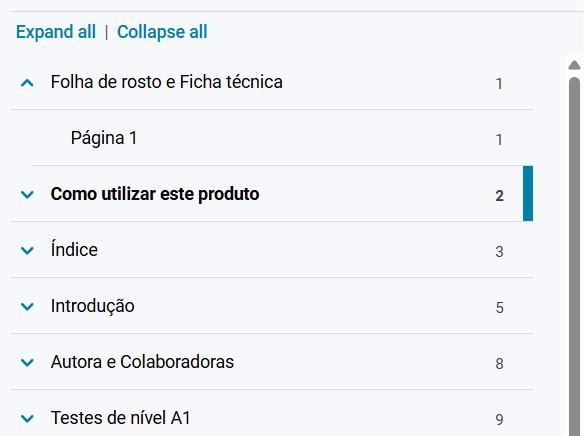
As shown in the image, by clicking the blue arrow next to each chapter, the table of contents will display the pages within that chapter. You can also click “Expand all” to view all pages and subchapters hidden within the chapters, or “Collapse all” to hide them again.
By clicking on the chapter name, you will be directed to the first page of that chapter. If you want to open a different page, first click the arrow and then click the name of the page you wish to open. This allows you to navigate the eBook using the table of contents.
1.4. How to Access Multimedia Content
Throughout the eBook, you will find multimedia content that will help you complete the interactive activities.
1.4.1.
Audio
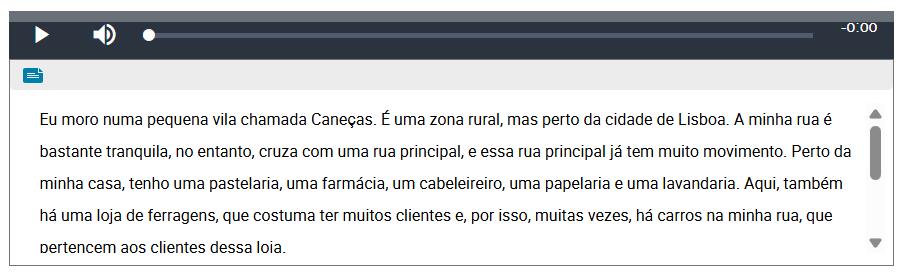
Audio files are displayed in a black horizontal rectangle, as shown in the image below.

To start or pause the audio, click on the button . To adjust the volume, click on the button . You can also move forward or backward in the audio by dragging the white dot along the grey line. Additionally, by clicking the button located below the black rectangle, a subtitle box will open, as shown in the image below. To close the subtitles, simply click the same button again.

1.4.2.
Videos


Videos are displayed in a black rectangle with the button in the centre, as shown in the image below. To start the video, click the button

Once the video starts, a control bar will appear at the bottom, as shown in the image below.

To pause or resume the video, click the button . To adjust the volume, click the button . You can move forward or backward in the video by dragging the white dot along the grey line. To expand the video, click the button and the video will open in a larger format.

As with audio, clicking the button below the black rectangle will open a box with the video subtitles. To close the subtitles, click the button again.
1.5. How to Complete the Interactive Activities?
You can complete all activities directly within the eBook. You will also have access to automatic corrections for closed-answer activities and, for open-answer activities, suggested answers are available under “Mostrar possibilidade de resposta”, whenever possible.
1.5.1. Closed-Answer Activities
In closed-answer activities, after typing or selecting your answer in the corresponding space, the “Check Answer” button below the activity will turn blue (see image below). To validate your answer, simply click it.

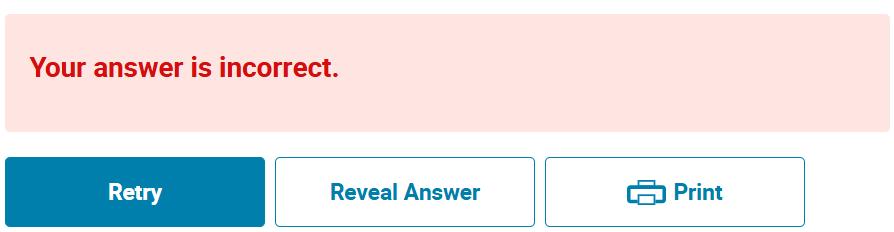
A red bar will appear if your answer is incorrect, or a green bar if your answer is correct, as you can see in the image below. If you want to try the activity again, click “Retry.” To see the correct answers, click “Reveal Answer.” To print the activity, click “Print”.
1.5.2. Open-Answer Activities
In open-answer activities, after typing your answer in the corresponding space, it will be saved. This means that when you open the eBook again, your answer will still be there and can be consulted at any time. You can also print your answer by clicking the “Print” button located just below the answer space (see image below).

You may also view a suggested answer by clicking the button in the “Mostrar possibilidade de resposta” box, located below the “Print” button (see image below). When you click it, the box will expand and display a possible answer to the activity. You can hide it again by clicking the button

2. Accessibility Features of Interactive eBooks
Our interactive eBooks comply with the accessibility requirements defined by the European Accessibility Act (EAA), including the following features:
• Alternative text for all images;
• Image zoom functionality;
• Read-aloud (synchronized) feature;
• Subtitles for audio and video;
• Single or double-page view;
• Text size adjustment;
• Font selection (including OpenDyslexic);
• Choice of four colour filters (light, dark, sepia, and cyan modes);
• Margin adjustment;
• Line spacing adjustment.
Below, we explain how to activate these features, except for audio and video subtitles, which are explained above under “How to Access Multimedia Content.”
2.1. Alternative Text for Images
Alternative text allows images to be read by assistive technologies for people who are blind or visually impaired. If you have such technologies installed on your computer, they will read the alternative text that we have previously added to the image metadata of our eBooks.
2.2. Image Zoom

To zoom in on images, simply click the icon located in the lower-right corner of the image, as shown in the example below. When you click this button, the image will open in a larger size.
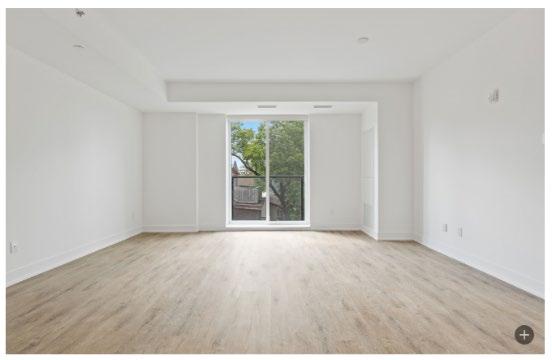
For images embedded in coloured text boxes, to open them in a larger size, click the button located in the upper-right corner of the image. Then click “See image in a separate window”

A new window will open with the image, which you can expand to full screen. At the top of this window, you will find two buttons: one to zoom out - - and one to zoom in -.


2.3. Read-Aloud (Synchronized)
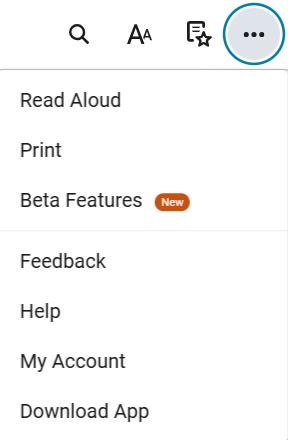
To activate the synchronized read-aloud feature, click the ellipsis (three dots) button located on the right side of the top navigation bar of the eBook, and then select “Read aloud” (see image below).
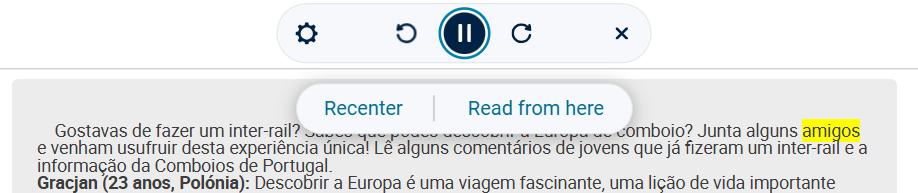
Once activated, a box like the one shown below will appear on your screen. Click the button to start reading. As the reading is synchronized, the words will be highlighted in yellow as they are read. You can pause and resume the reading at any time by clicking the button . You can also use the arrows to return to the beginning (left arrow) or move to the next line (right arrow) or select a word and choose “Read from here” so that the reading starts from that word instead of from the beginning of the page.

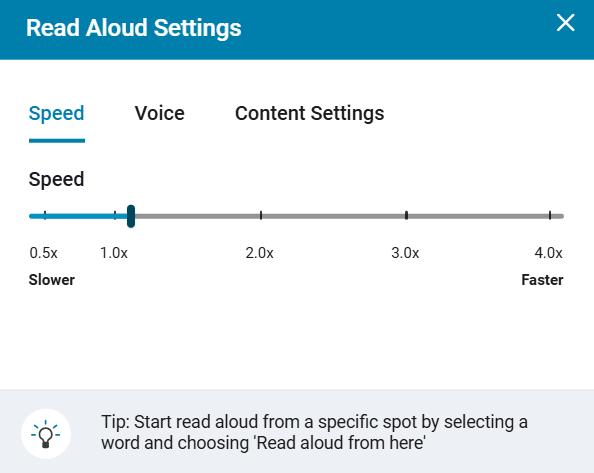
By clicking the icon on the right, you can also change the “Read Aloud S ettings”, including the reading speed (see image below).
2.4. Single or Double-Page View, Text Size Adjustment, Font Selection, Colour Filter, Margin and Line Spacing Adjustment
To activate the remaining features, click the “AA” icon in the top navigation bar, as shown in the image below.
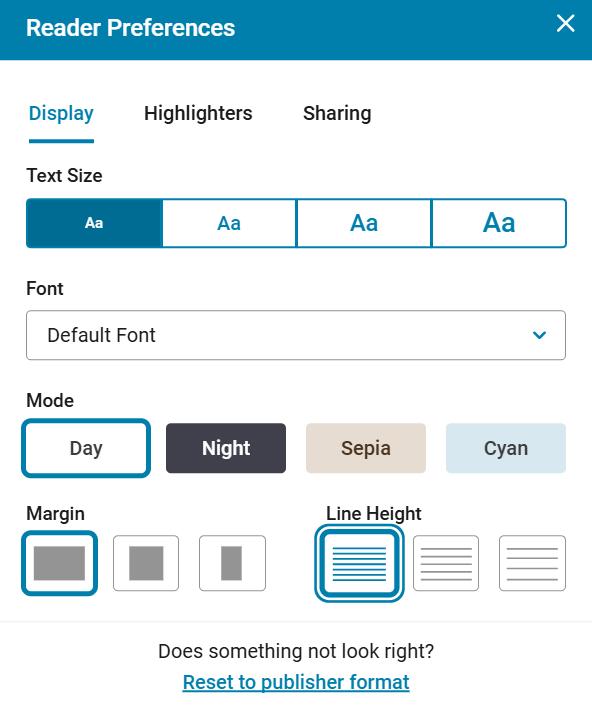
This will open the Reader Preferences panel (see image below).
• Single or double-page view: If you are on the BookShelf app you will see the button on the top of the “Reader preferences” panel. Over the toggle to the right to switch to double-page view.

• Text size adjustment: Move the dark blue slider in the “Text size” section to the right to increase the font size or to the left to decrease it.
• Font selection: Click the downward arrow in the “Font” section to open a dropdown menu with seven font options (including OpenDyslexic) and select the desired font.
• Colour filters: To choose one of the four available colour filters (Day, Night, S epia, or Cyan), click the box corresponding to the filter you want in the “Mode” section.
• Margin adjustment: To adjust the margin size, click the corresponding option in the “Margin” section. The first option applies the smallest margin, the middle option applies a medium margin, and the last option applies the largest margin. On computers, the default margin is medium/small, so selecting the largest margin may not result in a very noticeable difference. This feature is particularly useful on smaller screens, such as mobile phones or tablets, where the margin size becomes more perceptible.
• Line spacing adjustment: Click the desired option in the “Line Height” section. You can choose between three spacing levels: small, medium, and large.
For more information or if you have any questions, please contact us at livraria@lidel.pt