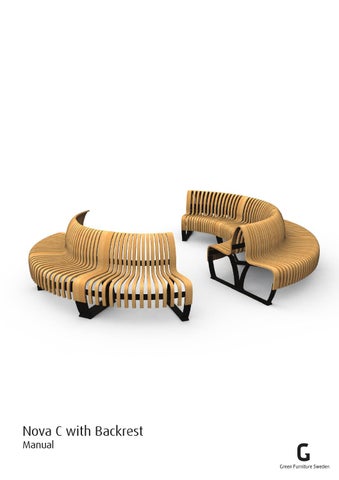
Nova C with Backrest Manual
Index
Product description Recycling Add-ons Assembly instructions Maintenance/repair
Product description
Slender veneer ribs
Wide veneer ribs
Metal strip
Metal legs Plastic feet
One meter section straight Nova C with Backrest
Convex
Straight
Concave
Nova C with Backrest can be made to any curvature between the degrees of 0-50, both concave and convex. Standard sections are straight and convex/concave 45 degrees.
The bench sections are snapped together and locked with a eccentric lock.
By opening the eccentric lock the bench sections can be easily moved and regrouped.
The colour choice on the bench sections can be based on the standard colors (see below) or be based on your own choice of colour for a custom order.
Dark Oak
Pure Birch
Charcoal Oak
Sthlm C Oak
Mixed
Recycling
Wide and slender ribs are sorted as wood
Legs, stripes and small parts are sorted as metal
Feets are sorted as plastic
Add-Ons
Nova Table Nova Table is an optional product that can be mounted as an add-on for Nova C and Nova C with Backrest.
Armrest Nova C with Backrest has an optional armrest that can be mounted as an add-on.
Assembly instructions
Nova C w Br leg x2
Nova C w Br single
Nova C w Br single slender rib x 13
Nova C / Nova C w Br metal strip x2
(
Eccentric lock x2
Eccentric hook x2
(
Nova C w Br single wide rib x2
Nova single glide x4
Bolt (A) Screw (A) Screw (B) x 16 x 16 x 68 Notice: Due to that the assembly of this bench mostly is done with the ribs upside down we recommend you to use a blanket or similar to prevent damage to the ribs and metal parts.
*Only if you have more than one bench
Instructions - Nova C w Br single 1
Use bolt (A) to attach glides with the leg.
2a If straight
Use screw (A) to attach metal strips with wide and slender ribs. Start with the two wide ribs, continue with the slender ribs.
2b If concave
2c If convex
Use screw (A) to attach metal strips with wide and slender ribs. Start with the two wide ribs, continue with the slender ribs.
Use screw (A) to attach metal strips with wide and slender ribs. Start with the two wide ribs, continue with the slender ribs.
3
Use screw (B) to attach the legs with the rib construction.
(5)
(4)
Use bolt (A) to attach eccentric lock and eccentric hook. The eccentric lock/hook should be mounted in the holes closest to the edges of the bench section (make sure to map the eccentric lock with the eccentric hook on your other bench sections). If the eccentric lock is mounted on the right side of the bench the hook should be mounted to the left.
Use the eccentric lock to snap the benches together.
Assembly instructions
Nova C w Br leg x4
Nova single glide x4
(
Eccentric lock x4
Nova C w Br double straight
Nova C w Br double slender rib x 26
Nova C w Br double wide rib x4
Nova C / Nova C w Br metal strip x4
Eccentric hook x4
(
Nova double glide x2
Bolt (A) Screw (A) Screw (B) x 32 x 32 x 170
Plug (A) x 17
Clip (A) x 17
Notice: Due to that the assembly of this bench mostly is done with the ribs upside down we recommend you to use a blanket or similar to prevent damage to the ribs and metal parts.
*Only if you have more than one bench
Instructions - Nova C w Br double straight 1
Use bolt (A) to attach double glide and glide with leg.
2
Use screw (A) to attach metal strips with wide and slender ribs. Start with the two wide ribs, continue with the slender ribs.
3
Use screw (A) to attach clips and plugs to one of the two rib constructions (see picture 3). 3
Use screw (B) to attach legs with the second rib construction, in the same manner as in picture 4. Guide the ribs by means of he plugs.
(5)
Use bolt (A) to attach eccentric lock and eccentric hook (make sure to map the eccentric lock with the eccentric hook on your other bench sections).
4
Use screw (B) to attach legs with the first rib construction.
4
Use screw (A) and metal clip to attach the ribs back-to-back.
(6)
Use excenter to snap the benches together.
Assembly instructions
Nova C w Br single / double leg x4
Metal strip (S) x1
Nova C w Br double 45
Nova C w Br double slender rib x 26
Metal strip (L) x1
Metal strip (M) x1
Nova single glide x4
Nova double glide x2
Nova C w Br single wide rib x4
Nova C w Br single slender rib x 14
Metal strip (XL) x1
Bolt (A) Screw (A) Screw (B) x 32 x 32 x 226
Plug (A) x 17
(
Eccentric lock x4
Eccentric hook x4
(
*Only if you have more than one bench
Clip (A) x 17
Notice: Due to that the assembly of this bench mostly is done with the ribs upside down we recommend you to use a blanket or similar to prevent damage to the ribs and metal parts.
Instructions - Nova C w Br double 45 1
Use bolt (A) to attach double glide and glide with leg.
2
Use screw (A) to attach metal strips S and M with wide and slender double ribs. Start with the two wide ribs, continue with the slender ribs.
3
4
Use screw (A) to attach clips and plugs to one of the two rib constructions
Use screw (A) to attach metal strips L and XL with wide and slender ribs. Start with the two wide ribs, continue with the slender ribs. The green ribs are single ribs, the rest is double ribs
5
6
Use screw (B) to attach legs with the first rib construction.
Use screw (B) to attach legs with the second rib construction, in the same manner as in picture 5. Guide the ribs by means of he plugs.
7
Use screw (A) and metal clip to attach the ribs back-to-back.
(9)
Use excenter to snap the benches together. 5
(8)
Use bolt (A) to attach eccentric lock and eccentric hook (make sure to map the eccentric lock with the eccentric hook on your other bench sections).
Assembly instructions
Nova C w Br single / double armrest x1
Add-ons
Armrest plate x2
Bolt (B) x4
screw-nut (A) x4
Instructions - Nova C w Br armrest A1
A2
Either use slender rib with pre-drilled holes in or use template to make the holes in the slender rib.
Before snapping the benches together install armrest with Bolt (B), armrest plate and Screw-nut (A) (see picture A2).
Nova Table x1
Armrest plate x1
Washer x1
Bolt (B) x5
screw-nut (A) x5
Instructions - Nova C w Br armrest A1
A2
Either use slender rib with pre-drilled holes in or use template to make the holes in the slender rib.
Before snapping the benches together install Nova Table with Bolt (B), armrest plate, washer and Screw-nut (A) (see picture A2).
Maintenance/Repair
Background
The Nova Series wooden ribs are treated with hardwax Rubio Monocoat Oil Plus 2C, a maintenance serie that is environmentally sound and solvent. We recommend that you use the Rubio Monocoats (Rubio) products from oiling to cleaning and maintenance, as these products are environmentally friendly and designed to be compatible at each stage: Origin Treatment - Weekly cleaning - Stain removal - Touch up - Maintenance.
Colors
The hardwaxoil may be undyed or dyed. Green Furnitures Swedens standard colors is was follows: Pure Birch, Dark Oak, Charcoal Oak and Sthlm C Oak.
Pure Birch
Dark Oak
Charcoal Oak
Sthlm C Oak
Weekly maintenance
First cleaning can be done within six days after the original treatment. 1 Brush ribs from dirt and dust. 2 Second Immerse a cotton cloth or microďŹ ber towel in a solution of Rubio Monocoat Soap. (Mixing ratio: 150ml RMC Soap per 10 liters of water. Wring out to semi-wet cloth) 3 Third Wipe 2-4 square meters of ribs. 4 Rinse the cloth in the bucket with clean water and wring out thoroughly. Cleaning with RMC Soap helps to preserve the surface protection and helps to keep the matte surface.
Touching up scratches - Rubio Monocoat Oil Plus 2C
Scratches can be treated locally with Rubio Monocoat Oil Plus 2C, with color according to the original treatment, giving no joints, making the damage less visible and gives the injured surface back it’s surface protection. Maintenance cycle depends on rate of use/wear.
1
2
3
Dark Oak rib
Scratched Dark Oak rib
Clean the damaged area (Use ďŹ ne sandpaper if necessary)
4 Carefully mix the two components with a ratio of appr. 3 units A to 1 unit B.
5 Once the cleaned surface is dry, spread out a small quantity of RMC Oil Plus 2C with a cloth.
6 Let the oil absorb during a few minutes.
Note:
The product may NOT be diluted!
7 Thoroughly remove all excess of oil with a dry cloth. The surface should feel dry!
8 Treated Dark Oak rib. Let dry for at least 12h (may vary depending on temperature and humidity, check before use)
Cloths, saturated with oil, may spontaneously combust. After usage, they need to be soaked in water before disposal.
Tightening the screws
Depending on humidity, screws and bolts may need to be tightened 3-6 months after delivery, otherwise the construction may become loose (applies to all wooden structures). Check the screws and bolts once a year. If armrests have been kicked or ill-used in other ways they should be tightened again so they never get a chance to start loose.
Replace broken rib
x2
x2
1
2
Unscrew the four screws that belongs to the damaged rib
Remove the damaged rib
x2
x2
3 Add a new rib
4 Screw the new rib in place
www.greenfurniture.se