10 minute read
Dough


HOME SLICE
USE A LIGHT HAND
Advertisement
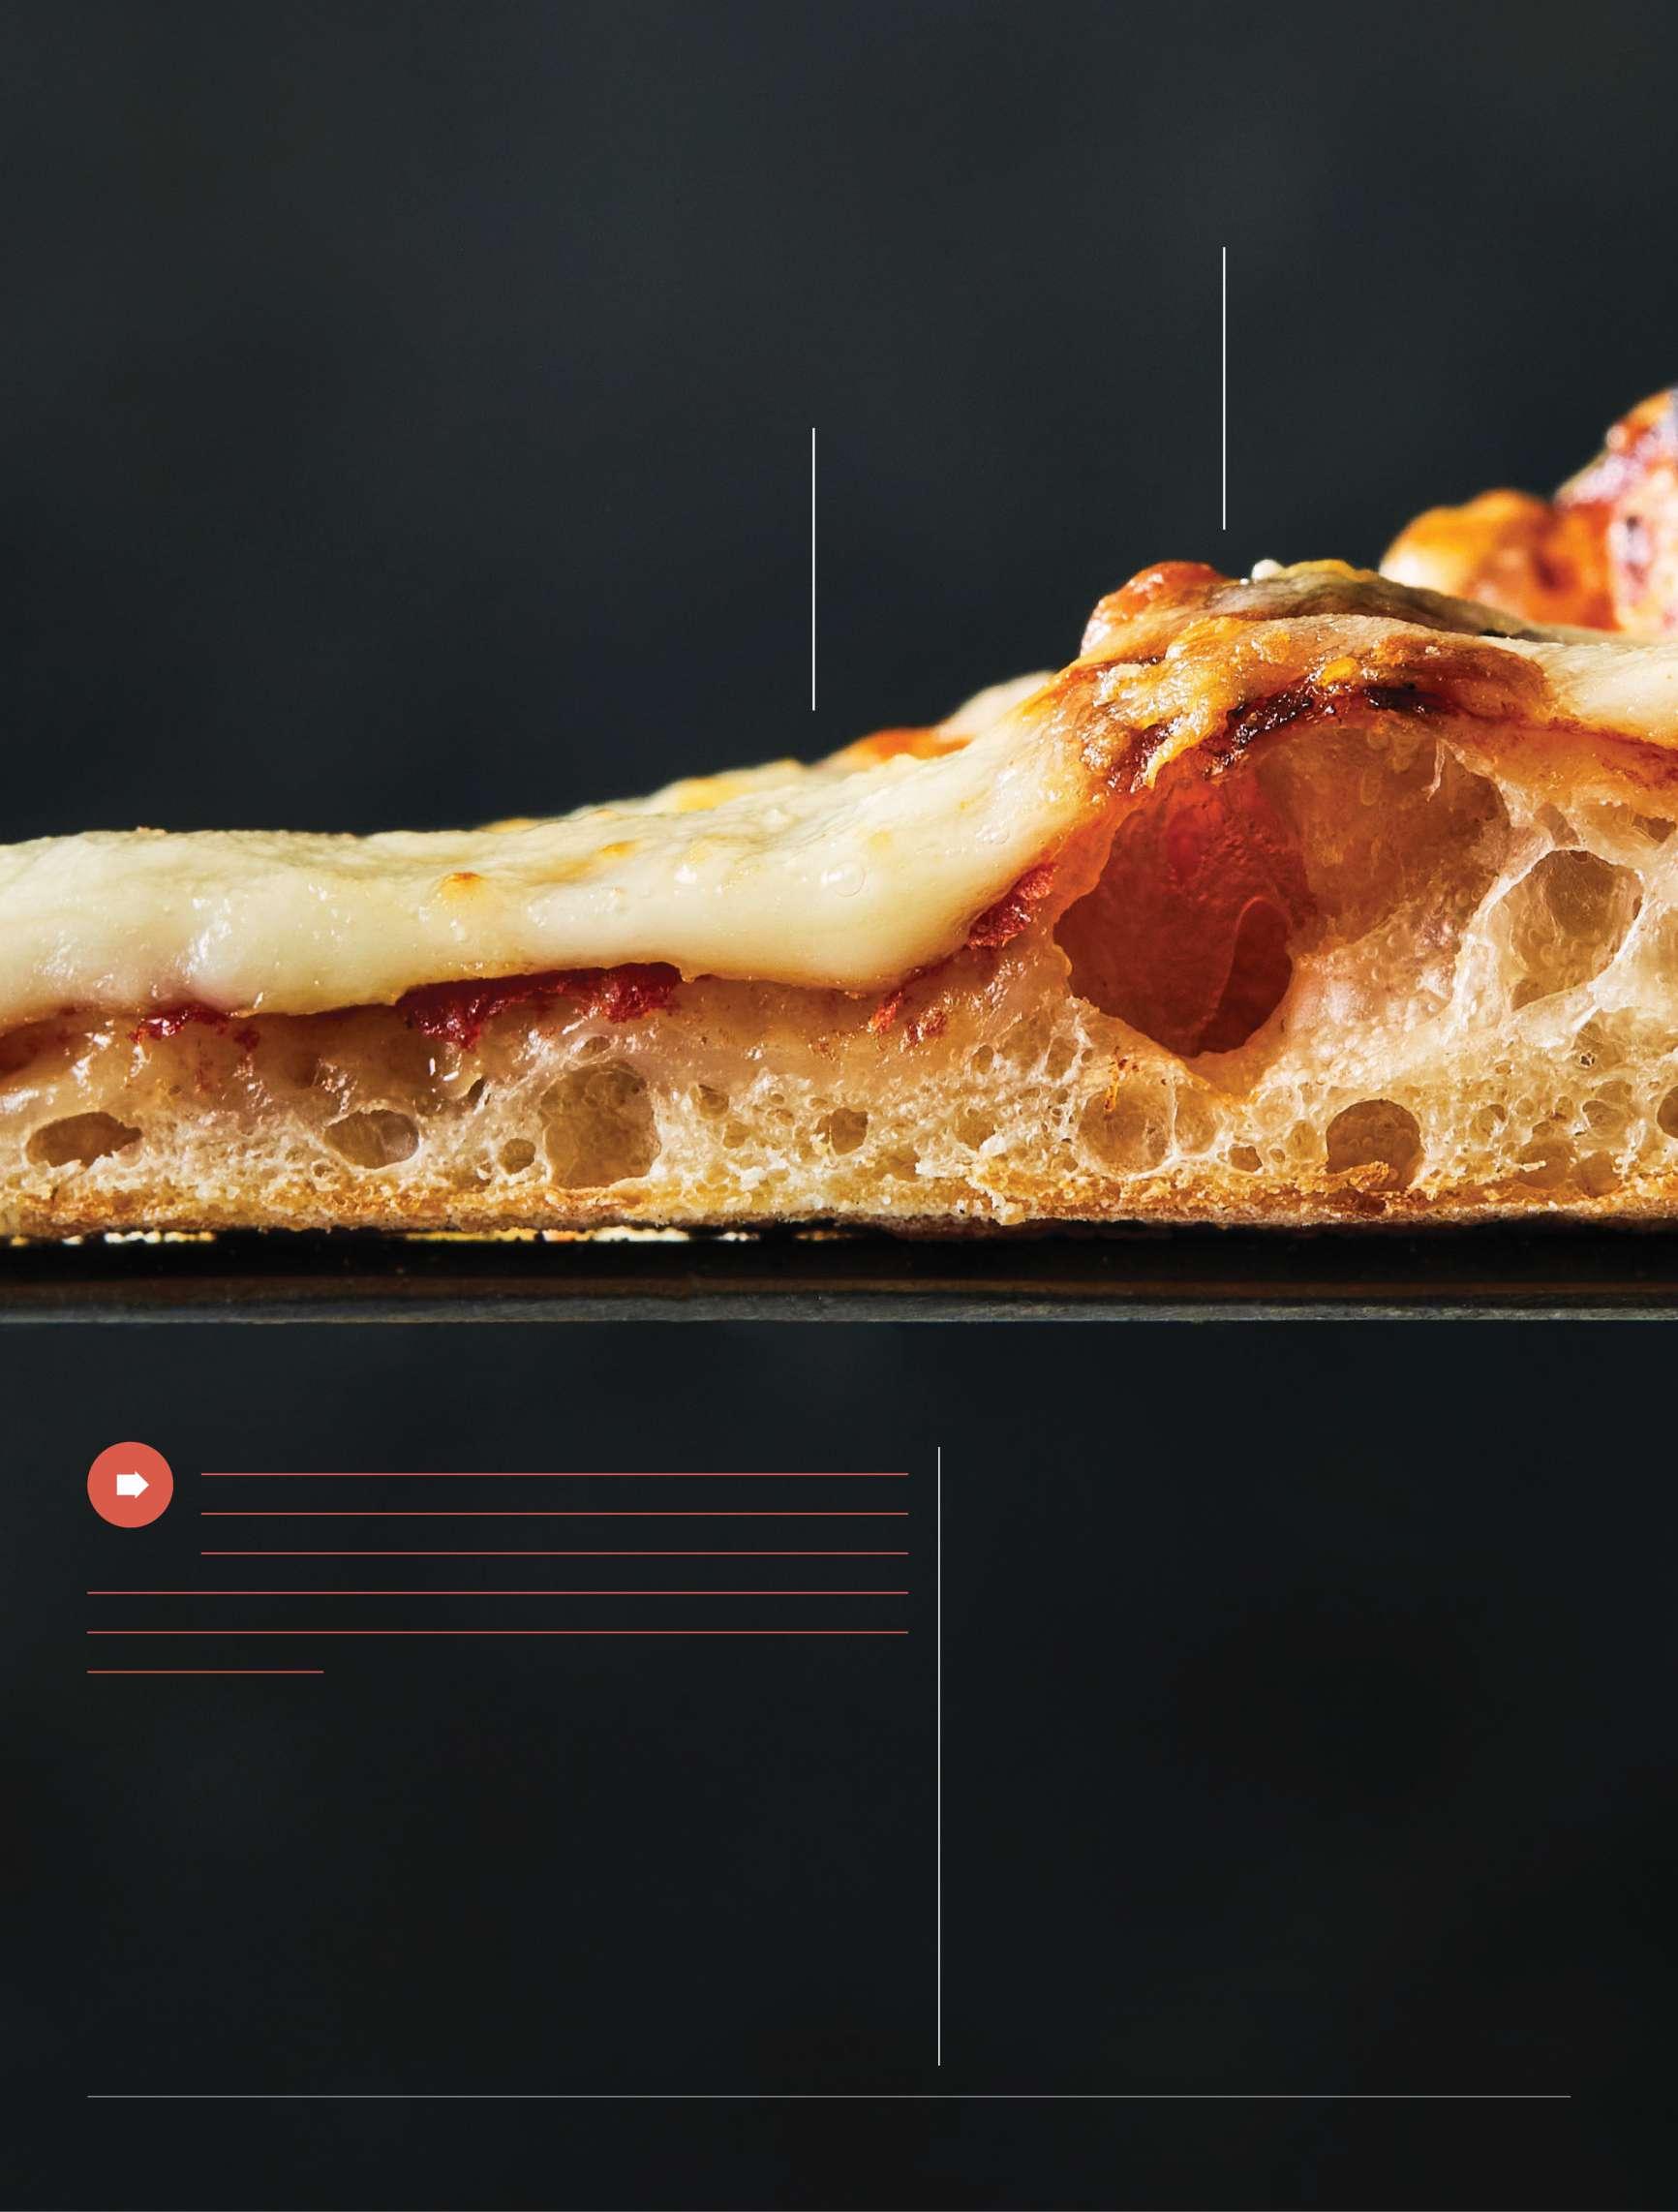
Going easy on toppings (see p. 78) allows the quality, texture, and flavor of the dough to shine— and doesn’t weigh down the pie.
GIVE IT TIME
Fermentation (with sourdough starter or a mix of yeast, water, and flour—see p. 74) gives the crumb its airy structure and complex flavor.
A good pizza is one of the most rewarding things you can cook at home. There’s the way dough feels alive and responsive in your hands. The crackling sound a knife makes while crunching neatly through a properly baked pie. The fragrant steam that arises when you bite into a pillowy, chewy, tangy crust. The joy shared among the lucky people at your table.
I’m especially attuned to these pleasures because pizza success eluded me for too long. My pies would come out of the oven blistered on the outside and gummy on the inside (cooked at too high a heat). Often my dough tore while I tried to shape it (weak gluten network). My crust lacked flavor (not fermented long enough). Thus began a low-key quest for a bulletproof recipe that would work in my home oven so I could finally bake a proper pie. I referenced cookbooks and talked to experts; I learned about hydration ratios of flour to water and protein levels in supermarket flours. I acquired tools, including some fancy outdoor pizza ovens. (See p. 80.) Still, perfection remained out of reach.
Enter my pizza-loving colleague Mary-Frances Heck. The dough, she knew, was key, and she set to developing a flavorful, forgiving pizza dough that didn’t require fussing over. Then our fellow pizza-head and recipe developer Paige Grandjean refined the recipe further in the test kitchen. After that, we pressure-tested the recipe with a team of test kitchen cooks in their home kitchens with basic residential ovens.
Sure enough, the key to good pizza is good dough. And the dough that resulted from our repeated testing, tinkering, and evaluation (the dough on p. 74 and the cornerstone of this story) is very good. It has complex—but not too tangy—sourdough-like flavor, and it’s elastic and easy to work with —perfect whether this is your first time making pizza or your 50th. We then gave toppings, tools, and cook times the same workout. The result of our collective quest isn’t just good pizza at home—it’s great pizza at home.
So go ahead. Get out your favorite toppings, crank up the oven, and pour yourself a glass of wine. It’s pizza night
MAKE IT SNAPPY
A thin, crackling crust comes from stretching the dough by hand (see p. 77) and baking it on a stone or steel in a hot oven.
FOOD STYLING: TORIE COX; PROP STYLING: AUDREY DAVIS. ILLUSTRATIONS BY DANA JUNG
6 ESSENTIAL PIZZA TOOLS

WEIGH IT
The most accurate way to measure the ingredients and portion the dough is with a simple battery-powered digital scale that will tare to grams and ounces. Our testers like the Escali Arti Glass Kitchen Scale ($35, surla table.com).
MOVE IT
Use a lightweight aluminum pizza peel to transfer topped dough rounds to the oven and turn the pies while cooking. We like perforated peels like the Gozney Placement Peel ($99, us.gozney .com) that allow excess flour to fall away.
PROOF IT
To proof dough balls, place them on half sheet pans (Vollrath Wear-Ever HalfSize Sheet Pans, $35 for 2, amazon.com) or in BPA-free
plastic pint containers
(Safeware Deli Plastic Food Storage Containers, $22 for 50, amazon.com).
BAKE IT
Pros swear by the Baking Steel ($119, bakingsteel .com), a 16- x 14-inch slab that creates an ultra-hot surface for dough to crisp and rise. We also love the more lightweight, less expensive
Lodge 15-inch pizza pan
($43, lodgecastiron.com).
SHAPE IT
A flexible, straight-edge plastic bowl scraper like the 51/4- x 31/2-inch Ateco Straight Edge Plastic Bowl Scraper ($1.19, webstaurant store.com) is helpful for handling and cutting the dough and for shaping the dough into balls.
SLICE IT
Forget the pizza scissors and wheels. We like the versatility and length of the 14-inch rocker-style KitchenStar
Stainless Steel Pizza
Cutter for clean, even slices. It doubles as a mezzaluna for cutting herbs and vegetables. ($19, amazon.com)
STEP NO. 1
MAKE THE DOUGH
Despite its reputation as a convenience food, the most essential element of great pizza is time. A slow fermentation gives our pizza dough its chewy-crispy texture and depth of flavor. It starts with your choice of sourdough starter (aka levain) or a simple mixture of flour, water, and active dry yeast (poolish) left to ferment for 12 hours. Both options start fermentation and build flavor in the dough overnight. Strategic stretching of the dough during the initial fermentation stage develops gluten and makes the dough evenly elastic and forgiving to work with.
GET STARTED
FERMENTATION FORMULAS
POOLISH
Stir together 3/4 cup unbleached bread flour (about 31/4 ounces or 95 grams), 1/2 cup warm water (about 80°F) (4 ounces or 115 grams), and a pinch of active dry yeast (about 1/16 teaspoon) in a medium bowl. Cover loosely with a clean kitchen towel, and let ferment at cool room temperature (about 65°F) until increased in volume 21/2 to 3 times and passes the float test (see note below), about 12 hours.
LEVAIN
Stir together 1/2 cup warm water (about 80°F) (4 ounces or 115 grams) and 3/4 ounce mature
sourdough
starter (about 11/2 tablespoons or 25 grams) in a medium bowl until starter is mostly dissolved. Stir in 3/4 cup unbleached bread flour (about 31/4 ounces or 95 grams) until well combined and mixture resembles thick batter. Cover loosely with a clean kitchen towel; let stand at room temperature until increased in volume 21/2 to 3 times and passes float test, at least 4 hours or up to 8 hours.

Is My Starter Ready? One way to know your levain or poolish is ready to work with is by doing the float test. Using wet fingers, pinch off a small portion (about 1/2 teaspoon) of poolish or levain, and drop it in a glass of room- temperature water. If it floats, it’s ready to mix into dough. If it sinks, continue to ferment, performing the float test again after 30 minutes.
REALLY GOOD PIZZA DOUGH
ACTIVE 20 MIN; TOTAL 3 HR 20 MIN, PLUS 12 HR STANDING; MAKES 6 (9-OZ.) PIZZA DOUGH BALLS
Each 9-ounce dough ball will make one 10-inch pizza, a personal-size pie that’s also easy to maneuver around home countertops and ovens. This overnight dough is easily doubled for pizza parties. Not cooking for a crowd? The raw dough may be frozen. (See note below.) For more make-ahead tips on parbaking and freezing pizza dough rounds, see p. 80.
21/4 cups (about 18 oz. or 510 grams) warm water (about 80°F) Levain or poolish (see sidebar at left) 7 cups (about 1 lb. 133/4 oz. or 850 grams) organic unbleached bread flour (such as
King Arthur), plus more for work surface 1 Tbsp. (about 1/2 oz. or 16 grams) fine sea salt 2 Tbsp. (about 3/4 oz. or 20 grams) extravirgin olive oil, plus more for greasing
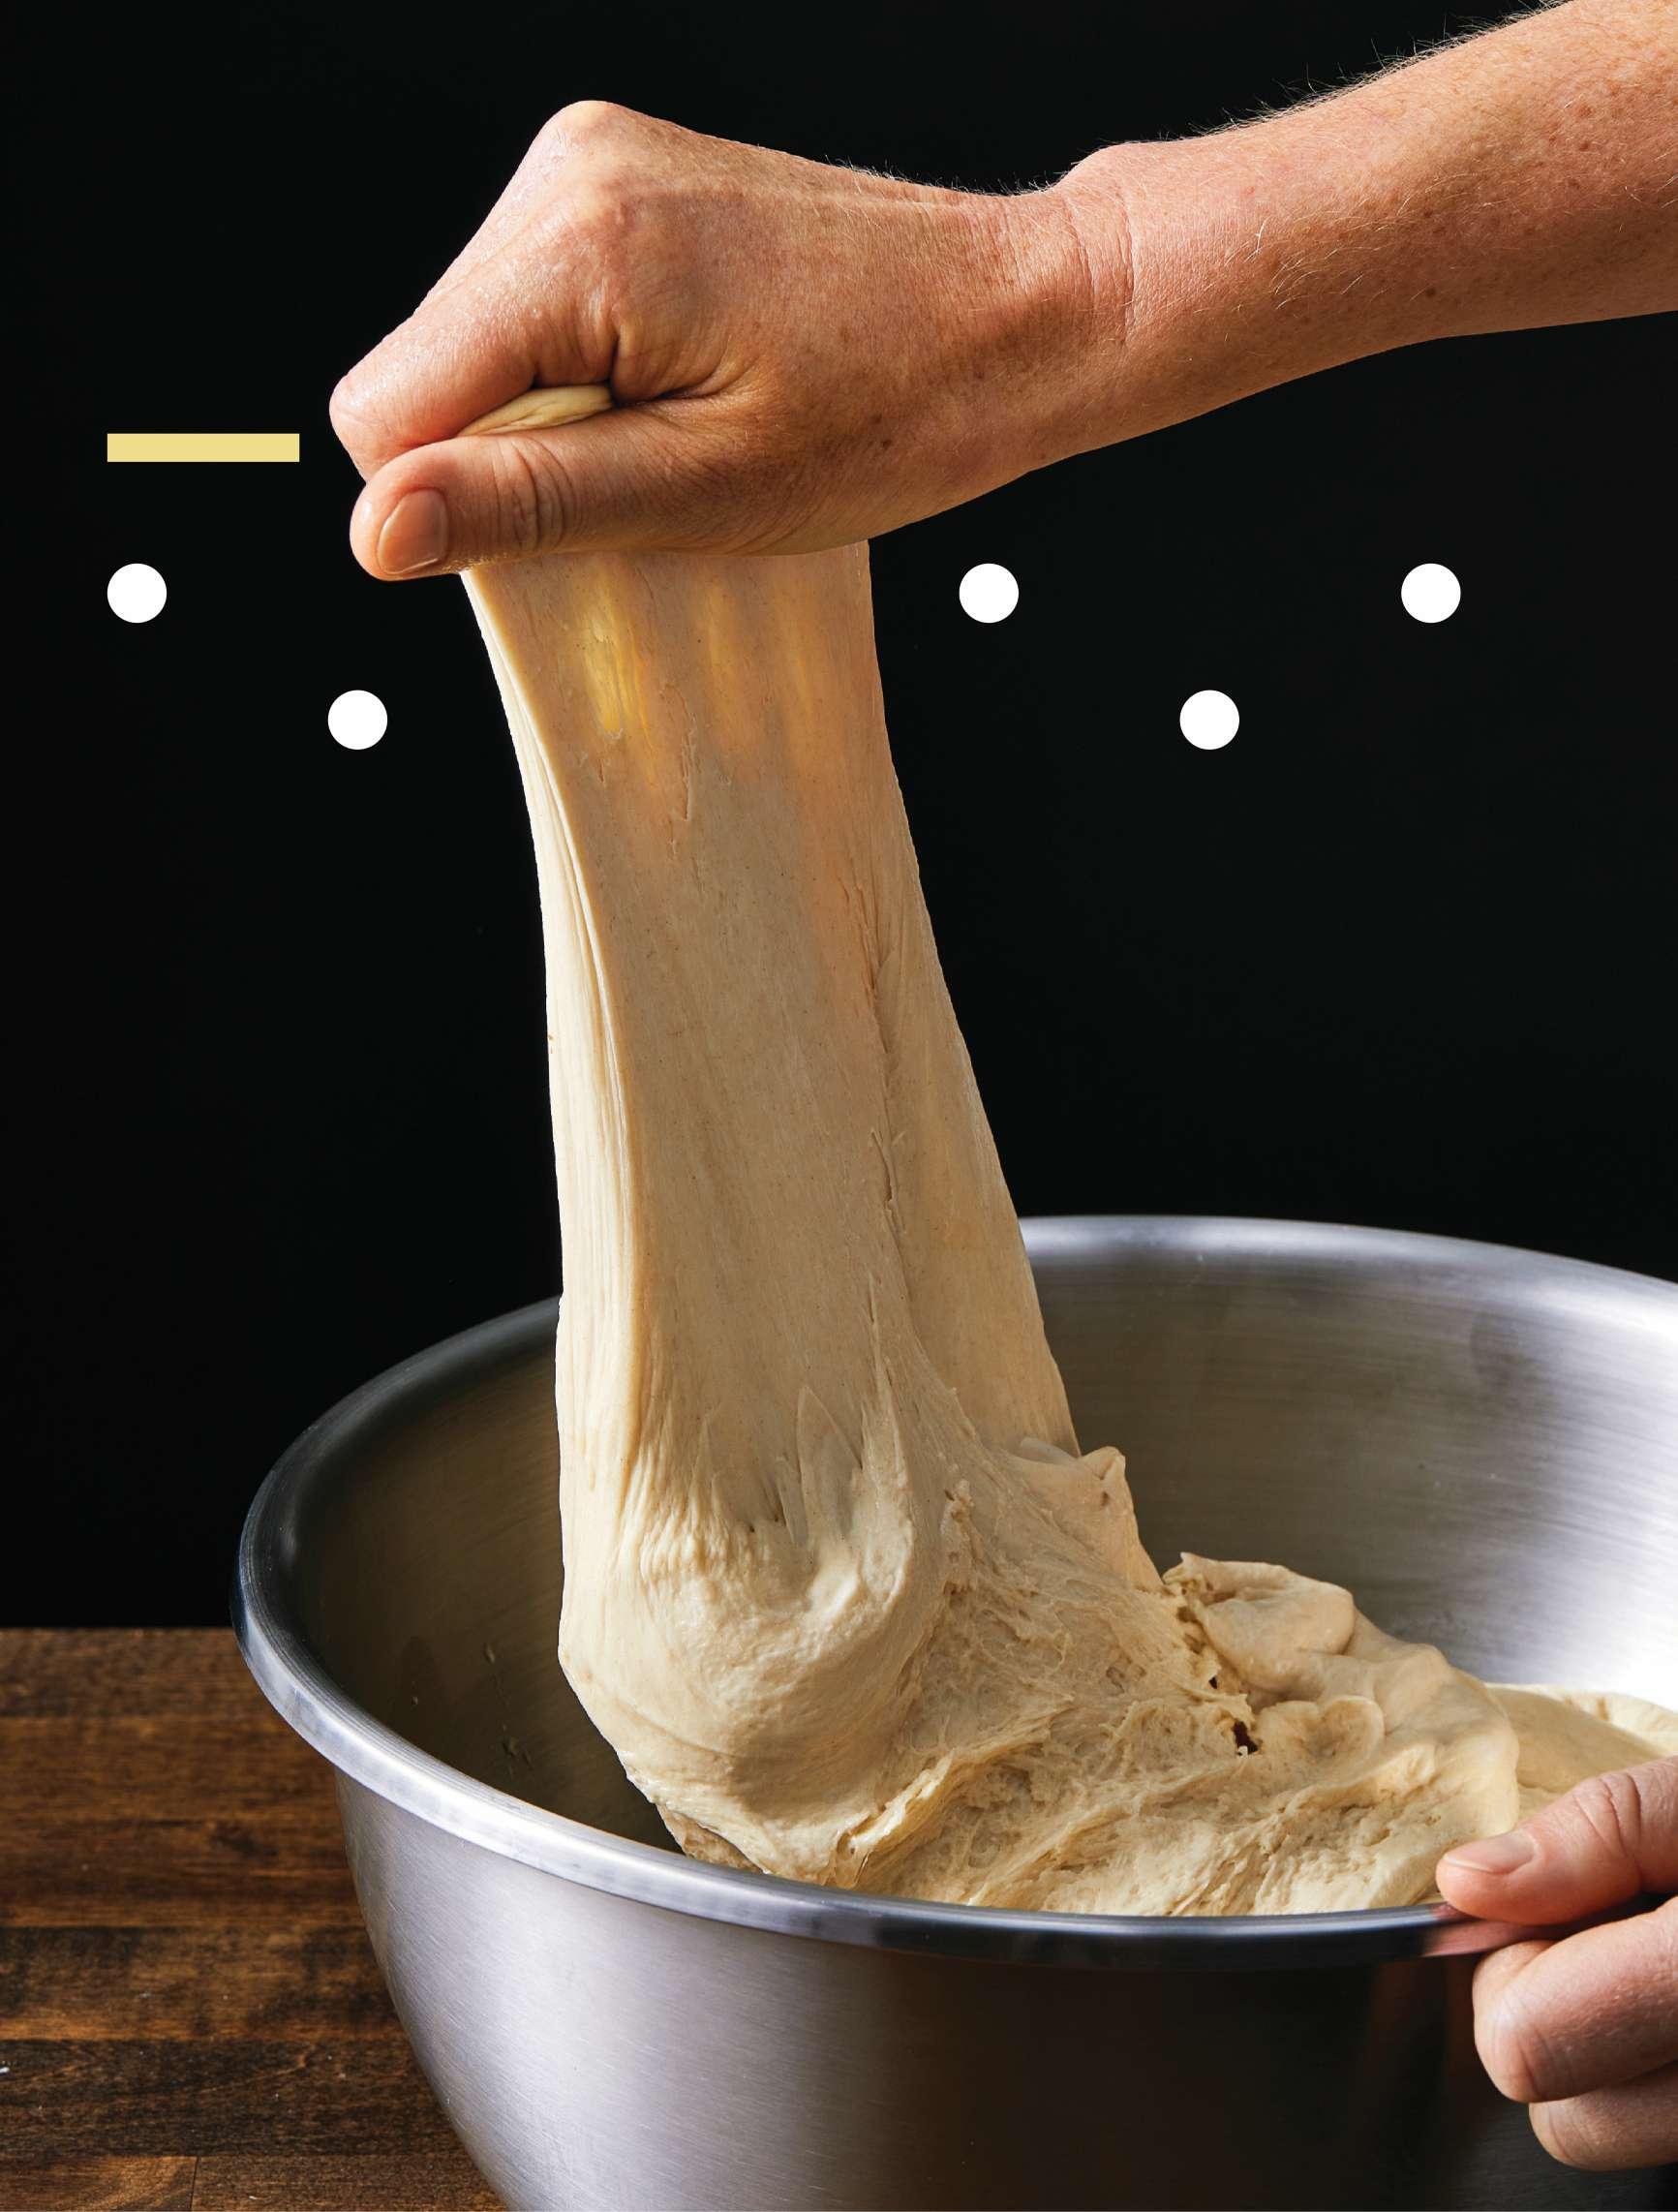
1. Stir together 21/4 cups warm water and levain in a large bowl until levain is mostly dissolved. Add flour and salt. Stir using a wooden spoon to form a shaggy dough. When dough becomes too stiff to stir with spoon, knead dough in bowl to form a ball. Turn dough onto a clean work surface, and knead until there are no dry patches of flour, about 1 minute. (Dough will be sticky. To easily clean doughy hands, sprinkle hands lightly with flour, and rub together over a trash can to loosen any stuck dough.) Place dough in a clean large bowl, and drizzle with oil. Knead dough in bowl until oil is incorporated, about 1 minute. Cover bowl tightly with plastic wrap, and let rest at room temperature until dough begins to rise, about 1 hour. 2. Uncover dough; starting at edge of bowl farthest from body, use a wet hand to lift edge of dough and stretch until there is tension, approximately 1 foot in the air (see photo, opposite). Press the dough in toward the center; rotate bowl 90 degrees, and repeat motion to fold dough 4 times total. Flip dough seam side down; cover tightly with plastic wrap, and let stand 1 hour. Repeat folding process 1 more time. 3. Cover dough bowl tightly with plastic wrap, and let stand at room temperature until tripled in volume, about 12 hours, or refrigerate until increased in volume 21/2 to 3 times, at least 24 hours or up to 48 hours. 4. Line a large rimmed baking sheet with plastic wrap, leaving about 3 inches of overhang on all sides; lightly grease plastic wrap with oil. Alternatively, lightly grease insides of 6 lidded plastic pint containers with oil. Set aside. 5. Uncover dough, and gently press to release air bubbles. Turn dough out onto a heavily floured work surface. Divide dough evenly into 6 portions (about 9 ounces or 255 grams each). Working with 1 dough piece at a time, stretch and fold 4 corners of dough in toward center. Flip dough seam side down. Using a bench scraper and a lightly floured hand, drag dough across work surface, rotating dough gradually with your hand as you pull it with bench scraper, until dough forms a taut ball. Using bench scraper, transfer dough ball, seam side down, to prepared baking sheet (or to 1 prepared pint container). Repeat process with remaining 5 dough pieces, spacing evenly apart on baking sheet, and pulling plastic wrap up between dough balls to prevent sticking (or place in 6 oiled plastic pint containers). Cover tightly with plastic wrap or lids. 6. For faster dough, let proof at room temperature 1 hour, and then refrigerate at least 1 hour or up to 5 hours. Alternatively, for more flavorful dough, let dough proof more slowly in refrigerator, at least 6 hours or up to 3 days. —MARY-
FRANCES HECK AND PAIGE GRANDJEAN
MAKE AHEAD Dough balls can be frozen in lightly greased individual freezer-safe pint containers up to 2 weeks. Let thaw in refrigerator at least 12 hours or up to 2 days. NOTE If you’re new to making pizza, prepare a double batch of dough to get the hang of shaping and baking. Practice makes perfect.
5 KEY INGREDIENTS FOR REALLY GOOD DOUGH
1
STARTER
The key differentiating factor in this dough is the use of a mature, flavorful sourdough levain, or a quickly assembled poolish made from active dry yeast, that develops its complexity overnight.
2
BREAD FLOUR
Unless you’re baking at temperatures over 750°F, skip the fancy 00 flour. Bread flour with a high protein content of around 12.7% yields a supple, forgiving dough with moderate gluten strength that’s easily stretched without tearing. Its neutral taste lets the toppings shine. We like King Arthur Organic Bread Flour.
3
OLIVE OIL
In addition to boosting flavor, olive oil makes for an elastic dough that’s easy to shape. As the pizza bakes, the fat in the dough bubbles and blisters in the hot oven, forming a speckled and lightly crisp and chewy crust.
4
WARM WATER
The ideal dough temperature for fermentation is around 78°F. Starting with water just warmer than this target temperature jump-starts fermentation and ensures the yeast stays happy and active. Filter tap water to remove chlorine, which can adversely affect the dough’s taste and rise.
5
FINE SEA SALT
The small granule size of fine sea salt, such as La Baleine, dissolves quickly and evenly in dough, providing a crisp and clean salinity throughout. Avoid kosher flake and iodized table salt, which will perform differently than fine sea salt. Finish pizzas with a sprinkle of flaky sea salt, such as Maldon, for an extra punch of flavor and texture.


