
5 minute read
Jon Price Masterclass


CONSTRUCTING A MOUNT PACKAGE
A MASTERCLASS WITH JON PRICE GCF (APF)
Advertisement
If there is anything that’s guaranteed to make me rant like Basil Fawlty, it is the number of incorrectly mounted pieces of artwork I see. I would estimate that 95% of the pre-mounted pictures and framed pieces that come through my door are mounted in a way that has damaged or will damage them. This includes works self-mounted by artists and photographers but also those mounted by professional framers, which is why I persuaded Larson-Juhl that one of their new ‘how to’ videos should be on constructing a mount package.
Although this is visually the least exciting of the six videos, I would say that it is the most important. Knowing how to mount a piece of paper-based artwork is a fundamental framing skill that should be utilised with all artwork. In this video I demonstrate how to; construct a mount package consisting of a hinged window mount and under mount, attach artwork to the mount using T-hinges (which allow the artwork to expand and contract and therefore reduce cockling or buckling), seal the whole package and glazing together to help prevent insect infestation and reduce potential damage by airborne pollutants.
With the emphasis of this video being on technique rather than design, we were more conservative with our choice of window mount and frame. The mountboard used was the classic 8065 Hayseed with its textured finish. The 406335110 Sable moulding’s Teak veneer beautifully matches the colour, tone and texture of the hare print being framed. The overall result is tasteful and classy.
Figure 1 - Measure and cut a window mount as required. In this case the border dimensions were 80mm top and sides and 95mm at the bottom. Cut an under mount (LLL008950) of the same external dimensions as the window mount.
Place the window and under mounts side by side on a flat surface with the longest sides butted up against one another. For portrait mounts the top edge should be placed against the under mount, on a landscape mount it should be the left-hand side.

Figure 2 - Cut a piece of white gummed conservation tape (999000026) a few millimetres shorter than the long edge of the mountboard. Dampen the tape using a sponge or brush and deionised water. Place it along the join of the window and under mounts with half the tape on each mount. Burnish with an artist’s bone.

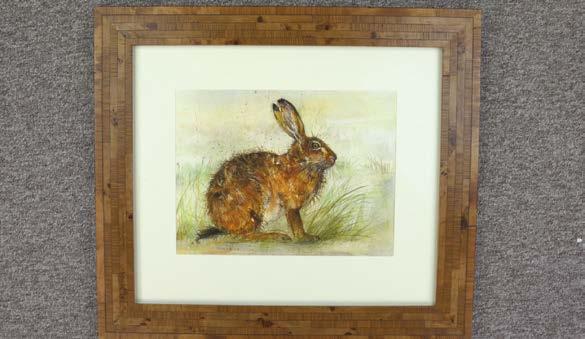
Figure 3 - Cut two pieces of the same gummed conservation tape to about 30mm long. Dampen the end 5mm of the gummed side using the deionised water. Attached the 5mm of dampened gummed tape to the top edge of the back of the artwork a quarter of the way in from each side. These are the uprights of the capital ‘T’ that forms the T-hinges.

Figure 4 - Fold the window and under mounts together along the hinge and carefully adjust so they sit together well. It may help to run an artist’s bone along the hinged join. Figure 5 - Open up the mount package and place the artwork between the under and window mounts. Close the package and adjust the artwork so it sits in the correct position. Use a paper weight to hold the image in place while you open up the mount. Cut and dampen two 75mm pieces of (999000026) gummed tape. Secure the artwork by placing these pieces of tape across the pieces of tape you previously attached to the back of the artwork. Leave a gap of a few millimetres between the top of the artwork and these cross pieces which are the capital ‘T’ of the T-hinges. Figure 6 - Sealing the glazing, window mount, artwork and under mount. Cut and clean the glazing. For all of the Larson-Juhl ‘how to’ videos I used Larson-Juhl Clarity AR99 (CLF915122). Having made sure the mount is dust and blemish free, place the glazing on top of the mount package. Cut four pieces of the white gummed conservation tape. Each piece should be cut to slightly longer than each of the four sides of the mount package. Dampen one piece using the deionised water. Place the dampened piece of tape along one edge of the mount/glazing package overlapping the edge of the glazing by a few millimetres (remember the tape needs to be covered by the rebate lip once the package is placed in the frame). It is easier to do this with the edge being taped protruding off the edge of a workbench. Smooth the tape down with your finger and then an artist’s bone, bending the tape slightly around the edge of the glazing/mount as you do so.
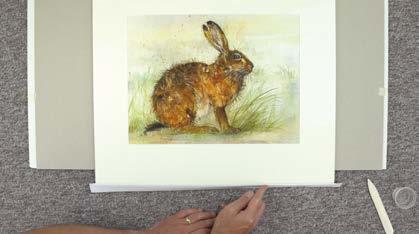
Figure 7 - Smooth the dampened tape along the outer edge of the package using your finger and then a bone bending the tape around the bottom edge

as you go. Smooth the tape along the underside of the package.

Figure 8 - At both corners cut the tape in a way that overlaps the left and right edges of the package. This reduces the chances of any gaps once all four


edges have been taped. Repeat on all four sides taping opposite sides first. Figure 9 - Using Evacon R Conservation Adhesive (SUEVAR0001) glue down any corners of the gummed tape that haven’t adhered properly. Place the mount and glazing package in the frame. Cut a backing board (999110000) and secure with a Fletcher Framemaster (999000083), framers points (999000084) and brown gummed paper tape.
Where I live on the North Devon/Cornwall border, insects like Thrips, which have a reputation for getting into framed pieces between the glazing and the window mount, are not common. Therefore, I only tend to seal the mount and glazing package for higher end conservation and museum level framing. Constructing a mount package, however, is something I do on a daily basis. If you don’t mount and T-hinge most of your paper-based artwork in the same way, you are not only doing it long term damage, but also may well be the cause of some of my Fawlty-esque rants.
For more information on T-hinging and constructing a mount package please refer to my articles in 4walls Issues 32 & 33 or go to ‘How to mount your art and photography’ on my website handmadepictureframing.co.uk.
Jon Price owns Handmade Framing and Gallery near Bude, North Cornwall. Jon is Cornwall’s only Guild Certified Framer. His clients include national museum groups, art conservation and restoration companies and private collectors.


