
3 minute read
Fight Fire


How to install a fire port in your boat’s engine compartment.
The first rule of successfully containing and extinguishing a fire is fighting it in a way that doesn’t make the situation worse. A good example would be seeing smoke coming from the engine compartment, then lifting the hatch to see what’s going on (an act that provides a rush of oxygen that can make the fire even worse). A fire port allows you to fight an engine compartment fire without opening the hatch. Here’s a look at how they work, as well as selection and installation tips.
extinguisher. Clean agents, such as Halon, FM-200 (heptafluoropropane) or FE-241 (chlorotetrafluoroethane) leave no residue. Dry chemical powder may be effective, but it’s also highly corrosive and the residue is difficult to remove. In some cases, dry chemical residue can actually cause more damage to the engine than the fire itself. Another problem is that where a clean agent extinguisher floods the engine compartment when deployed, a dry chemical extinguisher has to be aimed directly at the base of the fire to be effective (something that will likely be impossible when using a fire port).
When selecting a portable fire extinguisher for use with the fire port, ensure the port is large enough to accept the extinguisher discharge nozzle. The extinguisher must also be of sufficient size to service the entire engine compartment
Installation considerations
Fire ports are simple to install: Select a suitable location and (using the pattern provided by the manufacturer) drill or cut the mounting hole.
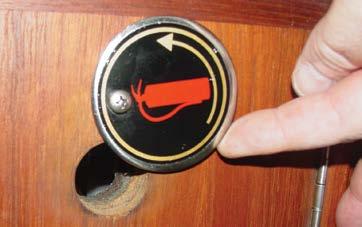
What is a fire port?
The American Boat and Yacht Council (ABYC) recommends that all inboard and sterndrive vessels not protected by a fixed fire extinguishing system have a suitable means of discharging a portable fire extinguisher into the space without opening the primary access hatch or panel. Fire ports are small hatches or ports that allow you to discharge a portable, clean agent fire extinguisher directly into the engine compartment without opening access panels (and providing that additional oxygen to the fire). Some fire ports utilize clear components, allowing you to peek inside the engine compartment and assess the situation without opening or breaking the fire port seal.
It’s important to note the statement above concerning the use of a clean agent fire
The first step is choosing a proper location for the fire port. You’ll want to follow the instructions provided by the manufacturer, but in general, the fire port must be positioned so that the clean agent portable fire extinguisher you’ll be using can be properly discharged into the engine compartment in accordance with the extinguisher manufacturer’s instructions. For example, if mounted on the side of your engine hatch, the fire port will typically need to be high enough up to facilitate discharging the extinguisher while it is in a vertical position, unless the extinguisher is equipped with a hose and nozzle. The same can also be true for a fire port mounted on a horizontal surface.
Tips for a successful installation
While you’ll want to follow the manufacturer’s installation instructions, here are some general tips that can be used for most any fire port installation.
1. Once you’ve decided on the location of your fire port, double check to make sure of what’s on the other side prior to drilling. Putting holes in hoses or electrical cables are never conducive to a good installation.
2. Cover the area with a good painter’s masking tape to protect the gelcoat from scratches and help prevent chipping while drilling or cutting.
3. If the fire port is circular, mark the center position using the provided template.
4. When drilling or using a hole saw, start slowly, applying moderate pressure as needed.
5. Once the cut is completed, insert the fire port to check fit and alignment, then mark the mounting bolt or screw holes and drill. When drilling the holes, run the drill in reverse until through the gelcoat (to help prevent chipping) then switch to forward and continue drilling.
6. Bevel each hole once drilled, which prevents future gelcoat cracking and provides a better seal once caulking is applied. File or sand the edge of the center hole as well.
7. Dry fit the fire port and mounting bolts to ensure a perfect fit prior to bedding (caulking) to include installation of any required backing plates or washers.

8. Seal any exposed wood coring with epoxy and let dry. Seal non-wood coring with a suitable marine-grade caulking (such as 3M 4200).
9. Apply a bead of caulking to the flange of the fire port and bolt holes, then insert in the mounting hole. Install mounting hardware (backing plate, washers and locknuts) and snug up until bedding compound begins to ooze out around the edges, then leave overnight to set up, forming a gasket. Come back the next day and tighten to the proper torque. ★


