
This guide will help you get started.
You’ll find step-by-step instructions for navigating your library, completing assignments, checking your grades, managing notifications, and updating your profile.
Let’s get started!
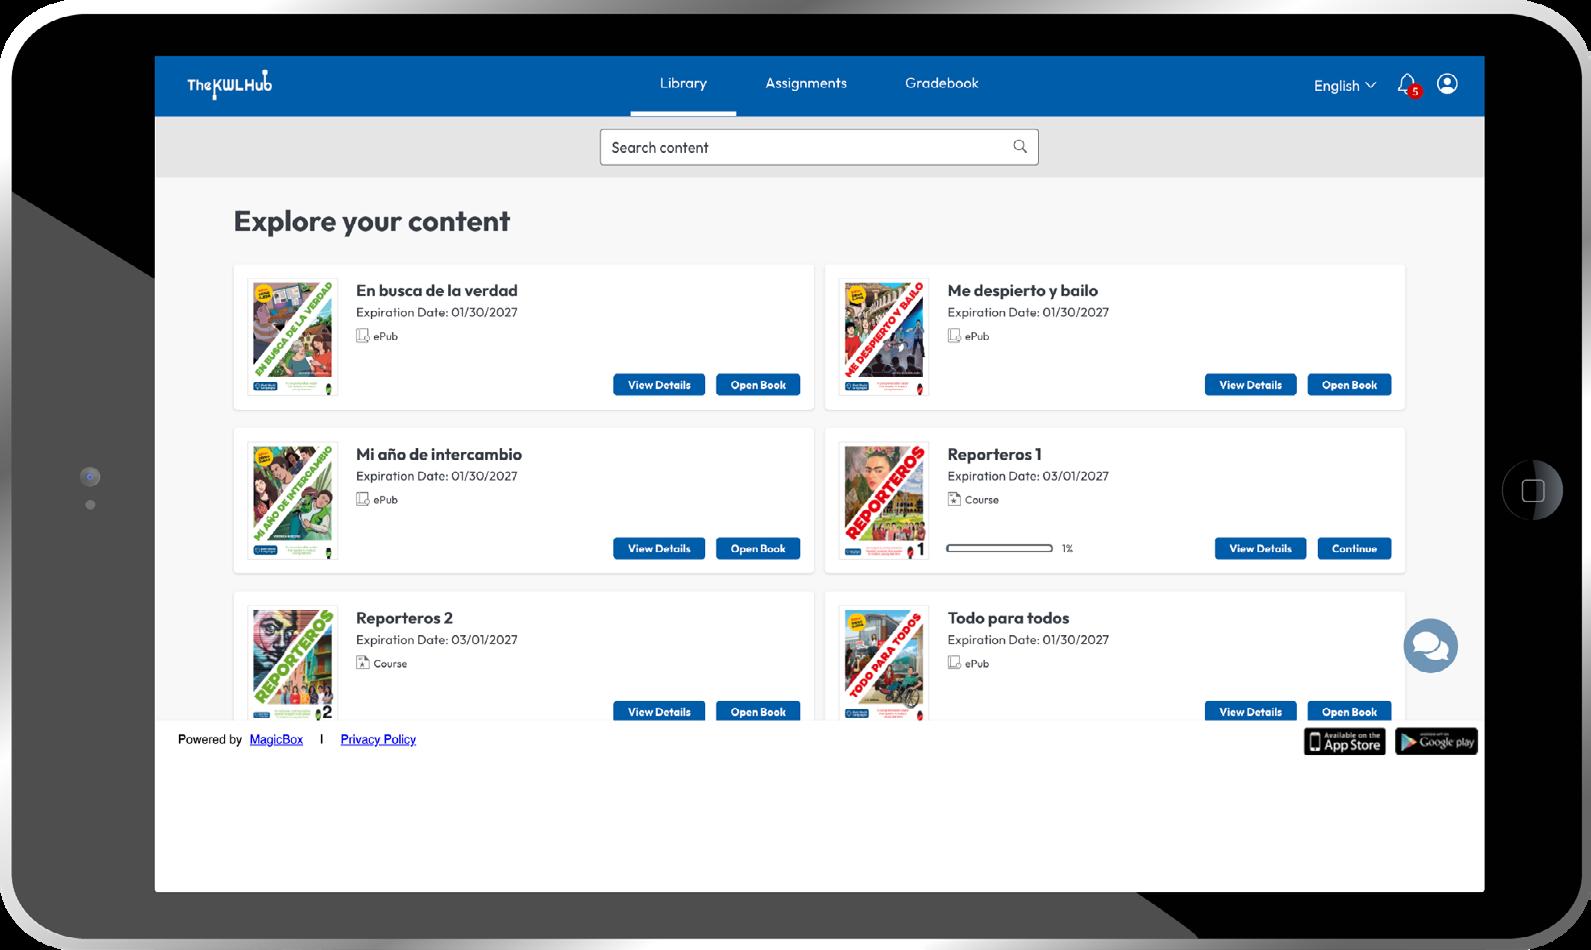
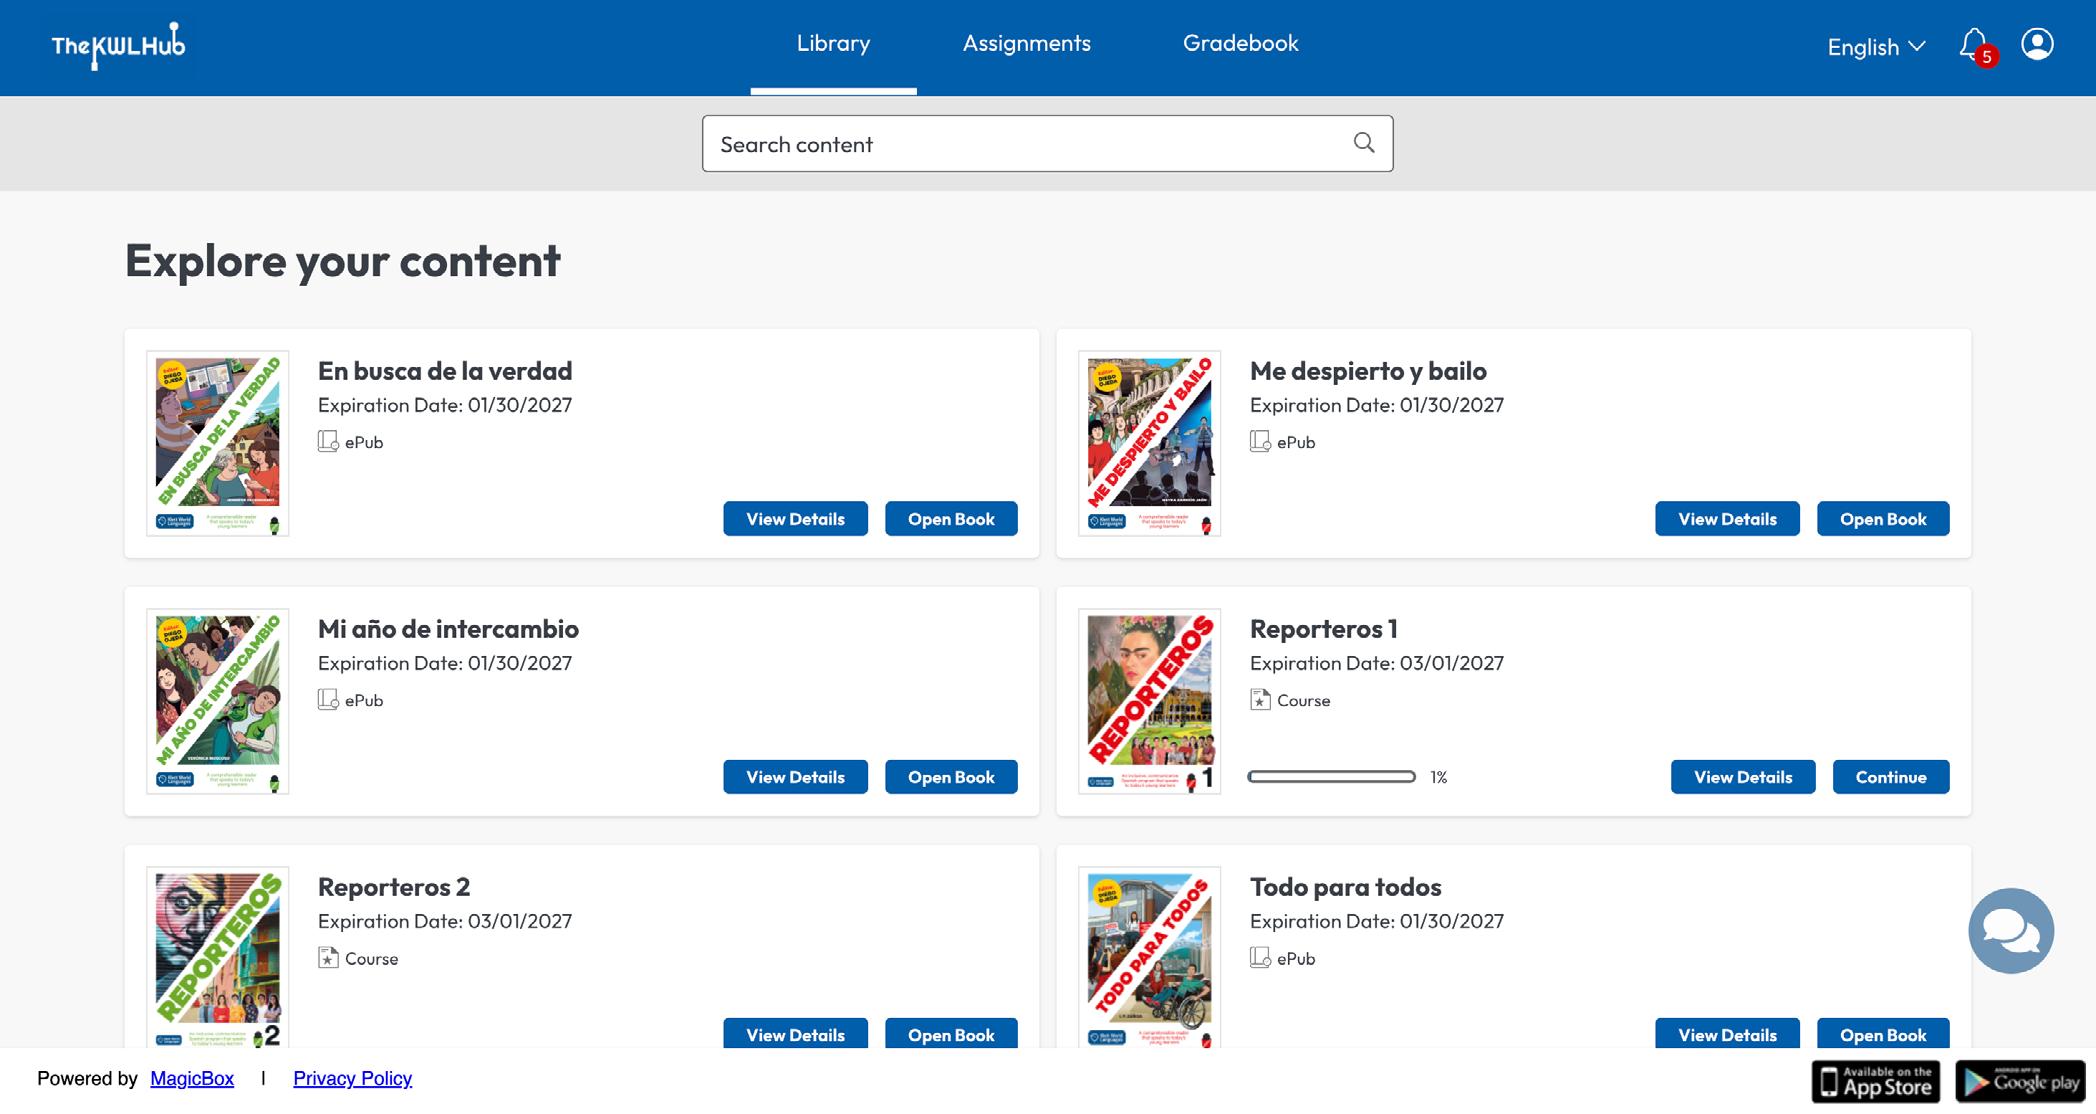
The Library is where you’ll find all the books your teacher has assigned. It’s an important part of the platform, now with a modern design and easier navigation based on student feedback.
SEARCH
Search for a book within all content types by entering the title, author, ISBN, or description in the search field.
VIEW DETAILS AND LAUNCH CONTENT
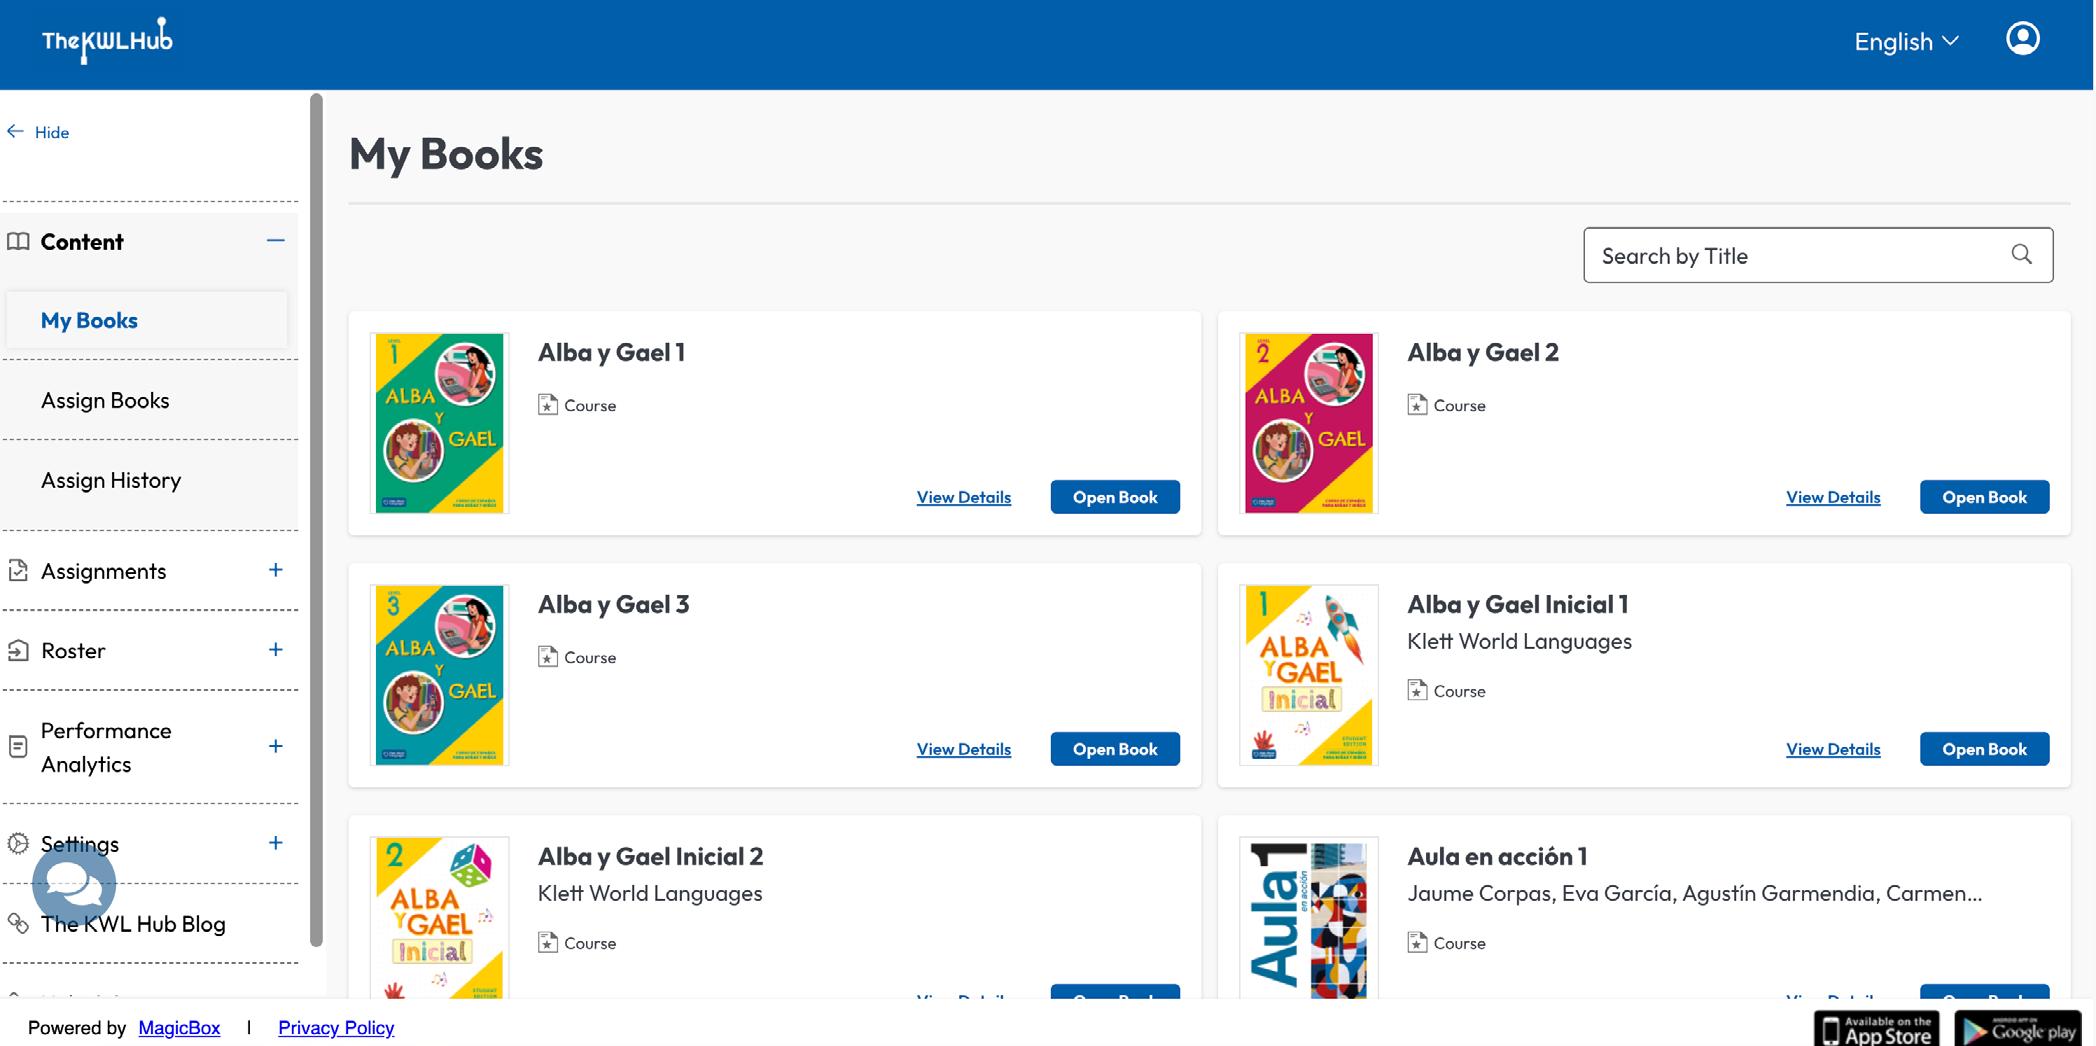
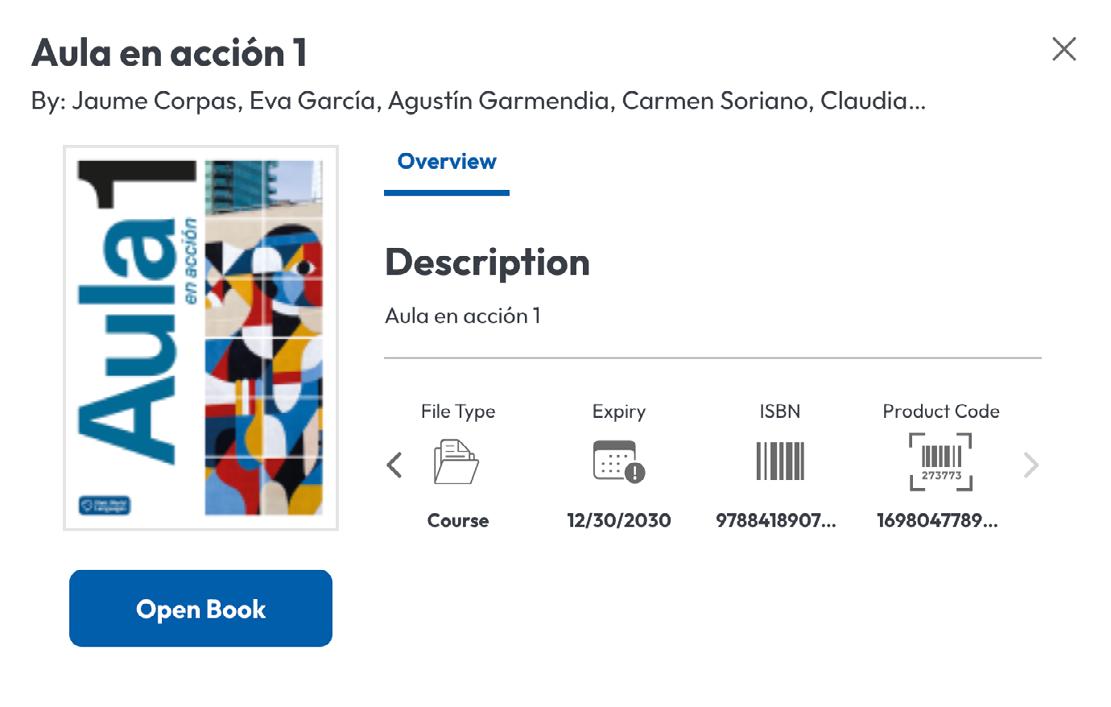
In the Library section, all books are displayed with a content card. Books can be viewed by pressing Open Book to launch the material.
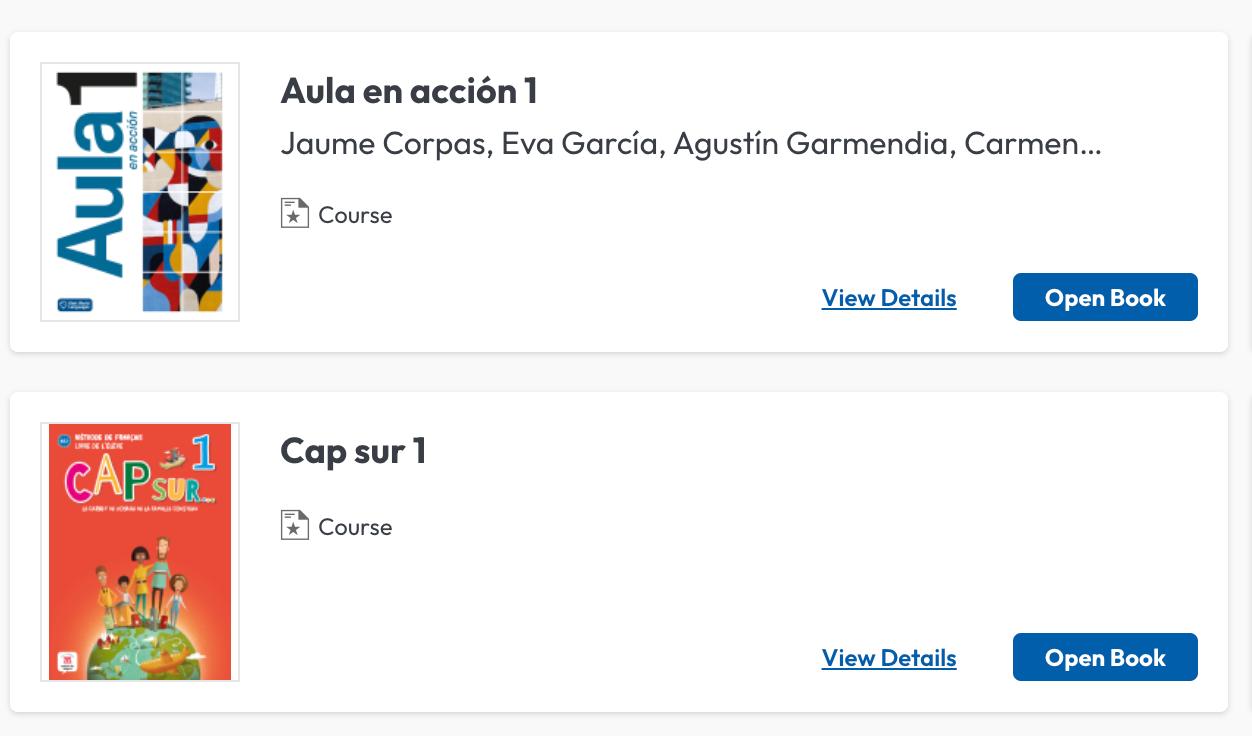
Add text: Click View Details to see additional information related to your book, such as the ISBN and the book access expiry date.
We’ve added new features to improve your reading experience and make it easier to navigate your eBook.
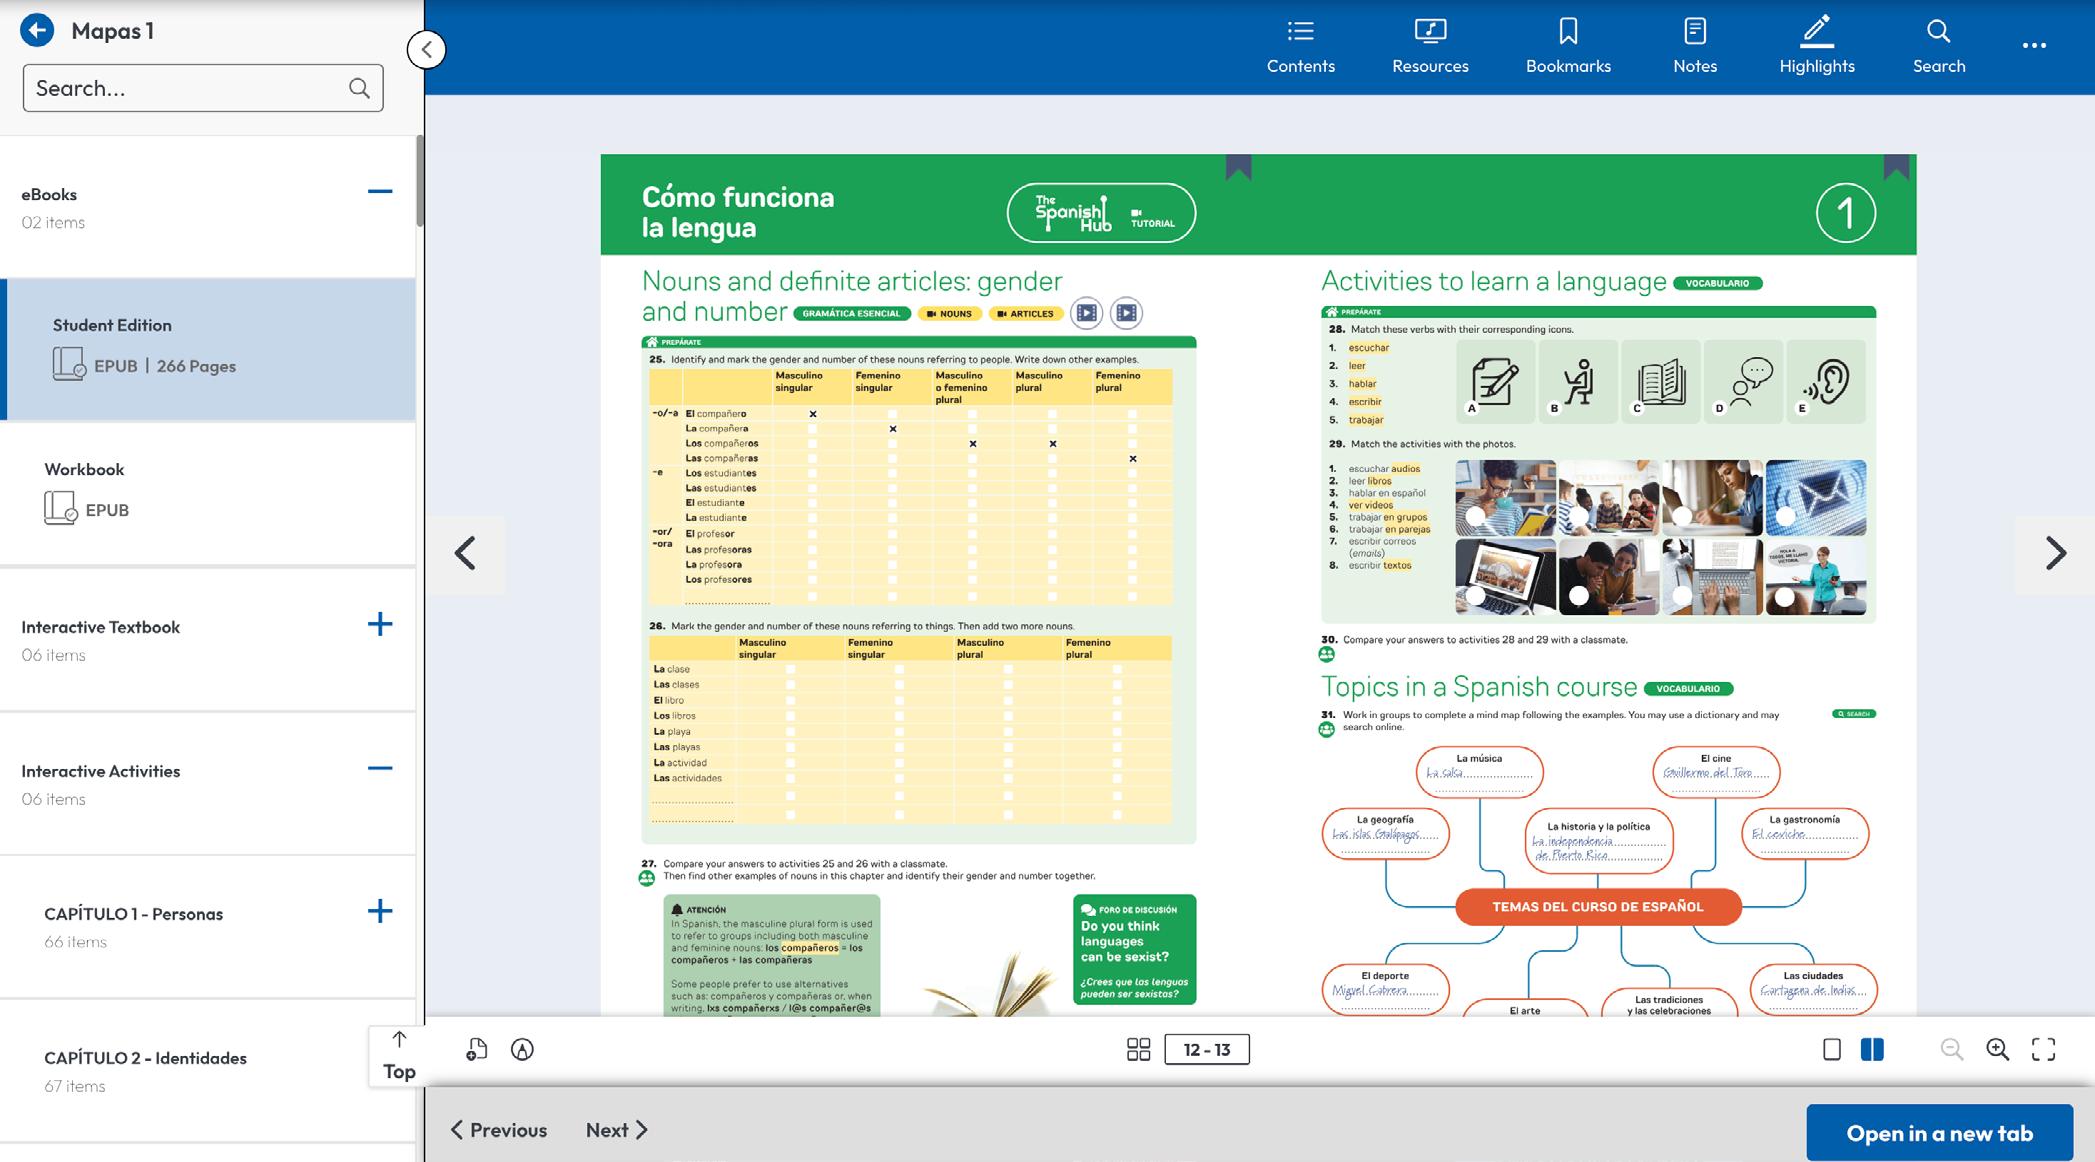
Contents – Opens the table of contents for quick navigation across chapters or sections.
Resources – Provides access to related resources such as audio, video, PDFs, or external links.
Bookmarks – Gives you access to all the pages you’ve bookmarked by clicking the tab on each page. Use it to quickly return to important or frequently visited content.
Notes – Lets you view and navigate to previously created notes.
Highlights – Displays all the text you’ve highlighted throughout the eBook. Click on any highlight to jump directly to its location in the content.
Search – Helps you find keywords or phrases throughout the eBook.
Three-dot icon – Gives access to Help
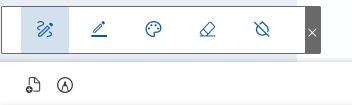
Options at the bottom left of the page
Add Note – Lets you create a note directly on any page. It will also appear in the Notes section.
Highlighter – Enables you to highlight any text in the eBook. These will also be listed in the Highlights section.
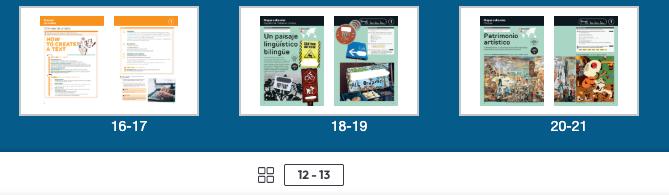
Page Thumbnails – Displays miniature previews of all pages to quickly navigate to any page.

Single/Double Page View – Switches between single-page and doublepage display modes.
Zoom In/Zoom Out – Allows you to zoom in and out of the eBook page.
Fullscreen View – Enables viewing the eBook in full-screen mode.
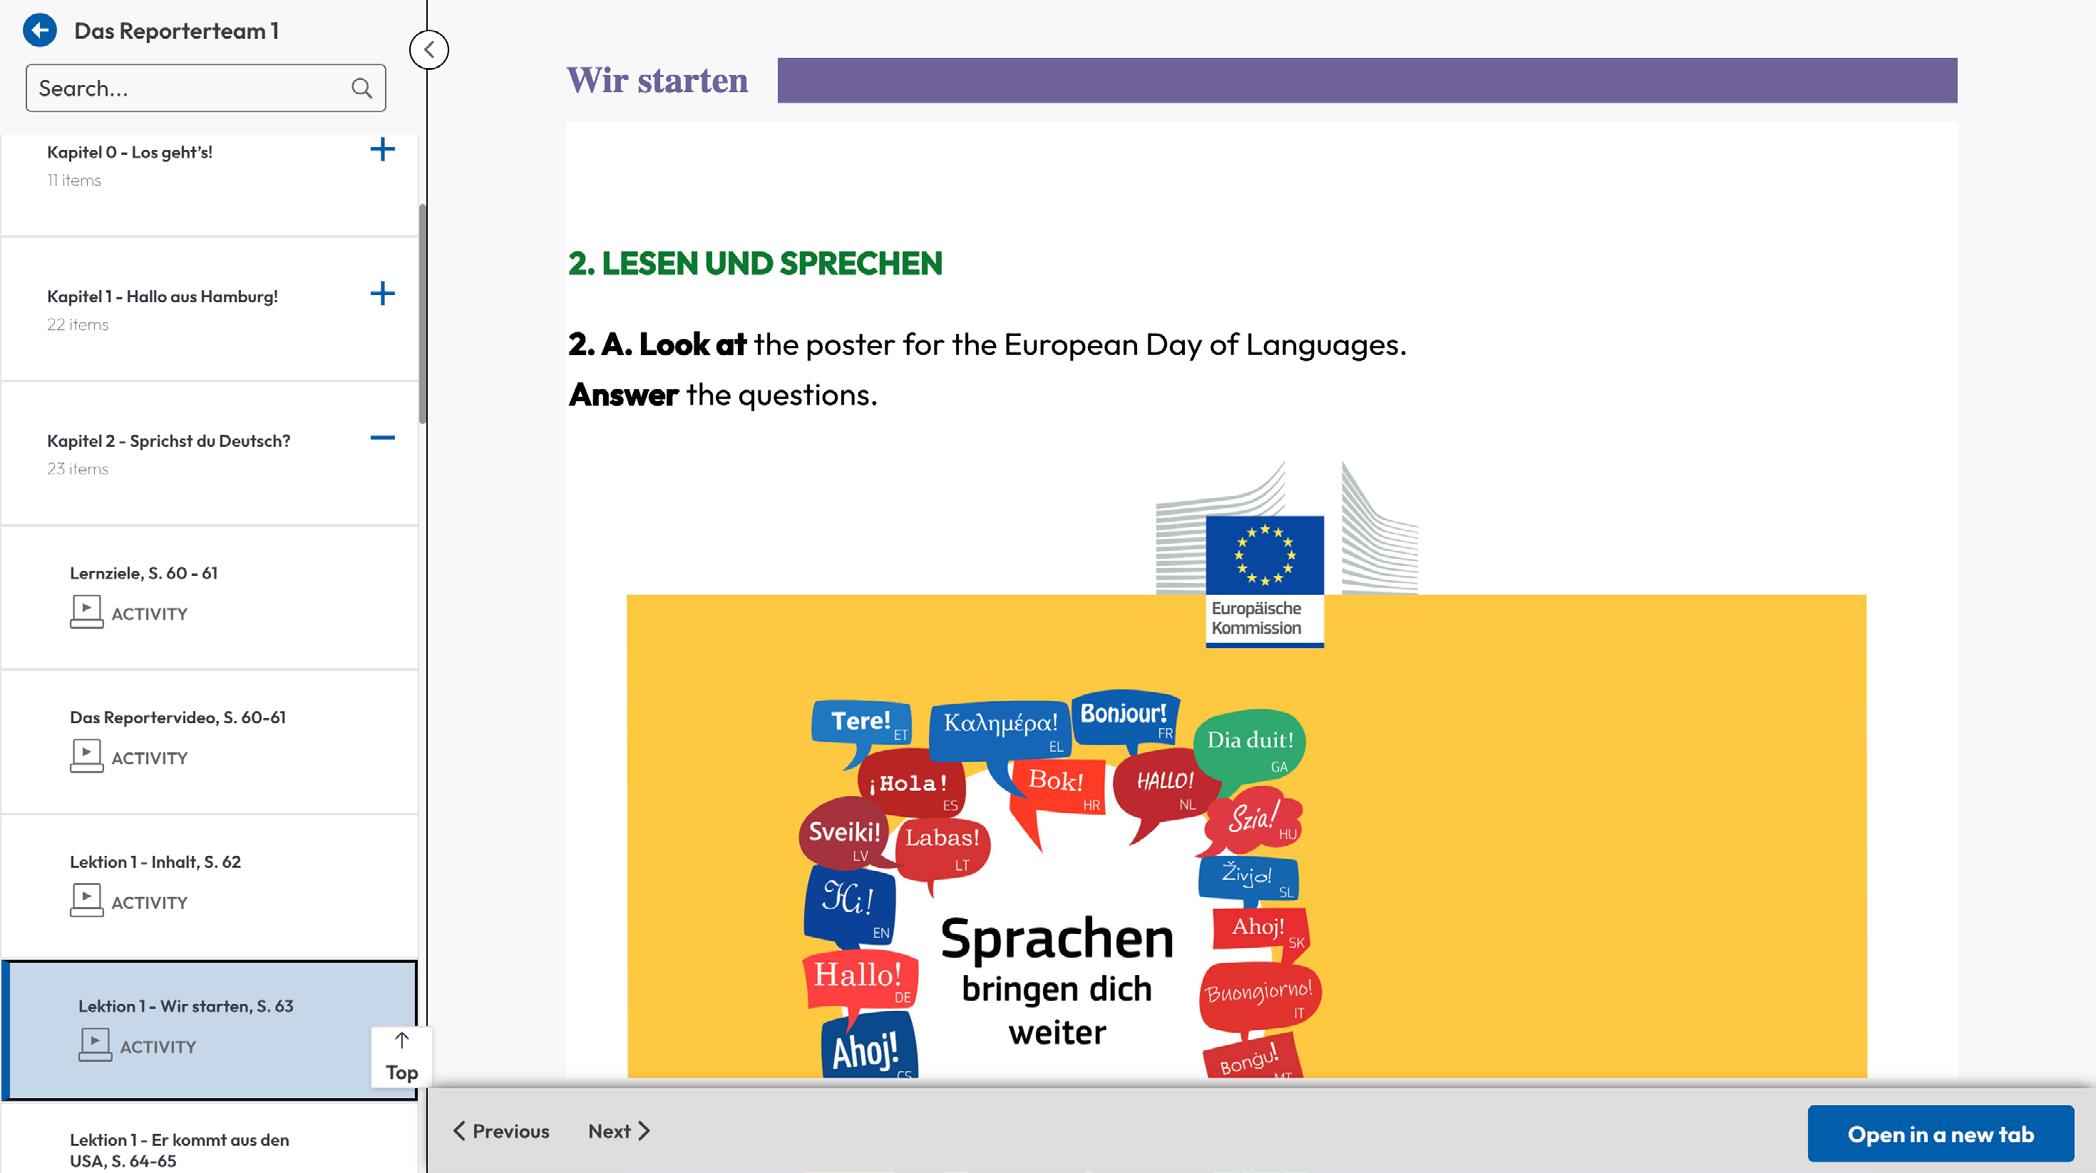
The Interactive Content keeps the same navigation as before. Only the Table of Contents on the left has been updated to make it easier to see and use.
Navigate to the Assignments page by clicking the assignment icon on the homepage header.
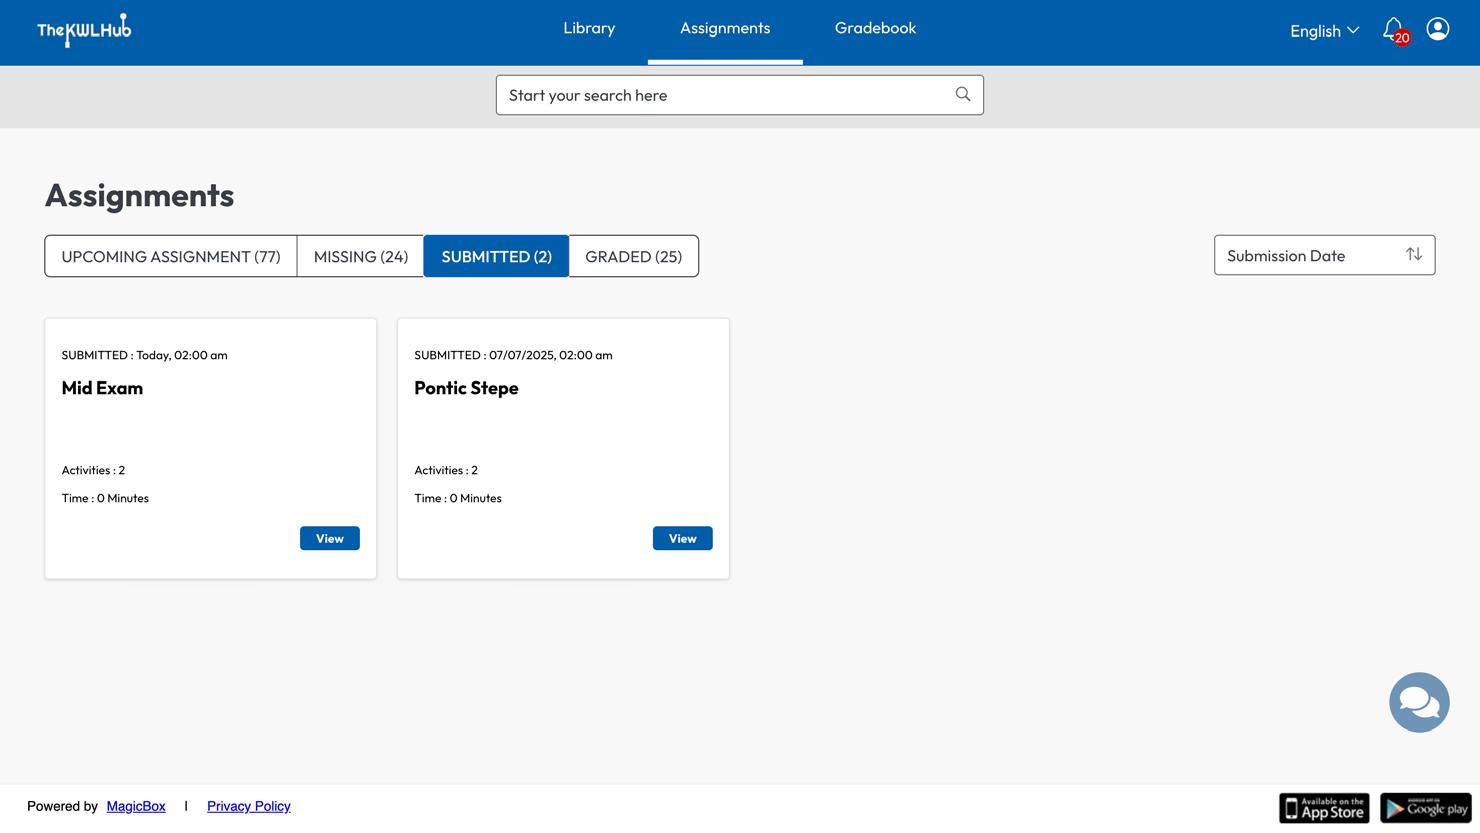
On the Assignments page, you’ll find the following sections:
Upcoming assigment
Missing
Submitted
Graded
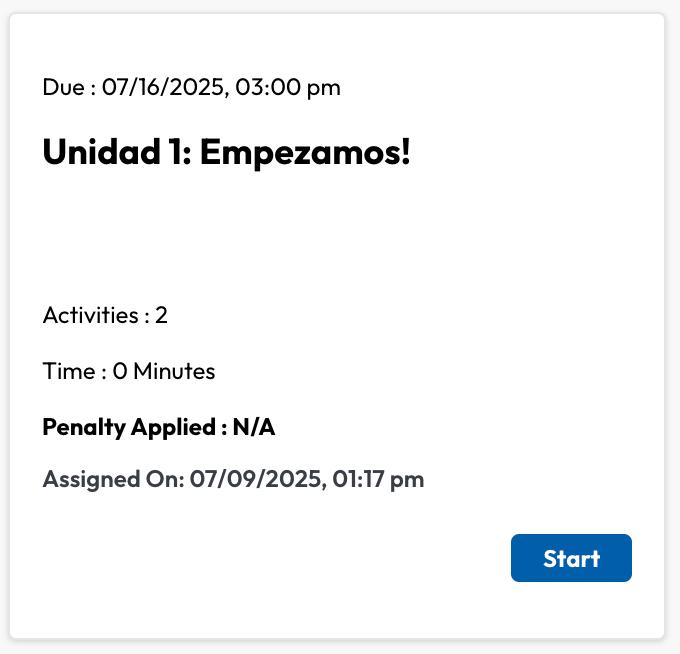
Check your upcoming assignments and when they’re due.
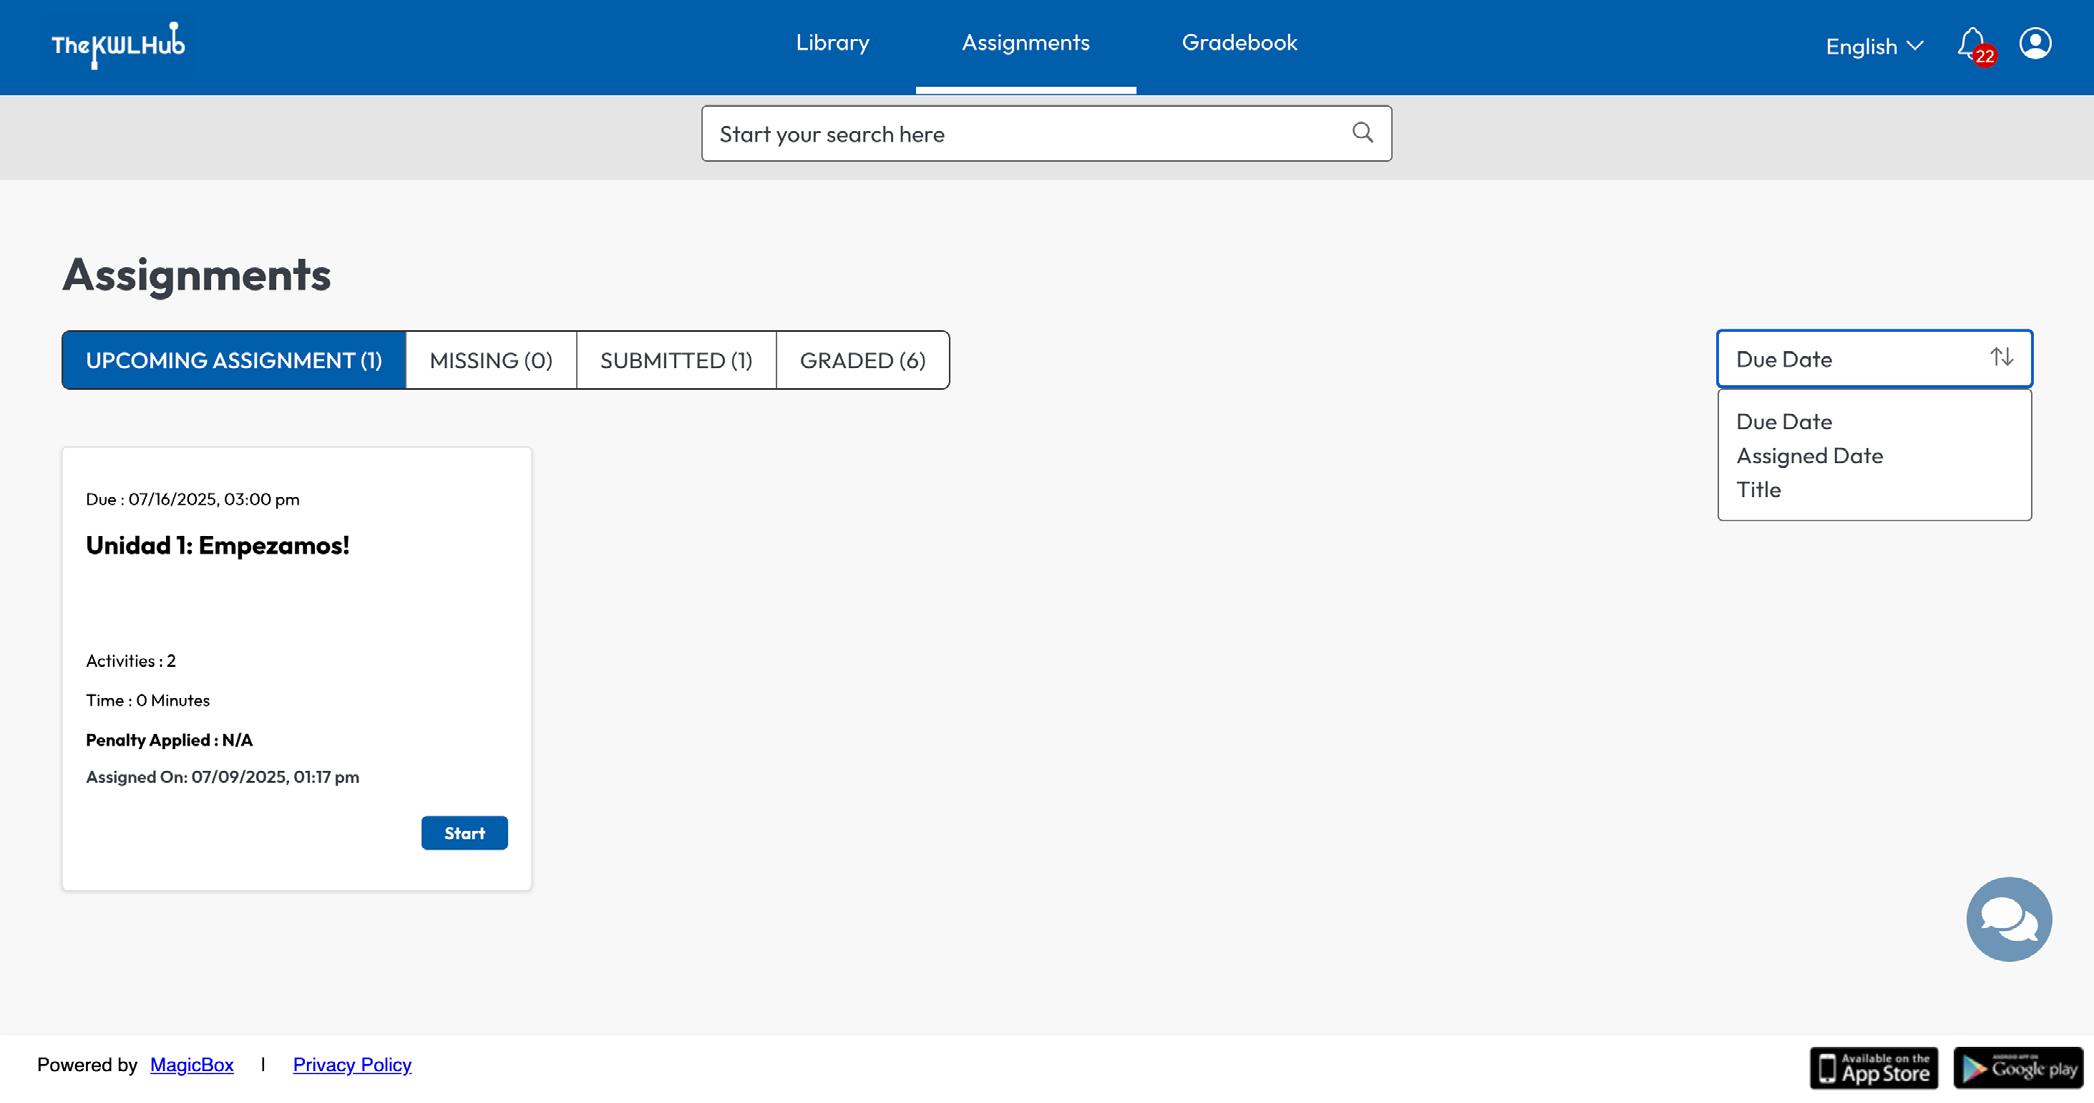
Each assignment card includes the following details:
Due date and time (if set)
Title of the assignment
Number of questions in the assignment
Time limit set by the teacher (if applicable)
To begin an assignment, click ‘Start’ or ‘Resume.’
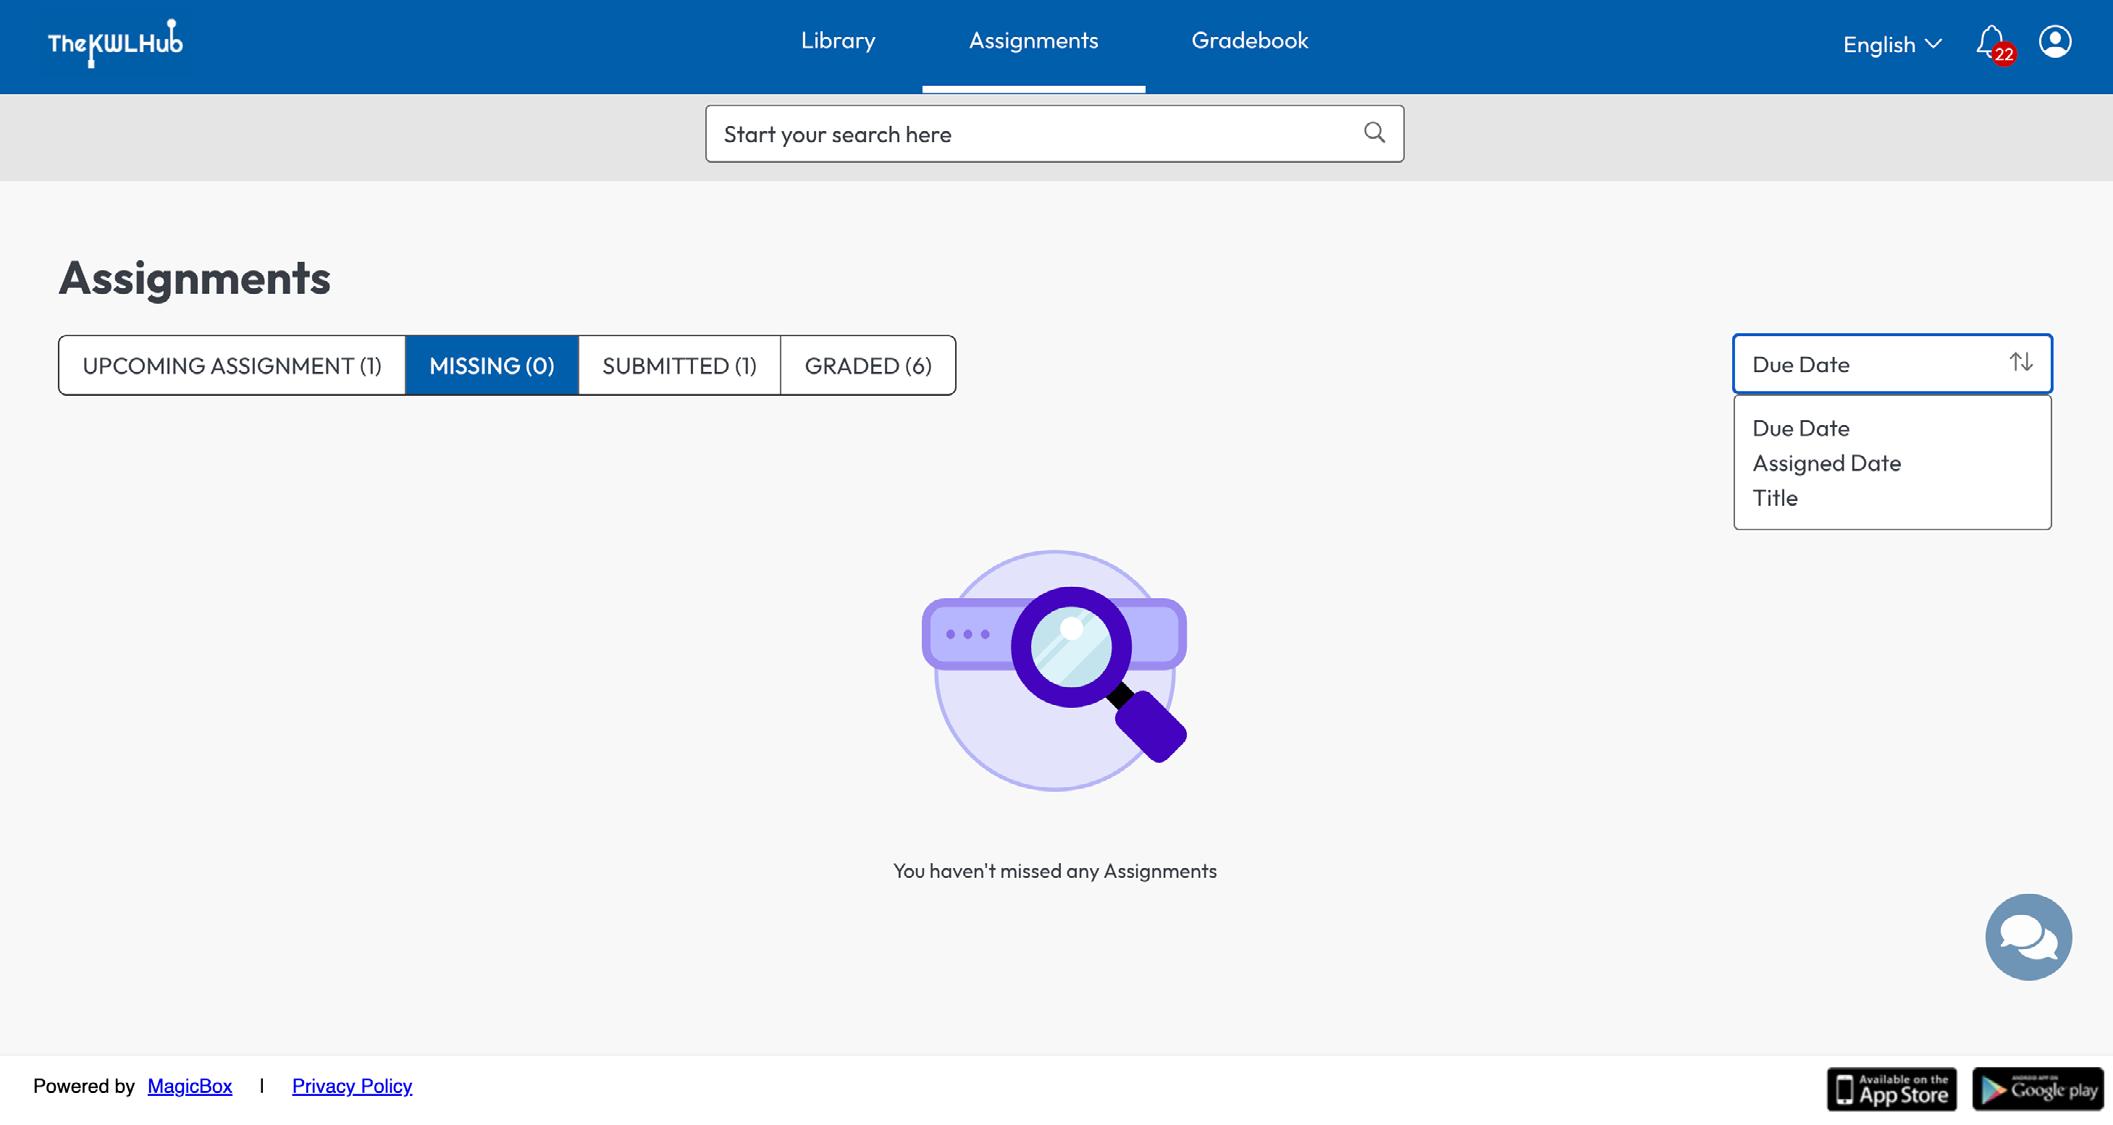
Assignments can be sorted by Due Date, Assigned Date, or alphabetically by Title.
This section displays assignments you didn’t start or submit before the due date. These assignments can no longer be submitted because the date has passed and your teacher has not allowed late submissions.
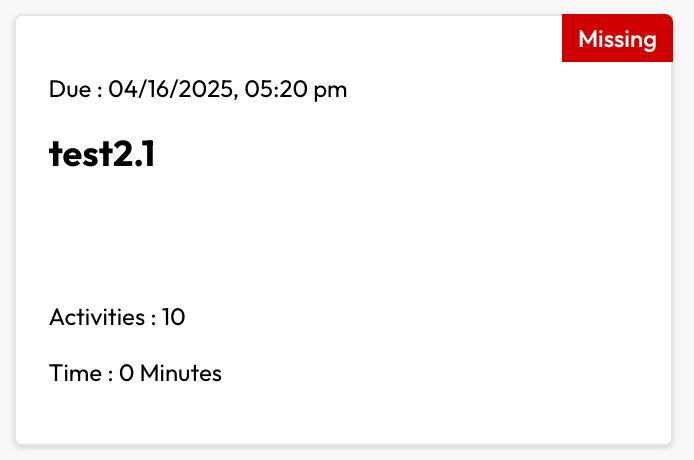
Each assignment card includes the following details:
Due date and time (if set)
Title of the assignment
Number of questions in the assignment
Time limit set by the teacher (if applicable)
Missed assignments can be sorted by Due Date, Assigned Date, or alphabetically by Title
This section displays the list of assignments that you have attempted and submitted for evaluation.
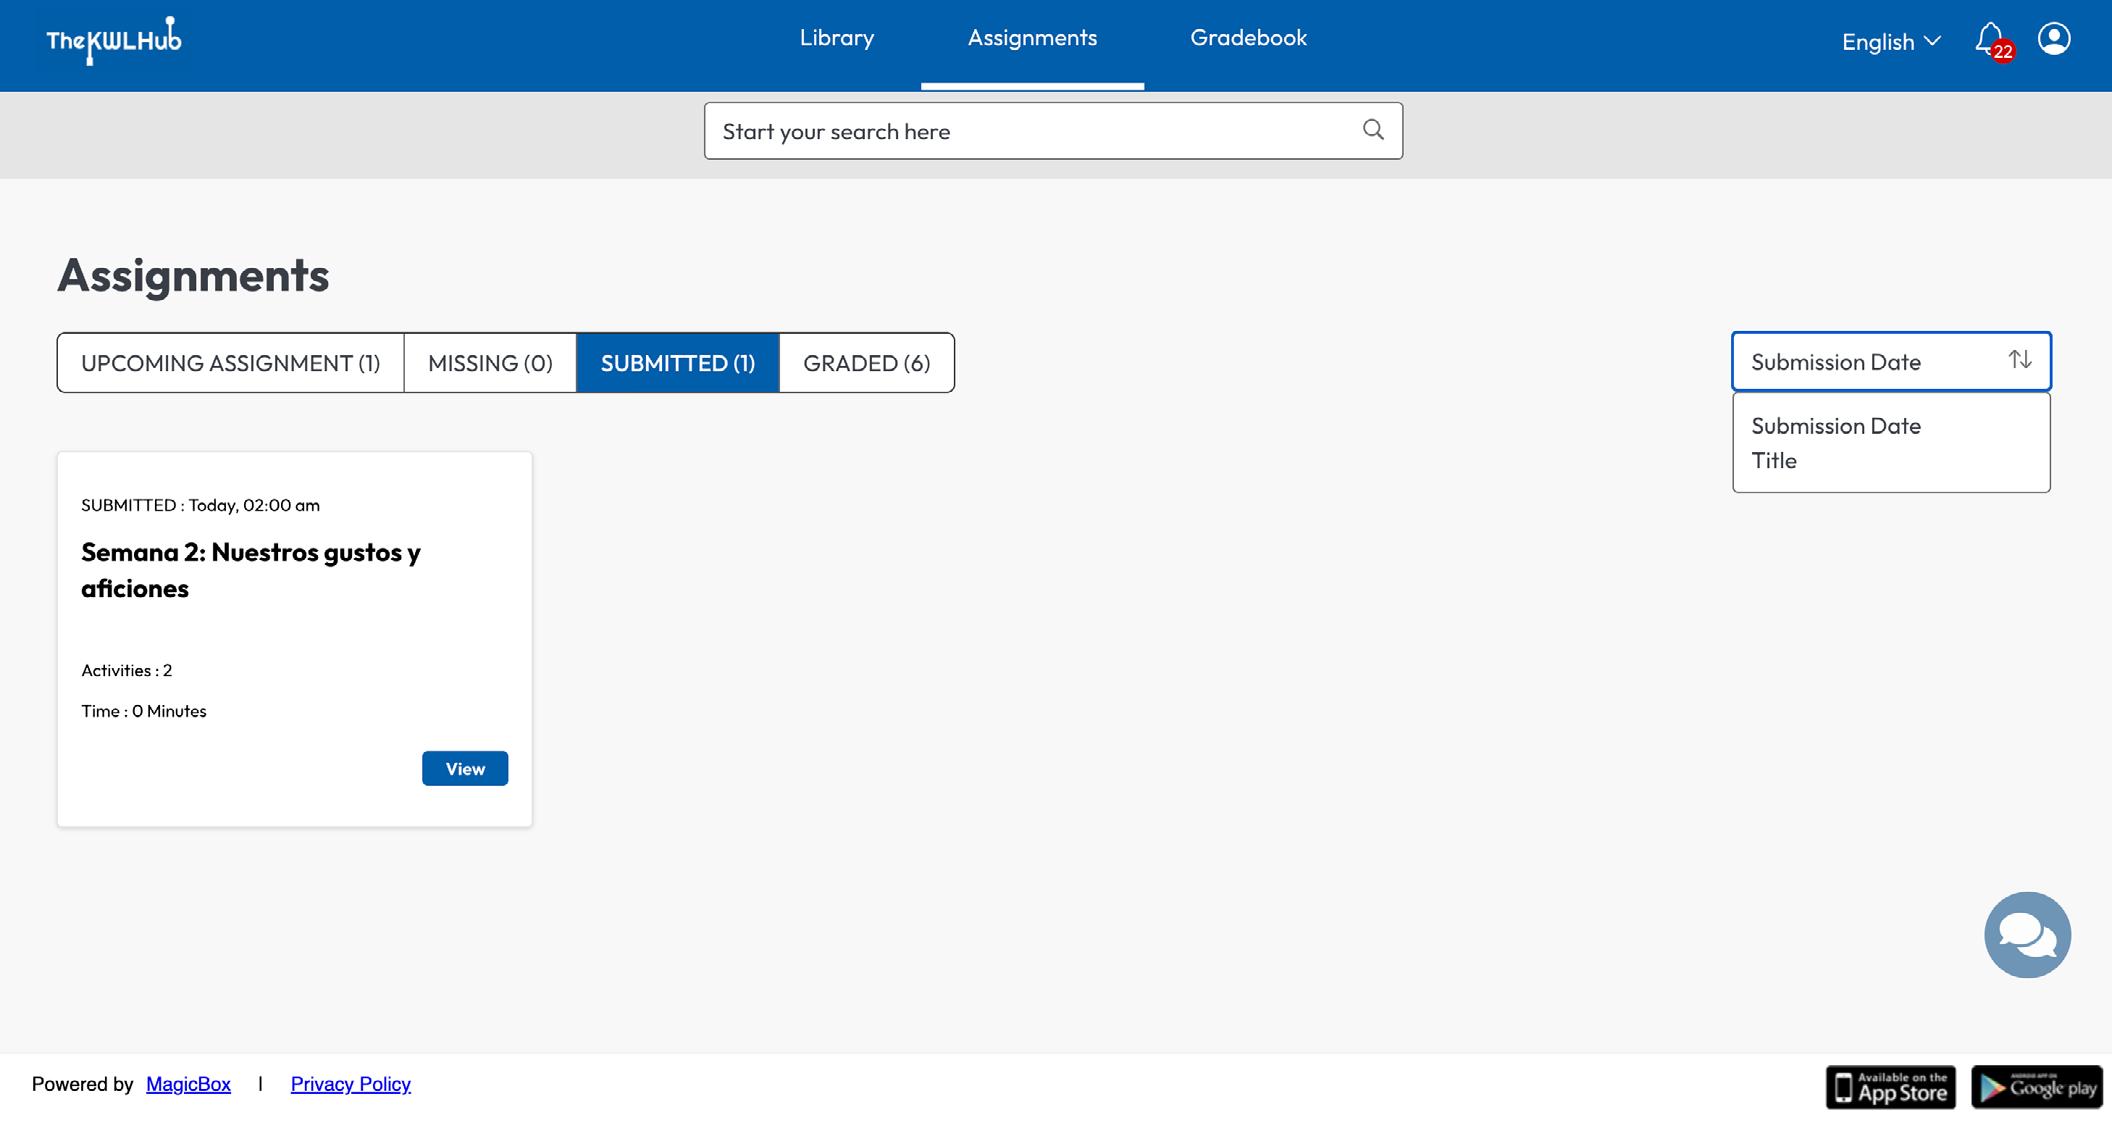
Each assignment card includes the following details:
Submission date and time (if available)
Title of the assignment
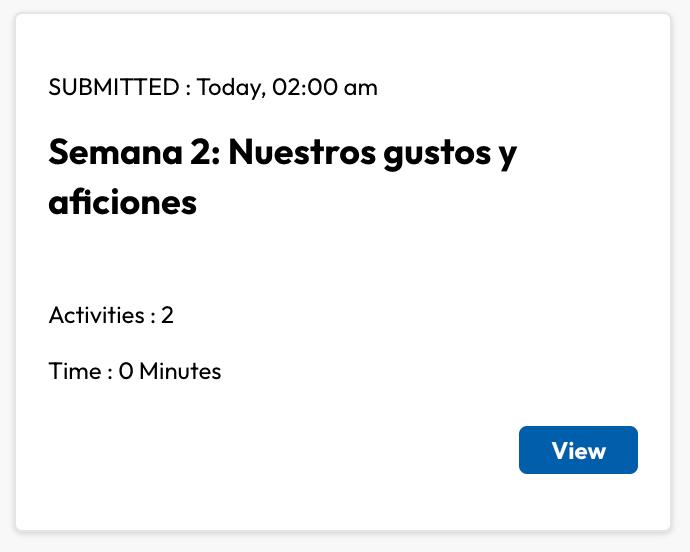
Click the View button to see the assignment questions and your submitted responses. Assignments can be sorted by Submission Date or alphabetically by Title.
Here you’ll find the assignments that have already been graded.
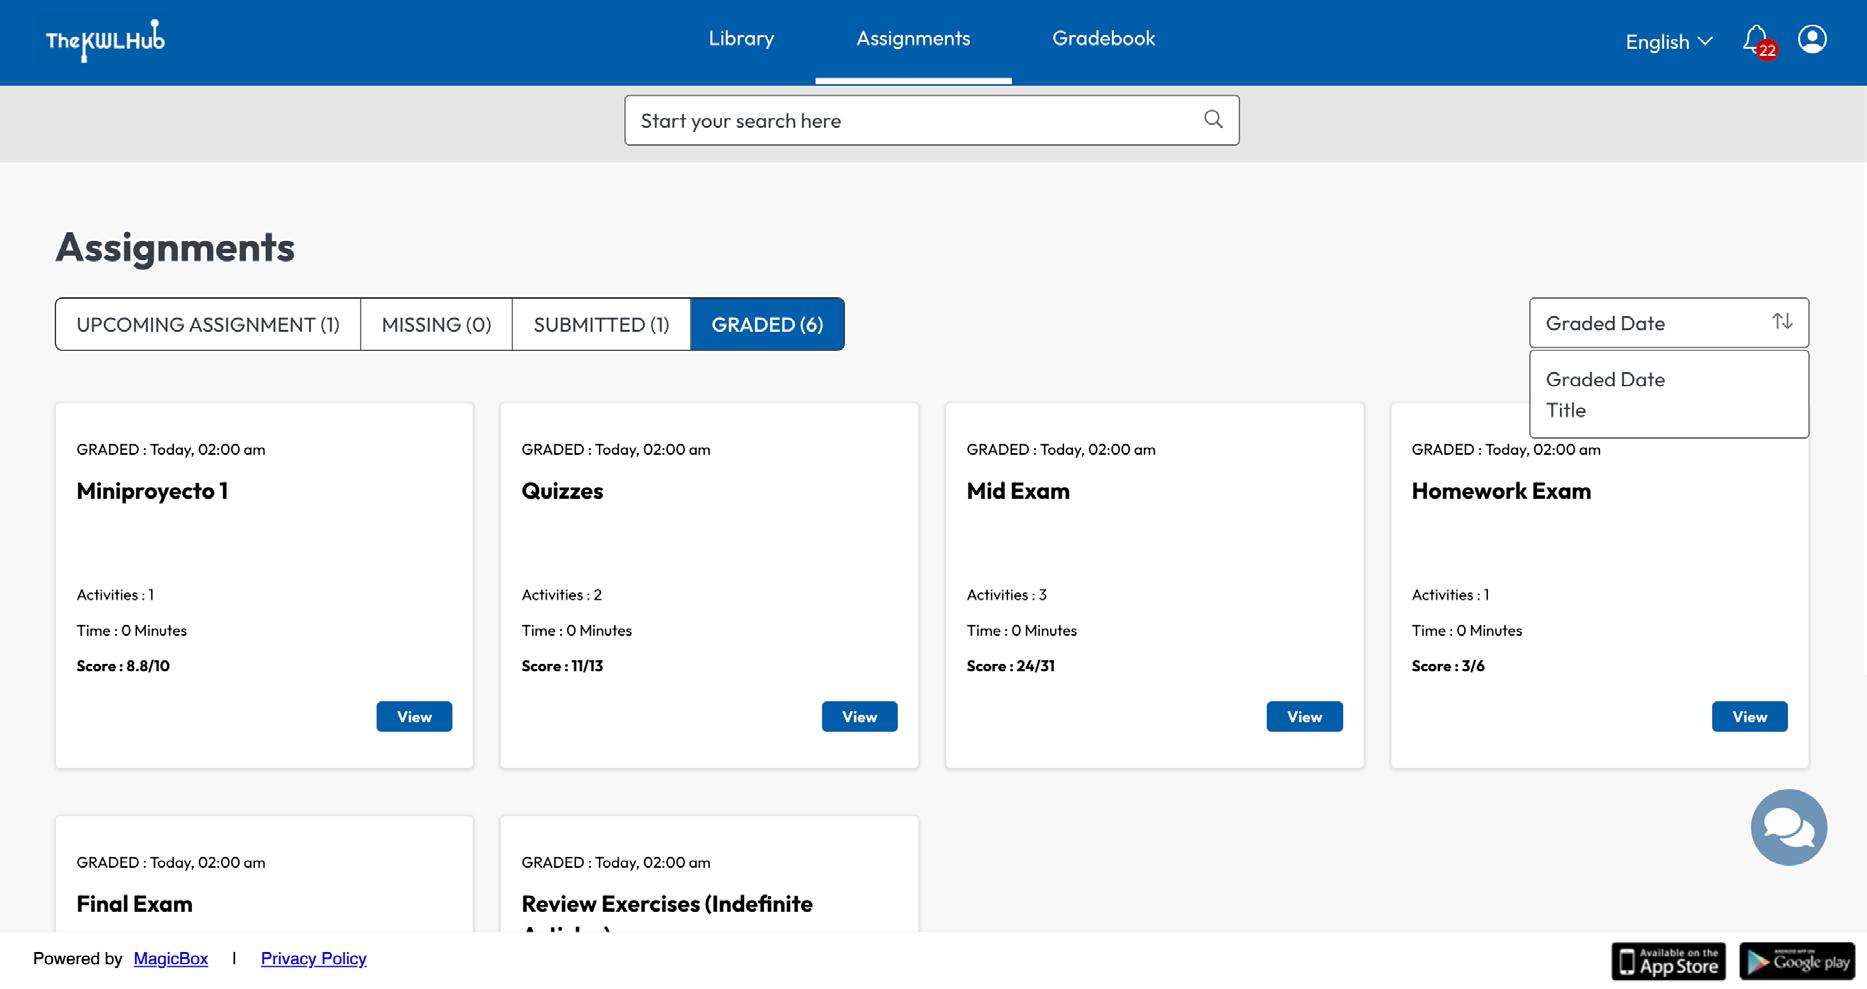
Each assignment card includes the following details:
Grading date
Title of the assignment
Time taken by the student to complete the assignment (if available)
Click the View button to see your results for the whole assignment and for each question. Assignments can be sorted by Graded Date or alphabetically by Title
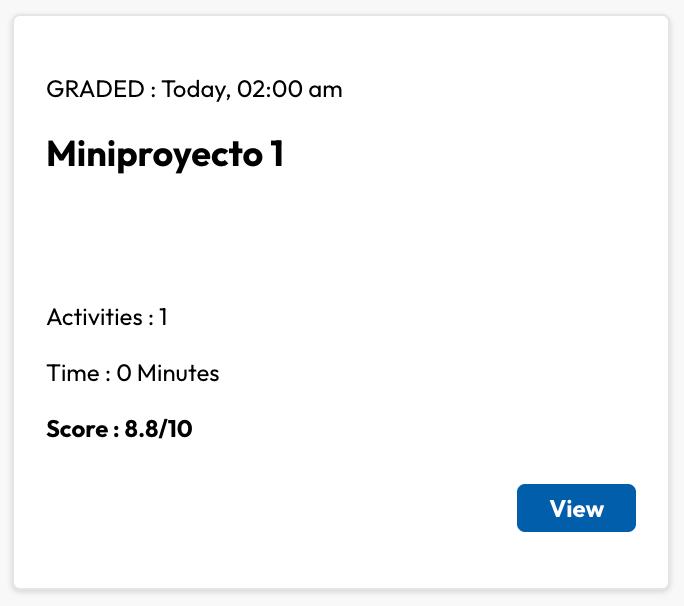
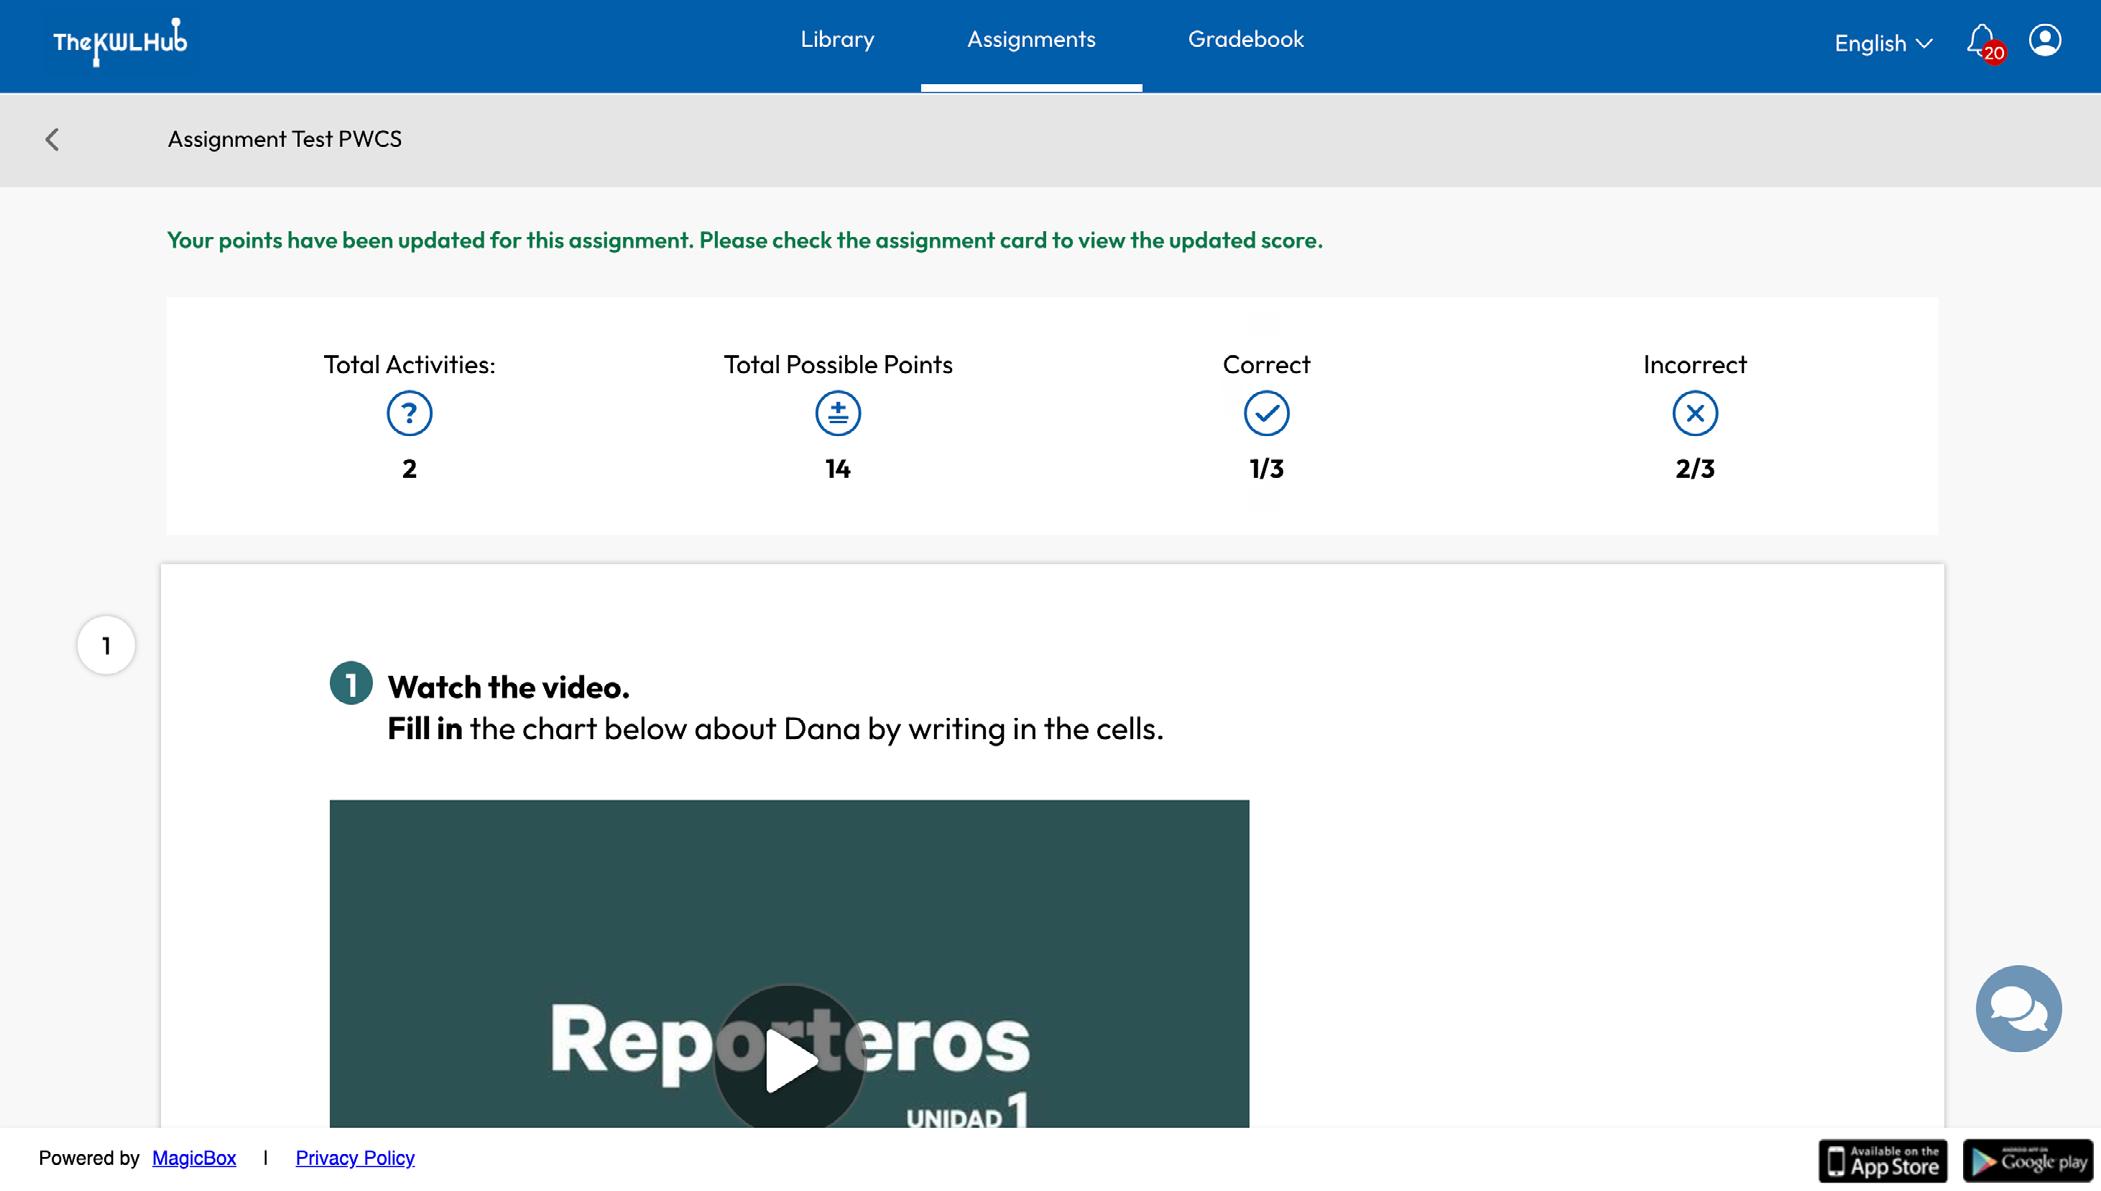
For each graded assignment, the results are displayed with the following details: Total number of questions or activities, total possible points, number of correct answers, and number of incorrect ones.
Use the left sidebar to filter and navigate activities, view your progress with color-coded boxes, and manage your answers with options like Answered, Pending, and Flagged. You can also view your current score and the status of each activity.

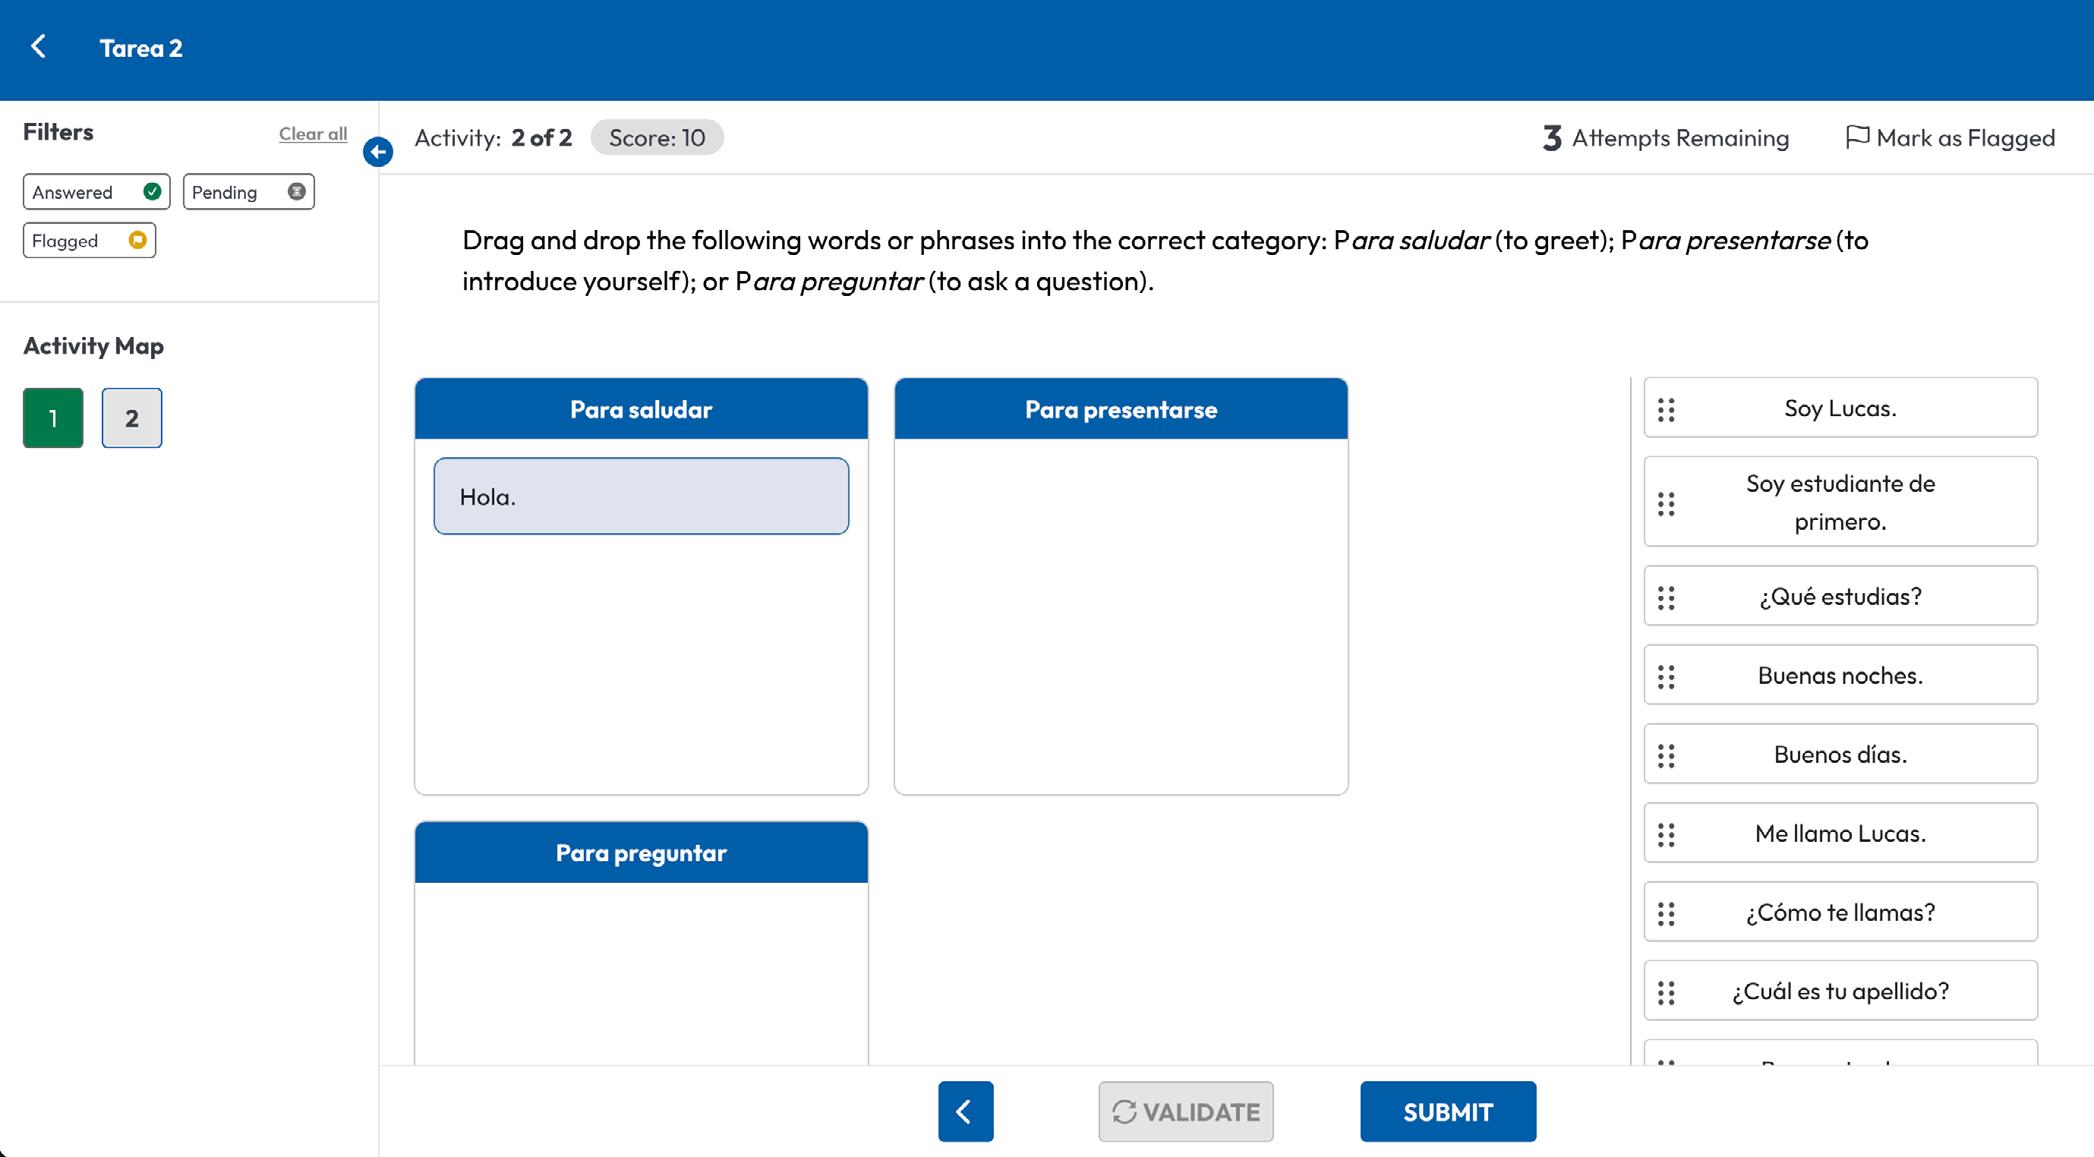
Filters Section Filter activities by status:
Answered – Already attempted.
Pending – Not yet attempted.
Flagged – Marked for review.
Clear All – Resets filters and displays the full activity list.
Activity Map
Numbered boxes (1, 2, 3, ...) represent individual activities.
Click a number to go directly to that activity (if skipping is allowed).
Color indicators show activity status:
Green = Answered
Yellow = Flagged
Grey = Not attempted
Activity: 1 of 7 – Indicates the activity you’re currently on.
Score: 12 – Shows the points assigned to that activity.
Flag Option
Mark as Flagged – Lets you flag an activity to revisit it later.
Attempts Remaining
Shows how many attempts you have left.
Save, Validate, Submit
Save: saves your response. You’ll see this for activities that have only one attempt and for activities that are open-ended, such as a recording or when you have to type a response.
Validate: checks your answer. You’ll see this if your teacher has allowed multiple attempts. You can Try Again until you exhaust attempts or when you are happy with your score. Please note that the system will save your latest response, not your highest score.
Submit: submits your entire assignment. Be sure to click submit when you are done. Please note that any unused attempts will be lost, and you will not be able to retry this assignment once you submit it.
In the Gradebook tab, you’ll find a list of all the assignments you’ve completed and been graded on. Each row in the table is one assignment. At the top, you’ll see a search bar to quickly find assignments by name.
What’s in the Gradebook:
Assignment Title – Click to view each question, your responses, and whether they were correct or incorrect.
Score – Shows your percentage score using color codes:
Green = High score
Light brown = Approximately 40–50%
Red = 0%
Total Activities – Number of activity sets in the assignment. Correct Answers – Shows how many you got right out of the total (e.g., 3 / 6).
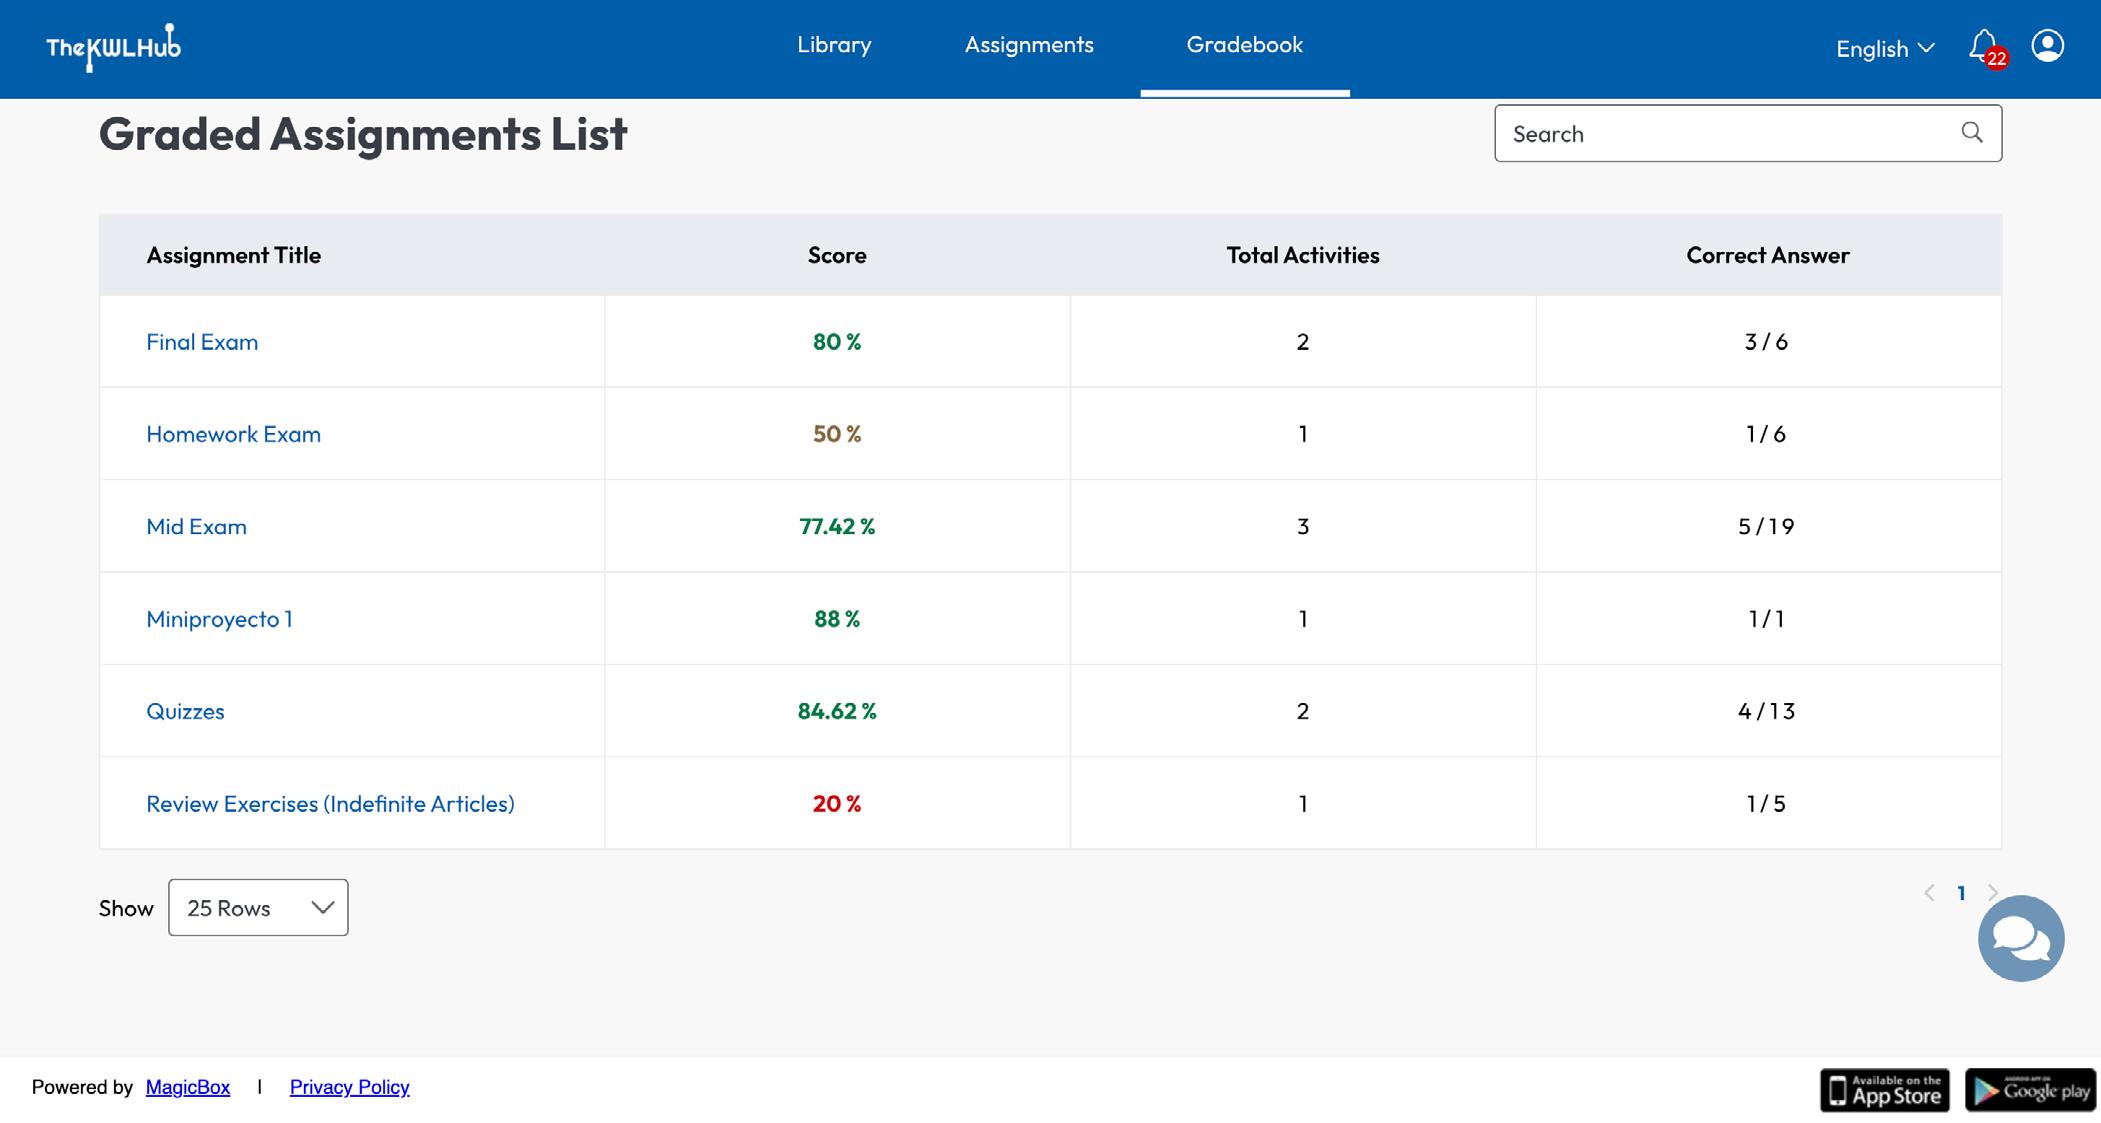
To view detailed feedback for an assignment: Click any assignment title. You’ll be taken to a detailed view where you can: See the questions. Review the options you selected. See which ones were marked correct or incorrect.

Manage your account information, update your avatar, or change your password from the My Profile page.
To access it:
Click the profile icon on the header. Select My Profile in the drop-down menu
You will be redirected to the My Profile page.
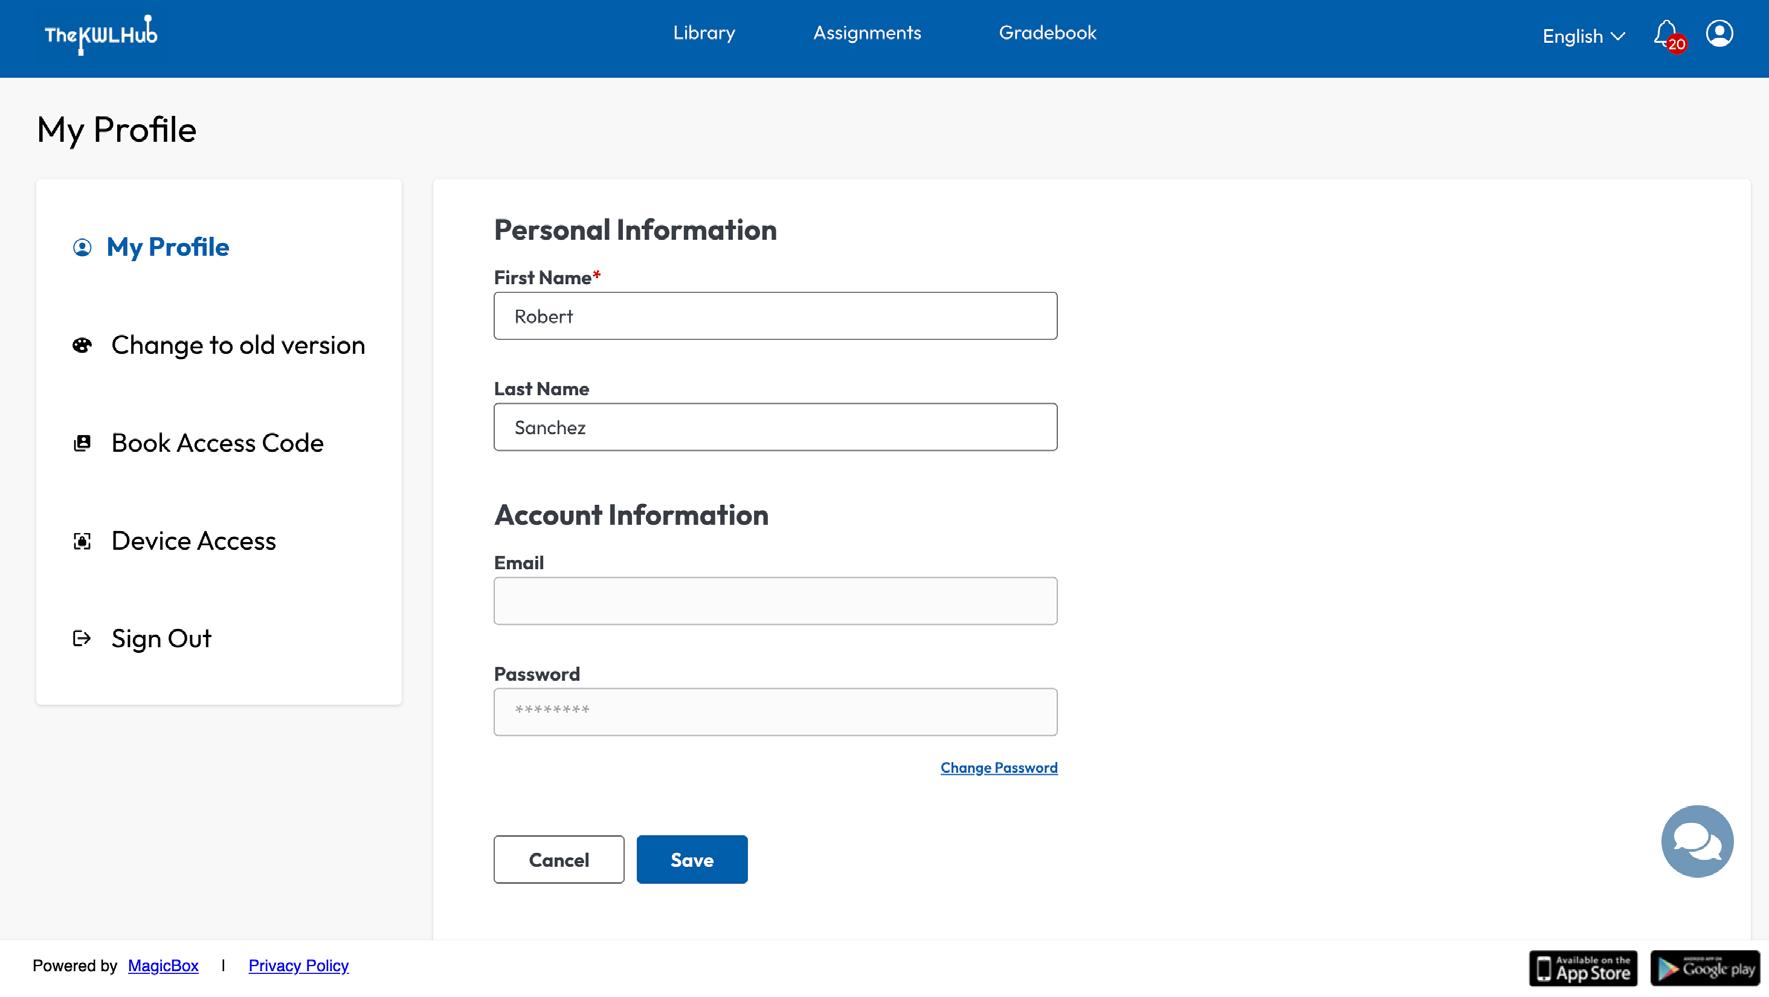
What You Can Do on the My Profile Page:
Edit your first name and last name.
Update your password:
1. Click the Change Password button.
2. A pop-up will appear. Enter your current password.
3. Enter and re-enter the new password.
4. Click Update to save changes.
Account management options are only available to students who create their own account. If your account was created automatically through your school, you cannot edit your profile information.
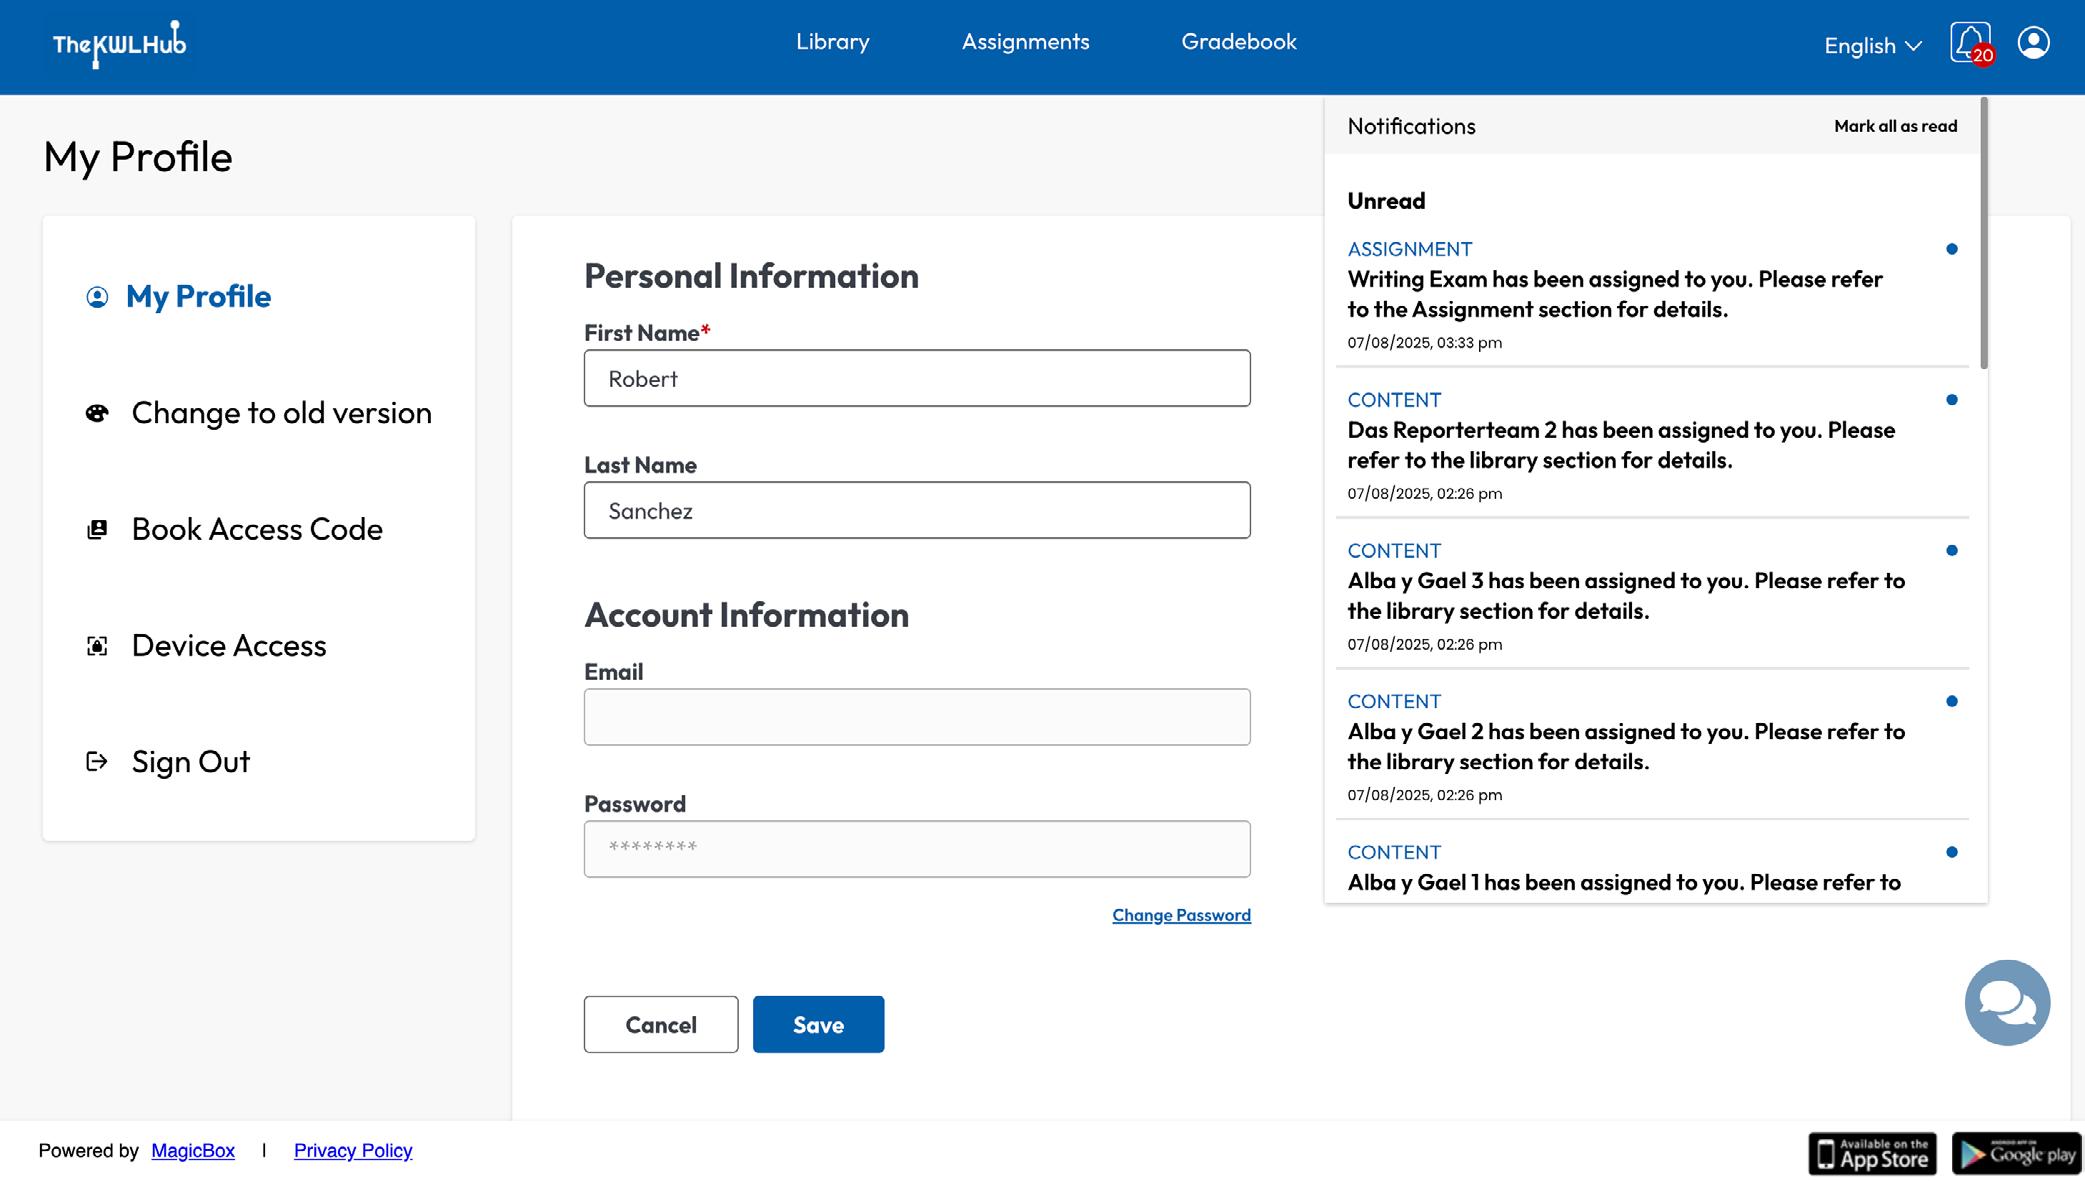
Stay up to date with announcements, assignments, and feedback by clicking the notification bell icon in the top header.
New alerts appear under Unread (marked with a blue dot).
Once opened, they move to Read
Notifications are scrollable and can be cleared using “Mark all as read”.
You’ll receive notifications for:
Content – Assignments, updates, and expirations.
Assignments – Assignments, updates, and teacher feedback.
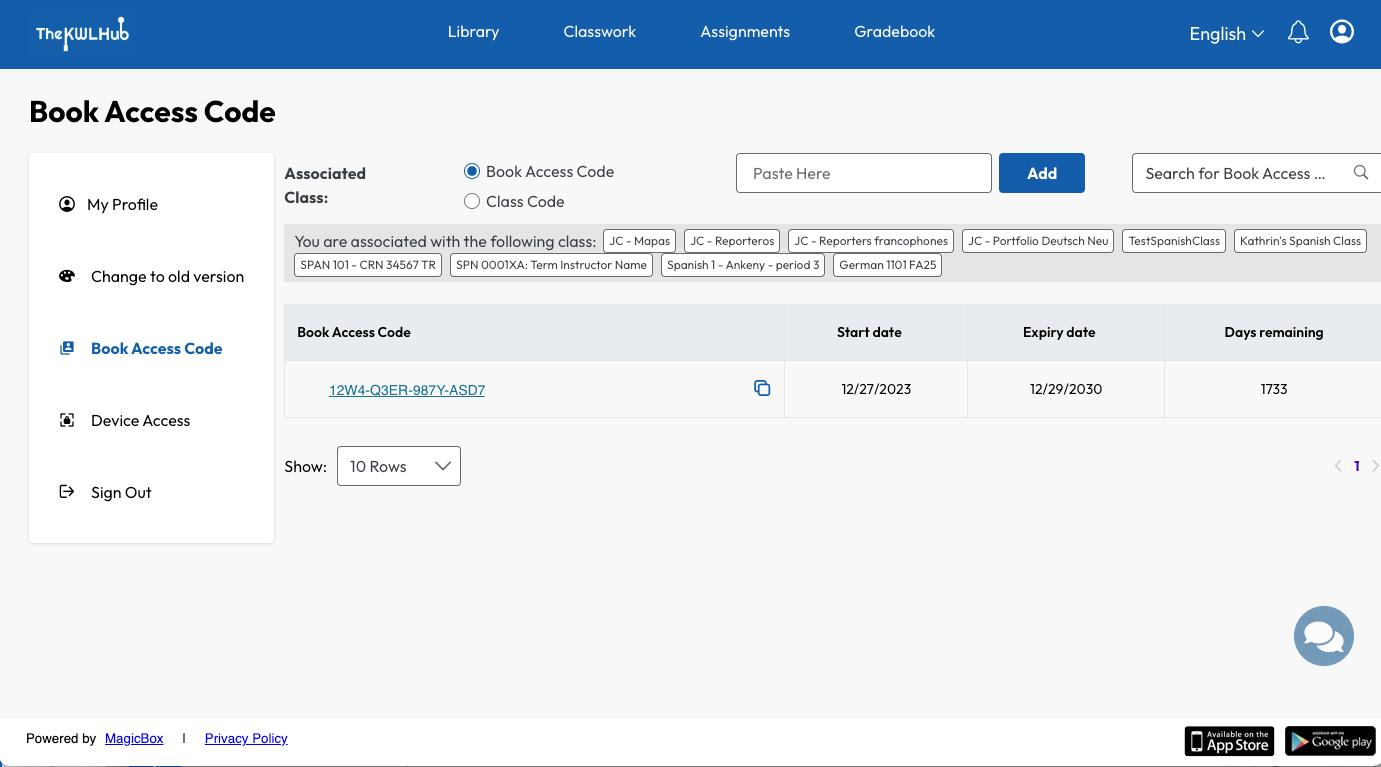
Use the Book and Class Code page to unlock content or join a class using a code.
To redeem a code:
1. Log in and go to Book and Class Code from the profile menu.
2. Choose one of the following: Book and Class Code – Paste the access code, then click Add Class Code – Paste the code, then click Add
This will either unlock specific content or enroll you in a class.
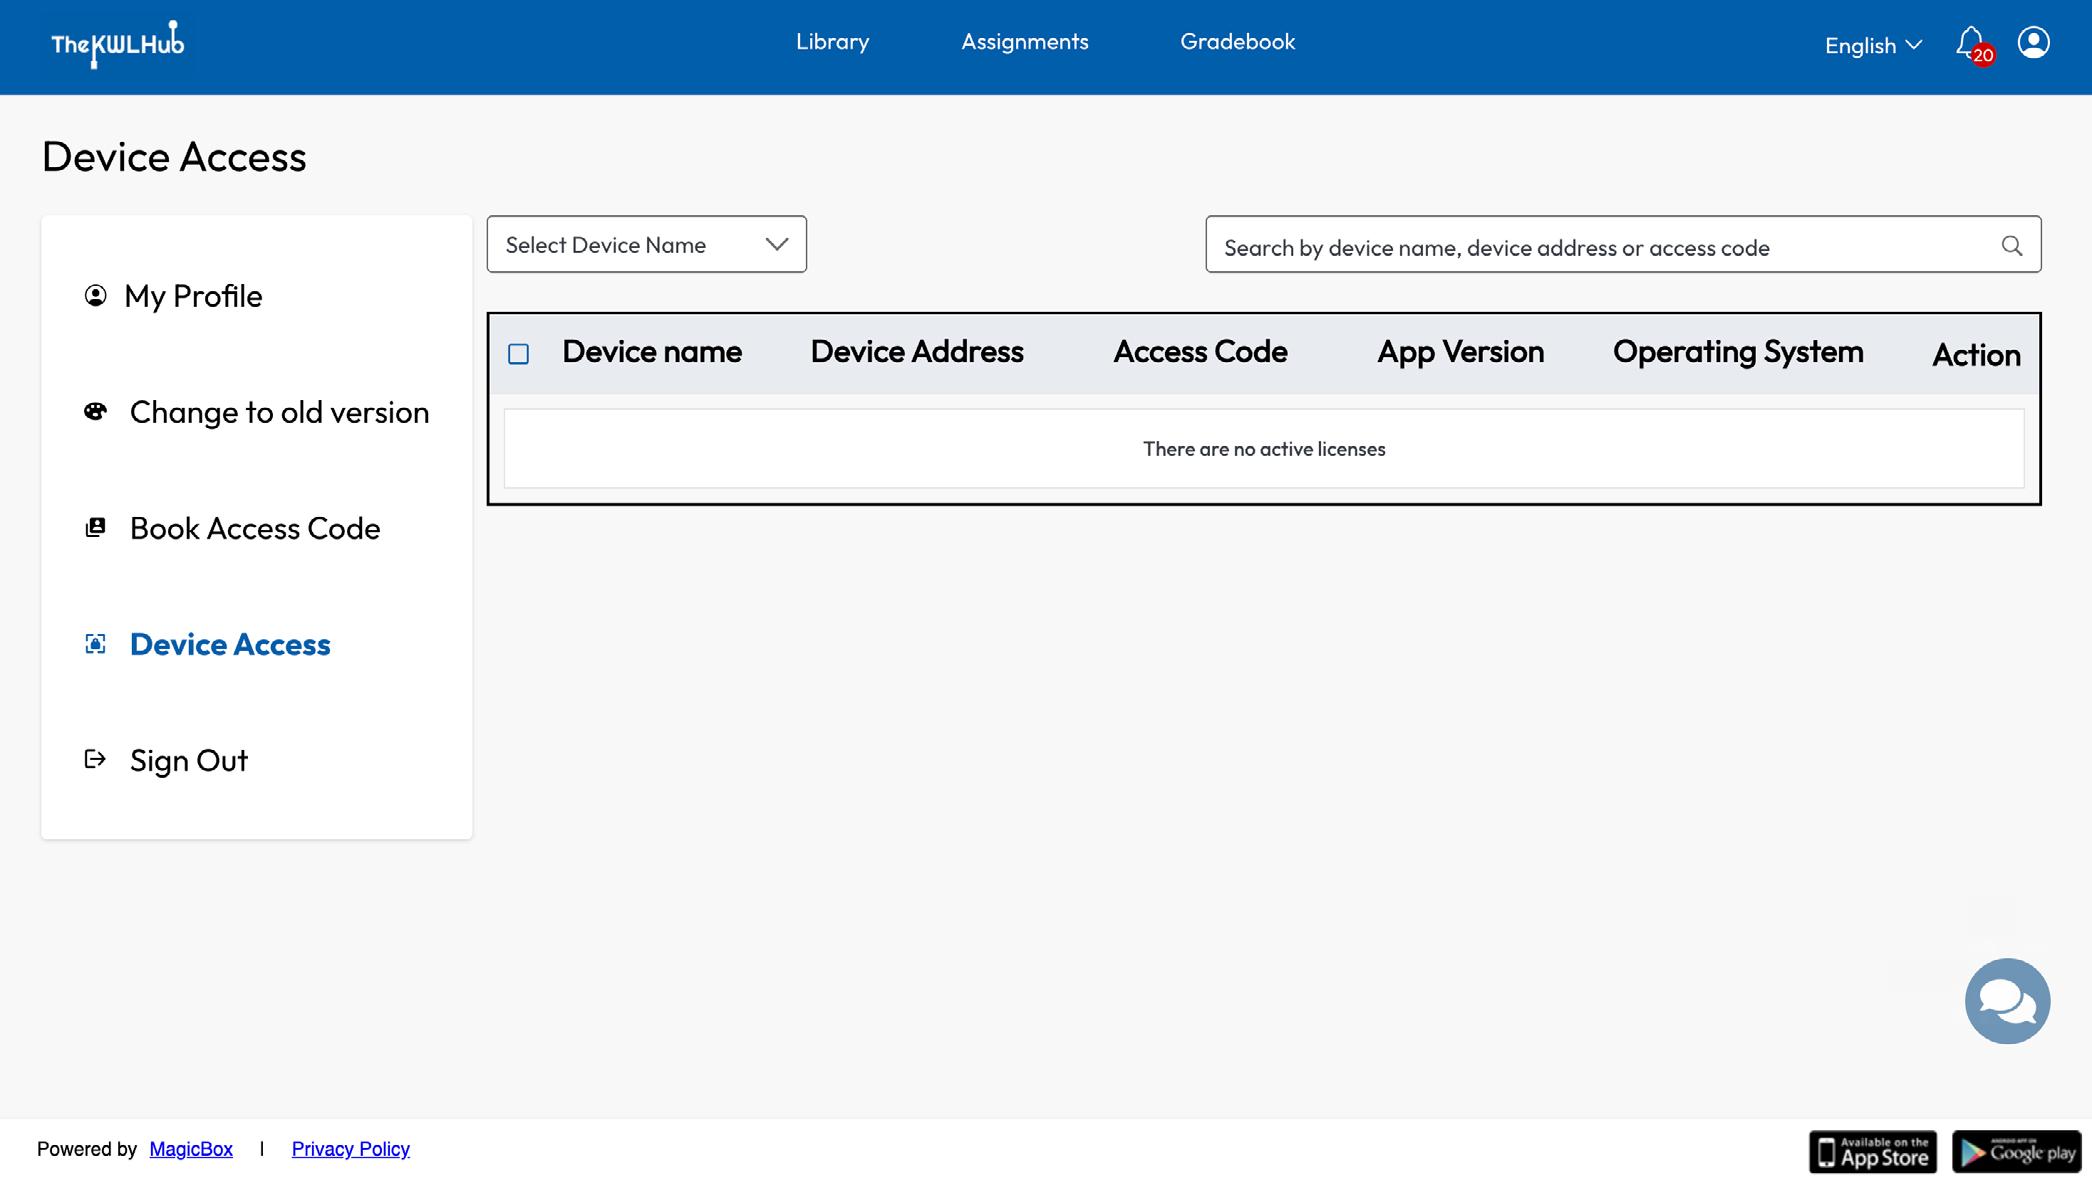
This feature lets you control the number of devices that can access your content.
To manage your devices:
1. Log in and go to Device Access from the profile menu.
2. Select the device(s) you want to remove and click Deactivate
3. Confirm by clicking Yes. The selected device(s) will be removed.
If you see:
Error 779 – “Device count is exhausted”, follow these steps:
1. Log in to the web platform.
2. Go to Manage Devices.
3. Deactivate one or more devices.
4. Try logging in again on the new device.
This keeps your account within the allowed device limit.
YOU’RE ALL SET!
You’re now equipped with the tools and knowledge to navigate The KWL Hub with confidence. As you continue exploring, remember that support is always available.
• The KWL Hub Support Page: Explore our step-by-step guides and FAQ NEED ADDITIONAL SUPPORT? WE’VE GOT YOU COVERED!
• Technical Support: Contact us directly by completing our support form. We’re happy to help!