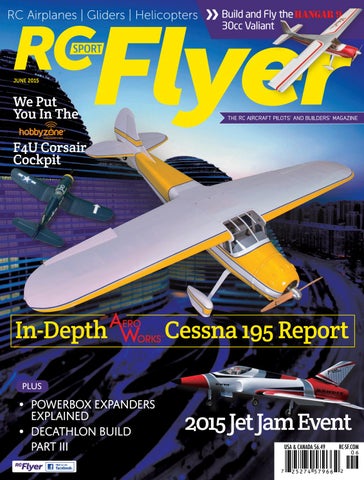
RC Airplanes | Gliders | Helicopters
Build and Fly the 30cc Valiant
JUNE 2015
We Put You In The F4U Corsair Cockpit
In-Depth
Cessna 195 Report
PLUS
• PowerBox Expanders Explained • Decathlon BuilD Part III
2015 Jet Jam Event USA & CANADA $6.49
RC-SF.COM
HOT PRODUCTS ALIGN T-REX 800E F3C COMBO
T
he T-REX 800E is an 800-class helicopter designed specifically for 3D flight. The CCPM direct connect servo design, coupled with DFC rotor head assembly, results in fast, precise, and more direct control reactions. The frame material integration technology is utilized on the landing gears and vertical tail fin, creating
Specifications Length Height Width Main blade length Main rotor diameter Tail rotor diameter Motor drive gear Main drive gear Autorotation tail drive gear Tail drive gear Drive gear ratio Weight w/ motor
1490 mm 402 mm 204 mm 780 mm 1740 mm 301 mm 12T 112T 104T 22T 1 : 9.33 : 4.37 4100 grams
a unique look for the T-REX 800E, but also resulting in an innovative design that encompasses structural rigidity along with beautiful aesthetics. Nothing was spared in the electronics components of the kit: The mighty power of the 850MX (490Kv) motor paired with Castle Edge HV 160 speed controller for unparalleled power output. The new CNC machined aluminum cased BL800H brushless high-voltage cyclic servos paired with BL850H rudder servo not only exhibited top of the line servo aesthetics, but also combine heatsink function and best performance in the market segment.
The T-REX 800E can be described as the current flagship representing Align’s product line. Based on the pedigree of pure 3D flight, the newest design concept with absolute top quality equipment, along with superior aesthetics and attractive lines, the T-REX 800E will definitely get your attentions. Price $1529.99
Distributor ALIGN RC Alignrcusa.com
ESPRIT EDF LAUNCHING SYSTEM
E
sprit Model company just introduced their new Power EDF retractable launching systems, which is designed for scale sailplane launching. The unit is built by the German MIG Flight company, with their target market being for scale or sport sailplanes. This new unit is a beautifully engineered product that will get your model into the air quickly and easily, where you can then soar it for hours on end. It is made for an easy installation, without the complexity of the typical up-andgo system. The Jetec EDF comes in three sizes: E-90 $985.00 E-120 $1,595.00 E-130 $2,650.00
12
RC SPORT FLYER . JUNE 15
Distributor ESPRIT MODEL 1240 Clearmont St. NE #12 Palm Bay, FL, 32905 Phone: 321-729-4287 Espritmodel.com
twitter.com/rcsportflyer
PRECISION AERO GLUE CADDY
Distributor
P
recision Aero announces its newest product, the Glue Caddy. This new plywood caddy assembles in minutes and will help clean up that mess on your workbench. The Caddy holds one-half, one, and two-ounce glue bottles. Its unique adapters can be used as required for the small half-ounce bottles. Epoxy bottles can also be placed upright or upside down in the Glue Caddy. The Caddy is laser-cut from 1/8-inch plywood so it will last for many years of use. Note that the Glue Caddy is a quality product made in the USA!
PRECISION AERO 1561 River Highlands Dr Oconomowoc, WI 53066 262-352-6670 Precision-aero.com
Price $12.95
ESPRIT JETI DS-14 BASIC
J
eti’s new DS-14 Basic transmitter is designed to let you create a system for your needs, yet give you the option of future expansion. The Jeti DS-14 lets you customize its software and features, so you only pay for features that your model needs. This revolutionary, digital, 14+8 (22-channel — upgradable from 8), 2.4-GHz system is designed and manufactured by Jeti Model. The transmitter employees a CNC-machined aluminum case with integrated antennas, a mini USB port, built-in speaker, headset jack, plastic transmitter gimbals with Hall sensors for 4096 step resolution, and four ball bearings for precise resolution, a 320 x 240 backlight display, and more. Price $795.00
Distributor Esprit Model 1240 Clearmont St. NE #12 Palm Bay, FL, 32905 Phone: 321-729-4287 Espritmodel.com
APC Competition propellers for the intermediate and
advanced sport flyer as well as the competition community. Over 400 pitch/diameters available ranging from slow-flyer electric to High performance Giant Scale Racers.
Visit the APC Prop Website for product selection and detailed information on product design and features.
LANDING PRODUCTS All propellers are in stock and overnight delivery is available. Proudly made in the USA
rc-sportflyer.tumblr.com
1222 Harter Ave., Woodland, CA 95776 (530) 661-0399 est. 1989 by Mr. Fred Burgdorf
RC-SF.COM
13
EVENT
MONSTER ENERGY JET JAM THEY’RE PILOTS WANTING TO BUZZ THE TOWER! BY SHIRLEY BRENON AND MURRAY ROSS
Monster Jet Jam banner
24
RC SPORT FLYER . JUNE 15
twitter.com/rcsportflyer
This was one of the Horizon Hobby’s team low mirror pass smoke on.
Here you see one of Horizon Hobby’s formation team maneuvers.
Terry Buckley’s giant MIBO A-10 Warthog weighs 63 lb and requires special waiver inspection. It is powered by two Titans P-160. (160 refers to Newtons )
T
he Coachella Valley Radio Control Club’s (CVRCC) flying field is 25.3 miles from the Palm Springs International Airport, or just close enough to be at risk for a Temporary Flight Restriction (TFR) when Airforce One arrives. Sure enough, for the second year in a row, President Obama flew in for a few rounds of golf and warm weather. Club president, Dan Metz and contest director Clay Seddon had to scramble to get a waiver for the Jet Jam weekend of February 13 – 15. The scramble was successful, but the waiver stated no flying above 1000 feet or any further than half mile radius from the runway. In addition, the pit area was closed to all spectators and no flying could occur after 3:00 p.m. Saturday until after the rc-sportflyer.tumblr.com
president left on Monday. Some of the 37 pilots arrived before the weekend in recreational vehicles, taking advantage of the ample parking area and others trickled in during the weekend. Both Friday and Saturday, pilot meetings were conducted by Metz and Seddon to familiarize the pilots with the field procedures and safety equipment and explain how to earn tickets for the big pilot raffle. The raffle was organized so that a pilot was given a ticket for each flight, encouraging him to fly more times over the weekend. Each day after the pilot meeting, the National Anthem came over the PA system, accompanied by an astounding demonstration of formation flying by the Horizon Hobby Team. The team members,
Vince Tolomeo’s EDF A-10 gets power from twin 90-mm fans — gear down approach.
Mike Adams and Ken McSpadden used special Spektrum radio equipment designed to facilitate synchronized flying. Both were flying Sky Master Vipers. McSpadden’s Viper has a P-160 engine and Adams’ a P-180 to enable “catching up.” Otherwise, the speed of each plane is locked at the same value. Additionally, each plane has a second receiver, which is under control of one pilot so that use of smoke is precisely synchronized. They orchestrated their demonstrations many times over the weekend and really wowed the audience with the belly-to-belly mirror formation. Adams said, “We fly six minutes and 30 seconds and that leaves us enough fuel if we have to go around again for another approach.” One of the stand-out airplanes RC-SF.COM
25
BUILD
DECATHLON FUSELAGE THE WOODWORK IS ABOUT CRAFTSMANSHIP BY JEFF TROY
T
he woodwork for my Dynaflite Super Decathlon has been completed, and in this installment, I will show you the procedures I used to assemble and mount the wing struts and prepare the fuselage for covering. I hope you can take advantage of some of the methods I describe when
1 32
constructing your own favorite models. I use Bob Smith Industries (BSI) Insta-Cure + medium CA (cyanocrylate) glue for most of my models’ basic construction. InstaCure thin CA and Maxi-Cure thick CA are also used where needed. When epoxy is called for, BSI Quik-Cure (5
This installment picks up with the Dynaflite Super Decathlon woodwork nearly complete, needing only a final filling and sanding of the fuselage, and assembly of the two hardwood wing struts before moving to the next installment. RC SPORT FLYER . JUNE 15
minute), Mid-Cure (15 minute), and Slow-Cure (30 minute) epoxy are my choices. Before the model can be covered, it’s important that no rough edges, high spots, or low spots are present in the woodwork. High spots will cause lumps in the covering. Low spots will result in valleys where there the covering is unsupported. Rough edges can cause snags in the covering and prevent it from shrinking correctly, most often at joints between stringers and bulkheads, as well as where ribs meet leading and trailing edges, spars, and sheeting. If you’re building something—not necessarily the Decathlon—along with me, you’ve already block-sanded the fuselage with medium to coarse sandpaper on the Easy-Touch Bar Sander from Great Planes®. Block sanding does a nice job of eliminating high spots and ridges, but something more is needed to fill valleys and gaps in your model’s joints. I use HobbyLite from Hobbico, which is available in your choice of two colors: white and “balsa,” which is a pleasing shade of medium tan. Before applying HobbyLite, it’s wise to clean up any rough edges twitter.com/rcsportflyer
2
Remove any fuzz, splinters, and blemishes from the model’s LitePly parts. My favorite tool for this kind of edge dressing is the Sanding Pad Dual Grit 120/240 from Stevens AeroModel.
3
I use HobbyLite filler to bridge any valleys and minor gaps in my models. For optimum penetration and adhesion, dab the area with tap water just before applying the filler.
4
The coarse — 120-grit — side of the Stevens Dual Grit pad is ideal for taking down the filler. Flip it over to feather the edges of the filler into the wood.
5
HobbyLite sands easily, and doesn’t require much elbow grease to make the smoothest possible base for the Coverite 21st Century Fabric skin that will eventually cover my Dynaflite Super Decathlon.
that may still remain on your model’s Lite-Ply parts. Blemishes in the cabin area are the most obvious in the window perimeters and wing saddle. These blemishes are generally in the form of fuzz or small splinters created when the die-cut parts were removed from their sheets. Coarse sandpaper can gauge these edges or remove too much material, so I use the coarse (120 grit) side of the Stevens AeroModel Sanding Pad Dual Grit 120/240 to dress Lite-Ply edges after block sanding. Get a feel for using the sanding pad by lightly dusting the edges of the wing saddle; then you’ll see how nicely this tools works and how easy it is to master. Next, work the sander around the inside and outside edges of the window openings, applying only light to medium pressure. The object is to remove any fuzz and jagged edges without altering the rc-sportflyer.tumblr.com
hard edge of the opening. After a few minutes with this amazing tool, you will have become a sanding-pad expert, and will most likely never build another model airplane without having one or more of these pads on hand. HobbyLite is a pleasure to use, and you’ll love the results. It’s soft, dries quickly, and sands easily. You can apply it directly onto the surface, although I like to treat balsa and other porous surfaces with a dab of fresh water before wiping on the filler. Doing this helps the filler penetrate the grain of the wood and increases the bond. I keep an open jar of water next to the tub of HobbyLite, using one finger to wet the surface being filled, and another finger to apply the filler. You might also want to use the water finger to help smooth the filler over the surface as it’s being applied. Just remember that the filler
must always dry at a level above the surface. Sanding is what brings it flush. Unless it’s heavily applied, HobbyLite will dry within a few hours. You can test it with a light dusting of the Stevens sanding pad. If the filler takes down smoothly, you’re all set, but if it starts to load the pad, wait an hour or two longer and check again. When it’s dry, sand with the coarse side of the pad to bring the filler level with the surface, then use the fine side to smooth the job and feather the edges so they can’t be detected under the model’s film or fabric covering. Each Decathlon V-strut is made from two pieces of airfoil-shaped wood. Holes must be drilled for the mounting hardware, and the individual struts must be joined at the base to form the V. Begin by drilling a 1/8-in. hole on one end of each of the four lengths of strut material, then threading a nylon strut-mount RC-SF.COM
33
3-VIEW
CESSNA 195 DRAWINGS BY HANS-JĂœRGEN FISCHER
T
he Cessna 195 Businessliner was manufactured by Cessna between 1947 and 1954. It is a single, radial-engine-powered, general aviation aircraft, with the use a tail-dragger type landing gear. The first 195 prototype flew in 1945, and it entered production in 1947. The 195 was Cessna’s first all aluminum airplane. It features a cantilever wing. The wing planform has a straight taper from root chord to tip chord, and it has no dihedral. The airfoil employed is a NACA 2412. The 195 has two seats up front, with three passengers accommodated on a bench seat in the back. The 195 has flat sprung-steel landing gear legs. Many were equipped with swiveling crosswind
38
RC SPORT FLYER . JUNE 15
twitter.com/rcsportflyer
rc-sportflyer.tumblr.com
RC-SF.COM
39
HOW TO
FIREWALLS
MAKE IT REMOVABLE TO MAKE IT EASY BY ROBERT CASO
1
This is the nose of the Bulldog with blind nuts mounted in a circumferential ring to accommodate the firewall. A centering ring was also fabricated.
C
ertainly, by now you should know that I am a big proponent of electric power for RC scale models. Electric motors are compact, clean, powerful, reliable, and vibration free, all of which are critical elements for a flying scale model. My Mosquito and DH2 for example could never have been successful and field friendly models with other than an electric motor — and the combinations available today in terms of motor, propeller, electronic speed controller (ESC), and batteries are almost limitless. Nevertheless, I am always searching for ways to make my models more scale and easier to work on. This goal oftentimes requires models to be designed at the outset to eliminate non-scale features such as exposed linkages and equipment access hatches or panels. While not really a new idea per se, I have started using removable firewalls on my electric models to help accomplish this goal.
42
RC SPORT FLYER . JUNE 15
2
Here is the plywood firewall plate that mounts to the nose. It is shown prior to the installation of the airplane’s box-shaped motor mount.
With such a design feature, the model’s front end essentially becomes a power unit, and would incorporate the motor and its mount, the ESC, attachment points for the cowling and dummy engine, and a flange for mounting the unit to the model. There are a number of benefits here that take advantage of a motor’s characteristics noted above. First, without significant vibration, there is little risk of the power unit parting company from the model. Once removed from the model, the open area on the nose becomes a hidden equipment access hatch for batteries and servos. This area also makes a model easier to fit out during construction, allowing the insertion of pushrods, scale cockpits, landing gear and other critical items. A useful byproduct of this design is that it also allows you to change your mind. Let me explain. Although I use Motocalc to determine the power needs of a given design, a critical input to Motocalc is airframe weight.
I have the bad habit of constantly underestimating what this will be, which in turn requires the installation of a larger motor, batteries and ESC. Sometimes too, I simply decide that I want to use a different motor, for whatever reason. If the motor mount was designed to accommodate the initial selection has already been permanently affixed to the airframe, I’m looking at a major redo of a critical area on my model. Not so with a properly designed removable mount. With the latter, it is simply a question of making a new mount to accommodate the change and affixing this to a plate that already fits the model. Done! An excellent case in point is my recent 51-in. Bulldog. Early on, I estimated the flying weight to be three and one half pounds and selected an appropriate motor to power it. What was I thinking? The final weight was north of five pounds. Thankfully, I recognized this when I was well into the build as I was twitter.com/rcsportflyer
3
At this point, the plywood firewall plate has been test fit to the nose. The rectangular holes for servo pushrods were later eliminated.
4
The mounting ring is shown with the installation of the 4-40 blind nuts. It is a bit flimsy by itself, but is later boxed in with balsa filler pieces
5
Here the nose filler pieces are being installed that give shape to the Bulldog’s nose aft of the cowling.
6
The reverse side of the removable firewall is test fit in its ring and showing the vertical cross grain hard balsa stiffeners
7
This photo shows the nose of a three-engined SM-79 Sparviero I have been working lately. It uses the same removable firewall concept as the Bulldog
8
This is the layout of all the necessary pieces for the removable fuselage firewall — the same setup will be used for the wing mounted engines.
slathering on layer after layer of fiberglass and filler. Although I had good cause to believe the model would fly at this weight, I nevertheless had to up-gun the motor selection. rc-sportflyer.tumblr.com
The new motor was slightly larger in footprint, longer and had a different propeller mount. Since I had already employed the power unit concept in the original design of the model,
ultimately this change was no big deal. Had I used a traditional construction methodology, I would have had a real mess on my hands. Using the Bulldog as the guinea RC-SF.COM
43
REVIEW
VALIANT CLASSIC LOOKS IN A MODERN, EASY-TO-FLY MACHINE
BY WIL BYERS
The Valiant is a high-wing monoplane design that employs a strong, cantilevered wing to reduce drag and increase performance. An Evolution 33GX engine powers the model.
50
RC SPORT FLYER . JUNE 15
twitter.com/rcsportflyer
A
fellow modeler once said, “If it looks good it will fly good!” That is certainly the case with the new Hangar 9 Valiant 33-cc-powered, high-wing, monoplane. It has good looks and performance to spare, with an affordable price tag that nearly any modeler can fit into their budget. When this model landed in our office I was immediately drawn to the design from the box art. Then when I opened the box I knew this gas-powered model would be one I’d want to review. It has all the fit and finish of the typical Hangar 9 almost-ready-to-fly (ARF) airplane, plus the gas-powered engine meant
affordability and performance. Throw in the Spektrum servos, receiver, and batteries and you have a winning combination. What you’ll discover is that the Valiant can be powered by an Evolution 33GX engine or by an E-flite Power 160 motor. Also, there is an option for tundra-style landing gear and balloon tires, or you can add floats to fly it off water. Plus, the engine’s igntion can be run on a two-cell LiPo packs, as can the high-voltage servos. That means radio setup and ignition are easy to do, which is a time saver! It certainly seems that Hangar 9 was thinking outside the kit box on this monoplane.
Hangar 9’s Valiant has classic good looks that are in combination with modern, state-of-the-art design and engineering, which makes it an excellent sport flyer. rc-sportflyer.tumblr.com
RC-SF.COM
51
REVIEW
180 CFX BNF BASIC BY JAMES VANWINKLE
The 180 CFX is only a 360-mm machine, but it delivers large helicopter performance that you must experience to truly appreciate. It is even fit for beginner pilot training.
60
RC SPORT FLYER . JUNE 15
T
he RC 3D helicopter craze continues to grow, which is a huge positive for pilots everywhere. It was not so long ago that it required a very special skill set to fly an RC helicopter, which were quite difficult to master. Today most RC pilots can make the leap from winged flight to rotors without a lot of damage and/or broken parts in their wake thanks to advanced stabilization technologies.
The popularity of 3D helicopters also makes for many choices in machine brands and sizes. Previously the rotor world was dominated by the 600-size helicopters, where the machines’ rotor diameters measured roughly 600 mm in length. Today a standard size seems to be the 700, with a few 800 versions now gaining in popularity. In addition to these larger sizes, other helicopter versions continue to get smaller, and way more powerful than ever. The smaller machines have been dominated by the 450 size. Note that there is no standard small size thanks to the evolution of batteries, motors, and most of all, the stabilization systems we typically refer to as gyros. BladeŽ offers helicopters in almost any size as a way to fit the needs of rotor pilots. One of their best offers in the micro-size is the 180 CFX. This helicopter can perform amazing twitter.com/rcsportflyer
The Blade 180 CFX BNF Basic’s all-around good looks will impress you. The color scheme makes it easy to see in the air, while the power under the canopy delivers stellar 3D action.
stunts, or gently fly in circles if the pilot chooses — powered by a 3-cell LiPo battery. Moreover, this little helicopter is an entirely new design, not a new face on an older version, so be ready to be astounded. IN THE AIR Flying the Blade® 180 CFX is amazing! For such a small helicopter it is not only more stable than I would have thought, but it is also extremely agile and quick. Taking off in normal mode, and hovering a few feet off the ground to avoid the cushion of air we refer to as ground effect, the 180 CFX holds its position very well. A quick switch flip to Stunt 1, and then the most aggressive Stunt 2, and I was off and away to a great time zipping around the sky with the 180. One quick note to those who may not be aware, stunt mode means the rotor head speed is mostly constant. The main rotor changes pitch and goes full positive when the throttle
With an aluminum center section wedged between two carbon fiber frames, the 180CFX is stiff and strong, which it must be for the amazing stunts this little machine can deliver. rc-sportflyer.tumblr.com
The Blade® 180CFX arrives assembled in this molded-plastic and cardboard box. Just charge the battery, bind the Rx to any DSM2/DSMX , transmitter, program, and it’s ready to take to the skies.
is pushed up and the pitch goes full negative when the throttle is lowered. The helicopter will hold its altitude position at someplace around the mid-throttle settings, but lowering the throttle will not lower the rotor speed. Only switching back to normal mode will allow that to happen. I suggest you take it off in normal mode and once a stable hover is established around a mid-stick position on throttle, simply flip the stunt mode switch for the extreme flight capabilities to shine. Most pilots switch back to normal mode for landings, so the rotor head speed will slow when lowering the throttle. After flying around in stunt mode, getting back into normal mode is simple, requiring the stick to be someplace around mid-level, and just flipping the switch back to normal mode for control of pitch and rotor speed to work together again. This little helicopter is smooth, and capable of flying away very fast if pitched forward while at full power.
Check out the side frames, landing gear, swashplate and battery pack. They are all high quality, and make for a helicopter that you can put thru its paces.
It is amazingly fast actually, and will cover lots of ground quickly. There isn’t anything the Blade® 180 CFX cannot do either as far as I can tell. I fly a little aggressively but I am by no means a skilled 3D pilot, though I have witnessed some simply amazing flying with this helicopter in its stock configuration. Inverted flight is a no-brainer, and tic-tocs, funnels, and about anything you can possibly imagine can be done when flown by the right pilot. Expect about three-minute flights to start, and then work your way up depending on how the battery performs for your piloting style. If you look online at some of the great videos available, three minutes will give plenty of time to fly some amazing aerobatics. Check out this one from a team Horizon pilot: youtube.com/ watch?t=54&v=BuU4xmQj52A Let me tell you a quick story. One day a guy was walking his dog around the local park. He saw my 180 CFX
This little helicopter is entirely flybarless thanks to the amazing AS3X® technology in the stabilization system. That means its fast and more precise than its predecessor. RC-SF.COM
61
REVIEW
F4U CORSAIR S RTF w/ SAFE® A CLASSIC WWII FIGHTER MAKES YOU THE VICTOR
BY MAX KEPPLER
66
RC SPORT FLYER . JUNE 15
twitter.com/rcsportflyer
The hobbyzone F4U Corsair comes as a very much almost-ready-to-fly kit. You’ll spend less that 30 minute getting it flight ready, including charing the LiPo battery!
You get everything you need to fly the F4U Corsair with the excpetion of a Spektrum transmitter. We recommend you use a DX6 for this model.
T
he F4U Corsair was a superb fighting machine during WWII. It was loved by its pilot because it had plenty of power from its 2800-cubic-inch big, radial engine, was nibble in the air for air-to-air combat, had lots of firepower from rockets, 50-caliber machine guns, and bombs, and was armored well to protect the pilots from enemy fire. It is probably most noted for its performance while in the capable hands of the Jolly Rogers, and was flown by the fighting forces of both the U.S. Marines and Navy — coming to aircraft carriers late in the war after British pilots perfected deck landings. Now, the F4U Corsair is most seen in aviation musuems and rarely at an airshow like the one at Oshkosh, Wisconsin. The hobbyzone® F4U Corsair S RTF with SAFE technology built into its control system gives you the chance to fly this famous airplane, but without having the need for a time machine to take you back to 1942. This little fighter will deliver hours of RC fighter flying for you, as well as let you be part of your club’s next warbird event. Moreover, it will do so without you needing to spend a couple hundred hours to build it. The radio gear comes from hobbyzone installed in the model. You’ll only need to charge the 3S LiPo pack and program your radio to fly this model.
rc-sportflyer.tumblr.com
RC-SF.COM
67
REVIEW
CESSNA 195 IT IS A CLASSIC. IT IS A BUSINESSLINER! BY WIL BYERS
AeroWorks is one of the few companies left that is building ARF models of this quality for the scale enthusiasts. From tip to tail, AeroWorks has done a superb job of creating a nice looking and flying airplane.
72
RC SPORT FLYER . JUNE 15
The DA-35 is turning a 19 x 10 Xoar wooden propeller. This powerplant delivers exceptional climb performance and speed. Let’s just say, you will not need full-throttle power. twitter.com/rcsportflyer
The DA-35 is a high-quality gaspowered engine that makes serious power. It started very easily and required no additional tuning, even right out of the box.
The business end of the Cessna 195 tells you that this airplane was built for performance. It is a very clean design so it will surprise you with its speed and handling.
C
essna 195 Businessliners were manufactured in an era after World War II when men labored long hours building a nation that has been second to none since. It was a time when even the Chief Executive Officer (CEO) would roll up his sleeves and get dirty on the assembly line if that is what it took to get the job done. In my opinion, the Cessna 195 represent that era’s quintessential business airplane, rc-sportflyer.tumblr.com
designed to get the bossman from job to job as quickly as possible and in reasonable comfort. Looking at one — even now, when biz jets streak from country to country carrying seriously overpaid CEOs — I feel like the Cessna 195 was designed to do the dirty work that needed to get done. And, it did its job! When AeroWorks offered me the chance to review this model I was absolutely delighted. It would be
You’ll find that the AeroWorks Cessna 195 is quite a nimble performer. It is not a slowpoke airplane that will bore you to tears. It is anything but...
RC-SF.COM
73
REVIEW
UMX HABU S DF180 ™
BY JAMES VANWINKLE
N
You’ll discover that this UMX Habu will climb impressively well when you push the throttle up and have the need for a bit of speed.
80
RC SPORT FLYER . JUNE 15
early all of us have seen the original E-flite Habu 32X, a much larger cousin to this UMX Habu version. These jets are amazing to watch, and even more amazing to fly. E-flite took the cool factor of the 32X and incorporated it in the micro-sized Habu UMX, which has resulted in loads of inexpensive fun. What is really great about this model is that you can fly it in very tight space areas, even the size of a baseball diamond. Fully assembled and ready to bind to any DSM2 or DSMX capable transmitter, the Habu UMX can be in the air within the time it takes to charge its 200-mAh lithium polymer (LiPo) battery. The airplane comes brightly colored in a U.S. Navy flight twitter.com/rcsportflyer
The model makes for a great looking little electricducted fan model in the air and even on the ramp at the airfield. I like it!
school color scheme that makes the airplane easy to see against any sky condition. It is a very impressive looking little machine, but once you get the Habu in the air the real amazement begins. FEATURES • AS3X® system stabilization • E-flite 28-mm Delta-V 180m EDF • Brushless 11750Kv inrunner motor • Four-channel control with linear long-throw servos • Engineered intake and exhaust ducting • Removable landing gear • Steerable nose wheel
This is the box that the Habu comes in. It works very well as a carrying case too, which is a nice feature as a way to protect the model during transit.
NEEDED • 4-channel transmitter min. • 7.4-volt 2S 200-mAh 25C LiPo • 2S 7.4-volt LiPo charger FLIGHT REPORT Talk about a hoot to fly, the UMX Habu is very stable, easy to see and just plain fun! To get started, just plug in a charged LiPo battery, turn the Habu over, and then wait the few seconds rc-sportflyer.tumblr.com
The Habu comes assembled. Its Rx must be bound to a Spektrum™ DSM2®/DSMX® transmitter. Charge the battery and it’s ready to take flying.
RC-SF.COM
81