PORTABLE DIGITAL MICROSCOPE User Guide
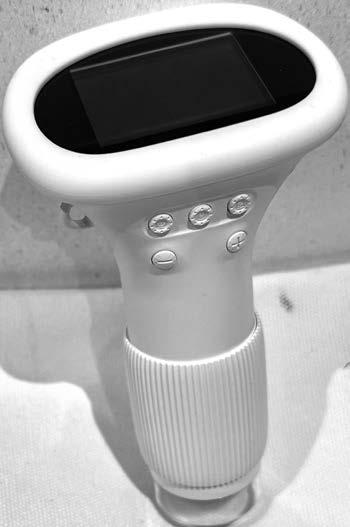
Thank you for purchasing this device. This product is complex to use, so please read this manual in detail to understand how to operate the microscope before using it.
1. Please fully charge the device before first use. Do not charge directly via the PC. Please choose the 5V 1A adapter.
2. For the first use, please format the memory card.
3. This product requires rotating the focus ring to obtain a clear magnified image of the object.
4. This device cannot accurately read the microscope magnification. It is a combination of digital and optical magnification microscope, the specific magnification effect is subject to the actual picture taken.
5. Please do not touch the lens and other optical parts with your hands, as this may result in blurred images and affect the image quality.
6. Do not disassemble the product or its components to avoid abnormal use of the device.
Benutzerhandbuch
2.0-inch IPS Display
Power Button (Power On/Off/Confirm)
• While powered off, long press “Power On”
• In any interface, long press “Power Off”
• In review mode, long press “Review Button”, then short press to confirm deletion after the “Delete” icon appears.
• In playback mode, short press the “power button” to play or pause the video.
Review Button (Review/Delete)
• In observation mode, short press “Enter Review”
• In review mode, short press “Exit Review”
• In review mode, long press to display “Delete” icon
• If a new storage card is inserted and formatting information appears, long press “Confirm Card Formatting”
Benutzerhandbuch für das tragbare digitale Mikroskop | SKU: 41005019
Capture Button (Capture/Record)
• In observation mode, short press “Capture”
• In observation mode, long press “Record”
• Short press to end recording
• In review mode, short press “Exit Review”
“-” button (Zoom Out/Adjust Light Brightness/Previous Image)
• In observation mode, short press “Zoom Out”
• In observation mode, long press “Decrease Light Brightness”
• In review mode, short press “Previous Image”
“+” button (Zoom In/Adjust Light Brightness/Next Image)
• In observation mode, short press “Zoom In”
• In observation mode, long press “Increase Light Brightness”
• In review mode, short press “Next Image”
Focus Ring
• In observation mode, rotate the focus ring to obtain a clear magnified image of the object.
Charging Indicator Light
• When charging, the indicator light is solid red, and when fully charged, it shows solid green.
Reset Hole
• In case of abnormal freezing of the microscope, use a fine-pointed object to poke this hole to force shutdown.
TF Card Slot
• Supports a maximum of 64GB memory card, please use C10 or above high-speed cards.
Charging Port
• Supports charging and data transmission.
This device is divided into 3 modes:
1. Device Observation Mode: Connect to a computer for simultaneous charging and usage.
2. Memory Card Reading Mode: Connect to a computer for TF card reading, writing, and formatting.
3. Computer Observation Mode: Connect to a computer and use through computer software for a more intuitive large-screen experience.
1. Device Observation Mode:
Connect the microscope to the computer via USB data cable, select Device Observation Mode, then press the confirm button, to use the device while charging.
2. Memory Card Reading Mode:
1. This product comes with built-in storage space, capable of storing approximately 200 photos. Insert a personal storage card to shoot videos (Photos stored internally cannot be read by other devices for security reasons.)
2. If additional storage is needed, please use a personal storage card (supports up to 64GB),
3. Connect the microscope to the computer via USB data cable, select Memory Card Reading Mode, then press the confirm button, to view stored photos and videos on the computer (device buttons will be disabled in memory card mode).
3. Computer Observation Mode:
Note: When using Computer Observation Mode
1. Some function buttons on the device will be unavailable, which is normal.
2. After connection, if there is no image in the software, please repeatedly plug and unplug the USB data cable or insert the data cable into the USB port on the back of the computer host, and you can observe the image on the computer.
Windows vista/XP/7/8/10/11 or higher are supported
1. Software installation:
1) For WIN 7/8 systems, download and install the AMCAP software.
2) For WIN 10 systems, search directly for the software Windows Camera (Note: Please disable the default laptop camera in Windows! And you must change the camera’s privacy settings, which is needed for allowing access.)
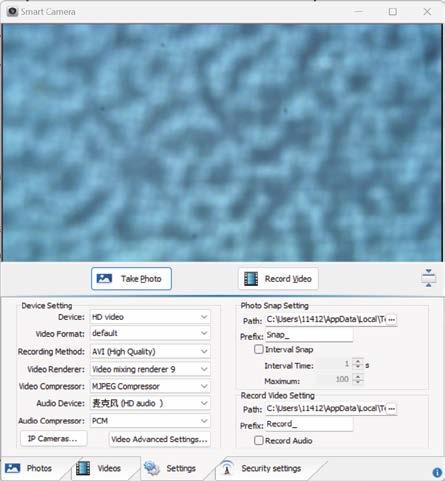
3) Or download the application Smart Camera for your computer. Download link: www.inskam.com/download/camera.zip
4) Connect the USB cable supplied with the microscope to the USB port on the back of the computer case. Press and hold the power button to turn on the device and select to enter PC camera mode,
5) Different software is recommended for different Windows systems, please download the appropriate software for your system.
2. Software page display:
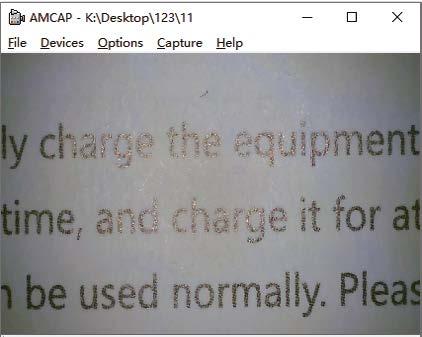
1) AMCAP page, as shown below.
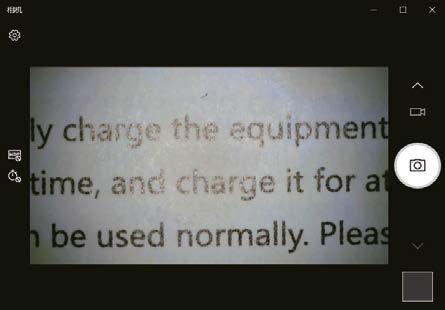
2) Windows Camera page, as shown below.
3) Smart Camera page, as shown below.
* Note: The following situation occurs for a long time when connecting the device to the computer using the data cable. You may try the following solutions:
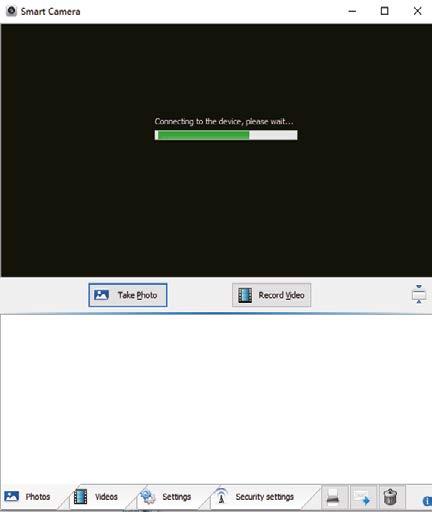
a. Firstly, please repeat plugging and unplugging the USB cable or plug the cable into the USB port on the back of the computer case to ensure that the device is powered properly.
b. Secondly, the software may not be compatible with the system, so you can check if you are using the software installation instructions correctly.
MacOS X 11.0 or higher is supported, not available for Apple laptops with Type-c interface.
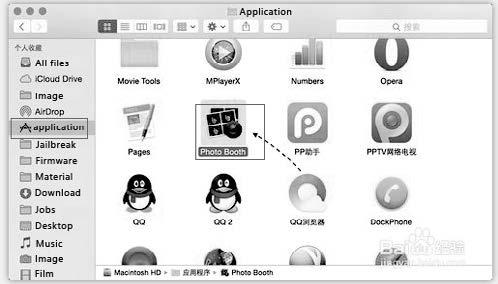
Opening the software (we recommend using the “Photo Booth” software that comes with your Apple computer).
1. Firstly, in the Applications directory of the Finder window, find an application called “Photo Booth”.
2. Connecting device.
1) Connect the microscope to the USB port of your computer with the USB cable that comes with the microscope, press and hold the power button to turn on the device. Select to enter PC camera mode. Open and run the application “Photo Booth”.
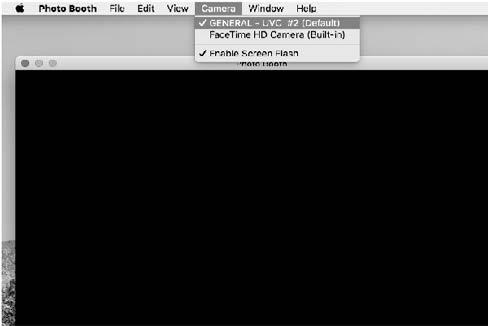
2) Click on Photo Booth and select the camera “HD video”.
3) You can also use the alternative software “Quick Time Player”.
1. Please use 5V 1A power adapter to charge the device.
2. During charging, there will be indication on the microscope panel. When charging is complete, the battery indication is as shown below.
3. After fully charged, the microscope can be used continuously for up to 2 hours.
4. After the device is completely dead, it needs to be charged with a 5V/1A charger for at least 1 hour before it can be used normally.
Formatting will delete all data on the card, please proceed with caution!
Format? Long press the review button to confirm deletion of all data on the card.
When inserting a new or incompatible Long press the review memory card, a formatting prompt button to confirm may appear.
Long press the review button to confirm formatting. If you do not want to format, please remove the memory card (lightly press the card to eject).
Screen parameters
2.0” IPS
Pixels 2.0 megapixels
Magnification 1000X
Image format JPG
Video format AVI
Focus mode Manual focus
Light source 8*LED
Battery capacity 600mAh
Operating time 2 hours
Charging time 2 hours
Supported systems Windows vista/XP/7/8/10/11. MacOS X 11.0 or higher
Q1: The device cannot be charged.
A1: 1. Replace with a working Type-C data cable.
2. Turn on the main power of the power supply device (e.g., power strip, computer power).
Q2: The device is frozen.
A2: 1. Press the reset hole on the main unit with a fine needle to force shutdown the device.
Q3: Cannot connect to the computer.
A3: 1. Ensure the data cable is plugged in securely, replace the data cable, or use the original data cable.
2. The microscope main unit is not powered on.
3. Confirm whether the device is correctly set to memory card reading mode.
Q4: Unable to save photos/videos.
A4: 1. If a storage card is inserted, replace it with a personal storage card.
2. If no storage card is inserted, please insert a personal storage card.
3. Format the memory card (Note: Formatting will delete all data on the memory card, please remember to back up in time).
Q5: Images appear blurry.
A5: 1. You need to rotate the focus ring to get a clear magnified image of the object.
Made in China on behalf of CSG Global Education Ltd.
KCS Education, Unit 1, New Hythe Lane, Aylesford, Kent, ME20 7FE Tel: 0808 281 9440
CSG Global Education Ltd, T/A KCS Education, 25 Bd Romain Rolland, 75014, Paris, France