01 GESTURE & ROTATION
Hybrid Expriment for Fabrication & Design
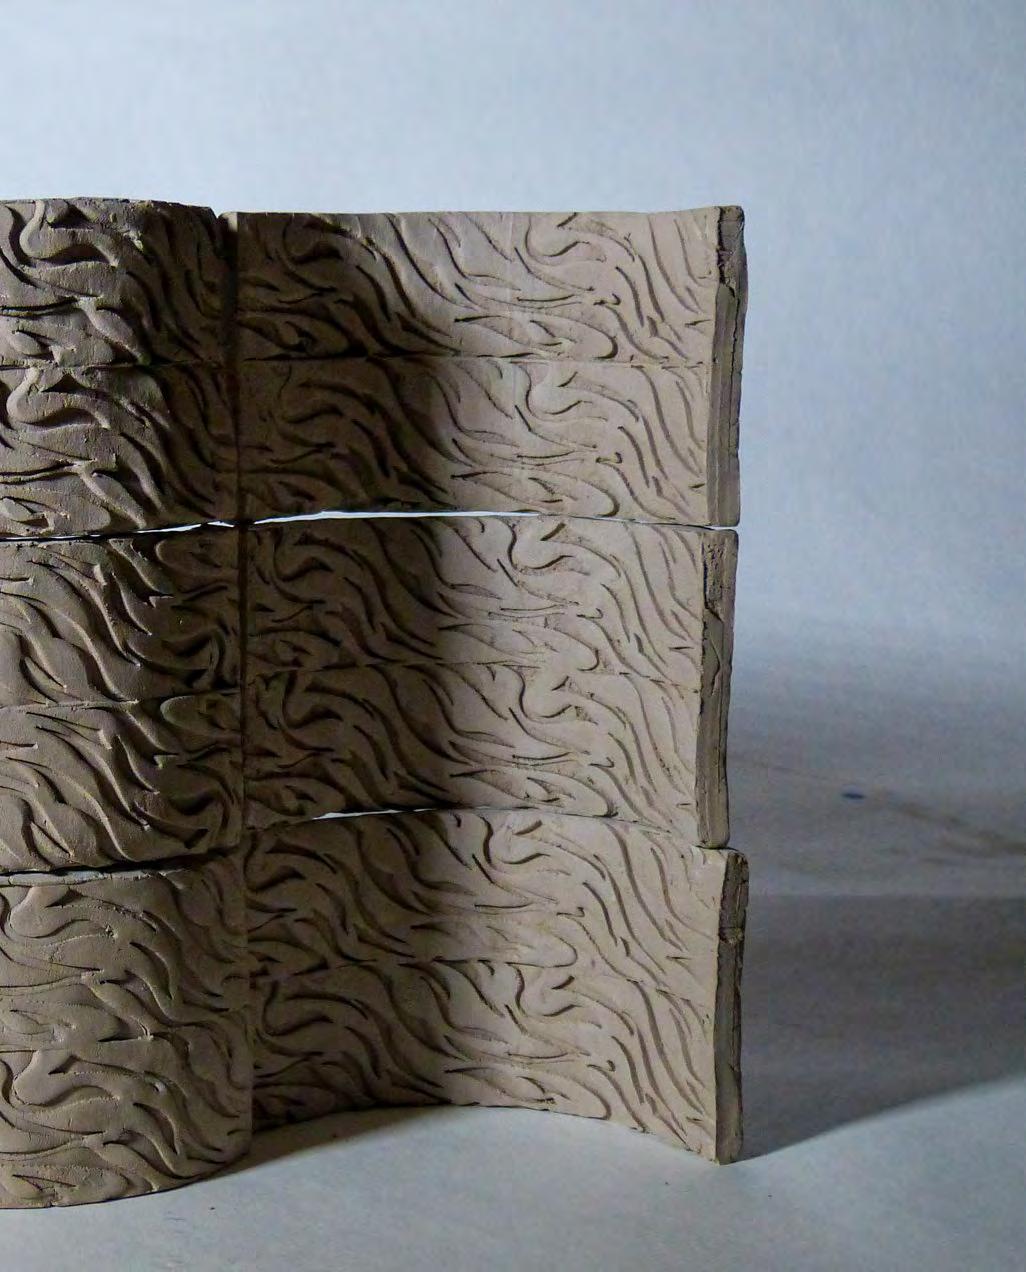
The Gesture and Rotation is a hybrid fabrication process for making rollers to produce different tiles patterns. The project explores the different processes of design thinking and fabrication. The design process explores traditional handcraft and digital fabrication that use a 3D printer to produce rollers. Design thinking involves the result-oriented of designing patterns through hand drawing and the parametric design-oriented of designing rollers to explore possible patterns. The project is the design of the pattern of tiles and the process to experience the different designs and fabrication for exploring possible workflow and potential.

4 | Digital Clay

DSN S 546 Spring 2022 | 5
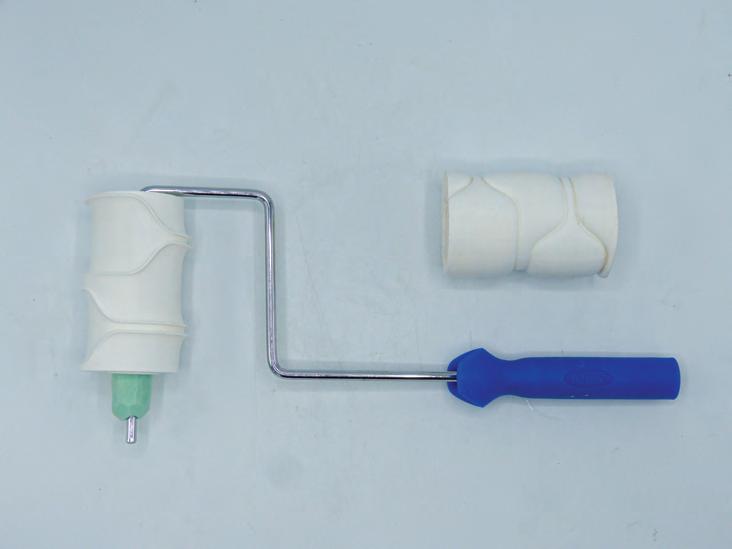
Making tiles patterns by the rolling tool are more related to the handcraft. However, the rollers of patterns are produced by a 3D printer. Because PLA makes rollers, it needs more skill and experience to find the right way for avoiding clay to stick on the roller.
6 | Digital Clay FABRICATION RECIPES
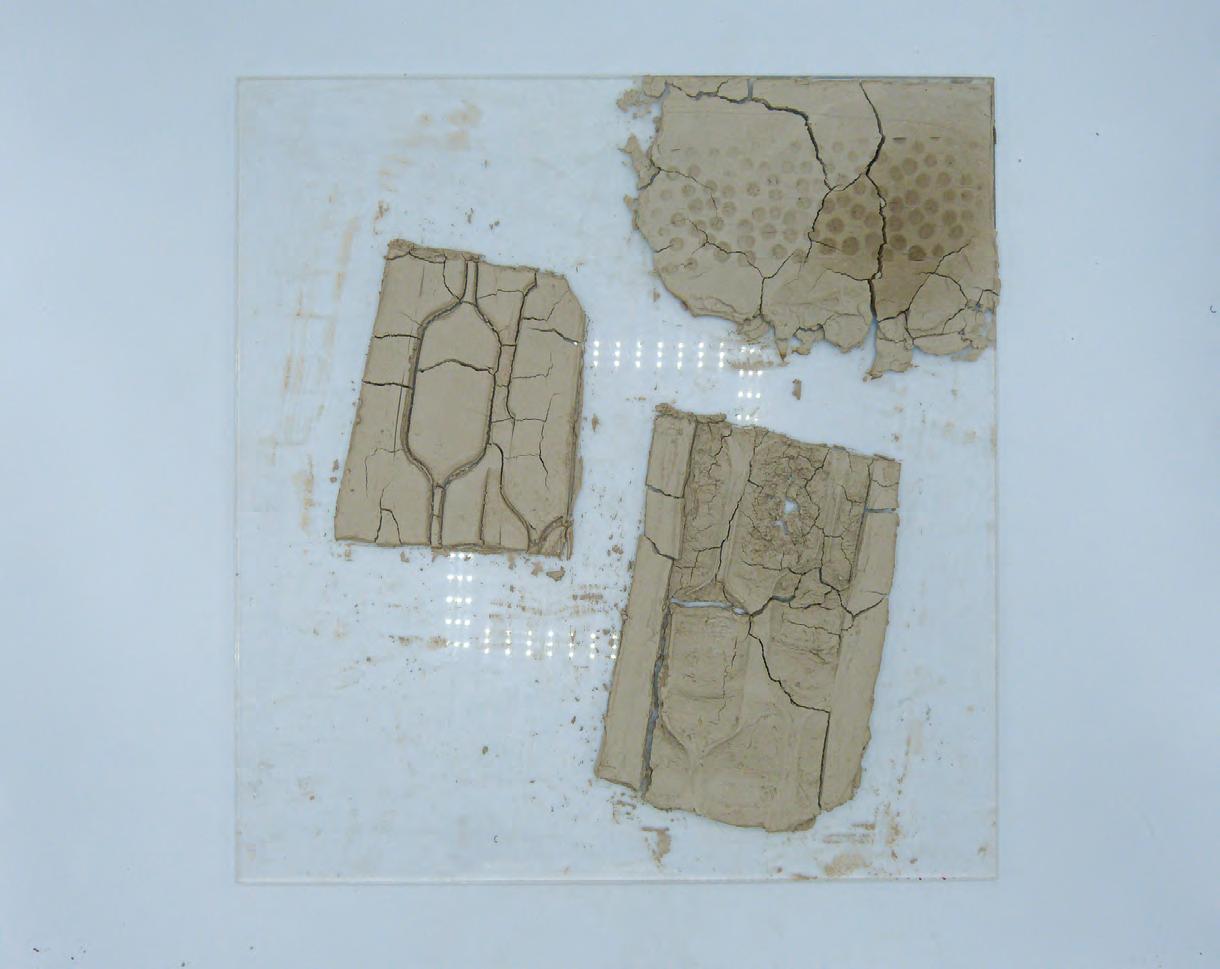
CLAY Put clay in the mould 01- Mould for Tile 02 - Rolling Tool (use two hands) 03 - Clay for Making Tile 04 - Cling Wrap (for releasing tile from table) 05 - Rolling Tool (use one hand) 06 - Rolling Tool (fabricate by 3D printer) 07 - Exacto Knife (for releasing tile form mould) 08 - Rolling Pin (for at clay in the mould) 01 02 Flat the clay Choose
DSN S 546 Spring 2022 | 7 CLAY 04 06 07 08 03 05 Choose rolling methods
Cut edge and take out the tile from mould
Wait clay to dray (around 2 days)
Fire In Kilns
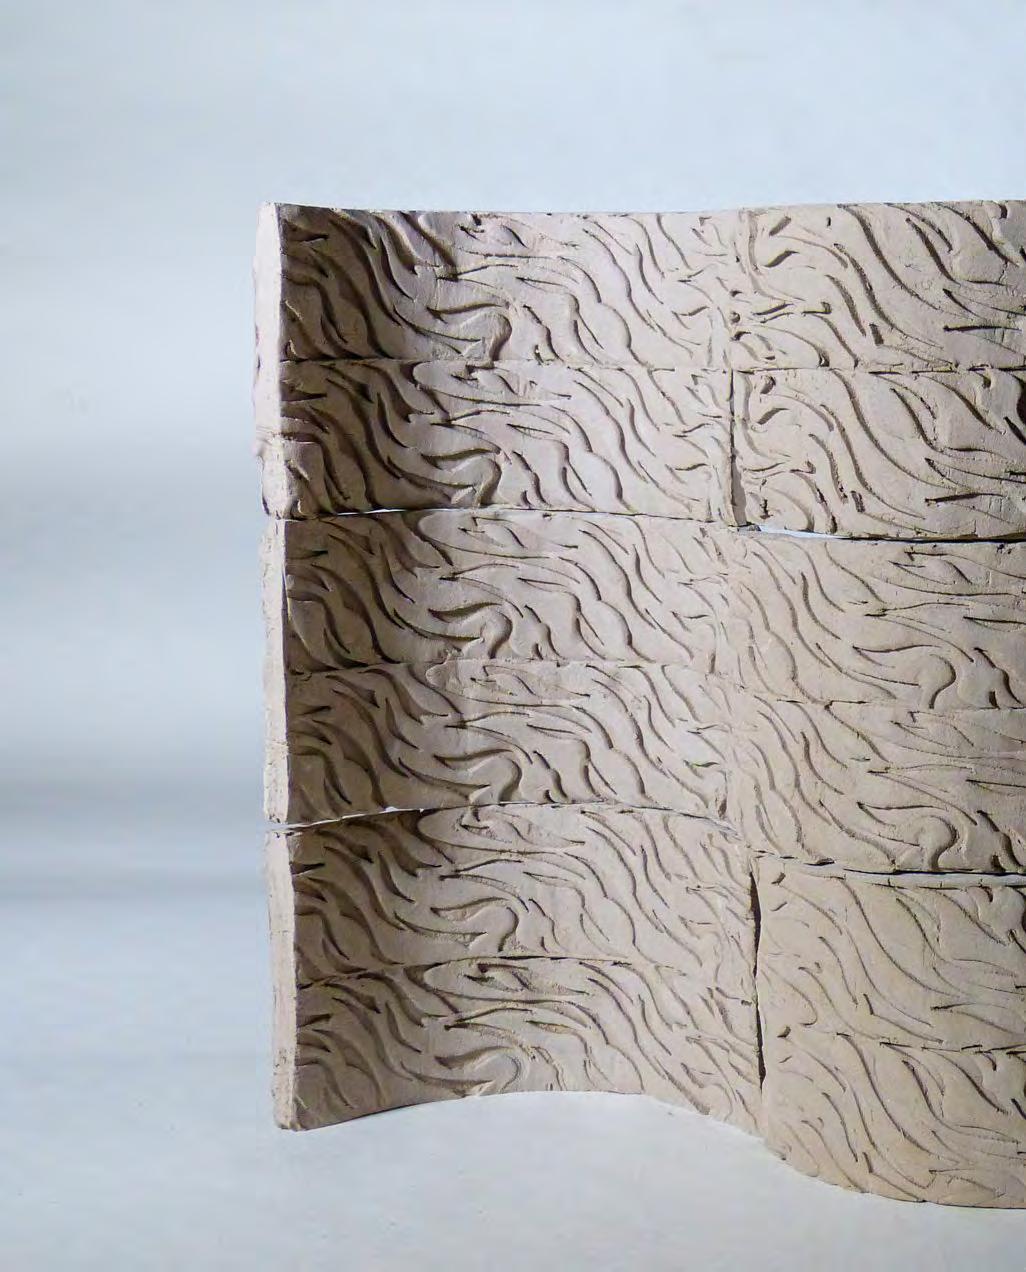
The project discusses using digital fabrication to produce rollers to create tiles. I consider both handcraft feeling and digital fabrication identity cases to inspire flow and continuity for the roller tools. The interior artistic relief tiles show interesting flow. The similar subtle repetition and handcraft feeling create rhythmic change. The digital fabrication pattern brings virtual materiality, which mimics the identities of waving fabric. The pattern creat continuity indirectly, and the rhythmic flow through the visual interpretation.


8 | Digital Clay CASES STUDY


INITAL DESIGN || DESIGN EXPERIMENT
There are two types of design strategies. The first one is more emphasis on the result of the pattern. The roller will come out from the accurate pattern. The design process is controllable and the result pattern-oriented. The second one is the parametric design logic. It is based on digital modeling and emphasis exploring the form of a roller. The design
process focused more on the section and generating the roller based on different vertical direction algorithms. The result of the pattern becomes less certain and more exploration through the way of using a roller.
10 | Digital Clay
ITERATION 01|| DESIGN STERATEGY RANDOM LOFT 30 ROTATION 6” 9.5” = 3” = 2” 01 02 03 04 05 06


DSN S 546 Spring 2022 | 11 03 02 01 06 05 04 03 02 01 06 05 04 ITERATION 02 || ROLLER AND TILES
After making texture on the tiles by rolling, I also try to reform the shape of tiles. I used a CNC router to make a double curve surface to reform tiles. However, the CNC machine only can cut 2-inch depth, so the change of height is not enough to create interesting double curve tiles.

12 | Digital Clay FABRICATION | CURVATURE
SURFACE
Reform Clay (Before Getting Dry)
Then, I try the single curve using the PVC pipe. Tiles can reform by the pipe and create an interesting shap.

DSN S 546 Spring 2022 | 13
Reform Clay (Before Getting Dry)
14 | Digital Clay PATTERN || CONTINUITY
DSN S 546 Spring 2022 | 15
02 IMPRESS & CUTTER
Hybrid Expriment for Fabrication & Design
The project uses a digital fabrication tool, Formlab, to make stamps and use stamps to create a different tiles pattern. Through using stamps, the project tries to explore the composition of patterns. Also, it discusses shifting the push to cutter the tiles and make puncture patterns.

16 | Digital Clay

DSN S 546 Spring 2022 | 17
CLAY
01-Put Clay in the Frame
The fabrication process is similar to the rolling tools. The only difference is the Formlab, resin printer, using resin, and the resin is less sticking with the clay. So, it is relatively easy to fabricate compared with rolling tools.
04-Cutting Edge and Take Out from Frame
01- Rolling Pin (for at clay in the mould)
02- Mould for Tile
03- Stamp (made by 3D printer or resin printer)
04- Exacto Knife (for releasing tile form mould)
05- Clay for Making Tiles
18 | Digital Clay FABRICATION PROCESS
DSN S 546 Spring 2022 | 19
02-Flat the Clay Tile
for
03-Stamping the Tile 05-Waitting
Dry
CLAY 01 02 03 04 05
06-Fire in the Kiln
There are two cases for exploring stamps ideas. The first one is the movable type. Stamps can have different combinations to create various textures. The second one is cookie cutter. Shifting push to cut gives an interesting pattern for the remaining negative space.


20 | Digital Clay CASES STUDY
The initial pattern extracts the elements of drawing patterns. The pattern creates interesting figures in the negative space.

DSN S 546 Spring 2022 | 21
INITIAL DESIGN-IMPRESS || STAMP DESIGN 01 60% Y AXIS 1.25” 1” 1” 1.5” 1” 1”
The first design iteration uses the figure, ground, and mirror to create a new pattern of stamps. The new stamps have more surface area, which causes the stamp to be hard to take out from the clay.

22 | Digital Clay IMPRESS ITERATION || STAMP DESIGN 01
MIRROR 1.5” 1” 1” 1.5” 1” 1”
Negative space create interesting gure


Hard to make a clear grid
Tolerance Problem
Need more tolerance extra clay push to side
Hard to stamp need to push and shake more
Strong shadow and contrast
DSN S 546 Spring 2022 | 23 REFLECTION ON PATTERN || STAMP DESIGN 01
The combination of four stamps creates a lot of potentials. Instead of following the grid, overlapping ping stamps create interesting depth and flow. Also, stamps could flow the flow of figures to create interesting patterns.
24 | Digital Clay
COMBINATION || STAMP DESIGN 01

DSN S 546 Spring 2022 | 25 COMBINATION || STAMP DESIGN 01
The second design inspires the pattern of combination and shifts the stamp’s pattern. The whole stamps become a sandwich way to compress clay for getting hollow patterns. The double also changes the interesting form of tiles.

26 | Digital Clay
3” 3” SHIFTING CUTTING EXTRACT CURVE DOUBLE CURVE 1.25” 0.75” 0.5” 0.75” SECOND DESIGN-CUTTER || STAMP DESIGN 02

DSN S 546 Spring 2022 | 27 REFLECTION ON TOOLS || STAMP DESIGN 02 Clay stick inside hard to take out Bad edge condition CLAY
The second design deconstructs the initial mold. So, the first step is using different “Cuter” to make whole in the flat tiles. Then, use the double curve surface to reshape the tile.

28 | Digital Clay CUTTER ITERATION || STAMP DESIGN 02 0.25” 0.75” DETOUCH


CLAY CUTTER ITERATION || STAMP DESIGN 02 CLAY 01 02

30 | Digital Clay

DSN S 546 Spring 2022 | 31
The project used the Brent Die Hand Extruder to fabricate different clay pipes. The design explores the controllable level of different section shapes. Also, it explores the possible combinations between clay pipe unites.In the process, the laser cutting fabricates the section of extrusion. For the Hand Extruder, it is a manual process but contains the computation logic to fabric clay pipes.

32 | Digital Clay
03 COMPRESS & EXTRUDE Clay Extrusions

DSN S 546 Spring 2022 | 33
The Brent Die Hand Extruder needs a sequence to assemble the tool. During the process, it is better to have two people working together. The fabrication uses the extrusion idea to produce clay pipes. However, the manual process is hard to perfect the consistent quality of pipes. The good quality usually shows in the middle of the extruding process so the process will use a lot of clay. After getting the nice quality of pipes, people cut different angles and lengths of modules based on design purposes.
34 | Digital Clay
1 3 2 75° 60° 45° 30° 15°
01- Assemble the Mould 02- Put Clay
8
04- Cutting Extrusion in Di erent Angles
DSN S 546 Spring 2022 | 35 4 5 6 7
Clay into the Extrusion Tool
03- Compress and Extrude Clay
05- Waiting for Dry
I am a Clay! :)
06- Fire in the Kiln
The extrusion of the Wave creates a good surface quality, but the Wave isn’t strong enough. Also, the middle part was broken because of strong pressure. The Gear creates interesting furry skin, and teeth are relatively identifiable. The middle part reduces the circle size, so the pressure reduces, and the middle part doesn’t break.


36 | Digital Clay 36 5 1 DIVIDE ROTATION CURVATURE FILLET OFFSET OFFSET 1 1 2 3 DIVIDE ELLIPSE OFFSET OFFSET OFFSET SKETCH PROPORTION STACK WAVE GEAR


DSN S 546 Spring 2022 | 37
Broken by Pressure
The feeling of waving from Twist was not intense. The sharp corners cause the edges to become furry. The middle part was broken, so the middle part only shows half hollow. The Shift creates nice units, but the middle part was broken. Using a 3D printer, print the middle part to create more durable pieces. The new middle part can hold pressure and help produce nice thin units.


38 | Digital Clay 5 1 ROTATION FILLET OFFSET 1 1 2 3 DIVIDE ELLIPSE OFFSET OFFSET OFFSET SKETCH PROPORTION STACK TWIST SHIFT


DSN S 546 Spring 2022 | 39
Broken in the Process
Broken By Pressure
3D Print ( .5“)

40 | Digital Clay

DSN S 546 Spring 2022 | 41
04 STAGGER & STACK
The project used the 3D Potterbot to create small-scale clay bricks. The design develops based on the idea of stagger and stack to explore several iteration designs through Rhino Grasshopper. The Potterbot uses the specific moisture clay to fill in the pipe. The pipe uses the C.N.C technology to extrude clay and produce a different design, challenging the traditional ceramic fabrication process.

42 | Digital Clay
3D Clay Potterbot - Clay Bricks

DSN S 546 Spring 2022 | 43
When people use 3D Potterbot, most of them only work on the interface to print designs. However, there are a lot of steps before starting to print. First, the Potterbot uses more moisture clay than clay for making tiles. Second, the pipe of Potterbot needs to use a plug mill to infill clay and manually compress the clay into the right position. Fourth, people need to assemble sequential parts into the pipe for the machine. The whole preparation process will take an hour.

44 | Digital Clay
CLAY WATER
01-Make Clay
6 7 8 10 11 12 13 9
04-Assemble All of Parts on the Pipe
I am a Clay!
02-In ll Clay into Pipe
03-Put Clay in Right Position and Install the Head
05-Put all the Machine and Check the Z Axis
06-Print and Clean Extra Clay
:) 1 2 3 4 5 14 15 16
The first design is based on the form of point arches to consider stacking bricks. Through the reflection of load and structure, gradually iterate the design process.
46 | Digital Clay
SKELETON ENCLOSE-STRUCTURE REPETITION-STACK
The initial design gives nice support in the vertical direction, but the horizontal force causes the brick to be broken. The second design adds the extra arch against the horizontal force, but then the transition of vertical force is not strong. The third version adds structure to the middle to transfer load. The print results show that more intersect points will reduce the precise level of edge condition. Also, Rhino Grasshopper will generate the extra path for efficiency.


DSN S 546 Spring 2022 | 47
Load Shrink Down 3’ 3’ 2.5’ Transition Vertical Load Precise Reduce Extra Path 3’ 3’ 2.5’ Precise Reduce Extra Path 3’ 3’ 3’
Horizontal

48 | Digital Clay

DSN S 546 Spring 2022 | 49
The second design use circles as elements to explore more curvature boundary between bricks. After confirming the relationship between bricks, other iterations explore more intersection relationships within the circle.
50 | Digital Clay
RELATIONSHIP OVERLAP ROTATION


DSN S 546 Spring 2022 | 51 =1” =2” 2’ 2’ 3’ Structure Problem -Transition Precise Reduce =1” =2” 2’ =1” =2” 2’ 2’ 3’ Structure Problem -Cantilever
The second iteration becomes unstable when stacked using the circle’s surface. However, the vertical direction makes an interesting pattern of the surface.


52 | Digital Clay

DSN S 546 Spring 2022 | 53 Reduce Size Angle Change 135.68 135.68 94.9 94.9
05 GLAZING
Glazing Tiles and Bricks
Project five is a glazing process that applies ceramics techniques to digital fabricating productions. In the glazing process, it adds an extra color layer on the surface of the clay but also explores the potential way to interact with surface grain, texture, and patterns.

54 | Digital Clay
01-Blending Glazes 02-Dipping
Fully mix the deposit into the liquid so that the clay can glaze evenly.


Dip into the liquid for 2 to 3 seconds.
There are five steps for glazing after deciding the color to glaze on the clay surface. First, find the color to glaze and fully mix glazes to blend with liquid evenly. Second, dip the clay into a glaze with the surface that needs to glaze and leave the face attached to the kiln blank. Third, put it on the shelf to wait to dry. If you need to add the extra glaze on the previous glaze surface, the clay needs to wait for at least 45 minutes. The last step is to put the clay into the kiln and the surface without glazing touching the base.
56 | Digital Clay
Second
03-Clean Extra Glaze
Clean the extra glaze on clay. Keep the side of the touching table clean so that the glaze won’t stick on the kiln's surface.


04-Waitting For Dry 05-Fire In Kilns
The second dipping needs to wait at least 45 minutes.
Second Dipping
The ring process has four rounds, and each round has a di erent temperature and hours.
RampIncrease/HourTemp. Hold Time
Ra 1100 180 F1 - 4 Hours
Ra 2150 208 F1 - 4 Hours
Ra 3300 1070 F5 minutes
Ra 4400 1900 F5 minutes
Alarm 1910 FPress Start
DSN S 546 Spring 2022 | 57
I used my early design to test out the two layers of glazing. The experimental purposes are to find consistent results of glazing and factors that affected the glazing. Some groups use the same form of clay bricks but use different ways to dip them into the glaze. So the form and gravity affect the glazing result.


58 | Digital Clay


DSN S 546 Spring 2022 | 59


60 | Digital Clay


DSN S 546 Spring 2022 | 61