2 minute read
Sepia

When I first bought Photoshop 2.0 in 1991, I had no idea how to use it. I had extensive experience in the darkroom, so the first thing I did in learning the new software was to try and convert my knowledge from one medium to another. I thought, I know how to make sepia prints in the darkroom, so how do I do that in Photoshop?
If you like black and white photography, sepia toning is simply an adjunct to what you already appreciate. In the darkroom, a sepia print was made by emersing a black and white print into a chemical bath until the silver halide particles that made up the image were replaced by the toning solution.
In Photoshop, it’s a three step process that takes a fraction of the time, and it’s devoid of dealing with toxic chemicals. First, though, you have to understand what color sepia really is based on the familiar color wheel. Sepia is a shade of brown, and brown is dark orange. Orange, of course, is comprised of red and yellow. Therefore, sepia is a dark rendition of red and yellow.
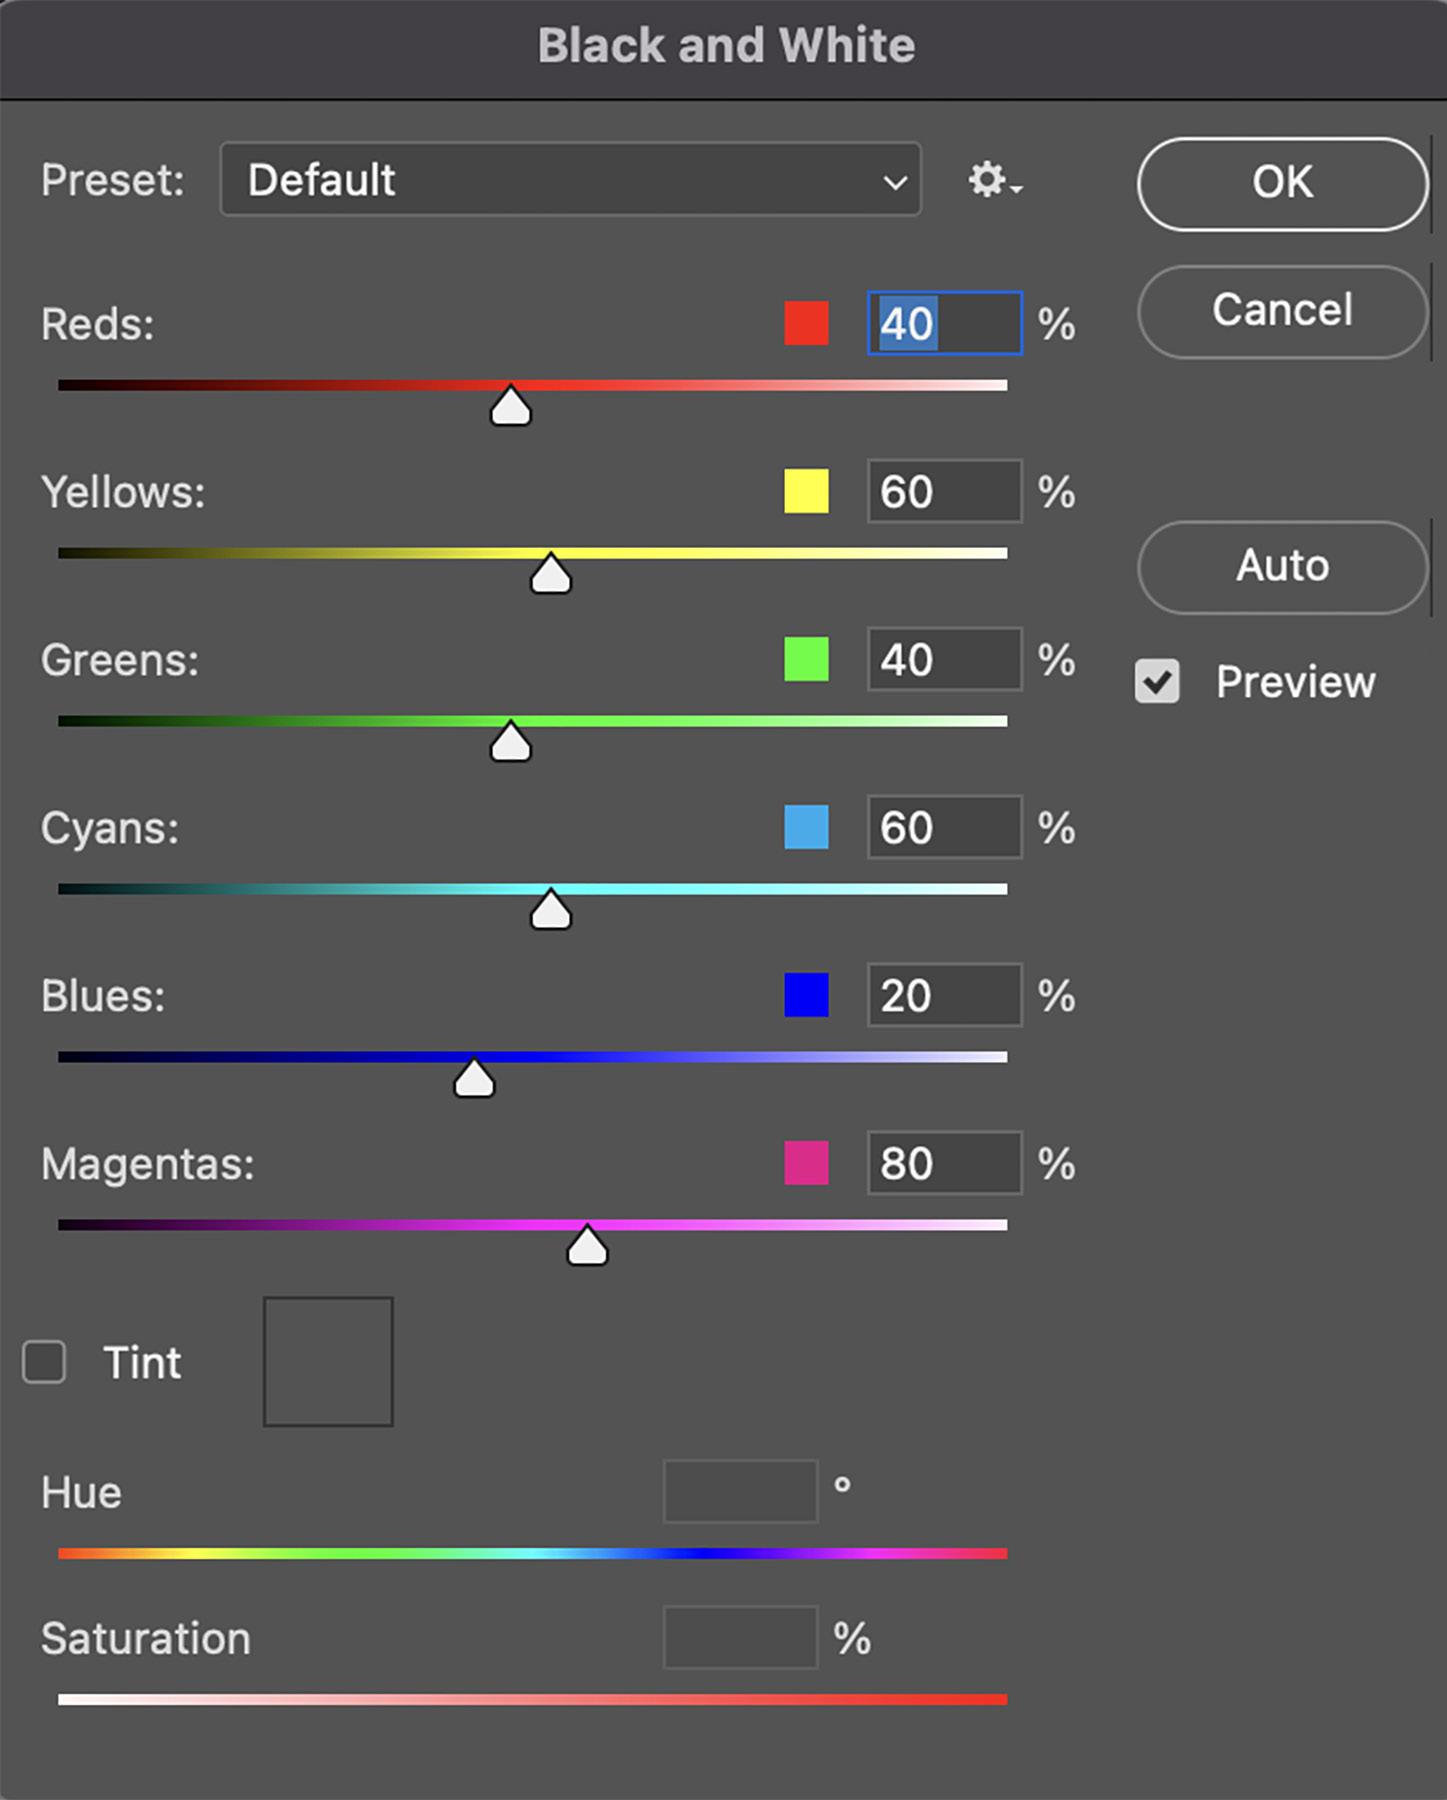
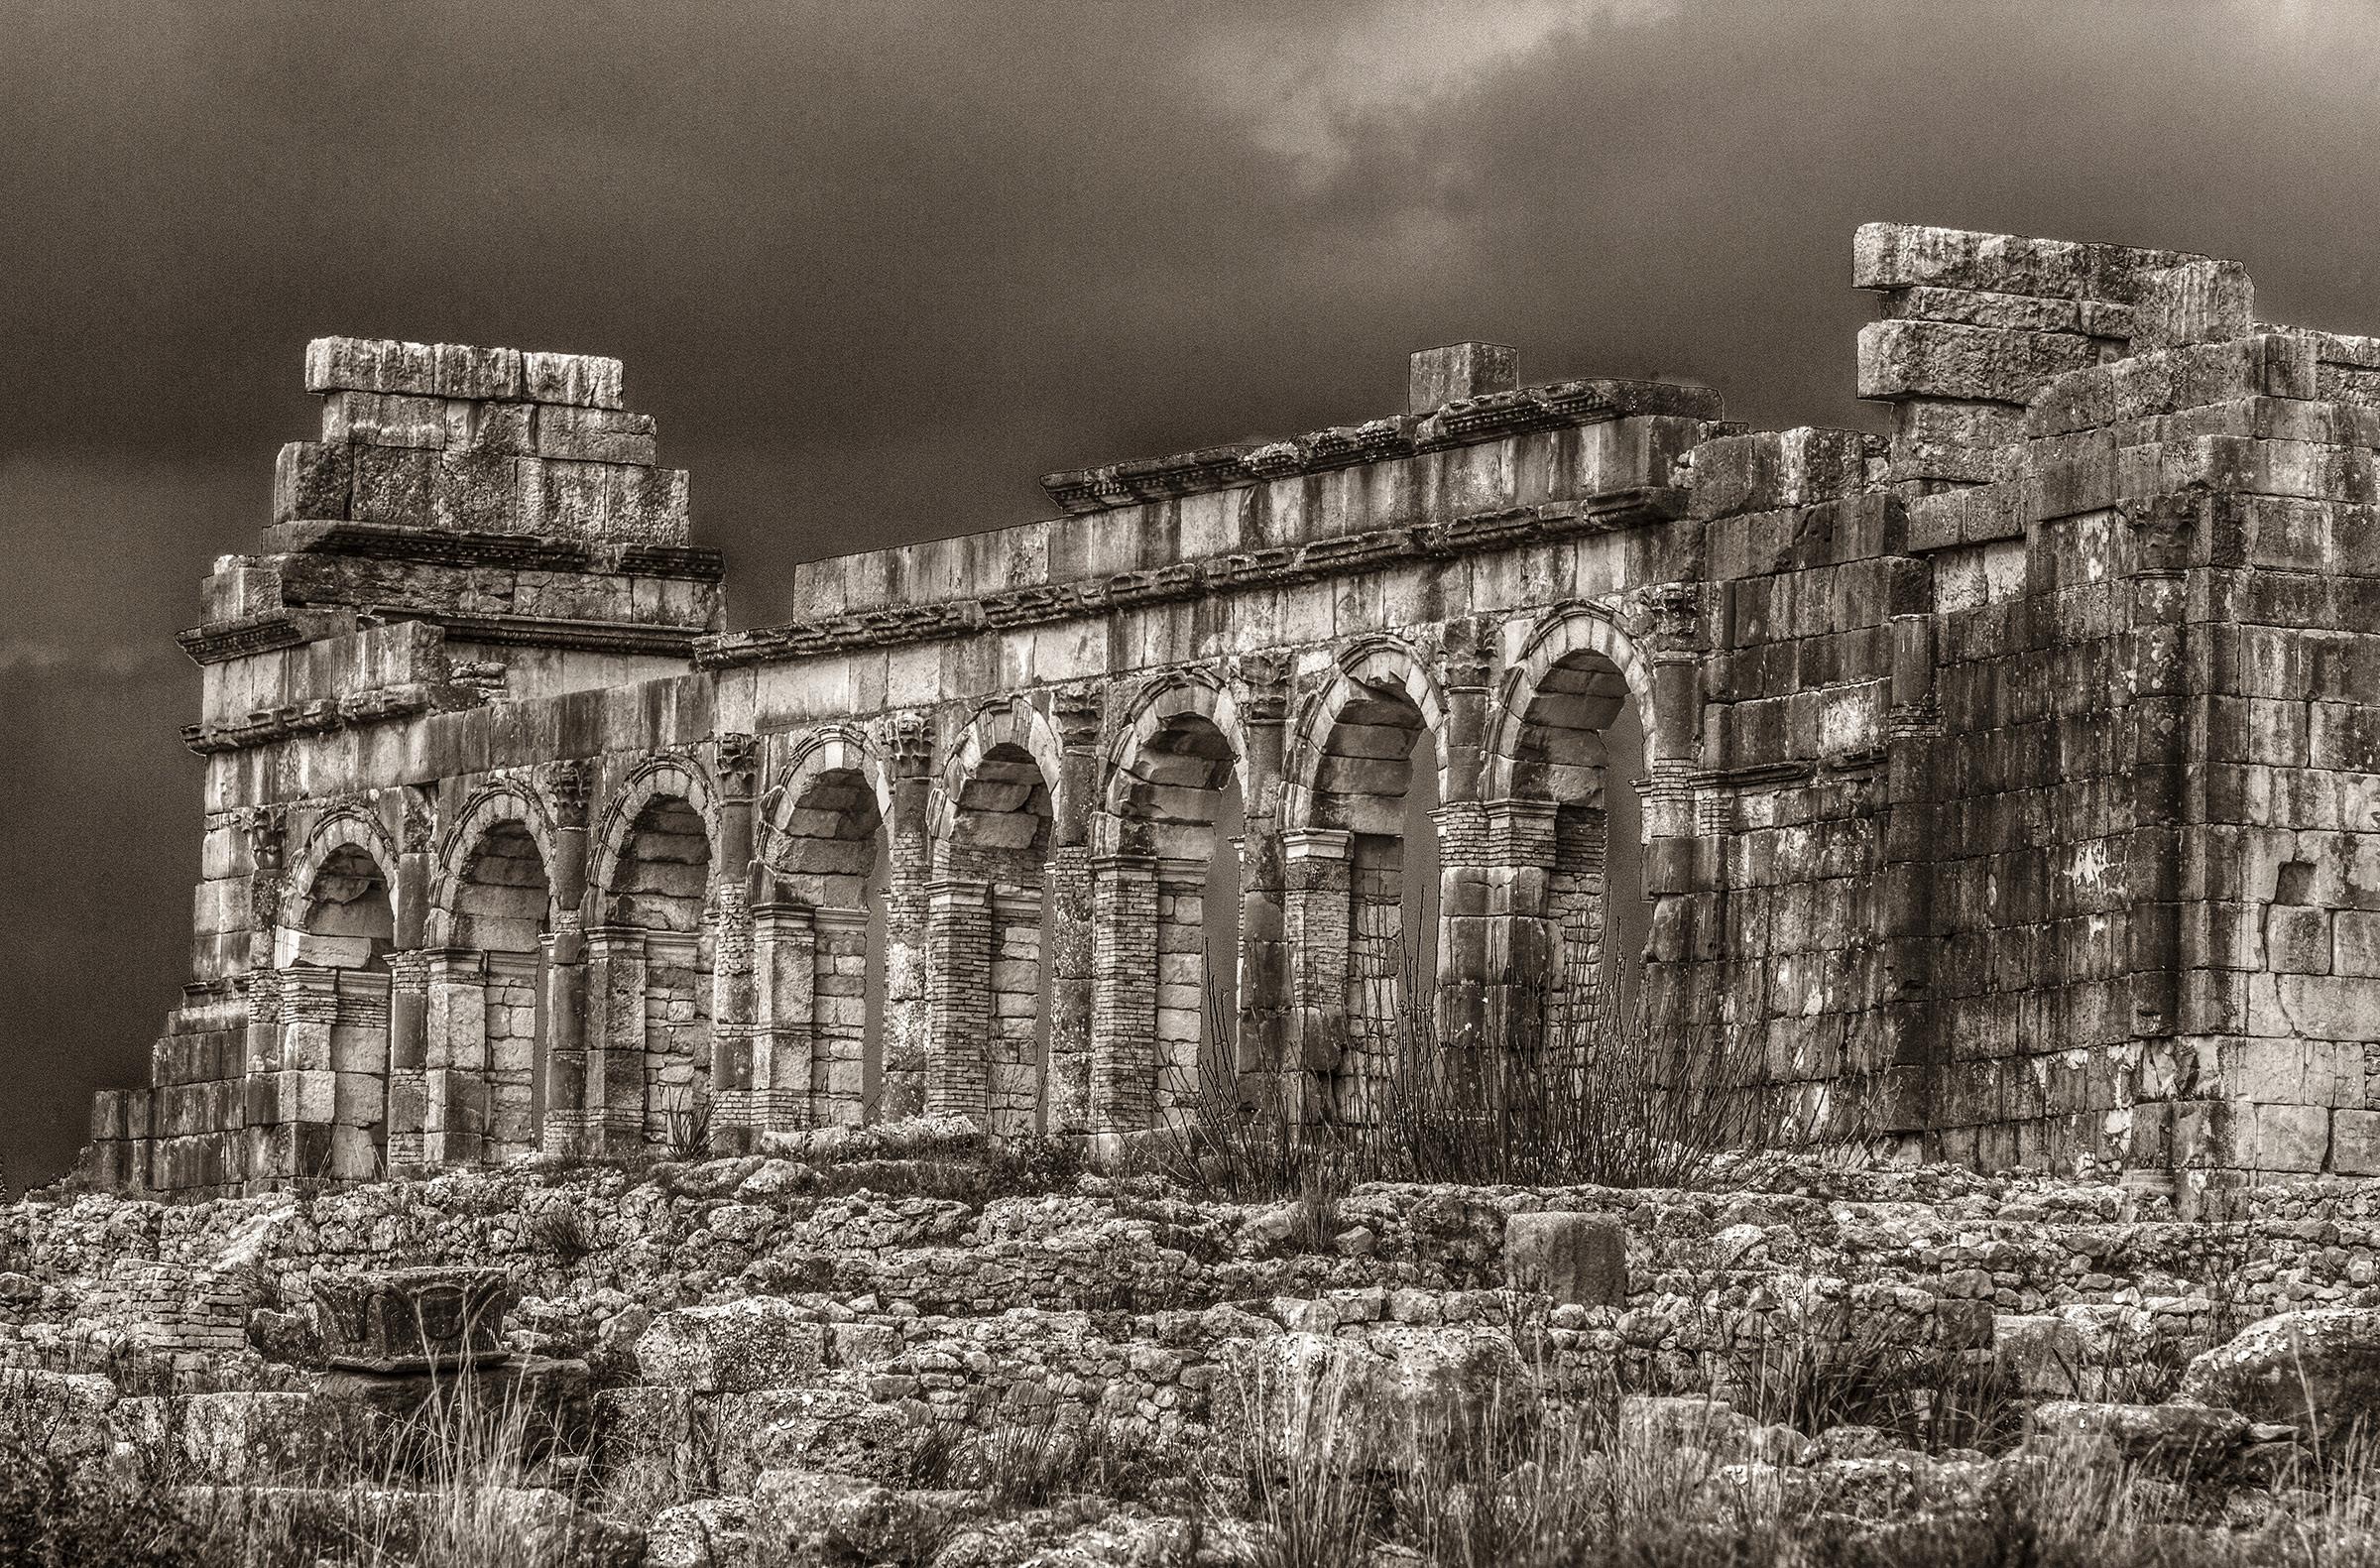
Our digital cameras shoot only in color, so the first thing we have to do is convert the color files to black and white. The best way to do that is by using the pulldown menu command, Image > adjustments > black and white. In the open dialog boxt shown at right, you can see the various color channels are isolated with sliders. Here you can manipulate the tones in your image, per each color, to replace the contrast that was lost in the color-to-blackand-white transition. Plus you can tweak the various areas of the image to darken or lighten them to taste as I did in the photo below of the Roman ruins in Volubilis, Morocco.
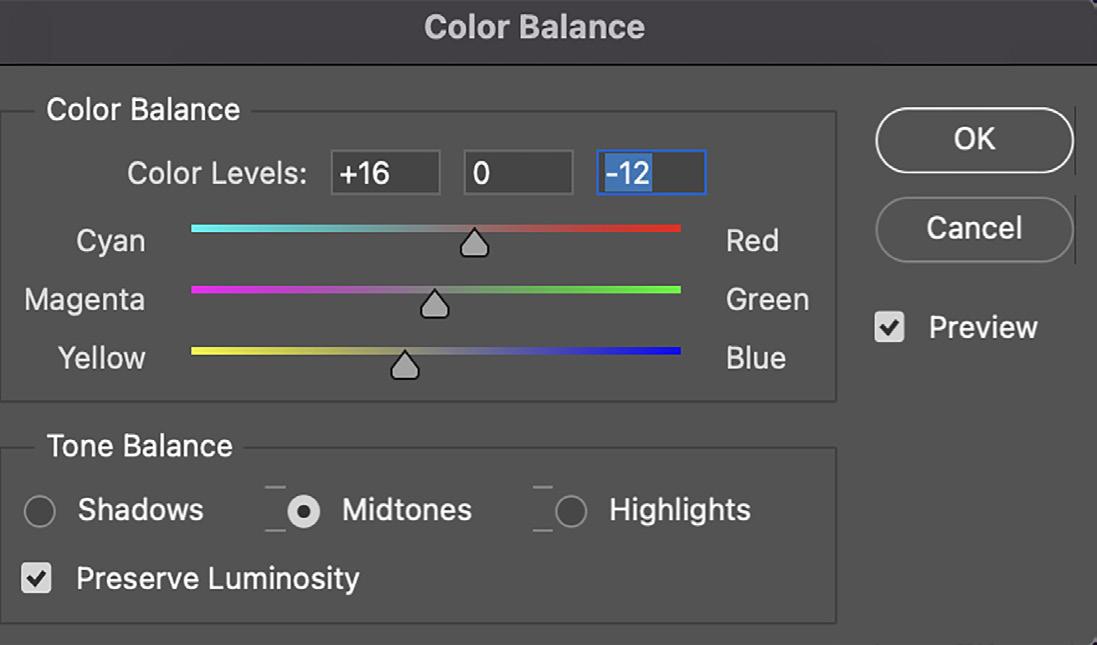
Once you’ve tweaked the black and white image using the sliders, choose Image > adjustments > color balance. Here is where you add the sepia color. See the dialog box on the next page. Move the cyan/red slider a little to the right to introduce red into the image, and then move the yellow/blue slider to the left to add yellow. The image should now look sepia.
To embellish the final result, I bring the photograph back into camera RAW with the pulldown menu command, Filter > camera raw filter. Using the clarity slider, I add life to the image by sharpening the midtones.
The pictures you select for conversion to sepia contribute to the success of the effect you’re trying to achieve. Historic and nostalgic images, ancient ruins, portraits in period costumes, etc., seem to lend themselves to a sepia look because, before color photography, the only kinds of photos people ever saw were black and white and sepia.
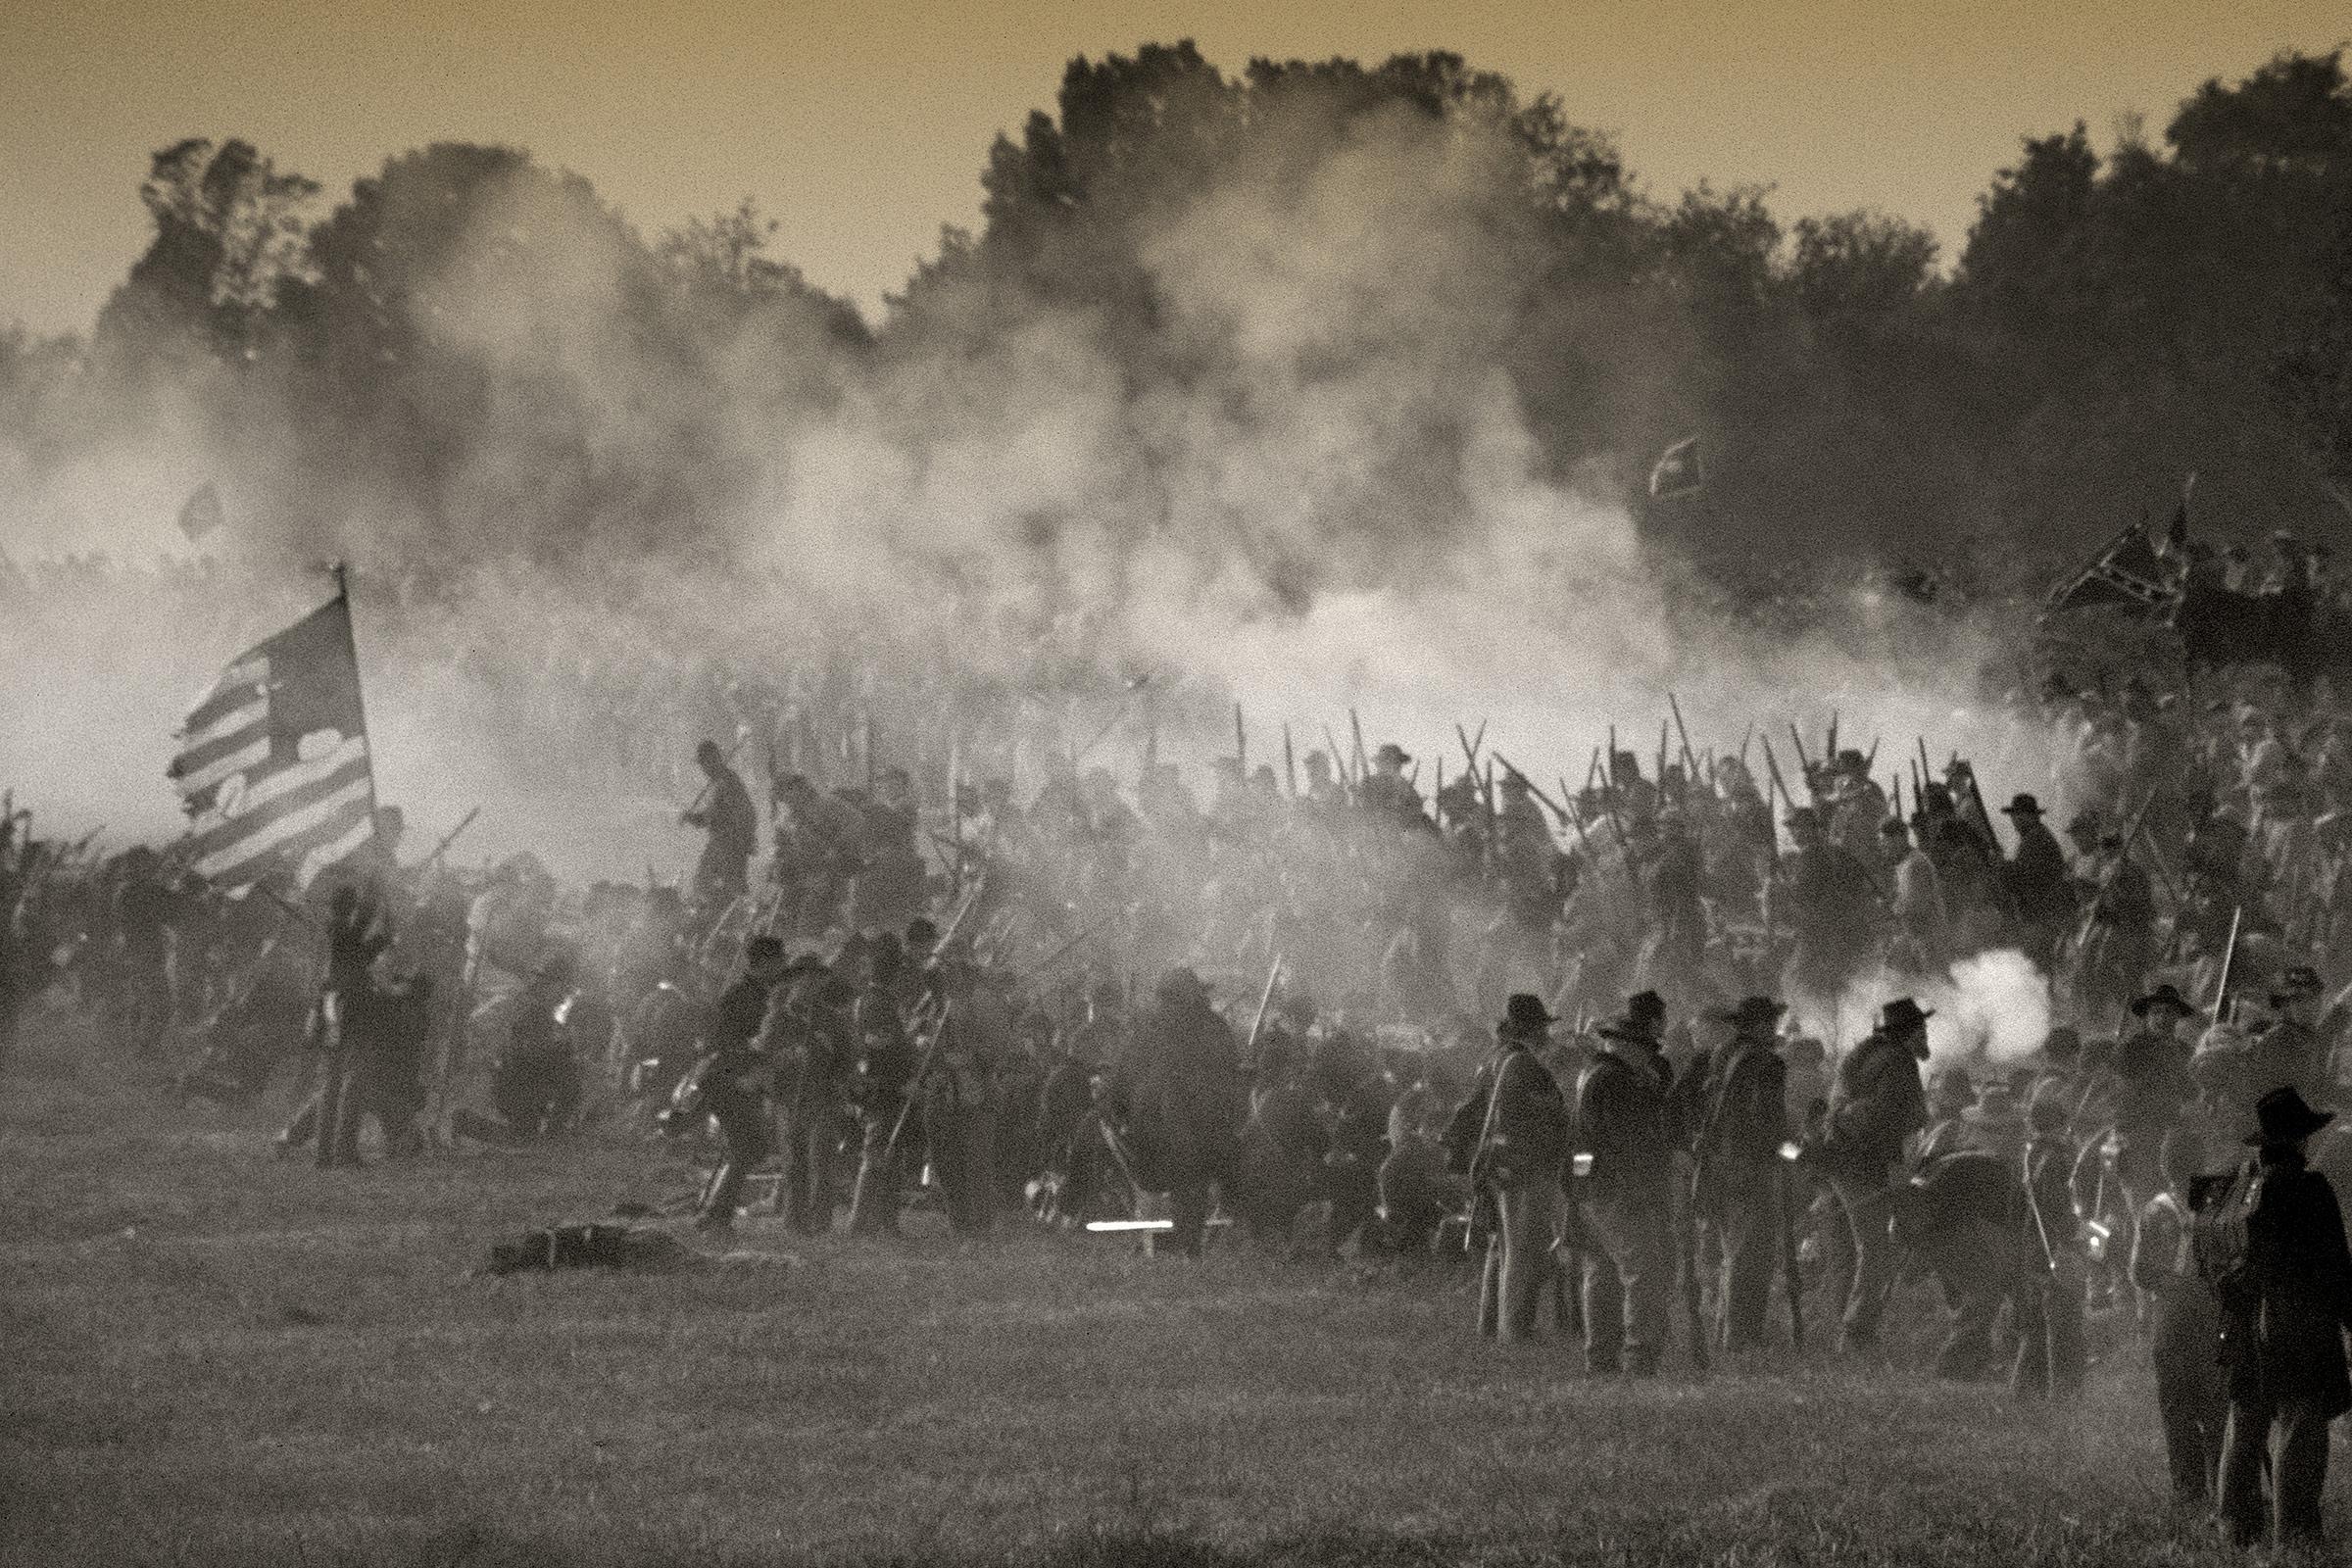
The image below is an example. I took this in 2004 with a medium format film camera, the Mamiya RZ67. It’s an historically accurate reinactment commemorating the 140th anniversary of the Battle of Franklin (Tennessee), which was the last major battle of the American Civil War. I liked the shot in color, but in sepia it looks a lot more authentic. It looks like it had really been taken in 1864. I softened the image a bit and added some noise to suggest poor quality, as compared to our images today, again to suggest this was taken on a glass plate in the 19th century. §