1 minute read
Step 2: Using a biscuit jointer

from Simple Storage Box
by jessica30251
Step 2: Using a biscuit jointer
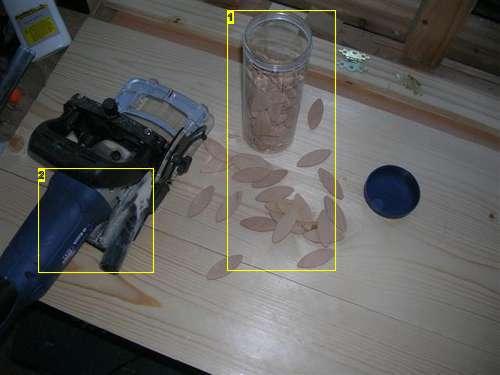
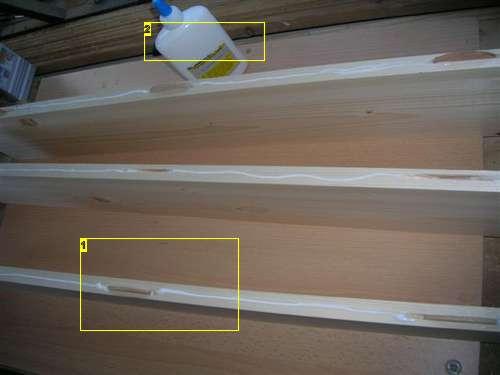
Choose your biscuits (don't eat them!!! ) I used no 10. Set your jointer height so the blade will be in the center of the timber and set the depth of the blade to be in the center of your biscuit. Most important: work on a SUPER FLAT surface or your joints will not match. Hold the jointer using the red guide line against your pencil mark on the timber, turn jointer on and push it into the timber moving about 5mm left and right to create a wider joint in case you miss the mark. After all joints are ready make a dry assembly to see if it all fits nicely together. Use PVA wood glue, don't be shy make sure you get good glue coverage in all joints, use a glue roller to spread it all evenly. Attach all parts to each other and wipe excess glue with damp cloth. On a flat surface use clamps to pull parts together, what will happen is the timber will lift up like a banana so use 2 thick lengths of timber and clamp them pushing the work piece downwards.
Advertisement
On this video I'm showing you how to use a biscuit jointer:
Image Notes
1. No' 10 biscuits 2. Biscuit jointer
Image Notes
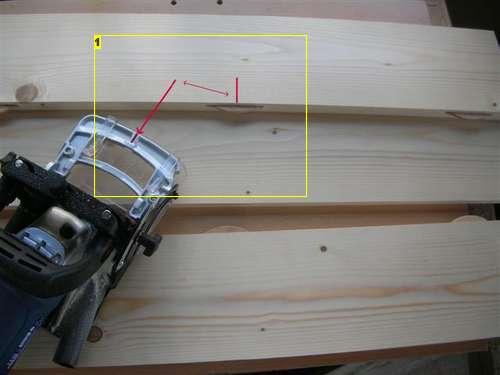
1. Jointer center mark infront of pencil mark. After using jointer dry assemble parts.