22 minute read
Autonomous Animator


Some Tips & Tricks for SIGGRAPH Job Seekers
SIGGRAPH is the undisputed champion of Special Interest Group on Computer Graphics conventions. Achieving such stature over the years means it can offer lots of opportunities for networking and job seeking. On the other hand, it also means there will be lots of competition. Here are a few tips and tricks that could help you stand out from the crowd.
Reconnaissance
Before checking out this year’s SIGGRAPH virtual event with the intention of landing a job, you must first do your homework. An ounce of recon is worth a pound of resumes. Look up each and every company that you are even remotely interested in, find out everything you specializing in one area for your entire career (such as being an effects artist). If this sounds like heaven to you, then you must hone your portfolio with laser-like focus in this single area so that if anyone in the world ever is looking for your particular specialty, you are much more likely to land on the shortlist.
Overexposure Is the Right Amount of Exposure
Create a digital version of your entire portfolio and put it securely online. This should consist of PDFs or JPGs of your resume and portfolio and multiple copies of your demo reel in various video file formats (.MOV, .MP4, etc.) to maximize the chances that the person
Stack Your Deck
If you want to stack the deck in your favor, have multiple versions of your demo reel on hand so you can readily drop off the most specific demo reel possible based on who you are giving it to and what they would like to see. For example, have a generalist link available online and a specialist link available online. Based on who you are talking to and what approach you think would be best to take, you know which pocket to pick.

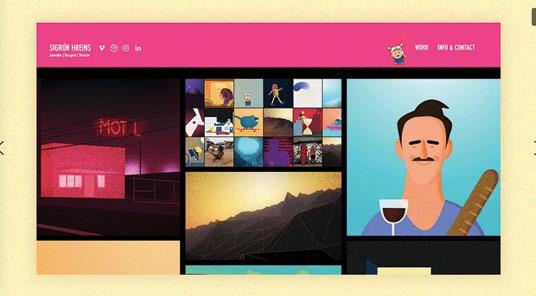
Nicely designed websites for Sigrún Hreins (L) and Jon Frickey (R).
can about them, discover important contacts, take notes and commit them to memory.
Being bright-eyed and enthusiastic and contacting the right person at each studio who is in charge of hiring will go a long way towards making an impressive first impression. Being memorable for your stunning professionalism is one of the best ways to stand out in a crowded marketplace where competition is fierce.
Lasers vs. Nets
When planning on how to best approach potential hiring companies, you need to make a decision whether you want to use a laser or a net.
The “Net Approach” involves generalizing your portfolio to try and cover a wide array of disciplines. This approach hedges your bets that the more variety you show, the more chances you have of showing something that a hiring manager wants to see.
On the other hand, the “Laser Approach” is for those of you who are passionate about you are giving it to will be able to view the files. Since most of the events are online this year, you need a nicely designed web destination and digital portfolio where studios can see your background and check out your art and animated projects. While YouTube does this for you automatically, sometimes it can be a nice touch to have your work available on your own terms and file servers.
More applications = greater chance of being hired, so keep multiple copies of your portfolio on your person (and your devices) at all times so you can instantly, effortlessly give samples of your best work to anyone that may be hiring, or even someone who knows someone who may be hiring.
In case things go back to normal and we are able to have real-world recruiting events like CTN eXpo later this year, do yourself a huge favor and invest in custom memory sticks so you can have your name and contact info printed on the case or the stick itself. Don’t be afraid to stock up – you’ll get a better price per stick the more you order. Buy as many as you can possibly afford (over 100 if possible), and give them away like a street hustler passing out event flyers.
Portfolios on the Fly
What if you find the company of your dreams while browsing the SIGGRAPH site, but realize the latest edit of your demo reel needs to be tweaked to make the best impression possible?
Normally, you’d be out of luck.
However, with a little pre-planning you can rise to the occasion. Before checking out all the companies that are recruiting this year, go overall the material you are able to include in your portfolio. Find out what exactly each recruiter or studio is looking for in a job applicant. Then, take the time to customize your portfolio to maximize your chances of making the best impression possible which could ultimately lead to landing your dream job. ◆
Martin Grebing is the president of Funnybone Animation Studios. He can be reached at www.funnyboneanimation.com.
Stefan Kraus
Rocking the Digital Landscape World
World Creator 3 is poised to revolutionize the digital terrain building market later this year.
Stefan Kraus, CEO of German software developer BitetheBytes, answered a few of our questions about the latest version of his company’s fantastic terrain and landscape generating tool World Creator, which is used by major studios such as Bioware, Blizzard, Bandai Namco, Cinesite, Hybride, Warner Bros. Games and Unity. Here is what we found out:
Can you tell us a little bit about the development history of World Creator?
The very first version of World Creator had a different name: Geo Control and was developed by Johannes Rosenberg. Sadly, after he had a stroke, the product’s development came to a halt for around two years. He contacted us and wanted us to use his code-base to further develop Geo Control. We wanted to help him out and honestly, we liked his product and saw a lot of potential in it. To bring it back to life, we had to create a new brand. So in 2012, we changed the name to World Creator and fixed all open bugs and made it much more stable—that was in 2012.
We then decided to re-develop it entirely from scratch, and that’s how World Creator for Unity was born. Initially it was a prototype to prove, that terrain and landscape generation can be done well on the GPU—in 2015 we made a product out of it for the Unity Engine. But the main and long-term goal was a standalone application which can be utilized not only by Unity users. So after the Unity plugin, we started the development of World Creator 2 in 2016 and released an awesome terrain and landscape generator in early 2018. World Creator 2 was a game changer due to its real-time generation capabilities. Now, two years later, World Creator 3 will be released by the end of 2020 bringing terrain and landscape generation again to the the next level with new outstanding and breath-taking features.
What are some of the improvements and added features we can look forward to in Version 3, which will be available later this year?
Honestly, there is a lot! I personally look forward to our new erosion and sediment system. Quality has improved drastically and the best about all this is, that we were also able to improve the performance. World Creator 2 is still the fastest generator but World Creator 3 is about 2.5 times faster than the previous version. The reason is that we developed our own engine specialized on terrain and landscape creation performed on the GPU—so just like in World Creator 2, everything in World Creator 3 will be real-time. In addition, we added a new workflow for creating landscapes; this time, using biomes. So with version 3 you will be able to setup different biomes allowing you to define real-world situations.
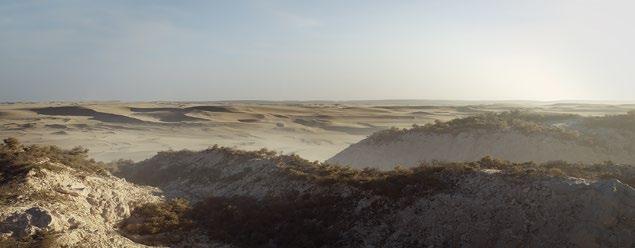
A biome can be anything—think of a desert biome including an oasis with a lake, nice vegetation, sand dunes and some rocks … or a forest containing different tree species with different textures underneath, flowers and grass surrounding the trees with different textures as well, and so on. It is a fully flexible hierarchical system, and you can save your biomes as templates and share it with others. Artists will be able to create their own biome settings and share it with others that can import them into their own projects. We have a real-time path-tracer that creates photo-real renders instantly, new design and sculpting tools that allow you to create exactly the terrain you want, a new powerful and ultra-flexible UI system, fully customizable export options allowing you to adapt the export settings to your own workflow.
Also, the long-awaited support for Wacom tablets will be available. One of the most powerful extensions in World Creator 3 will be the new hierarchy based distribution system allowing artists to combine many different distributions such as flow, several noise patterns, and post-processing techniques such as blur, and a lot more. World Creator 3 also has a tile based creation system—there are no limits in terrain size and resolution anymore. This also applies to textures, colors and even distribution rules. World Creator 3 will ship with tons of filters, distribution rules, and ready-to-use biomes for your productions. It will be an amazing package.
We also never had a clue about how many fantastic artists are out there—from hobbyists to professionals; I personally think that they most like is the real-time instantly get what they want with World Creator: Everyone can design a terrain shape without having to wait multiple minutes or hours for a single iteration – with World Creator they get it instantly. This allows them to be way more creative and
yes, it also makes a lot of fun to see all changes instantly. It’s like an ultimate playground, a perfect mix of design by hand and procedural content creation.
What was the response to the two previous versions of World Creator?
The response to World Creator for Unity was really amazing—once released in the Unity Asset Store it sold multiple hundred times immediately. The response to the standalone version of World Creator was also outstanding—within a very short period of time, the largest gaming and movie companies were attracted to the capabilities and with them almost everyone followed. We also didn’t realize how many fantastic artists are out there—from hobbyists to professionals; I personally think the best thing about World Creator is the real-time workflow and powerful design capabilities.
Everyone can design a terrain shape without having to wait multiple minutes or hours for a single iteration—with World Creator they get it instantly. This allows them to be way more creative and yes, it also makes a lot of fun to see all changes instantly. It’s like an ultimate playground, a perfect mix of design by hand and procedural content creation.
How long has the company been around and what do you specialize in?
We originally founded BiteTheBytes in 2008 but it goes back to 2004 when we started making short real-time animations for the international demo-scene as students. From the beginning, our main focus was the visualization of large terrain and landscapes for real-time applications in general. It all started with a new algorithm to render vast areas, planets or even entire galaxies. We soon figured out that not only the visualization is a problem, but also the generation of so much data is more vial to artist. So, we shifted to
creating landscapes, always in mind that everything has to be real-time. One of the benefits of digital art is that you can play around with settings and try things out. You don’t want to wait several minutes or even hours until something has finished loading, so we deeply concentrated our software to be able to do everything instantly.
What do you find your clients are looking for in 2020 most of all?
We realize that a lot of our customers and the industry in general is looking for more tools that support the creation of procedurally generated assets—and they must look as realistic as only possible created as fast as possible. Also, a good workflow between several tools is required as well—this could be done by bridge tools or by direct integrations. We also realize that the demand of photo-real rendering capabilities has grown as well a lot: I think that the new GPUs supporting real-time ray-tracing will make this demand grow even larger.
What is your take on the state of digital arts and visual effects in 2020?
I think I will pass this question over to our artist Aaron Westwood who did all the amazing renders for our marketing, and also the one man army behind our upcoming World Creator short film. He says, “Not so much from industry point of view but form a macro perspective on the artist level, it would be about developing an individual style and an aesthetic. As software becomes more attainable and user-friendly, it leads to a saturated market which is amazing for popularity. However, it is important not to just stick to trends, because you’ll get lost in the ocean.”
What do you personally enjoy most about World Creator?
Everything! Even now, when creating some feature videos or renders for maintaining our social communities, I just get blown away when using it: Honestly, it is pure fun and I still discover filter combinations that create absolutely lovely terrain shapes that put a huge grin on my face—and that is after years of using it almost daily. And not to forget the community, the people and companies using it: The entire BiteTheBytes team is so proud to be part of something that is used in games, movies and art-works. For me personally, this is a dream came true and I am simply blown away what people create with World Creator—a big THANK YOU! to all of our customers, our community, and those who support us.
For more info, visit bitethebytes.net and world-creator.com.
Tech Reviews
by Todd Sheridan Perry
Unreal 4.25
Over the past six weeks, I have been involved with a fellowship program at Epic Games to do a deep dive into Unreal Engine 4.25 and better understand its important role as a tool for pre-production, production and post-production. And with that comes reviews of not only Unreal Engine 4.25, but a handful of tools that extend the functionality. But first, let’s start with the base software: Unreal Engine 4.25 — as of this writing 4.25.1.
The big news about the latest release of Unreal Engine has to be the support for real-time ray-tracing, which is bolstered by the RTX technology in the Nvidia cards. Now, “real-time” is a factor of the complexity of the scene, its materials and its post-processes. You can quickly take down the scene to sub-24 fps if you aren’t cognizant of the variables. But, when set up properly, you have proper soft shadows, reflections and
refractions — without a need to bake lighting — in real time. This delivers a level of realism that has been a hurdle for quite some time. And now that the hardware is readily available, the software is rising to fill that potential.
This realism ties directly into the rise of actually shooting LCD screens in camera as backgrounds behind actors — not only providing a virtual set extension, but contributing to lighting and reflections on the actors and props. The results speak for themselves, being a key part of the production workflow in The Mandalorian series. And it’s not just larger productions that are using them: a whole subculture of filmmakers are beginning to put together homegrown systems. Epic Games is supporting the movement effectively by creating tools to tether the VCam (virtual camera) to be driven by an iPad, or facial motion-capture feeding character performances in real time through your iPhone.
Niagara has been upgraded to a production-ready particle system after living in an experimental stage and then beta for quite a while. Its UI has been overhauled with a birds-eye view of the system and a consistent, color-coded system for clarity. The particle systems live in containers at this level, but functions can be clicked on to dive deeper into a Blueprint-style node graph. But the deeper change has been within the particles themselves and the attributes. This is nothing new to Houdini users as particle attributes are fundamental to controlling complex particle systems.
Also upgraded to “production-ready” in 4.25 is the Chaos Destruction system, which is Unreal’s flavor of dynamics. It supports general collisions and dynamics, but in addition, you have destruction and fracturing, cloth and hair, ragdolls and all kinds of physics goodness. All of which is accessible through Blueprints for customization.
To go along with the ray-tracing features, the new shader systems are available like thin transparency, anisotropic features and updates to the clear coat. But, what is exciting to me as a filmmaker is the ability to put scenes together in Sequencer (Unreal’s equivalent to an Avid or Premiere timeline), and then render out to ultra-high resolutions with motion blur, depth of field and all the bells and whistles, with the bottleneck being the time it takes to the write the frames to disk, rather than the calculation of the frame itself. I’m even planning on testing some actual production shots using Unreal to see what I can and cannot get away with. This release — and this recent fellowship — may have pushed my career into an entirely new vector!
Website: unrealengine.com
Brushify
While working in Unreal Engine, I discovered the vast repository of assets found in the Unreal Marketplace. One of the standout packages (or sets of packages) is found under Brushify. Created by Joe Garth, a decade-long veteran of game environment development, these packs are specifically designed to be able to quickly develop and audition complex environments — exteriors, specifically.
Unreal Marketplace packs frequently come with a set of textured geometry that are used to populate your game level or scene, which is great. I’d rather buy a set of pre-textured oil barrels for $5 rather than model and texture them myself. But while the Brushify packs do come with some geo, the power is in the toolsets, maps and dynamic shading systems therein.

I was able to layout a hilly forest with blowing trees using the Unreal internal Landscape tools to sculpt the ground. I used the Foliage tool to scatter trees and bushes. But it was the materials in the Forest and Natural Roads pack that let me lay down layers of grass, dirt, puddles and rocks quickly and artistically; either through painting with brushes or controlling things via some curves. And it was the materials that dynamically changed from grass to rock as I changed my landscape after the fact to make some hills higher and more steep. I mean, it’s not akin to sorcery... I do know about how Unreal works with height maps and slope angle to be able to control materials and object distribution. But the Brushify tools are doing everything under the hood, and I don’t have to figure that out. I just create. Furthermore, because Garth comes from a gaming background, the tools are designed to be agile and lightweight, and exceedingly customizable. And general hurdles have solutions built in — for instance, being able to break up texture tiling over vast areas via layers of different noises and LODs, or using height maps generated from real geographic data (or from
World Creator; see other review) to allow you to drop in natural Earth (or Moon) structured with a click of the Wacom pen.
To compound the usefulness of Brushify packs, Garth has created a complete library of training. Each pack comes with its own tutorial on how to use the specific features. But there are a bunch of bootcamps and deep dives into literally creating entire environments from scratch. That’s hours and hours of training. The packs include: Urban Buildings, Desert
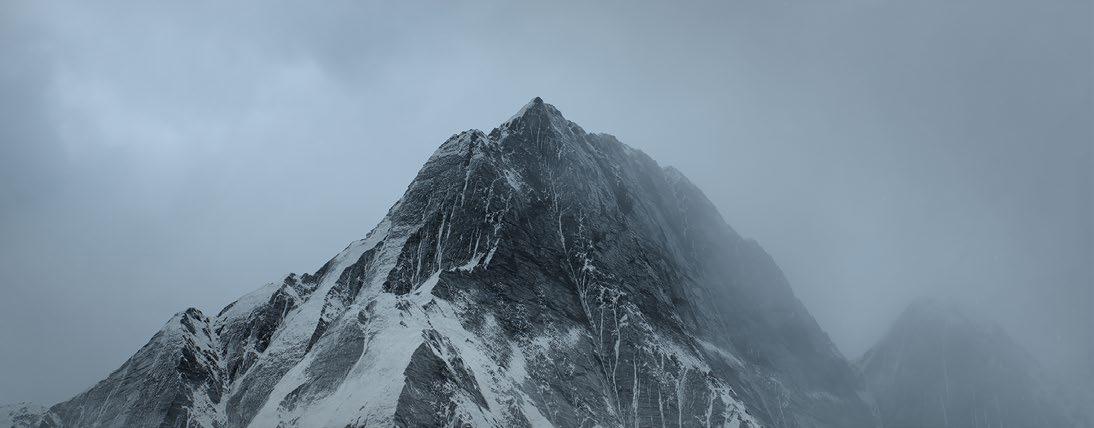
Mountains, Country Roads, Volcanos, Mountains, Grasslands, Forests, Cliffs, the Moon!, Canyons, Moorlands, Dunes, the Arctic and Tropical stuff. All in, you’d be out around $450 — but maybe you only need a Volcano!? $20. And spending $20 to have a volcano within the hour rather than spending a week modeling and texturing? It’s a no brainer. Plus, Joe Garth is taking his knowledge and experience and making your life better. The least you can do is to support him!
Website: Brushify.io Price: Varies ($9.99 to $39.99 per shader or pack)
World Creator 2
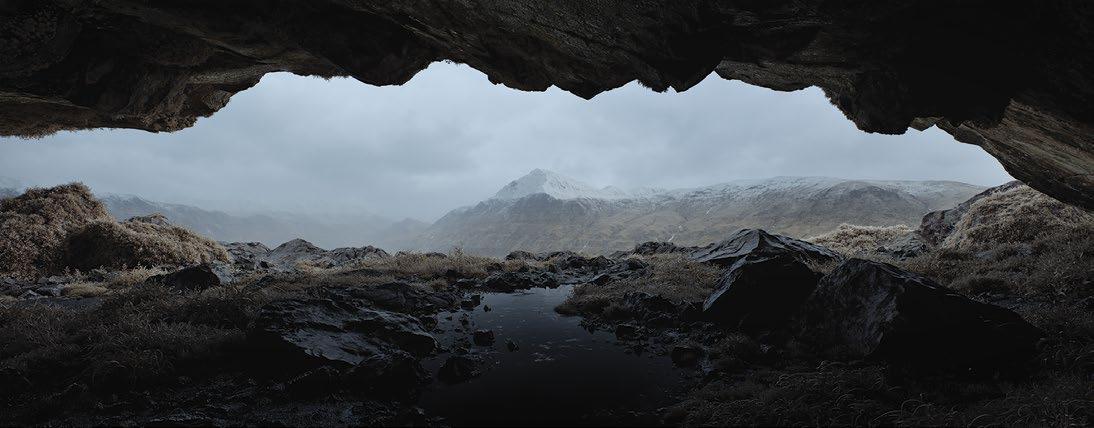
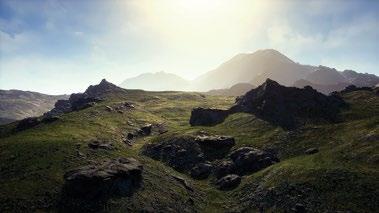
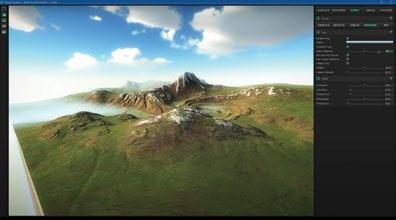
Our Unreal journey continues to World Creator 2 — which I learned about from Brushify’s Joe Garth. Now, World Creator 2 is not Unreal exclusive. In fact, it is a standalone terrain and environment generator that happens to have a bridge plugin to migrate data into the Unreal (and Unity) game engines. But, the data is also perfect for traditional DCCs like Maya, Houdini, etc. So, what does it do, exactly? World Creator is meant to create worlds. (Duh.) It has a sophisticated workflow of layering systems of sculpting and filtering to create extremely complex terrains. The idea is that you get your general form of hills, valleys, plains and mountains first. This can be done with a grid system of controllers that you lift and push down to mold the surface. And you can use different brushes to sculpt in specific detail. Once you have the general idea, you begin to apply filters to the geometry to create erosion patterns. But the complexity lies in not only the ability to stack filters on top of each other (the order of the stack matters), but there are sliders to allow you to affect how granular you want the detail to be. In my test case, I grabbed some USGS data from the Internet for an area in Santa Clarita, Calif. The resolution was 1 pixel = 1 meter. Not great, but could be worse. It’s fairly typical of what you can find if you aren’t a government official. But the height maps make for very mushy results. Certainly way too low-res for something your character might be running around on. So, this was my base layer. Adding filters on top of this brought in details that were otherwise not there. And if I were a real stickler for geologic veracity, I could have used World Creator’s sandbox simulation to do natural rain and water erosion with sedimentary buildup to wear away the Santa Clarita mountains.
Once I had the terrain, World Builder gave me texturing tools that could be controlled with “heat maps,” which, loosely translated, are alpha channels that indicate elevation, slope angles, or even customized areas that can determine individual biomes. All of this could be populated with trees, bushes, grass or geometry that I could import. More importantly, I could render pretty pictures, right from World Creator itself.
However, I needed this to come into my Unreal level. World Creator exports the final height map to be imported into UE (at insane resolutions if you are crazy enough and your workstation is powerful enough). The textures and the heatmaps will come along, and you can use those to drive the materials in Unreal.
One last thing, I have to admit that I’m glossing over the power of this software. It does much, much more, and it’s very smart and non-destructive about it. There may be arguments that Houdini has these same types of tools and features, and you could go to Unreal through Houdini Engine. But World Creator 2 is $289 and, for me, that’s where the debate ends.
Website: world-creator.com Price: (Windows: $149, $289; Mac: $149, $249; Bundle: $189, $389)

Chaos Group’s V-Ray 5
This last review takes us out of the Unreal space. And while V-Ray is available for Unreal Engine, version 5 is currently, as of this writing, available initially in its hometown of Autodesk’s 3ds Max.
This latest release, like most, has a laundry list of updates. But the most impactful, in my eyes, is the ability to adjust and mix lights from a render directly in the Virtual Frame Buffer. In the distant past, lighting artists would render out individual lights, comp them in After Effects or Shake or Nuke, and then try to balance them. Some of the more sophisticated pipelines would allow you to push those changes back into the 3D lights so when you rendered everything together it would look like the comp.
Then came raytracing and rendered elements, and the whole world changed — lights could be manipulated solely in the comp through one render, and it wouldn’t go back to CG. In V-Ray 5, both of these techniques are used, and then some. The Render Elements are rendered during the primary pass. Those can then be accessed and modified within the frame buffer itself to not only balance the lights — but you can change the lighting design if you want. This is great for auditioning looks for a director. The result can then be pushed out to layers for the compositor. Or you can push the data back to the scene, which will adjust the values of the lights to match your look. Which is great if you have to propagate a look across many shots. This process is extended into Layered Compositing, which gives you not only the control of the elements, but post-processing features like color balance, color curves, exposure and lens effects; saving you a round trip to a compositor or image processing software like Photoshop. Many of these were available in earlier versions of V-Ray, but only on the entire image. I should mention that the V-Ray material library is greatly expanded — so much so that I had to walk away for a while during installation. And so much so that they made a new As-
set Browser to manage them. Along with the vast array of 500 material presets, some new features were added. A coat layer updates what we would normally have done using a blend to make is look like a clear surface on top of another. A sheen layer was put in for surfaces like velvet. In the textures department, we have some tools to randomize UVs, hues, gamma, material and object ID, all dirtied up with a stochastic texture to break up repeated patterns in tiled textures. Furthermore, the V-Ray Dirt texture extends its functionality with the ability to add streaks to emulate dirt and sediment dripping from cracks.
There are lots of cool things to get you up and running quickly. But at the risk of repeating the importance of the LightMix — that feature will alter the way you work. For the better.
Website: Chaosgroup.com/V-Ray/3ds-max Price: $80 (per month), $470 (per year), $1,180
(perpetual) ◆


