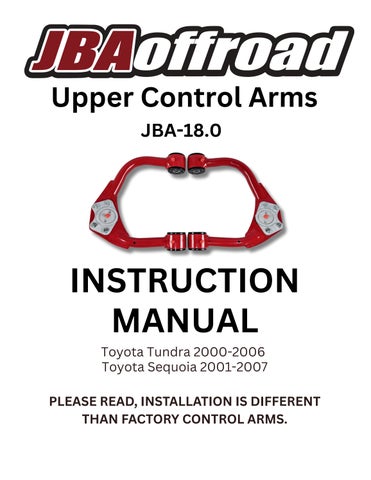
Upper Control Arms JBA-18.0
INSTRUCTION MANUAL Toyota Tundra 2000-2006 Toyota Sequoia 2001-2007 PLEASE READ, INSTALLATION IS DIFFERENT THAN FACTORY CONTROL ARMS.
IMPORTANT
READ BEFORE INSTALLATION. WARNING: DO NOT ADD BALL JOINT SPACERS OR MODIFY THE BALL JOINT MOUNTS. ADDING SPACERS CREATES ADDITIONAL LEVERAGE AND STRESS ON THE UPPER CONTROL ARM, WHICH CAN CAUSE BENDING, CRACKING, OR SUDDEN STRUCTURAL FAILURE. THIS CAN RESULT IN LOSS OF VEHICLE CONTROL, SERIOUS INJURY, OR DEATH.
JBA UPPER CONTROL ARMS ARE ENGINEERED FOR SPECIFIC GEOMETRY WITHOUT SPACERS OR MODIFICATIONS. SUCH MISUSE VOIDS ALL WARRANTIES AND IS DONE ENTIRELY AT THE USER’S OWN RISK. JBA ASSUMES NO LIABILITY FOR ANY DAMAGES, INJURIES, OR LOSSES RESULTING FROM MODIFICATIONS OR MISUSE. GENERAL WARNINGS: NEVER WORK UNDER AN UNSUPPORTED VEHICLE. ALWAYS USE JACK STANDS RATED FOR YOUR VEHICLE'S WEIGHT. JBA UPPER CONTROL ARMS SHOULD BE INSTALLED BY A QUALIFIED TECHNICIAN OR EXPERIENCED INSTALLER. A PROFESSIONAL FRONT-END ALIGNMENT IS REQUIRED AFTER INSTALLATION. RE-CHECK ALL MOUNTING HARDWARE TORQUE SPECIFICATIONS AFTER THE FIRST 100–300 MILES. GREASE BALL JOINTS AND BUSHINGS WITH LITHIUM MOLY FORTIFIED EP GREASE BEFORE FIRST USE AND EVERY 3,000– 5,000 MILES THEREAFTER.
Table of TABLE OF CONTENTS Contents 01
INTRODUCTION Warranty Information Verifying Your Order JBA Build Database
02
PRODUCT OVERVIEW EZ Lube Bushings JBA Ball Joints Powder Coat Process
03
10 11-12 13
MAINTENANCE Control Arm Maintenance Bushing Replacement Owner Record
05
06 07 08
INSTALLATION Upper Control Arm Removal Upper Control Arm Installation Front-End Alignment Specs
04
02 03 04
15 16-17 18
ABOUT JBA Our Story Customer Service Team Gear
20 21 22
INTRODUCTION BUILT WITH PURPOSE.
01
Warranty Information JBA upper control arms are engineered for specific vehicle applications. Use outside intended specifications voids warranty coverage. Warranty determinations are made at JBA’s discretion. JBA Offroad components should be installed by a qualified technician or experienced installer.
JBA UCA WARRANTY JBA has a lifetime warranty on the structural integrity of our upper control arms. JBA has a one-year warranty on ball joints, bushings, and powder coating.
WHAT WILL VOID YOUR JBA WARRANTY? Adding ball joint spacers to the JBA upper control arms. Adding spacers creates additional leverage and stress on the upper control arm, which can cause bending, cracking, or sudden structural failure. Adding bump stops that hit the JBA upper control arms. Adding limiting straps attached to the JBA upper control arms. Cutting, grinding, welding, or modifying the JBA upper control arms. Using the JBA arms on a vehicle, and/or a lift kit they were not designed for. JBA upper control arms are not designed to be used when stacking two lift kits together. Taking part in any of these practices voids all warranties and constitutes misuse for which JBA bears no responsibility or liability.
WARRANTY CLAIMS
Scan to begin your claim.
To submit a claim, please provide: Proof of purchase (including order ID). Description of the issue. Clear photos of the affected component. 02
Verifying Your Order BEFORE INSTALLATION, CONFIRM THE FOLLOWING: Part number matches your order. High Caster or Stock geometry version. Driver or Passenger side (USA driven vehicles). Matching left and right arms. If anything is incorrect, contact us before installation and we will resolve it as quickly as we can. Do not disassemble your vehicle until your parts have been verified.
EXAMPLE:
03
18.0
HC
PS
PRODUCT NUMBER
STOCK/HIGH CASTER
DRIVER/PASS SIDE (USA)
JBA Build Database REAL PEOPLE. REAL BUILDS. REAL RESULTS. Explore our database of customer builds using JBA Upper Control Arms. Filter by vehicle, lift height, tire size, and more.
Owner: @Panahrama
Owner: @LooseAxles
2016 Toyota Tacoma Tire Size: 315/70/r17 Wheel Offset: -38 Lift Height: 3" Control Arm: HD High Caster
2007 Toyota 4Runner Tire Size: 35x12.5 R17 Wheel Offset: -38 Lift Height: 3.5" Control Arm: HD High Caster
EXPLORE THE FULL BUILD DATABASE Scan to browse builds or submit your own.
04
PRODUCT OVERVIEW ENGINEERED. NOT IMITATED.
05
JBA EZ Lube Bushings EZ LUBE BUSHING OVERVIEW JBA EZ Lube Bushings are patented, fully serviceable bushings designed for durability and quiet performance. One way relief valves seal out dirt and water. Advanced synthetic elastomer construction. Internal lubrication channels for full surface greasing. Serviceable without loosening control arm mounting bolts. EZ Lube Bushings are used in all JBA Upper Control Arms.
U.S. Patents: 11,293,511 • 11,603,897 • 11,953,070 • 12,247,631
GREASING & INSPECTION To Service Bushings: Do not loosen mounting bolts during greasing. Attach grease gun to bushing fitting. Pump lithium moly fortified EP grease until fresh grease appears between washers. Wipe away excess grease. Service Interval: Grease every 3,000 to 5,000 miles. After deep mud, water crossings, or heavy off-road use. Inspect For: Squeaking, binding, and excess movement. Damaged fittings. For grease specifications, see Maintenance Procedure (page 15) or visit our FAQ. 06
JBA Ball Joints
BALL JOINT OVERVIEW
JBA joints are fully serviceable and designed for long term durability. Heavy duty construction for off-road use. Replaceable internal components. Ball Joint Greaseable design for extended life. Retaining Nuts. Serviceable without replacing the entire 13 ft. lbs. control arm. JBA 18.0 Ball 90 degrees of articulation. Ball Joint Stud Nut. Joint Adapter 60 ft. lbs. WARNING: DO NOT ADD BALL JOINT SPACERS OR MODIFY THE BALL JOINT MOUNT. DOING SO CAN RESULT IN LOSS OF VEHICLE CONTROL, SERIOUS INJURY, OR DEATH.
GREASING & INSPECTION For long lasting ball joints, ensure you: Add 3 to 5 pumps of lithium moly fortified EP grease until the boot slightly expands. Old grease may vent out of the boot. Clean the grease fitting before and after servicing. Service every 3,000 to 5,000 miles or after mud, water, or heavy off-road use. Inspect for: How to Check Boot cracks or tears. JBA Ball Joints: Loose or damaged fittings. Scan to learn Excess play or noise. more! Contamination. For grease specifications, see Maintenance Procedure (page 15) or visit our FAQ. 07
Powder Coat Process INDUSTRIAL POWDER COATING JBA steel upper control arms undergo a 10-stage industrial powder coating process. Each step prepares the steel, prevents corrosion, and ensures maximum coating adhesion for long term durability. This multi stage system protects against rust, chipping, peeling, and premature coating failure.
FINAL QUALITY INSPECTION Every JBA upper control arm undergoes a final visual inspection to verify coating consistency, full coverage, and finish quality before leaving our facility.
WHAT POWDER COAT DO YOU USE? The upper control arms are finished with Tiger Drylac Bengal Red powder coating and oven cured at 400°F to achieve a fully cured, durable, and long-lasting finish.
LOOKING FOR TOUCH UP PAINT? Minor chips or shop accidents can happen. We offer factory matched touch up paint. Scan the code for ordering details.
08
INSTALLATION DONE RIGHT THE FIRST TIME.
09
Upper Control Arm Removal Removal Procedure 1.Prior to installation, verify the part number matches your order. Confirm Driver and Passenger side arms are correctly identified and oriented prior to removal (stamped near the ball joint). 2.Raise the vehicle and support it securely with jack stands placed under the frame rail behind the front wheel. Remove the wheel. Never work under an unsupported vehicle. 3.Unbolt ABS wire from the control arm and the spindle/steering knuckle. 4.Remove the cotter pin from the ball joint stud and unscrew the castle nut. 5.Separate the ball joint from the spindle/steering knuckle. A puller tool may be required. IE: OEM/Pitman arm puller (27016) 6.Use a jack stand to support the loose spindle/steering knuckle. Make sure the brake lines are not being stretched. 7.Remove the nut and washer on the end of the long shear bolt. 8.Pull out shear bolt and remove the upper control arm from the vehicle. 9.Press out the upper ball joint from the spindle/steering knuckle.
10
Upper Control Arm Installation Installation Procedure 1.Apply a light coat of grease to the outer surface of the EZ Lube bushings prior to installation. 2.Press the ball joint adapter into the spindle/steering knuckle from the bottom and install the supplied snap ring into the groove. IMPORTANT: Older Toyotas have a common issue with the thin ball joint ring on top of the knuckles becoming stretched out of shape and oversized over time. Installation of the adapter requires a hydraulic press or a C-clamp type ball joint press and significant force. If the ball joint adapter is not a tight press fit, it indicates that the steering knuckle has been worn oversized by use and mileage and should be replaced with a new OEM Toyota steering knuckle. Additionally, when tightening the large M14 ball joint nut, the ball joint adapter should NOT turn in the steering knuckle. If it rotates, this indicates a loose fit and means the knuckle is worn beyond use and must be replaced with an OEM Toyota steering knuckle. Proper Orientation: Front to back: Shear bolt head → factory washer → 0.156" washer → black bushing → red bushing sleeve → black bushing → 0.156" washer → UCA tube mounted to chassis → 0.156" washer → black bushing → red bushing sleeve → 0.156" washer → factory washer → nut. Installation continued on next page. 11
Upper Control Arm Installation Installation Procedure Continued 3. Position the UCA in place and insert the long shear bolt from the front of the vehicle toward the rear. 4. Apply thread locker (Loctite) to the bolt and nut threads and torque the shear bolt nut to 85 ft-lbs. 5. Insert the ball joint stud into the adapter. Install the nut finger tight, then torque to 60 ft-lbs. If the stud spins, use a 3/8" hex wrench to hold it while tightening. 6. Torque the ball joint retaining nuts to 13 ft-lbs. 7. Reattach the ABS wire to the top of the UCA and two spots on the spindle/steering knuckle. Ball Joint 8. Reinstall any removed splash guards Retaining Nuts and clips. 13 ft. lbs. 9. Reinstall the wheel and torque lug nuts in a star pattern. Lower the vehicle JBA 18.0 Ball Joint Ball Joint Stud Nut 60 ft. lbs. Adapter from the jack stands. 10. Grease the ball joint with 3–5 pumps of lithium moly fortified EP grease until the ball joint boot just begins to swell. 11. Grease the bushings with lithium moly fortified EP grease until fresh grease is visibly pushing out from the EZ Lube ports. 12. Repeat the procedure on the opposite side. 13. Re-check all mounting hardware torque specifications after the first 100–300 miles.
For grease specifications, see Maintenance Procedure (page 15) or visit our FAQ. 12
Front End Alignment OPTIMIZED ALIGNMENT SPECIFICATIONS The following specifications are recommended for your specific JBA equipped vehicle:
-0.1
-0.1
3.2
3.2
0.08
0.08 ALIGNMENT SPECS FOR JBA 18.0
ALIGNMENT TERMS & LIFT EFFECTS Camber is the inward or outward tilt of the tire when viewed from the front of the vehicle. Too much negative or positive camber can cause uneven tire wear. Caster is the forward or rearward tilt of the steering axis when viewed from the side. More positive caster improves straight-line stability and steering wheel return to center. Toe is the direction the tires point relative to each other when viewed from above. Incorrect toe is the fastest way to destroy tires. Lifting an independent front suspension reduces positive caster, which can cause light steering and reduced highway stability. JBA upper control arms restore lost caster to improve tracking, steering return, and overall stability.
13
MAINTENANCE
14
Maintenance Procedure BALL JOINTS Pump grease into the ball joint zerk fitting until the rubber boot just starts to swell, at least 3-4 pumps.
EZ-LUBE BUSHINGS Pump grease into the bushing zerk fitting until fresh grease exits the EZ-Lube ports.
SERVICE INTERVAL Pump fresh grease into the ball joints and EZ-Lube Bushings every 30005000 miles or after deep mud, water crossings, or heavy off-road use.
WHAT GREASE SHOULD I USE? Use only lithium moly fortified EP grease. Using the wrong grease can lead to premature wear and failure.
APPROVED GREASE EXAMPLES: Mobilgrease XHP 222 Special Grease Chevron EP Moly Valvoline Multi Vehicle Moly Fortified REPEAT EVERY 3-5K MILES Pennzoil EP with Moly John Deere HD Moly Motomaster Moly Extreme Pressure Shell Rotella SD Moly Phillips 66 Megaplex XD5 Liqui Moly LM 47 Grease Plus MoS2
15
OUR #1 PICK: MOBIL GREASE XHP 222 SPECIAL GREASE
Bushing Replacement BUSHING KIT REPLACEMENT PROCEDURE - PART 1 Part Number: #JBA-TC-69000-EZ-XX 1. Press the inner bushings into the control arm first.
2. Open the supplied grease packet. Apply grease evenly to the inside surface of each bushing bore (¾" inner diameter). 3. Apply a thin, even coat of grease to the steel sleeves. 4. Apply additional grease between the inner bushing faces to ensure the cavity between the bushings is fully lubricated. 5. Press the outer bushings into the control arm housing until fully seated.
16
Bushing Replacement BUSHING KIT REPLACEMENT PROCEDURE - PART 2 Part Number: #JBA-TC-69000-EZ-XX 6. Install the steel sleeves through the bushings until flush and fully seated.
7. Spread any excess grease evenly around the outer faces of the bushings. 8. Continue installation per the Upper Control Arm Installation Procedure.
17
Owner Record INSTALL RECORD Installation Date:______________________________ Vehicle Mileage: _______________________________ Installation Notes:
RIDE HEIGHT MEASUREMENTS Measure from center of wheel hub to bottom edge of fender flare.
FRONT
REAR
Driver Side Before:________________________ After:__________________________
Driver Side Before:________________________ After:__________________________
Passenger Side Before:________________________ After:__________________________
Passenger Side Before:________________________ After:__________________________
MAINTENANCE INTERVAL Every 3 months or 3,000-5,000 miles. Mileage:
Date:
Mileage:
Date:
Mileage:
Date:
Mileage:
Date:
Mileage:
Date:
Mileage:
Date:
Mileage:
Date:
Mileage:
Date:
Retain your alignment printout with this record for future service reference. 18
ABOUT US WHY JBA EXISTS.
19
Our Story WHERE IT BEGAN JBA started in 2004 when Al Handy lifted his Jeep Liberty and the factory upper control arms failed prematurely. As an engineer, he refused to accept that compromise was normal. He designed a better upper control arm, modeled after oval track race car geometry, and installed the first generation on his own vehicle. One solution became a mission.
HOW IT GREW Through multiple generations of refinement and expanded platforms, that original design evolved. In 2007, Marlin Gehman’s ownership carried the vision forward, improving serviceability, introducing bolt-in ball joints, and ultimately focusing exclusively on building the best upper control arms possible. Growth didn’t mean chasing everything. It meant sharpening our focus.
BUILT WITH CONVICTION We are a family-run company, and we strive to treat people the way we would want our own family treated. That applies to our customers, our team, and our partners. Our Christian faith guides how we do business. For us, that means honesty, humility, fairness, and keeping our word. It means taking responsibility when we fall short and working to make it right. We believe the opportunity to build and serve others is something we’re entrusted with, and we take that seriously. Business, to us, is stewardship — using our skills and resources in a way that reflects integrity and respect.
20
Customer Service WE’RE HERE TO SUPPORT YOU If you have questions about your parts, installation, maintenance, or fitment, we’re glad to help. You can reach us by phone or email during regular business hours.
CONTACT INFORMATION:
BUSINESS HOURS:
Phone: (215) 660-3770 Email: sales@jbaoffroad.com
Monday – Friday 8:30 AM – 4:30 PM Closed on holidays
Mailing Address: 704 Forman Road Souderton, PA 18964
We strive to respond promptly and respectfully to every inquiry.
CONNECT WITH US Follow us on Instagram, Facebook, and Youtube for product updates, installs, customer builds, and opportunities to be featured: @jbaoffroad
HAVE MORE QUESTIONS? Our FAQ (Frequently Asked Questions) page on our website may have the answers you are looking for - scan the QR code to check!
21
Team Gear
OFFICIAL JBA OFFROAD APPAREL & ACCESSORIES
REPRESENT THE BRAND Official apparel and accessories. Built for the shop, the trail, and everyday wear. Scan to shop the full collection.
22
Tha k you for your support!
215-660-3770 704 Forman Rd. Souderton, PA 18964 sales@JBAoffroad.com