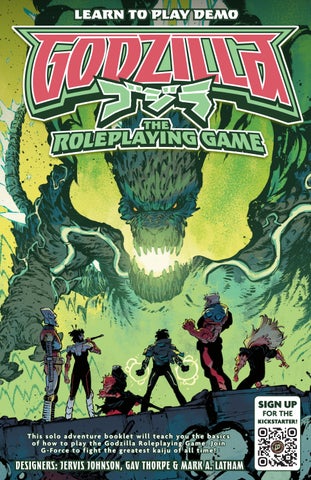
LEARN TO PLAY DEMO
SIGN UP FOR THE
KICKSTARTER!
T h i s s o l o a d v e n t u re b o o k l e t w i l l t e a c h y o u t h e b a s i c s o f h o w t o p l ay t h e G o d z i l l a R o l e p l ay i n g G a m e . J o i n G - Fo rc e t o f i g h t t h e g re a t e s t k a i j u o f a l l t i m e !
DESIGNERS: JERVIS JOHNSON, GAV THORPE & MARK A. LATHAM
LE A RN TO PL AY
GODZILLA In a game of Godzilla, one player is the deck master, or DM, while the other 2–5 players control individual characters. You can interact with the world however you want, and the DM will improvise alongside you. Unfortunately, this booklet can’t improvise, but it will guide you step-by-step through a mission to teach you the basic game rules. It will be your DM while you solo play as the prewritten character, Agent Casey.
CARDS
CRISIS CLOCK
To play the full Godzilla RPG, you would need two standard packs of playing cards (1 for the players to share and 1 for the DM). For this single player booklet, you’ll only need one deck of cards. The face cards (Jack, Queen, and King) each have a value of 10, aces a value of 1, and all other cards the value shown on the card (i.e., 2s are worth 2 points, 3s worth 3 points, and so on). Put any Jokers to one side for the time being—they are not needed for this booklet but would be used if you play a game with the full rules.
At the start of a game and at the end of each of your turns, the DM will draw a card from their own deck and add it to a stack of face-up cards that is called the Crisis Clock. When the cards in the Crisis Clock add up to certain totals (for example, 25), it triggers a major crisis for the characters—in other words, something bad will happen! In a full game, your DM would predetermine what clock total triggers a crisis. For this booklet, we’ll tell you what card the DM draws for the Crisis Clock and what the cards add up to. The first crisis will occur when the clock strikes 25. Speaking of which…
ASPECTS Each card suit corresponds to an aspect, which is used when a character attempts to carry out a challenge: DEXTERITY AGILITY REFLEXES
COORDINATION
TENACITY COMMUNICATION INTUITION
MINDFULNESS
RESEARCH PROBLEM-SOLVING PLANNING
INTELLIGENCE
STAMINA HEALTH BRAWN
STRENGTH
We’ll explain how aspects and challenges work in more detail on the following pages.
7
The first card drawn for the Crisis Clock is a 7. Tick, tock…
U.S. G-FORCE AGENT CASEY
+2 +1
3
+2 +1
ABILITIES
GEAR
TRAITS
ANTI-KAIJU TACTICS +2
9MM PISTOL +2
QUICK-THINKING
TRAINED SHOOTER +1
UNDER ORDERS DARING
CHARACTER SHEETS
DESTINY CARDS
Every character has a character sheet, which contains all of the information you need to use the character in a game. The character sheet includes a set of four aspect values (one for each aspect), the character’s Willpower, and any special abilities, gear, or traits they have. These things provide bonuses as you play the game. You’ll learn specifics about how to use the information on the character sheet as you read through the booklet.
Before the game starts, you must draw a number of cards from your deck equal to your character’s Willpower. These are called Destiny cards, and you can use them during the game to influence the outcome of the challenges that your character has to overcome. We’ll explain how to do this when you face your first challenge.
You control a character called Agent Casey, an operative of the United States branch of the anti-kaiju organization G-Force. The above character sheet shows what you are best at, and as you might expect, that leans toward combat and other physical activities.
G-FORCE: GLOBAL ANTI-KAIJU MILITARY FORCE
Agent Casey’s Willpower is 3, so draw three Destiny cards for your hand. You can look at them. Higher-value cards are better because you can add their value to upcoming challenges. Destiny cards won’t replenish during this mission, so spend them wisely!
WILLPOWER A character’s Willpower can be modified up or down during the course of an adventure. If it’s reduced to less than 0, the character is taken out of action and will play no further part in the adventure until they have recovered. If that happens to Agent Casey, you have lost!
1
THE ADVENTURE A game of Godzilla is called an adventure and is played in turns. In each turn, the players can carry out actions with their characters. An action can be anything that the character wants to achieve. You will find out about the kinds of actions your character can attempt in entries for the adventure on the following pages. After the players have carried out their actions, the DM advances the Crisis Clock by adding a card to it and may carry out actions with any Antagonists that are in play. An Antagonist is anything that wants to oppose the characters, which
ENTRY 1: THE ADVENTURE BEGINS The city has just suffered a kaiju attack from a spawn of the plant beast, Biollante. Local National Guard units have engaged and driven off the kaiju. During the fighting, a piece of the Biollante spawn was blown off by tank shells. You’ve been stationed to guard the fragment of kaiju until G-Force reinforcements arrive. You are standing in a rubble-choked street, surrounded by the burned-out remnants of cars and shattered shop fronts. The remains of a police cordon block some of the side streets. A gigantic wilting flower stem lies across a broken building along one side of the road, a flattened news van beneath it.
17
2
can be anything from an immortal kaiju to a gang of street thugs. You will find out more about Antagonists as the adventure progresses.
STARTING YOUR ADVENTURE To start your adventure, go to Entry 1 below and read the text there. Usually, you’ll be asked to choose an option or carry out a task, and depending on the outcome, you’ll then be directed to read a new entry, where you do the same thing. As the adventure continues, a story will unfold for your character that will end in you either winning or losing the game. Good luck!
Pick one of the following two options. OPTION 1: PREP GEAR
Preparation Action! Your gear is ready for action. Draw one card from your deck. You can either replace one of the Destiny cards in your hand with the card you’ve drawn or discard the card you’ve drawn and keep your original three Destiny cards. Remember, higher-value cards make it easier to succeed on challenges. Then go to the First Crisis Phase below. OPTION 2: INSPECT REMAINS
Recon Action! The Biollante spawn left scars on the city and scraps of plant matter behind. You gain the “Know the Foe” trait for the rest of this mission, which may give you a +1 bonus in later challenges. Make a note that you’ve gained the trait, then go to the First Crisis Phase below.
FIRST CRISIS PHASE The DM draws a card and adds it to the Crisis Clock. The card is a King, which adds 10 to the clock. The Crisis Clock now stands at 17. Tick, tock…
ENTRY 2: SEARCH THE RUINS About 15 minutes have passed, and still your relief has not arrived. You notice that one of the collapsed buildings is a sporting goods store. On the other side of the road, there could be a way up to the higher floors of a partially intact apartment building. Pick one of the following two options. OPTION 1: LOOK FOR A WEAPON
Make a Luck Check (see the rules to right). There is an “even odds” chance of finding a Hunting Rifle +3. Make a note in the character sheet’s gear box if you find the rifle, then go to the Second Crisis Phase below. OPTION 2: FIND REINFORCED COVER
Make a Luck Check (see the rules to right). There is an “odds for” chance of gaining the “Reinforced Cover” trait. Make a note on the character sheet if you gain this +1 trait for the rest of the mission, then go to the Second Crisis Phase below.
SECOND CRISIS PHASE The DM draws a 5. This adds 5 to the Crisis Clock. The Crisis Clock now stands at 22. Tick, tock…
22
FAILURE
SUCCESS ODDS AGAINST
EVEN ODDS
ODDS FOR
LUCK CHECK
Sometimes, you’ll want to find out or do something as a player that’s not covered directly by the scenario and not dependent on your characteristics. When this happens, you must make a Luck Check to determine the outcome. Luck Checks determine results left up to random chance. The DM will first decide how likely it is that the character will get what they want, using the following guidelines: Odds Against: There’s a slim chance the character can find or do what they want. Even Odds: There’s about a 50/50 chance the character can find or do what they want. Odds For: There’s a good chance the character can find or do what they want. In this adventure, the odds are provided for each option you can choose (see options to left). To make the Luck Check, flip over the top card from your deck and compare the suit of the card to the chart in the bottom left corner of this page to determine whether you succeed. If you succeed, you get what you want; otherwise, you do not. For example, if Agent Casey is looking for the Hunting Rifle, he has an “even odds” chance of finding it. To determine whether he does, you would flip over a card—if it was a ♠️ or a ♥️, Casey would find the rifle, and if it was a ♦️or a ♣️, he would not. CONTROLLING YOUR DESTINY
When you make a Luck Check for Casey, you can choose to play a card from your hand of Destiny cards instead of using a random card from your deck. This allows you to control Casey’s destiny by playing a card that will ensure he is successful. However, keep in mind that the Destiny cards you have in your hand are a rare resource and need to last you all the way to the end of the adventure, so use them wisely.
3
ENTRY 3: THE SURVIVORS You hear voices nearby and the scrunch of footfalls on broken masonry. Peeking through the settling dust and debris, you see a group of eight men and women trapped in one of the partially collapsed buildings. They have a couple of children with them. One of the men sees you and raises a baseball bat; an older woman has a tire iron in her fist. “Stay back! We don’t want any trouble from G-Force.” You must choose how Casey reacts to the survivors. What you choose to do will be resolved using the rules for CHALLENGES on pages 5 and 6. We recommend you read the rules for challenges now. Pick one of the following four options to choose how Casey reacts and then resolve the challenge. Once you’ve completed the challenge, go to the outcome below to see what happens.
OPTION 1: FIRE A WARNING SHOT AND TELL THEM THEY ARE IN A RESTRICTED AREA
Take a Coordination challenge with a target number of 5, using Coordination (+2), Trained Shooter (+1), and 9mm Pistol (+2). OPTION 2: PERSUADE THEM TO EVACUATE
Take a Mindfulness challenge with a target number of 5, using Mindfulness (+1) and Under Orders (+1). OPTION 3: TRICK THEM INTO LEAVING BY SAYING THE KAIJU REMNANT IS STILL ALIVE
Take an Intelligence challenge with a target number of 5, using Intelligence (+2) and Quick-Thinking (+1). OPTION 4: CLEAR AWAY RUBBLE TO HELP THEM GET FREE
Take a Strength challenge with a target number of 5, using Strength (+1) and Daring (+1). OUTCOME
If you succeeded at the challenge you undertook, your plan worked! The trapped civilians move away, realizing that it’s not safe to stay. If you fail at the challenge, the people refuse to go. Distracted by their presence, you must pay a cost by discarding one of your Destiny cards. Regardless of the outcome, go to the Third Crisis Phase below.
THIRD CRISIS PHASE The fourth card drawn for the Crisis Clock is a 6. The Crisis Clock now 28 stands at 28. Tick, tock… The DM raises an eyebrow and says, “When the clock got to 25, it triggered a crisis!” Go to Entry 4.
4
CHALLENGES A challenge is used to resolve what happens when a character attempts an action that they may or may not carry out successfully. Unlike a Luck Check, challenges are not decided by pure chance. This booklet lists which bonuses you should use for each option. In a real game, you would choose what you want to add from your character sheet and the DM would determine the results once you resolve the challenge. FOCUS
All challenges have a focus that’s linked to an aspect based on what the character wants to achieve. In this adventure, the focus is determined by the option you choose to take. TARGET NUMBER
Each challenge has a target number that’s based on how hard the DM thinks it will be to overcome. In this adventure, the target number will be included in the rules for the challenge that Casey is trying to overcome (see page 4). OUTCOME NUMBER
To determine how well you handle the challenge, calculate your outcome number. If your outcome number is higher than or equal to the target number, you succeed! If not, you fail. Aspect Value: You can add your aspect value that matches the focus of the challenge to your outcome number. For example, if it’s a Coordination challenge, start by adding Casey’s Coordination (+2) to the outcome number. Ability or Gear: You can add the modifier for one ability and/or one piece of gear that your character has to the outcome number. For example, you can add the ability Trained Shooter (+1) and/or the gear 9mm Pistol (+2). Hook: You can choose up to three traits to create a hook. Each trait you use adds 1 to the outcome number. For example, you could add the traits Under Orders (+1), Quick-Thinking (+1), and/or Daring (+1). You can’t use exactly the same hook more than twice in a row. Additional Bonuses: In a full game, you would have other optional bonuses you could add to an outcome number. These include teamwork bonuses and pulling a stunt. We haven’t used stunts or teamwork in this adventure to keep things simple.
CHALLENGE RULES CONTINUE ON NEXT PAGE OUTCOME NUMBER FORMULA
BASED ON CHALLENGE FOCUS
OPTIONAL ADD-ONS
FLIP A CHANCE CARD
ASPECT VALUE GEAR
DESTINY CARD
5
CHALLENGES (CONTINUED) ADD DESTINY & CHANCE CARDS
The final step in determining a challenge is the most exciting and important: using cards to see whether destiny or chance will influence the outcome. Destiny: You can use one of the Destiny cards from your hand and add its value to the outcome number. If a Destiny card matches the focus of the challenge, then it’s treated as having a value of 10. Destiny cards are a limited resource, so use them wisely! Chance: Finally, flip over the top card from your deck. If it’s a or , add its value to your outcome number. If it’s a or , subtract its value from your outcome number. In short, black cards are good; red cards are bad. DETERMINING THE OUTCOME
The outcome of the challenge can now be determined. If the outcome number equals or beats the target number, the character has been successful. If it’s less, they’ve failed. CARRYING OUT YOUR CHALLENGE
Use this procedure to carry out the challenges in this adventure. You must decide for yourself which abilities or gear to use, what sorts of hooks you’ll use, and whether you’ll play a Destiny card. The entry that describes the challenge will tell you what happens depending on the result that you manage to achieve.
Part of the fun of Godzilla is coming up with exciting hooks—it makes the game incredibly immersive and cinematic. For example, say you decide that Casey will try to trick the civilians to get them to leave. This is an Intelligence challenge with a target number of 5. Casey has an Intelligence of 2, so the outcome number starts with a value of 2. None of Casey’s abilities or gear are helpful for this challenge, but you might say he will use his “Daring,” “Under Orders,” and “Quick-Thinking” traits as a hook to help him to outwit the survivors (a combined bonus of +3). Keep in mind he can’t use this combination more than twice in a row. Casey’s outcome number for the challenge therefore stands at 2+3=5. This means that if the Chance card is a black card, he will succeed, and if it’s a red card, he will fail. That’s a 50/50 chance of succeeding, so you might want to use one of Casey’s valuable Destiny cards to influence the outcome. If you use a Destiny card that matches the focus—Intelligence ( ) in this case—you add 10 to the outcome number, making success a certainty!
6
ENTRY 4: THE REMNANT ATTACKS! When you return your attention to the piece of Biollante spawn, you notice several seedlike growths about the size of basketballs have fallen from its giant bloom. As you move in for a closer look, the severed kaiju branch twitches, then rears up like a striking snake two stories tall. It seems to have a life of its own! The creature confronting Casey is called a Florapod Remnant. It turns toward him and prepares to attack, and he must fight it if he is to survive. If you can reduce the Florapod Remnant to 0 Willpower, you drive it away and win the adventure. If you are reduced to 0 Willpower first, you are taken out of action by the Florapod Remnant’s attacks and lose the adventure. If you win the battle, go to Entry 5. If you lose the battle, go to Entry 6. How Casey can win the battle is explained in the following rules.
ANTAGONISTS & BATTLES Opponents that you have to fight, like the Florapod Remnant, are called Antagonists. Each one has an Antagonist sheet that provides all of the information you need to use it in a game (see below). BATTLE ROUNDS
The combat with the Florapod Remnant is resolved in a series of battle rounds. Each round has two steps: First Casey attacks the Florapod Remnant, and then it attacks back. Keep on carrying out battle rounds until either Casey’s or the Florapod Remnant’s Willpower is reduced to 0. ATTACKING THE FLORAPOD REMNANT
Casey will attack with either his 9mm Pistol or (if he found it) his Hunting Rifle. The attack is a risky challenge (see page 8) and has a Coordination focus. The attack has a target number of 10. In a real game you would choose what attack you want to make, but for this booklet we’re keeping it simple. SEE COMBAT DIAGRAM ON PAGE 8
FLORAPOD
5
ATTACKS
LIVING MORASS
CHOKING MASS
Damage Ace–10 = 1 Jack, Queen, or King = 2 The creature tries to pin down its prey for its next attack. Casey must make a save with a target number of 5 plus the Florapod’s current Willpower value (see save rules, page 8). Pinned Down: The next time the Florapod attacks, add 1 to the damage it inflicts.
Damage Ace–10 = 1 Jack, Queen, or King = 2 The fronds attempt to latch on to a single target, trying to constrict around their body. Casey must make a save with a target number of 10 plus the Florapod’s current Willpower value (see save rules, page 8).
7
COMBAT ROUNDS ORDER:
CASEY GOES FIRST, THEN THE FLORAPOD, THEN REPEAT.
CASEY’S ATTACK
FLORAPOD’S ATTACK
Add together the following to determine the outcome number for Casey’s attack.
Flip a random Chance card. If black, you’ll perform the Florapod’s Living Morass attack. If red, you’ll perform the Florapod’s Choking Mass attack.
Coordination +2 Anti-Kaiju Tactics +2 9mm Pistol +2 -or- Hunting Rifle +3 Quick-Thinking -and- Daring +2 Know the Foe +1 (if earned on page 2) Add 1 Destiny card (unless your hand is empty) Flip a random Chance card
Compare outcome number to the target number (10). Calculate extra rewards or costs (see below). If Success, reduce Florapod’s Willpower. If Failure, reduce Casey’s Willpower if he suffered any additional costs.
CASEY’S SAVE
Add together the following to determine the outcome number for Casey’s Save against the Florapod Remnant’s attack. Coordination +2 Anti-Kaiju Tactics +2 Quick-Thinking -and- Daring +2 Reinforced Cover +1 (if found on page 3) Add 1 Destiny card (unless your hand is empty) Flip a random Chance card Compare outcome number to the target number (see save rules below). Reduce Casey’s Willpower by 1 for each point of remaining damage.
RISKY CHALLENGES A risky challenge is resolved in the same way as a normal challenge. (Challenge rules, page 5–6.) If Casey succeeds, reduce the Florapod’s Willpower by 1. If he fails, the Florapod is unharmed. However, a risky challenge has additional rewards and costs because it’s a dangerous activity or attack. Rewards: Casey reduces the Florapod’s Willpower by an additional 1 for each 5 points by which he beats the target number. If you exceed the target number by 5–9 points, that’s –2 to the Florapod’s Willpower, 10–14 points would be –3, etc. Costs: Casey loses 1 point of Willpower from his own sheet for each 5 points by which he fails the target number. If you fail the target number by 5–9 points that’s –1 to Casey’s Willpower, 10–14 points would be –2, etc. ANTAGONIST ATTACKS
After Casey has made his attack, the Florapod Remnant attacks back. To carry out the attack, first flip over the top card from your deck. The suit of the card determines which of the attacks on the Florapod Remnant’s sheet it uses, and the value of the card determines how much damage the attack inflicts. For example, if the card drawn for the Florapod Remnant were a King of , it would use its Living Morass attack and inflict 2 damage. SAVES
Next, Casey must make a save to reduce the oncoming damage by dodging out of the way. A save plays out like a challenge. (Challenge rules, page 5–6) It uses the target number from the Florapod Remnant’s sheet and has a Coordination focus (see Casey’s Save in the diagram above). If Casey fails the save, he loses Willpower points equal to the attacks damage value. If the save is successful, the damage is reduced by 1 point, plus an extra point for every 5 points by which he beat the target number. (The damage for an attack can never be reduced to less than 0.) For example, if Casey beat the target number by 5 points, the damage he received is reduced by 2 points: 1 point for succeeding and 1 extra point for beating the target number by 5 points.
8
ENTRY 5: CASEY WINS
ENTRY 6: CASEY LOSES
Its stem shredded by bullet holes, dark sap gushing from the wounds, the Florapod Remnant sways one way and then the other before finally crashing back onto the road, crushing an abandoned car. You wait, gun leveled, unsure whether it really is dead. After half a minute, an armored car screeches onto the road, followed by a black SUV with tinted windows. As the rest of your team spreads out to secure the area, a woman steps out of the SUV. She’s dressed in the uniform of the G-Force Internal Police.
The looming Florapod Remnant seems to fill the sky above you, the muzzle flash of your gun almost swallowed in shadow. Flexing with incredible speed, the monstrous tendril slams you across the road, sending you tumbling into a pile of rubble. You feel blood trickling from a gash in your forehead and everything swims in and out of focus. Your whole body trembles. The Florapod Remnant extrudes a subappendage dripping with sap and curls it around the seeds, their spiky hulls adhering to the weird leaf.
“Well done, Agent Casey. I’m Major Davidson.” She regards you for several seconds, assessing you, and then points at the cluster of seed-eggs. “Grab those and come with me.”
The Florapod Remnant seems to regard you for a moment, and then you catch the noise of approaching engines. The Florapod Remnant twitches and slides off like an enormous snake. Drifting in and out of consciousness, you barely register the approach of an SUV. A woman steps out dressed in the uniform of the G-Force Internal Police. “Very disappointing, Agent Casey. I’m Major Davidson.” She turns away, looking in the direction the Florapod Remnant went. Two more Internal Police officers lift you to your feet and half drag you into the SUV. “You’re coming with me.”
THE ADVENTURE CONTINUES… YOU CAN FIND OUT WHAT HAPPENS TO AGENT CASEY NEXT BY SIGNING UP FOR THE GODZILLA RPG KICKSTARTER!
9
LAUNCH DATE
MARCH 2026 SIGN UP TO BE THE
FIRST TO KNOW
WHEN WE LAUNCH AND
RECEIVE A SPECIAL OFFER FOR OUR BACKERS
Godzilla: The Roleplaying Game & System Designers: JERVIS JOHNSON, GAV THORPE, AND MARK A. LATHAM Editor: ELLEN BOENER Specialty Product Manager: CHAD WOOD Graphic Designer: DARRAN ROBINSON Additional Designs: NATHAN WIDICK Kai-Sei Consultant: JAKE WILLIAMS Cover Artist: JORGE CORONA Interior Artists: ALBERTO PONTICELLI (ART, 2), JAY FOTOS (COLOR, 2), PABLO TUNICA (4), AND SEBASTIÁN PÍRIZ (6, 7, 9) Godzilla Kai-Sei Era comics Writers: Tim Seeley, Griffin Sheridan, Ethan Parker, and Chris Gooch Series Artists: Nikola Čižmešija, Pablo Tunica, Oliver Ono Series Colorists: Gloria Martinellie, Francesco Segala Letterers: Nathan Widick and Hassan Otsmane-Elhaou Editor: Jake Williams Designers: Nathan Widick and Brian Kolek Special thanks to Aaron John Gregory and all of Toho for their invaluable assistance.
GODZILLA: THE ROLEPLAYING GAME — LEARN TO PLAY. NOVEMBER 2025. FIRST PRINTING. TM & © TOHO CO., LTD. IDW Publishing, a division of Idea and Design Works, LLC. Editorial offices: 14144 Ventura Blvd, Suite 210, Sherman Oaks, CA 91423. The IDW logo is registered in the U.S. Patent and Trademark Office. Any similarities to persons living or dead are purely coincidental. With the exception of artwork used for review purposes, none of the contents of this publication may be reprinted without the permission of Idea and Design Works, LLC. IDW Publishing does not read or accept unsolicited submissions of ideas, stories, or artwork. Davidi Jonas, CEO • Andrew DeBaker, CFO • Gregg Katz, General Counsel • Tara McCrillis, President Publishing Operations • Bobby Curnow, Editor in Chief • Aub Driver, VP Marketing • Gregg Katzman, Sr. Manager Public Relations • Kim Estlund, Publicist • Ryan Balkam, Director of Sales • Warren Buchanan, Licensing Manager • Heather Antos, Group Editor • Jake Thomas, Group Editor • Alonzo Simon, Group Editor • Lauren LePera, Sr. Managing Editor • Shauna Monteforte, Sr. Director of Manufacturing Operations • Jamie Miller, Director Publishing Operations • Jasmine Gonzalez, Director Ecommerce Operations • Alison Quin, Sr. Director IT • Nathan Widick, Director of Design • Neil Uyetake, Sr. Art Director, Design & Production • Darran Robinson, Art Director • Ted Adams and Robbie Robbins, IDW Founders. For international rights, contact licensing@idwpublishing.com. Printed in USA.